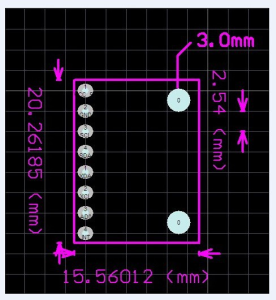
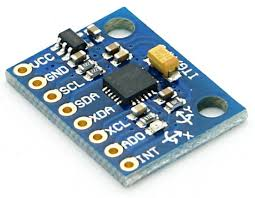
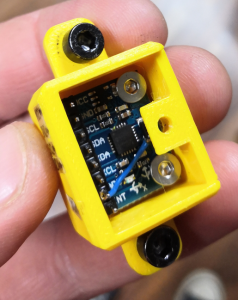
Ceiling module | Gyroscope and acceleration sensor GY-521 (MPU6050)
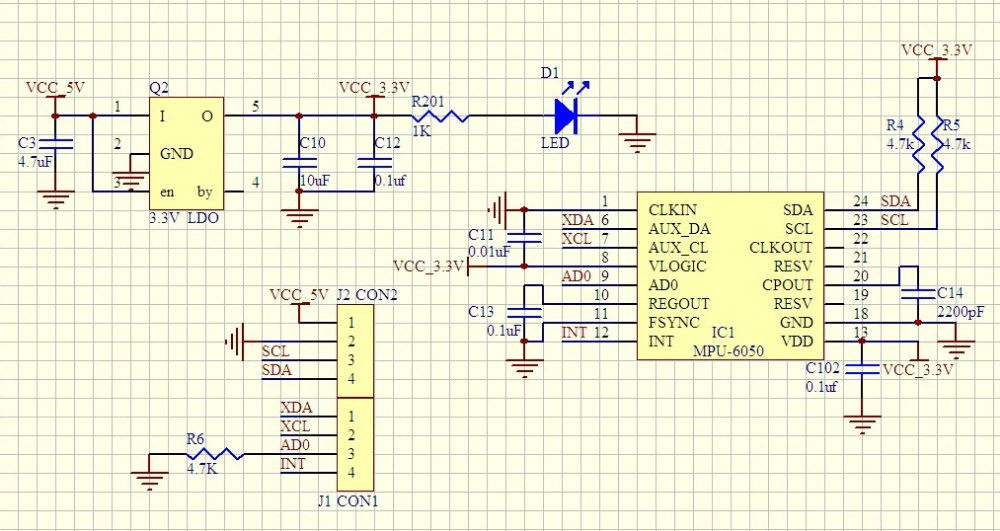
MPU6050 pin configuration
|
Pin number |
Pin name |
Description |
|
1 |
Vcc |
Provides power for the module, can be +3V to +5V. Typically +5V is used |
|
2 |
Ground |
Connected to Ground of system |
|
3 |
Serial Clock (SCL) |
Used for providing clock pulse for I2C Communication |
|
4 |
Serial Data (SDA) |
Used for transferring Data through I2C communication |
|
5 |
Auxiliary Serial Data (XDA) |
Can be used to interface other I2C modules with MPU6050. It is optional |
|
6 |
Auxiliary Serial Clock (XCL) |
Can be used to interface other I2C modules with MPU6050. It is optional |
|
7 |
AD0 |
If more than one MPU6050 is used a single MCU, then this pin can be used to vary the address |
|
8 |
Interrupt (INT) |
Interrupt pin to indicate that data is available for MCU to read. |
MPU6050 features
- MEMS 3-aixs accelerometer and 3-axis gyroscope values combined
- Power Supply: 3-5V
- Communication : I2C protocol
- Built-in 16-bit ADC provides high accuracy
- Built-in DMP provides high computational power (Digital Motion Processor) - reduces the load for the microcontroller (like the Arduino)
- Can be used to interface with other IIC devices like magnetometer
- Configurable IIC Address
- In-built Temperature sensor
Key words
- gyro
- Inclinometer
- Beschleunigungssensor
- Neigungssensor
- gyroscope
- accelerometer
- tilt sensor
Enable I2C on Raspberry Pi
vim /boot/config.txtdtparam=i2c_arm=onvim /etc/modulesi2c-bcm2708
i2c-devFinde installierte I2C Module.
i2cdetect -y 1 #returns 0x68By default, each MPU 6050 has the same address with bit 0x68. An enable signal can be sent via pin "AD0", which redirects the sensor to 0x69. Pin AD0 got a fixed solderding to give the secondary address 0x69.
i2cdetect -y 1 #now returns 0x69
Debugging
Sometimes the gyros do not properly work when connected. While working within Trikarus project, multiple errors occured. There were errors thrown like "OSError: [Errno 121] Remote I/O error - has occurred". Especially making DMP work was a horror trip because it threw a lot of errors while with regular raw values this was not the big deal. It seems to be a problem with long wire, unstable clock frequency and pullup resistors.
There are multiple solutions to fix the situation.
- check wiring quality and wire length/isolation
- check the supply voltage vor MPU 6050. It requires nominally 3.3 V
- VDD → 2.375 V - 3.46 V
-
VLOGIC → 1.71 V to VDD
-
check / adjust the I²C bus frequency of Raspberry Pi (have a look at https://github.com/fivdi/i2c-bus/blob/master/doc/raspberry-pi-i2c.md)
-
 show recent baudrate
cat /sys/module/i2c_bcm2708/parameters/baudrate

# adjust baudrate temporarily - set it to 10.000
modprobe i2c_bcm2708 baudrate=10000
cat /sys/module/i2c_bcm2708/parameters/baudrate

# if you want to edit it permanently edit boot config by your needs - maximum baudrate is 400.000, default is 100.000
vim /boot/config.txt
dtparam=i2c_arm=on
i2c_arm_baudrate=400000
-
-
check I²C communication by i2c dumping
-
while i2cdump -y -r 0-7 1 0x68 c; do sleep 1; done
while i2cdump -y -r 0-7 1 0x69 c; do sleep 1; done
-
-
maybe add some delay after setting smbus.SMBus(1) to settle. A lot of people set some wait time, e.g. 1 second
- if there is a second MPU 6050 connected please check if there are problems while addressing them. Check if AD0 is set to 1 accordingly and if AD0 is grounded correctly. Check the devices separetely by disconnecting one of both to ensure that they work in single mode correctly.
Monitoring → MPU 6050 (GY-521) Gyro + Accelerometer monitoring
C++ script to read the data (quickly show the output to console)
At https://github.com/richardghirst/PiBits there's a good example to use MPU6050 with raw data or filterered by DMP.
Configure and build
apt install libgtkmm-3.0-dev
git clone https://github.com/richardghirst/PiBits.git
cd MPU6050-Pi-Demo/

#adjust I2C basics
vim I2Cdev.cpp #change all "/dev/i2c-0" to "/dev/i2c-1"

#to change I2C 0x69 or 0x69 change MPU6050 accelgyro; to MPU6050 accelgyro(MPU6050_ADDRESS_AD0_HIGH);
vim demo_raw.cpp

#to change I2C 0x69 or 0x69 change MPU6050 mpu; to MPU6050 mpu(MPU6050_ADDRESS_AD0_HIGH);
vim demo_dmp.cpp

make
Run
#raw mode
./demo_raw


#DMP mode
./demo_dmp
#this will sometimes fail with
Initializing I2C devices...
Testing device connections...
MPU6050 connection successful
Initializing DMP...
DMP Initialization failed (code 1)

#You can also run gdb to debug:
gdb ./demo_dmp
#then enter "run"
Keine Kommentare vorhanden
Keine Kommentare vorhanden