OpenSCAD cookie cutter file output
Generate a 3D-printable OpenSCAD cookie cutter file out of an Inkscape document.
Sources:
- https://inkscape.org/~arpruss/%E2%98%85openscad-cookie-cutter-file-output
- https://github.com/arpruss/gcodeplot
Instructions also available at https://www.instructables.com/3D-Printable-Cookie-Cutters-With-Inkscape-and-Open
Create SVG File
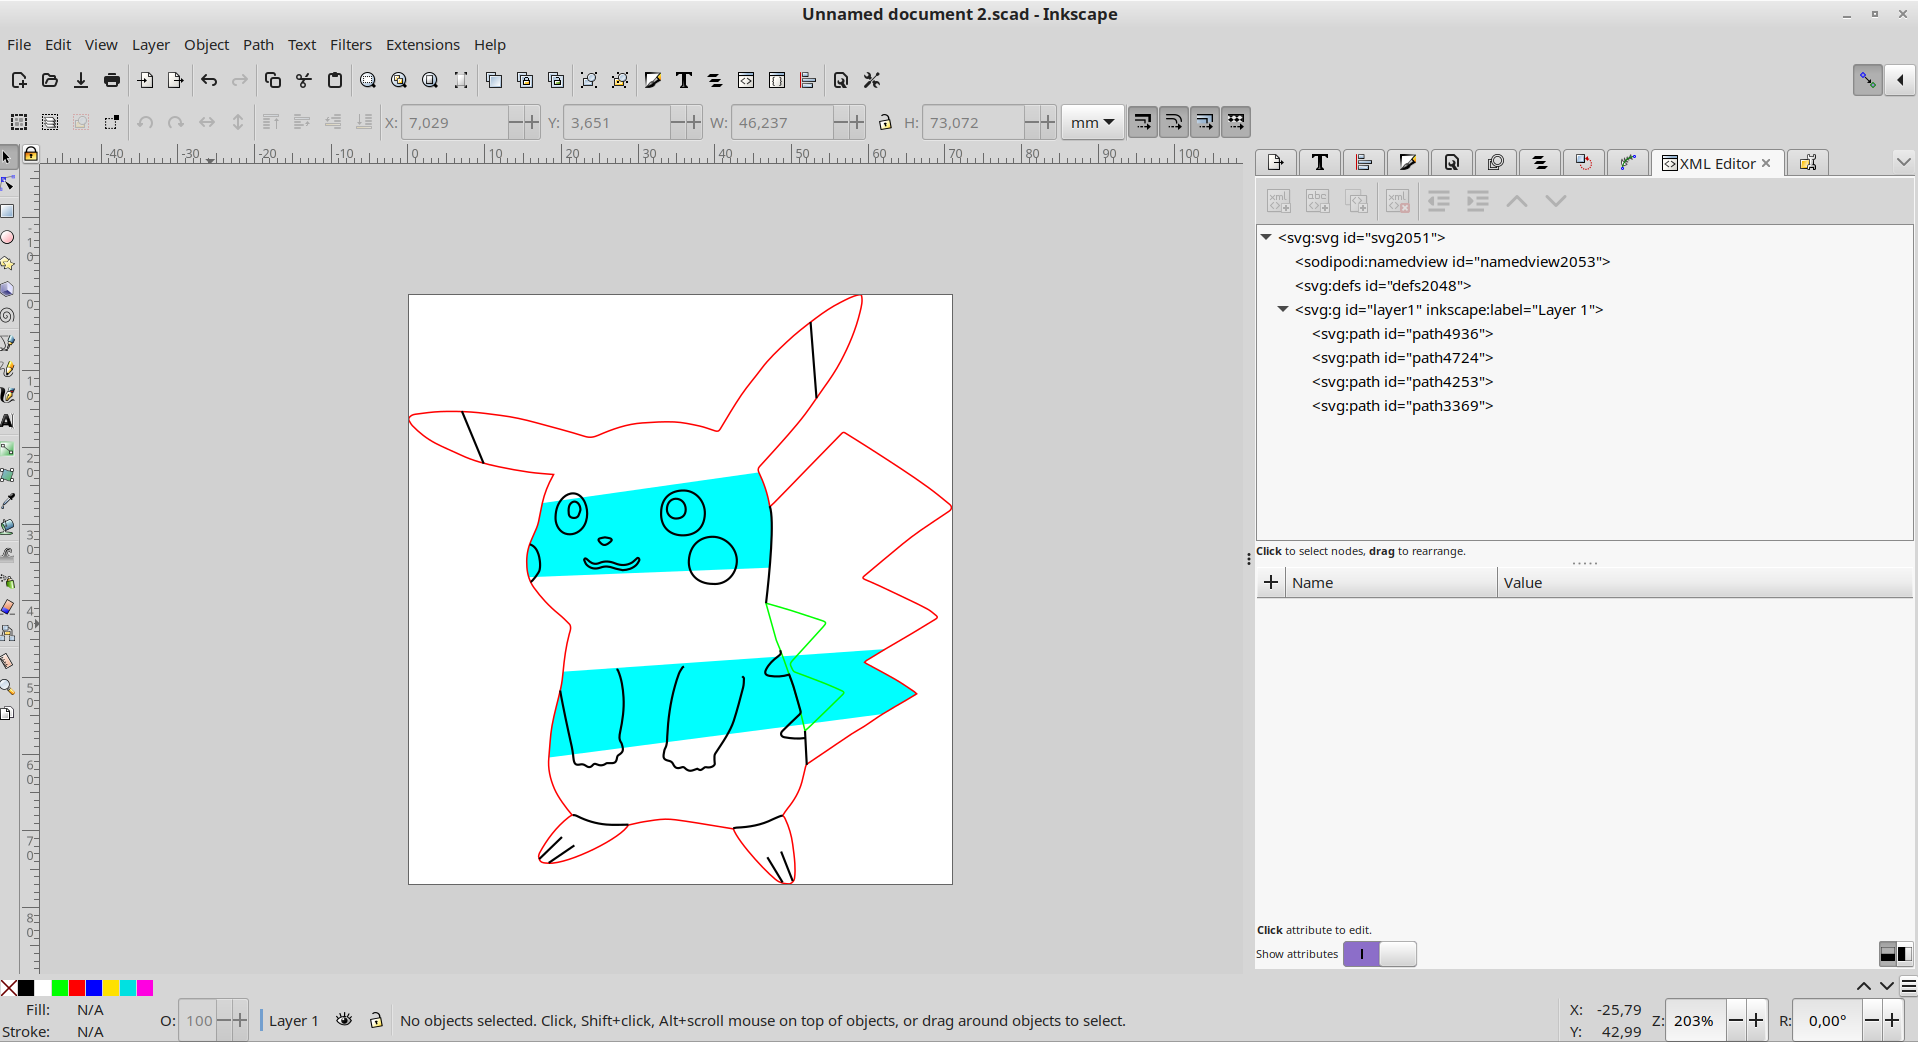
- everything converted to paths
- use red outline on outside walls
- use green outline on any inside walls (holes)
- use black outline on inside detail (this generates a wall that doesn't reach all the way through, so it marks the cookie but doesn't cut it)
- use red or green fill on areas you want filled in at full wall height
- use black fill on areas you want filled at inside detail height (walls that don't reach all the way through)
- use blue or cyan on inside connection polygons which keep inside detail and inside walls connected to the outside walls.
Load file into Inkscape. Then:
- Select all. (Ctrl + A)
- Path | Object to Path.
- Object | Ungroup.
- Remove all fill. (Click on X in color palette in lower-left corner of Inkscape screen)
- Turn on all outlines to black. (Shift-click on black square in color palette.)
- Delete duplicate lines, remove fine detail that won't work well in a cookie.
- Turn outside outline red. This should be a single polygon.
- Turn outline of any inside walls (holes) green.
- If there are any details or inside walls not connected to the outside wall, add filled-in polygons connecting the details to the outside wall. I did this by duplicating the outside walls, so I could re-use parts of their paths.
Generate 3D Files
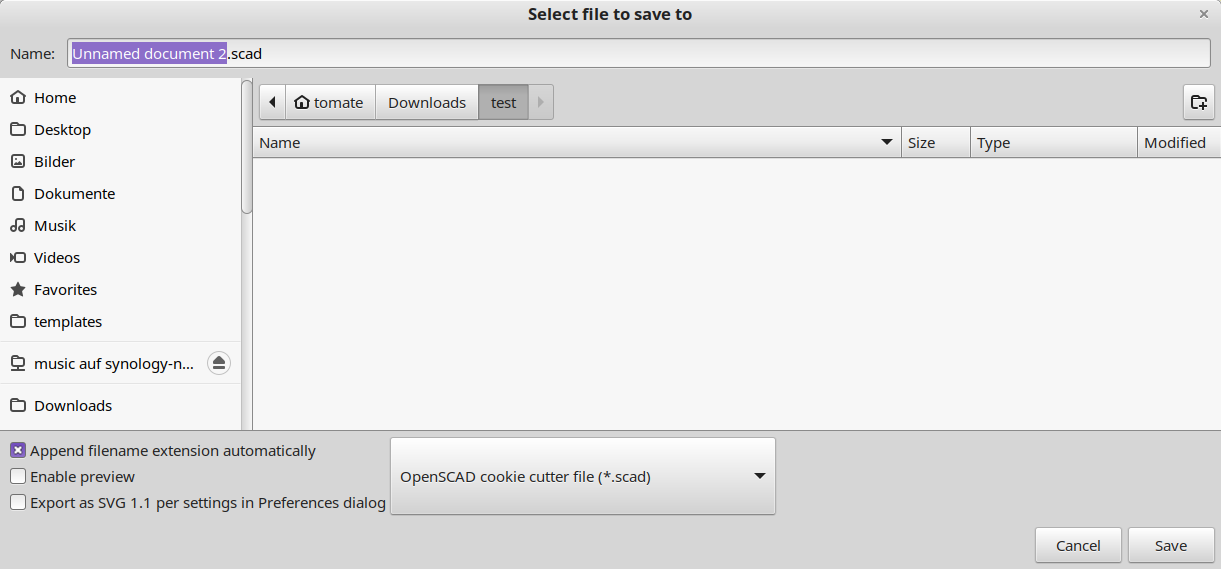
- In Inkscape, go to File | Save As... and choose "OpenSCAD cookie cutter file". Save the file. Make sure you give it a .scad extension.
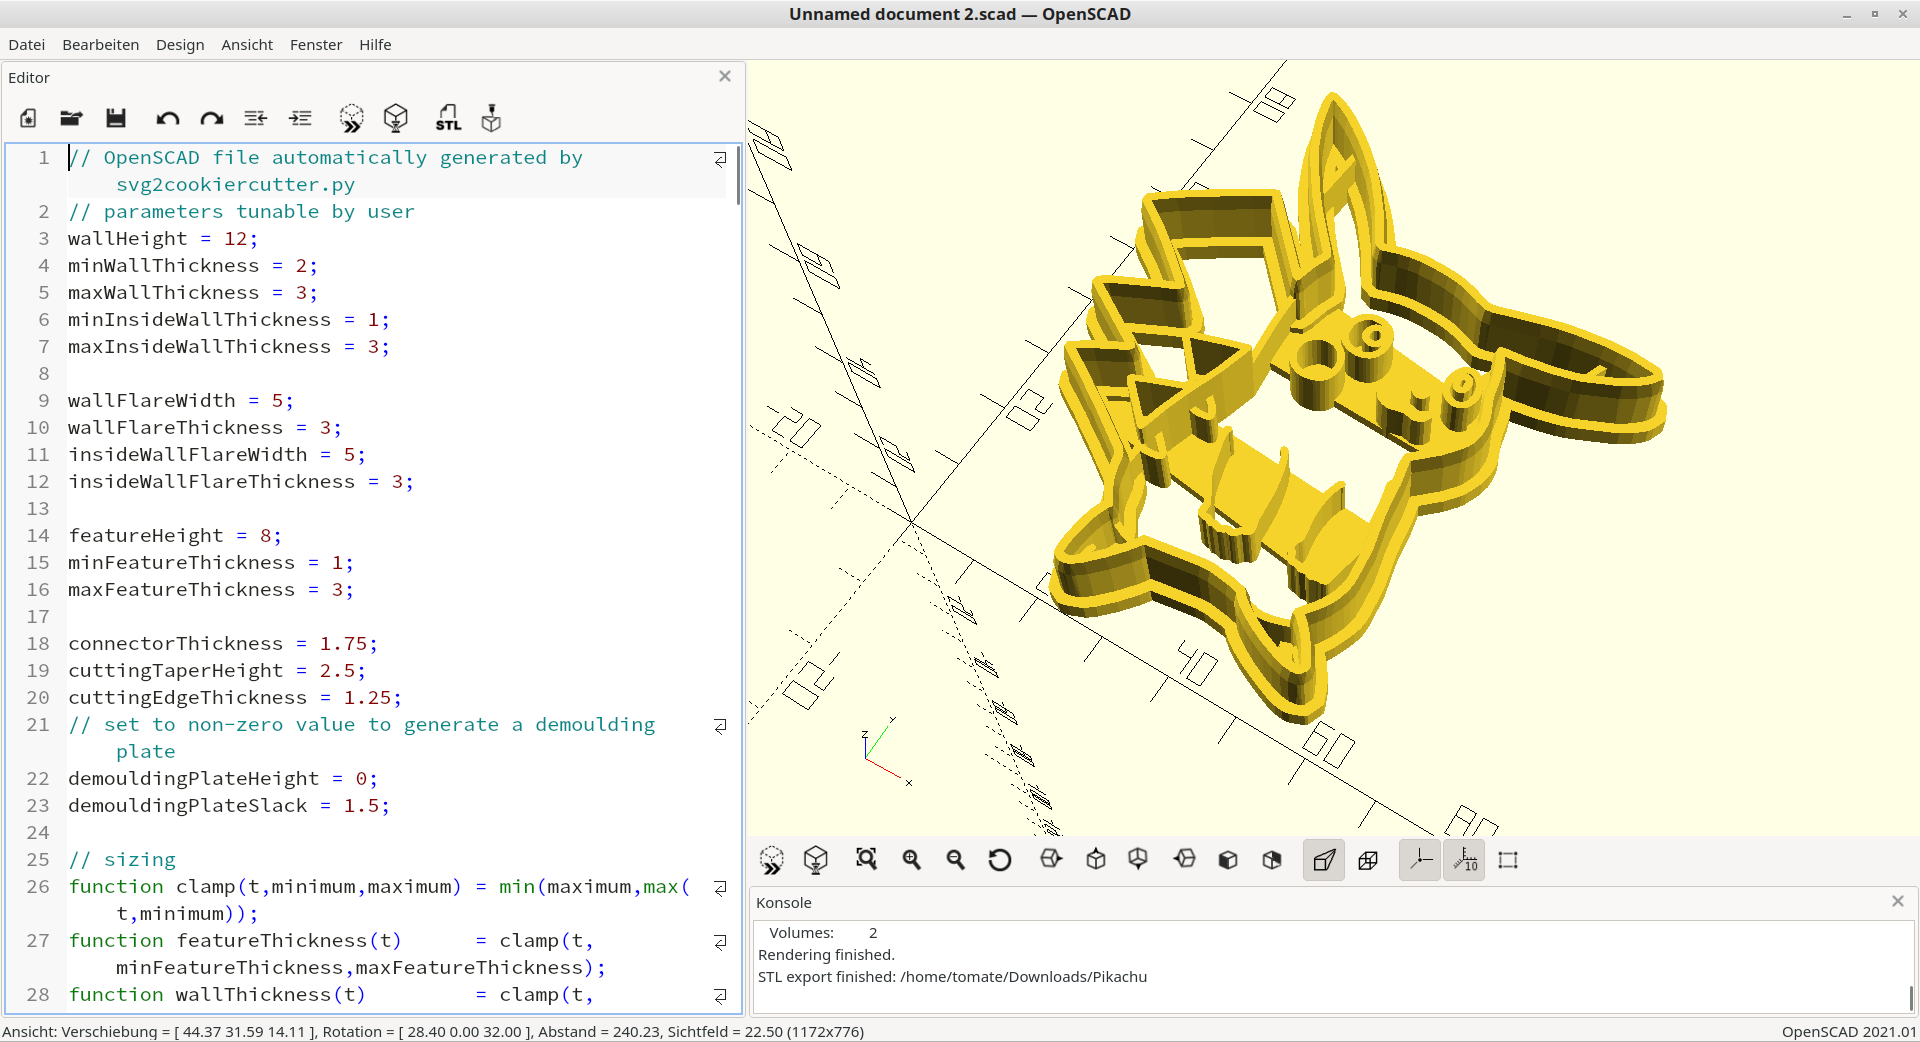
- Load file into OpenSCAD.
- Adjust parameters at the top of the file to taste. The size parameter is the size of the cookie cutter in millimeters. Adjusting this will resize the cookie cutter without changing wall thickness, which is handy.
- Press the cube+hourglass icon at the top of the code to generate mesh.
- When done, press the STL button to generate an STL file.
- Print! We recommend food safe filament with 0.2mm layer size.
Keine Kommentare vorhanden
Keine Kommentare vorhanden