GCode Import
Source of documentation: https://github.com/ClayJarCom/ImportGCode
ImportGCode
An Inkscape input extension to add support for some G-code files to the File/Import... dialog.
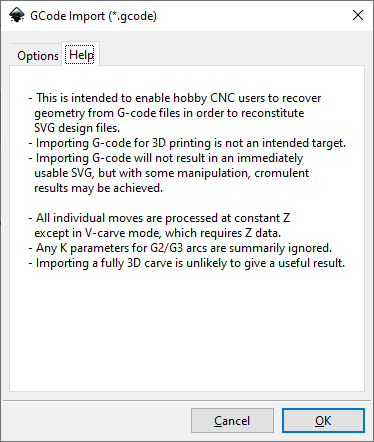
- This is intended to enable hobby CNC users to recover geometry from G-code files in order to reconstitute SVG design files.
- Importing G-code made for 3D printing is not an intended use of this extension and will likely not give cromulent results.
- This is not magic. G-code can be imported, but some manipulation will be required in order to achieve cromulence.
- Some detail (e.g. sharp inside corners) in the original design may not be reflected in the G-code. This cannot be helped, at least within the rules of this universe.
- SVG is inherently two-dimensional, so importing a fully 3D carve is unlikely to give any useful result.
Notes
- In V-carve mode, Z-axis data is used to regenerate the geometry.
- In any other mode, all moves are interpreted as being at constant Z.
- If any arcs have a K parameter, that's between them and their creator.
- In "Laser Mode", moves without the spindle on and at non-zero speed are ignored.
Reconsituting Designs from G-Code
Importing G-code is easy. Turning it back into something worthwhile may be a bit more work, but in many cases a good result can be reached without too considerable an effort.
V-Carves
First import your V-carve G-code:
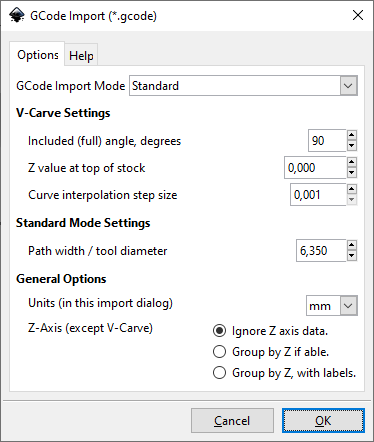
- Choose Import Mode:
V-Carve - Choose the right V-bit angle. This is the included (full) angle, so if the tip cuts a 90-degree V, enter 90, not 45.
- Using too large an angle will make everything inflate and break, and you may even get a message if it breaks the math.
- Using too small an angle will make everything deflate, and you'll end up with spikes instead of corners.
- Choose the right value for the top of your stock. Generally, this is zero, but if the G-code is zeroed to the table not the top of the stock, you'll need to enter that.
- If your V-carve G-code has G2/G3 arcs (you can open it in Notepad++ and just search for G2 and G3), you'll need to choose a curve interpolation step size. The arcs will be broken up into line segments so they can be converted into SVG path data.
Now you need to turn it back into something resembling the original geometery. For V-carves, this is actually quite easy.
- Select the import and ungroup it.
- Select some (or all) the V-carvings.
- On the
Pathmenu, chooseUnion (Ctl-+)to merge the pieces into one outline.
Standard Carves
First, import your G-code:
- Choose Import Mode:
StandardorLaser - Choose a path width / tool diameter.
- If you're going to be working with pockets and such, it's often easier to choose a small value so your imported paths show up as lines and are easier to distinguish.
- If you're importing a very basic G-code file, using the actual tool diameter may save you steps.
- Choose what to do, if anything, with Z.
- Ignoring Z often gives the cleanest results, and it is all but necessary if the G-code ramps between Z depths.
- For some G-code files, grouping by Z (with or without labels) can be a convenient way to separate pockets from profiles, et cetera.
- If you import with labeled groups and end up with a huge stack of labels, your file likely was 3D or had ramping. You may want to just ignore Z.
Unlike V-carves, there's a bit more involved when reconsituting geometry from G-code.
- First, ungroup the import, then...
- For a pocket:
- Select the set of paths representing the pocket's toolpaths.
- From the
Fill and Stroke (Ctrl-Shift-F)dialog, change the stroke width to your tool diameter. - On the
Pathmenu, chooseStroke to Path (Ctrl-Alt-C)to convert the stroke to a filled closed curve. - On the
Pathmenu, chooseUnion (Ctl-+)to turn your selection into an object with the pocket's shape. - From the
Fill and Stroke (Ctrl-Shift-F)dialog, turn off the fill and set the stroke width to a small value. - You now have an outline of the pocket.
- For an inside/outside contour cut:
- Select the paths representing the contour toolpaths.
- From the
Fill and Stroke (Ctrl-Shift-F)dialog, change the stroke width to your tool diameter. - On the
Pathmenu, chooseStroke to Path (Ctrl-Alt-C)to convert the stroke to a filled closed curve. - From the
Fill and Stroke (Ctrl-Shift-F)dialog, turn off the fill and set the stroke width to a small value. - On the
Pathmenu, chooseBreak Apart (Shift-Ctrl-K)to break the path into one inside path and one outside path. - Keep the one you want and delete the other.
- For a carve along a line in the original:
- Select the paths representing the contour toolpaths.
- That's it. If you imported with a thick path width / tool diameter, just change the stroke to a nice thin line.
Keine Kommentare vorhanden
Keine Kommentare vorhanden