Printing, pausing, shutting down, recovering and resetting
Wooooah. After planning, manufacturing, building, coding and having trouble everywhere, you finally reached the goal! Now you can nearly start to print! Here are some tips for the real usage of Trikarus.
When Trikarus is not printing
When Trikarus is not actively printing and no print job is just paused for the next days, we should do the following: push the emergency halt button. That turns off the steppers and the lighting (saves energy, keeps lifetime of OLED displays, etc.)
Dont's while Trikarus is printing
There are a lot of bad ideas which should never be executed while printing.
- never restart Repetier Server (it could recover your print automatically but it might fail possibly)
- never restart Raspberry Pi
- never update the Raspberry Pi operating system or any package on it
- never power off PSU
- never power off Smart Steppers
- never reboot Smart Steppers
- never run G0 H2 command. The printer will move randomly to some unkown positions. This can despool your lines completely.
- never touch the emergency halt button
- never remove main power cable
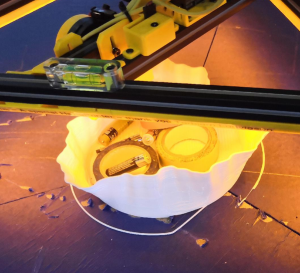
Hardware pre-flight checks (filament guiding and extruder)
Printing can easily fail.
Clean the hotend
Before you print please check if the nozzle is clean. Otherwise unneccesary fumes from old sticky PLA might get into air. Cleaning also gently helps to better calibrate the nozzle. Use some old cloth to the grab old filament when hotend is hot enough. The Aero Extruder sometimes fails to extrude filament because it is clogged. In this case it is not possible to push filament through the heated hotend - wether by hand nor by using extrude command. Then we have to unscrew the assembly to remove old filament pieces and small flakes maybe. If the extruder is fine you must be able to easily push filament through the complete hotend until it leaves the nozzle.
Check the filament guiding
-
check that the filament spool can move with ease on it's mounting platform (roller frame). Use construction where filament roll is kept on two shafts which can rotate freely. This is much better than using the inner mounting hole of the spool
- if you use massive spools note that the printer cannot pull material from spools which have more than 6 kg of total weight (tested with a 8.5 kg roll of Redline Filament with 1045 grams of raw spool weight). I also tested 1kg, 2.3kg and 4.5kg spools which work well without any doubt. If you do not respect weight limitation it you will get failing prints. There is not active filament feed system present yet which is required to support the guiding. So no chance to deal with 20 kg spools right now. We just have too much friction!
- allow the dangling filament string to have some free windings above extruder for the first layer. If there is too much force the filament string will lift up the effector in uncontrolled way in case the friction gets too high
-
check the PTFE tubing for bucklings
- check for well installed filament roll. If somethings block unwinding the friction gets too high
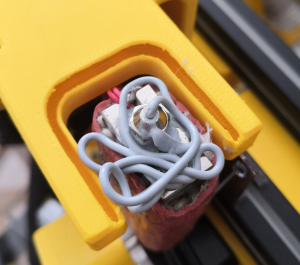
- check the Filament sensing with KY-040 Rotary Encoder for good grip
- check if the extruder gear spring is adjusted fine so the hotend can grab the filament without grinding (screw is too tight) or slipping (screw is too lose). The Aero Titan allows to turn ~7 rounds. We use 5 rounds to fix the filament string. If we tighten grinding will be to heavy, if too lose the filament is not pulled correctly. Tightening is turning against clock direction, losening the opposite way. Use a permanent marker to draw a dot on the screw. This helps counting the rounds.
- Put down the effector to the ground. To have a smooth and easy way to let the effector "fly" to the ground you can use /opt/sms_modes/sms_zdown.sh script
Check the line guiding
If one or more lines do not correctly seat in their bearing grooves we might get into big trouble because this will modify the line length(s) (anchor positions). We risk to destroy the lines on sharp edges and we ignore the calibration we did before spending a lot of time. Before printing check all 6 lines at the ABC frame anchor points another time. It quickly happens that a lines is not correctly mounted anymore. It can happen if a drive unwinds in an uncontrolled way so we have to wind up the whole line again.
Check for despooled lines
Sometimes spools are not properly set up. Lines might slip off or are wounded unevenly. Please have a look visually on it to respool in such a case and fix it. If the lines are not properly spooled we will get trouble when Trikarus is moving.
Important daily use GCodes
M84                 ; disable steppers - warning: using this at higher Z coordinate could result in line jamming because ABC lines untighten!
M114                ; show current coordinates
M119                ; show end stop status

;babystepping - sometimes required to adjust the first layer properly
M290 S-0.10         ; babystep the effector down 0.10 mm
M290 S0.10          ; babystep the effector up 0.10 mm
M290 R0 S0          ; clear babystepping (RepRapFirmware 1.21 and later only)

G0 Xnnn Ynnn Znnn   ; move to XYZ coordinate
G28                 ; set XYZ to zero
G90                 ; set absolute coordinates
G91                 ; set relative coordinates
G92 X0 Y0 Z0        ; set XYZ to zero - does not always work. better use G28
Avoid using the following commands
works too but dirty! Better use the above commands because they correctly map the drives
G0 H2 X10           ; move X independently. Makes no sense because X is an overlap of ABC
G0 H2 Y10           ; move Y independently. Makes no sense because Y is an overlap of ABC
G0 H2 Z10           ; move Z independently. Shorthand for the D drive
;G95                ; not usable for Trikarus
;G96                ; not usable for Trikarus
;M114 S1            ; not usable for Trikarus
vim /opt/sms_modes/sms_prepare.py#!/bin/bash
#this script sets the motors into torque mode for origin placements and will automatically set to sPID mode after a defined amount of seconds
#to make this script working properly we need to set well defined timeouts in /opt/smartStepper.py:
# - timeout
# - write_timeoue
# - wait_interval
source "/opt/repetier-conf.sh" # source config for Repetier Server instance
function sad_led_exit { #let it blink once and turn off!
python3.7 /opt/gpio/ledspot-off.py
python3.7 /opt/gpio/ledspot-on.py
python3.7 /opt/gpio/ledspot-off.py
exit 1 #exit with error
}
function happy_led { #let it blink and leave switched on!
for c in {1..3}; do
python3.7 /opt/gpio/ledspot-off.py
python3.7 /opt/gpio/ledspot-on.py
done
}
#check IR probe value. Should be > 500 and illumating. If that's not the case the nozzle is too far away from platform
function check_ir_probe {
#note: this block is dirty because we curl Duet. If it is not available over LAN but USB only we will get an error here. We could jump over this or we try to filter it out on console (hard because G31 returns only number value but no "regex"-able text)
#curl --silent "yourduet/rr_connect?password=password" > /dev/null
#LOG_LINE=$(curl --silent "yourduet/rr_status?type=2")
#PROBE_VALUE=$(jq -r '.|{sensors}|.[]|{probeValue}|.[]' <<< ${LOG_LINE})
#if [[ $PROBE_VALUE < 500 ]]; then
# send_gcode 'M117 \"IR probe too far away (probe value < 500). Check if LED illuminates with constant red light!\"'
# echo "IR probe too far away (probe value < 500). Check if LED illuminates with constant red light!"
# sad_led_exit #call function - visual feedback
#fi
#better style:
python3.7 /opt/zprobe_state.py > /dev/null
if [[ $? != 0 ]]; then #check error code. zprobe_state.py returns 0 if probe was triggered correctly
send_gcode 'M291 P\"IR probe too far away (probe value < 500). Check if LED illuminates with constant red light!\"'
echo "IR probe too far away (probe value < 500). Check if LED illuminates with constant red light!"
sad_led_exit #call function - visual feedback
fi
}
#check tty availability
function check_avail {
send_gcode 'M291 P\"Checking USB availability of SmartSteppers\"'
echo "Checking USB availability of SmartSteppers"
SERVICE_ERROR=0
for d in {A,B,C,D}; do
service smartStepper${d} status | grep "could not open port /dev/ttyUSB-SMART-${d}-AXIS\|Error:Write timeout" > /dev/null
if [[ $? == 0 ]]; then
echo "smartStepper${d} has no tty or has write timeout. Try to power-cycle"
SERVICE_ERROR=$(echo $SERVICE_ERROR + 1 | bc)
fi
done
if [[ $SERVICE_ERROR != 0 ]]; then
send_gcode 'M291 P\"One or more Smart Steppers have no assigned USB tty or write timeout\"'
echo "One or more Smart Steppers have no assigned USB tty or write timeout"
sad_led_exit #call function - visual feedback
fi
}
#check for service states in ABCD smartStepper{}.service
function check_running {
send_gcode 'M291 P\"Checking status of SmartStepper Services\"'
echo "Checking status of SmartStepper Services"
SERVICE_ERROR=0
for d in {A,B,C,D}; do
service smartStepper${d} status | grep Active | grep inactive > /dev/null
if [[ $? == 0 ]]; then
send_gcode 'M291 P\"smartStepper'${d}' service is not running. Try to restart it\"'
echo "smartStepper${d} service is not running. Try to restart it"
SERVICE_ERROR=$(echo $SERVICE_ERROR + 1 | bc)
fi
done
if [[ $SERVICE_ERROR != 0 ]]; then
send_gcode 'M291 P\"One or more Smart Stepper Service are not running. Try again\"'
echo "One or more Smart Stepper Service are not running. Try again"
sad_led_exit #call function - visual feedback
fi
}
#check if spid mode is fine or not
function check_spid {
send_gcode 'M291 P\"Checking if sPID mode is applied for all motors correctly. This takes about 2 seconds\"'
echo "Checking if sPID mode is applied for all motors correctly. This takes about 2 seconds"
sleep 1 #wait 1 seconds to let apply and read new values. This was changed at 02.11.2021 from 4 to 1, because we reduced the wait_interval in smartStepper.py from 0.4 to 0.1
DRIVE_ERROR=0
for d in {A,B,C,D}; do
send_gcode 'M291 P\"Checking Smart Stepper '${d}'\"'
echo "Checking Smart Stepper ${d}"
TORQUE=$(journalctl -u smartStepper${d}.service | grep -v "Drive" | grep "torque = " | tail -n1 | awk '{print $NF}')
if [[ ${TORQUE} != 0 ]]; then
send_gcode 'M291 P\"Error: Drive '${d}' is not set to sPID mode. Torque = '${TORQUE}'\"'
echo "Error: Drive ${d} is not set to sPID mode. Torque = ${TORQUE}"
DRIVE_ERROR=$(echo $DRIVE_ERROR + 1 | bc)
fi
done
if [[ $DRIVE_ERROR != 0 ]]; then
send_gcode 'M291 P\"One or more Drives are not correctly set to sPID mode. Try again\"'
echo "One or more Drives are not correctly set to sPID mode. Try again"
sad_led_exit #call function - visual feedback
fi
}
##########################
# Arguments
##########################
TIME=15 #can be changed by argument, if passed
for i in "$@"; do
case $i in
-t=*|--time=*)
TIME="${i#*=}"
shift # past argument=value
;;
*)
# unknown option
;;
esac
done
##########################
# Check if already running
##########################
SCRIPT_FILE="$(basename "$(test -L "$0" && readlink "$0" || echo "$0")")"
CONCURRENT=$(ps -C ${SCRIPT_FILE} --no-headers | wc -l) #get the count of recently running prepare scripts. Must be 0 to continue
if [[ $CONCURRENT != 2 ]]; then #we use value 2 because this script is the counted inclusice when running
send_gcode 'M291 P\"Already running. Cannot execute start script multiple times simultaneously\"'
echo "Already running. Cannot execute start script multiple times simultaneously"
exit 1
########################
# Perform preparations
########################
else
check_running #check if smartStepper services are error free
check_avail #check if smartStepper USB tty's are assigned correctly. If not we might need to power-cycle the smart steppers. We read this information from service, so we check first for services are running
send_gcode 'M291 P\"Preparing the next print job Put the effector into X0 Y0 Z0 within '$TIME' seconds\"'
echo "Preparing the next print job Put the effector into X0 Y0 Z0 within $TIME seconds"
/opt/sms_modes/sms_torque_all.sh #regular torque mode
send_gcode "M106 P2 S255" #turn on the laser pointers
until [ $TIME -lt 1 ];do
send_gcode 'M291 P\"You have '$TIME' seconds left before swapping to sPID mode\"'
echo "You have "$TIME" seconds left before swapping to sPID mode"
((TIME=TIME-1))
sleep 1
done
/opt/sms_modes/sms_spid_all.sh #set to sPID mode
check_ir_probe #check IR probe value. Should be > 500 and illumating. If that's not the case the nozzle is too far away from platform
send_gcode 'M291 P\"Resetting positions (rotary encoder, smart stepper positions, home positions, babystepping)\"'
echo "Resetting positions (rotary encoder, smart stepper positions, home positions, babystepping)"
systemctl restart rotaryEncoder.service #reset the feed encoder to begin with zero extrusion in next job
#/opt/sms_modes/sms_reboot.sh #reboot the smart steppers to reset the angle degree errors. They CANNOT be nulled with setzero. This command was added at 22.10.2021 (to replace sms_setzero) and disabled again at 31.10.2021 as it leads to jumping off the head from set postion because steppers reboot in different times. In the meantime one or more steppers already pull the lines
/opt/sms_modes/sms_setzero.sh #reset positions of Smart Steppers - we do not validate if this worked
send_gcode "M290 R0 S0" #reset baby stepping to zero
send_gcode "G28" #reset positions of Duet
send_gcode "G90" #reset to absolute coordinates
send_gcode "M106 P2 S0" #turn off the laser pointers again
send_gcode "M220 S100" #reset speed factor override
send_gcode "M221 S100" #reset extrude factor override
check_spid #function call to check if sPID mode is applied correctly
#Finally visualize the success
happy_led #call function - perform some visual feedback
send_gcode 'M291 P\"Everything done. Ready to print!\"'
echo "Everything done. Ready to print!"
fivim /opt/zprobe_state.pycat zprobe_state.py
import asyncio
import json
import sys
import websockets
import urllib.parse
import re
import time
timeout = 0.5 #max 0.5 seconds timeout for receiving feedback
M119_CBID=545 #some callback id
#await true callback from Repetier Server if command M119 is sent (filter out Z probe at min)
async def getProbeStatus():
uri = "ws://localhost:3344/socket/printer/api/Trikarus?apikey=APIKEY"
timeout_start = time.time()
async with websockets.connect(uri) as ws:
await ws.send(json.dumps({'action':'send','data':{"cmd":"M119"},'printer':'Trikarus','callback_id':M119_CBID}))
while time.time() < timeout_start + timeout:
line = await ws.recv() # Starts receive things, not only once
#print(line)
#p = re.compile(r'^."callback_id":' + str(M119_CBID) + '.*', re.M)
p = re.compile(r'Endstops - X.*Y.*.Z.*Z probe: at min stop')
m = p.search(line)
if m:
print("z_min")
exit(0) #clean exit with code 0
loop = asyncio.get_event_loop()
loop.run_until_complete(getProbeStatus())
loop.close()
print("probe not triggered")
exit(1) #exit with error code 1
Configuring the IR probe and auto calibration procedure for ABCD
The auto calibration routine does not yet work.
For auto calibration we need the installed IR Probe which comes with Trikarus. Remember that we already used the print platform for measuring anchor coordinates and that we said the print platform is ideally level. So there is a small logical discrepance using auto calibration. But we can use auto calibration and/or mesh bed compensation to handle slight differences due to later on happening temperature changes or things like platform primers (tapes, sprays, plates).
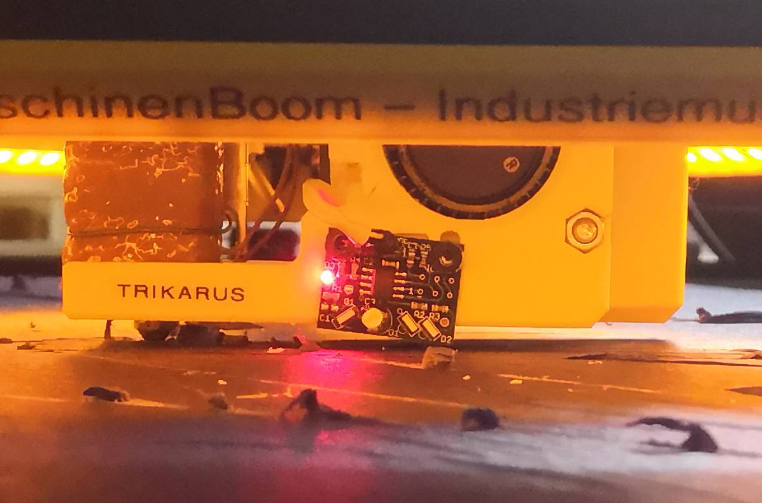
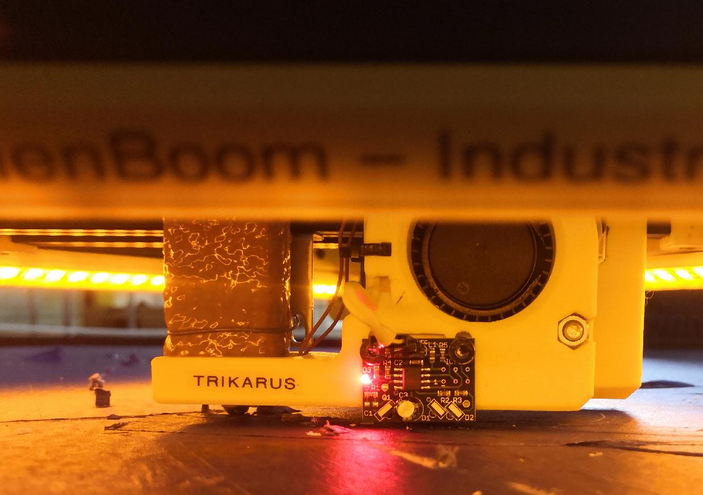
See RepRapFirmware and calculations about details on working M558 settings which define important values like probe dive height (this has to be higher value because otherwise we just scratch the print platform with our nozzle), vertical feed and more. We need to ensure that IR probe values returns values:
- close to zero when probe is ~ 20 mm or further away from the print platform
- around 465 when probe distance from print platform is 1 ~ 3 mm
- around 537 when probe distance is the lowest possible
- With the sensor slightly closer to a surface the red LED on the sensor board should illuminate (in case we use a glass plate we have to stick a little blue tape on the platform (below the sensor spot) to avoid wrong distances)
We need to move the effector some millimeters off the platform until LED stops illuminating. Otherwise the probing will fail because it will say "Error: Z probe was not triggered during probing move". Because we use an IR problem we do not need to deploy or retract the probe because there are no mechanics.
| poor positioning (but works) | well positioned |
|
|
|
You can use the following types of auto calibration:
- 3-factor: adjusts the spool zero positions. Useful as part of the homing sequence (see earlier).
- 6-factor: as 3-factor and also adjusts the B anchor Y coordinate and the C anchor X and Y coordinates
- 9-factor: as 3-factor and also adjusts the A, B and C anchor Z coordinates. This may be too sensitive to line buildup to work well.
You must use at least as many probe points as calibration factors you want to use. More probe points are better and will give you an indication of the height errors after calibration.
Auto calibration is performed by sending command G32 (which is the same command used to do auto bed compensation on a cartesian printer). This command runs macro file sys/bed.g, so all the work is done there. Here is a sample bed.g file:
; Auto calibration routine
M561		                 ; clear any bed transform, otherwise homing may be at the wrong height
G90                          ; absolute coordinates
G28	                         ; home the printer
G0 Z5                        ; move up to get IR unlightened (or probing will not work so)
G30 P0 X0    Y-450 Z-9999    ; towards A anchor
G0 X0 Y0                     ; reset XY position because each G30 commands let effector move to some "unknown" position
G30 P1 X390  Y-230 Z-9999    ; between A and B anchors
G0 X0 Y0                     ; reset XY position because each G30 commands let effector move to some "unknown" position
G30 P2 X390  Y230  Z-9999    ; towards B anchor
G0 X0 Y0                     ; reset XY position because each G30 commands let effector move to some "unknown" position
G30 P3 X0    Y450  Z-9999    ; between B and C anchors
G0 X0 Y0                     ; reset XY position because each G30 commands let effector move to some "unknown" position
G30 P4 X-390 Y230  Z-9999    ; towards C anchor
G0 X0 Y0                     ; reset XY position because each G30 commands let effector move to some "unknown" position
G30 P5 X-390 Y-230 Z-9999    ; between C and A anchors
G0 X0 Y0                     ; reset XY position because each G30 commands let effector move to some "unknown" position
G30 P6 X0    Y-230 Z-9999    ; halfway to A anchor
G0 X0 Y0                     ; reset XY position because each G30 commands let effector move to some "unknown" position
G30 P7 X220  Y125  Z-9999    ; halfway to B anchor
G0 X0 Y0                     ; reset XY position because each G30 commands let effector move to some "unknown" position
G30 P8 X-220 Y125  Z-9999    ; halfway to C anchor
G0 X0 Y0                     ; reset XY position because each G30 commands let effector move to some "unknown" position
G30 P9 X0    Y0    Z-9999 S6 ; centre, and auto-calibrate 6 factors
The probing is commanded by the G30 commands. The probe positions and order are not critical, but you should cover at least the centre and the extremities of the bed, both next to towers and opposite the forks, and some points in between the centre and the periphery. The XY coordinates are where the nozzle will be, so if the Z probe is displaced from the nozzle then you must ensure that the probe is always over the bed. The S parameter on the last (final) G30 command is the number of factors to calibrate.
Error: unknown XY drift
This error seems to be related to non-I2C wired Smart Steppers.
Send:16:11:21.360: N782 G30 P1 X390 Y-230 Z-9999
Recv:16:11:28.943: Motor 1014.38,1024.50,1621.13 to Cartesian 390.54,129.38,-324.73 (2)
Send:16:11:37.384: N794 G0 X0 Y0
Send:16:13:06.106: N883 G30 P2 X390 Y230 Z-9999
Recv:16:13:16.166: Motor 1449.67,715.02,1447.80 to Cartesian 391.39,435.82,-854.12 (2)
Send:16:13:36.742: N897 G0 X0 Y0
Send:16:13:49.200: N905 G30 P3 X0 Y450 Z-9999
Recv:16:13:59.195: Motor 1616.20,1019.41,1023.55 to Cartesian 1.64,356.08,-1002.17 (2)
Send:16:14:15.671: N913 G0 X0 Y0
Send:16:14:25.278: N923 G30 P4 X-390 Y230 Z-9999
Recv:16:14:35.356: Motor 1449.70,1444.61,716.10 to Cartesian -389.11,-15.05,-541.38 (2)
Send:16:14:44.091: N930 G0 X0 Y0
Send:16:14:53.461: N939 G30 P5 X-390 Y-230 Z-9999
Recv:16:15:03.218: Motor 1014.41,1620.27,1022.12 to Cartesian -388.64,-324.20,-830.55 (2)
Send:16:15:16.661: N946 G0 X0 Y0
Send:16:15:27.304: N954 G30 P6 X0 Y-230 Z-9999
Recv:16:15:33.811: Motor 936.42,1298.20,1297.80 to Cartesian 1.08,-141.08,-655.38 (2)
Send:16:15:51.402: N968 G0 X0 Y0
Send:16:15:58.143: N976 G30 P7 X220 Y125 Z-9999
Recv:16:16:05.001: Motor 1309.89,914.67,1315.88 to Cartesian 221.05,227.46,-640.56 (2)
Send:16:16:16.534: N984 G0 X0 Y0
Send:16:16:27.171: N996 G30 P8 X-220 Y125 Z-9999
Recv:16:16:34.137: Motor 1309.90,1313.58,915.63 to Cartesian -219.41,-26.55,-364.86 (2)
Send:16:16:40.191: N1003 G0 X0 Y0
Send:16:16:47.637: N1011 G30 P9 X0 Y0 Z-9999 S6
Recv:16:16:50.652: Motor 1166.33,1167.61,1168.55 to Cartesian 0.06,-0.01,-33.42 (2)
Mesg:16:16:51.373: Connection closed by os.
Mesh bed leveling
Trikarus is not at the level to support mesh bed leveling yet and it's maybe not required to do in the future. We use a high output hotend (SuperVolcano) with high layers ( minimum 0.50 mm). That might avoid by it's raw nature some issues with unlevel grounds. More information about possible mesh bed compesation alogithm → https://duet3d.dozuki.com/Wiki/Using_mesh_bed_compensation
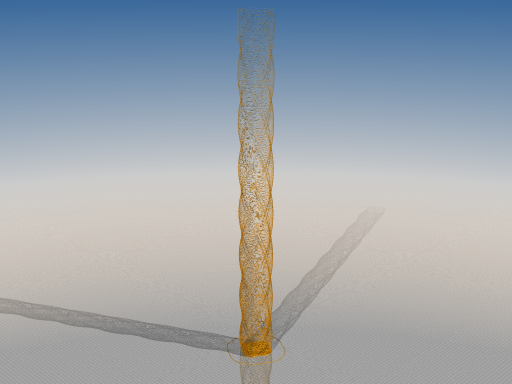
Dry run code for a stable examining build envelope
The current firmware does not support to check unreachable coordinates. If we command impossible coordinates the printer will try to reach them regardless the spools have enough line. The result is usually a knocked out movement system. Before printing we should try to check what coordinates are fine.
Dry run sample GCode
; re-enable the laser pointers to see what's going on in X0 Y0 per moving circle
M106 P2 S255

; set feed for quick moves
G0 F8000

;set absolute coordinates
G90

; lift the nozzle 10mm to avoid scratches on the platform surface by the nozzle
G0 Z10

;radius 420mm @ Z=0
G0 X-420 Y0
G2 Y0 I420
G0 X0 Y0
G4 S5; wait 5 seconds

;radius 380mm @ Z=100
G0 Z100
G0 X-380 Y0
G2 Y0 I380
G0 X0 Y0
G4 S5; wait 5 seconds

;radius 350mm @ Z=200
G0 Z200
G0 X-350 Y0
G2 Y0 I350
G0 X0 Y0
G4 S5; wait 5 seconds

;radius 340mm @ Z=300
G0 Z300
G0 X-340 Y0
G2 Y0 I340
G0 X0 Y0
G4 S5; wait 5 seconds

;radius 300mm @ Z=400
G0 Z400
G0 X-300 Y0
G2 Y0 I300
G0 X0 Y0
G4 S5; wait 5 seconds

;radius 300mm @ Z=500
G0 Z500
G0 X-300 Y0
G2 Y0 I300
G0 X0 Y0
G4 S5; wait 5 seconds

;radius 300mm @ Z=600
G0 Z600
G0 X-300 Y0
G2 Y0 I300
G0 X0 Y0
G4 S5; wait 5 seconds

;radius 300mm @ Z=700
G0 Z700
G0 X-300 Y0
G2 Y0 I300
G0 X0 Y0
G4 S5; wait 5 seconds

;radius 250mm @ Z=800
G0 Z800
G0 X-250 Y0
G2 Y0 I250
G0 X0 Y0
G4 S5; wait 5 seconds

;radius 200mm @ Z=900
G0 Z900
G0 X-200 Y0
G2 Y0 I200
G0 X0 Y0
G4 S5; wait 5 seconds

;radius 180mm @ Z=1000
G0 Z1000
G0 X-180 Y0
G2 Y0 I180
G0 X0 Y0
G4 S5; wait 5 seconds

;radius 150mm @ Z=1100
G0 Z1100
G0 X-150 Y0
G2 Y0 I150
G0 X0 Y0
G4 S5; wait 5 seconds

;radius 120mm @ Z=1200
G0 Z1200
G0 X-120 Y0
G2 Y0 I120
G0 X0 Y0
G4 S5; wait 5 seconds

;radius 120mm @ Z=1300
G0 Z1300
G0 X-120 Y0
G2 Y0 I120
G0 X0 Y0
G4 S5; wait 5 seconds

;radius 100mm @ Z=1400
G0 Z1400
G0 X-100 Y0
G2 Y0 I100
G0 X0 Y0
G4 S5; wait 5 seconds

;radius 90mm @ Z=1500
G0 Z1500
G0 X-90 Y0
G2 Y0 I90
G0 X0 Y0
G4 S5; wait 5 seconds

;radius 90mm @ Z=1600
G0 Z1600
G0 X-90 Y0
G2 Y0 I90
G0 X0 Y0
G4 S5; wait 5 seconds

;radius 80mm @ Z=1700
G0 Z1700
G0 X-80 Y0
G2 Y0 I80
G0 X0 Y0
G4 S5; wait 5 seconds

;radius 80mm @ Z=1800
G0 Z1800
G0 X-80 Y0
G2 Y0 I80
G0 X0 Y0
G4 S5; wait 5 seconds

;radius 60mm @ Z=1900
G0 Z1900
G0 X-60 Y0
G2 Y0 I60
G0 X0 Y0
G4 S5; wait 5 seconds

;radius 50mm @ Z=2000
G0 Z2000
G0 X-50 Y0
G2 Y0 I50
G0 X0 Y0
G4 S5; wait 5 seconds

;radius 40mm @ Z=2100
G0 Z2100
G0 X-40 Y0
G2 Y0 I40
G0 X0 Y0
G4 S5; wait 5 seconds

;radius 30mm @ Z=2200
G0 Z2200
G0 X-30 Y0
G2 Y0 I30
G0 X0 Y0
G4 S5; wait 5 seconds

;radius 20mm @ Z=2300
G0 Z2300
G0 X-20 Y0
G2 Y0 I20
G0 X0 Y0
Check the sliced output and upload it to Repetier Server
After slicing the desired model within PrusaSlicer with correct parameters, we are going to upload the gcode to Repetier Server. We could do this with Duet too but we use Repetier Server as centralized print server and monitoring system.
Please double-check the sliced file for bad happenings. If printing complex geomtry with a lot of overhangs bridging might be required. But briding can create excessive forces while printing, as shown in the following video clip. Filament can lift up generating obstacles. Additionally extruder feed can be too quick while performing bridges. In this case if filament is pulled with too much speed it cannot be grabbed by the feeder gears correctly. It will slip and the print will fail because there is no coninuous extrusion from now on. We would need the Bluetooth Arduino Filament Feeder, Weigh and Monitor to assist the extruder mechanism.
Watch the cooling of the print
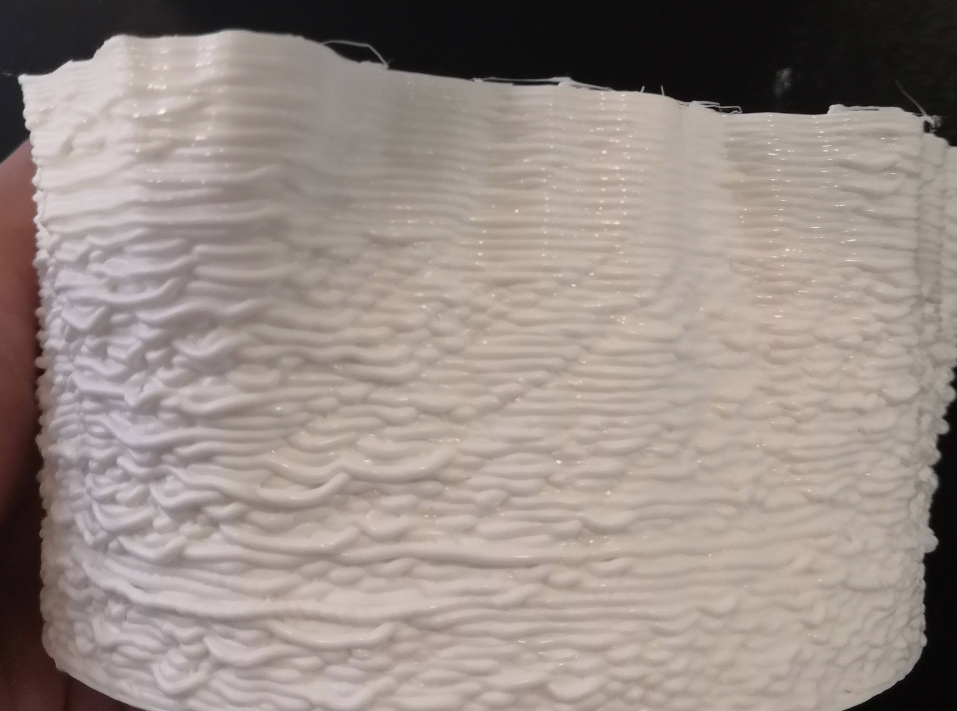
With SuperVolcano hotend we definitely need to cool down the printed parts while printing quick because the amount of heat is really high when printing with 60 mm/s or above. It's less a matter when printing with default speed of 30 mm/s. Because we use Duet Web Control, Repetier Server and PrusaSlicer there are some possible caveats which lead to failure of cooling. Then the printed result will look really bad like this (0.70 mm layer height, 1.57 mm track width):
To fix cooling we need to ensure the command M106 S255 will turn on the blower fan to 100% - that's the same command which PrusaSlicer puts into exported GCode files to activate print cooling. While printing the GCode could be ignored and get turned off by fan overrides of Repetier Server and/or Duet Web Control. Make sure there is absolutely no override or at least no override with 0% fan speed (see https://forum.duet3d.com/topic/3447/ability-to-turn-pinned-fans-off-with-gcode/5):
| Repetier Server | Duet Web Control | Duet Web Control |
| fans are pinned - override | fans are unpinned - no override | fans are pinned - override |
|
|
|
|
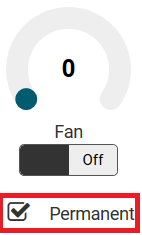
Never use print fan for first layer because it will curl off the printed lines on the platform adhesion (blue tape)
Retightening slack lines while printing and baby stepping for first layer adhesion
While printing the lines may get slack or overtightened. Maybe we have to react to the printer's situation by babystepping up or down (sometimes down to -0,5 .. -1,3 mm), or to send some additional step signals to the Smart Steppers to do some alternative line releasing or tensioning.
Watch for first layer adhesion and check if it's okay. Use baby step mechanism to tell the printer to apply the specified additional offsets to the XYZ coordinates for all future moves. It can be applied per axis of coordinate system. You cannot babystep ABCD axes but you can babystep XYZ. Ideally we do the baby step adjustment while the initial outline perimeter is printed (the line before the actual part is printed).
Height adjusting using baby stepping
M290 Z0.05 ; babystep the head up 0.05mm (Z+ direction)
M290 R0 S0 ; clear babystepping (RepRapFirmware 1.21 and later only)
Retightening lines independently using Smart Stepper interfaces
The baby stepping can only be used for Z (D drive), but we can also adjust the drives directly by sending "step" commands to the motors. We can use
- /opt/sms_modes/sms_release_abc.sh
- /opt/sms_modes/sms_release_d.sh
- /opt/sms_modes/sms_tighten_abc.sh
- /opt/sms_modes/sms_tighten_d.sh
You can do this while printing. Check motor errors in Grafana and adjust line tension for the motors which exceed tolerated error values (error should not be higher than 0.90).

Fixing prints while printer is running
Make the part stickier to the ground. Add mass (temporary weights) to the part or tape the part walls to make them sticky to the ground. This helps to prevent parts which peel off the platform too easily.
Last instance before aborting the print: omit broken part sectors
If printing errors occure in the middle of the print but you think you can finish it by ignoring some zones, just exclude them. This is possible with Repetier Server:
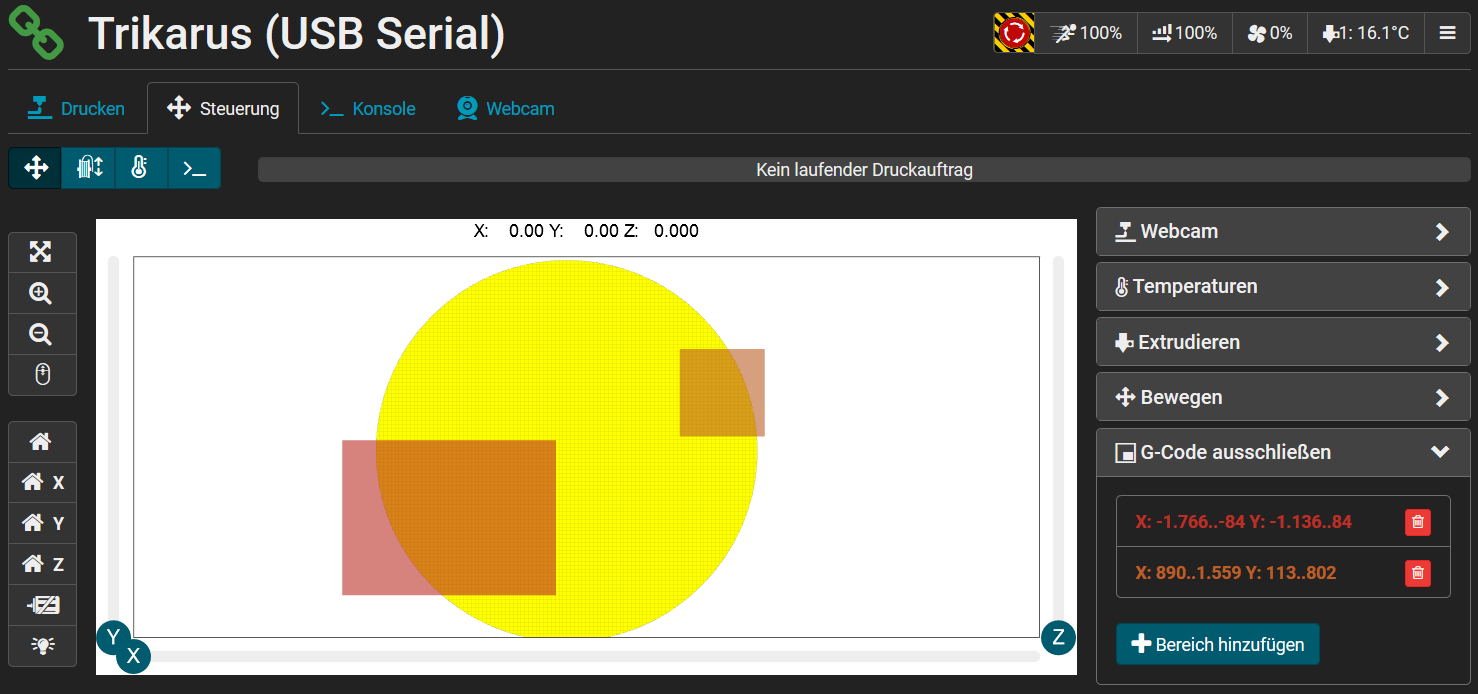
The print platform is segmented into three equal parts. If the part is printed in the center point of the bed, you can use the segmentation to remove the parts easily by pulling up segment for segment slowly. If this does not work you still can just remove the blue tape.
Restoring failed print / continuing stopped print (power loss)
In case the main power is lost the Smart Steppers will go offline. Trikarus has no drive brakes yet which could trigger to keep them in place. The result is that the effector lowers down by it's own mass. We tested this and found out that it takes about 100 ~120 seconds until the effector reached the ground from 2.5 meters height. So it does not crash but it lowers down smoothly. It still may damage the printed object on the platform if there was an object before the power loss.
Continuing and restoring prints was not tested out yet with Trikarus. This is a longterm task.
- https://duet3d.dozuki.com/Wiki/Setting_up_to_resume_a_print_after_a_power_failure
- https://forum.repetier.com/discussion/7688/print-recovery-on-server-service-reboot-or-fail#latest
Replacing filament
- press "pause" in Repetier Server - the position of the effector will be moved up +50mm (by Repetier Event GCode Trigger) and held in this position
- press continue. The effector will lower back to previous Z coordinate automatically!
Do not change the filament while the printer is running. The extruder construction will not allow to push in the new
filament string while the last centimeters of the previous filament string is running out. Result will be a clogged extruder
Pausing and continuing the printer
In case of printing over several days we need to pause the printer (this is tested out to work fine in case there is no powerloss in the meantime). We can press the pause button in Repetier Server.
A monitoring script will turn off the heater after 15 minutes automatically (in case we forgot it), but we should turn off the heater immediately after pressing the pause button.
We should pause at an infill position ideally to keep the hull intact. Additionally we can raise the z coordinate up for 1-2 mm.
Shutting down (planned power down)
- The hotend needs more than 20 minutes to cool down from 240 °C to room temperature. The 40 x 40 mm fan helps cooling down. Powering off the printer by turning of the power supply unit will kill the fan so hotend takes even longer to get cold.
- To power down the machine completely (except the UPS) press the emergency halt button. That's it.
Special "party" and passive idle mode
Trikarus can do nonsense automatically too. We just can let it blink and move up and down without any doubts. In case Trikarus is not printing it should just do some optical feedback for fun.
vim /opt/trigonometry.sh#trignometry - by http://advantage-bash.blogspot.com/2012/12/trignometry-calculator.html?m=1
sin ()
{
echo "scale=5;s($1*0.017453293)" | bc -l
}
cos ()
{
echo "scale=5;c($1*0.017453293)" | bc -l
}
tan ()
{
echo "scale=5;s($1*0.017453293)/c($1*0.017453293)" | bc -lvim /opt/idling-blink-lights.shsource /opt/trigonometry.sh
source /opt/repetier-conf.sh
TIME_OFFSET=0.5
ANGLE=0
while true
do
ANGLE=$(echo $ANGLE + 10 | bc)
LASER_VALUE=$(sin $ANGLE | sed 's/-//g' | sed 's/^\./0\./g' | cut -c 1-5) #remove negative numbers and let . numbers begin with 0, then cut after third digit
if [ $LASER_VALUE == 0 ]; then
python3.7 /opt/gpio/ledspot-on.py #perform some visual feedback
fi
send_gcode "M106 P2 S$LASER_VALUE" #turn on the laser pointers
echo $LASER_VALUE
sleep $TIME_OFFSET
if [ $LASER_VALUE == 1.000 ]; then
python3.7 /opt/gpio/ledspot-off.py #perform some visual feedback
fi
doneLED Party
vim idling-led-party.shwhile true
do
for i in {1..15..1}
do
python3.7 /opt/gpio/ledspot-on.py
sleep 0.01
python3.7 /opt/gpio/ledspot-off.py
sleep 0.01
done
sleep 5
doneDebugging the LED relay (might sometimes not fully switch)
Actively pushing it on/off quickly for ~1 minute fixes the issue if the LED stripe stays off while relays is on:
/opt/led-relais-test.sh source /opt/repetier-conf.sh
while true
do
python3.7 /opt/gpio/ledspot-on.py
python3.7 /opt/gpio/ledspot-off.py
doneMoving the effector around in the print volume without GCode randomly
We do not use negative torque values because that could cause unwanted despooling. We use some secure values to let the effector fly a little bit to positions nearly only above print platform. Due to the used settings the effector will not move far away in anchor directions.
vim sms_random.sh#!/bin/bash
#PID_FILE="/opt/sms_modes/sms_random.pid"
case "$1" in
start)
#get the scripts own PID number
#echo $$>"$PID_FILE"
while true;
do
RAND_A=$(((RANDOM%35)+1)) #1..35
RAND_B=$(((RANDOM%35)+1)) #1..35
RAND_C=$(((RANDOM%35)+1)) #1..35
RAND_D=$(((RANDOM%90)+1)) #1..90
echo RAND_A = $RAND_A
echo RAND_B = $RAND_B
echo RAND_C = $RAND_C
echo RAND_D = $RAND_D
echo "torque $RAND_A" > /opt/A.cmdlist
echo "torque $RAND_B" > /opt/B.cmdlist
echo "torque $RAND_C" > /opt/C.cmdlist
echo "torque $RAND_D" > /opt/D.cmdlist
sleep 3 #loop every 3 seconds
done
;;
stop)
#pkill -P `cat "$PID_FILE"` #kill the service first
#rm "$PID_FILE"
killall sms_random.sh
echo "put effector to ground (sms_zdown.sh)"
/opt/sms_modes/sms_zdown.sh
;;
restart)
$0 stop
$0 start
;;
#status)
#if [ -e "$PID_FILE" ]; then
# echo Service is still running, pid=`cat "$PID_FILE"`
#else
# echo Service is NOT running
#exit 1
#fi
;;
*)
#echo "Usage: $0 {start|stop|status|restart}"
echo "Usage: $0 {start|stop|restart}"
esac
exit 0