# Trikarus Project (Hangprinter)
A cable driven large scale 3d printer at the Industriemuseum Chemnitz
# Bills of material and hardware compenent features
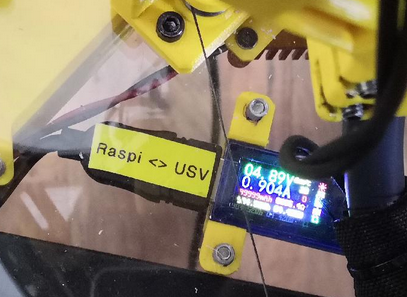
# Ceiling module | AT34 USB Tester
[](https://wiki.stadtfabrikanten.org/uploads/images/gallery/2026-06/YQs6SoxyY2ibT4DH-grafik.png)
This is used to check the voltage of Raspberry Pi and to validate occuring undervoltage happenings. It's a really useful helper.
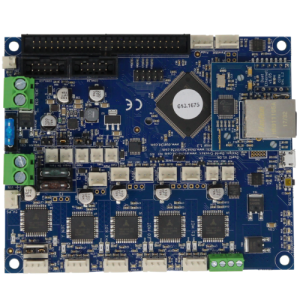
# Ceiling module | Duet 2 Ethernet v1.04
[](https://wiki.stadtfabrikanten.org/uploads/images/gallery/2026-06/AoGaSFyk34yI2do7-grafik.png) [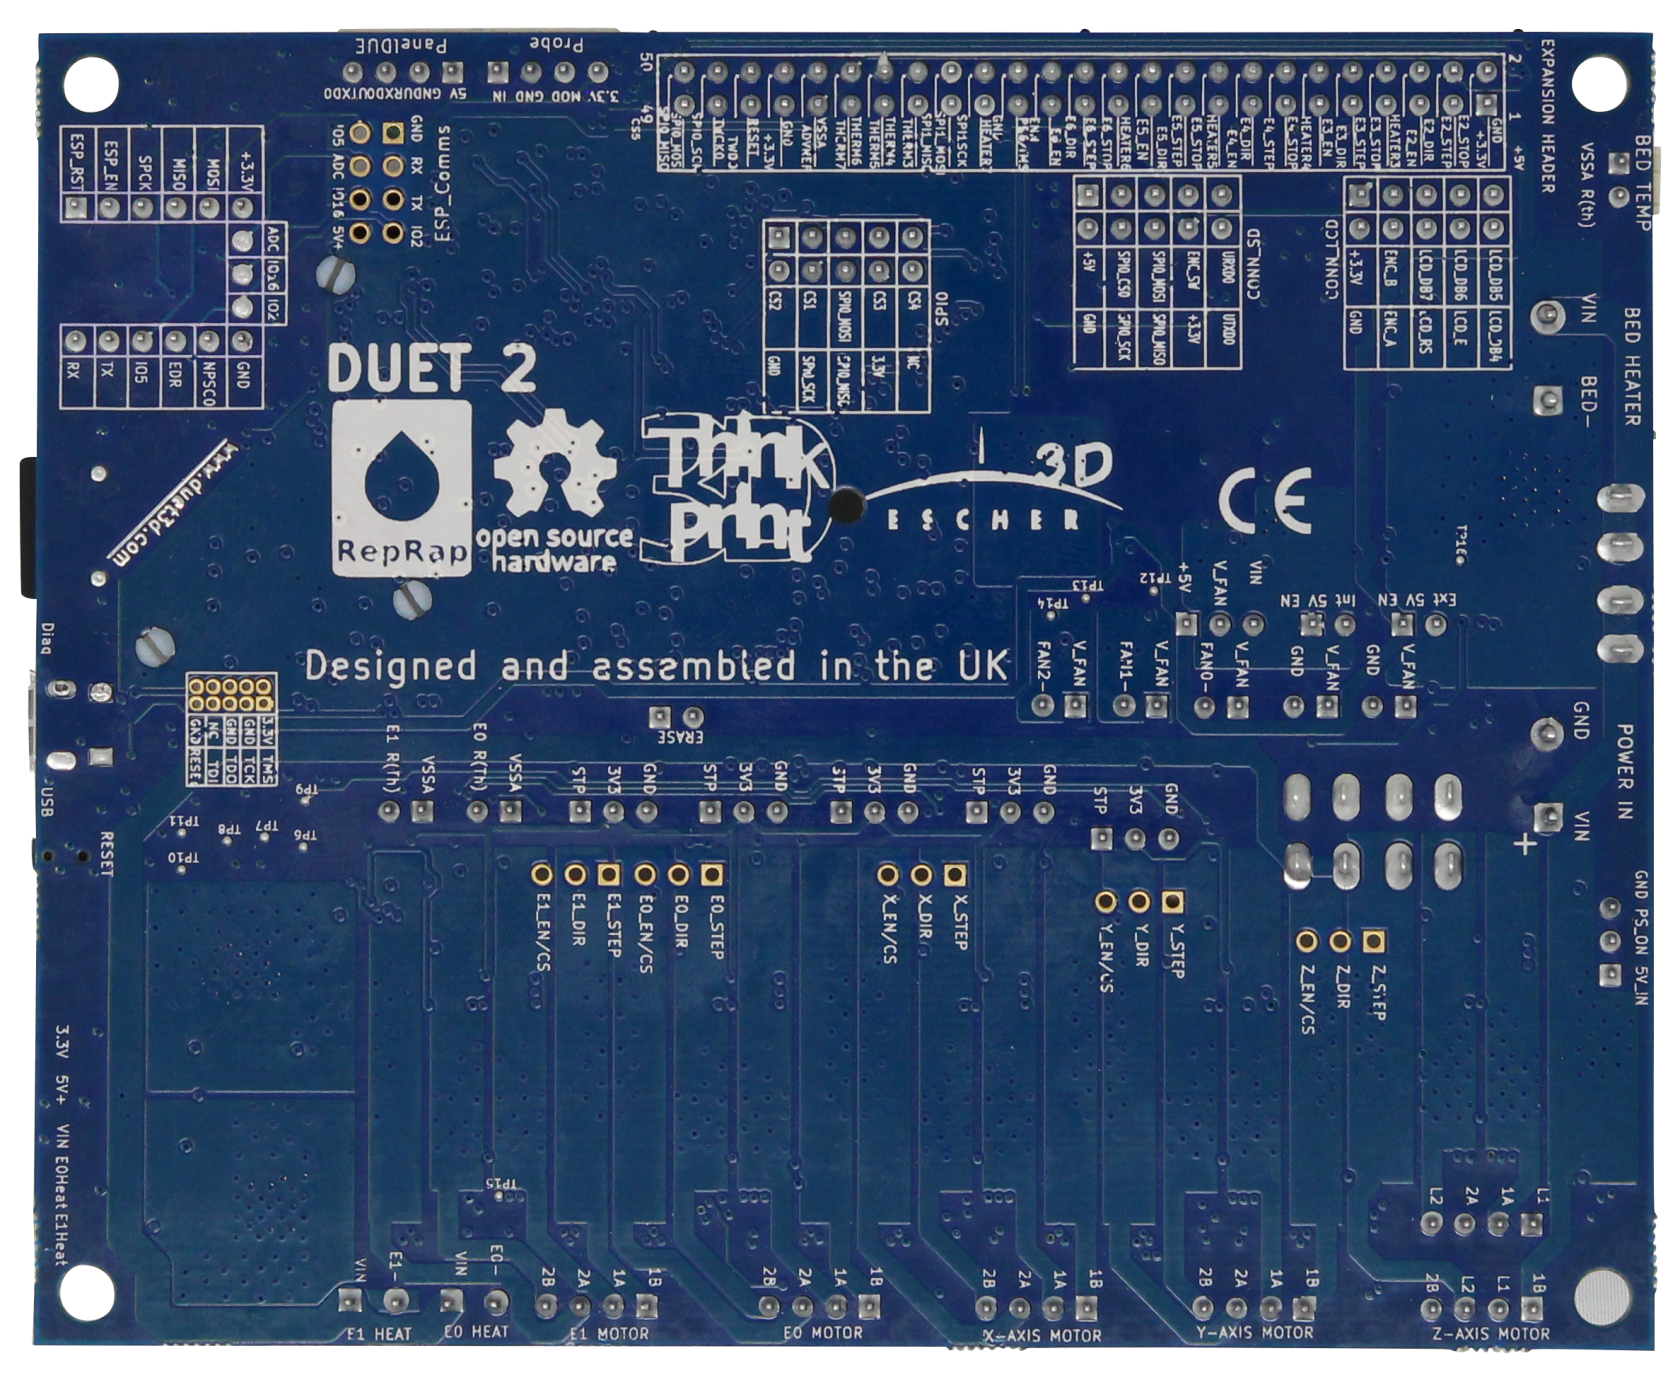](https://wiki.stadtfabrikanten.org/uploads/images/gallery/2026-06/l7sicPYcukxeSOHj-grafik.png) [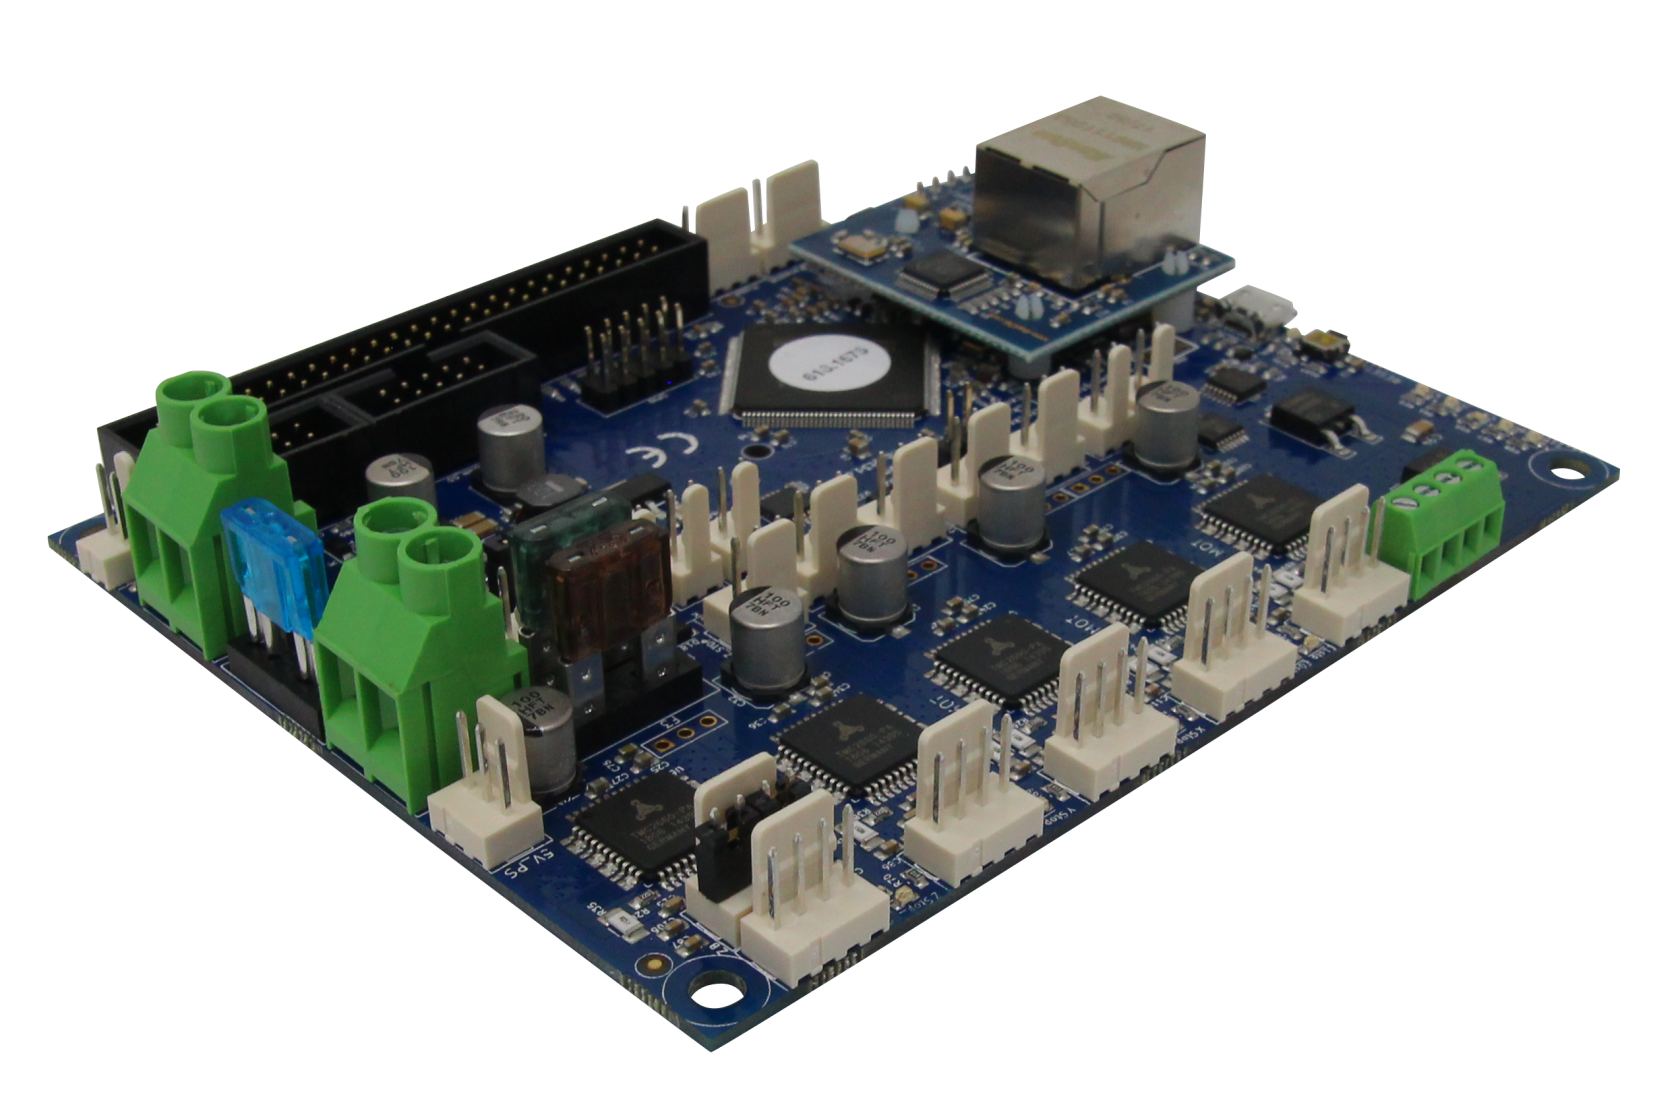](https://wiki.stadtfabrikanten.org/uploads/images/gallery/2026-06/PhXhtlsvVtbpqAQ5-grafik.png) [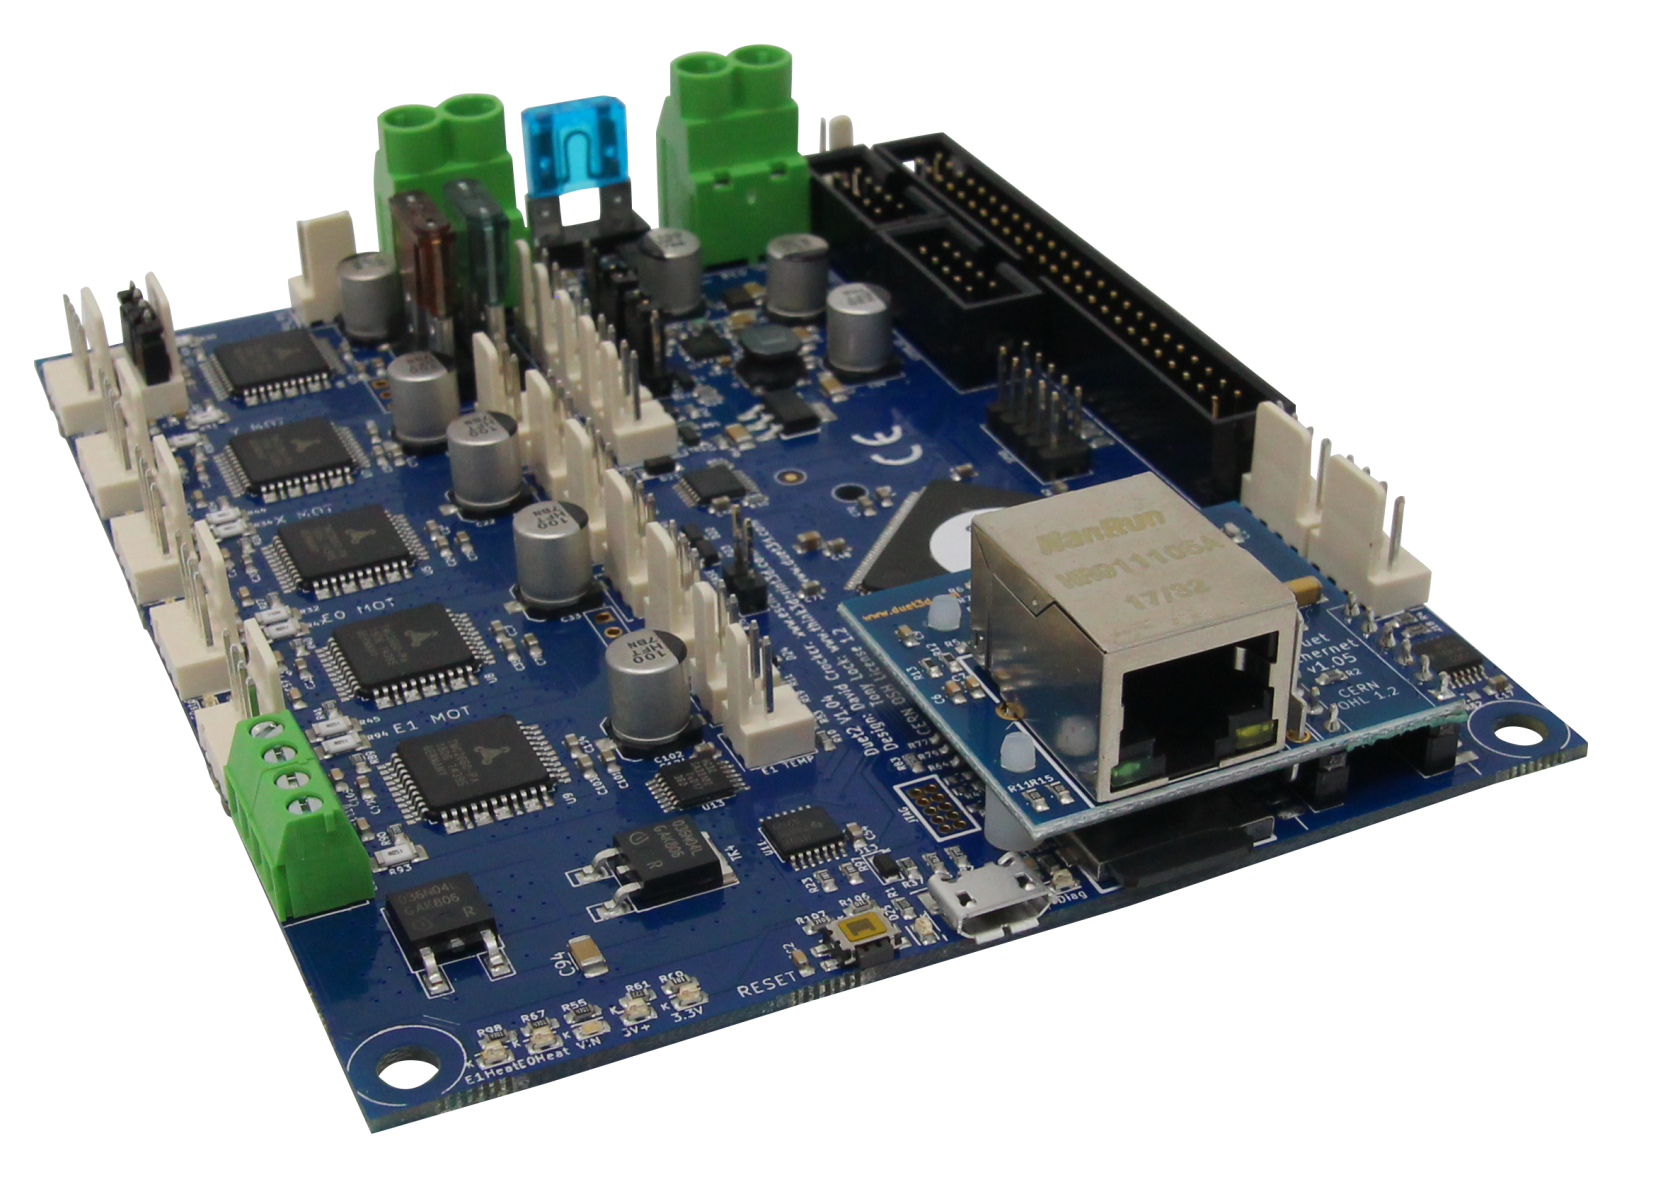](https://wiki.stadtfabrikanten.org/uploads/images/gallery/2026-06/qAUX8Ra4EUHjeIhl-grafik.png) [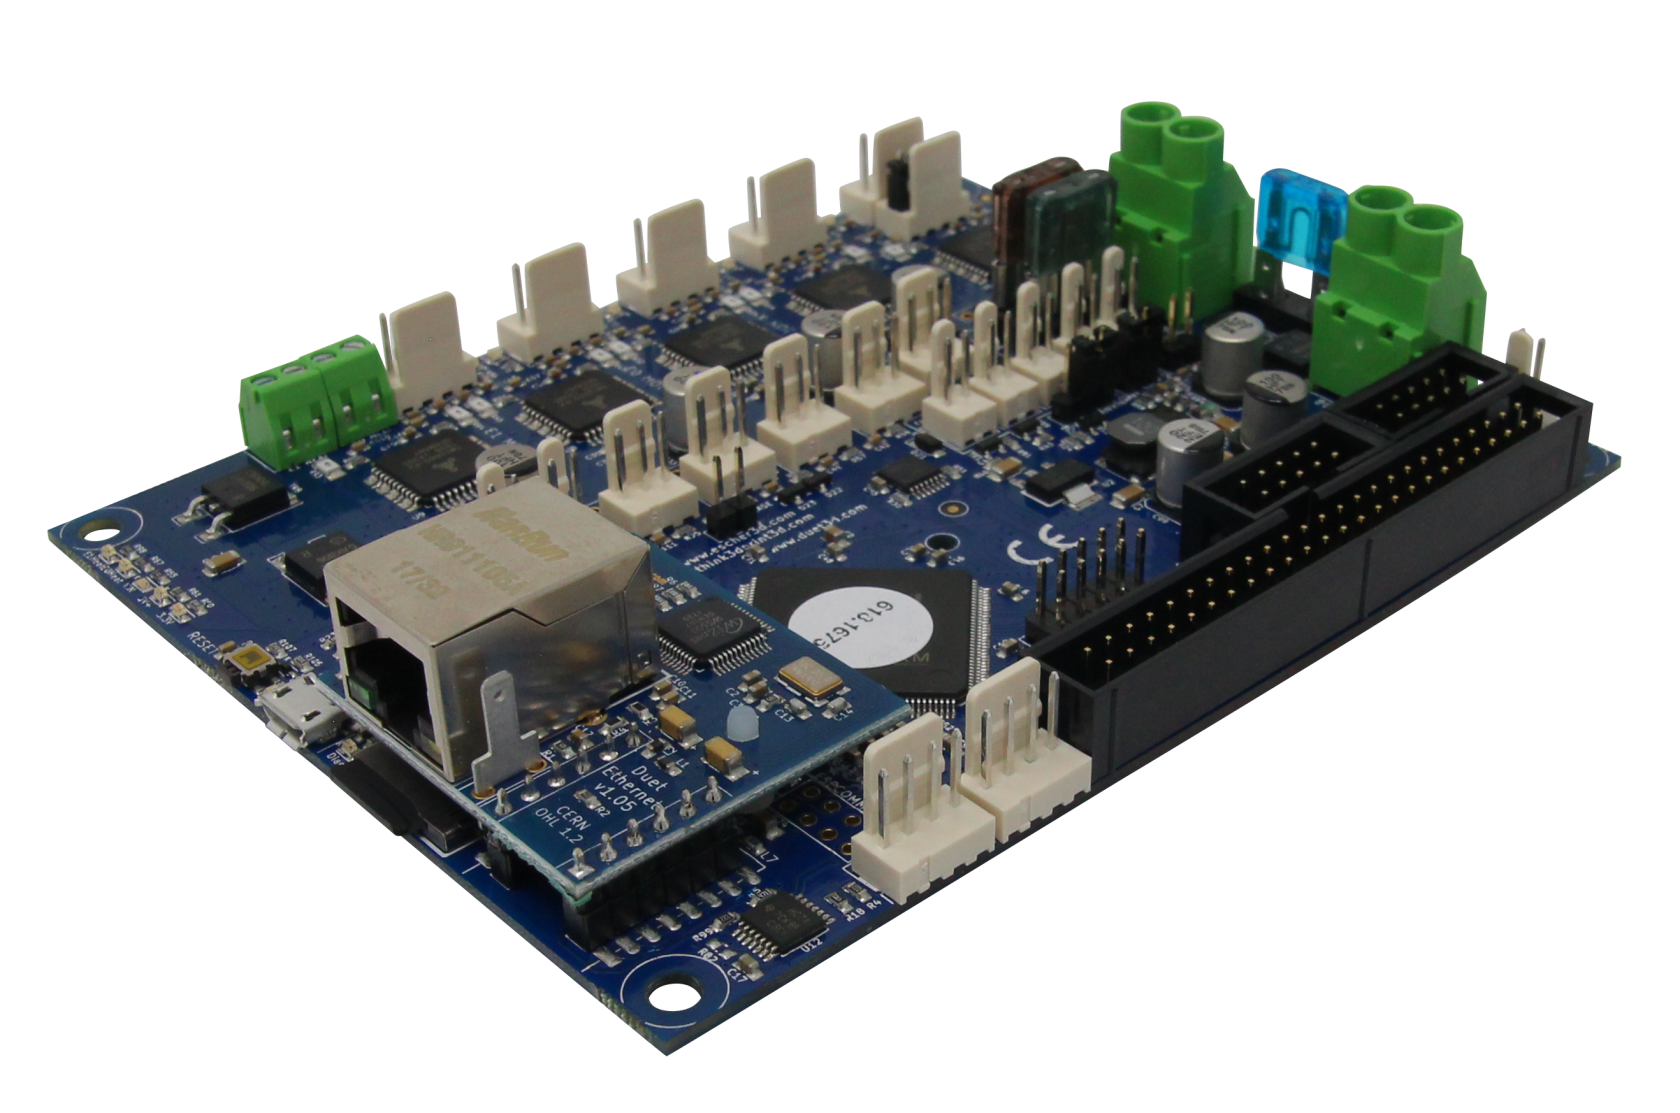](https://wiki.stadtfabrikanten.org/uploads/images/gallery/2026-06/92s7tte8Pa2uCiiO-grafik.png)
[](https://wiki.stadtfabrikanten.org/uploads/images/gallery/2026-06/RkvpzXBea2sJAib5-grafik.png) [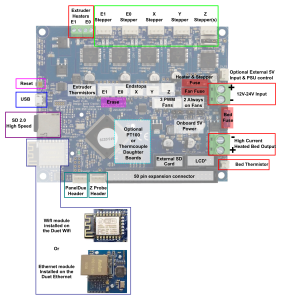](https://wiki.stadtfabrikanten.org/uploads/images/gallery/2026-06/mpoiOCbSFyS4rinN-grafik.png)
# Description (copied from [https://www.duet3d.com/DuetEthernet](https://www.duet3d.com/DuetEthernet))
This is the latest PCB revision of the Duet 2 Ethernet, v1.04.
The Duet 2 Ethernet is an advanced 32 bit electronics board for the control of 3D printers and other CNC machines. It has the same features as the [Duet 2 Wifi](https://www.duet3d.com/DuetWifi), other than providing ethernet connectivity rather than Wifi, a [full feature description is available on our documentation](https://duet3d.dozuki.com/Wiki/Hardware_Overview), in summary:
- Powerful 32 Bit Processor
- Dedicated ethernet module.
- Super quiet TMC2660 stepper drivers, up to 256 microstepping.
- High speed SD card and support for a second SD external card if required.
- Dual extruders on the main board, up to 5 more extruders on the [expansion board](https://www.duet3d.com/Duex5).
- High Power rating: Each stepper driver is capable of 2.8A motor current, currently limited in software to 2.4A. The bed heater channel is specifically designed for high current (18A).
- Connect via PC, tablet or smartphone on the same network to the on board web interface.
- Setup your printer and update the firmware through the [web interface](https://duet3d.com/wiki/Duet_Web_Control).
- All common 3D printer geometries are supported
- Expandable up to 7 extruders with Firmware support for mixing nozzles and remapping axes to use high power external drivers.
- Support for the [PanelDue](https://duet3d.com/wiki/PanelDue): a full colour graphic touch screen.
- Support for [DC42’s IR Z probe](https://www.duet3d.com/IRProbe) and the [Duet3D Smart Effector](https://www.duet3d.com/DeltaSmartEffector) for delta printers.
- Provided with Molex compatible plugs and crimps as well as ferrules for power and heater terminals.
The Duet 2 Ethernet can have [Thermistors ](https://www.duet3d.com/e3d_Thermistor)connected directly, alternatively we have two different temperature sensing daughterboards available:
- [PT100 Temperature daughterboard](https://www.duet3d.com/PT100_DaughterBoard)
- [Thermocouple temperature daughterboard.](https://www.duet3d.com/TC_K_DaughterBoard)
We also supply genuine e3d PT100 and thermocouple sensors compatible with their range of hotends:
- [PT100 sensor](https://www.duet3d.com/PT100Sensor_2wire)
- [Type K Thermocouple sensor.](https://www.duet3d.com/TypeK_TC)
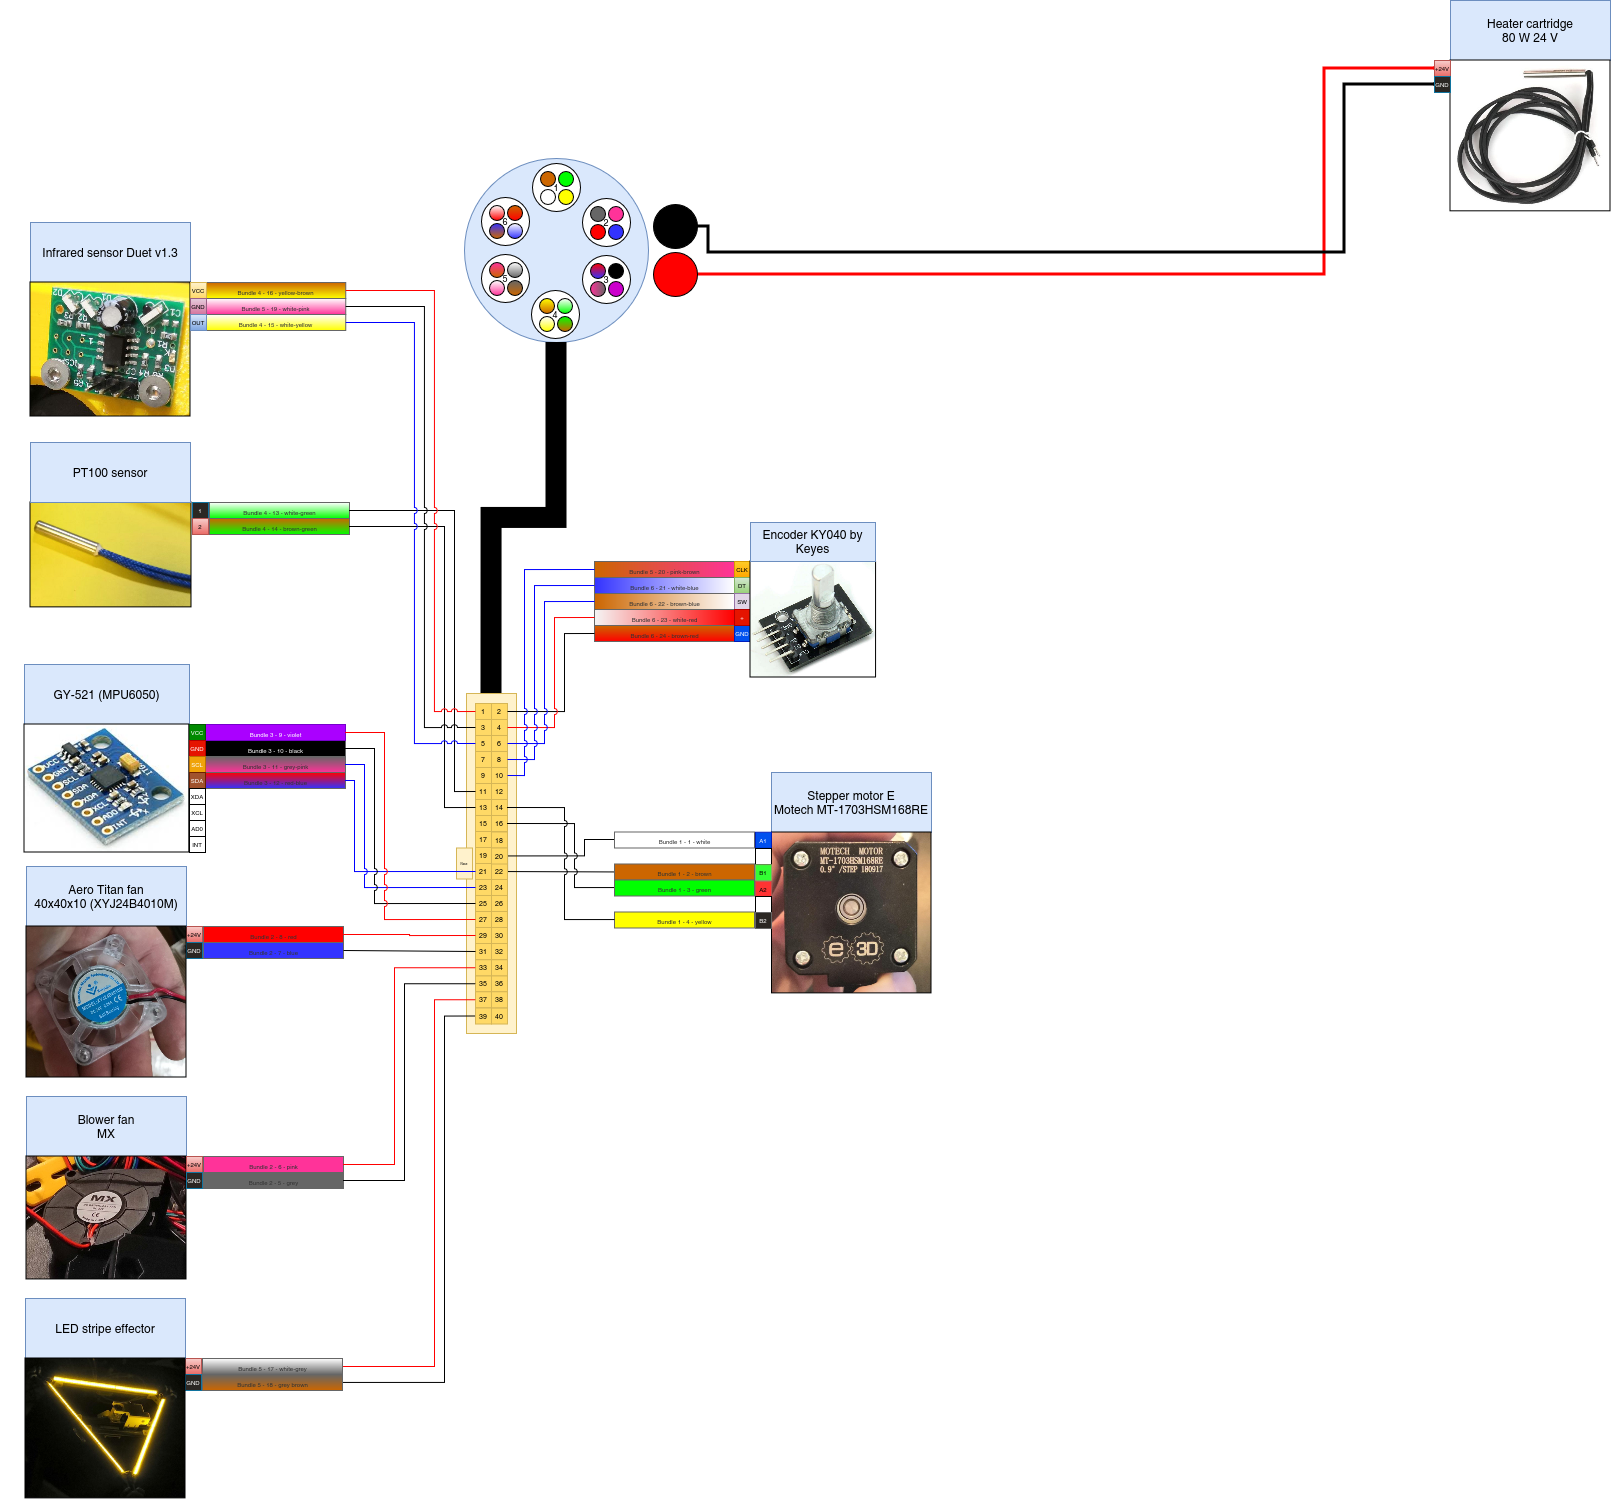
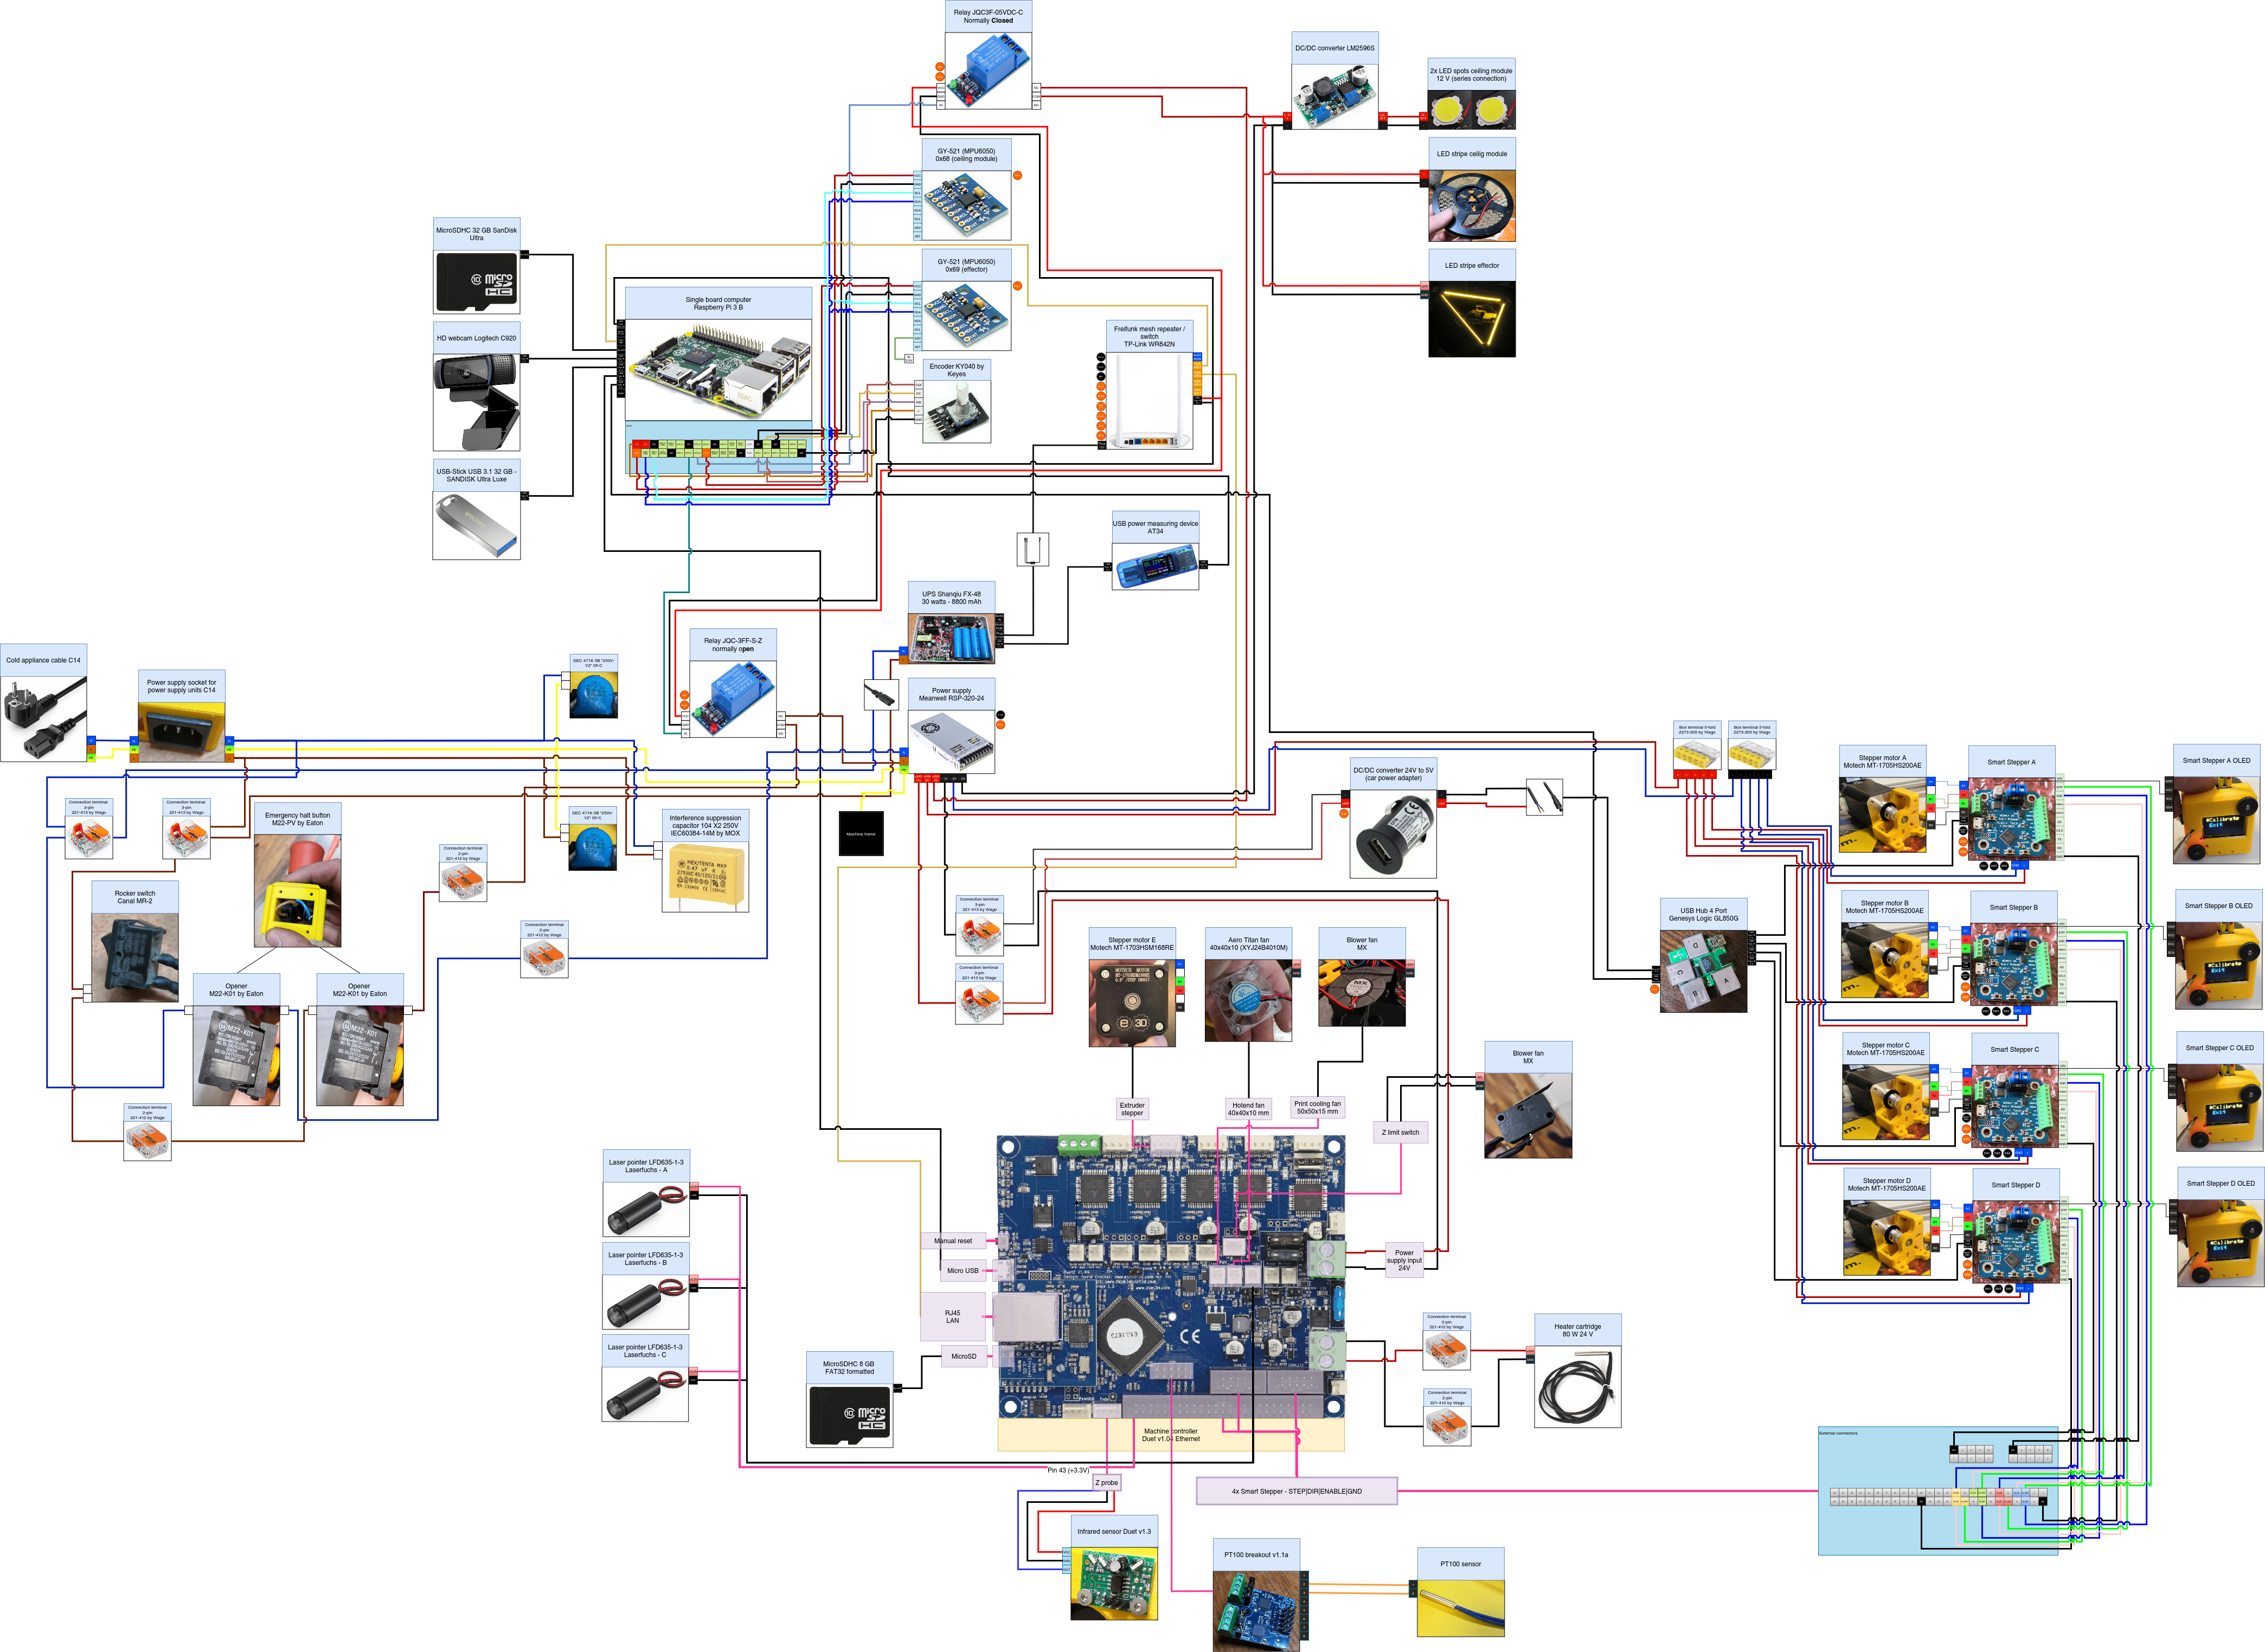
# Wiring
[](https://wiki.stadtfabrikanten.org/uploads/images/gallery/2026-06/rnwHF5OVwOkHff9p-grafik.png)
## Replacement parts
[https://duet3d.dozuki.com/Wiki/Connector\_and\_spare\_part\_numbers](https://duet3d.dozuki.com/Wiki/Connector_and_spare_part_numbers)
## Fan mosfet
If you short out a PWM fan, the fan driver mosfet will burn out. The replacement part number is **PMV40UN2** or **PMV40UN2R** which is available from the usual electronic component distributors such as Farnell/Newark/element14, Digikey, Mouser and RS. You can also use type **PMV20XNER** or **AO3400A** which have a higher peak current rating. The component identifiers on the board are:
- Fan 0 mosfet: TR5
- Fan 1 mosfet: TR9
- Fan 2 mosfet: TR1
To remove the old mosfet, you will need either a hot air desoldering tool with a small nozzle, or low melting point solder such as ChipQuik . If using hot air, use a shield made from e.g. corrugated cardboard covered with Kapton tape to shield connectors and other plastic components from the hot air. The new mosfet can be soldered in place using a fine-tipped soldering iron, or by putting a little no-clean flux on the pads, placing the new mosfet on top, and using hot air again. Hot air soldering/desoldering is easier if you heat the whole board to about 100-125C on an electric hotplate.
## Heater MOSFETs
Note when removing any of the heater MOSFETs there is significant heat-sinking into the copper of the board. A combination of hot air rework, Chipquick, and a heated plate may be needed to remove one successfully.
- Bed Heater
- TR2: this is an IPD036N04LGBTMA1
- E0, E1 Heaters
- TR3, TR4: this is an AOD4184A (you an also use IPD036N04LGBTMA1)
- The small green component bearing the letters 'bF' is the self-resetting fuse, and the component with stripes is the optional 10K resistor. A piece of Kapton tape was put on the board first to provide additional insulation.
## Mini blade fuses
- 1A mini auto blade fuse protecting the fan circuits when the fan voltage selection jumper is in the VIN position. You can increase the fuse rating to 2A or even 3A if your fans, air pumps etc. draw more than 1A in total.
- 15A fuse for the bed heater circuit
- 7.5A fuse for everything else
## TFT panel backlight inverter IC
If the TFT panel of a **non-integrated** PanelDue assembly suddenly refuses to light up, chances are that the backlight inverter chip has failed. This is a 6-pin chip marked L6CE or L6EN or L6GE or similar (the Pin 1 marking bar can easily be mistaken for a letter I in front of the L). The part number is MP3202DJ. It is available from RS Components, Digikey and Mouser, and also on eBay and Ali Express.
### Other things
Duet has no support for POE and will be fried if it get's connected to passive POE like [Shanqiu Mini UPS FX5-48 / Vultec Continuity UPS30PW-DC](https://old.stadtfabrikanten.org/pages/createpage.action?spaceKey=TH&title=Shanqiu+Mini+UPS+FX5-48+%2F+Vultec+Continuity+UPS30PW-DC&linkCreation=true&fromPageId=56623211) has got.
Provides power for the module, can be +3V to +5V. Typically +5V is used
2
Ground
Connected to Ground of system
3
Serial Clock (SCL)
Used for providing clock pulse for I2C Communication
4
Serial Data (SDA)
Used for transferring Data through I2C communication
5
Auxiliary Serial Data (XDA)
Can be used to interface other I2C modules with MPU6050. It is optional
6
Auxiliary Serial Clock (XCL)
Can be used to interface other I2C modules with MPU6050. It is optional
7
AD0
If more than one MPU6050 is used a single MCU, then this pin can be used to vary the address
8
Interrupt (INT)
Interrupt pin to indicate that data is available for MCU to read.
## MPU6050 features
- MEMS 3-aixs accelerometer and 3-axis gyroscope values combined
- Power Supply: 3-5V
- Communication : I2C protocol
- Built-in 16-bit ADC provides high accuracy
- Built-in DMP provides high computational power (Digital Motion Processor) - reduces the load for the microcontroller (like the Arduino)
- Can be used to interface with other IIC devices like magnetometer
- Configurable IIC Address
- In-built Temperature sensor
## Key words
- gyro
- Inclinometer
- Beschleunigungssensor
- Neigungssensor
- gyroscope
- accelerometer
- tilt sensor
## Enable I2C on Raspberry Pi
```bash
vim /boot/config.txt
```
```bash
dtparam=i2c_arm=on
```
```bash
vim /etc/modules
```
By default, each MPU 6050 has the same address with bit 0x68. An enable signal can be sent via pin "AD0", which redirects the sensor to 0x69. Pin AD0 got a fixed solderding to give the secondary address 0x69.
[](https://wiki.stadtfabrikanten.org/uploads/images/gallery/2026-06/rYLN1tdKEE3rLEju-grafik.png)
```
i2cdetect -y 1 #now returns 0x69
```
## Debugging
Sometimes the gyros do not properly work when connected. While working within Trikarus project, multiple errors occured. There were errors thrown like "OSError: \[Errno 121\] Remote I/O error - has occurred". Especially making DMP work was a horror trip because it threw a lot of errors while with regular raw values this was not the big deal. It seems to be a problem with long wire, unstable clock frequency and pullup resistors.
There are multiple solutions to fix the situation.
- check wiring quality and wire length/isolation
- check the supply voltage vor MPU 6050. It requires nominally 3.3 V
- VDD → 2.375 V - 3.46 V
- VLOGIC → 1.71 V to VDD
- check / adjust the I²C bus frequency of Raspberry Pi (have a look at [https://github.com/fivdi/i2c-bus/blob/master/doc/raspberry-pi-i2c.md)](https://github.com/fivdi/i2c-bus/blob/master/doc/raspberry-pi-i2c.md))
- ```bash
show recent baudrate
cat /sys/module/i2c_bcm2708/parameters/baudrate
# adjust baudrate temporarily - set it to 10.000
modprobe i2c_bcm2708 baudrate=10000
cat /sys/module/i2c_bcm2708/parameters/baudrate
# if you want to edit it permanently edit boot config by your needs - maximum baudrate is 400.000, default is 100.000
vim /boot/config.txt
dtparam=i2c_arm=on
i2c_arm_baudrate=400000
```
- check I²C communication by i2c dumping
- ```bash
while i2cdump -y -r 0-7 1 0x68 c; do sleep 1; done
while i2cdump -y -r 0-7 1 0x69 c; do sleep 1; done
```
- maybe add some delay after setting smbus.SMBus(1) to settle. A lot of people set some wait time, e.g. 1 second
- if there is a second MPU 6050 connected please check if there are problems while addressing them. Check if AD0 is set to 1 accordingly and if AD0 is grounded correctly. Check the devices separetely by disconnecting one of both to ensure that they work in single mode correctly.
## Monitoring → [MPU 6050 (GY-521) Gyro + Accelerometer monitoring](https://old.stadtfabrikanten.org/pages/viewpage.action?pageId=65405374)
## C++ script to read the data (quickly show the output to console)
At [https://github.com/richardghirst/PiBits](https://github.com/richardghirst/PiBits) there's a good example to use MPU6050 with raw data or filterered by DMP.
## Configure and build
```bash
apt install libgtkmm-3.0-dev
git clone https://github.com/richardghirst/PiBits.git
cd MPU6050-Pi-Demo/
#adjust I2C basics
vim I2Cdev.cpp #change all "/dev/i2c-0" to "/dev/i2c-1"
#to change I2C 0x69 or 0x69 change MPU6050 accelgyro; to MPU6050 accelgyro(MPU6050_ADDRESS_AD0_HIGH);
vim demo_raw.cpp
#to change I2C 0x69 or 0x69 change MPU6050 mpu; to MPU6050 mpu(MPU6050_ADDRESS_AD0_HIGH);
vim demo_dmp.cpp
make
```
## Run
```bash
#raw mode
./demo_raw
#DMP mode
./demo_dmp
#this will sometimes fail with
Initializing I2C devices...
Testing device connections...
MPU6050 connection successful
Initializing DMP...
DMP Initialization failed (code 1)
#You can also run gdb to debug:
gdb ./demo_dmp
#then enter "run"
```
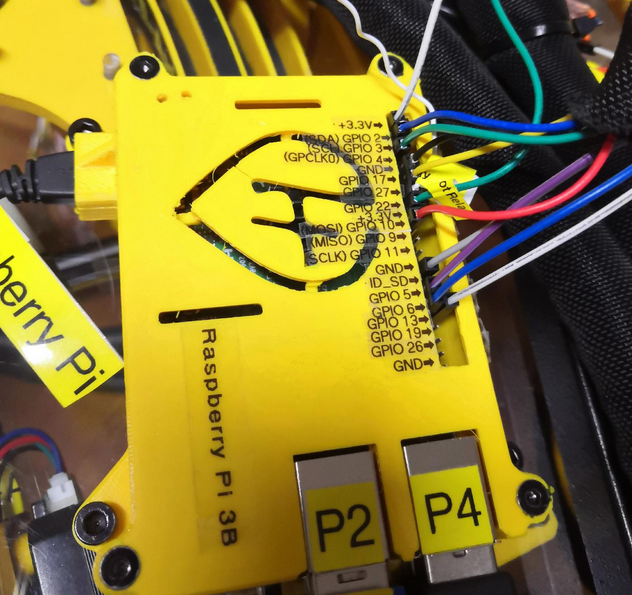
# Ceiling module | Raspberry Pi 3 B
[](https://wiki.stadtfabrikanten.org/uploads/images/gallery/2026-06/cLWh7qQRE0t8pL8f-grafik.png)
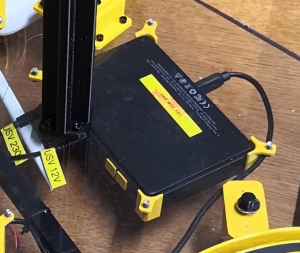
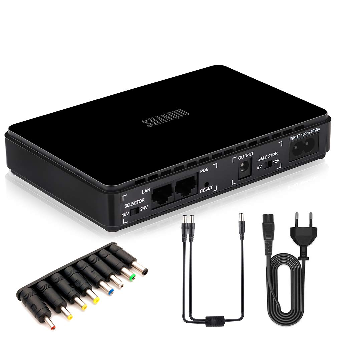
# Ceiling module | Shanqiu Mini UPS FX5-48 / Vultec Continuity UPS30PW-DC
[](https://wiki.stadtfabrikanten.org/uploads/images/gallery/2026-06/ibwQpvqU1pG4aTSx-grafik.png) [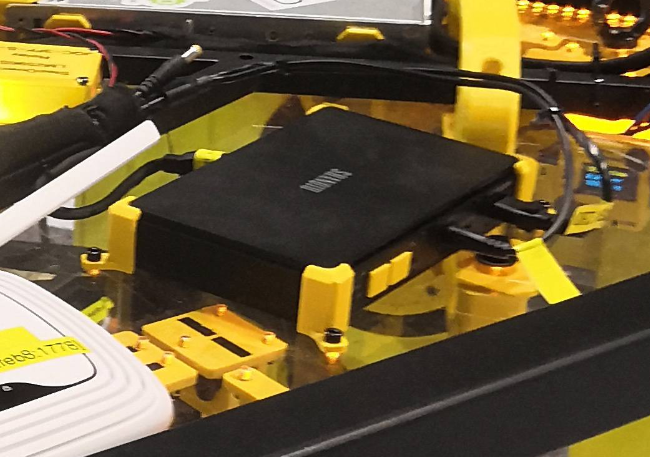](https://wiki.stadtfabrikanten.org/uploads/images/gallery/2026-06/tBxUDxmyb6cERKBs-grafik.png) [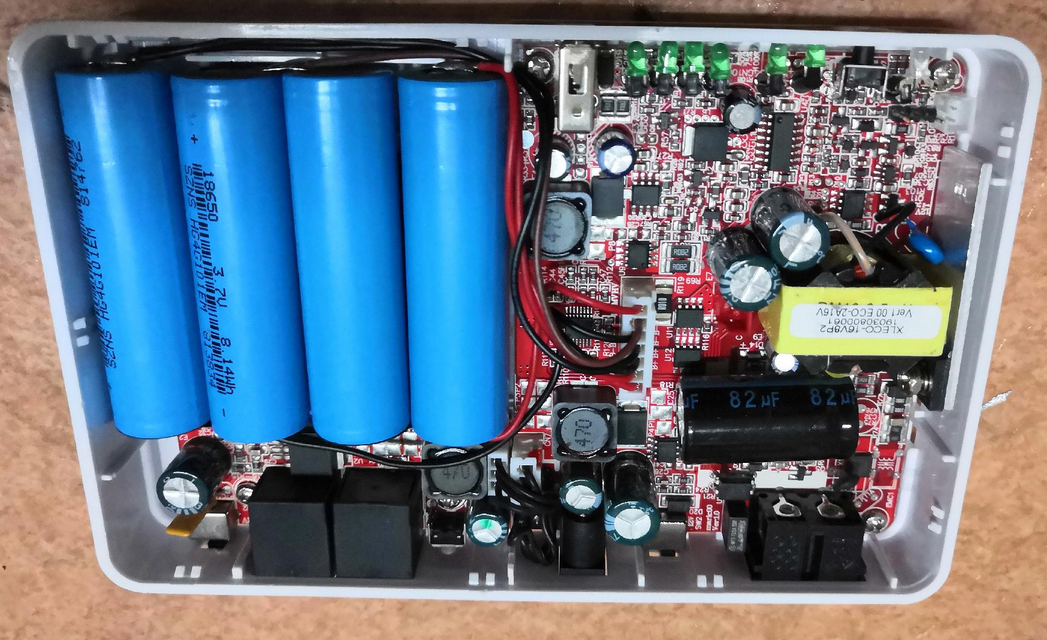](https://wiki.stadtfabrikanten.org/uploads/images/gallery/2026-06/OhhzifE114nQawpl-grafik.png)
[](https://wiki.stadtfabrikanten.org/uploads/images/gallery/2026-06/h5pCt2jZIIN2KSWA-grafik.png) [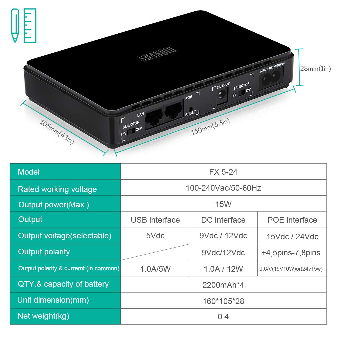](https://wiki.stadtfabrikanten.org/uploads/images/gallery/2026-06/nHUXpoIXXPp2XomH-grafik.png) [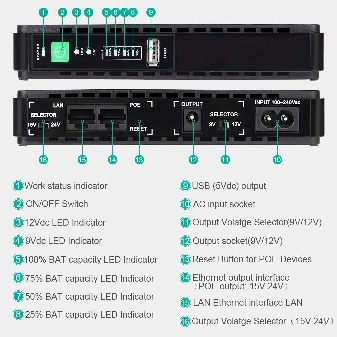](https://wiki.stadtfabrikanten.org/uploads/images/gallery/2026-06/Q2NlagfouYDmiX7M-grafik.png) [](https://wiki.stadtfabrikanten.org/uploads/images/gallery/2026-06/mKn79KzdHJh187sB-grafik.png)
## Notes
- There are different versions of the UPS ("USV" is german short name for this) on the market. Shanqiu Mini USV FX5-48 and Vultec Continuity UPS30PW-DC are nearly the same models except different color, POE wattage and branding. Both come with 5 V USB connector which allows up to 2. 0 A output.
- product link: [https://www.amazon.de/VulTech-Continuity-Serie-DC-Watt/dp/B07TBKVLKX](https://www.amazon.de/VulTech-Continuity-Serie-DC-Watt/dp/B07TBKVLKX)
- **Warning**: The UPS does not have a POE with sensing technology. Devices that do not have POE support can suffer damage. I have tested it on my USB network card. This started after about 30 seconds with intense smoke formation. I quickly released the connection by plugging off again. For this reason, I 3d printed 2 adapter pieces to seal the POE-LAN sockets (some kind of disallowed usage). → [https://m.drivesncontrols.com/news/fullstory.php/aid/4494/PoE\_extensions\_\_91can\_damage\_non-PoE\_equipment\_92.html](https://m.drivesncontrols.com/news/fullstory.php/aid/4494/PoE_extensions__91can_damage_non-PoE_equipment_92.html)
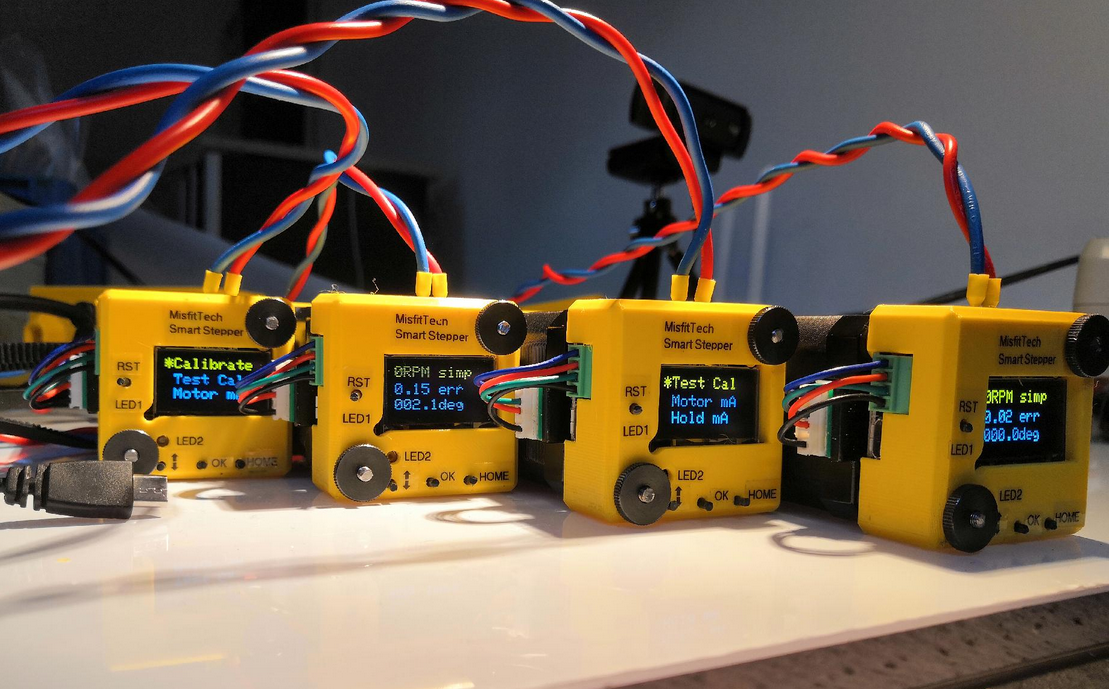
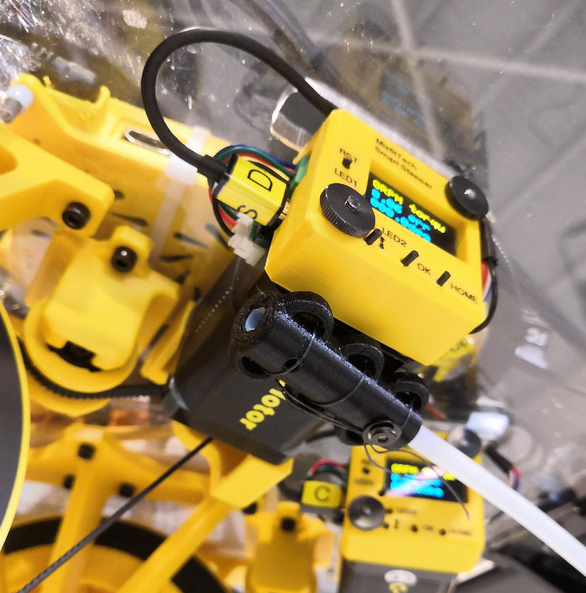
# Ceiling module | Smart Stepper rev 1/20/2019 by MisfitTech
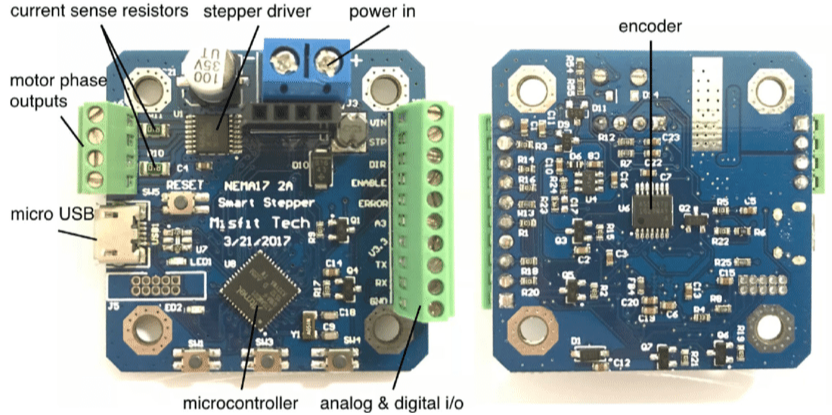
## Electrical Components on the MisfitTech Smart Stepper Board
- Allegro 4954LPT DMOS PWM Motor Driver
- AMS AS5047D High Speed Position Sensor
- Atmel ATSAMD21G18 Cortex MCU
[](https://wiki.stadtfabrikanten.org/uploads/images/gallery/2026-06/TEhmxuCuADyGw2jT-grafik.png) [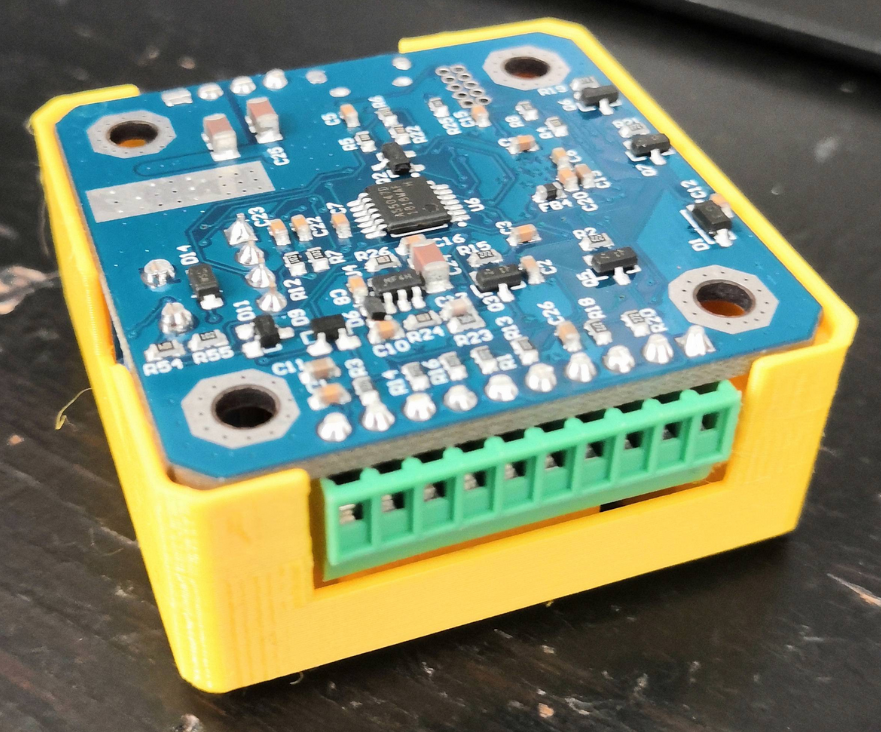](https://wiki.stadtfabrikanten.org/uploads/images/gallery/2026-06/LOGAwX6yCQlOpLkK-grafik.png) [](https://wiki.stadtfabrikanten.org/uploads/images/gallery/2026-06/EwBreNJcv2ftirYl-grafik.png)
[](https://wiki.stadtfabrikanten.org/uploads/images/gallery/2026-06/biLhbFdyzQjighDL-grafik.png)
## Neodymium magnets and encoder sensor
The reference magnet for the AS5047D encoder is a magnet of strength N35H with dimensions of 8 mm diameter and 3 mm thickness. Tropical Labs uses [https://www.kjmagnetics.com/proddetail.asp?prod=D42DIA](https://www.kjmagnetics.com/proddetail.asp?prod=D42DIA) for their Mechaduinos. The used magnet for Smart Stepper has size of 6.35 x 3.175 mm to fit into usual holes of Nema 17 motors. You need to use diametral ("diamagnetic") neodynium magnets instead of usual axial magnets because the magnetic field direction is important for the encoder. The Hall array center is located in the center of the IC package.and has an array radius of 1.1 mm. The required orthogonal component of the magnetic field strength measured at the die's surface along a circle of 1.1 mm is 35 - 70 mT. Without a good working encoder data the whole Smart Stepper would be useless. See also [https://github.com/Misfittech/nano\_stepper/issues/56](https://github.com/Misfittech/nano_stepper/issues/56)
## Hardware + firmware forks
MisfitTech Smart Stepper were called "nano zero stepper" before they were changed into "Smart Stepper". They represent a fork of the open hardware project called Mechaduino by Tropical Labs. Smart Stepper were forked too. The forking roughly looks like this
- [https://github.com/jcchurch13/Mechaduino-Firmware](https://github.com/jcchurch13/Mechaduino-Firmware)
- [https://github.com/Misfittech/nano\_stepper](https://github.com/Misfittech/nano_stepper)
- [https://github.com/thmjpr/nano\_stepper](https://github.com/thmjpr/nano_stepper)
- [https://github.com/makerbase-mks/MKS-SERVO42A](https://github.com/makerbase-mks/MKS-SERVO42A)
- [https://github.com/makerbase-mks/MKS-SERVO42B](https://github.com/makerbase-mks/MKS-SERVO42B)
You can find more forks by checking out this: [https://techgaun.github.io/active-forks/index.html](https://techgaun.github.io/active-forks/index.html). It is good to know about fork projects to find useful firmware modifications or hardware updates. A lot of good tips for operating closed loop steppers and information or ideas about mounting hardware parts can be found at the root project Mechaduino. Have a loot at [https://github.com/jcchurch13/Mechaduino-Firmware/blob/master/Mechaduino%20Manual%200.1.3.pdf](https://github.com/jcchurch13/Mechaduino-Firmware/blob/master/Mechaduino%20Manual%200.1.3.pdf).
## Finding more help
- [https://groups.google.com/forum/#!forum/smart-stepper](https://groups.google.com/forum/#!forum/smart-stepper)
- [https://github.com/Misfittech/nano\_stepper](https://github.com/Misfittech/nano_stepper)
## Buttons and colors
- LED1 = Reset LED (rot)
- LED2 = Status / Error (orange)
## Tips for installation
- Smart Stepper have ground pads: The PCB design layout has ground pads such that the motor housing is grounded to the PCB, this reduces the noise and possibility of ESD. Screw them down metal to metal (no washer required).
## Bootup times (measured)
- 4-5 seconds after powering on the USB interface is online
- 12-13 seconds after powering the OLED display shows up the screen
## Troubleshooting typical problems with hardware and software
1. OLED display is blank
1. reset button stucks physically
2. firmware has a problem (some older versions included a bug)
2. reset LED is on all the time
1. reboot Smart Stepper to fix this problem
3. capacitor gets really hot (> 80°C) and Smart Stepper does not react as exspected
1. re-flash the firmware
4. motor does not move
1. check the A/B phase wiring of the 4 leads
5. stepper motor moves randomly
1. check the wiring. If the DIR cable is not fixed properly it leads to un-wanted signal generation
6. USB serial interface does not respond
1. happens if the interface does not get handled properly by the connected device (Raspberry Pi in this case). Only possibility is to power off and repowering the Smart Stepper, or
2. reset button stucks which may lead to permently red lighting LED. Unstuck the button and try to reset until LED goes off
7. loud noise
1. calibration is bad, or
2. magnet was not mounted well on the motor, or
3. Smart Stepper PCB is not correctly fixed on the motor back. If it does not sit tight errors by vibrations have high influence on encoder accuracy.
8. Smart Stepper sounds like doubling the steps while running calibration
1. do a factory reset by entering the command on console
9. Smart Stepper is moving endless and never reaches it's target position
1. do a factory reset by entering the command on console
10. current settings do not apply when changing at display or console
1. do a factory reset by entering the command on console
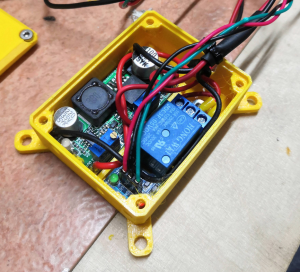
# Ceiling module | Relay JQC-3FF-S-Z
[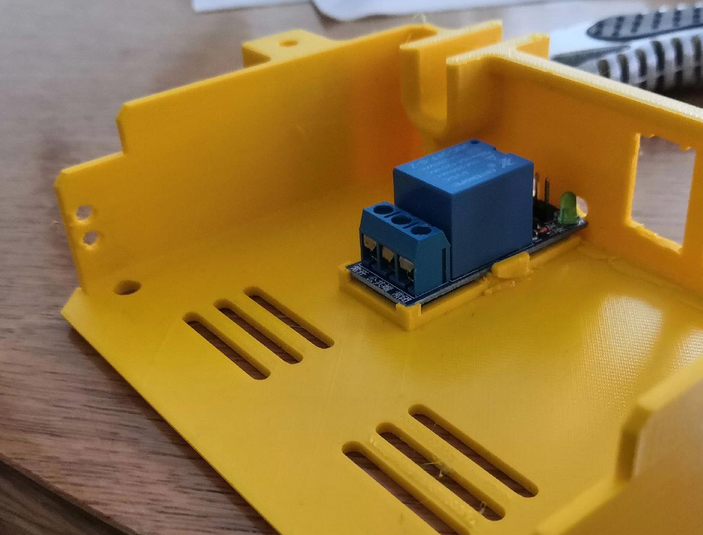](https://wiki.stadtfabrikanten.org/uploads/images/gallery/2026-06/6RSKSHgmbjqm1bEh-grafik.png) [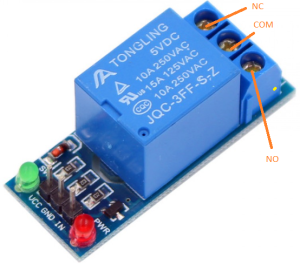](https://wiki.stadtfabrikanten.org/uploads/images/gallery/2026-06/zzYfAaogwRwrgPYc-grafik.png) [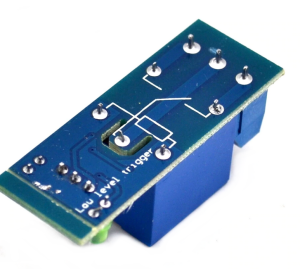](https://wiki.stadtfabrikanten.org/uploads/images/gallery/2026-06/hvEqEaBP1kgeOJNu-grafik.png) [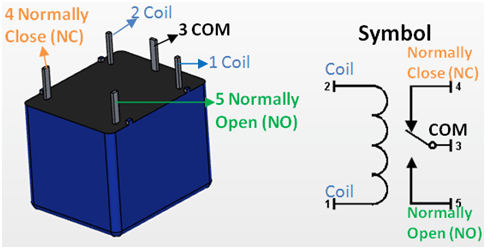](https://wiki.stadtfabrikanten.org/uploads/images/gallery/2026-06/oeq5GevyrEde9AoO-grafik.png) [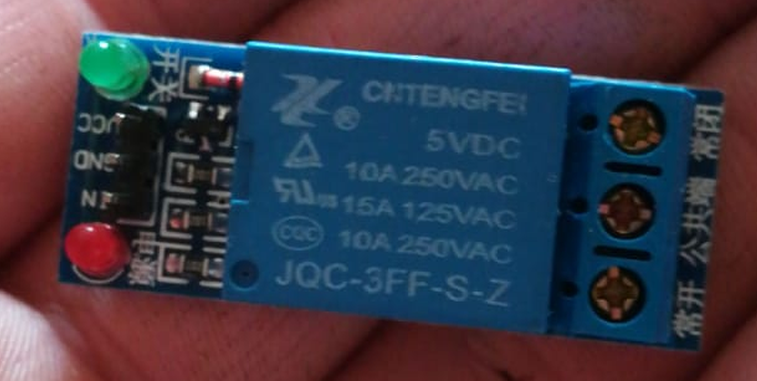](https://wiki.stadtfabrikanten.org/uploads/images/gallery/2026-06/0tI1blmZrHjFjDKZ-grafik.png)
This relay is used to switch on the Power Supply by Raspberry Pi GPIO.
## Specifications
- in line with international safety standards (control area and the load area has a separate slot)
- double-sided FR-4 circuit board design
- LED status
- pull up bright (green light is on)
- disconnect is not bright (green light is off)
- red LED signalizing power
- blue KF301 terminal
- module size: 43x17x18.5mm
- net weight: 15g
- Module Interface Output Section
- NO - Normally Open
- COM - Common
- NC - Normally Closed
- Module Interface Input section
- VCC: Connect 5V power supply positive (according to the relay voltage)
- GND: Connect 5V power supply negative
- IN: relay module signal trigger (low level active)
- High and low meaning:
- High-level trigger refers to the VCC side of the positive voltage and the trigger side of a trigger connection, when the trigger side has a positive voltage or to reach the trigger voltage, the relay is sucked.
- Low-level trigger refers to the GND side of the negative voltage and the trigger side of a trigger connection, when the trigger side of the 0V voltage or voltage can be triggered when the relay is pulled.
- Relay contact capacity: 250V 10A (AC) or 30V 30A (DC)
- Electrical parameters
5 V
4 mA
65 mA
0-2 V
2 mA
9 V
5 mA
45 mA
0-4 V
3 mA
12 V
5.5 mA
42 mA
0-4 V
3 mA
24 V
12 mA
40 mA
0-12 V
3 mA
# Ceiling module | Relay JQC3F-05VDC-C
[](https://wiki.stadtfabrikanten.org/uploads/images/gallery/2026-06/zivdAFGn1UwTDul0-grafik.png) [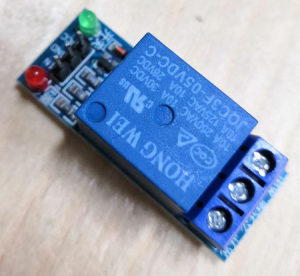](https://wiki.stadtfabrikanten.org/uploads/images/gallery/2026-06/bbBaIIM3W8UAKcTW-grafik.png) [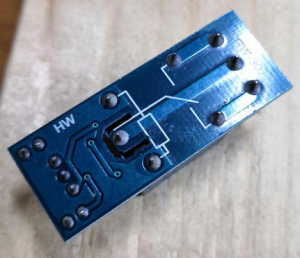](https://wiki.stadtfabrikanten.org/uploads/images/gallery/2026-06/xCKJsw2ZHS2jgT2j-grafik.png)
- This relay is slighty different than [Relay JQC-3FF-S-Z](https://old.stadtfabrikanten.org/display/TH/Relay+JQC-3FF-S-Z) (Logic Level difference due to other layout of resistors)
- measured: relay switches off properly at >= 3.2 V and switches back at <= 1.1 V
This relay is used to control the LED stripes and spots of Trikarus.
# Effector (mover) | Duet IR Probe (Mini height sensor board) v1.3
This documentation is a copy from [https://miscsolutions.wordpress.com/mini-height-sensor-board](https://miscsolutions.wordpress.com/mini-height-sensor-board)
[](https://wiki.stadtfabrikanten.org/uploads/images/gallery/2026-06/AGNSL3Sey8C35Tgz-grafik.png)
- A differential modulated IR height sensor. The sensor detects the target height by looking for the reflected light from two separate LEDs to be equal. The two LEDs are positioned such that they reflect light into the sensor at slightly different heights. This allows the sensor to be used most any bed surfaces.
- A high degree of immunity from sunlight, incandescent artificial light, and other background sources of IR.
- Unlike capacitive and inductive sensors, the sensor measures the height to the top surface of a glass bed, not the distance to a backing plate.
- A red LED indicates when the head is at or below target height.
- Automatic selection of a 4-level analog output for printer electronics that support it (e.g Duet), or a digital output for other printer electronics.
## Specification
- Power: 5V or 3.3V
- Maximum current draw: 20mA @ 5V, or 12mA @ 3.3V
- Size: 18mm high x 24mm wide x 10mm deep
- Weight: 2g (board and 3-way header, excluding socket)
- Trigger height to 3mm glass target on top of black paper: between 2.5mm and 3.5mm
- Reproducibility of repeated probing at same spot: approx. 0.01mm
## Mounting the board
The board needs to be mounted with the two fixing holes at the top, and the bottom edge of the board (where the infrared components are mounted) facing the bed and at right angles to it. The sensing area is approximately in the middle of the bottom edge of the board, below the cylindrical capacitor. In order to minimise the effect of any tilt of the hot end as it moves in the XY plane, this area should be as close to the nozzle as reasonably possible, without being so close that the board or the components on it get hot. Mounting it with the back facing the nozzle is recommended, because it reduces the chance of the optical components getting contaminated by extruded filament, and shields the optical components from the heat of the nozzle.
The bottom edge of the board should be no more than 2mm higher than the tip of the nozzle, to ensure that it will trigger before the nozzle touches the bed. To avoid the risk of the board fouling on the print, we suggest that the bottom edge is at least 1mm higher than the tip of the nozzle. So aim for 1.5mm.
**Very important**! Check that there is **no possibility** of the board shorting against anything (e.g. the printer frame or the nozzle heating block), even if the head moves outside the normal printing range. **Note that the heater block on E3Dv6 and similar hot ends is liable to rotate about the heat break!** If the back of the sensor is close to the heater block, you should trim any protruding wire stubs and header pins on the back of the board, and put at least two layers of Kapton tape or alternative high-temperature electrical insulation on the back of the board. It is also a good idea to fit a silicone sock over the heater block, because this will provide additional electrical and thermal insulation. E3D now includes silicone socks with their hot ends, and they can supply socks to retrofit to earlier hot ends that were supplied without them.
**Note for delta printer owners**: It is important that the effector does not change its tilt relative to the horizontal as it moves in the XY plane. Otherwise, the height difference between the tip of the nozzle and the bottom of the sensor board will vary with XY position, giving rise to calibration errors when you use the sensor to auto-calibrate your printer. If you are using Duet electronics then you can compensate for effector tilt in the bed.g file, but it is better to avoid it in the first place.
## Bed surface
For best results, the sensor needs to sense the reflection from the top surface of the bed. There is a potential problem when the sensor is used with a transparent bed material that reflects infrared light weakly and there is a surface below the transparent material that reflects IR much more strongly. Here is a guide to using the sensor with different print surfaces:
- Glass (with or without coatings such as hairspray, PVA or Kapton tape): works as-is if placed directly on a PCB bed heater or other surface that does not reflect strongly. If there is an aluminium heat spreader or bed plate underneath the glass, then either paint the aluminium surface matt black (see below), or put a sheet of matt black paper between the glass and the aluminium. Coatings on the glass affect the trigger height slightly.
- PEI: this is highly transparent to IR. Paint the underside matt black (see below) before using adhesive sheet to attach it to the bed plate. Changes to the surface finish affect the trigger height slightly. We have a report that as an alternative to painting the underside black you can sand the top surface with very fine grit sandpaper until it has a dull matt appearance, but we have not confirmed this.
- BuildTak: the dark grey variant works well with the sensor. I have not tested the white variant, but it should work too.
- PrintBite: early samples were found to be opaque to IR, but more recent samples are transparent to IR. This means that it needs to be painted black on the underside in order to work well with the IR sensor. However, this is not practical if the PrintBite sheet has the adhesive already attached.
- Anodised aluminium, with or without a thin PEI coating: suitable if the finish is matt or semi-matt
- Bright aluminium: not suitable
- Mirror: not suitable
If you need to paint the top of an aluminium heat spreader or the underside of a PEI sheet matt black, then I recommend using spray-on barbecue & stove paint. It needs to be cured at an elevated temperature to harden. I have found 2 hours at 170C in a domestic electric fan oven works well. Caution: the temperature in a domestic oven **without** a fan will vary greatly in different parts of the oven.
## Connecting the board
Looking at the board from the component side, with the mounting holes at the top and the cylindrical capacitor at the bottom, the pads for the 3-pin connector are near the top. These pads are labelled from left to right on the front of the board as follows:
- OUT: this is the output from the board to the printer electronics.
- GND: this must be connected to signal ground on your printer electronics.
- VCC: this must be connected to the +3.3V rail of your 3.3V printer electronics, or the +5V rail if you have 5V printer electronics.
There are also pads for a 6-pin connector, on the right of the board looking at it from the component side. Ignore those pads – they are used for programming only.
Duet 0.8.5 and Duet WiFi electronics: wire the sensor to the 4-pin PROBE connector. Connect sensor GND and VCC pins to Duet GND and 3V3 pins respectively. The OUT pin of the sensor should be connected to the AD12 or IN pin on the probe connector. Leave the AD14 or PC10 or MOD pin on the probe connector unconnected.
## Testing and commissioning the board
### Testing with Duet electronics
In your config.g file, use probe type P1 in your M558 command and trigger threshold P500 in your G31 command.
Start with the hot end and sensor some distance above the bed. Power up the Duet using USB power only. About 4 seconds after power is applied, the LED on the sensor should flash four times, indicating that the board has started in analog output mode. If it does not flash, check the power connections to the board.
Connect to the Duet from a PC using the web interface. On the Control page you can see a continuous readout of the Z probe reading.
Send M558 P1 to the Duet, then send G31 P500 Z1.0.
Move a suitable target (e.g. white paper or glass) up underneath the sensor. Check that you get the following readings:
- With the sensor a long way above any surface, the reading should be close to zero.
- With the sensor close to a surface but slightly further away than the trigger height, the reading should be about 465.
- With the sensor slightly closer to a surface, the reading should be about 535 and the red LED on the sensor board should illuminate.
- If you place a surface right up against the sensor board, then the reading may drop to near zero again. This is normal.
- If you see a reading of around 1000, or if the LED flashes rapidly, this means that there is too much ambient IR for the sensor to function correctly. This normally happens only when direct bright sunlight is reflected from the bed into the sensor, or when you place a highly reflective surface below the sensor such as aluminium foil.
If you get the expected readings, then you can apply 12V power and continue with commissioning. If not, check your wiring.
With 12V power applied, send M558 P1 followed by G31 P500 Z1.0 to the Duet again. **Note**: if your printer does not use the Z probe to home any axes, you also need to add parameters X0 Z0 to the M558 P1 command.
To calibrate the sensor for Z homing and bed probing, home X and Y, then position the head over the centre of the bed. With the nozzle at operating temperature, lower the head so that it is just touching the bed or just gripping a sheet of paper, then send G92 Z0 to define that position as Z=0. Raise the head 5mm and remove the paper. Then send command G30 S-1 to probe the bed at that point without adjusting the Z height setting. Read off the Z height in the “Head Position” box in Duet Web Control, or from the Z coordinate shown on the Control page of PanelDue, or send M114 to retrieve the head position if using a USB host program on a PC. It should be in the range 0.5 to 2.5mm. Use that value for the Z parameter in your G31 command in config.g. Please note:
- The S-1 parameter may not be supported in the official RepRapFirmware release. It is supported in my fork and dcnewman’s fork.
- Always use a P value of 500. When the probe is triggered, the Z probe reading will be about 535. When it is slightly higher than the trigger height, the reading will be about 465. With a P value of 500, when the Duet sees the reading of about 465, it knows it is getting close to target height and it will slow down the Z motor.
- If you are using my (dc42) fork of RepRapFirmware, then the G31 command in **config.g** must come **after** the M558 P1 command. This is because the firmware supports different G31 values for different sensor types.
- After turning your printer on, do not perform any operation that uses the sensor (e.g. X homing on some printers) for 5 seconds, until after the LED has done its 4 flashes.
## Troubleshooting
**LED illuminates (more dimly than normal) as soon as the board is connected.** This usually means that you have plugged the 3-pin connector the wrong way round on the board, thereby transposing the Vcc and Out connections. Turn the power off and check your wiring.
**LED turns on/off to indicate triggering, but the printer firmware does not recognise whether or not it is triggered**. Check that you are getting the correct number of flashes from the LED after power up (4 if you are using Duet electronics or RADDS electronics running RepRapFirmware, 2 for other electronics). If you are getting 4 flashes but expecting 2, then either the sensor output pin is not connected to your electronics correctly, or the pullup resistor is not enabled in your printer firmware, or the pullup resistor has too high a value. If you are getting 2 flashes but the firmware always indicates that the sensor is triggered even when it is not, then the value of the pullup resistor may be too low – see the note for Smoothieboard users above.
**Trigger height relative to nozzle varies with XY position**. This may mean that there is a large variation in the surface of your print bed, or (if it is a glass bed) in the reflectivity of the surface underneath the glass. Check that the bed surface is the same everywhere you are probing. Another common cause is that the print head is tilting slightly by an amount that depends on XY position (this is common on delta printers). Mounting the sensor close to the nozzle will reduce the effect of any such tilt.
If you cannot eliminate the variation of trigger height with XY position, then if you are using Duet electronics running my fork of RepRapFirmware version 1.09e or later, you can compensate for differences in trigger height using the H parameter on the G30 commands in the bed.g file.
**Trigger height too low**. This usually means that you have mounted the board too high. The bottom edge of the board should be between 1mm and 2mm higher than the tip of the nozzle. This should give you a trigger height between 0.5mm and 1.5mm. Another possibility is that you are using a glass or PEI bed and the surface underneath the glass is reflective – you should use a black surface underneath the glass or PEI.
## Board dimensions and mounting holes
If the bottom left corner of the board is position (0, 0) then other points on the board are at the following (X, Y) coordinates, in mm:
Top right corner (24.0, 17.62)
Mounting hole centres (2.70, 14.92) and (21.11, 14.92)
Mounting hole diameter 2.8
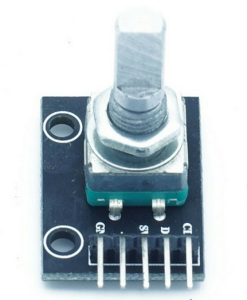
# Effector (mover) | Encoder KY-040 by Keyes - filament monitor
[](https://wiki.stadtfabrikanten.org/uploads/images/gallery/2026-06/tUA5qJ3rrZFIkITQ-grafik.png) [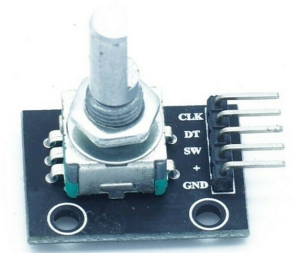](https://wiki.stadtfabrikanten.org/uploads/images/gallery/2026-06/tmTm9HW42uKelsWK-grafik.png) [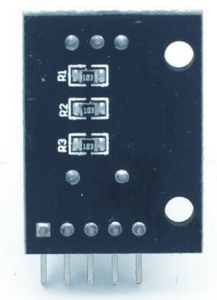](https://wiki.stadtfabrikanten.org/uploads/images/gallery/2026-06/LTr8kxJN1kKFucwO-grafik.png) [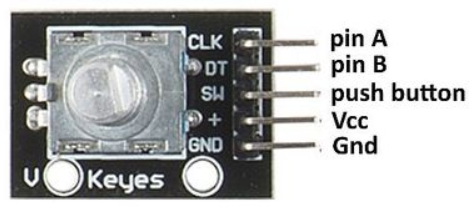](https://wiki.stadtfabrikanten.org/uploads/images/gallery/2026-06/MkbVPUcvvLFc0Uez-grafik.png) [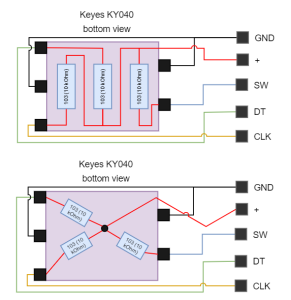](https://wiki.stadtfabrikanten.org/uploads/images/gallery/2026-06/jqQr2D8ZxlXapNEb-grafik.png)
**Technical data:**
- Operating temperature: -40 °C to 125 °C
- Setting points per revolution: 12 (you should measure for your self because this varies from vendor to vendor)
- with switch button
- Fixed hole size: 2.0 mm
- Product size: 32.0 mm \* 15.0 mm
- Working voltage: 3.0 V ~ 5.3 V
**Warning**: Wrong wiring can destroy CLK/DT lines (painfully tested)
## Used for
- [Filament sensing with KY-040 Rotary Encoder](https://old.stadtfabrikanten.org/display/TH/Filament+sensing+with+KY-040+Rotary+Encoder)
## Basic example script for testing with Raspberry Pi (not used in production!)
[https://pypi.org/project/pigpio-encoder](https://pypi.org/project/pigpio-encoder/)
[https://github.com/joan2937/pigpio](https://github.com/joan2937/pigpio)
```bash
apt install python3-pip
pip3.7 install pigpio_encoder
cd /opt/gpio/
git clone https://github.com/modmypi/Rotary-Encoder/
cd Rotary-Encoder
vim rotaryEncoder.py #used pins: clk=6, dt=12, sw=5
```
```bash
from pigpio_encoder import pigpio_encoder
def rotary_callback(counter):
print("Counter value: ", counter)
def sw_short():
print("Switch short press")
def sw_long():
print("Switch long press")
my_rotary = pigpio_encoder.Rotary(clk=6, dt=12, sw=5)
my_rotary.setup_rotary(min=10, max=300, scale=5, debounce=200, rotary_callback=rotary_callback)
my_rotary.setup_switch(debounce=200, long_press=True, sw_short_callback=sw_short, sw_long_callback=sw_long)
my_rotary.watch()
```
```bash
#enable pigpiod daemon (required to run pigpio things)
vim /etc/systemd/system/pigpiod.service
[Unit]
Description=Pigpio daemon
[Service]
Type=forking
#disallow port 8888 from outside
ExecStart=/usr/bin/pigpiod -l
[Install]
WantedBy=multi-user.target
systemctl enable pigpiod.service
systemctl start pigpiod.service
service pigpiod restart
```
```bash
#finally run the script
python3.7 /opt/gpio/rotaryEncoder.py #do not use Python2 because it will fail
```
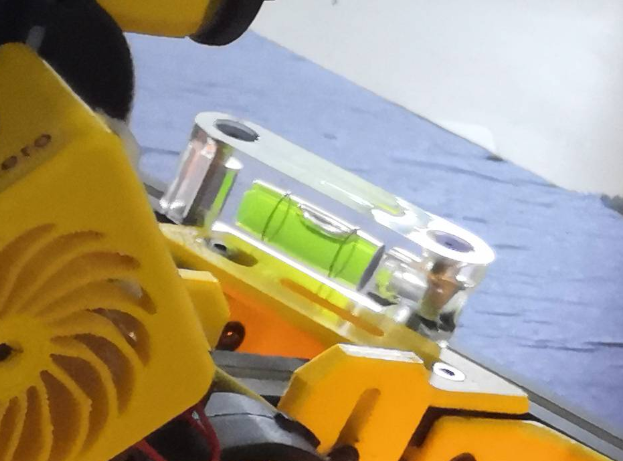
# Effector (mover) | Spirit level acrylic 36' 55x15x15mm
[](https://wiki.stadtfabrikanten.org/uploads/images/gallery/2026-06/tKBAn1bv5PK8rqYK-grafik.png)
**Details**
- block-shaped acrylic frame
- 2 drill holes
- 2 black bubble lines
- yellow-green filling
- leak-proof
- Block-shaped tubular spirit levels with 2 screw holes made of clear acrylic glass
- 55 x 15 x 15 mm
- hole distance: 41 mm
# Effector (mover) | Aero Titan Extruder and SuperVolcano Hotend by E3D
[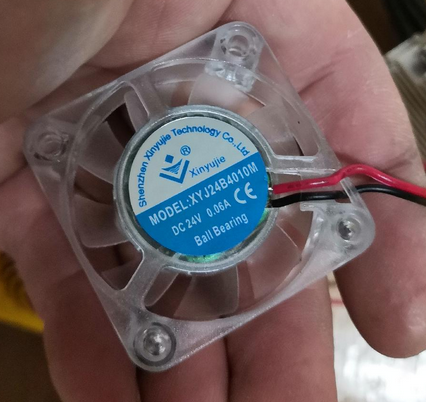](https://wiki.stadtfabrikanten.org/uploads/images/gallery/2026-06/Qez0CnviTr2HNxX5-grafik.png) [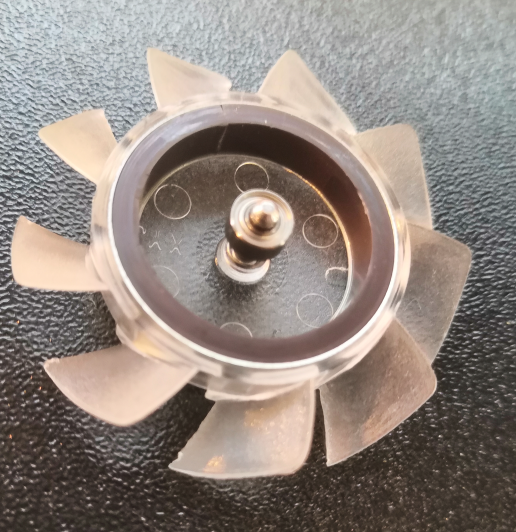](https://wiki.stadtfabrikanten.org/uploads/images/gallery/2026-06/uUsx5ylP8oXqIECZ-grafik.png)
- cooling fan: XYJ24B4010M by Xinyujie (has double ball bearing inside!)
- PT100 Sensor
- heater cartridge: 24 V, 80 watts
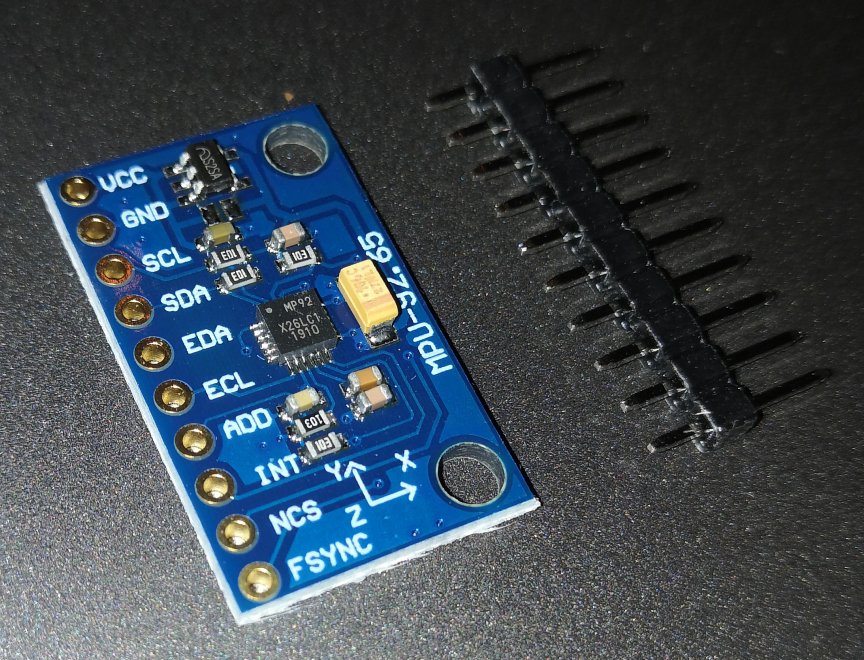
# Effector (mover) | Inertial Measurement Unit MPU 9250 / GY-250 InvenSense
[](https://wiki.stadtfabrikanten.org/uploads/images/gallery/2026-06/970OxMjRz7AYmPQR-grafik.png) [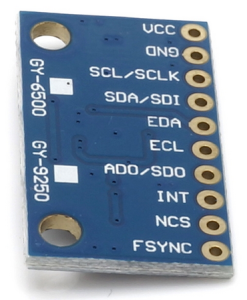](https://wiki.stadtfabrikanten.org/uploads/images/gallery/2026-06/Sh22AM5d1Hmr4TFY-grafik.png) [](https://wiki.stadtfabrikanten.org/uploads/images/gallery/2026-06/BVmJ6HvReX7SOwCT-grafik.png)
**Features**
- 3-axis gyroscope
- 3-axis acceleration sensor
- 3-axis magnetic field sensor (geomagnetic field/compass)
- Digital Motion Processor (DMP)
**Specifications**
- Three 16-bit analog-to-digital converters (ADCs) for digitizing the gyroscope outputs
- Three 16-bit ADCs for digitizing the accelerometer outputs
- Three 16-bit ADCs for digitizing the magnetometer outputs
- Gyroscope full-scale range of ±250, ±500, ±1000, and ±2000°/sec (dps)
- Accelerometer full-scale range of ±2g, ±4g, ±8g, and ±16g
- Magnetometer full-scale range of ±4800μT
- I2C and SPI serial interfaces
- Power supply: 3-5v
- Board Dimensions: 25. x 15.4mm, 3mm mounting holes
**Used wiring address**
- 0x68
**keywords**
- MPU
- IMU
- AHRS
- gyrometer
- accelerometer
- magnetometer
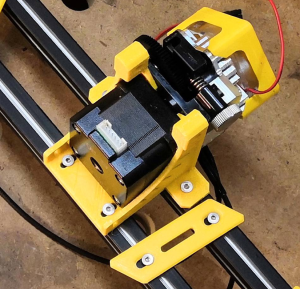
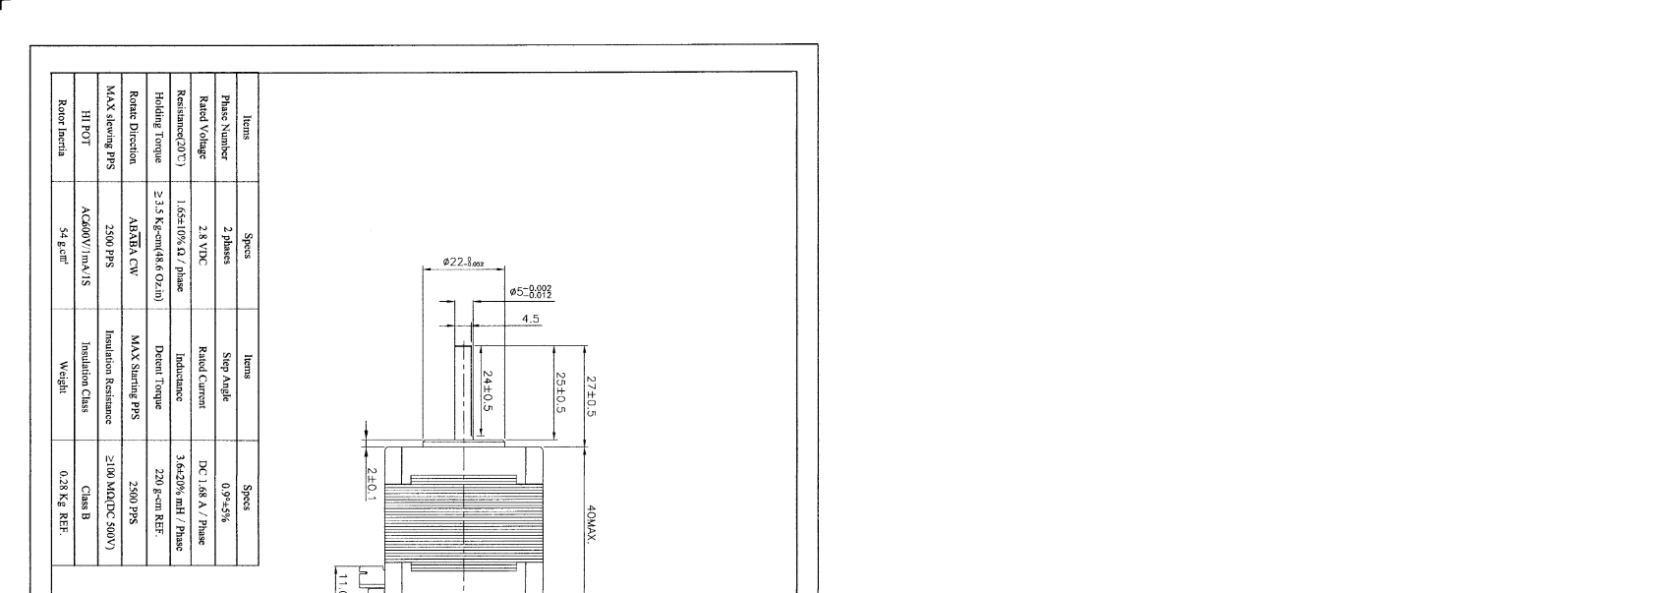
# Effector (mover) | Stepper Motor MT-1703HSM168RE by Motech Motors
[](https://wiki.stadtfabrikanten.org/uploads/images/gallery/2026-06/TqyG7l77qhWH9jgG-grafik.png) [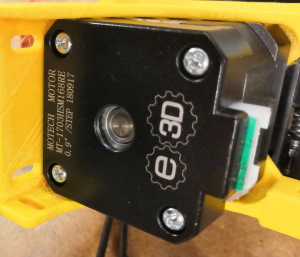](https://wiki.stadtfabrikanten.org/uploads/images/gallery/2026-06/ss4DSPvwXMddrReR-grafik.png) [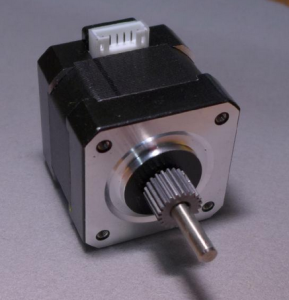](https://wiki.stadtfabrikanten.org/uploads/images/gallery/2026-06/dT47hk893J5BOoxO-grafik.png)
[](https://wiki.stadtfabrikanten.org/uploads/images/gallery/2026-06/l6bbEnof3f0F7kNE-grafik.png) [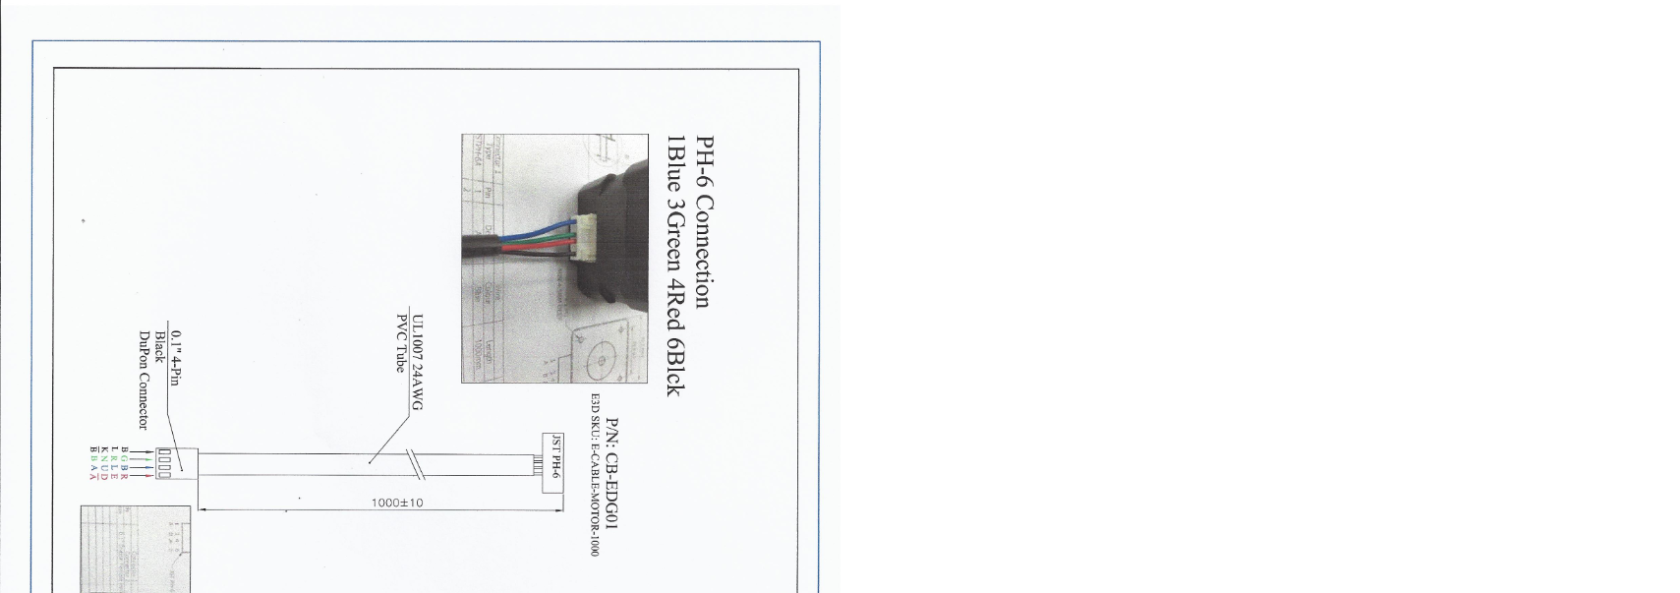](https://wiki.stadtfabrikanten.org/uploads/images/gallery/2026-06/1HpG5El8G9dhuvR2-grafik.png)
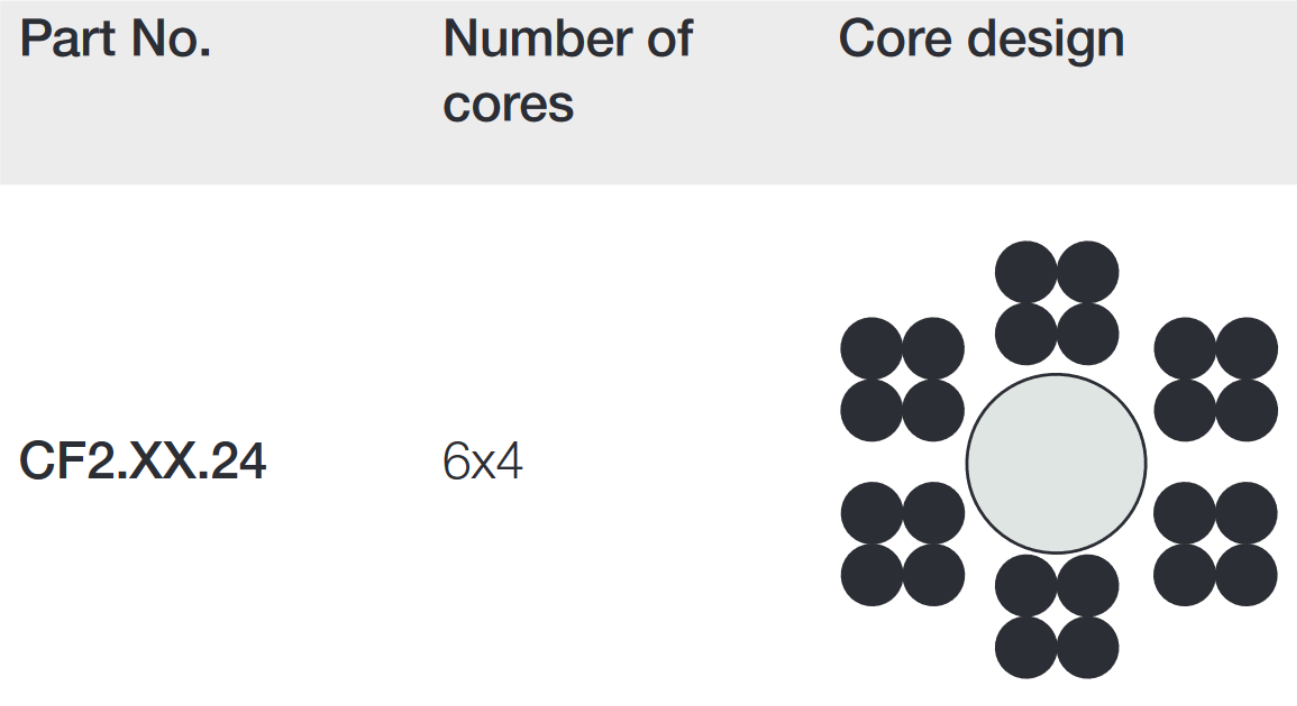
# Generic used parts and base frame parts | chainflex CF2.02.24 cable by igus
[](https://wiki.stadtfabrikanten.org/uploads/images/gallery/2026-06/PRUDhMWNP1YRLyge-grafik.png)
## Core packages
**Bundle**
**Conductor no.**
**Colours according to DIN ISO 47100**
1
1
white
1
2
brown
1
3
green
1
4
yellow
2
5
grey
2
6
pink
2
7
blue
2
8
red
3
9
black
3
10
violet
3
11
grey-pink
3
12
red-blue
4
13
white-green
4
14
brown-green
4
15
white-yellow
4
16
yellow-brown
5
17
white-grey
5
18
grey-brown
5
19
white-pink
5
20
pink-brown
6
21
white-blue
6
22
brown-blue
6
23
white-red
6
24
brown-red
# Generic used parts and base frame parts | Emergency push button and opener M22-K01 by Eaton
[](https://wiki.stadtfabrikanten.org/uploads/images/gallery/2026-06/o5DGoZURHjMFE9MK-grafik.png) [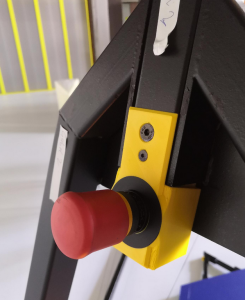](https://wiki.stadtfabrikanten.org/uploads/images/gallery/2026-06/3sixkX05TeCxMrU5-grafik.png) [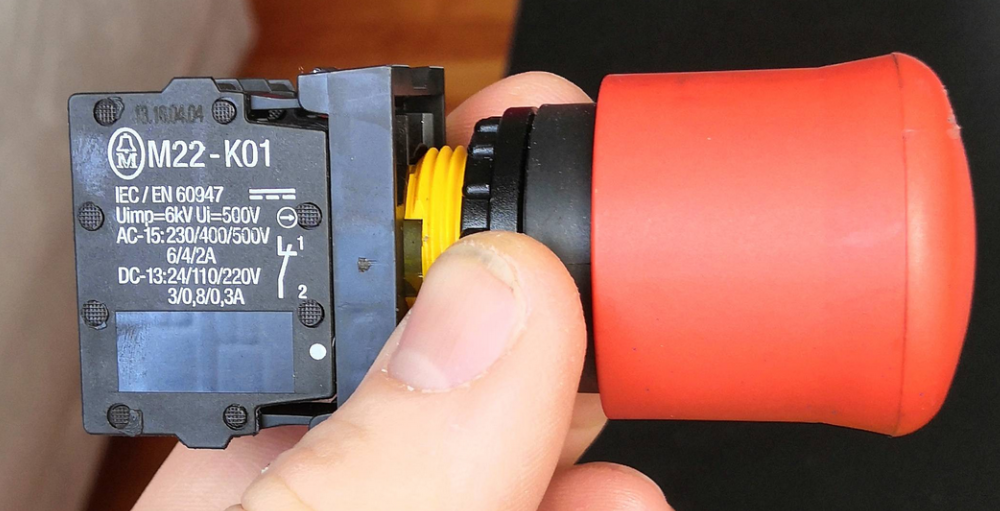](https://wiki.stadtfabrikanten.org/uploads/images/gallery/2026-06/tOmviVbQZC8scOwI-grafik.png) [](https://wiki.stadtfabrikanten.org/uploads/images/gallery/2026-06/4qiyeFYL7PWH9aLy-grafik.png)
- Cross sections: 1 x (0.75 - 2.5) 2 x (0.75 - 2.5) mm²
- Rated insulation voltage \[Ui\]: 500 V Rated impulse withstand voltage \[Uimp\]: 6000 V AC
- Operating torque (screw terminals): ≦ 0.8 Nm
- Climate resistance: moist heat, constant, according to IEC 60068-2-78 moist heat, cyclic, according to IEC 60068-2-30
- Ambient temperature: -25 - +70 ° C
- Overvoltage category / degree of pollution: III / 3
- Execution of the electrical connection: screw connection
- Operating frequency \[switching cycles / h\]: ≦ 3600
- Operating force: ≦ 5 N
- Max. Short-circuit protection device: 10 A
- Contact type: NC contact
- Switching voltage:220 V / DC
- Switching current (max.): 2 A
- Degree of protection: IP20
- Min. Temperature: -25 ° C
- Max. Temperature: +70 ° C
- Mechanical life: 5 x 10⁶ cycles
- Electrical life: 1.2 x 10⁶ cycles
- Mounting type: front mounting
- Product type: contact element
# Generic used parts and base frame parts | Fishing line FireLine Smoke 270m 0,50 mm by Berkley
[](https://wiki.stadtfabrikanten.org/uploads/images/gallery/2026-06/aC7gSrY7heu5qEay-grafik.png)
- PE braid
- high gliding performance
- new revised formula
- incredibly thin diameters
- high abrasion resistance
- highest possible knot load capacity
- incredibly sensitive bite transfer
- further and more precise litters
- saltwater resistant
- no salt crystal deposits in the spaces between the fibres thanks to surface finishing
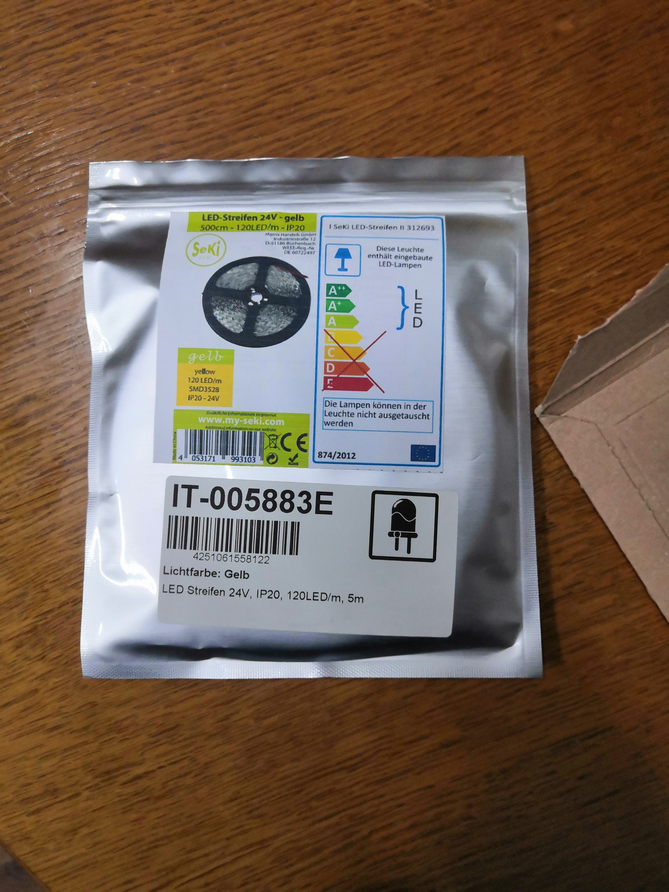
# Generic used parts and base frame parts | LED stripe 24V
[](https://wiki.stadtfabrikanten.org/uploads/images/gallery/2026-06/IqBtBiNF5LpgeKQd-grafik.png) [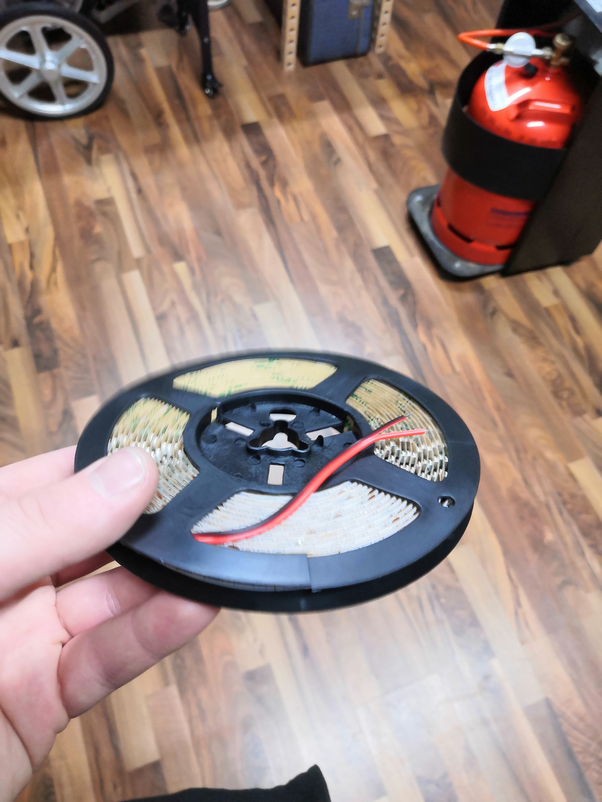](https://wiki.stadtfabrikanten.org/uploads/images/gallery/2026-06/ohoUDFq6pQYznChq-grafik.png) [](https://wiki.stadtfabrikanten.org/uploads/images/gallery/2026-06/kCpjNumIZoUSCVbx-canvas.png)
- Measurement
- Parameters
- after 30 minutes runningt
- 24 volts
- 8°C room temperature
- 120 LEDs SMD 3528 (ca. 1 meter)
- Result
- 0,37 A current
- 8,64 W power
- 27 °C temperature
- [https://www.led-studien.de/led-waerme-lebensdauer](https://www.led-studien.de/led-waerme-lebensdauer/)
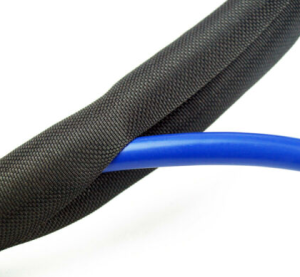
# Generic used parts and base frame parts | Self wrapping cable sleeve
[https://www.ebay.de/itm/2-m-Kabel-Schutz-Schlauch-Gewebe-Installations-Kanal-selbstschlie%C3%9Fend-flexibel/301815929370?ssPageName=STRK%3AMEBIDX%3AIT&var=600627190685&\_trksid=p2057872.m2749.l2649](https://www.ebay.de/itm/2-m-Kabel-Schutz-Schlauch-Gewebe-Installations-Kanal-selbstschlie%C3%9Fend-flexibel/301815929370?ssPageName=STRK%3AMEBIDX%3AIT&var=600627190685&_trksid=p2057872.m2749.l2649)
[](https://wiki.stadtfabrikanten.org/uploads/images/gallery/2026-06/CEGzoKqpgaMUYPSh-grafik.png) [](https://wiki.stadtfabrikanten.org/uploads/images/gallery/2026-06/XapTBjopCTo0lo6e-grafik.png)
- Ideal protection for wires and cables in all areas of application
- simple solution to bundle cables neatly and flexibly
- Material: Polyester, halogen-free
- abrasion-resistant
- Temperature range: - 50°C to +150°C
- melting point: 240°C +/- 10°C
- Fire protection: self-extinguishing V0, UL94
# Generic used parts and base frame parts | Tablet Lifetab P9812 by Medion
# Building basics, checks, maintenance
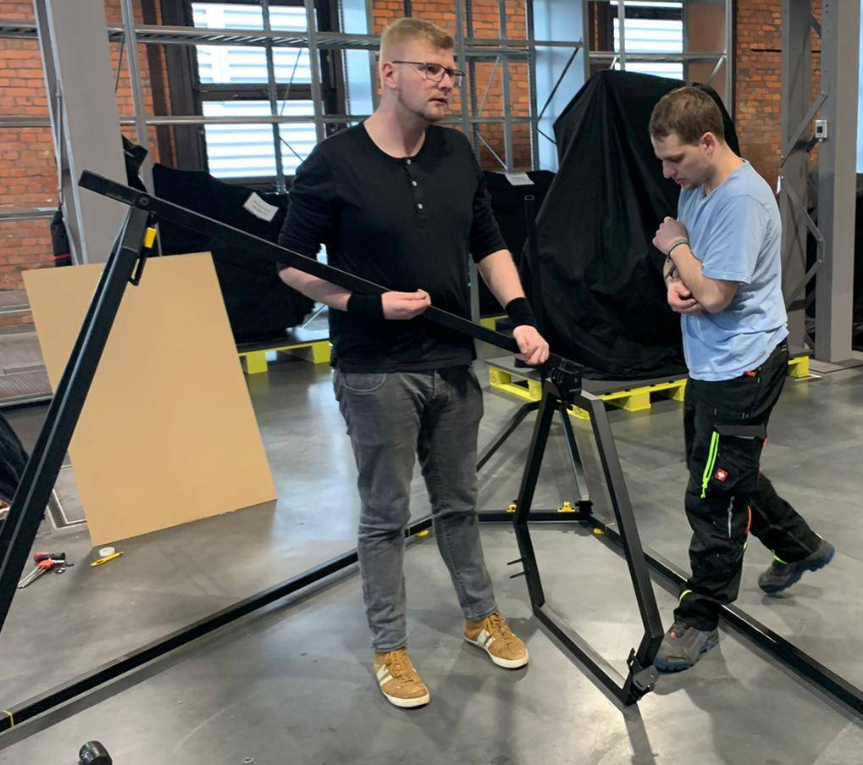
This guide only fits for Trikarus or Hangprinters which make use of RepRapFirmware and closed loop motors with implemented torque mode feature. If you have no closed loop motors, no torque mode or if you run Marlin those procedures are different (other ways of measuring anchor points, coordinate system buildup, G-Codes, ...). So please check if the firmware (fork) you use has the according features. Ignoring will result in strange results or just zero results. The guide tries to focus on the core parts which are ceiling module, effector, print platform and anchors. The short answer for what you have to do: get everything level (especially the horizontal direction), free of tilts and tighten the lines. Driven by concept a real Hangprinter might not have the fancy regular frame Trikarus has. It's not easy to say how long the procedure described at this page takes. Take hours into account! Only setting up the frame will take 40 - 60 minutes. Inserting all the components and fixing them has a lot of frustration potential.
You have to do an intense calibration after mounting your anchors in the room / frame because the firmware needs to know the XYZ position of each anchor. There are 4 general anchor points for 4 axes ABCD in total. Because there are 9 lines in total there are 9 places where the lines need to be fixed (knots) and tuned. An uncalibrated Hangprinter will never reach the targeted coordinates properly. Either it will try to move too far out of the volume (which is not possible) or it just will never reach the maximum possible volume - depending on the values you measured and entered. A bad calibrated printer will behave just not as exspected. For example if you set the effector to home position and let it move to some XY with keeping Z coordinate constant it may happen that the effector still lifts up or down, which means it does not keep the Z level constant. That means that you cannot print anything.
## General overview
Please have a look at [Typical Hangprinter problems](https://old.stadtfabrikanten.org/pages/createpage.action?spaceKey=TH&title=Typical+Hangprinter+problems&linkCreation=true&fromPageId=101974344) to have an overview of bad things which can happen with Hangprinters in general.
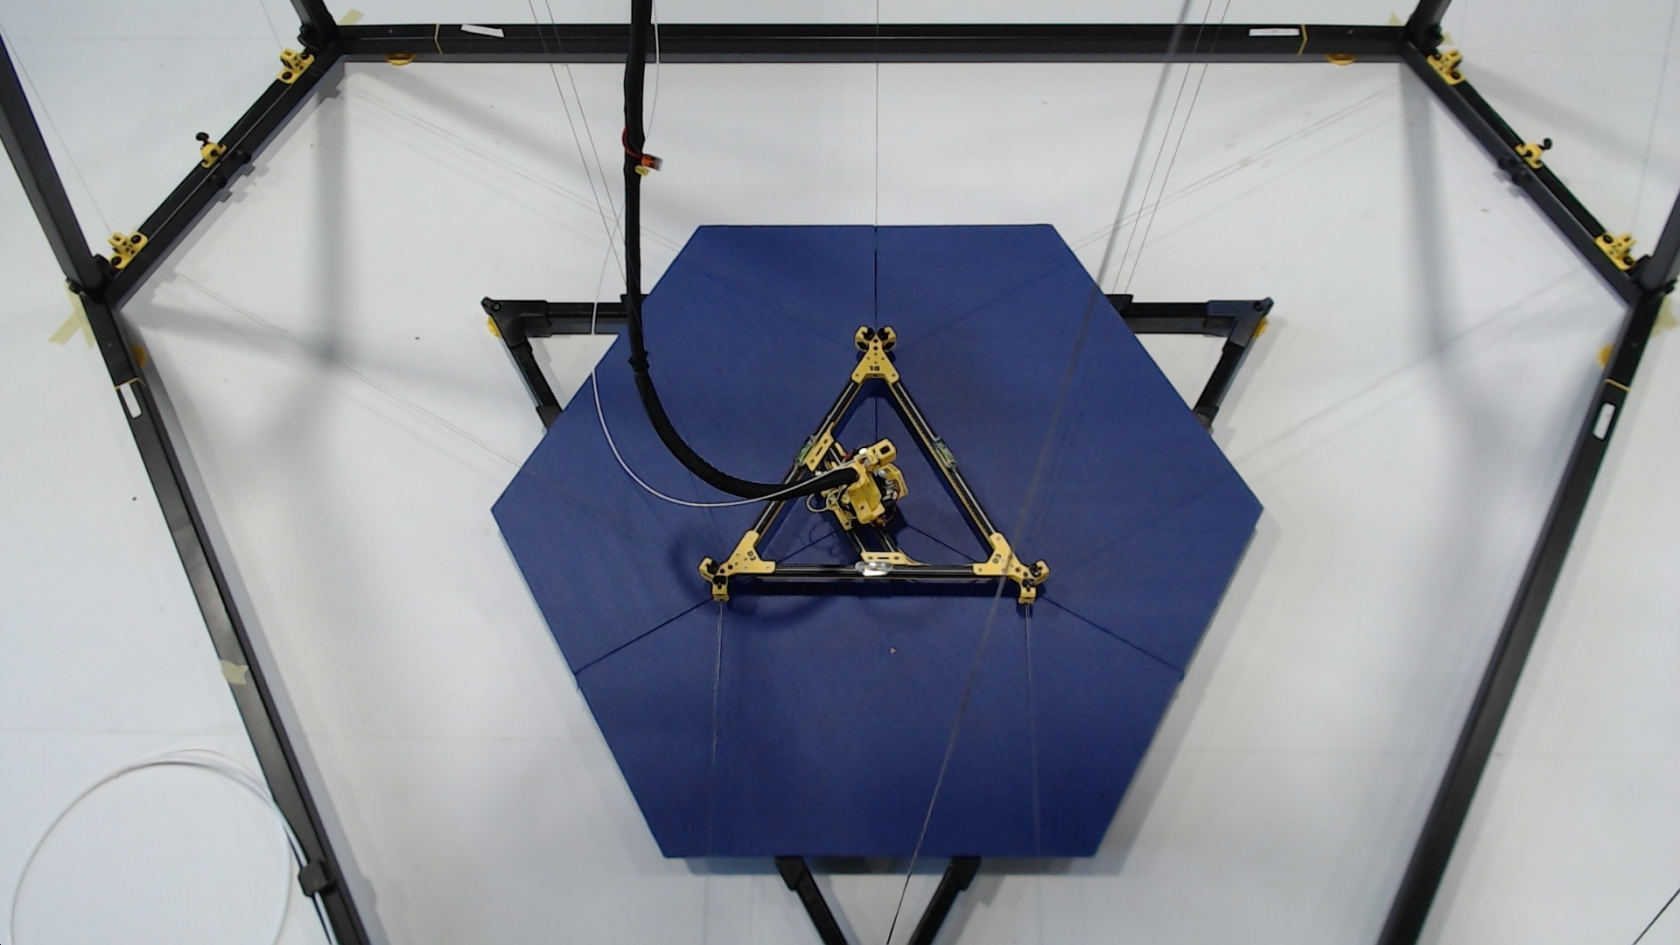
The following illustration shows the general concept of Trikarus, reduced to some core components.
[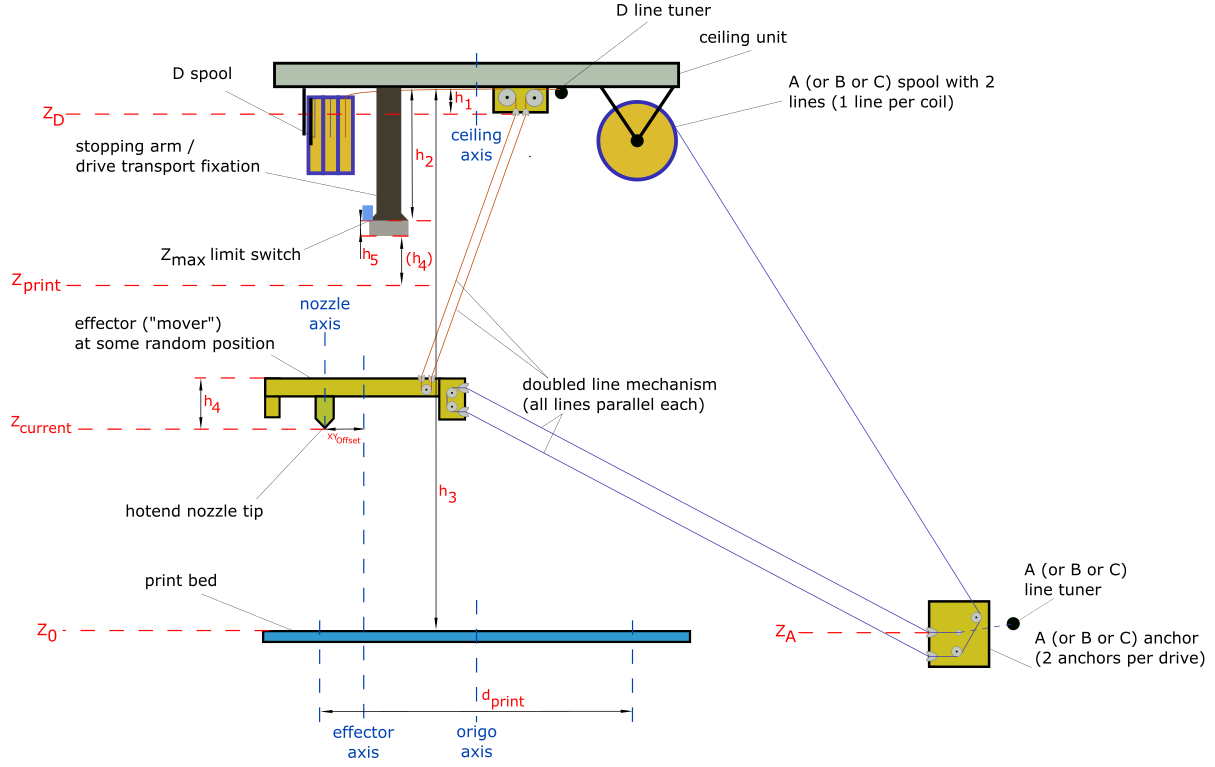](https://wiki.stadtfabrikanten.org/uploads/images/gallery/2026-06/B7N1pKgPtfR9h6js-grafik.png)
**Non-firmware-related constants of Trikarus**
- $h\_1 = 32 mm$ (effective height of the D line ceiling anchors)
- $h\_2 = 190 mm$ (height where mover will "sit" in the three arm pockets (usually for parking or [transport fixation](https://old.stadtfabrikanten.org/pages/viewpage.action?pageId=101974344))
- $h\_4 = 63.5 mm$ (height from effective effector D line entries to nozzle tip)
- $h\_5 = 15.08 mm$ (height of the arm borders - remember that the effector can not properly move if it is countersunk into the arms)
- $d\_{print} = 1000 mm$ (value bounded by the developed print platform). See also [Building basics, checks, maintenance](https://old.stadtfabrikanten.org/pages/viewpage.action?pageId=101974344) or thumb formula for recommended print diameter)
**Unknown variables of Trikarus to find out by measuring and calibrating**
- $Z\_{print}$ (maximum printing height - required for slicing. This will vary according to your frame size)
- $d\_{print}$ (maximum printing diameter - required for slicing. This will vary according to your frame size)
- $ \\vec{Z\_A} = \\begin{bmatrix} X\_A\\\\ Y\_A\\\\ Z\_A \\end{bmatrix}$ (A anchor point)
- $ \\vec{Z\_B} = \\begin{bmatrix} X\_B\\\\ Y\_B\\\\ Z\_B \\end{bmatrix}$ (B anchor point)
- $ \\vec{Z\_C} = \\begin{bmatrix} X\_C\\\\ Y\_C\\\\ Z\_C \\end{bmatrix}$ (C anchor point)
- $\\vec{Z\_D} = \\begin{bmatrix} X\_D\\\\ Y\_D\\\\ Z\_D \\end{bmatrix}$ (D anchor point)
- $XY\_{Offset}$ (the axis offset between the nozzle axis and effector axis)
**Notes on the scheme above**
1. only 1 of 3 drives ABC with one line shown
2. only 1 of 3 lines of D drive shown
3. only 1 of 3 stopping arms / drive fixations shown
4. only 1 of 3 line tuners shown
5. belonging to the height difference between your print platform and your ABC anchors the Z height per anchor might be a positive or negative value each. All anchors have a unique Z value because the floor / bottom frame will not be exactly horizontal. The six bottom anchors settle the pivot points ABC.
6. $Z\_{max} = h\_3 - h\_2 - h\_4 - h\_5 - h\_{buffer}$ is machine specific value which requires to set $Z\_{max}$ size correctly in firmware and slicer profile (remember: usually Hangprinters do not have any limit switch. Trikarus tries to implement a height switch for $Z\_{max}$ but it's experimental). Note that $h\_5$ is the height of the profile pocket where effector will sit in. The effector cannot move if it is caged, so you will have to reduce height effectively by this value. Additionally it makes sense to add some buffer (safety distance) between mover and $Z\_{max}$. You should use some value$h\_{buffer} > 5 mm$
7. $h\_3$ depends on the calibration itself. For example if a +50 mm move in Z direction only moves +40 mm, $h\_3$ and therefore $Z\_{print}$ and $Z\_{max}$ will be horribly wrong
8. $d\_{print}$ needs to be be tested for each new room / frame because larger anchor distances mean larger print diameter
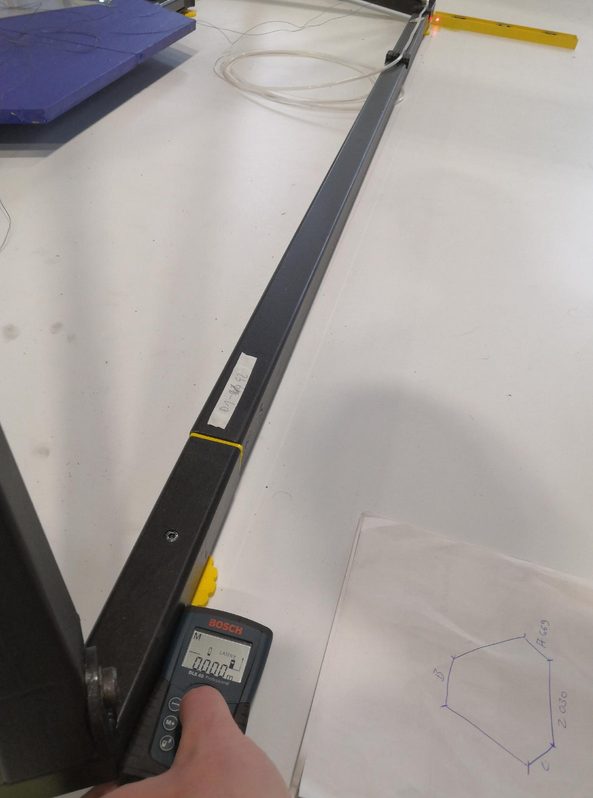
9. pivot point $Z\_D = h\_3 - h\_1$ can be measured manully with a laser distance meter (measure the total height from bed to ceiling plate and subtract $h\_1$) or just calculate it by
$$Z\_D = Z\_{max} + h\_2 - h\_1$$
$$= Z\_{max} + 190 mm - 32 mm$$
$$= Z\_{max} + 158 mm$$
$$= Z\_{print} + h\_5 + h\_4 + h\_2 - h\_1$$
$$= Z\_{print} + 15.08 mm + 63.5 mm + 190 mm - 32 mm$$
$$= Z\_{print} + 236.58 mm$$
10. pivot points $Z\_A$, $Z\_B$, $Z\_C$ can be measured with linear ruler or similar
11. $Z\_0$ is where the top side of print bed including print surface (like blue tape) is
12. $XY\_{Offset}$ is a required value for offset between nozzle axis and effector axis to define the tool position
13. Basically there are different axes which could be the Z axis of the origin coordinate system, for example the axis of the nozzle, the center of the effector triangle, the center of the print platform (if it has some kind of center - maybe your print platform is just some random piece of wood) or the center of your ceiling plate (center of the triangle which is formed by the three D lines) or the middle of your frame. We use the ceiling axis as origin axis. The ceiling axis can be understood as some kind of "root axis" because it's spawned by the center of the three D lines. And as we already did some [pre-matching adjustments while setting up the machine](https://stadtfabrikanten.org/display/HAN/Building+basics%2C+checks%2C+maintenance?src=contextnavpagetreemode), we can say roughly that nozzle axis, effector axis, ceiling axis and bed axis and frame axis are aligned on each other.
14. the coordinate system (origin X0 Y0 Z0) is where the nozzle tip touches the print bed. It is aligned as shown in the following image (X axis perpendicular to to the line the A anchors form, B and C are kind of mirrored each other to Y axis). Another description: A lines are always parallel to Y axis (X- quarters). B anchor points are in X+/Y+ quarter and C anchor points are in X-/Y+ quarter.
15. for calibration and verification purposes there are different types of anchor coordinates. There are pivot points A, B and C anchor coordinates, as well as explicite A1/A2, B1/B2 and C1/C2 anchor coordinates. The explicite A1/A2, B1/B2 and C1/C2 anchor coordinates can be used for [print volume verification OpenSCAD tool](https://stadtfabrikanten.org/display/HAN/Printer+profiles%2C+slicing+and+filaments).
[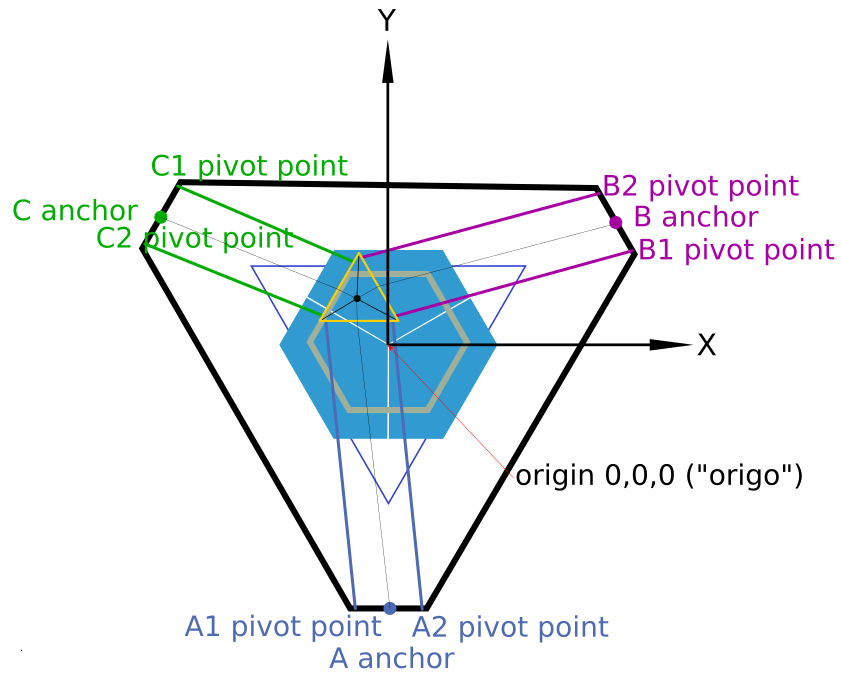](https://wiki.stadtfabrikanten.org/uploads/images/gallery/2026-06/o3SkD9uU3c1pHsaJ-grafik.png) [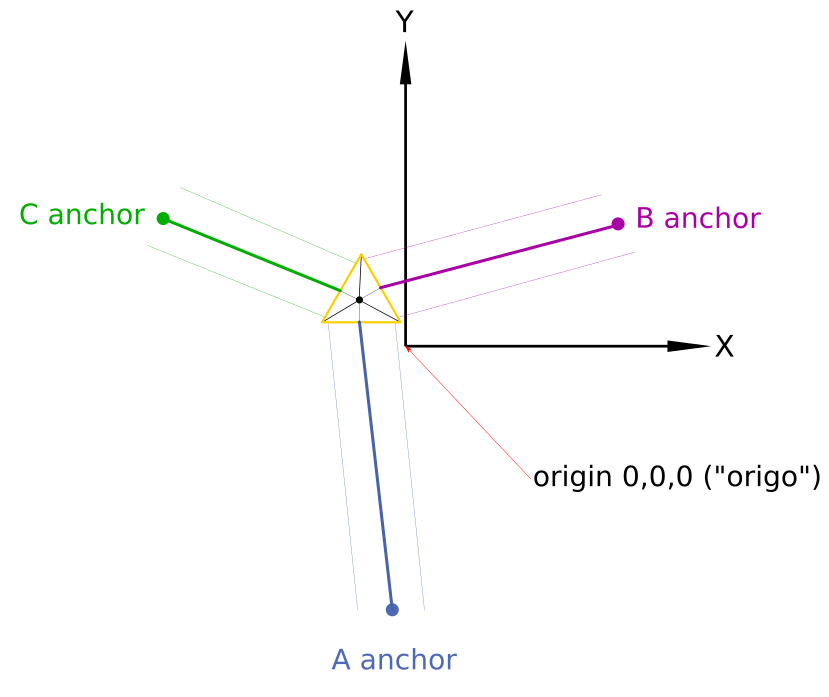](https://wiki.stadtfabrikanten.org/uploads/images/gallery/2026-06/UZVtmUpN9vbPPxAv-grafik.png)
Note that in this drawing the print platform is not centered perfectly like you will have in a real world situation too. The image also shows the effector at some random position to better clarify for the parallelism of each line pair A, B and C.
## Required tools for building and calibrating
1. computer with network access and all required software stuff → [Building basics, checks, maintenance](https://old.stadtfabrikanten.org/pages/viewpage.action?pageId=101974344)
2. grease gun (for sure with grease inside)
3. set of metric hex keys (standard sizes from 2 up to 10 mm) **- this is really important**
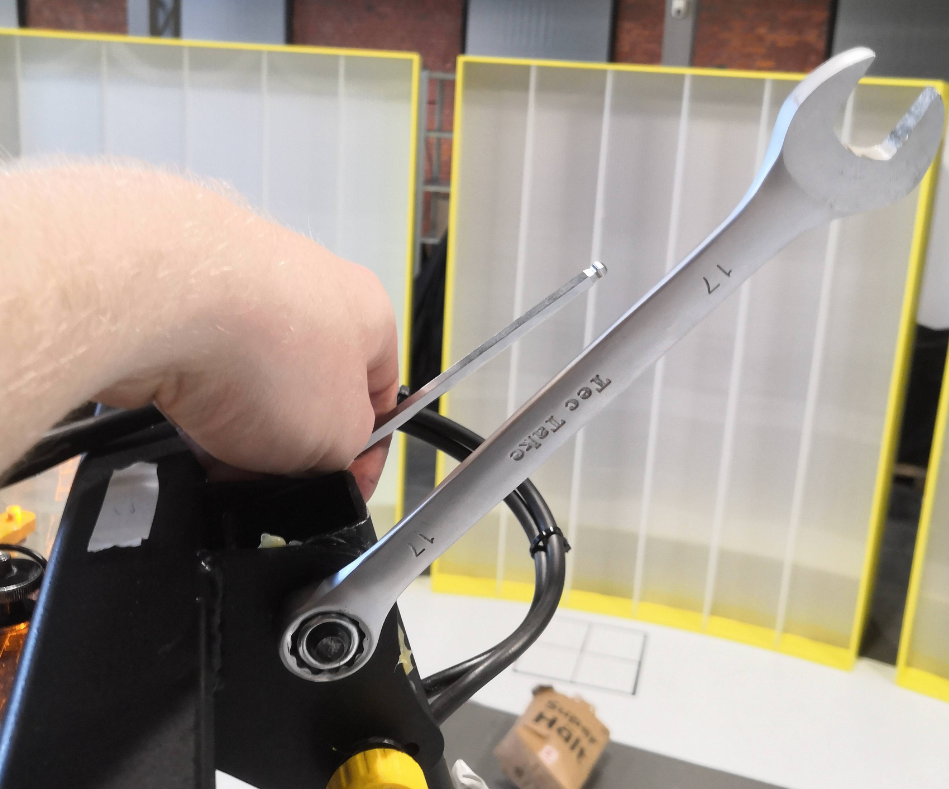
4. set of open jaw wrenches **- this is really important**
5. adjustable jaw wrench (there are a lot of parts which have a hexagon socket to keep fixed)
6. pipe wrench
7. rubber hammer
8. marking
1. permanent marker - thick
2. permanent marker - thin
3. masking tape (for temporary markings at the floor and elsewhere)
4. elektronic labeleling device (if you don't label your things it will be your death)
9. spare parts
1. screws
2. fireline
3. other components which might belong to Hangprinter
10. measurement things
1. tape measure
2. carpenter's rule
3. caliper
4. multimeter
5. cross spirit level (used for the print platform)
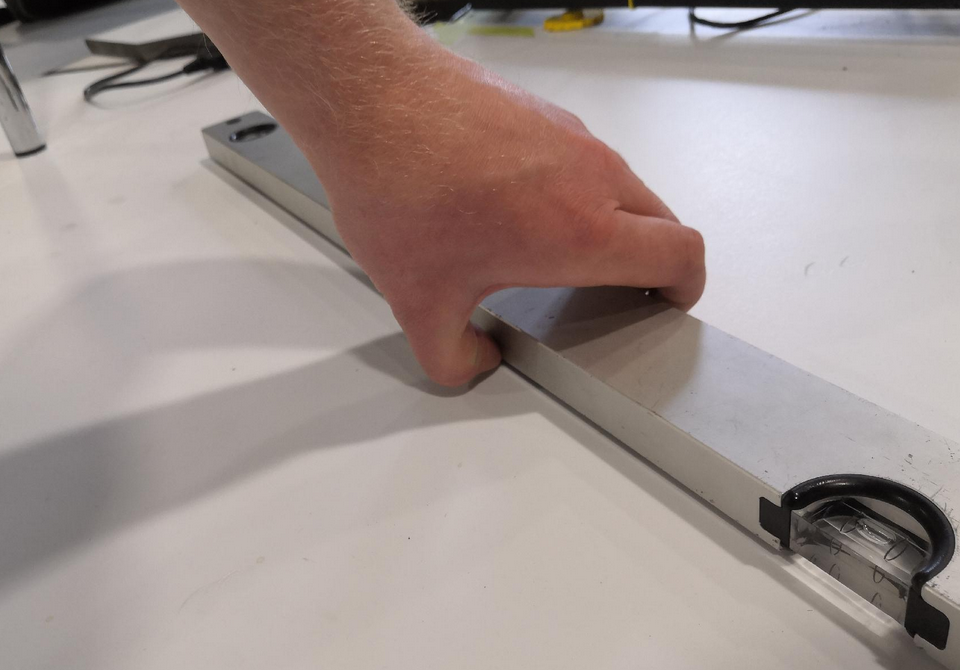
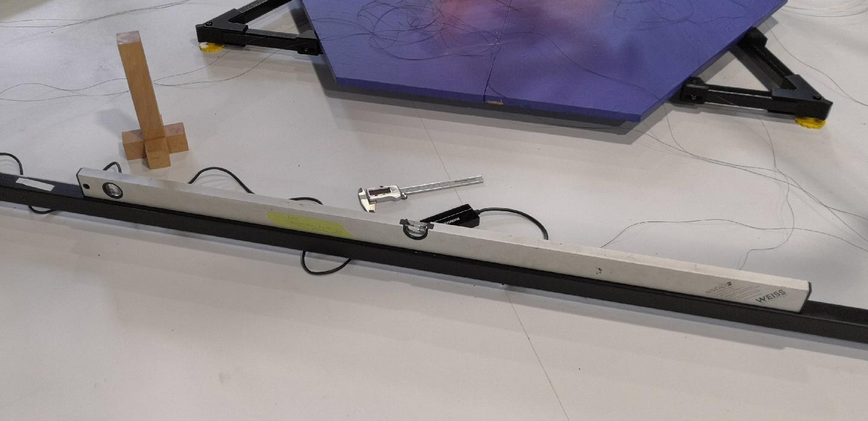
6. regular long shape bubble level (used for the base frame - don't use a crappy lightweight one and check if the spirit levels are correctly adjusted inside their housing)
7. laser distance meter**- this is really important**
8. marble or ball (for checking levelness of the ground)
11. cutter knife
12. thermal paste
13. tweezers or some individual bent paperclip (for picking up the lines or pulling out SD cards from Raspi / Duet)
14. piece of cloth (for cleaning and handling a really hot nozzle)
15. screw driver cross recess - rough
16. screw driver cross recess - fine
17. screw driver single recess - fine (for screwing down the terminals of Duet and Smart Stepper)
18. a ladder to reach the top of the frame **- this is really important**
19. roller or squeegee (for applying blue tape)
Other highly recommended stuff
1. access to a good high-output coffee machine
2. much much much much much time. It's not something you just do on the side while being in a hurry.
3. endurance
4. quiet people who don't bug you
## Transporting Trikarus and pre-preparations
### Effector fixation and bottom anchor line wiring
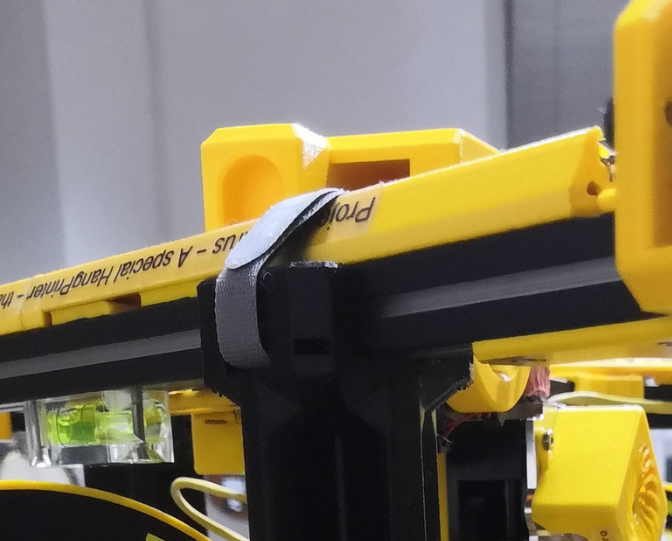
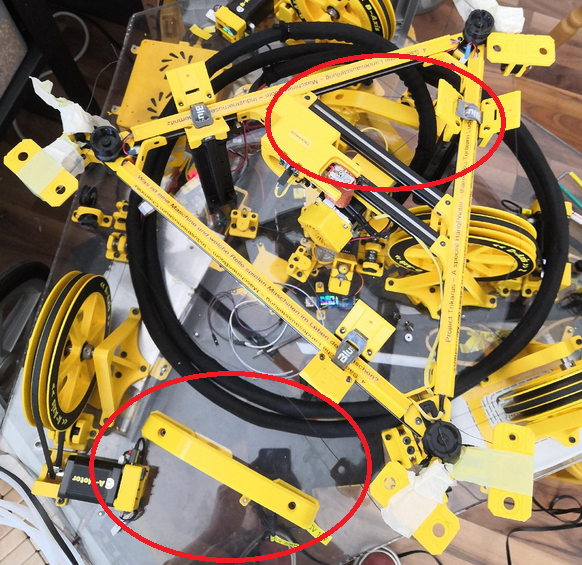
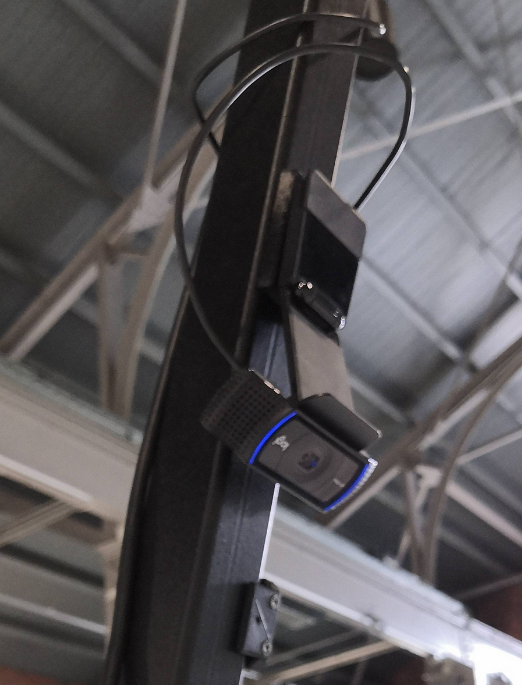
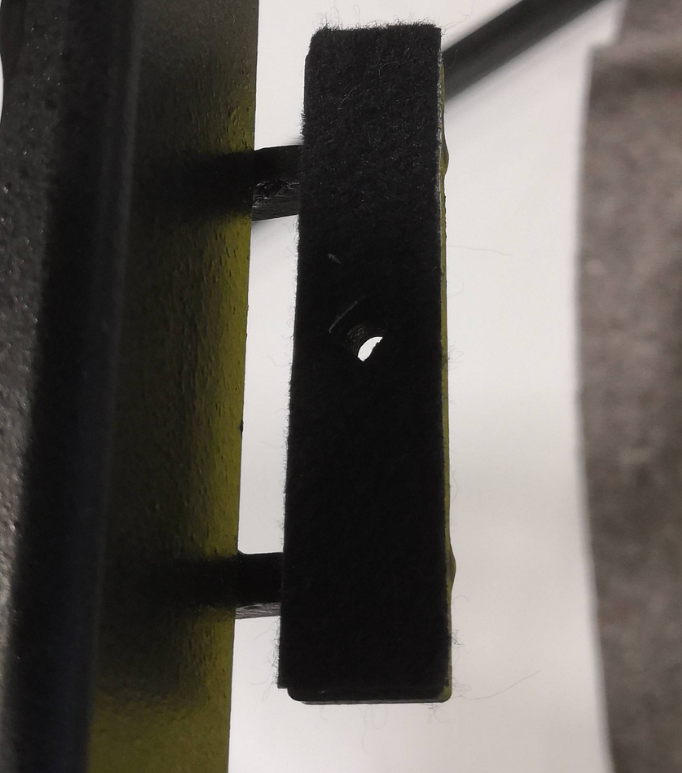
- lock the aluminum beams with three velcro strips at the arms. Note that the velcro clips are only for transportation and not for daily use! Using them for regular parking of the effector is not very handy. Brakes for each drive would be a better idea for this job.
[](https://wiki.stadtfabrikanten.org/uploads/images/gallery/2026-06/eyQvuv1pOyc2dPj0-grafik.png) [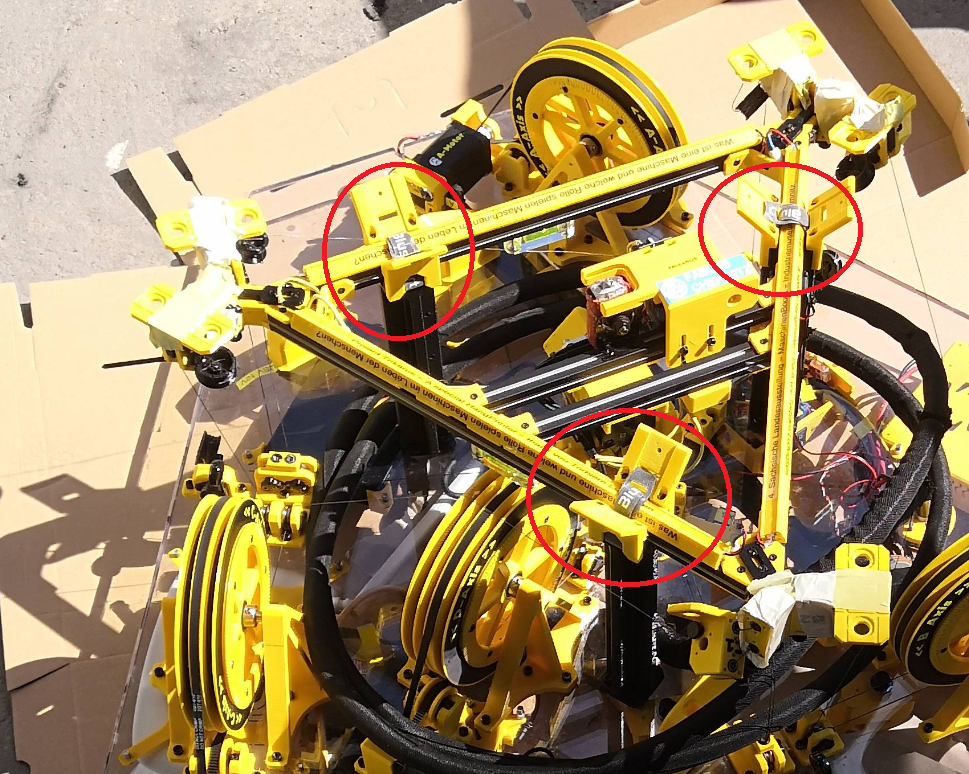](https://wiki.stadtfabrikanten.org/uploads/images/gallery/2026-06/06AjcBRGEjFK9yrU-grafik.png)
- mount complete line system at the ceiling module including the 6 bottom anchors. This reduces installation complexity a lot because you do not need to to the fuzzy work above your shoulders.
- While mounting the anchors ensure that all lines are put correctly in the ceramic inlets and bearing slots
- Ensure correct placement of the felted parts which prevent the lines to fall off from the lines but also check out if the bearings still can move smoothy. If the bearings cannot rotate properly the friction will get much higher which is bad for the movement system
### Handling
The ceiling module has 2 handles on the top side and two handles on the bottom side. Additionally it has 3 ring bolts for other purpose fixation. While transportation ensure that the effector looks to the sky because it's not constructed to withstand 16 kg of weight.
[](https://wiki.stadtfabrikanten.org/uploads/images/gallery/2026-06/655WZekEADHWumgl-grafik.png) [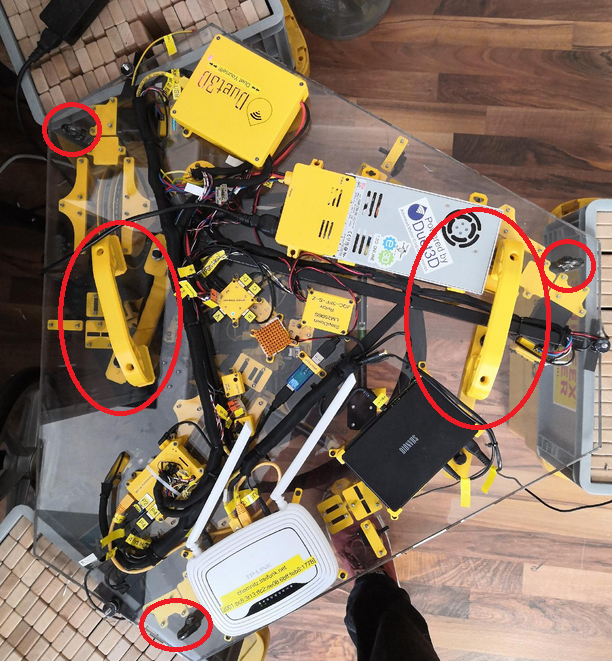](https://wiki.stadtfabrikanten.org/uploads/images/gallery/2026-06/RXKjWGE7vYjp4Y9b-grafik.png)
## Build steps for Trikarus
**General**
- Find the required tools and all necessary individual parts carefully before assembling! Better to pack too much than not enough!
- At least 3 people are required to set it up. It has been proven that there is a great danger that the frame will tip over or that the helping hands will not be enough to hand over individual parts.
- Please check out all the frame parts. They are labeled with "A", "A1", "A2", "B", "B1", "B2", "C", "C1", "C2" to mark which frame part joins the other part. This is **important** for tolerances and for things like wiring of power management, network cables, USB webcam and PTFE tubing. They also mark the positions of the anchors/coordinate system that way.
## I. Assembly steps: frame with ceiling module
Before assembling the frame, it should be ensured that all tolerances have been manufactured so that no moving parts seize. In our case there were tolerance problems, so that some parts had to be easily machined with a rubber hammer and the prepared nylon sliding washers could not be inserted at all points.
Before the frame is assembled, all individual assemblies must also have been prepared accordingly (pre-assembly).
### Spread parts on the floor
Spread out according to the rough arrangement on a flat place with sufficient free area around it (10 m² would be good!)
[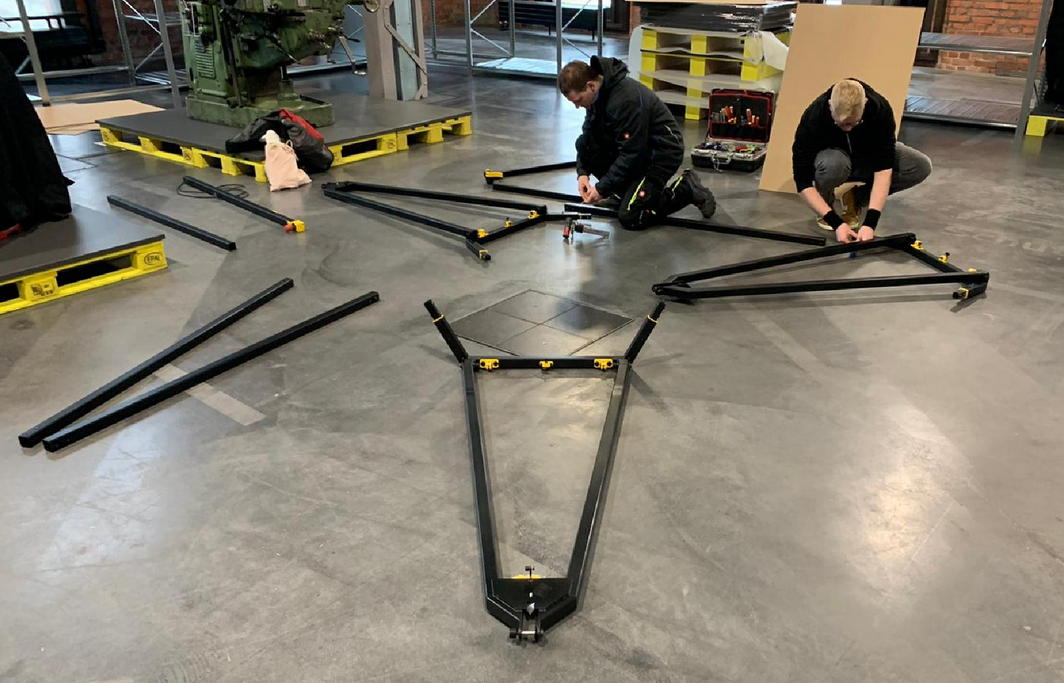](https://wiki.stadtfabrikanten.org/uploads/images/gallery/2026-06/bBiFX7typBu37iWY-grafik.png)
### (Re)grease stainless steel bushes / fitting screws
So that the dowel screw connections (swivel joints) do not squeak, do not rust and go easier, they should all be lubricated. Use a grease gun to distribute some grease in the stainless steel bushings or on the fitting bolts. If necessary, spread with a brush.
### Join the hexagon
1. First of all, the large hexagon is put together from the three prepared fork bases and the three belonging straight connector (fork top) profiles
2. After that, all profiles must first be aligned with each other
3. Then profiles can be screwed together (countersunk screws ISO 10642 M3 x 16 mm
[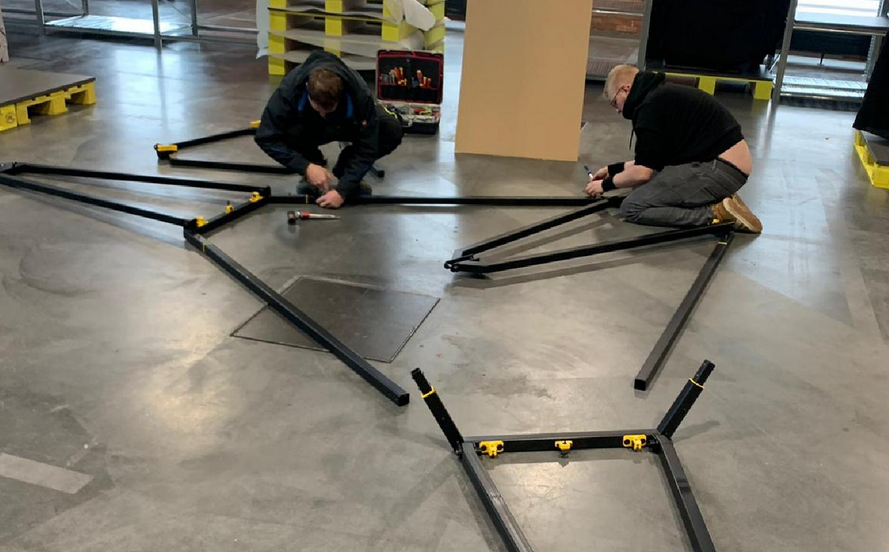](https://wiki.stadtfabrikanten.org/uploads/images/gallery/2026-06/6aD7xSFFlXPvEEWO-grafik.png) [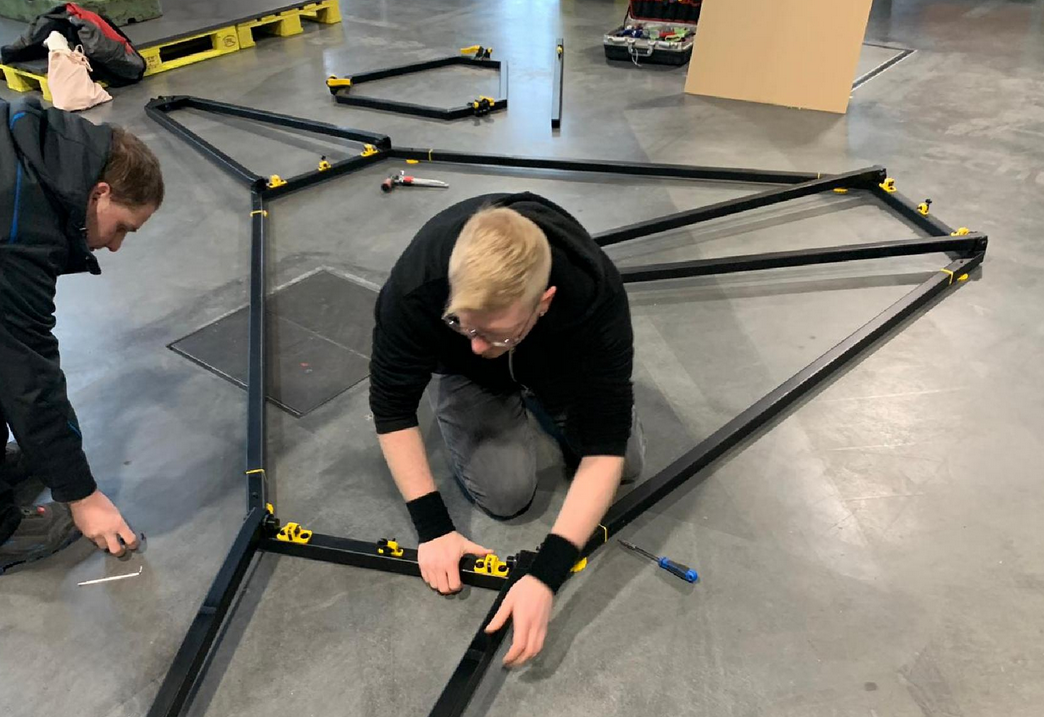](https://wiki.stadtfabrikanten.org/uploads/images/gallery/2026-06/vr4X9SWavIpq7pNo-grafik.png) [](https://wiki.stadtfabrikanten.org/uploads/images/gallery/2026-06/rPJFcpAM7EvVO1us-grafik.png) [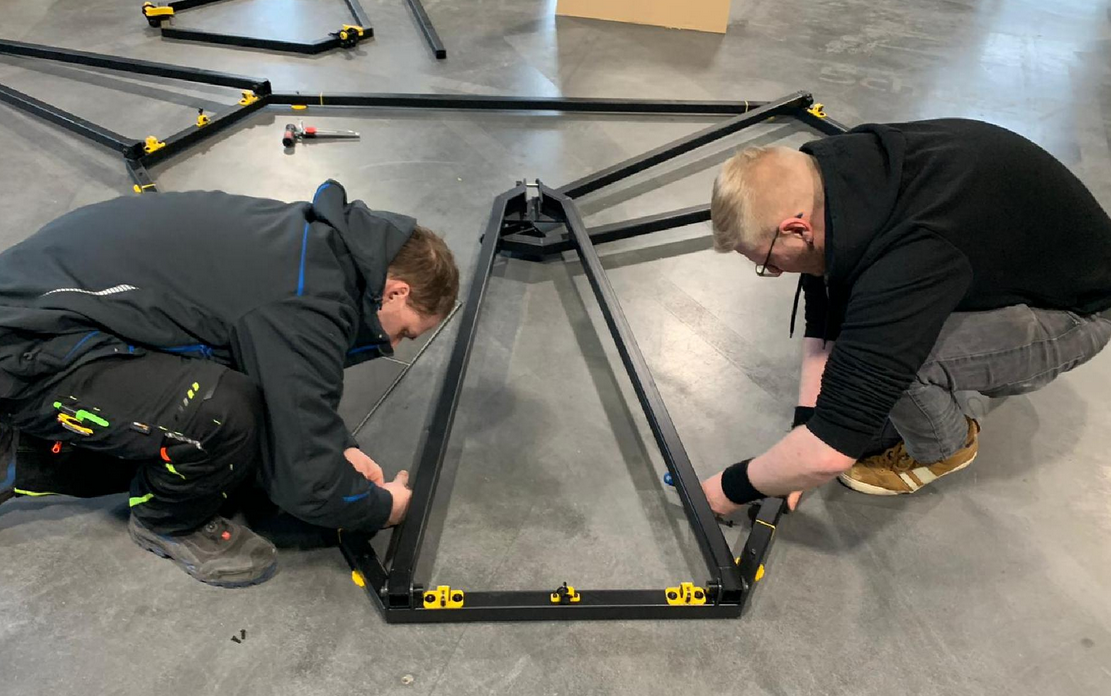](https://wiki.stadtfabrikanten.org/uploads/images/gallery/2026-06/JBaLuMI23xWdMVsV-grafik.png)
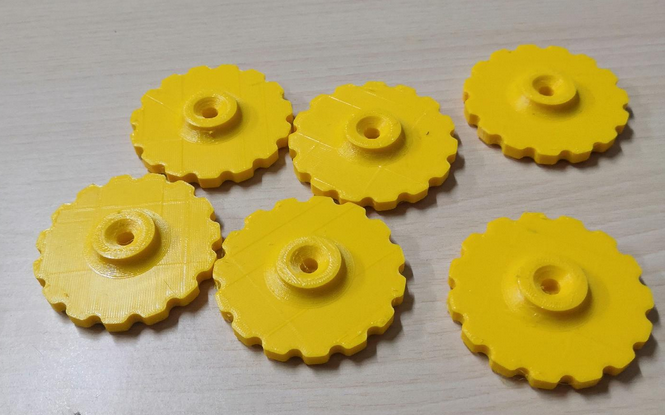
### Place the feet under the frame
Place 6x frame feet under the frame and screw in the 6x socket head screws ISO 4762 clockwise until the cylinder heads are at least smooth / flush with the 40 mm steel profile. Do not screw them down yet. Please also double check that you use screws which have thread from bottom to top (full thread screws). The feet shall have no configured distance to the beams yet. They are getting adjusted after building and placing the frame assembly. They are used to adjust the levelness of the ceiling module later. The feet should be put under the frame before it get's heavy due to installation of all the required components. Remember that the whole printer weighs several kilograms. The assembled frame can be lifted by one or two persons if you want to put the feet under it later but that's not really recommended. If you need more distance you can use the provided spacers.
[](https://wiki.stadtfabrikanten.org/uploads/images/gallery/2026-06/ZCED5LegHYdy1SLP-grafik.png) [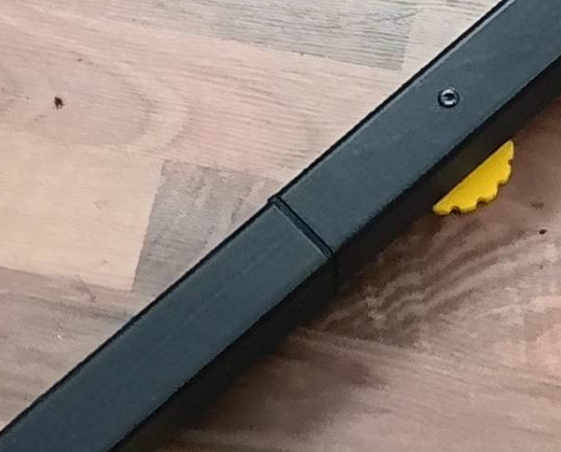](https://wiki.stadtfabrikanten.org/uploads/images/gallery/2026-06/MT4aMn8AOi7HDXai-grafik.png) [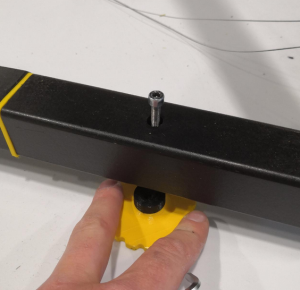](https://wiki.stadtfabrikanten.org/uploads/images/gallery/2026-06/c6wV7ewwNNwrIU8c-grafik.png)
### Move the frame to it's final target position
Please think of the place where Trikarus will stand. It needs stable ground. The flatter the better.
Please take a spirit level to check the levelness of your ground. You can also let roll a small ball or marble over the floor (maybe the marble does not roll because your ground is too soft or it's just really even). Then you have a first view where you will need to adjust your frame feet screws later. At the exhibition place where Trikarus was first installed the ground is not even. It has a small deviation.
[](https://wiki.stadtfabrikanten.org/uploads/images/gallery/2026-06/LBAxAa88ekikpS0E-grafik.png) [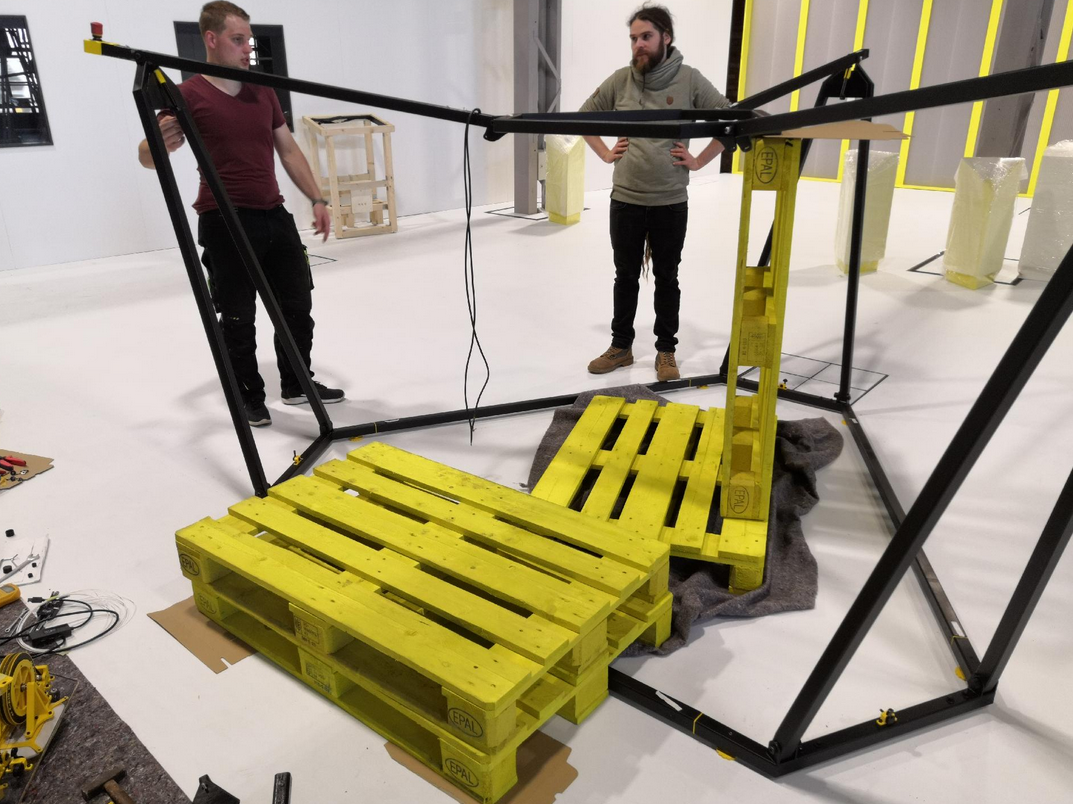](https://wiki.stadtfabrikanten.org/uploads/images/gallery/2026-06/IDrklNw2nm4fGGbn-grafik.png)
### Screw on the fork top profiles
Screw on the 3 upper fork parts (straight profiles) and fold each into the inside of the frame as shown.
Required for each join:
- 2x huge washer made of TPE
- 1x fitting screw
- 1x disc spring
- 1x lock nut
- 1x lock nut cap made of PETG
[](https://wiki.stadtfabrikanten.org/uploads/images/gallery/2026-06/HmTcv8mH3ypRGOQm-grafik.png)
If the fitting bolts seize, they can be easily hammered in with a rubber hammer. Normally they thread correctly through the stainless steel cylinder then.
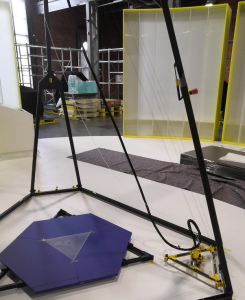
Since the frame is symmetrical, it doesn't matter where the emergency stop switch is attached!
### Mount gas pressure springs
The 3 gas springs help to move the head plate module vertically more easily
Required for each join fork:
- 2x washer made of PE
- 1x collar screw
- 1x lock nut
- 1x lock nut cap made of PETG
The fork joints can then be folded back to the starting position (as in the previous step)
[](https://wiki.stadtfabrikanten.org/uploads/images/gallery/2026-06/ozuBbougxs0qkNnZ-grafik.png) [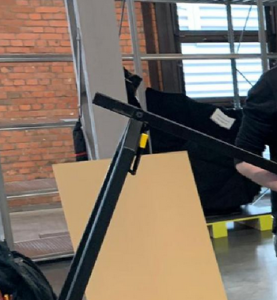](https://wiki.stadtfabrikanten.org/uploads/images/gallery/2026-06/3UFD3AttSq3IkwG8-grafik.png)
### Hook in the upper part of the frame (upper hexagon) and screw together
This step requires at least 3 people. 2 people have to hold the upper heaxgon while the third person makes the screw connections. Another cheat will be to put europallets below the hexagon. The first connection can still be made by two people (one person is holding, one person is screwing)
For each fork required:
- 2x huge washer made of TPE
- 1x fitting screw
- 1x disc spring
- 1x lock nut
- 1x lock nut cap made of PETG
[](https://wiki.stadtfabrikanten.org/uploads/images/gallery/2026-06/0JkRBguFfClZPuOK-grafik.png)
If the fitting bolts seize, they can be easily hammered in with a rubber hammer. Normally they thread correctly through the stainless steel cylinder then.
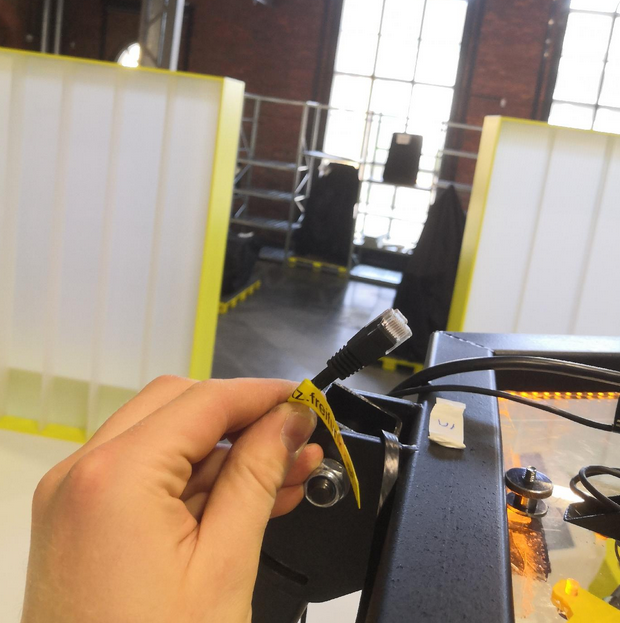
### Put the LAN cable into one of the forks (except the fork with the emergency halt button)
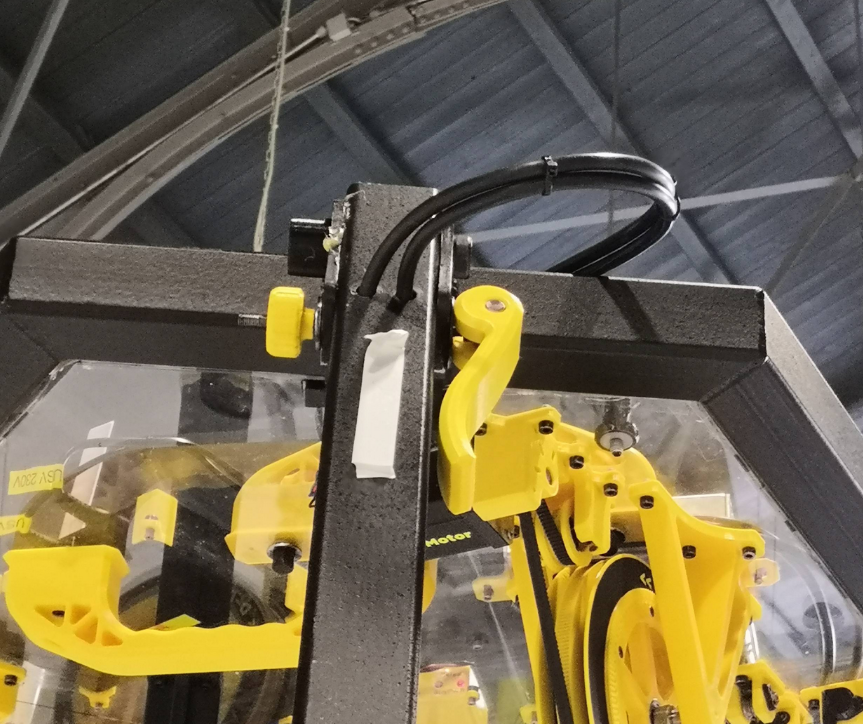
To have a local LAN access in case Wifi fails you have a wired fallback connection which can be hidden completely in the fork. Put the cable inside the beam and connect it to the router. Please use only flat style LAN cable because the frame will cut thicker cords (only rare space between top hexagon and fork pivot). Use the magnetic beam end cap to hide the cable if not used.
The photo shows Trikarus in an already installed state so please do not wonder!
[](https://wiki.stadtfabrikanten.org/uploads/images/gallery/2026-06/MWxJH0dF8HXVRMcj-grafik.png) [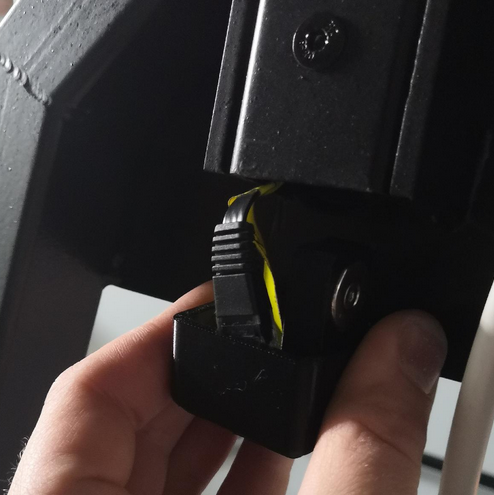](https://wiki.stadtfabrikanten.org/uploads/images/gallery/2026-06/VgyblgnUZZnOzpP7-grafik.png) [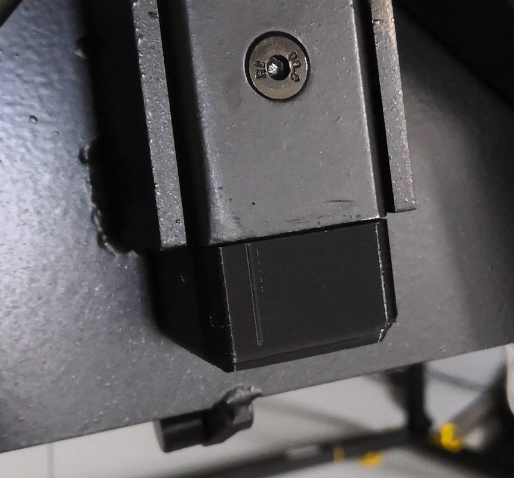](https://wiki.stadtfabrikanten.org/uploads/images/gallery/2026-06/dPYnC2lPYrOb8KHi-grafik.png)
### Wire up the USB Webcam
Avoid climbing up to the roof by connecting the USB webcam before lifting the ceiling module to the maximum frame height.
[](https://wiki.stadtfabrikanten.org/uploads/images/gallery/2026-06/ItlMveKZxpCKn7UX-grafik.png) [](https://wiki.stadtfabrikanten.org/uploads/images/gallery/2026-06/NMYeR0sjKdv2DhCH-grafik.png)
### Mounting and fixating the ceiling module
At first please install the felts between the top hexagon feets and the polycarbonate plate. This avoids scratching your material.
You cannot insert the module from downside. The ceiling module has to be inserted from the top side. Use the two handles on the top side to lay in. Insert the ceiling module so that the power supply has the shortest distance to the fork with the emergency halt cable.
[](https://wiki.stadtfabrikanten.org/uploads/images/gallery/2026-06/SeZKrZqRcX8ET8vY-grafik.png) [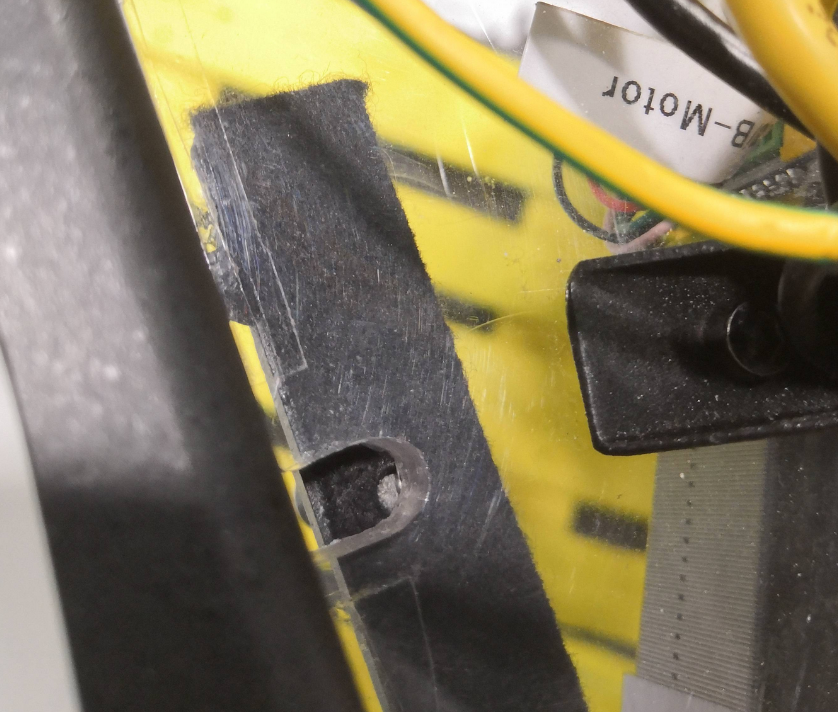](https://wiki.stadtfabrikanten.org/uploads/images/gallery/2026-06/H1TnQQgMJmc4h7gm-grafik.png) [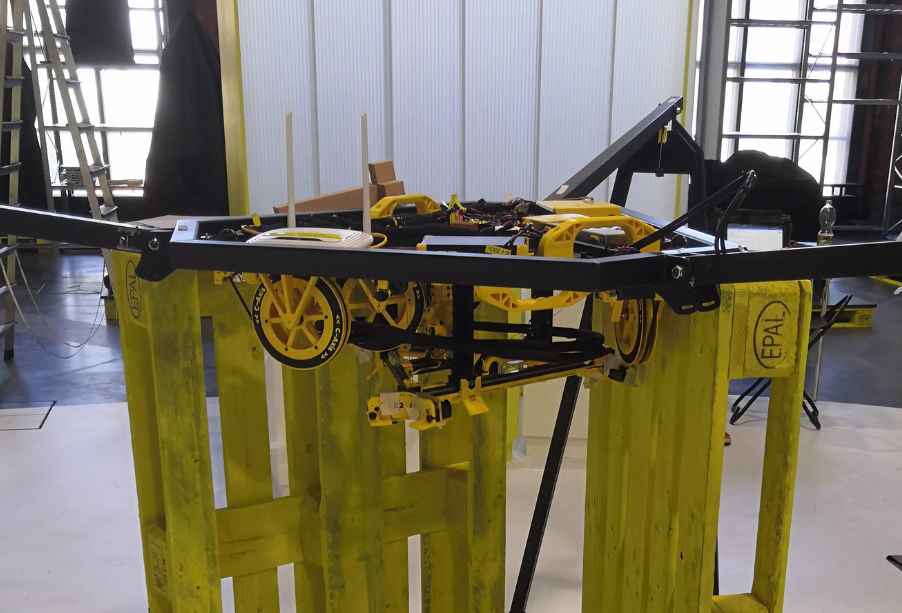](https://wiki.stadtfabrikanten.org/uploads/images/gallery/2026-06/lsO8Pl2KUEUfECGL-grafik.png) [](https://wiki.stadtfabrikanten.org/uploads/images/gallery/2026-06/Vy39MQnMpE8QRHQr-grafik.png)
The photo shows a state where Europallets where put below the top hexagon. Reason for this are some instabilties with our current frame construction (gas springs lost huge amount of their gas)
### Wiring the emergency stop button
After installing the frame with head plate, the electrical connection between the emergency stop switch and the power supply must be created. There are two cable openings provided on the housing of the power supply. These still have to be wired.
The emergency button is **not a decorative element**. It is used frequently - especially while adjusting basics!
[](https://wiki.stadtfabrikanten.org/uploads/images/gallery/2026-06/FgUiHq9M1hfwW6Fd-grafik.png) [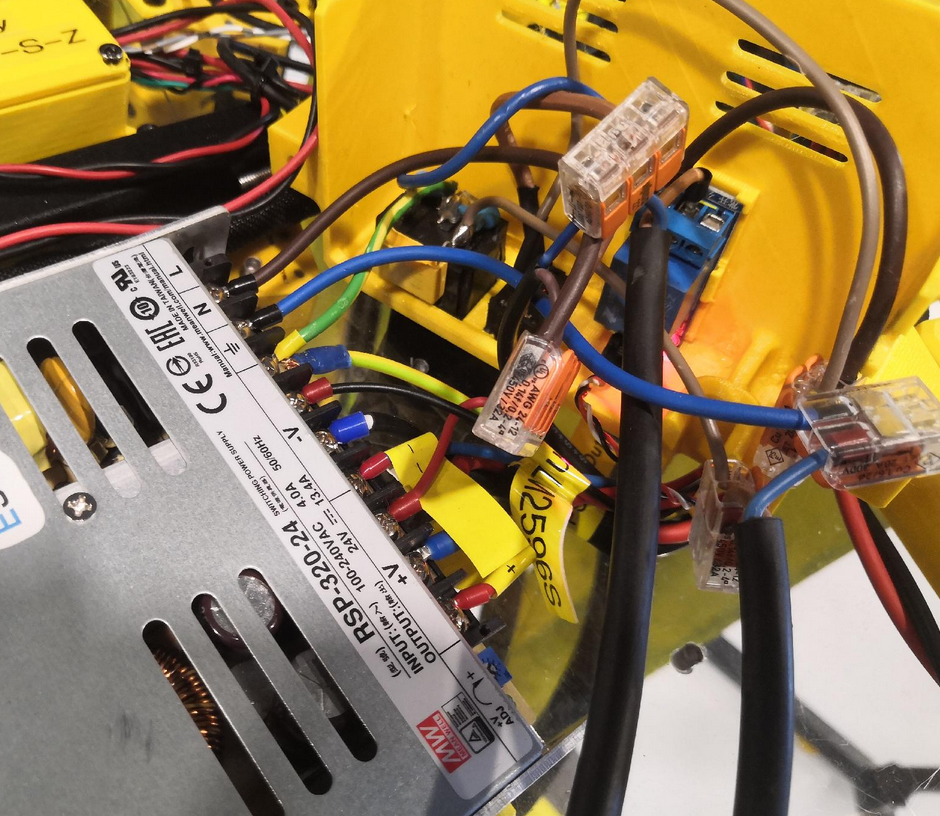](https://wiki.stadtfabrikanten.org/uploads/images/gallery/2026-06/MsqtIxNDu78GjC7N-grafik.png) [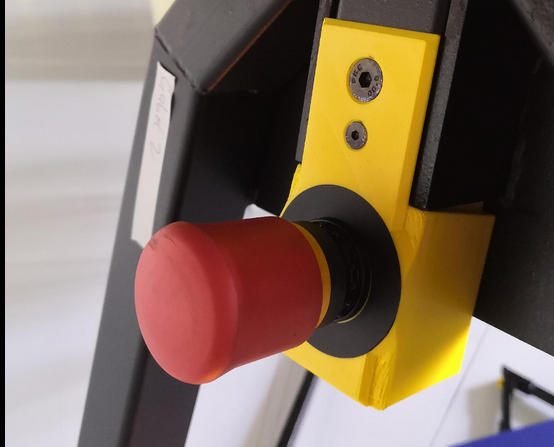](https://wiki.stadtfabrikanten.org/uploads/images/gallery/2026-06/CrQpkRJQQ2fbaD9E-grafik.png)
### Wiring up the ground wire
The following installation is not really professional yet but it does the job
[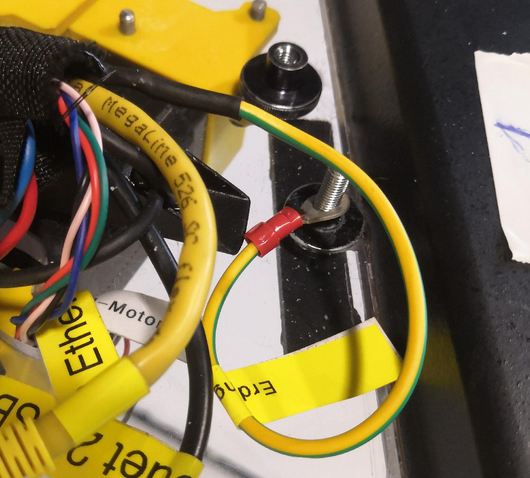](https://wiki.stadtfabrikanten.org/uploads/images/gallery/2026-06/Enz51q0w0hfBYzh2-grafik.png) [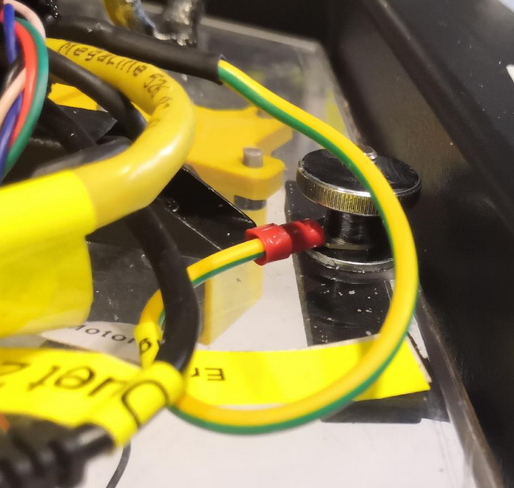](https://wiki.stadtfabrikanten.org/uploads/images/gallery/2026-06/7lefXtWQXt21NnaS-grafik.png)
### Connect the power cord to the printer
[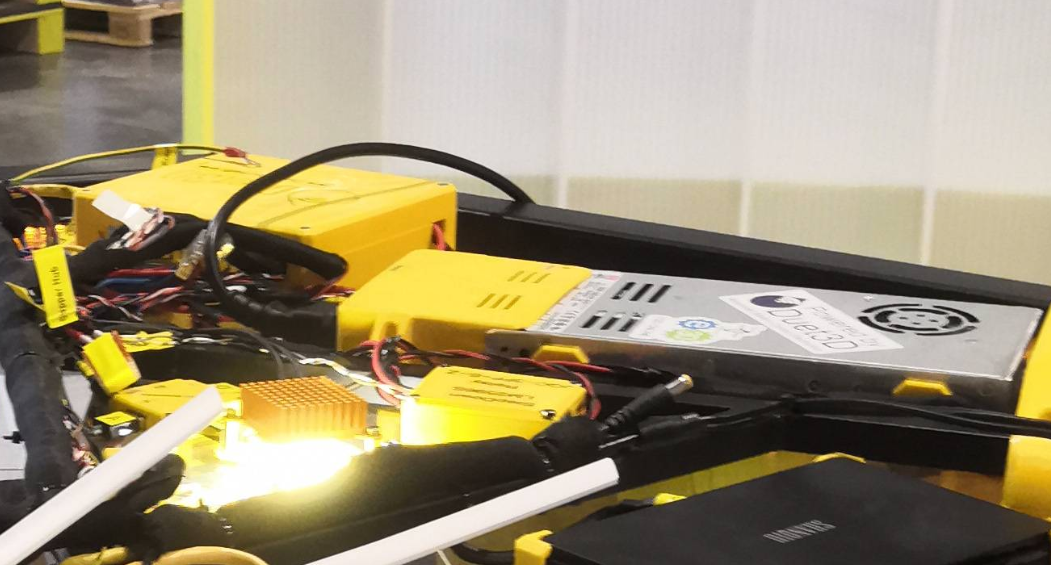](https://wiki.stadtfabrikanten.org/uploads/images/gallery/2026-06/CS4aDF32M2EqmYoh-grafik.png)
Connect the C14 power cord to the switching power supply, plug the other end into a socket and press the toggle switch. The internal relay should now have a red lighting LED and the power supply should turn on.
If your power socket (source power) is not on the ceiling, the electricity must be routed from the floor. To do this, the power cable must be laid on the machine frame.
Check all electronics before extending the printer to the top.
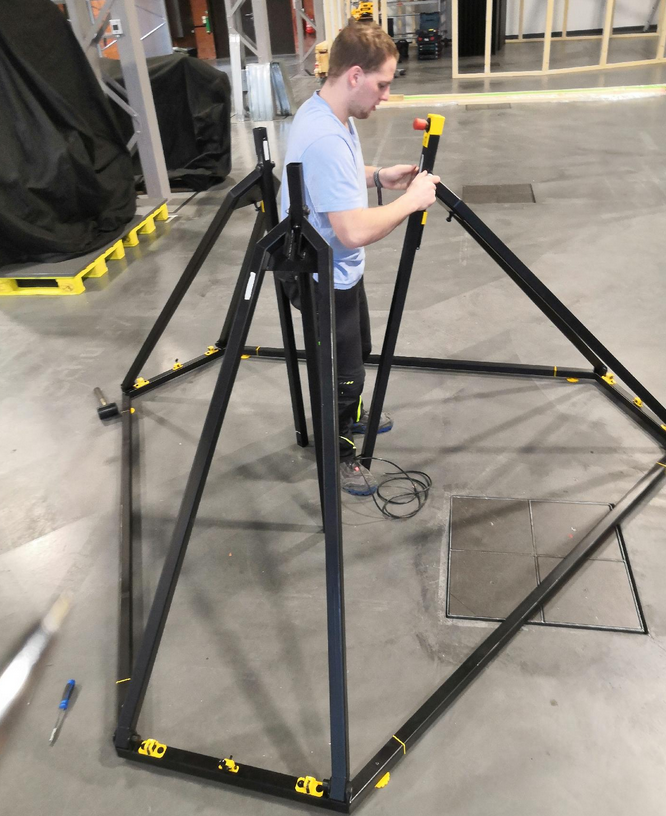
### Extend the frame to the top
This step requires special attention.
- The frame must be extended slowly and with patience as evenly as possible
- Before moving out, it makes sense to place one person per fork corner. At each corner, some body weight should be shifted to the floor frame so that it receives additional support.
- **Caution**, risk of bending if the frame feet have already been unscrewed and you tap on the frame parts!
[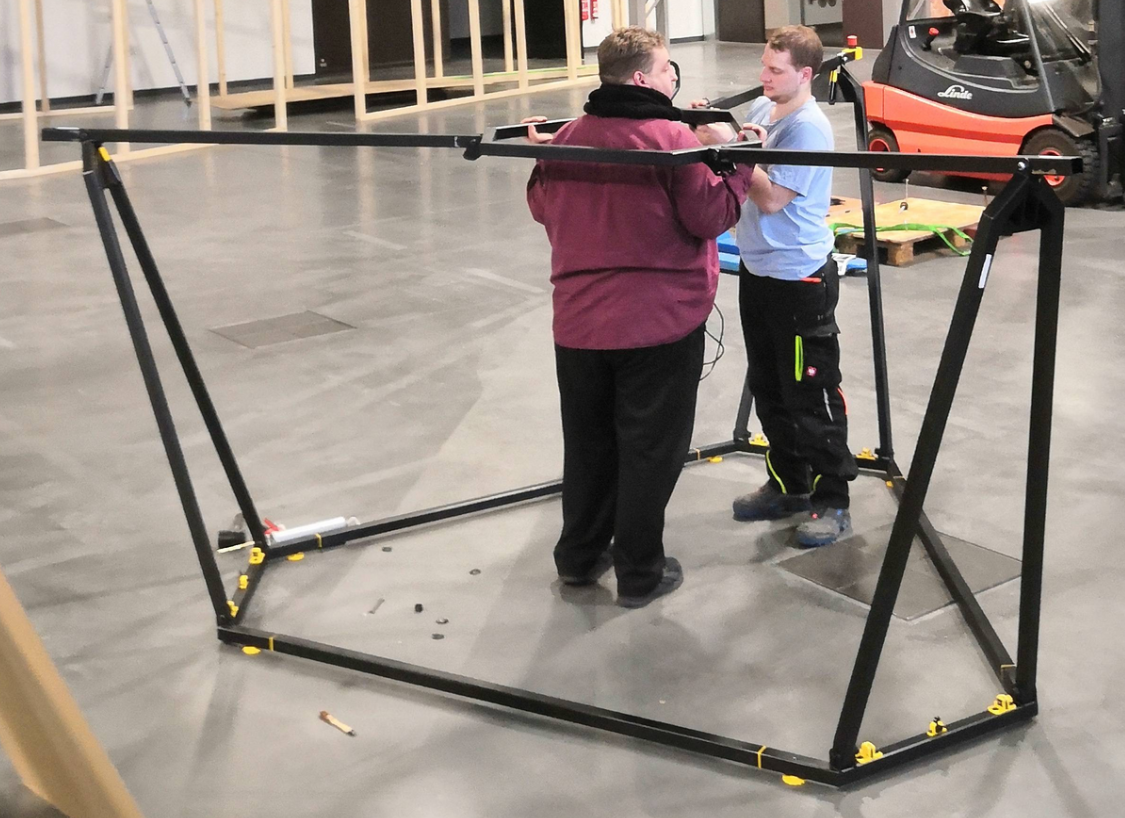](https://wiki.stadtfabrikanten.org/uploads/images/gallery/2026-06/zINn8GHvZPp6Isyx-grafik.png) [](https://wiki.stadtfabrikanten.org/uploads/images/gallery/2026-06/jL3KpS6TlluurTVM-grafik.png) [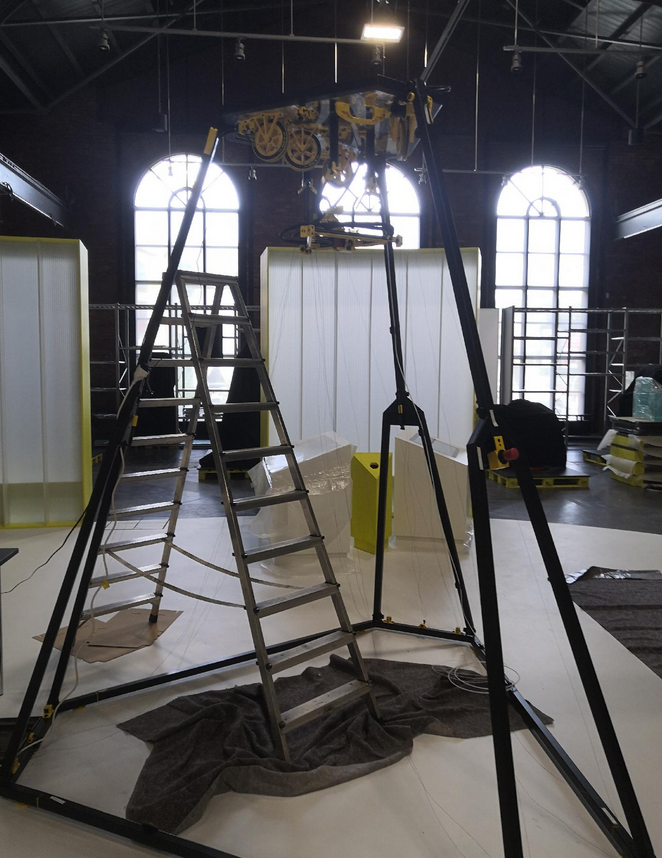](https://wiki.stadtfabrikanten.org/uploads/images/gallery/2026-06/te922CXTttaZ7SzA-grafik.png)
the left photo shows just some test
### Fix the fork joints
To fix the forks (prevents the folding movement), a countersunk screw ISO 10642 is screwed in for each fork.
[](https://wiki.stadtfabrikanten.org/uploads/images/gallery/2026-06/srvBLg1IALybyyg8-grafik.png) [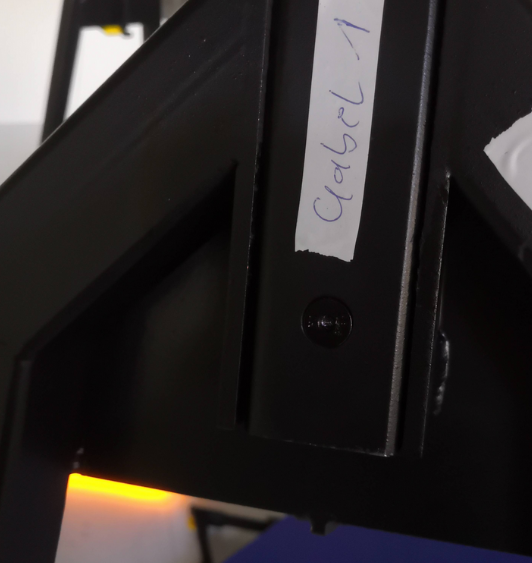](https://wiki.stadtfabrikanten.org/uploads/images/gallery/2026-06/mqm3vpwOQ95l7nqQ-grafik.png)
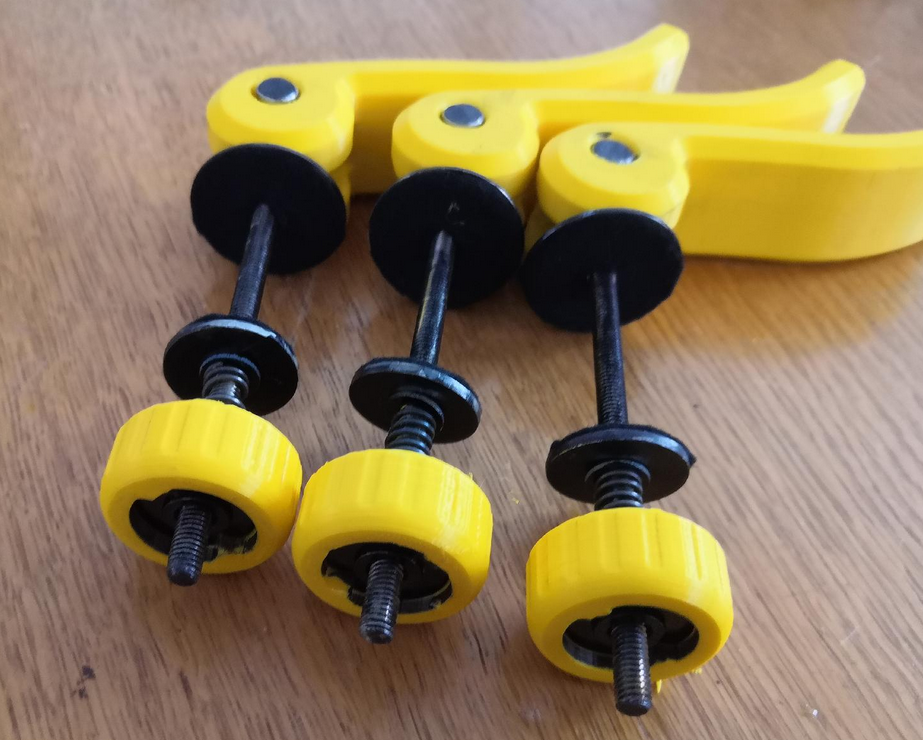
### Attach quick releases
Install 3x quick releases and use them to stiffen the frame. These angle adjustments help to prevent the frame from tilting or wobbling due to different manufacturing tolerances a bit.
It may be necessary to open and move the quick releases several times. By leveling the frame, it is possible that the curvy elongated holes move slightly
[](https://wiki.stadtfabrikanten.org/uploads/images/gallery/2026-06/9tq6P77XbdJw7o64-grafik.png) [](https://wiki.stadtfabrikanten.org/uploads/images/gallery/2026-06/aK0SSQC1bixEZWyD-grafik.png) [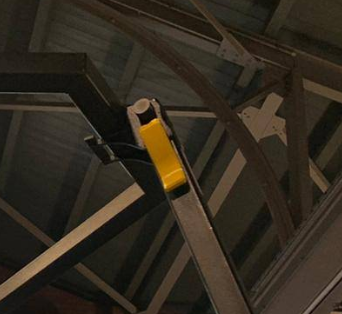](https://wiki.stadtfabrikanten.org/uploads/images/gallery/2026-06/qFjAhcKKG6NvK8Fc-grafik.png)
### Check frame stability
Check whether the frame wobbles very much. If yes: retighten all neccesarry screw connections (fitting screws) and check feet if they all touch the ground. There are 6 frame feet, 12 bolt connections, three quick releases and three fixation screws for the forks. All of them should have good contact. It's impossible to get the frame absolute non-wobbling. While running the printer this should not be the problem because no one ever should touch the frame or lines while printing. When shaking the frame it takes ~ 10 seconds until vibrations are gone.
[](https://wiki.stadtfabrikanten.org/uploads/images/gallery/2026-06/t7m4XalS2ORxXEUQ-grafik.png)
### Ceiling plate leveling
Before leveling the ceiling module you should check the general levelness of your ground (if not already done while placing the frame in the room). The fine leveling steps will be done later.
Take a spirit level and level the frame by configuring the height of the six adjustable yellow feet. You can put the level at the top surfaces of the three long connection beams between the fork corners. Adjust one feet per corner to adjust the frame like a triangle. The three remaining feet should hover due to missing contact with the ground now. If your frame is level you can adjust those remaining feet simply by screwing down until they get safe contact with the ground. Now the frame should be stable.
[](https://wiki.stadtfabrikanten.org/uploads/images/gallery/2026-06/xagpOvtsBpOul71o-grafik.png) [](https://wiki.stadtfabrikanten.org/uploads/images/gallery/2026-06/vhMWFNpGGJ57c9ry-grafik.png)
Ideally, the ceiling plate is now level too, provided the frame has been correctly leveled by adjusting feet and the frame tolerances are ideal. However, there is likely to be a discrepancy, even after having a level ground and a level frame. To check this we take another spirit level on the ceiling plate. Remaining angles can be corrected afterwards by placing a little felt between the ceiling module and the three welded support plates of the hexagon frame part or just by re-adjusting the feet screws on the frame bottom. You will also see (later) if your ceiling module is leveled well if your effector will sit in the three arms correctly at maximum Z because the installed Z endstop should trigger if everything is horizontal. If there is a gap between one or more arms and the effector, the ceiling plate is not level and/or the effector is not level too.
### Mount the six bottom anchors
This step is only for installation purpose. The calibration is complex and will be done later.
- Pull down the lines from ABC drives to lower the anchors until you can screw them down to the frame corners. You will have to pull down A1/A2, B1/B2 and C1/C2 pair-wise. If you only pull one anchor (one line) than the other line of the spool will de-spool
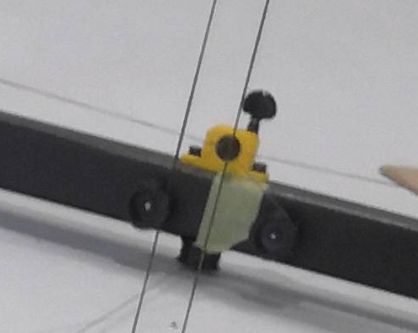
- ensure that all felt fixators are installed properly without blocking the bearings. A smooth movement is required
- check for collisions between ceramic inlets and the V bearings. Sometimes the inlets are pushed in too deeply into the base frame roller block. If thats the case push them into their correct fitting position again
- check all lines if there are any twistings between bottom anchors and effector. Each twist will lead to failing movement system
If there is power on the Smart Steppers and they are enabled they will not move when you try to pull the lines. To pull the lines you need to disable the Smart Steppers either by sending M84 command or by turning off the PSU power in the meantime. Another trick would be to push the reset button on the Smart Stepper LCD. Then you have around 5 seconds time to pull lines until it returns into previous control mode (sPID/pPID/torque).
[](https://wiki.stadtfabrikanten.org/uploads/images/gallery/2026-06/XZ4zW07DWb6vX4F1-grafik.png) [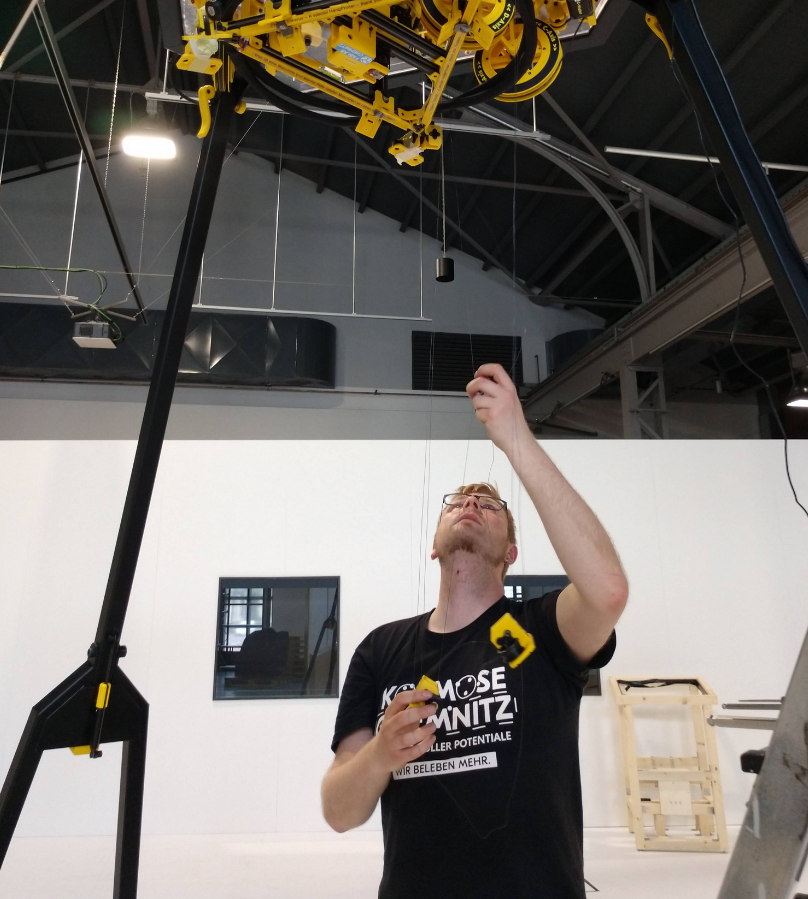](https://wiki.stadtfabrikanten.org/uploads/images/gallery/2026-06/SLSSwkq1ulBE6kZ9-grafik.png) [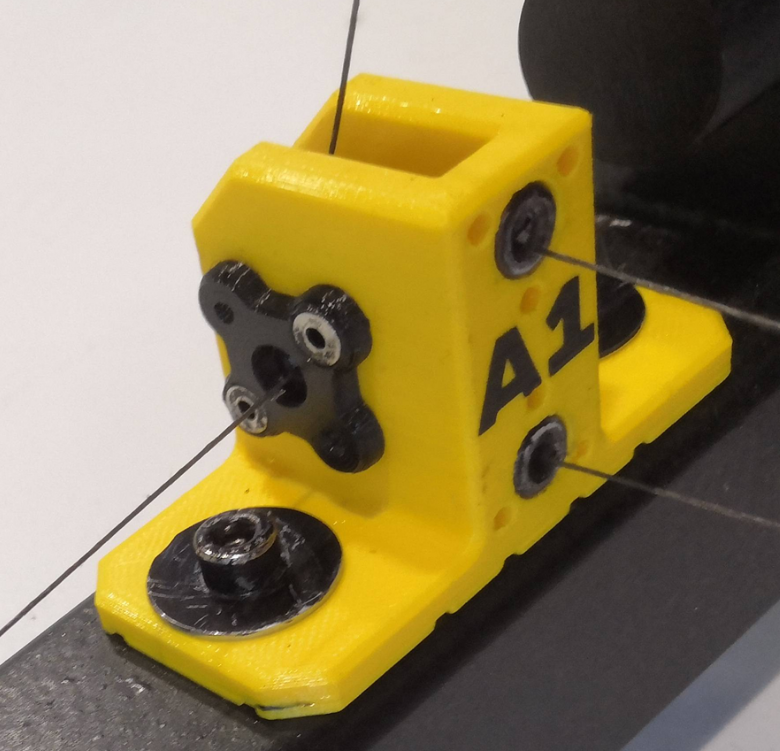](https://wiki.stadtfabrikanten.org/uploads/images/gallery/2026-06/YWGjBWSj1wcqryvt-grafik.png)
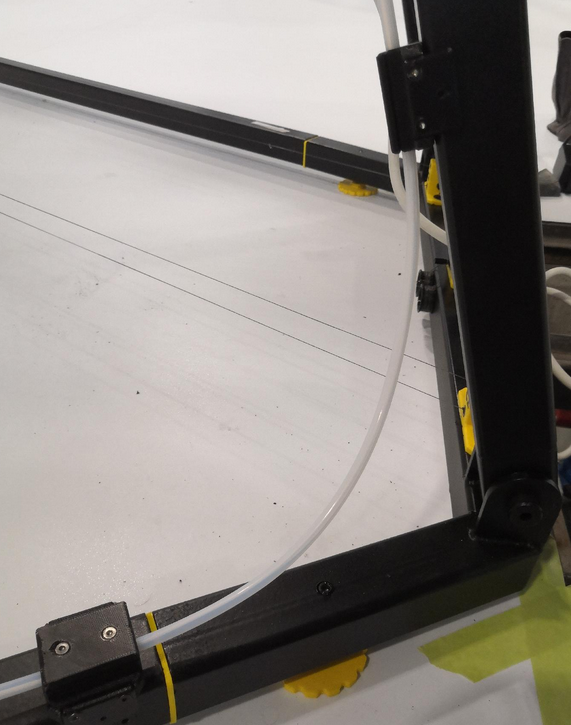
### Add filament tubing and join together with magnetic wire fixations
[](https://wiki.stadtfabrikanten.org/uploads/images/gallery/2026-06/eTgbeM4UnGVYH5co-grafik.png) [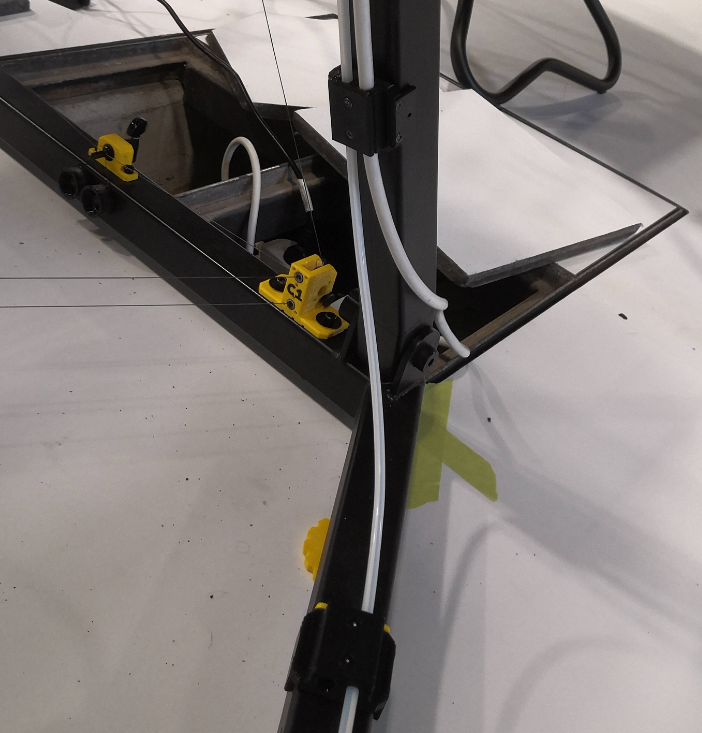](https://wiki.stadtfabrikanten.org/uploads/images/gallery/2026-06/OWmIuQhzxRknnMUJ-grafik.png) [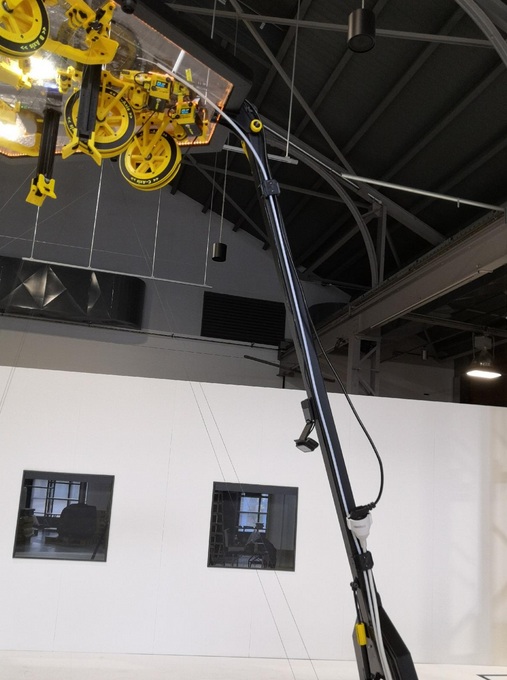](https://wiki.stadtfabrikanten.org/uploads/images/gallery/2026-06/cPro2WR4kTPFgwYE-grafik.png)
### Mount the filament tube end piece
Take some fishing line and knot it below the D motor. The tubing should end at the same height level like the transport fixation arms.
[](https://wiki.stadtfabrikanten.org/uploads/images/gallery/2026-06/cVWesyrVf6HBZoLj-grafik.png)
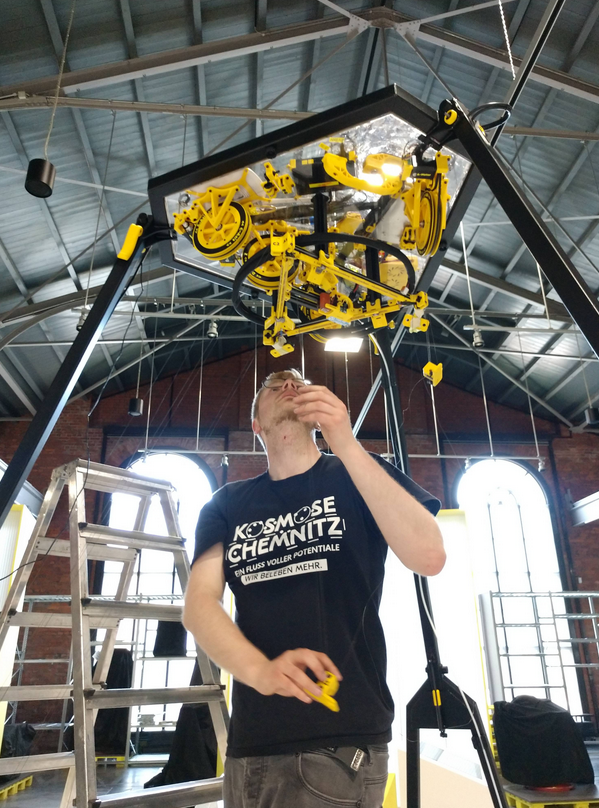
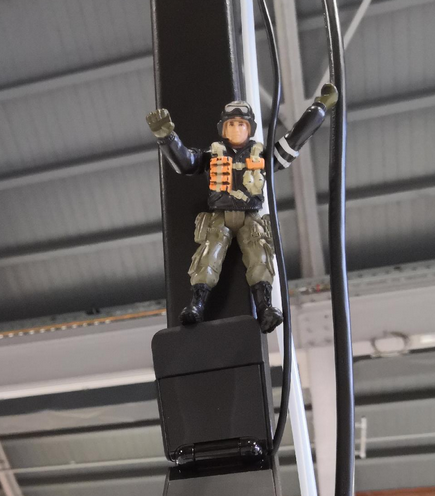
### Let Smarty Mac Skydriver climb up to the top
He's a "magni"-tude guy and watches the emergency exit.
[](https://wiki.stadtfabrikanten.org/uploads/images/gallery/2026-06/3pfJHEPok3yUAmuF-grafik.png) [](https://wiki.stadtfabrikanten.org/uploads/images/gallery/2026-06/vnYDeUOO8WnfKK73-grafik.png) [](https://wiki.stadtfabrikanten.org/uploads/images/gallery/2026-06/D9FRr0eEkwGajtMv-grafik.png)
### The base frame with ceiling module is fully assembled
[](https://wiki.stadtfabrikanten.org/uploads/images/gallery/2026-06/d5EG8mPCRavM76TD-grafik.png)
To maintain the position, the frame corners on the floor can be additionally secured with markings using some tape. This step is particularly important if Trikarus would be installed in the room without the fixed frame.
### Extra: sanity check of frame dimension
Do some sanity checks of the frame. This is optional because Hangprinters normally do not have a frame. But for better precision we try to measure all we can to find error sources quickly and in early states. In a Hangprinter without frame this is not relevant but for Trikarus exhibition frame we can use the benefits of this. The better the frame dimension are regular the easier it will be to adjust anchors later because the smaller the resulting angle deviations are. If the three verticals of the truncated triangle (hexagon style frame) are the same length this would be a perfect result. I remeasured all six frame bottom part lengths and the three distances between fork and the parallel connector beam on the opposite side, for each. So in total we get 9 measurements.
[](https://wiki.stadtfabrikanten.org/uploads/images/gallery/2026-06/Katq55xJXzNEUOwp-grafik.png)
### Adjust the webcam view to get a nice overview of the printer build volume
[](https://wiki.stadtfabrikanten.org/uploads/images/gallery/2026-06/XA05Zb9exc0c2nLm-grafik.png)
This image shows an already finished setup of Trikarus
### Mark the center of the frame
This step is a little bit dirty because we work on unknown ground (yet unknown grade of levelness)
We need the middle of the frame to (re)adjust the laser pointers for later usage. We use some magnetic line winders to create temporary helper lines between each anchor fork (take the center which is exacty below the guitar tuner) and it's parallel frame connector beam (take the half of it's length. That gives 800 mm).
Take some tape and put a marking on the ground.
[](https://wiki.stadtfabrikanten.org/uploads/images/gallery/2026-06/YjZ36hd6PR08M32H-grafik.png) [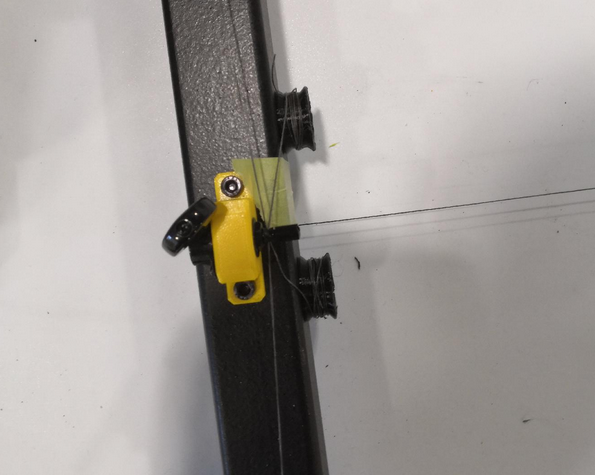](https://wiki.stadtfabrikanten.org/uploads/images/gallery/2026-06/SbAIuavuEgTNZ5IE-grafik.png) [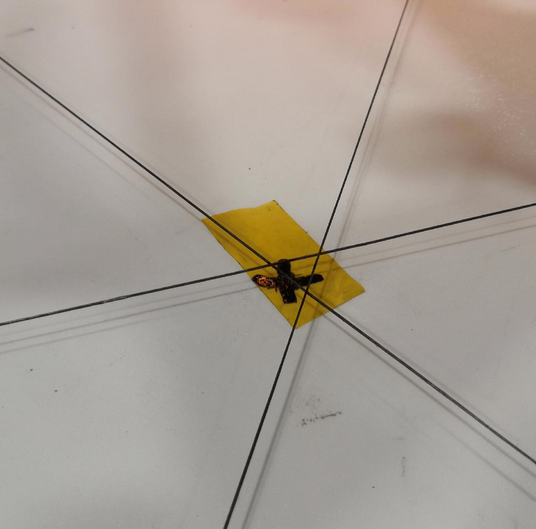](https://wiki.stadtfabrikanten.org/uploads/images/gallery/2026-06/2o1rf2Bj03UdUQRc-grafik.png)
### Adjust the laser pointers
To work out good calibration we make use of the three laser pointers at the ceiling module. But they are really sensible. We have to adjust their focus. To do this rotate the body of the laser pointers until the dot looks good. Additionally we need to adjust the position where the spots hit the ground. The angle of the pointers can be adjusted using the set screws. We make use of the template sheet with 570 mm circle and the three target markings. We use a 570 mm circle because the laser alignment has exactly the same size on the ceiling plate. Due to uknown ground levelness slight deviations may occure on the template (laser pointers could point slightly to different target position). Those can be fixed or reduced later.
[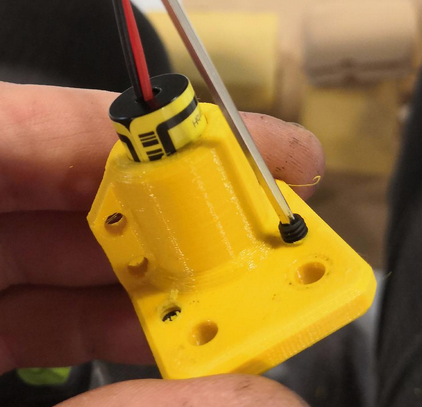](https://wiki.stadtfabrikanten.org/uploads/images/gallery/2026-06/1S62PusEQzlG7L0D-grafik.png) [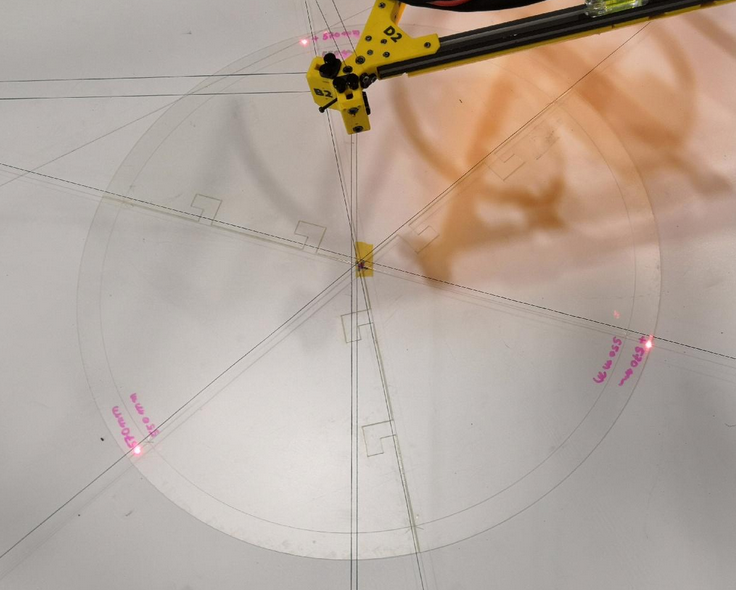](https://wiki.stadtfabrikanten.org/uploads/images/gallery/2026-06/YAL535cmeU6yaXUj-grafik.png) [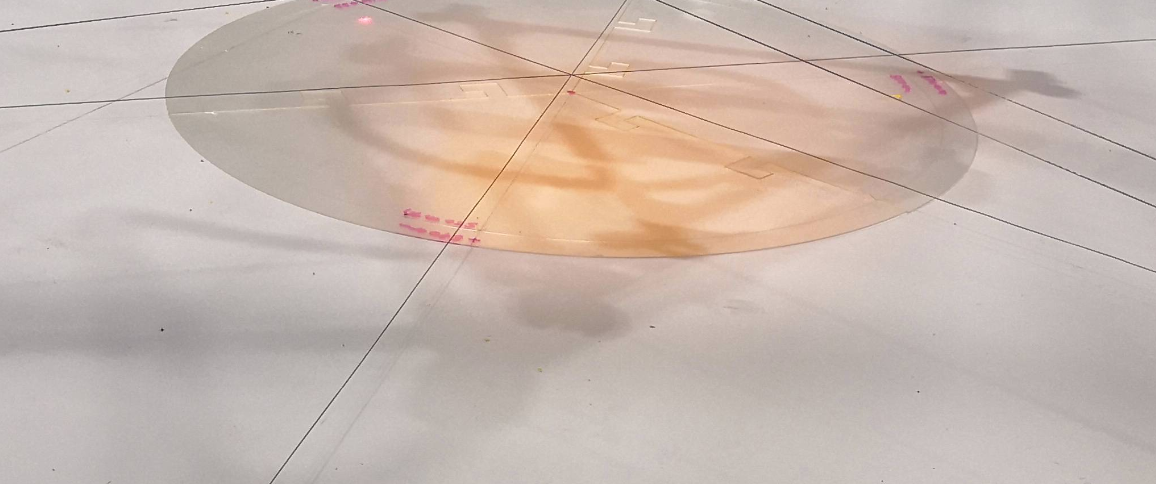](https://wiki.stadtfabrikanten.org/uploads/images/gallery/2026-06/uZHliEdKmRo07XTe-grafik.png)
## II. Setup steps for the effector (mover)
### Wire up the retraction cable management system
Trikarus uses a very thick main cable with a lot more weight. To compensate the weight effect we wire up a self retracting dyneema cable system (see [V2 Silent VR Cables by KIWI](https://old.stadtfabrikanten.org/pages/createpage.action?spaceKey=TH&title=V2+Silent+VR+Cables+by+KIWI&linkCreation=true&fromPageId=101974205)).
1. Wire up the six retraction cable units
1. Put the first unit next to the B anchor where the main cable leaves the ceiling plate and attach it to the main cable. Keep around 50 cm distance between the mounting point and the ceiling plate
2. Attach all other units to the main cable and leave 50 cm space between each mounting point. Follow the winding direction of the main cable
3. The last unit will be attached at the mounting point of the really first unit because one retraction cable unit can only handle a maximum of 180 cm elongation
2. zero out the small silent stoppers - we do not need them
3. rotate the rubber fixations at the main cable until the face inward. This reduces possible effect of collisions with the movement system
[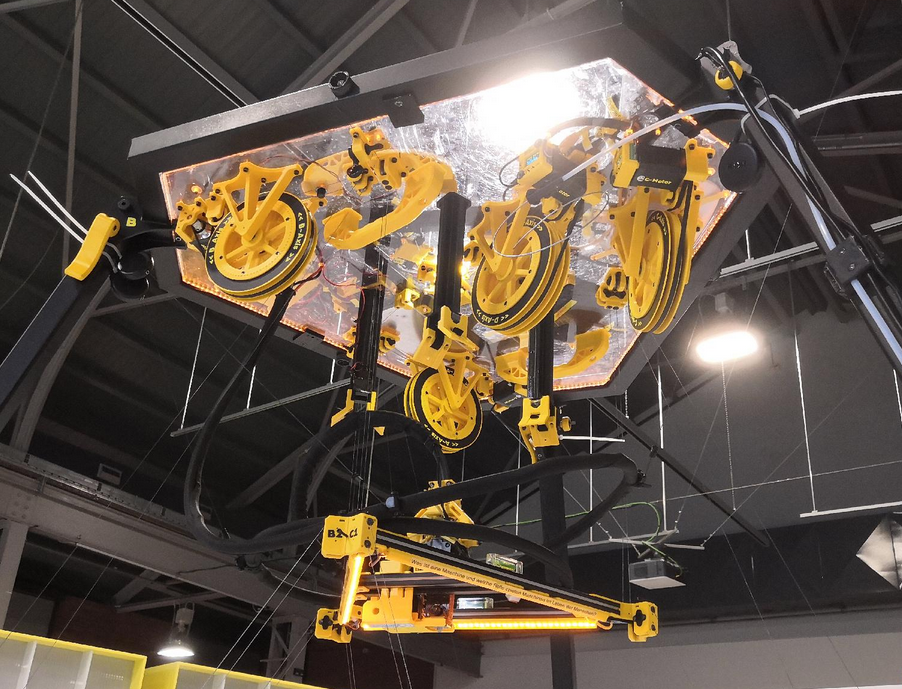](https://wiki.stadtfabrikanten.org/uploads/images/gallery/2026-06/NtVyj7OLrmXBWmGt-grafik.png) [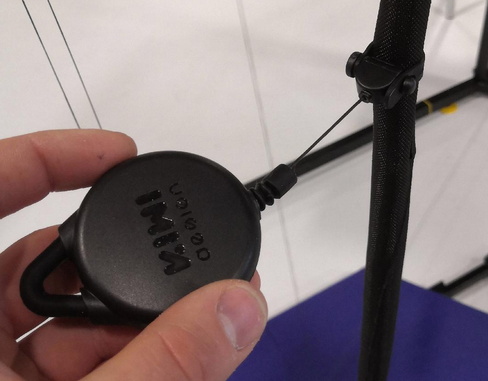](https://wiki.stadtfabrikanten.org/uploads/images/gallery/2026-06/zlRzlMMLnl6kAXbe-grafik.png) [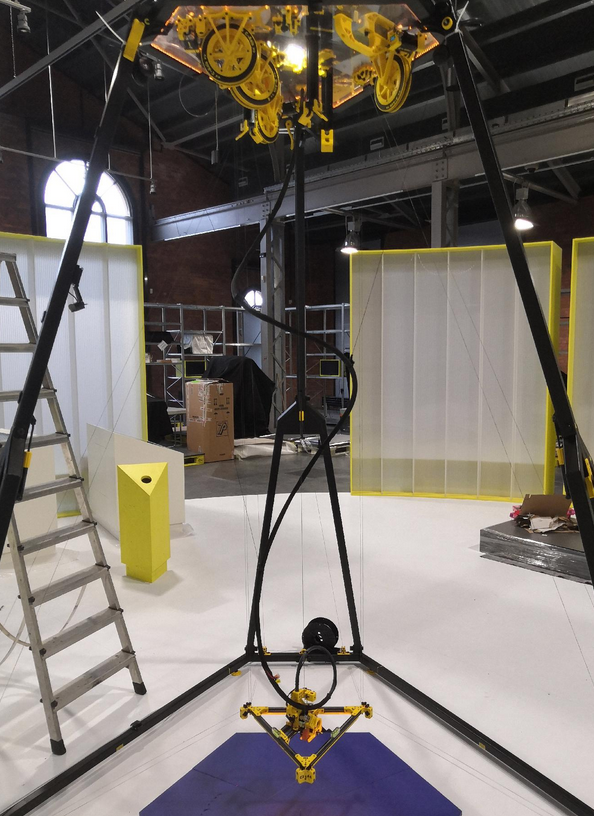](https://wiki.stadtfabrikanten.org/uploads/images/gallery/2026-06/PDlaQY7ZWGnorzDT-grafik.png) [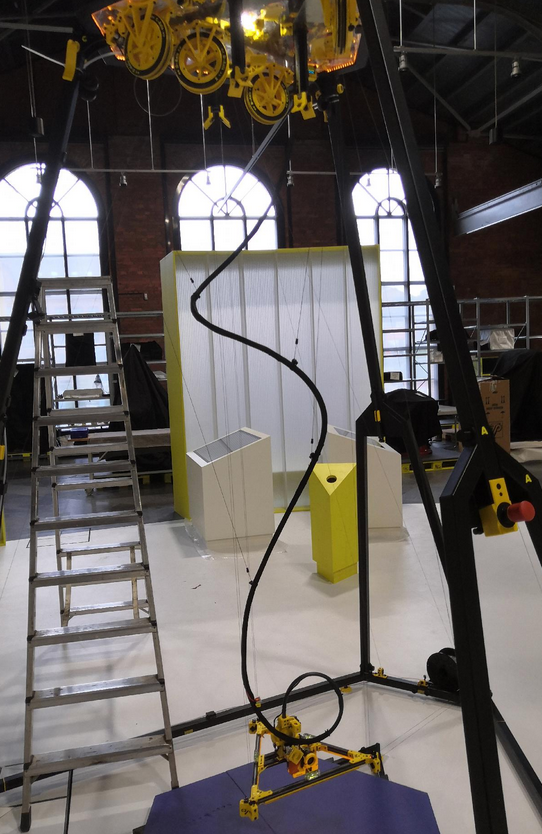](https://wiki.stadtfabrikanten.org/uploads/images/gallery/2026-06/0cq55UdNijuNn0qF-grafik.png) [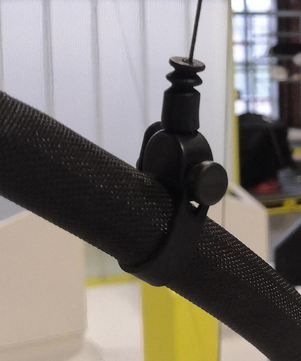](https://wiki.stadtfabrikanten.org/uploads/images/gallery/2026-06/n1TTzeXHg2aKaXjE-grafik.png)
### De-spool unrequired D line amounts
The effector is mounted by three lines, which are all on the same spool (D spool). Due to different winding, the height or the tilt angle (or the horizontality) of the effector can always change somewhat. It's a good idea to have some more line on the spools to have some backup but too much line is bad for the movement system. For this reason, the followup calibration should be done with as maximum as possible despooled lines. To have maximum quality of the behaviour of spooling up /down lines while printing, its good to leave only the amount of line on spool wich is required to keep Hangprinter fully operational in it's build volume.
Note: our system has got 28 windings for each coil on sools A, B and C. That's more than enough for our dimensions.
Move effector down (Z direction)
By sending an according move command the D-axis is going to lower the effector towards the floor. Move it until it hovers a few centimeters above the floor. Note that the ABC lines are dropping down to the bottom because they are not handled automatically by the drives. We do not perform classical XYZ movements in this step. We only move the D drive down. The ABC lines will loose tension while down movement until they are nearly flat on the ground. Please have close look that the lines do not jam with other elements like maintenance tools. In regular printing mode that might also be the print platform which could lead to line jammings. If the effector is moved in the wrong direction, the configuration should be checked. The direction of rotation of the motors can be changed in one of the following three ways: config.g in RepRap firmware, physical wiring of the phases or configuration in the Smart Stepper firmware. You can also pull the effector manually without any GCode movement. Then you will need to power down the machine or power off the D drive Smart Stepper or set the D drive Smart Stepper into "torque 1" mode.
```ini
G0 H2 D-250 F500 ; repeat until the effector is at the desired height - 250 mm each. It does not yet matter if the moved height is not exactly what you entered as long as your effector moves down to the floor until it hovers some centimeters above
```
[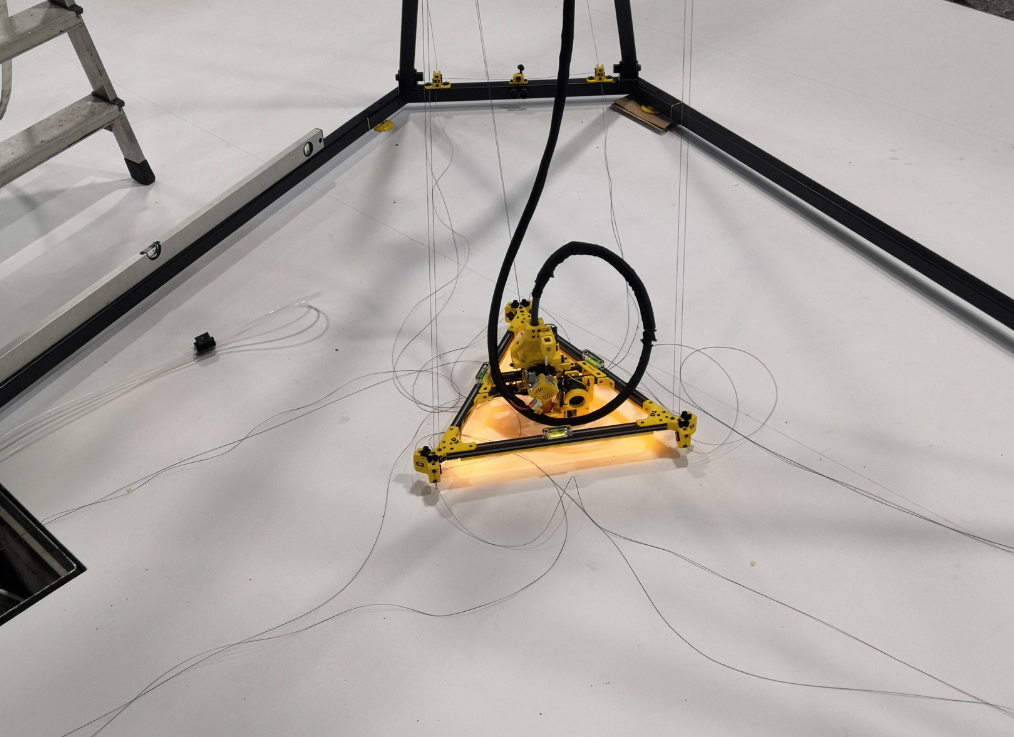](https://wiki.stadtfabrikanten.org/uploads/images/gallery/2026-06/k8QI04iA6ADWRDrA-grafik.png)
Pull all the line trough them while spooling down D drive. The effector should be kept at the bottom of on of the frame corners all the time. So you simulate the maximum possible required D length in normal printing operation circumstances. Leave at least two full windings on the D spool to have some good grip (less force on the blank knots).
[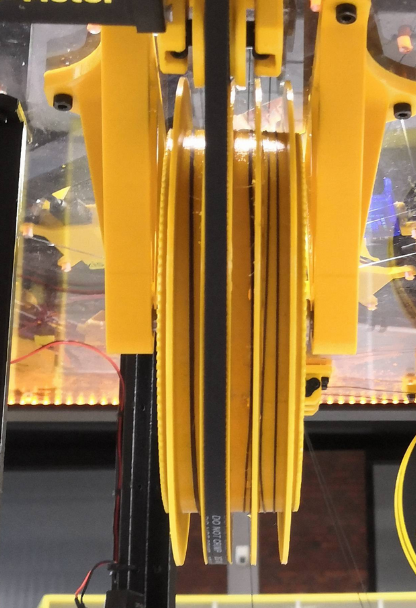](https://wiki.stadtfabrikanten.org/uploads/images/gallery/2026-06/xkUGoXMwuEh3aSL3-grafik.png) [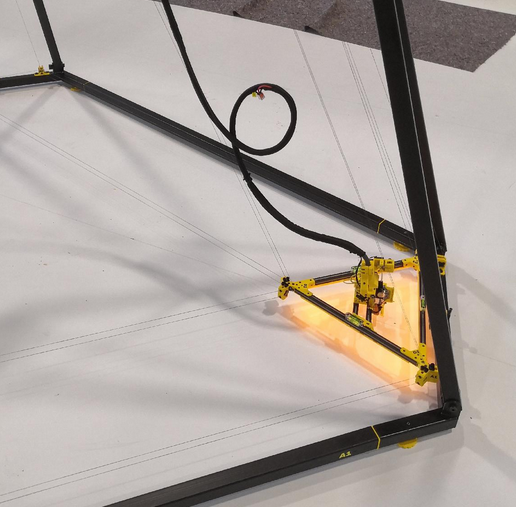](https://wiki.stadtfabrikanten.org/uploads/images/gallery/2026-06/yJD9LibNYGzJMxeQ-grafik.png)
When done re-tie the guitar tuner trimloks for knotting. Put the unrequired segment of line into the little line reservoirs (magnetic winders).
[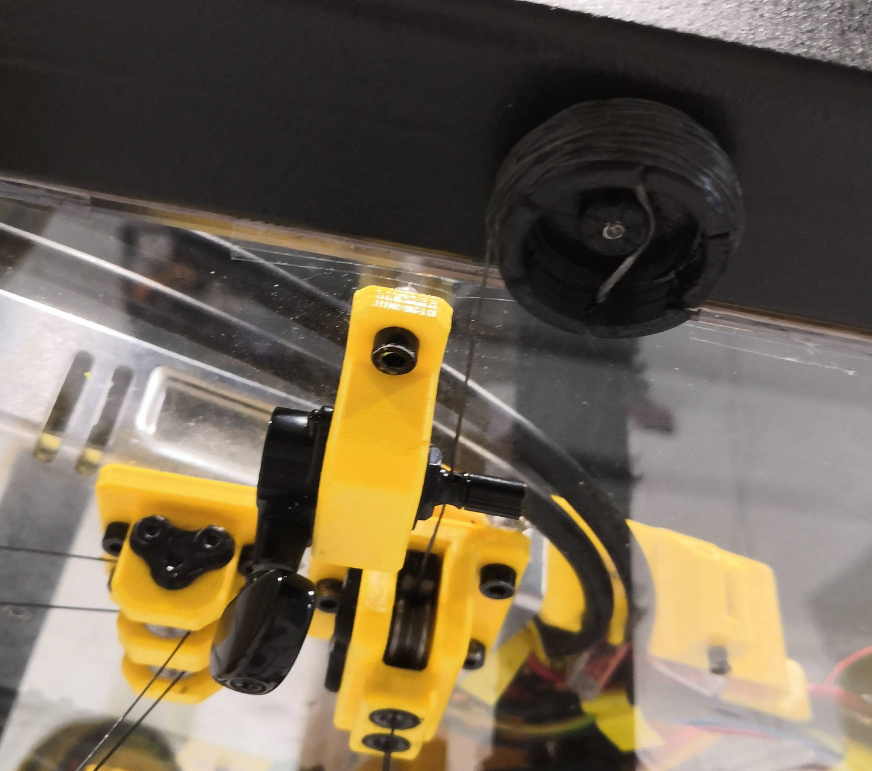](https://wiki.stadtfabrikanten.org/uploads/images/gallery/2026-06/yPctz7AWZta2fhmE-grafik.png)
### Equalizing the D line lengths (fine tuning)
Doing this step the effector is not level yet but you configure one of the hard requirements: lines D1 = D2 = D3. You will reach the condition that ceiling plate and effector are parallel to each other. But because the effector tilts around itself around Z axis we have make them parallel without dangling line and without any horizontal shifting first. So we need to wind up the effector back to top again until it sits in the three brackets (transportation arm fixations).
[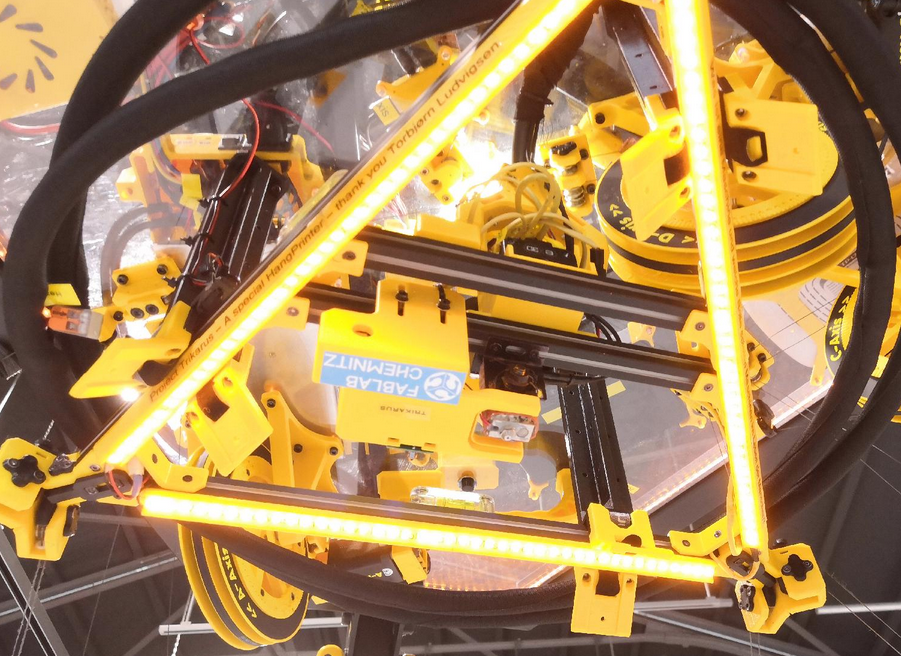](https://wiki.stadtfabrikanten.org/uploads/images/gallery/2026-06/5PFh08mQBSwUrnIe-grafik.png)
The effector needs to sit in the arms really tight. We use clockwise turning at the guitar tuners to tighten and counter-clockwise turning to losen the lines. Clockwise turning means when viewing at the guitar tuner's tuning wing points to your face (same rule is used for bottom anchors!). We are now going to "tune" all lines that they have same tension. We can check this by "playing" them like guitar strings. If they all sound equal then the tension is the same. Please not that the limit switch might create an extra offset between effector and fixation arm which should be nulled before doing this step.
[](https://wiki.stadtfabrikanten.org/uploads/images/gallery/2026-06/0y4JaCMQfGx3OsoF-grafik.png)
### Validate distance between nozzle tip and ceiling plate
While the effector is in top position it's good idea to validate some measurements. Move the effector to maximum Z position and take a ruler to measure the distance from nozzle tip to ceiling plate. This should give nearly or exactly the same values as the pre-set constants from theory: $h\_4 + h\_2 - h\_1 = 63.5 mm + 190 mm - 32 mm = 221.5 mm$
We measure this again by hand because it's useful and because it can change if you do something with the nozzle (changing to another for example).
### Remove effector tilt around Z axis and finalize frame levelness
The final horizontal alignment takes place using the three bubble levels installed on the effector, the three laser dots from the ceiling module and the machine frame.
There is a poisonous tilt around the Z axis. Omit self-twising misalignments which may come frome a effector which is idling perfectly horizontally but twists (around Z axis) by unequally created forces from effector's center of mass or unequal line lengths at the bottom anchors (if installed already). Due to the doubled lines this problem is reduced but still possible. Trikarus effector twists a lot because the extruder unit is heavy. The nozzle is in the center of the effector but the mass is not. You can see this in the photos. **However, the self-rotation of the effector has bad influence on the line equality for the anchor line pairs ABC and the self-tilt also makes it impossible to get a horizontal level effector and therefore no level ceiling plate. So this step is really import. In short: the three D lines must be totally vertical.**
[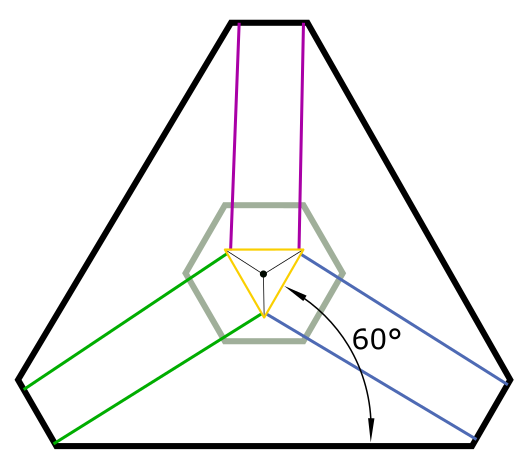](https://wiki.stadtfabrikanten.org/uploads/images/gallery/2026-06/FY8WwfyzwD7omddG-grafik.png) [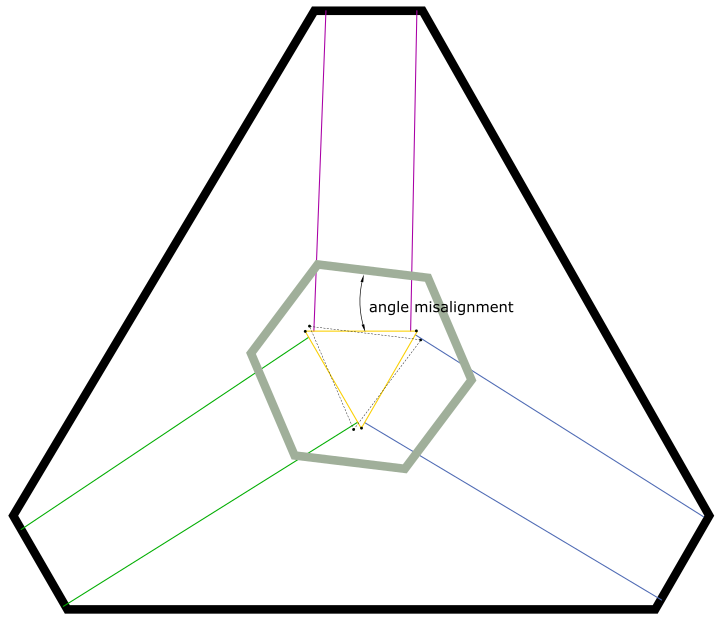](https://wiki.stadtfabrikanten.org/uploads/images/gallery/2026-06/y1vMsdpcnq1VRurT-grafik.png)
move effector to the ground
[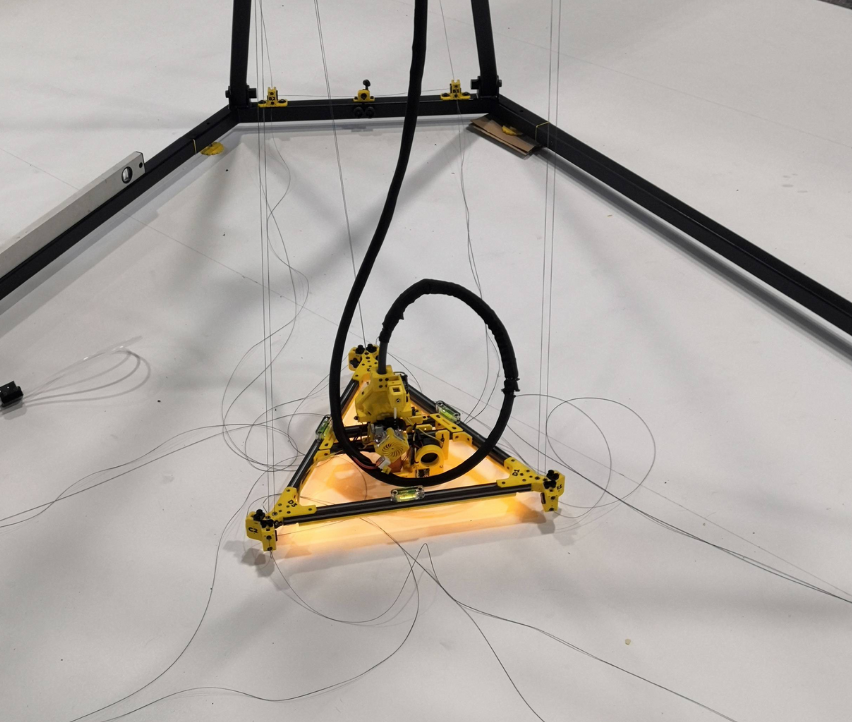](https://wiki.stadtfabrikanten.org/uploads/images/gallery/2026-06/S4NxvSii4RHFuo0I-grafik.png)
put some foam pieces below the effector corners so it cannot hover freely. We want to adjust it's rotation while using the laser dots. In case the lasers were correctly preconfigured and the laser screws on the effector have correct distance, the laser light will hit the surface of the screw heads. You need to screw out the effector corner screws until they match with the laser spots. The positive effect using the laser pointers is that they project the light also directly below the screws so they appear on the ground or print platform. We can always use the laser lights to put back the effector to X0 Y0 - even at higher Z positions. This can be really helpful for resurrecting failed prints.
[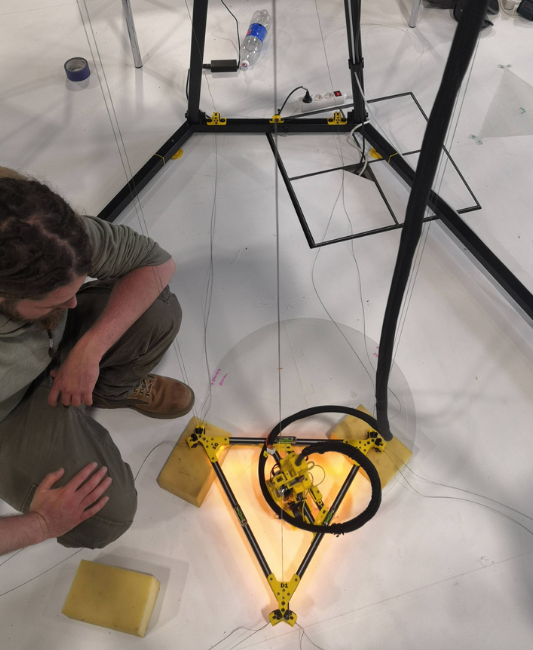](https://wiki.stadtfabrikanten.org/uploads/images/gallery/2026-06/7jSe8OgE6jaSkUGw-grafik.png) [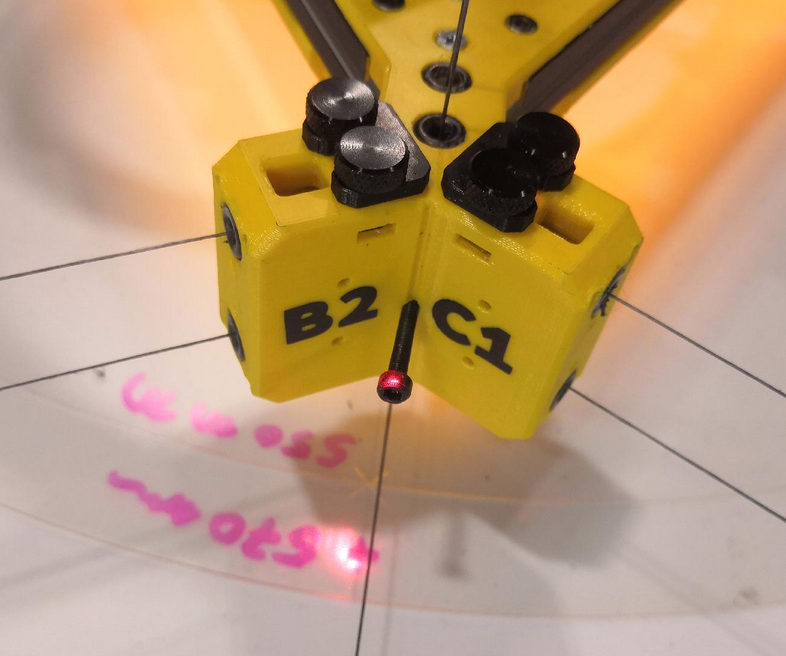](https://wiki.stadtfabrikanten.org/uploads/images/gallery/2026-06/EG2NfXDZKtnKzG2T-grafik.png) [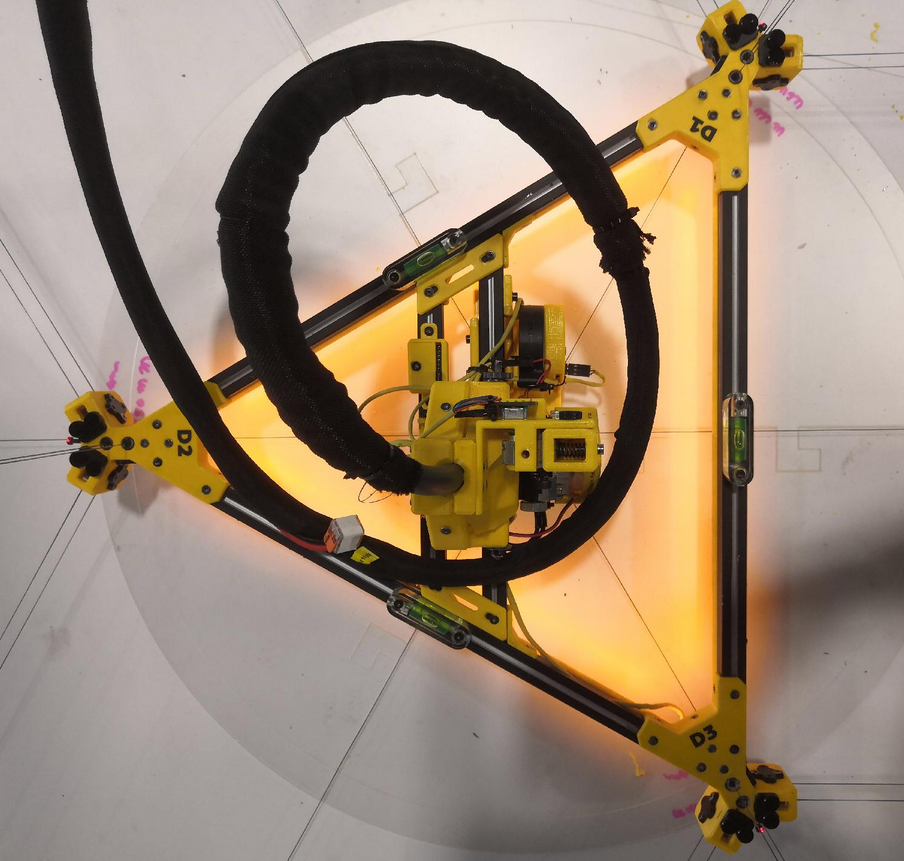](https://wiki.stadtfabrikanten.org/uploads/images/gallery/2026-06/jkjC1esFHm5QWChc-grafik.png) [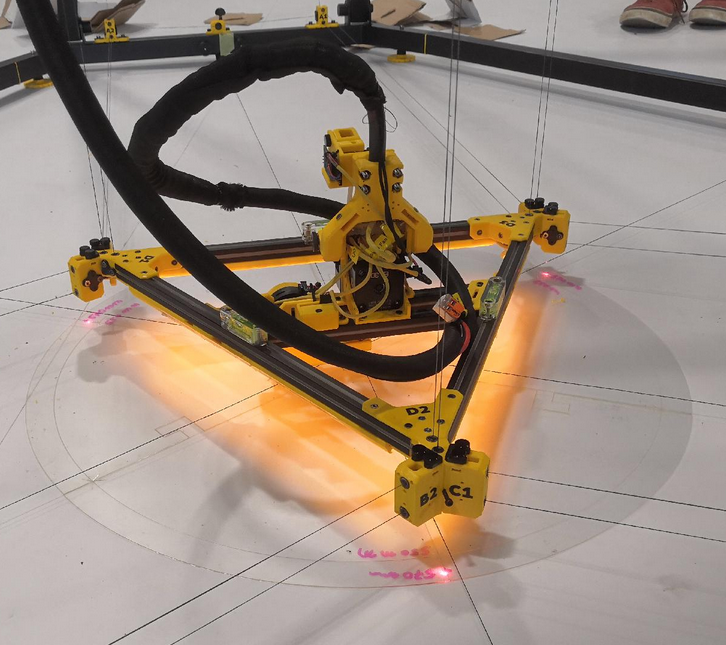](https://wiki.stadtfabrikanten.org/uploads/images/gallery/2026-06/feST3CqkxWQ7aIoK-grafik.png) [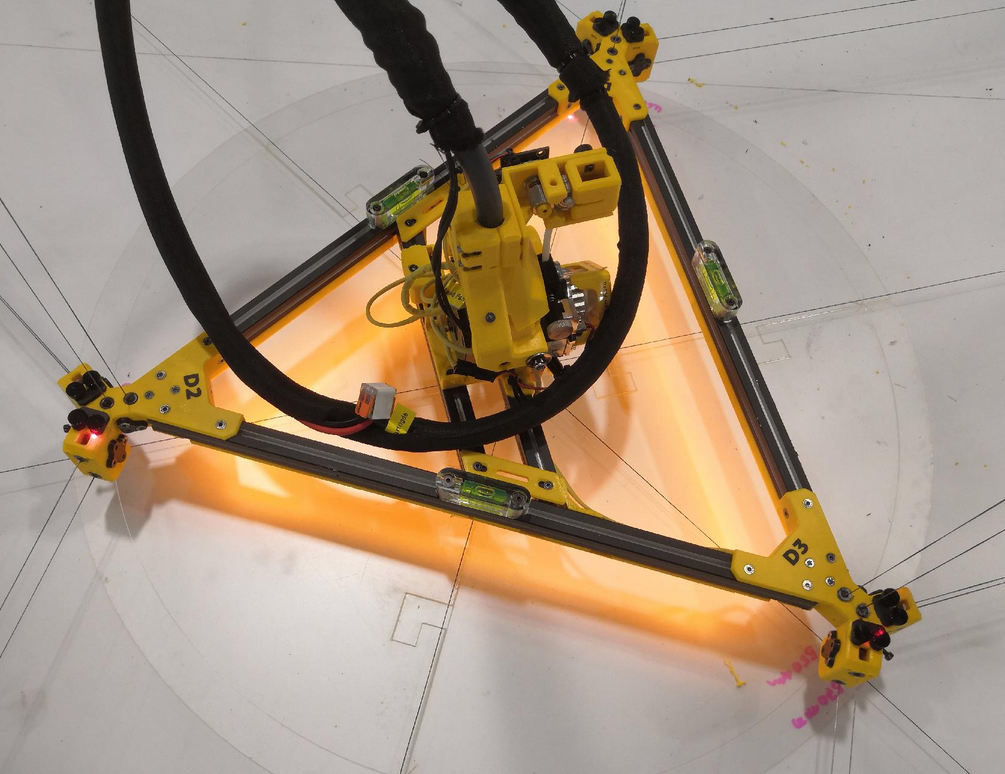](https://wiki.stadtfabrikanten.org/uploads/images/gallery/2026-06/s7aFFLkjywXw4kbe-grafik.png)
adjust the ceiling plate guitar tuners again until the effector spirit levels are fine
[](https://wiki.stadtfabrikanten.org/uploads/images/gallery/2026-06/6YLntFOs7ixsXP78-grafik.png)
### Adjust $XY\_{Offset}$ to align effector axis and nozzle axis (zeroing out offsets)
The center of the effector is not the same as the center axis of the nozzle. There might be an XY offset between those two vertical axes or you can eliminate that offset by adjusting your hotend installation on effector. If your effector has two or more tools (extruders or whatever) use the effector axis instead of nozzle axis to do later alignments. For calibration of the machine it's essential to do the best on eradicating misalignments or redundant / unrequired measurements. To eliminate possible issues it's best practice to match nozzle axis with effector axis (Trikarus is a single tool machine). The Aero Extruder mounting assembly is designed to be reconfigured. If this was not already done while assembling the effector, you should it do while setting up the printer environment. The following drawings show the orientation of the effector in the coordinate system, the A1/A2, B1/B2, C1/C2 pivot points and the offset of the nozzle. A well placed nozzle can reduce errors which can appear on slack lines while printing (self-rotation around Z axis). Note that this step is not required for finding the origin on the print platform. To place the effector into origin we use the laser pointer spots instead only.
[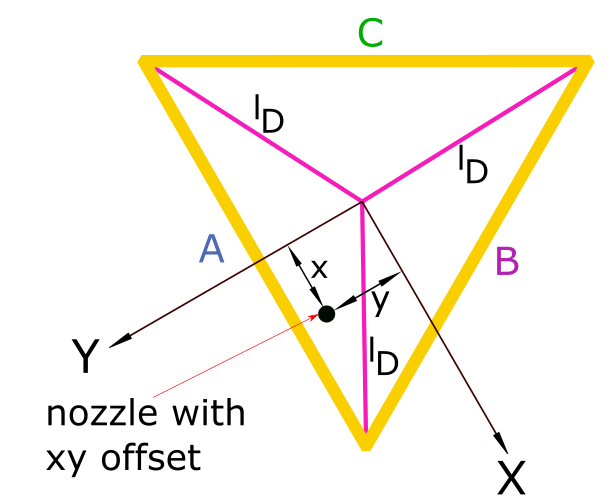](https://wiki.stadtfabrikanten.org/uploads/images/gallery/2026-06/Oi4XtYHRLv9W0wMF-grafik.png) [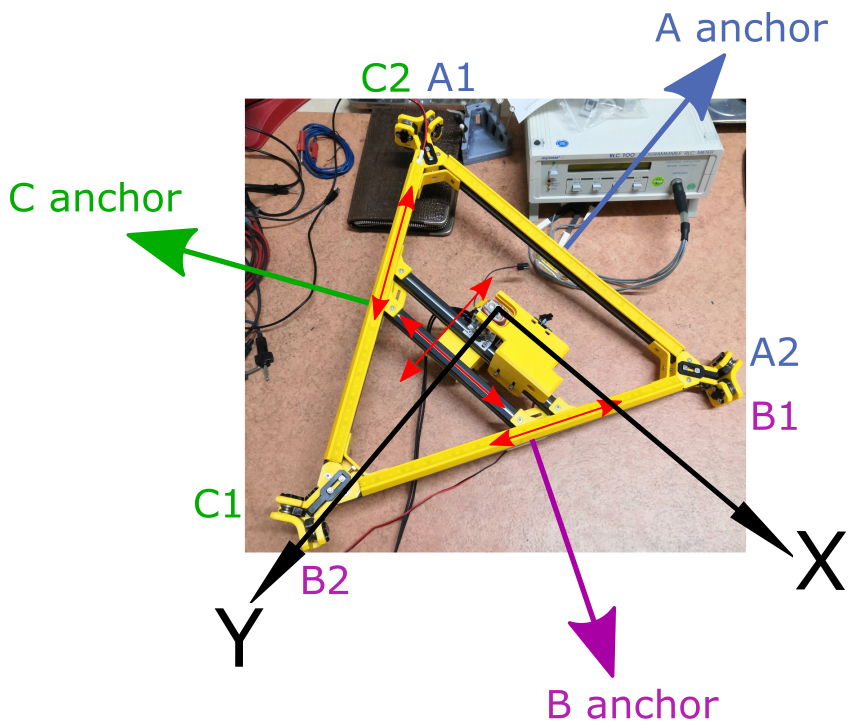](https://wiki.stadtfabrikanten.org/uploads/images/gallery/2026-06/z4jMzvhIuxC7fsO4-grafik.png) [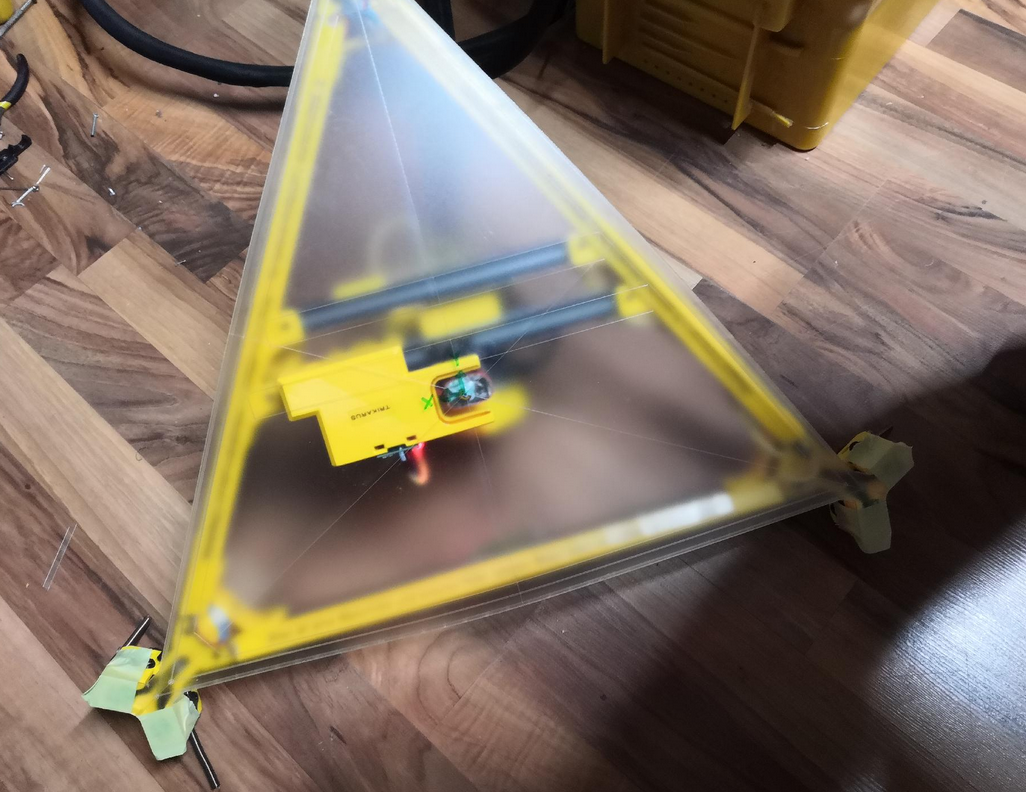](https://wiki.stadtfabrikanten.org/uploads/images/gallery/2026-06/I9xNsCyqEeVaJwrp-grafik.png) [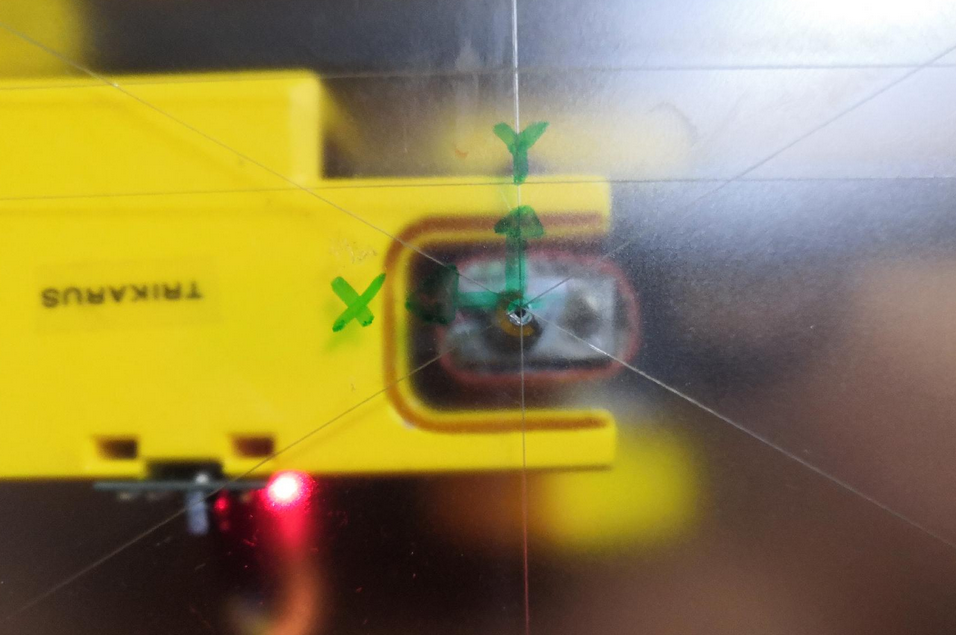](https://wiki.stadtfabrikanten.org/uploads/images/gallery/2026-06/tz24joQAJ0uUcgxo-grafik.png)
### Get the maximum movable Z height
For creating a good slicer profile it's recommended to read the maximum movable Z height for the effector. This depends on the frame or room where the Hangprinter is mounted, and it depends on the configured height of the print platform (honoring platform additions like tapes or sprays). Please have a look at the drawing in general overview.
1. To find out the maximum Z height just lower the effector until the nozzle tip touches the print bed in origo (if that's not already the case).
2. Null the Z value `G92 X0 Y0 Z0`
3. Raise the effector to the ceiling. Moving into maximum will raise the encoder error because tension will build up if the effector stucks. That's exactly what we want in this case.
`G0 H2 D250 ;repeat until effector stops moving and Smart Steppers react on torque overload.`
4. Interprete the values correctly:
1. read the encoder values of the D axis Smart Stepper
1. geterror()
2. readpos() - this needs to be recalculated by line buildup compensation and spool radius
2. read the recent Z value from current position: `M114 ;read current position`
3. compare with M114 value and readpos() value. You may also use a laser distance meter to check rough value.
### Fine adjustments of ABC lines orientation and de-spooling of unrequired line segments
To have maximum quality of spooling up lines while printing, its good to have only the amount of line on spool wich is required to keep Hangprinter fully operational in it's build volume. To do this release the guitar tuners and pull all the line trough it while spooling down and while effector is at the bottom (print platform). When done re-tie the guitar tuner trimloks. This step is the same like D lines which already happened while building up. Put the unrequired piece of line into the little line winders (reservoirs). Do this step while the print head (nozzle) is touching the origin X0 Y0 Z0
- the position of the six ABC anchors must be adjusted so that the following requirements are met
- the anchor pairs A1 + A2, B1 + B2 and C1 + C2 are each parallel to the effector
- line pairs have same length (A1=A2, B1=B2, C1=C2). The line lengths per anchor pair have to match exactly as much as possible. The anchors can be rotated and moved losening or tightening the screws at the frame. We can use the laser pointers illuminating the horizontal effector screws to validate that the effector is still in un-tilted position while we adjust the line lengths.
- each anchor pivot point pair has to have the same Z coordinate. For example if A1 Z coordinate is lower or higher than A2 Z coordinate this will mean that the line length of A1 ≠ A2. If the floor and/or frame parts are bumpy/uneven you will have to ensure "clean" Z height per anchor the mechanical way first. See also [Building basics, checks, maintenance](https://old.stadtfabrikanten.org/pages/viewpage.action?pageId=101974344)
- you can use tape and helper lines to perform measurements and temporary markings
This step is required to get matching line lengths by knotting the lines in the guitar tuners and adjusting the position of the anchors. Using the guitar tuner's tune function does not help to apply proper tension for each drive because every time the drive loses power it will lose it's torque. We use the tuners basically just for quick knotting of the lines. For having more secure knots we can apply some windings on the shafts of the tuners. We use clockwise turning to tighten and counter-clockwise turning to losen the lines - same way like already done at the ceiling module. Put remaining line on the magnetic line winders.
The lines cannot tear simply by tensioning them ([49.9 kg per rope pulling force](https://stadtfabrikanten.org/display/HAN/Angelschnur+FireLine+Smoke+270m+0%2C50+mm+von+Berkley) necessary). Rather, the stepper motors lose steps beforehand or the closed loop stepper motor drivers give way (maximum holding force exceeded). The maximum holding force for the used [Building basics, checks, maintenance](https://old.stadtfabrikanten.org/pages/viewpage.action?pageId=101974344) are 8.2 kg.
This step needs to be done when Smart Steppers are enabled/active with simple PID mode. Do **not** put them in torque mode for this step. Otherwise it may happen that you will need to catch moving lines or to fix messed up lines from de-spooled drives because torque mode without knotted lines results in endless turning drives.
The guitar tuner acts like a knot between the line pairs. If the lines de-spool unequally it will mean uneven forces. **While printing you might figure out that there are lines which have completely no tension.**
Floss each line pair A1+A2, B1+B2 and C1+C2 in the related guitar tensioning mechanism (use the small trim lock scew to fix them - marked with red circle in the following photo)
[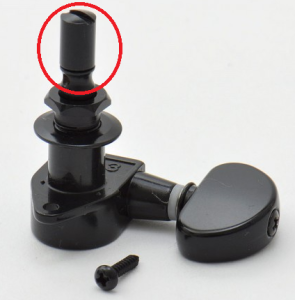](https://wiki.stadtfabrikanten.org/uploads/images/gallery/2026-06/zgvF8thTq4Cya3He-grafik.png)
"Play" the two lines <A or B or C>1 and <A or B or C> 2 like guitar strings and listen to them. Or try to use a guitar tuner. The frequency or "the sound" of both strings should be the same. Then they have the same length!Put remaining line on the magnetic line winders
[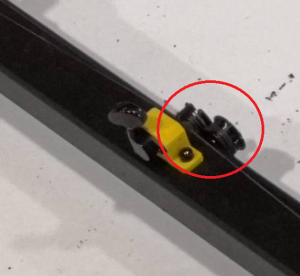](https://wiki.stadtfabrikanten.org/uploads/images/gallery/2026-06/USqk28NGypejsvMM-grafik.png) [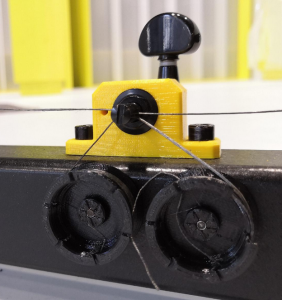](https://wiki.stadtfabrikanten.org/uploads/images/gallery/2026-06/EHBR3pfhHK8HA1BA-grafik.png)
**Notes on the knot:**
Ideally for ABC drives you would have one long line each which is fed through the motion system parts. But most Hangprinters including Trikarus include multiple coils. So for example there is not one A line but an A1 and an A2 line. While the printer moves it always will happen that one of the line's tension drops to zero. This could be reduced if the knot between A1 and A2 could float (moving freely) because the tension would better normalize between then. The tension per spool changes due to unequal line buildup even if A1 and A2 are on the same spool with the same motor. It would not help to knot A1 and A2 separately. It would just give some better handling for (un)mounting the lines.
### Clean up the spool winding quality (fixing line salad at the drives / optimize line buildup)
Before we continue with final measurements we re-adjust the lines on spools. Previously they were put on the spools by hand. Now we can use our electronics to make the best winding we can get. Additionally it may happen (often) that you lose lines because lines get slack while printing and the winding fails. It often causes manual troubleshooting at the drives. Then you need to climp up to the ceiling and fix it.
[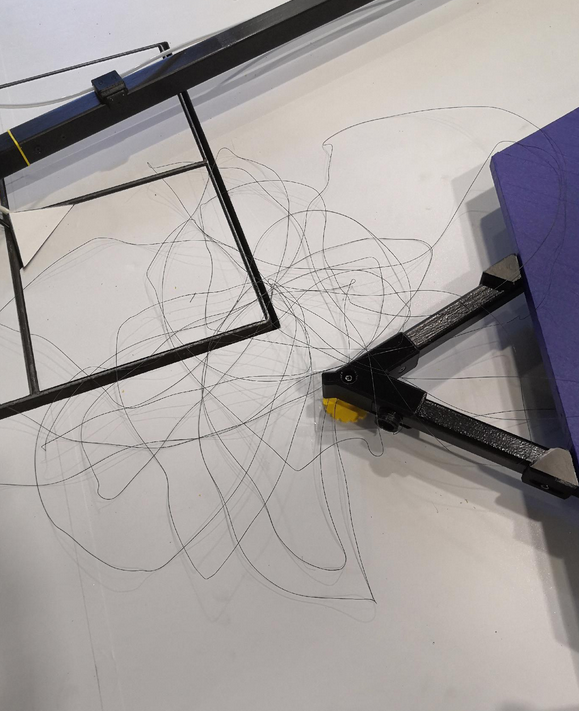](https://wiki.stadtfabrikanten.org/uploads/images/gallery/2026-06/HEwGKg6Bvj07rdAj-grafik.png)
To adjust or fix problems easily
1. smoothen the failed drives using /**opt/sms\_modes/sms\_smooth\_\*.sh** scripts
2. unwind the spool completely by hand. If you have luck you must not climb
3. let the spool wind up again using /**opt/sms\_modes/sms\_torque\_\*.sh** while keeping the lines in your hand. This way the drive will perfectly spool up (important to have best line buildup)
### Calibrate the IMU (MPU 9250) at the effector
Once installed and leveled physically the IMU should be nulled to have some clean reference output for correct monitoring and calibrating tasks.
TODO
### Move the effector back to the top
Now the effector should be moved up to the maximum height so that there is enough space to set up the printing platform. This can be done by
- GCode `G0 H2 D250 F500 ; repeat until the effector is at the desired height - but at least about 2 meters above the floor.`
- or with **torque zup mode (/opt/sms\_modes/sms\_zup.sh)**.
## III. Setup steps for printing platform
The print platform consists of 3 equal segment pieces which are small enough to be put into the back of a regular car (for transport). To keep it as simple as possible it has a form of an easy shape to produce with a plunge saw or cutting or milling machine. This is a lower cost but solid and plane solution. It's also not too heavy but heavy enough to keep in place. Other possible materials are regular wood, Multiplex, CDF, MDF, HPL-F, flagstone, glass, aluminum, circuit board, PET plate, PEI plate or Firepanel. Ideally you choose a material with low flammability.
### Preparing the print platform (apply adhesion promoter)
Trikarus uses an IR probe for Z level sensing. Usually they have high precision when used with opaque bed surfaces, medium or low with transparent surfaces. Transparent surfaces (glass, PEI etc.) must be backed with a matt black surface and must not be coated with glue, hairspray etc. The platform is opaque and can be masked with blue tape for example. You may also use other trivial "standard" products like classic hair spray or glue stick, or more specialized stuff like 3DLac or Magigoo. There are a lot of different materials and adhesion types possible. In our case we use 19 mm thick chipboard with blue painter's tape on it (to give a cooler look, to better peel off the printed parts and to protect the bare surface). You need about 0.31 m² of tape per segment and per side to wrap it. So in total you have 6 \* 0.31 m² = 1.86 m² (upside and downside) surfaces to cover. On a regular tape roll there are about 2.4 m² so you will need more than the half of a tape rolls. Use a roller or squeegee to apply the tape.
**Print platform position and orientation - centering print bed axis (if there is one) and nozzle axis (alignment)**
If your print bed is some random piece of platform (for an example of a random platform like Torbjørn does look the following photo) with no regular or symmetric shape you cannot really align some axis. But you can mark the point where nozzle tip on print platform is in X0, Y0, Z0. Some of the following steps cannot be applied to a such a platform.
[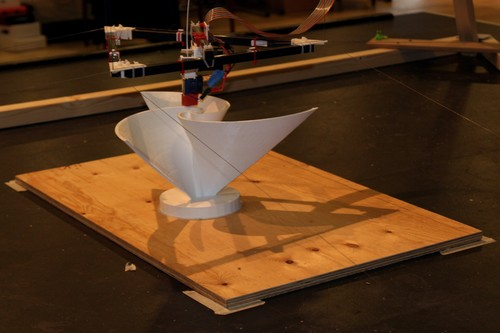](https://wiki.stadtfabrikanten.org/uploads/images/gallery/2026-06/jdvuOq2oktmyDKfm-grafik.png)
### Connect platform parts
Similar to the base frame, the printing platform can be connected with screws. It consists of individual parts so that it is easier to transport by car and by human. The platform frame is built directly into the printer frame already set up.
[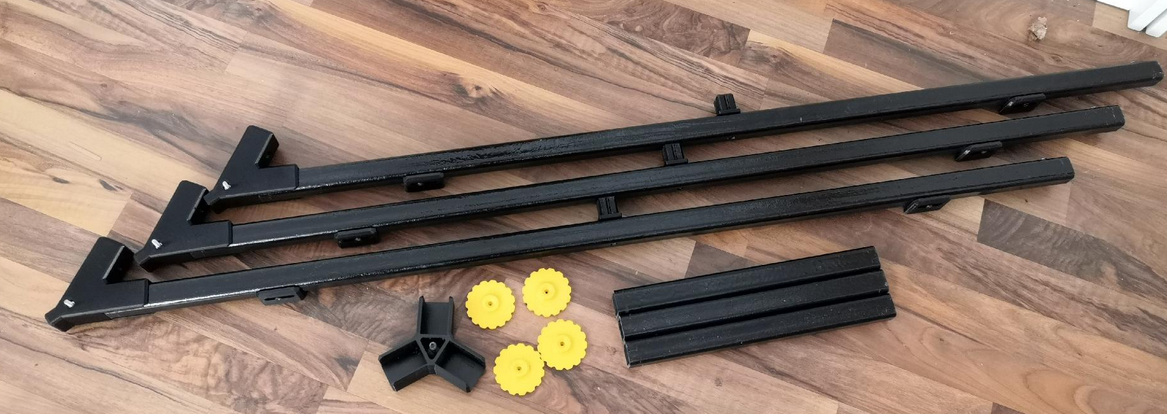](https://wiki.stadtfabrikanten.org/uploads/images/gallery/2026-06/JWvQgZLKWruAZjPy-grafik.png) [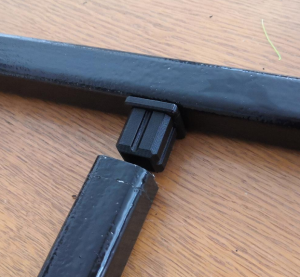](https://wiki.stadtfabrikanten.org/uploads/images/gallery/2026-06/apDFYoNuQabZODp6-grafik.png) [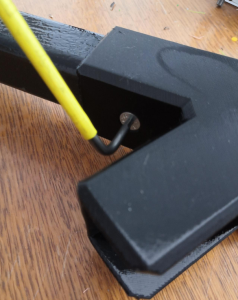](https://wiki.stadtfabrikanten.org/uploads/images/gallery/2026-06/O9zWrlTwzAjiLxpX-grafik.png) [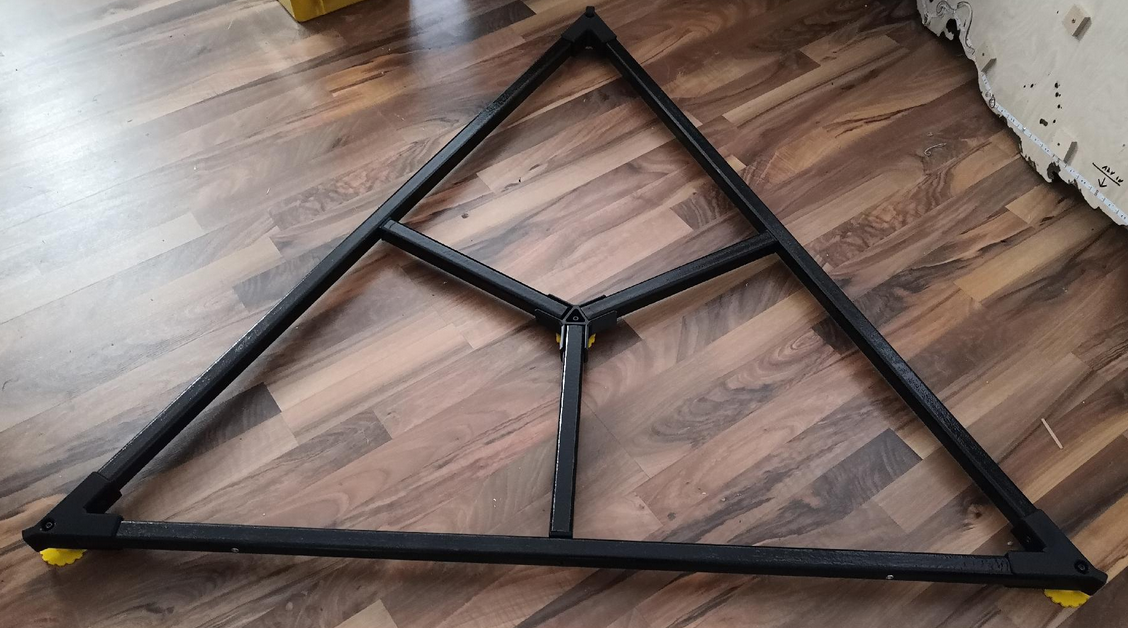](https://wiki.stadtfabrikanten.org/uploads/images/gallery/2026-06/gyLWlaK9QDT92FId-grafik.png)
1. Clamp straight profiles into the corners and screw together
2. Place platform feet underneath
3. Insert short straight profiles on the side lugs of the long straight profiles and insert them in the center cross
### Align the print platform and leveling
The platform should be located in the middle. We can make use of the three lasers which point on the surface of the middle beams. We also also make use of the premarked center point and put the center feet of the print platform on it. Adjust all four screws until the platform is level over complete beam surface structure.
[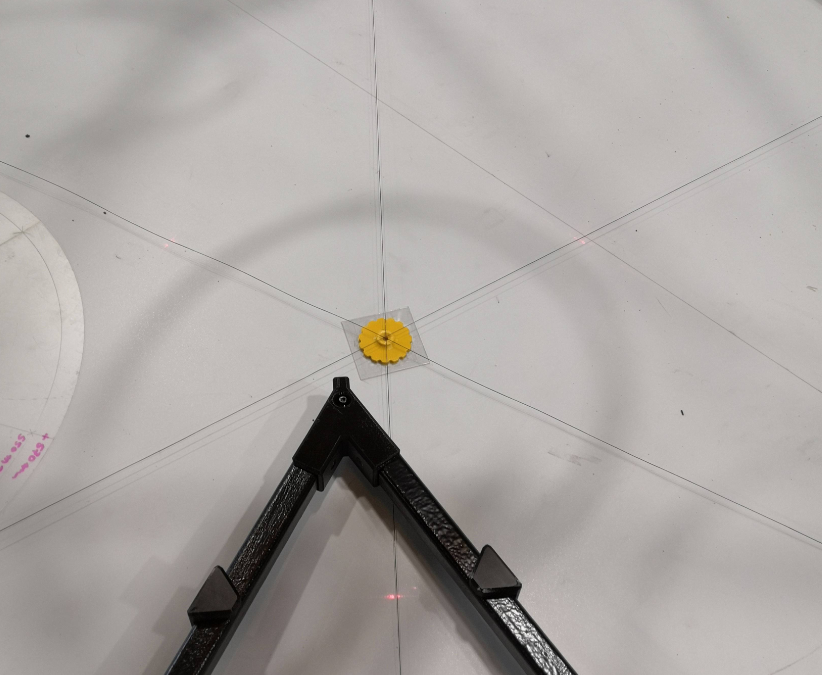](https://wiki.stadtfabrikanten.org/uploads/images/gallery/2026-06/mxmpc4qRAm7WBl6B-grafik.png) [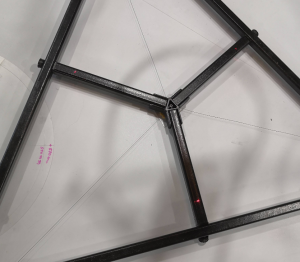](https://wiki.stadtfabrikanten.org/uploads/images/gallery/2026-06/4hi0XPJn2Xxi9Ohh-grafik.png) [](https://wiki.stadtfabrikanten.org/uploads/images/gallery/2026-06/aSdaqtuwrDwM3EdS-grafik.png) [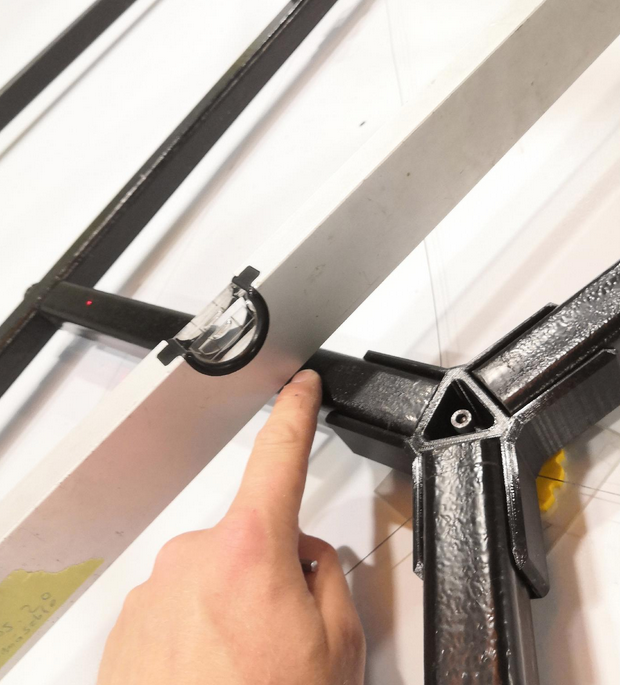](https://wiki.stadtfabrikanten.org/uploads/images/gallery/2026-06/1JZgaR1zZh8hNSKb-grafik.png) [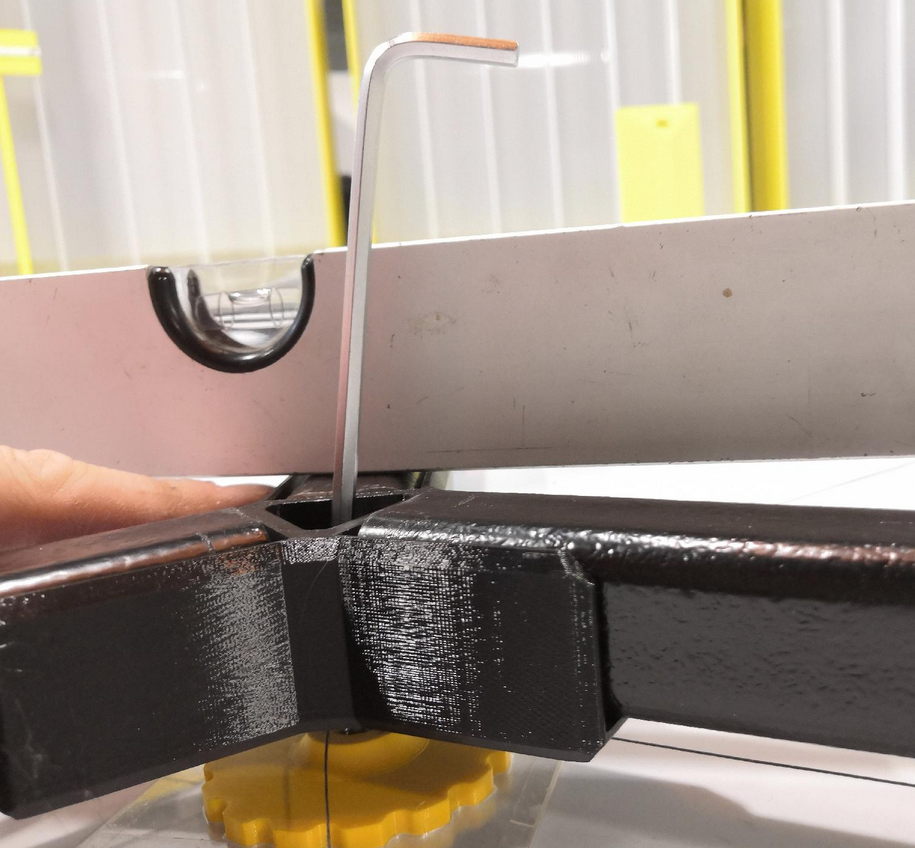](https://wiki.stadtfabrikanten.org/uploads/images/gallery/2026-06/DjZtGuVMAW7PDBoI-grafik.png)
### Place the 5-point polygon platform segments on the frame and check levelness again
- Place 3x platform elements. Everything should attach flatly and nothing should wobble
- If individual segments wobble or have an uneven surface tilt, small pieces of tape can be put at the bottom site to compensate for this
- configure the horizontal six platform adjusters to fixate the platform from all sides (prevent lateral displacement)
- re-adjust the platform orientation according to the laser spots and the circular template sheet. The middle is formed by the three inner bed segment edges
- If the platform was levelled correctly and if the ceiling module is really horizontally the laser dots should perfectly match the markings on the PETG template.
[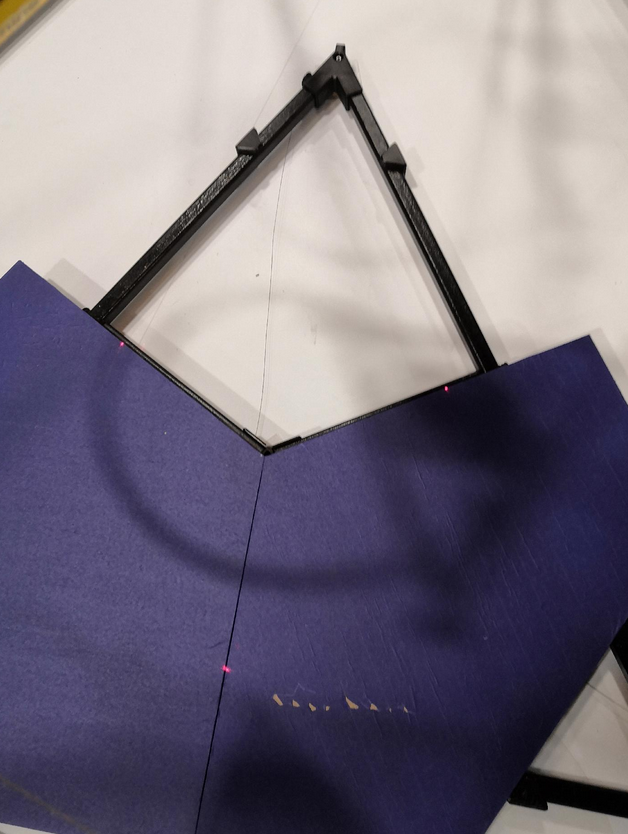](https://wiki.stadtfabrikanten.org/uploads/images/gallery/2026-06/mT3xAn2rHQGWvo74-grafik.png) [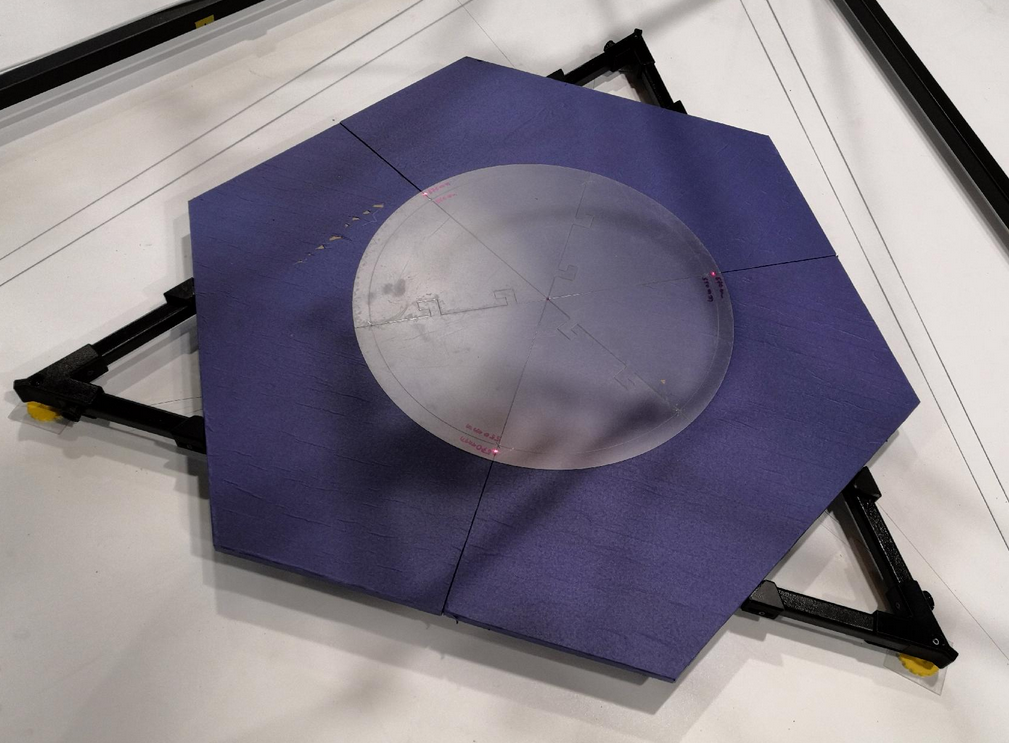](https://wiki.stadtfabrikanten.org/uploads/images/gallery/2026-06/K0uyi3aem8rgQsOe-grafik.png) [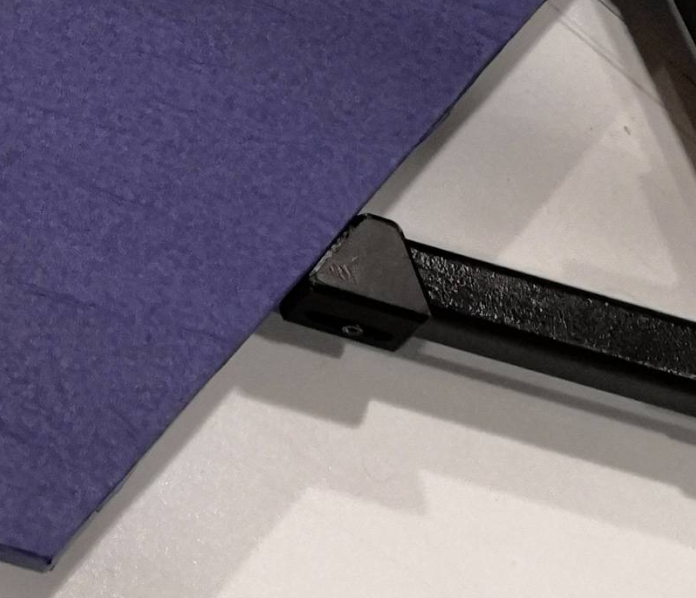](https://wiki.stadtfabrikanten.org/uploads/images/gallery/2026-06/UVhr6eTZ9mOz7wkX-grafik.png) [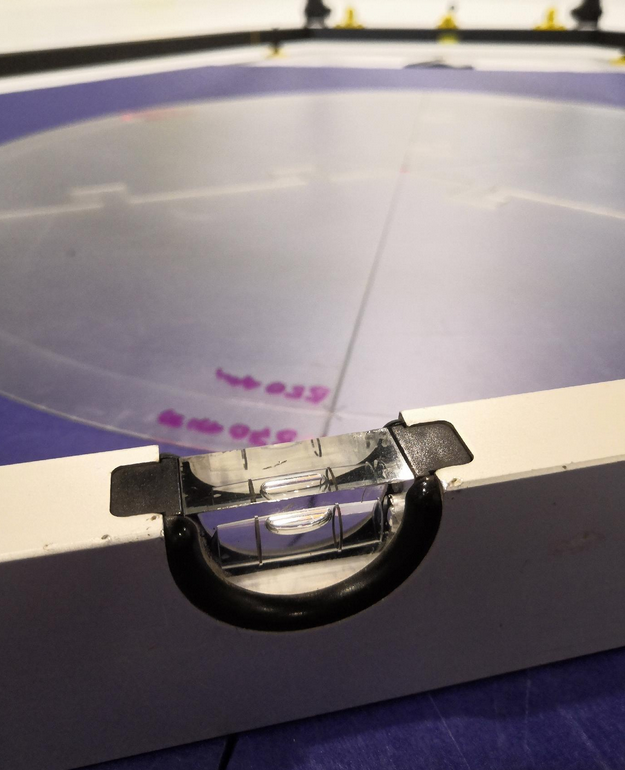](https://wiki.stadtfabrikanten.org/uploads/images/gallery/2026-06/AL3pSQPSRTBmbAFo-grafik.png) [](https://wiki.stadtfabrikanten.org/uploads/images/gallery/2026-06/NdiTAeEUpVButQ5Y-grafik.png)
### Mark the platform position
The print platform is heavy enough that it will not change it's position until you bump it with your feet but its better to fixate it. To maintain the the position, the frame corners on the floor can be additionally secured with markings using some tape or other templates.
[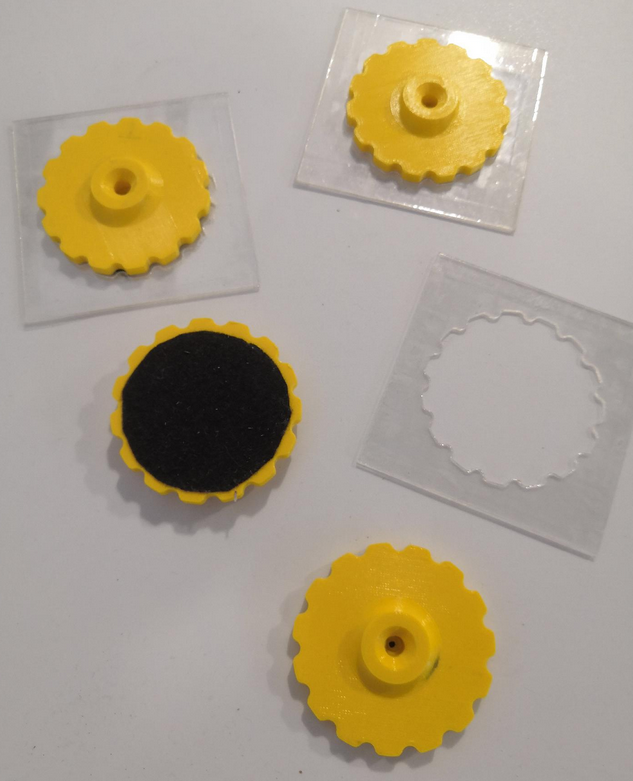](https://wiki.stadtfabrikanten.org/uploads/images/gallery/2026-06/pVuKBhU09ACwWB6M-grafik.png) [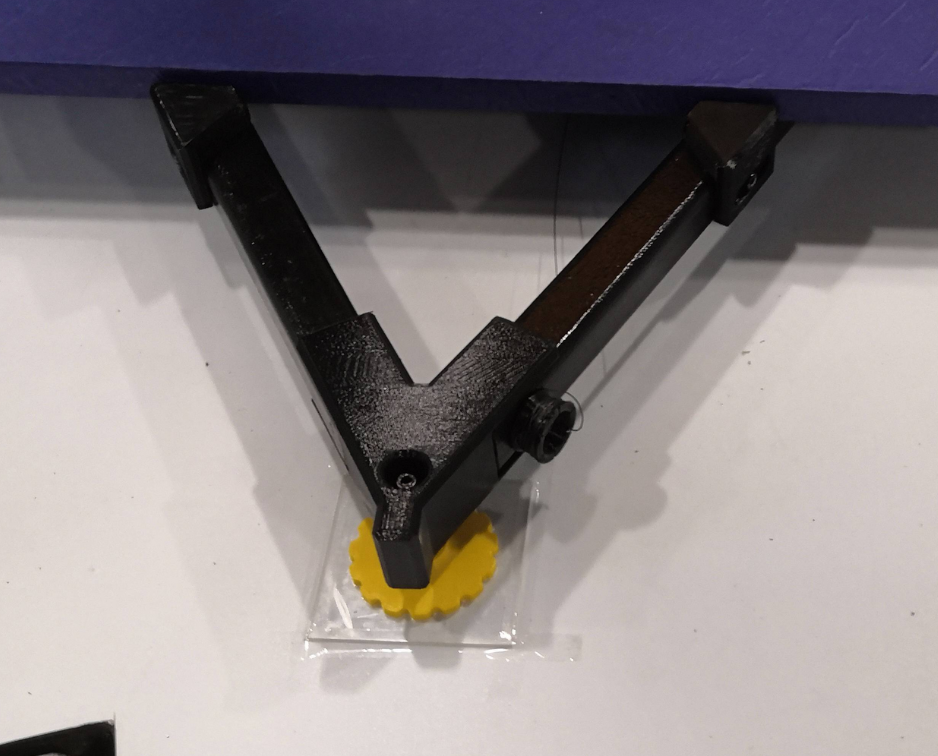](https://wiki.stadtfabrikanten.org/uploads/images/gallery/2026-06/AjZ9OWOK38gULS2J-grafik.png) [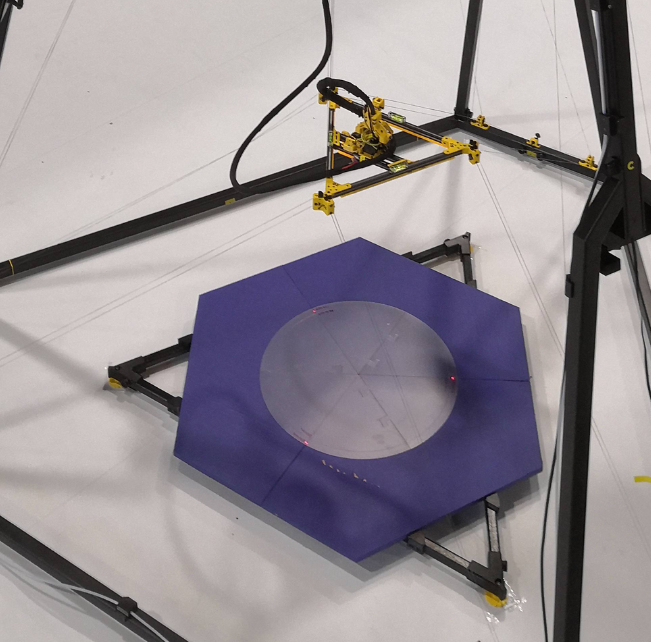](https://wiki.stadtfabrikanten.org/uploads/images/gallery/2026-06/VlLYkfn1HoJ0QgsC-grafik.png)
## IV. Configuring the movement system and final adjustments
### Dragging around the effector and measurements of ABCD lines (line lengths and anchor coordinates)
Getting measurements of the anchors feels a little bit strange because you do not measure absolute XYZ coordinates like in a regular coordinate system. It's more like a "fused system". You measure the values of a XYZ vectors for each anchor (they are called "anchor points"). This step is **highly important**. Using a laser distance meter we can measure the line lengths between the effector and the anchor points ABCD. You can only get useful measurements with tightened lines. Please do this step in **regular torque mode (/opt/sms\_modes/sms\_torque.sh)**. This step also can help to re-adjust anchors in case the print result should fail later on (due to happened changes in position of anchors or the leveling of the effector or levelness of ceiling plate). In this step we measure anchor coordinates XYZ and line lengths to validate those anchor coordinates. At least measurements for three of the six ABC lines are required. But it's better to take all six values to check against for each line pair. This will help you to eliminate other existing adjusting errors. By measuring all six bottom anchors we can see the rotation error around Z axis.
It's enough to measure with zero digits after comma because we will never get it more precise. Pre-defined anchor coordinate values and line lengths from theory do not help in practical use. We use the real situation and are going to measure the printer how it was built and configured physically. Note that there are small deviations for all anchors because i used ceramic inlets with inner diameter is 3 mm. Remember that lines are only 0.5 mm thick. So there is 2.5 mm of possible tolerance per inlet. Try to perform measurements using the center of the inlets. The following drawings show what we need to measure.
**Exhaustive drawing for measurents for ABC anchors**
[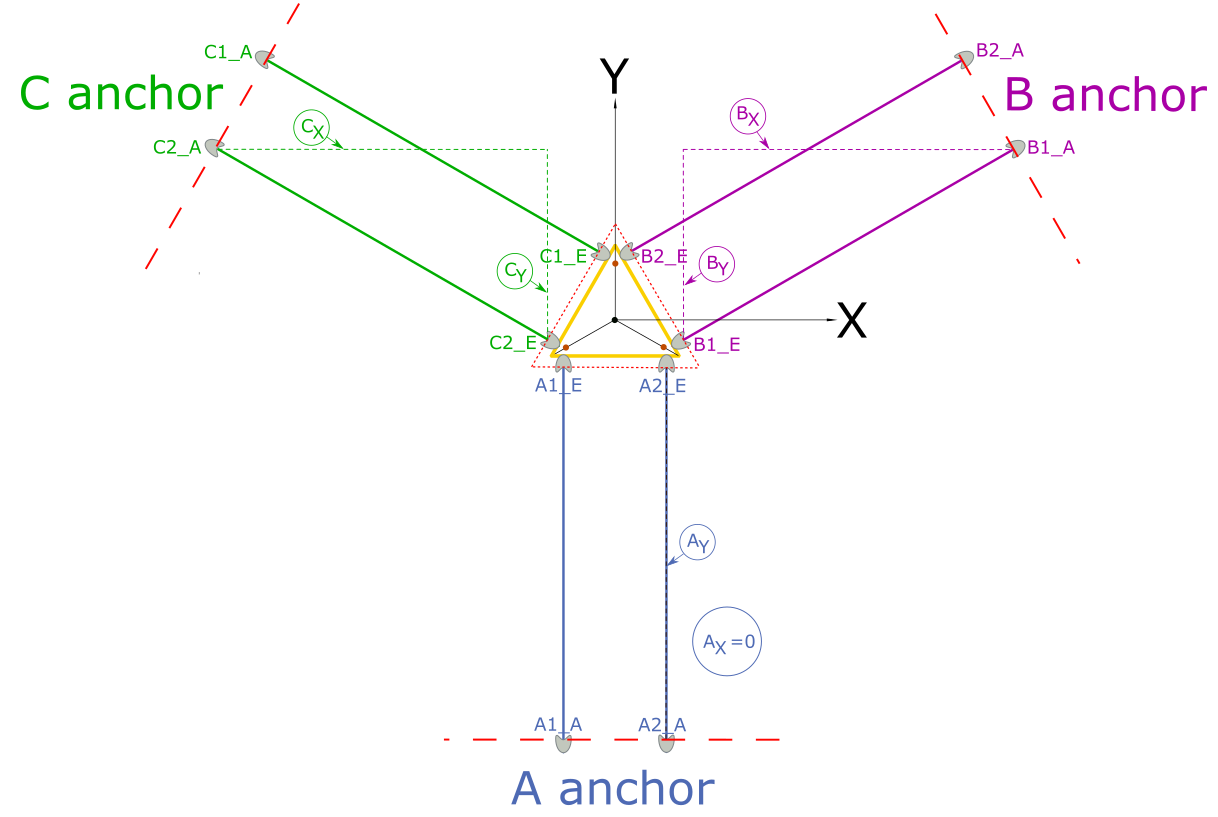](https://wiki.stadtfabrikanten.org/uploads/images/gallery/2026-06/6CVcLcA8GQsMWOLq-grafik.png)
**Simplified drawing (what the firmware actually understands)**
[](https://wiki.stadtfabrikanten.org/uploads/images/gallery/2026-06/HEChfwQXOfXkIsi7-grafik.png)
**Exhaustive drawing for measurents for D anchor**
[](https://wiki.stadtfabrikanten.org/uploads/images/gallery/2026-06/Et4n0DtO75Pr9uFk-grafik.png)
### Measuring anchor coordinates
There are two differet ways on how to measure ABC XYZ coordinates. The preferred way is to measure everything relative to the print platform (which was made horizontal before). The second best way is to measure everything from ground (which may not be level). Using both methods we can determine the error of the ground. For this step we need tape measurement, caliper, laser distance meter, some temporary lines and tape and **a lot of time and calm hands.**
[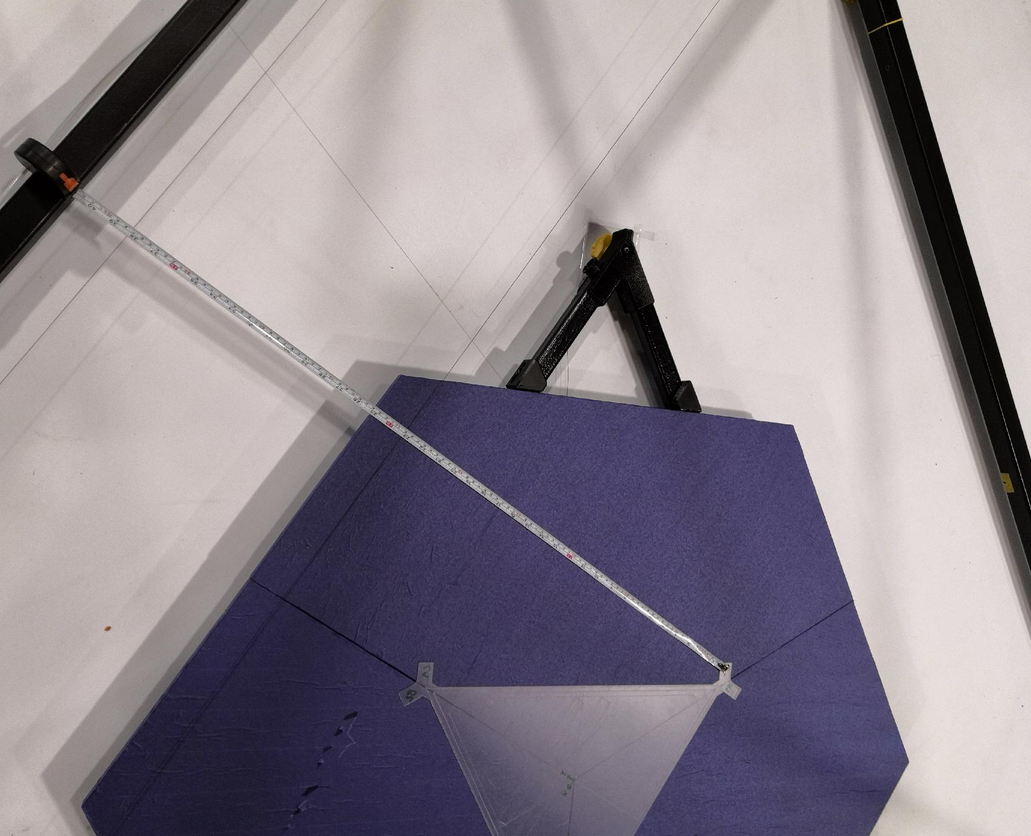](https://wiki.stadtfabrikanten.org/uploads/images/gallery/2026-06/8Ak3bIFCtIhgmdrx-grafik.png) [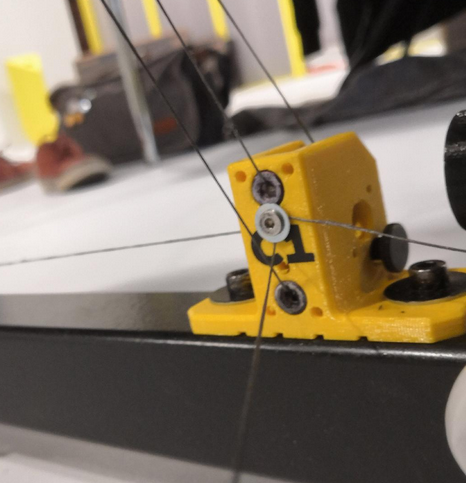](https://wiki.stadtfabrikanten.org/uploads/images/gallery/2026-06/gNwo4hVvjiRTeJ4U-grafik.png) [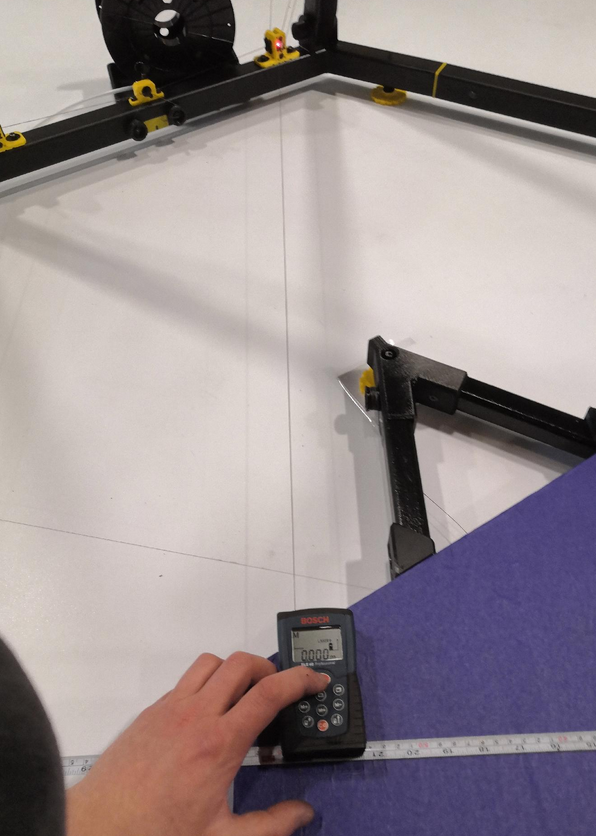](https://wiki.stadtfabrikanten.org/uploads/images/gallery/2026-06/qQboYSVxod0N7znx-grafik.png) [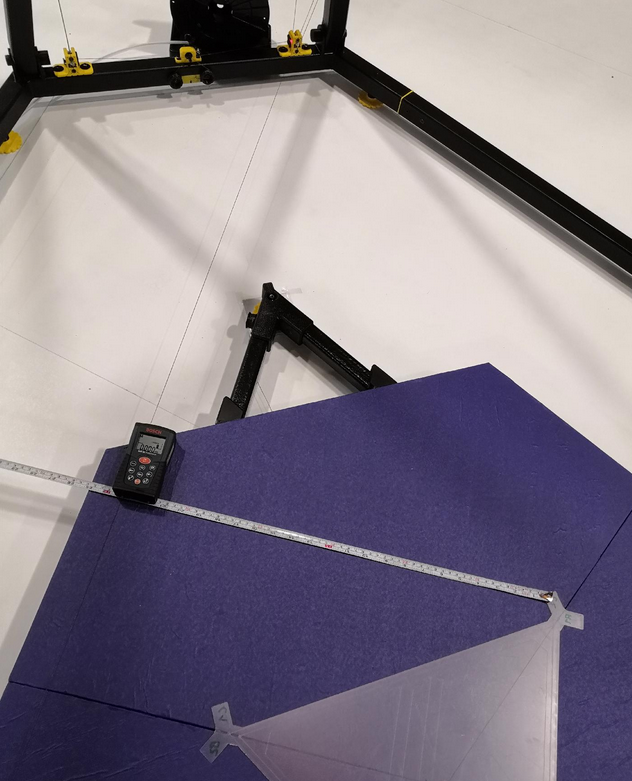](https://wiki.stadtfabrikanten.org/uploads/images/gallery/2026-06/oSoFMZjOozUuzqE3-grafik.png) [](https://wiki.stadtfabrikanten.org/uploads/images/gallery/2026-06/cSrszpLBo3wyz9Ak-grafik.png) [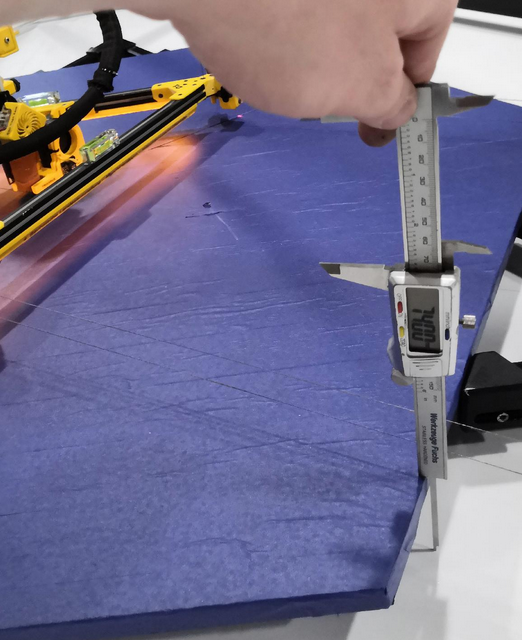](https://wiki.stadtfabrikanten.org/uploads/images/gallery/2026-06/29BYW3SK0Ma6OOdZ-grafik.png) [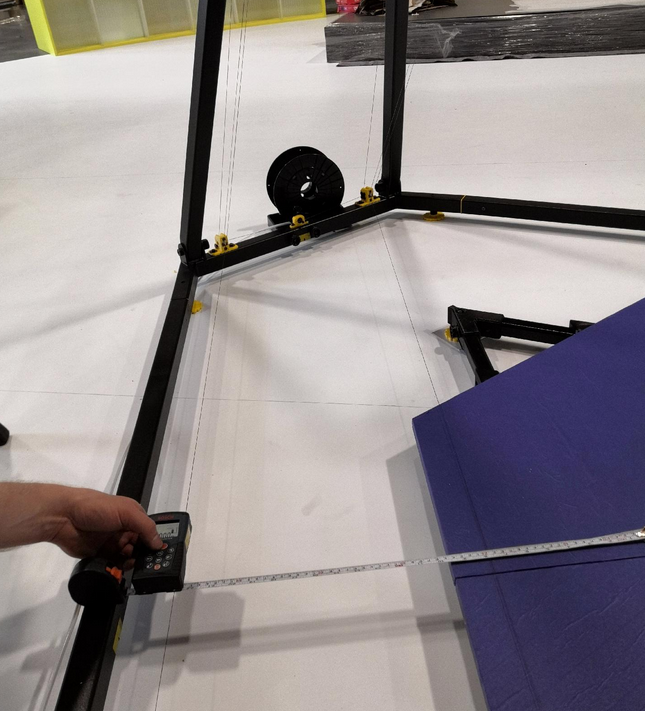](https://wiki.stadtfabrikanten.org/uploads/images/gallery/2026-06/EPvCnsqC5f3ReEW3-grafik.png) [](https://wiki.stadtfabrikanten.org/uploads/images/gallery/2026-06/cX1tDzgpoO1mRvEX-grafik.png) [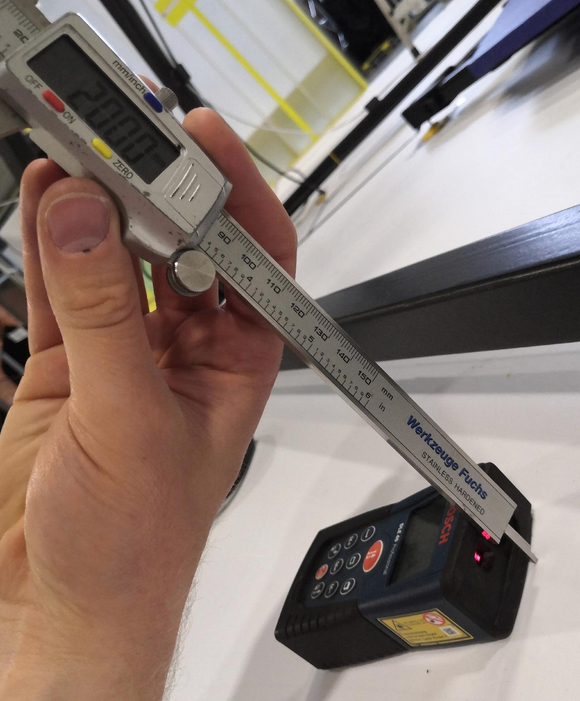](https://wiki.stadtfabrikanten.org/uploads/images/gallery/2026-06/28qDn9o2gyTdEbIs-grafik.png) [](https://wiki.stadtfabrikanten.org/uploads/images/gallery/2026-06/ibl4czZKphFHWyQq-grafik.png)
Old variant
#### Old variant
**Table sheet for downloading: [abc\_measurements\_2022.03.04.xlsx](https://wiki.stadtfabrikanten.org/attachments/160)**
$$ \\vec{A} = \\begin{bmatrix} X\_A\\\\ Y\_A\\\\ Z\_A \\end{bmatrix} = \\begin{bmatrix} 0mm\\\\ -1166.00 mm\\\\ -21.13 mm \\end{bmatrix} $$
$$ \\vec{B} = \\begin{bmatrix} X\_B\\\\ Y\_B\\\\ Z\_B \\end{bmatrix} = \\begin{bmatrix} 1010.00 mm\\\\ 585.00 mm\\\\ -25.26 mm \\end{bmatrix} $$
$$ \\vec{C} = \\begin{bmatrix} X\_C\\\\ Y\_C\\\\ Z\_C \\end{bmatrix} = \\begin{bmatrix} -1015.00 mm\\\\ 578.00 mm\\\\ -28.55 mm \\end{bmatrix} $$
While ABC coordinates are hard to get the D coordinates are really easy. We just take the average of D1, D2 and D3.
- $D1=2619mm$
- $D2=2617mm$
- $D3=2616mm$
$$ \\vec{D} = \\begin{bmatrix} X\_D\\\\ Y\_D\\\\ Z\_D \\end{bmatrix} = \\begin{bmatrix} 0\\\\ 0\\\\ Z\_D \\end{bmatrix} = \\begin{bmatrix} 0 mm\\\\ 0 mm\\\\ 2617.33 mm \\end{bmatrix} $$
#### Recent variant
[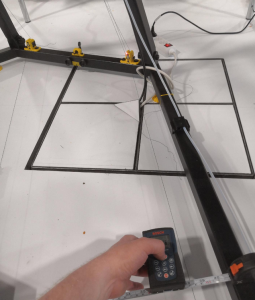](https://wiki.stadtfabrikanten.org/uploads/images/gallery/2026-06/m6Yp697UMRxV3wVZ-grafik.png) [](https://wiki.stadtfabrikanten.org/uploads/images/gallery/2026-06/w5V8pekavdls8LDX-grafik.png) [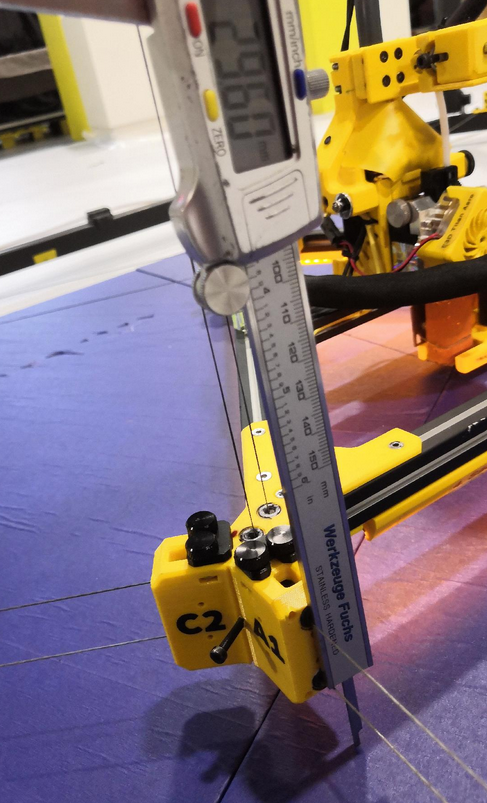](https://wiki.stadtfabrikanten.org/uploads/images/gallery/2026-06/NtGNNRbSAFIAoeVg-grafik.png)
### Measuring line lengths
In march 2022 we simplified the measuring routine a lot because we use nearly exact/symmetric frame. It allows us to calculate with default angle values 30/60/90 deg.
[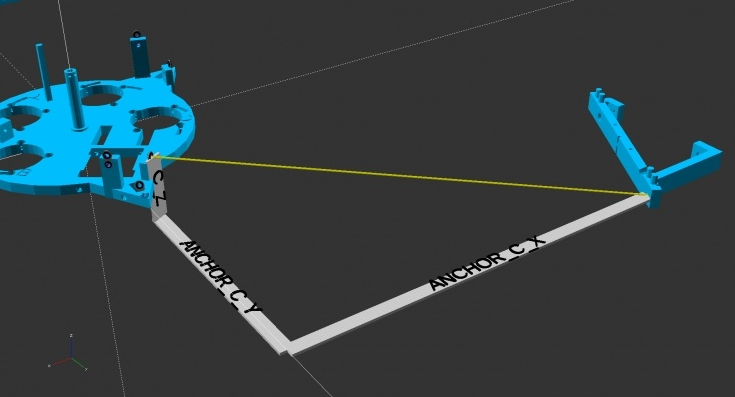](https://wiki.stadtfabrikanten.org/uploads/images/gallery/2026-06/7KhIXKo40eqSteqg-grafik.png) [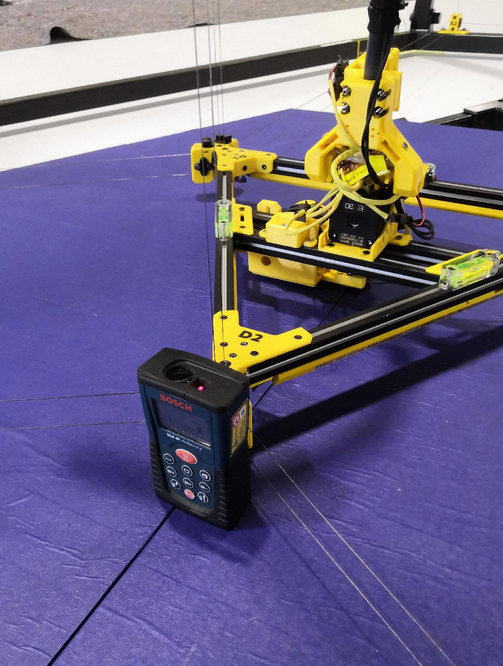](https://wiki.stadtfabrikanten.org/uploads/images/gallery/2026-06/zAif2ly8IHgkeMIL-grafik.png) [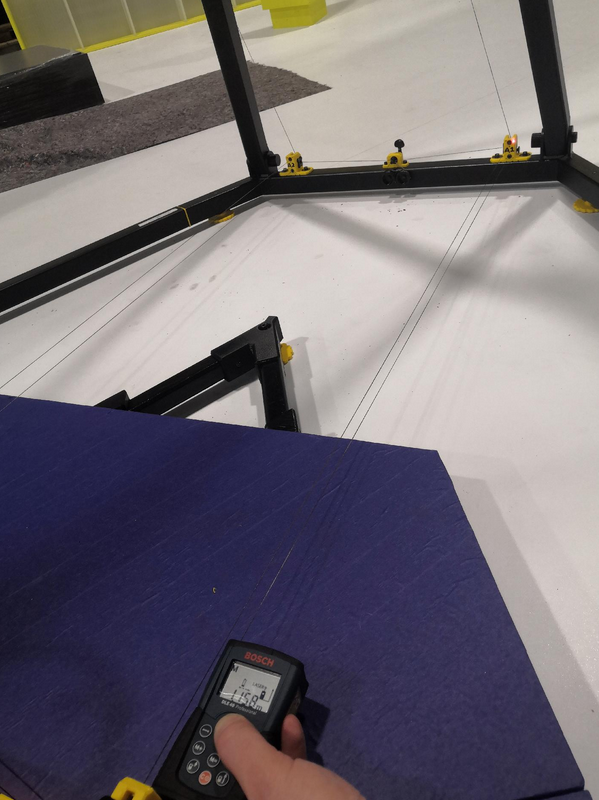](https://wiki.stadtfabrikanten.org/uploads/images/gallery/2026-06/d70Mn2aG10pplCJl-grafik.png) [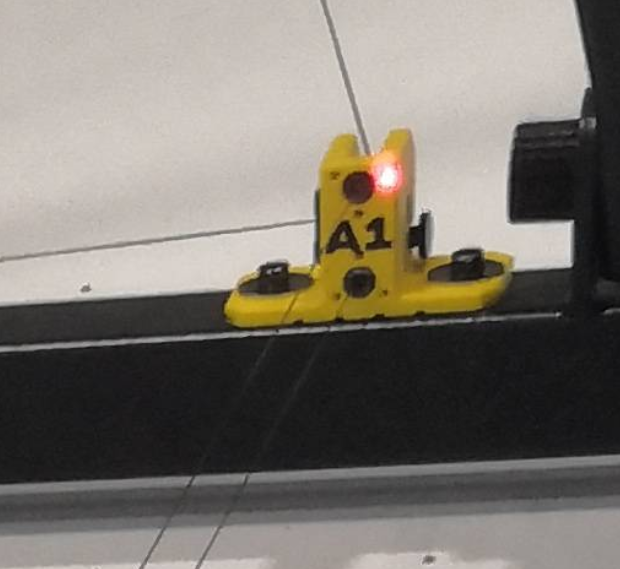](https://wiki.stadtfabrikanten.org/uploads/images/gallery/2026-06/QCm1jxvMXEAxHCb7-grafik.png) [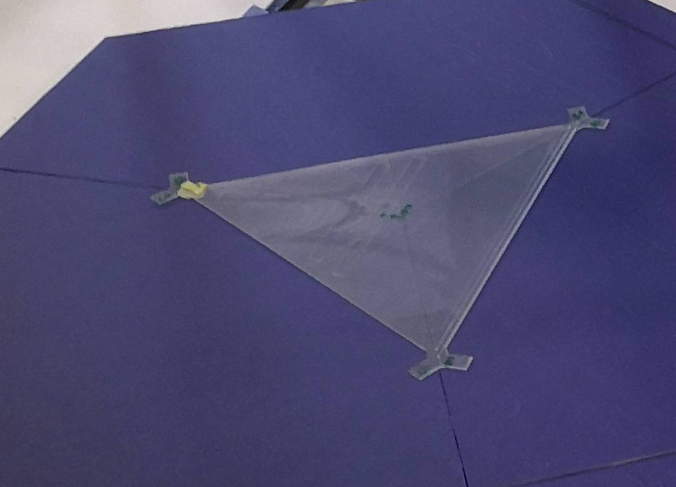](https://wiki.stadtfabrikanten.org/uploads/images/gallery/2026-06/1VH0bdkmzBLvZD2h-grafik.png)
**Table sheet for downloading: [abc\_measurements\_2022.03.04.xlsx](https://wiki.stadtfabrikanten.org/attachments/160)**
**$lineLengthInOrigin\_D = z\_D$ (** $Z\_D$ is not a fixed value because it depends on the print platform adjustment. The better the ceiling plate and bed were configured to be level, the more homogenious the measurements D1, D2 and D3 are.)
If they match well we are done and finally we can configure the K parameter of M666 which defines the coordinates for firmware. After entering them in config.g we need to reboot the controller. If not we need to remeasure. We get the required M669 command from Excel sheet.
```bash
M669 A0.00:-1166.00:-30.85 B1020.18:589.00:-28.90 C-1010.65:583.50:-33.90 D2617.00
```
### Testing to reach the entered ABC anchor coordinates
For Trikarus it's no problem to move to outer coordinates where A,B and C anchors are defined (XYZ). We might get large errors if the buildup compensation is not done well (slack lines) - i measured about 26 mm at A anchor before i calibrated the printer well - but we can just move the effector to the outermost fork anchors like shown in the photo:
[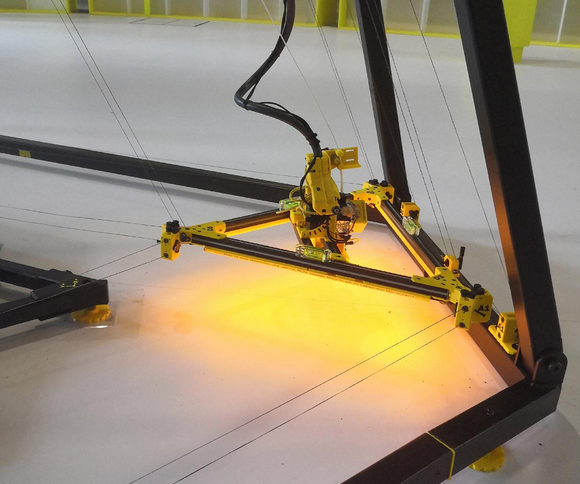](https://wiki.stadtfabrikanten.org/uploads/images/gallery/2026-06/loPcPbczxmyIX93F-grafik.png) [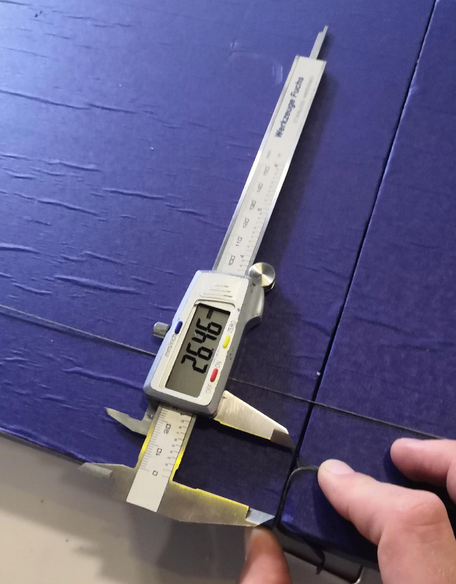](https://wiki.stadtfabrikanten.org/uploads/images/gallery/2026-06/yb70BOIgYPbD2iRe-grafik.png)
We can make use of this extremity moves because if the effector is placed there we can have another visual check for line lengths (A1 = A2, B1 = B2, C1 = C2). If we find any error we can re-adjust the guitar tuner trimloks this way.
### Validation of line buildup compensation (M666 Q and R) for ABCD
The line buildup compensation algorithm is really important for exact movements and to prevent slack or overtightened lines of ABCD drives. It is not that important for small build volumes but if you want to print high, using your great build volume advantage, **you need it**. Because without compensation the error created by spooling up and down lines will be too large (see [Building basics, checks, maintenance](https://old.stadtfabrikanten.org/pages/viewpage.action?pageId=101974344)). This makes it impossible to get good print results and it will waste your expensive filament. We need to ensure to have well tensioned lines all over the build volume. This steps requires to have properly configured movement system (e.g. corrent micro stepping, transmission ratios between pulleys and gears, etc.). The buildup compensation factor is highly sensible and is the same for all four drives. While sourcing the parts of your Hangprinter you measured / modeled the spool radius from each drive (or at least from one drive), the coil width and line diameter and you precalculated a line buildup compensation factor. If you put your effector in origin and there is a lot of idling line on spools then you have to adjust the spool radii with the extra diameter which comes from the extra line. We need to perform this validation step after leveling the ceiling module / effector / frame and after measuring and entering the anchor point locations into firmware.
See [Building basics, checks, maintenance](https://old.stadtfabrikanten.org/pages/viewpage.action?pageId=101974344) for the calucation of the factors. There exist theoretical values but due to mechanical tolerances in line diameter, coil width and so on we get some corridor of possible numbers. Usually we will find more correct factors by manual experiments.
**Checking the factors:**
1. Enter the calculated factor Q and the theoretical radii (R) values in firmware config.g
2. reboot the controller (each time you change M666 settings you need to do this)
3. Place printer in origin and apply **sPID mode.** We use **/opt/sms\_modes/sms\_prepare.sh** which does a lot of steps like sPID mode, setting home position and resetting the error values of the Smart Steppers
4. Make ABC smooth using
1. **/opt/sms\_modes/sms\_smooth\_a.sh**
2. **/opt/sms\_modes/sms\_smooth\_b.sh**
3. **/opt/sms\_modes/sms\_smooth\_c.sh**
5. Perform Z movements. Move slowly using F-Parameter in G0/G1 if you lose steps (check the error value on Smart Steppers). Maybe we need to adjust the motor currents before. See [Building basics, checks, maintenance](https://old.stadtfabrikanten.org/pages/viewpage.action?pageId=101974344)
```ini
G1 Z; slowly raise up D axis to +Z coordinate
```
6. Measure the distance between the nozzle tip and print platform center using a laser distance meter. If the buildup was calculated and entered correctly (Q and R values of M666 command) there is +/- 0 mm deviation between targeted height and measured height. Note that we cannot use the position information of Smart Stepper because they don't know anything about buildup compensation values. They only know about sent amount of step commands. The same is for error (we can only compare targeted steps with reached steps). You can even reach highly accurate XYZ coordinates at height of 2200 mm and higher. This was succesfully validated with Trikarus. Having deviations we need to adjust Q and R values and to remeasure Z until everything fits and the lines are tensioned all over their way - regardless of the Z coordinate. To validate if you found the correct line buildup value you will have a set of constraints:
1. targeted height = measured height. There should not exist any deviations Z coordinates at the ground level ( ~ 500 mm or less) and ceiling level (~ 2000 mm and higher)
2. no or less wobble: the ABC lines are not slack at higher Z coordinates (> 1000 mm). The effector still feels stiff when touching because the lines are just tight like yourself
3. the Smart Stepper error limit is not reached (trouble by force overloads)
1. note that it might be neccesary to recalibrate Smart Steppers if the default error is too high
2. effector will not "dance" if error value is below ~ 0.90 (tested)
7. Now place the effector to origin again and set all drives to **sPID mode**. Make some regular movements. Check if ABCD work well. If ABC drives create large forces at higher Z or the lines are just wobbling we need to adjust the radii.
If general machine calibration is bad, Smart Steppers have wrong calibration or tension gets too high due to misconfigured line buildup, the following video shows what can happen. The drives may get load and make some kind of cracking-noise sound and the effector starts to "dance" (it can happen while printing too the same way. It will make holes in your print surface or kick the print off the platform). The system can get overtightened and the servo motors try to fix the error by pulling back the lines.
## V. Setup steps filament feeder
The planned filament feeder is not ready yet so use ordinary spool mechanism (spool on two free rotatable rods)
### Place the feeder
Never place the filament inside the printer's moveable range because collisions can happen (painfully tested). It should be at some location far off the toolhead and the lines
[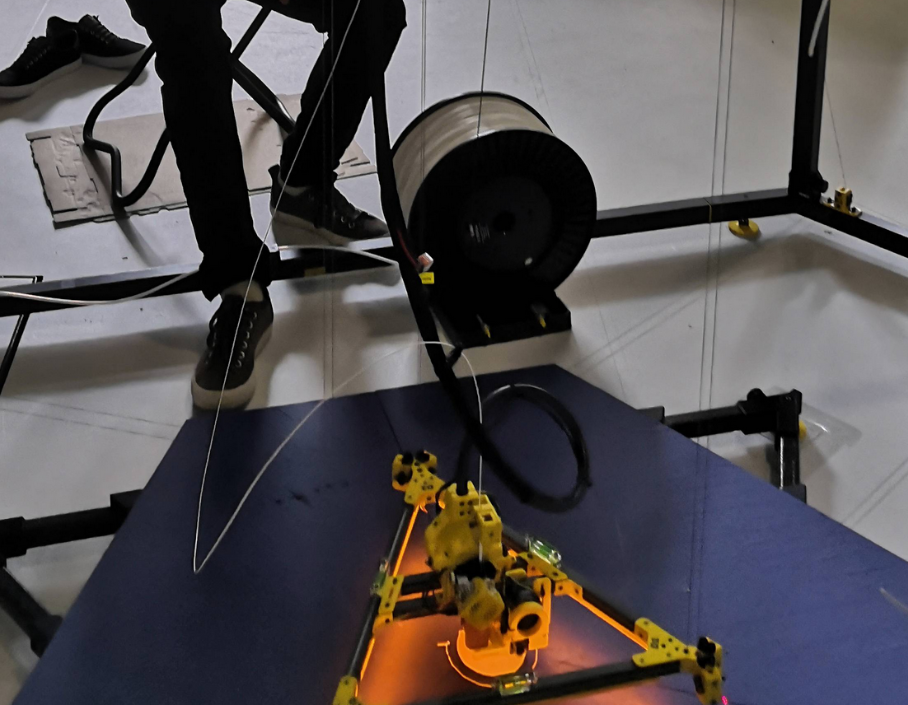](https://wiki.stadtfabrikanten.org/uploads/images/gallery/2026-06/P06WUEoiW8lvh67F-grafik.png)
## VI. Check the electronics
Check if all electronic parts act as exspected
- ceiling module
- UPS
- Power Supply
- Raspberry Pi
- Duet 2
- Relay LED spots and stripes
- Relay Power Supply
- Webcam
- Smart Steppers
- Gyro sensor
- LED stripe and LED spot
- Z limit switch
- Laser pointers
- effector
- IMU
- heater cartridge
- encoder
- extruder fan
- filament fan
- LED stripe
- z probe
## VII. Disassembly or emergency maintenance of the base frame (folding / dismantling)
### Uninstall the three quick releases
Otherwise the frame will block and cannot be pulled down to maintenance working height. If you forget those you will possibly destroy the threaded rods of the quick releases (tested painfully). So please do this first!
[](https://wiki.stadtfabrikanten.org/uploads/images/gallery/2026-06/DM8L3Oy3ovpvYJrW-grafik.png)
### The remaining things
The disassembly works the inverted order it was buildup except that you can skip adjusting step.
# Ceiling Module | 4 Port USB Hub GL850G Genesys Logic + 24V DC/DC Converter Traco Power TMA 2405S
[](https://wiki.stadtfabrikanten.org/uploads/images/gallery/2026-06/BVxTozn4OfwSXDA6-grafik.png) [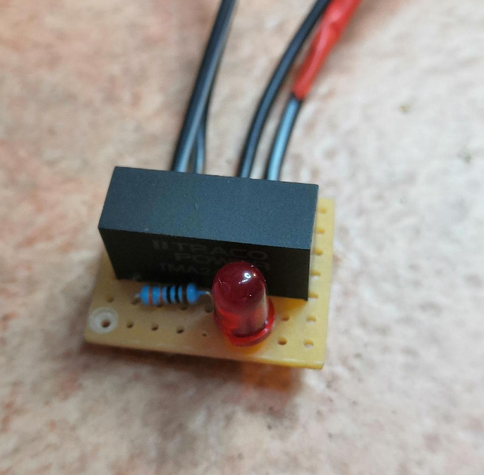](https://wiki.stadtfabrikanten.org/uploads/images/gallery/2026-06/VLlivCPIzvyrJuGr-grafik.png) [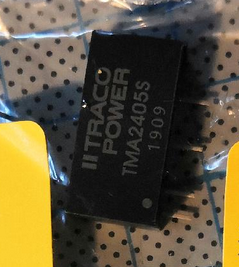](https://wiki.stadtfabrikanten.org/uploads/images/gallery/2026-06/4Pn6LAIyBJzuCHCg-grafik.png) [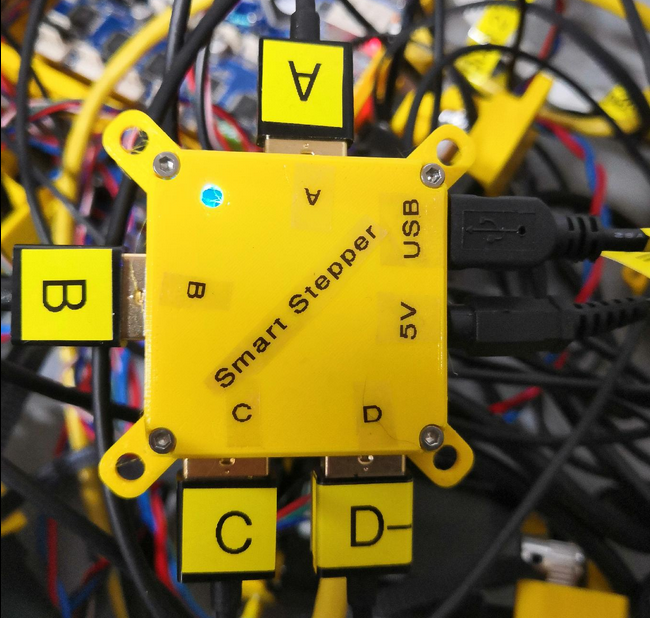](https://wiki.stadtfabrikanten.org/uploads/images/gallery/2026-06/65GUPRguSbvh3GHy-grafik.png) [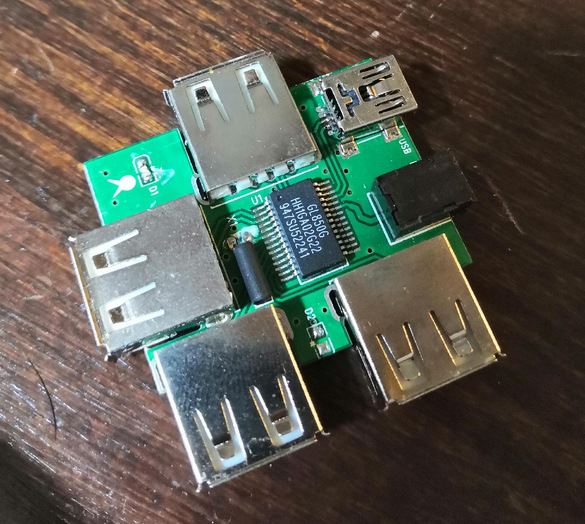](https://wiki.stadtfabrikanten.org/uploads/images/gallery/2026-06/EH0IrviRFcwiiGbg-grafik.png) [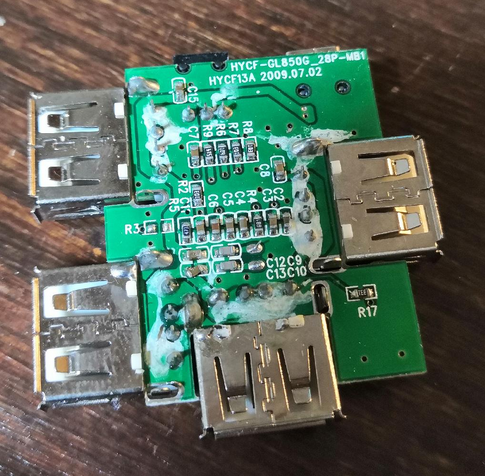](https://wiki.stadtfabrikanten.org/uploads/images/gallery/2026-06/SGWvuw9tLMIRvGim-grafik.png)
Traco Power TMA 2405S
- Pin 1 = 24V In
- Pin 2 = GND1
- Pin 4 = 5V Out
- Pin 6 = GND2
- ceramic condensator (KERKO) Pin 1-2: 1-50µF, 35V
- ceramic condensator (KERKO) Pin 4-6: 1-50µF, 10-16V
**Warnings**
This USB hub is cheap and has backfeeding issue. We should not buy it a second time. The power wiring was cut in the regular power source cable to prevent this backfeeding effect. We kept only the data bus (2 remaining wires). That means that the hub power comes from Traco Power TMA 2405S only. See [General power/wiring concept, consumptions and temperatures](https://old.stadtfabrikanten.org/pages/viewpage.action?pageId=56623748) for description.
# Ceiling Module | DC/DC Converter LM2596S
This module is used to control the current and voltage of the LED spots ([COB LED Spot 6000-6500K 260mA 10V](https://old.stadtfabrikanten.org/pages/createpage.action?spaceKey=TH&title=COB+LED+Spot+6000-6500K+260mA+10V&linkCreation=true&fromPageId=62685365))
[https://www.ebay.de/itm/DC-DC-LM2596S-60V-3A-Stepdown-Modul-Buck-Modul-zum-Regulieren-von-CC-CV/332730030268?ssPageName=STRK%3AMEBIDX%3AIT&\_trksid=p2057872.m2749.l2649](https://www.ebay.de/itm/DC-DC-LM2596S-60V-3A-Stepdown-Modul-Buck-Modul-zum-Regulieren-von-CC-CV/332730030268?ssPageName=STRK%3AMEBIDX%3AIT&_trksid=p2057872.m2749.l2649)
The DC/DC LM2596S 60V 3A Stepdown Module is designed to step down from input voltages from 5 to 57V to output voltages from 1.25 to 30V. Constant current (CC) and constant voltage (CV) can be regulated quickly and easily. By means of the 2 potentiometers constant current range and output voltage can be adjusted.
Thanks to integrated reverse polarity protection and short-circuit protection, it is a particularly reliable and durable module that can be used safely up to 2.2 A output current without external cooling. Applications for recharging rechargeable batteries, as a voltage source in laboratory quality or dimmers are now a thing of the past. The built-in LED indicator indicates a load (red) or whether it is free (green).
- Output short circuit protection at constant current
- Input reverse polarity protection
- Input voltage: 5 - 57 V (should be 2 V above output voltage)
- Output voltage: 1.25 - 30 V
- Output current: 2.5 A nominal current / max. 3 A; external cooling required
- Output power: max. 15 W
- Dimensions: LBH approx. 4.8 x 2.4 x 1.4 cm
- Potentiometer for setting constant current (next to OUT)
- Potentiometer for setting constant voltage (next to IN)
[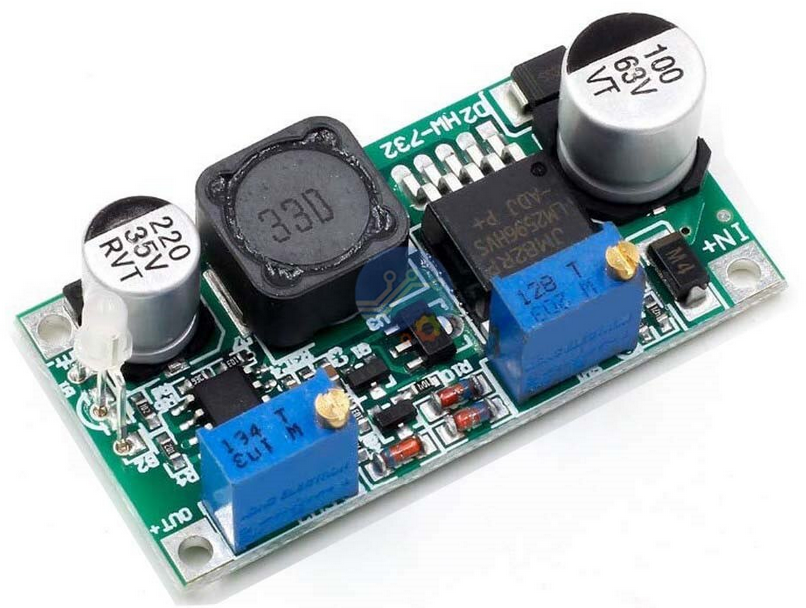](https://wiki.stadtfabrikanten.org/uploads/images/gallery/2026-06/ieFR4oHJF1q0FteB-grafik.png)
Integrated LED with status:
- green illuminated = constant voltage
- red light = constant current
#### To use the LM2596 CC/CV regulator module as an LED constant current driver
1. Make sure of the operating current and maximum operating voltage of the LED you will drive.
2. With no load connected to the output of the module (open circuit), adjust the Constant Voltage potentiometer CV to set the output voltage to the LED maximum operating voltage.
3. Short-circuit the module output, and use a multimeter in 10A current scale to measure output short-circuit current, and adjust the Current Potentiometer CC to set the output current to the required LED operating current.
4. Connect the LED to the module and test.
5. The module can drive multiple LEDs in series, parallel or in series/parallel strings, as long as the maximum voltage and current of the string does not exceed the 30V maximum output voltage and 3A maximum output current of the driver module.
# Ceiling Module | Duet PT100 RTD Board 1.1a
## Hardware
To connect a PT100 sensor to a Duet, you need a RTD interface board based on the MAX31865 chip. The interface board you need depends on which Duet you have.
Duet 2 (WiFi, Ethernet and Maestro) and Duet 3
These Duets support up to two MAX31865-based daughter boards. Each daughter board supports two PT100 temperature sensors:
[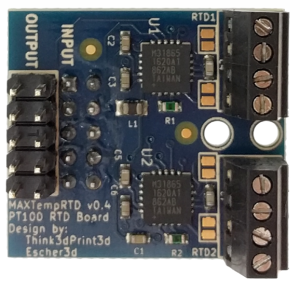](https://wiki.stadtfabrikanten.org/uploads/images/gallery/2026-06/udlWbTFJ1EGypAIx-grafik.png) [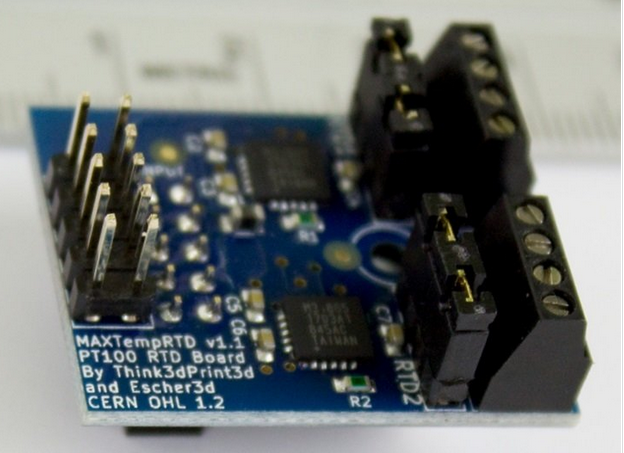](https://wiki.stadtfabrikanten.org/uploads/images/gallery/2026-06/oQQnNLY3QnwwjDNb-grafik.png)
The upper image shows the older broad version (pre v1.1) with solder jumpers to select between 2 wire and 4 wire PT100 sensors. The lower image shows the version 1.1 which has normal jumpers.
We supply a plastic pillar with each daughter board, to secure the daughter board to the Duet or to the daughter board below it. If the prongs of the pillar won't go into the hole in the circuit board easily, gently squeeze the prongs together with a pair of pliers first.
On the lower board, the terminal blocks labelled RTD1 and RTD2 will be temperature measurement channels 200 and 201 respectively. If you stack two PT100 daughter boards, the terminal blocks on the upper board will be channels 202 and 203. The Duex 5 & Duex 2 have an additional 4 channels allowing two more boards to be stacked for channels 204-207.
[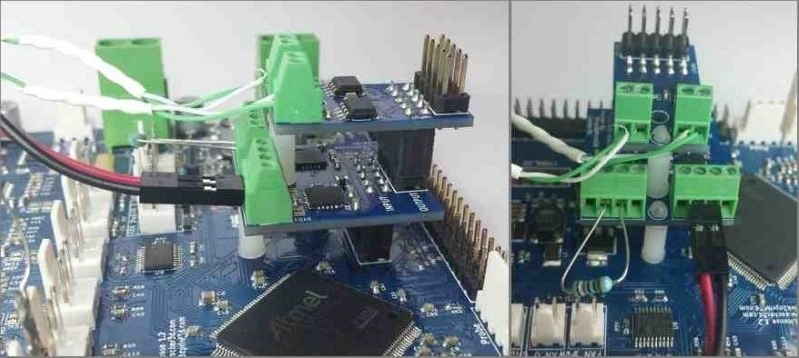](https://wiki.stadtfabrikanten.org/uploads/images/gallery/2026-06/MraNh6E74YTy1MiT-grafik.png)
This image shows a thermocouple daughter board stacked on top of a PT100 board. The right-hand connector of the PT100 board has a 2-wire PT100 sensor connected to it. The left hand connector has a test resistor connected to it (see later).
Each channel of the PT100 daughter board has a 4-position terminal block. We'll number the terminals 1, 2, 3 and 4 in order (it doesn't matter which end you start from, because PT100 sensors don't care about polarity). Terminals 1 and 4 supply current to the sensor, and the voltage developed across the sensor is measured between the terminals 2 and 3.
To connect a 2-wire PT100 sensor:
- Connect the PT100 wires to terminals 2 and 3
- Configure the channel for 2-wire operation:
- Recent production PT100 daughter boards (v1.1 or later see the image above) have 2 sets of 2 jumper pins per channel. Install jumpers on those pins.
- On an older production PT100 daughter board, either bridge each pair of solder pads next to the terminal block, or add a wire between terminals 1 and 2, and another between terminals 3 and 4.
- On a pre-production PT100 board there is already a trace bridging each pair of solder pads.
To connect a 4-wire PT100 sensor:
- Connect the two wires that go to one end of the PT100 resistance element to terminals 1 and 2 (it doesn't normally matter which wire in each pair goes to which terminal)
- Connect the two wires that go to the other end of the PT100 resistance element to terminals 3 and 4
- Configure the channel for 4-wire operation:
- Recent production PT100 daughter boards have 2 sets of 2 jumper pins per channel. Remove the jumpers from those pins.
- On an older production PT100 daughter board, ensure that the 2 pairs of solder pads next to each terminal block are not bridged.
- On a pre-production daughter board, cut the fine traces that bridge each pair of solder pads next to the terminal block.
[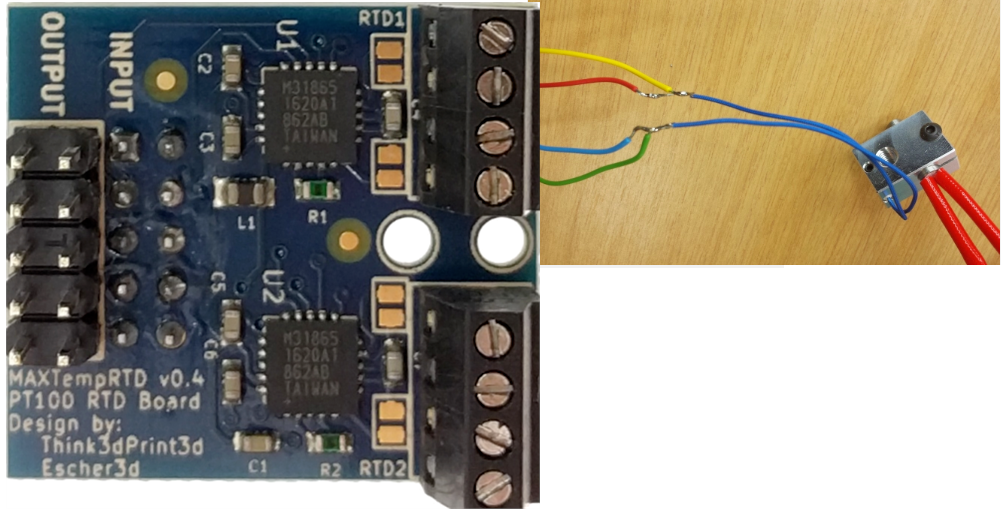](https://wiki.stadtfabrikanten.org/uploads/images/gallery/2026-06/wvFlvmMABuKDxVJg-grafik.png)
See [https://miscsolutions.wordpress.com/2016...](https://miscsolutions.wordpress.com/2016/06/25/more-delta-printer-upgrades-wifi-and-silence/ "https://miscsolutions.wordpress.com/2016/06/25/more-delta-printer-upgrades-wifi-and-silence/") for additional information about using a 4-wire PT100 connection.
## To test the functionality of one of the PT100 channels
- Connect the 100 ohm test resistor (supplied with the daughter board) to terminals 2 and 3
- Fit the 2 jumpers as for a 2-wire PT100 sensor
- RepRapFirmware should report a temperature very close to 0 degC for that channel.
## Firmware configuration
### RepRapFirmware 3.x
In RepRapFirmware 3 you first create a sensor using [M308](https://duet3d.dozuki.com/Wiki/Gcode#Section_M308_Set_or_report_sensor_parameters) then assign it to a heater using [M905](https://duet3d.dozuki.com/Wiki/Gcode#Section_M950_Create_heater_fan_or_GPIO_servo_pin)
For example:
```
;Duet 2
M308 S1 P"spi.cs1" Y"rtd-max31865" ; create sensor number 1 as a PT100 sensor in the first position on the Duet 2 daughter board connector
;Duet 3
M308 S3 P"3.spi.cs1" Y" rtd-max31865" ; define temperature sensor number 3 as a PT100 on the first port of a temperature daughter board plugged into the expansion board with CAN bus address 3.
```
For more detail see [RepRapFirmware 3 overview, M308 (Create or modify sensor or report sensor parameters)](https://duet3d.dozuki.com/Wiki/RepRapFirmware_3_overview#Section_M308_Create_or_modify_sensor_or_report_sensor_parameters)
### RepRapFirmware 2.x and 1.x
To tell the firmware to use a RTD channel for one of the heaters, use the X parameter in the M305 command for that heater to specify the required channel (200 to 203 on the Duet 2, 204-207 on the Duex 5 or Duex 2).
For example:
```
M305 P1 X200
```
This tells the firmware that for heater 1 (which is normally the first hot end heater) it should sense the temperature using the PT100 board whose CS pin is connected to NPCS0. The S, T, B, H and L parameters of the M305 command are not used. In firmware 1.20 and later, you can optionally use the R parameter to specify the value of the reference resistor if it is not 400 ohms.
## Troubleshooting
The daughter board comes with a 100Ω resistor that you can wire in place of a two wire sensor to check the board is working correctly. With the resistor in place, the reading should be 0°C.
If the reading at room temperature is higher than it should be, then you probably have a bad connection between the RTD interface board and the sensor, or the wires to the sensor are too long or too thin. Each additional ohm of wiring resistance will increase the temperature reading by 2.5C. Using a 4 wire solution PT100 sensor will improve this. If you only have a 2 wire P100 sensor you can still improve the accuracy by using 4 wires for the majority of the distance as [https://miscsolutions.wordpress.com/2016...](https://miscsolutions.wordpress.com/2016/06/25/more-delta-printer-upgrades-wifi-and-silence/ "https://miscsolutions.wordpress.com/2016/06/25/more-delta-printer-upgrades-wifi-and-silence/")
# Ceiling Module | High Endurance Micro-SDHC card 32 GB 100 MB/s UHS Class 3 by SANDISK
This card is used for Raspberry Pi operating system. Because we collect a lot of data which we are going to store in InfluxDB we have a huge amount of writing cycles. In the past we tested out regular SD cards which were defect after approx. one year of life time. So instead we use a "high endurance" or "industrial grade" SD card. Please do NOT remove the sd card with tweezers. You might scratch it to death, like shown in the following photo:
[](https://wiki.stadtfabrikanten.org/uploads/images/gallery/2026-06/ibirAcUv8pknCiWC-grafik.png) [](https://wiki.stadtfabrikanten.org/uploads/images/gallery/2026-06/5afFCz5jQaU86pIK-grafik.png)
## How to create a system image dump?
```bash
sudo dd if=/dev/sda of=/home/tomate/Downloads/hangprinter-dump.img bs=1M status=progress
31914459136 Bytes (32 GB, 30 GiB) kopiert, 1016 s, 31,4 MB/s
30436+1 Datensätze ein
30436+1 Datensätze aus
```
# Ceiling Module | I2C OLED Display 128x64 blue/yellow
[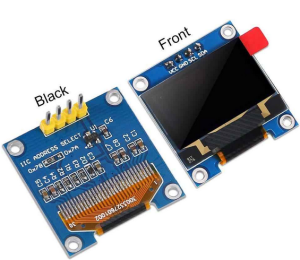](https://wiki.stadtfabrikanten.org/uploads/images/gallery/2026-06/iQrRXdL4puxe0g9J-grafik.png)
The used OLED displays for [Smart Stepper](https://old.stadtfabrikanten.org/display/TH/Smart+Stepper+-+Overview) have wiring order GND-VCC-SCL-SDA. We figured out that there are nearly identical modules on the market which have another order. The following photo shows another OLED display with order VCC-GND-SCL-SDA. We need to check out that before replacing!
# Ceiling Module | Point Laser 635 nm LFD635-1-3(12x30.5) by Laserfuchs
[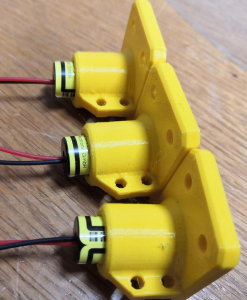](https://wiki.stadtfabrikanten.org/uploads/images/gallery/2026-06/NYlxpsmV97aRdX6O-grafik.png) [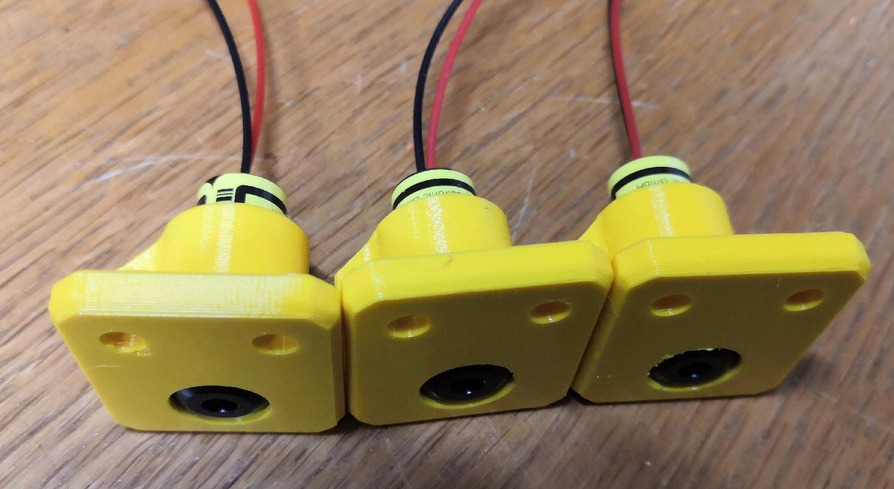](https://wiki.stadtfabrikanten.org/uploads/images/gallery/2026-06/5si4IzO77ScMfnBm-grafik.png) [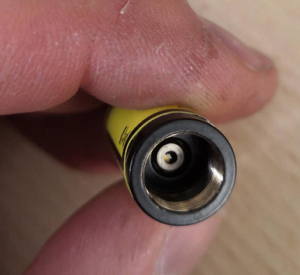](https://wiki.stadtfabrikanten.org/uploads/images/gallery/2026-06/6FHnlKXzJeroZ5sU-grafik.png) [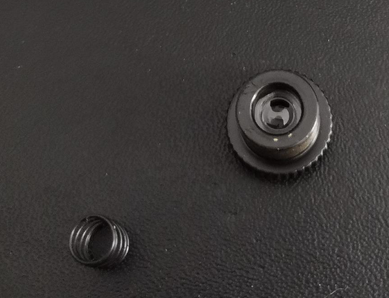](https://wiki.stadtfabrikanten.org/uploads/images/gallery/2026-06/rjmP17qY65cMdNhU-grafik.png) [](https://wiki.stadtfabrikanten.org/uploads/images/gallery/2026-06/nrWvHwlPtZklUyio-grafik.png) [](https://wiki.stadtfabrikanten.org/uploads/images/gallery/2026-06/oz622qsK2COUec9V-grafik.png)[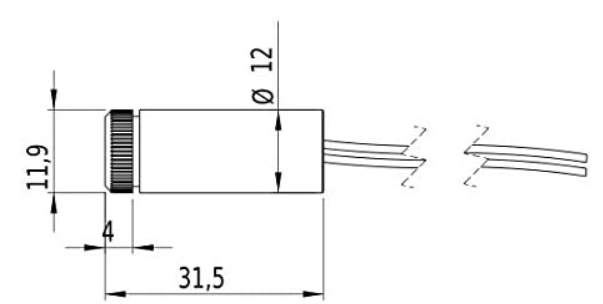](https://wiki.stadtfabrikanten.org/uploads/images/gallery/2026-06/sPwPSMZiNSKVgZHd-grafik.png) [](https://wiki.stadtfabrikanten.org/uploads/images/gallery/2026-06/2wtR8mR98KVU9hNw-grafik.png)
This type is a point laser for the projection of a red laser dot and is a laser module which is much better visible through the wavelength of 635nm than a comparable laser with 650nm. The optical diode power of the laser module is . Typical applications are low-cost applications. The laser has a very compact design. Due to the classification in the laser class no TÜV registration is necessary. The laser can be used e.g. at disco events or for installation in tools without any problems. (The laser protection measures must be observed!) The current consumption is very low, therefore 2 batteries can be used for power supply and the laser module can be used mobile.
### Technical data
- Lifetime: >3000 h
- Operating temperature: -20°C - 40 °C
- Storage temperature: -40°C - 80 °C
### Optical parameters
- Beam shape: point
- Optical power: 1 mW
- Laser class: 2
- divergence: H - 1.0 mrad
- dot size: adjustable
- Working distance: 10 m
- Optics: Acrylic lens
- Laser Technology: Diode
- Focus: adjustable
### Electrical parameters
- Potential of the housing: VDD(+)
- Operating voltage: 2.7 - 3.3, type 3 V DC
- Operating current: 30 mA
- Cable colour Plus: red
- Cable color GND: black
### Mechanical parameters
- Dimensions: Ø12x30.5 mm
- Material: Brass
- Cable length: 90 mm
- Cable type: 26AWG, 0.14mm²
- Outlet diameter optics: 4 mm
- Weight: 18.6 g
# Ceiling Module | Router TL-WR842N by TP-Link
[](https://wiki.stadtfabrikanten.org/uploads/images/gallery/2026-06/CpbvwvEc2wKps7zU-grafik.png) [](https://wiki.stadtfabrikanten.org/uploads/images/gallery/2026-06/ZqwY2trwf03QHCay-grafik.png)
This router is the connection end point for Raspberry Pi, Duet 2 Ethernet and local connection clients (wired or by Wifi). It acts as mesh repeater or switch (regarding to the configured mode). The housing is identical in construction to TPLINK WR840N / WR841N / WR842ND / WR843ND.
Warning: The router's Wifi power is weak. We would not use it a second time.
# Ceiling Module | Stepper Motors MT-1705HS200AE by Motech Motors
[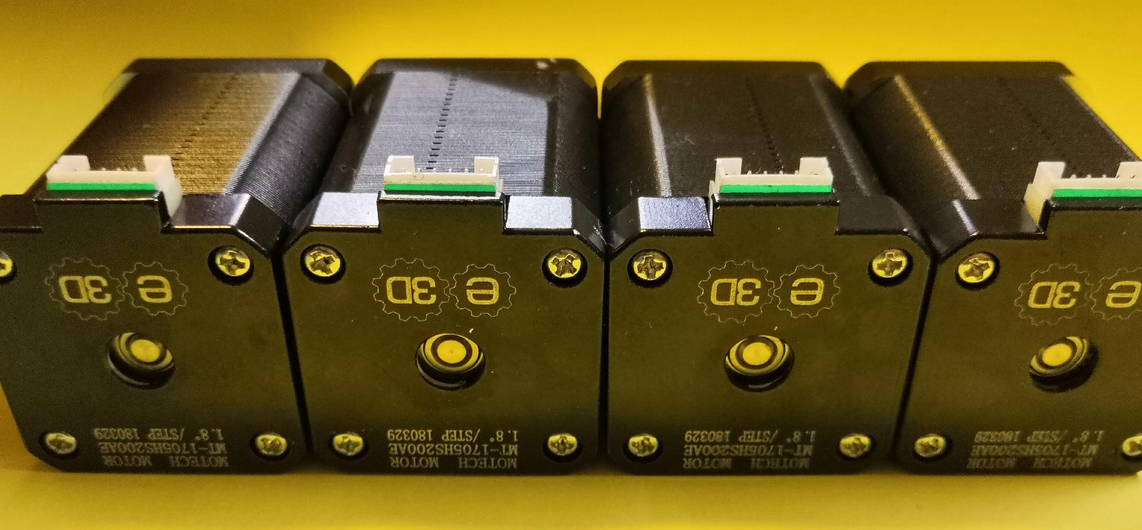](https://wiki.stadtfabrikanten.org/uploads/images/gallery/2026-06/KihdoDzkmCiuSpwm-grafik.png) [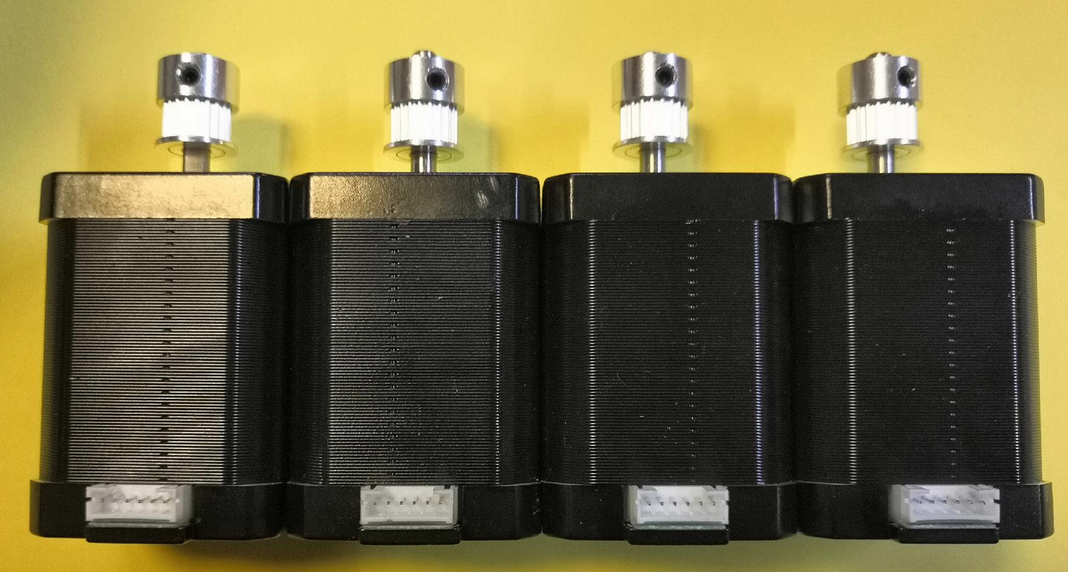](https://wiki.stadtfabrikanten.org/uploads/images/gallery/2026-06/i4KNMZ5ZherJogz8-grafik.png) [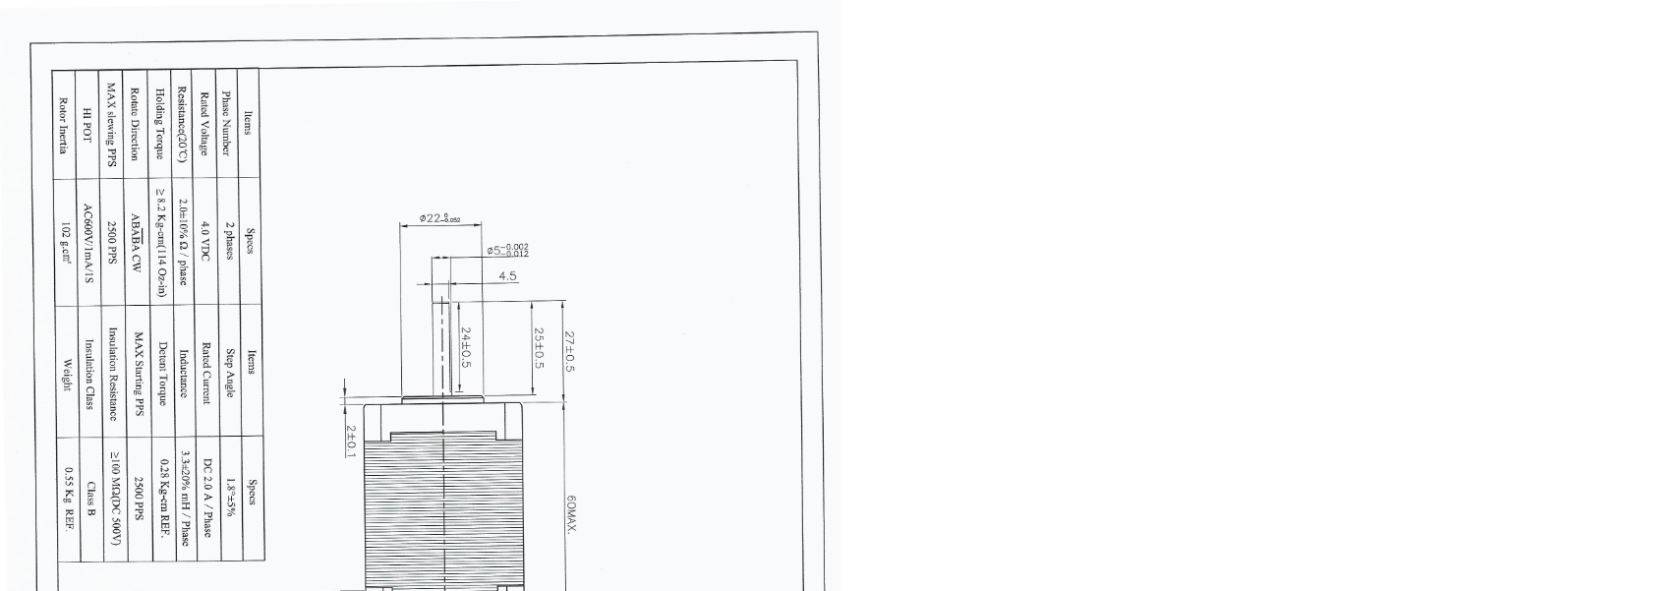](https://wiki.stadtfabrikanten.org/uploads/images/gallery/2026-06/XgMxJDSRuMxDu77X-grafik.png)
[](https://wiki.stadtfabrikanten.org/uploads/images/gallery/2026-06/2s2WNReoQ4HewPiW-grafik.png)
These stepper motor are strong Nema 17 which are installed at the A,B, C and D drives.
# Ceiling module | V2 Silent VR Cables by KIWI
[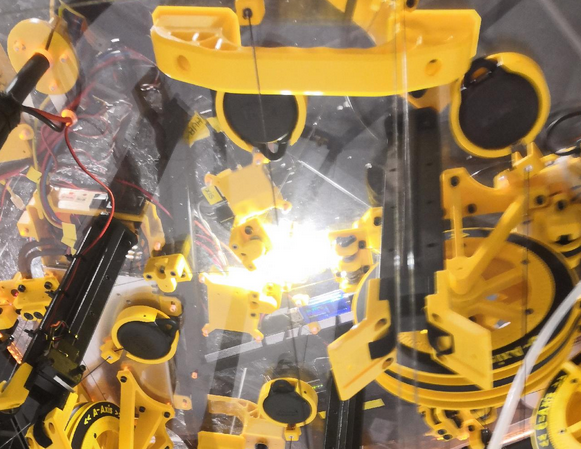](https://wiki.stadtfabrikanten.org/uploads/images/gallery/2026-06/TZJwZ7IaHPddFQpb-grafik.png)
Those items are used to keep the weighy main cable into position while Trikarus is moving. The higher the effector gets the more cable we have in idle state. We need to keep back the cable from collision points. So we use retractable cable holders to pull back the main cable.
# Ceiling module | Webcam C920 by Logitech
[](https://wiki.stadtfabrikanten.org/uploads/images/gallery/2026-06/nSkZU6ksBL8wVl0y-grafik.png)
The webcam is used for remote monitoring and for creating timelapse videos. Especially for long run prints we can use the timelapse feature to review unsuccessful prints.
# Ceiling module | COB LED Spot 6000-6500K 260mA 10V
[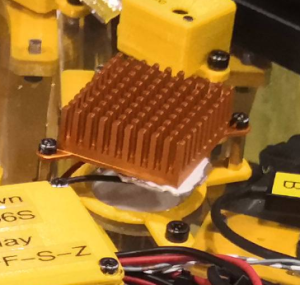](https://wiki.stadtfabrikanten.org/uploads/images/gallery/2026-06/QbtIzFyyICfwLZ9P-grafik.png) [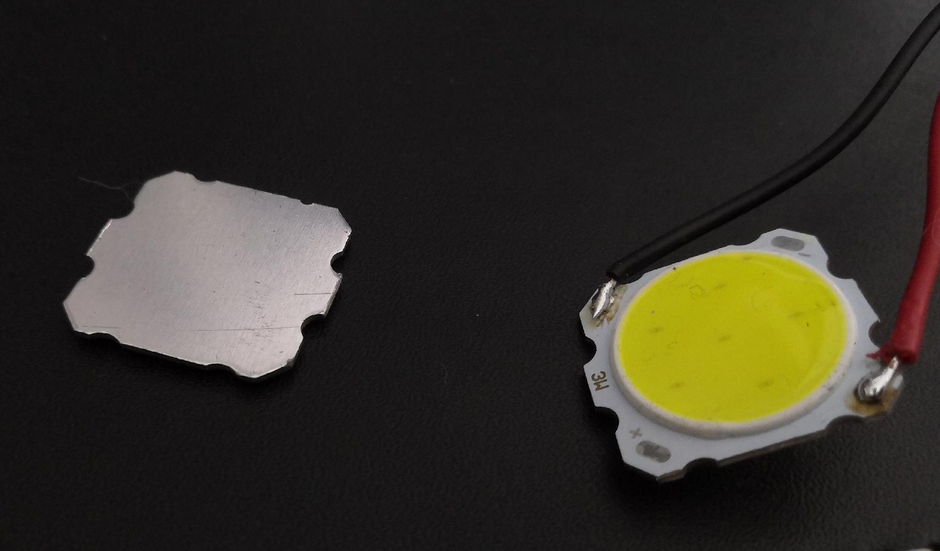](https://wiki.stadtfabrikanten.org/uploads/images/gallery/2026-06/RWibpVpbyCzX7Lv4-grafik.png)
[https://www.ebay.de/itm/173008003388](https://www.ebay.de/itm/173008003388)
- Power: 3 W
- Voltage: 9.6 - 10.5 Volt
- Max. brightness: 300 - 400 LM
- Current consumption approx. 260 mA
- Colour temperature: 6000 - 6500 K
- Beam angle: 120 - 140 degrees
- Lifetime : > 100,000 hours
- Diameter approx.: 28 mm
- thickness: 2,5 mm
To colorize the LED we use LEE lighting filter foil for light spots. We use those LED spots to have a neat top light from the ceiling. It's a more decorative element and it was planned to combine it with a circular spirit level (which failed) first.
# Ceiling Module | Rocker Switch MR-2 by Canal
[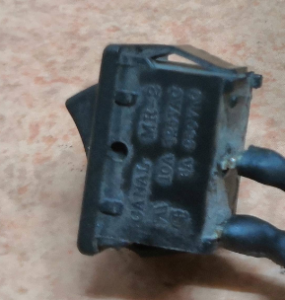](https://wiki.stadtfabrikanten.org/uploads/images/gallery/2026-06/TZsljvqXEeSG4ELl-grafik.png) [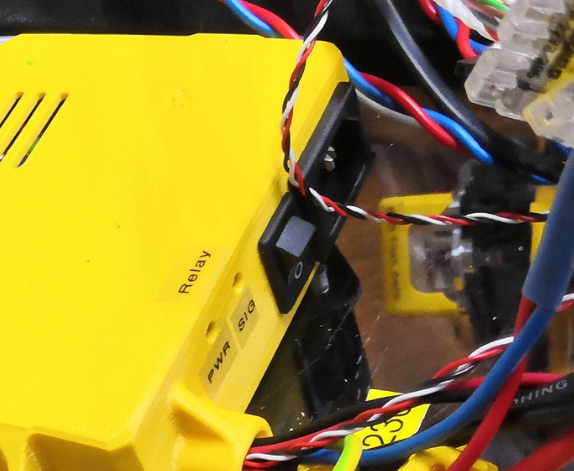](https://wiki.stadtfabrikanten.org/uploads/images/gallery/2026-06/PVd5OkEkn34U3Axa-grafik.png)
- 10A 125VAC ( UL, CUL )
- 6A 250VAC(UL, CUL)
- 10(4)A 250V~ T125/55 (VDE,ENEC))
- Snaps into 13 x 19mm panel
- Initial contact resistance : 20m ohm (max.)
- Insulation resistance : 100M ohm (min,) at 500VDC
- Dielectric strength : 1,000VAC for 1 minute
- Electrical life : 10,000 cycles
- Switch for Class II appliances
- Base : Nylon 66, UL rated 94V-2 min
- Actuator : PBT / Nylon 66, UL rated 94V-2 min
- Spring : Piano wire
- Contact : Silver alloy
- Terminals: Silver plated Copper, soldering, quick connecting and PCB terminals offered
- Approvals: ENEC, VDE, CQC, UL
This switch was ripped off from an old power supply and is used to turn on/off power manually at the Meanwell PSU ([Switching Power Supply MW RSP-320-24](https://old.stadtfabrikanten.org/display/TH/Switching+Power+Supply+MW+RSP-320-24)).
# Ceiling Module | Switching Power Supply MW RSP-320-24
[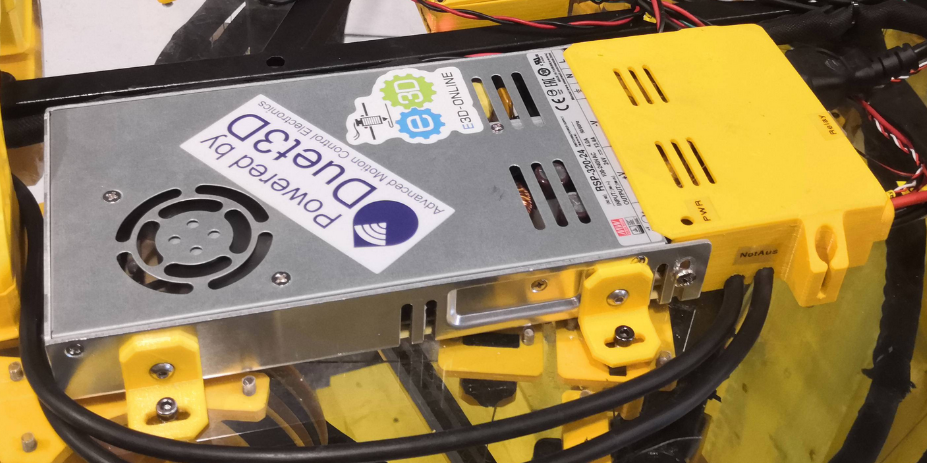](https://wiki.stadtfabrikanten.org/uploads/images/gallery/2026-06/dFT4P2CAg21YtHj9-grafik.png) [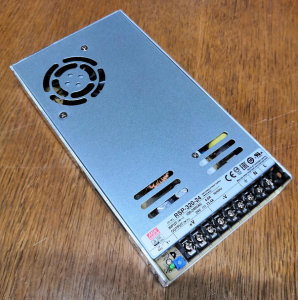](https://wiki.stadtfabrikanten.org/uploads/images/gallery/2026-06/ANWLXh30aE0ttWeu-grafik.png)
- closed design (case) with fan, screw terminals
- Universal input
- Overload protection by switch-off, auto recovery
- protected against short circuit, overload, overvoltage
- Built-in PFC circuit
- low installation height
Technical data
- Output voltage: 24 V DC
- Output voltage range: 20 - 26.4 V
- Output current: 13.4 A
- Power: 322 W
- Ripple: 150 mVp-p
- Input voltage: 88 - 264 VAC / 124 - 370 VDC
- Efficiency: 89%
- Inrush current, max.: 20A/115 VAC / 40A/230 VAC
- Operating temperature: -40 ... +85 °C
- Dimensions: 215 x 115 x 30 mm
- Weight: 0.9 kg
# Ceiling module | USB-Stick USB 3.1 32 GB - SANDISK Ultra Luxe
This stick is used to make local backups from filesystem (configs, scripts, Influx data, etc.)
# FAQ / Decisioning
This page contains some information about different decisioning which were met when designing hardware and software related things.
Why stepper motors and not brushless (BLDC) motors?
-
- Stepper motors are significantly less expensive and also require cheaper control electronics / hardware (comparison ODrive + BLDC vs. stepper motors with smart stepper)
- Stepper motors are easier to handle with standard 3D printer controls
- the official Hangprinter project does not yet have a ready release branch for the BLDC variant (either RAMPs with Marlin Fork or Duet 2 with RepRapFirmware Fork)What's the reason to use Smart Stepper?
Because they just work! And they work better than clones or the one's from Tropical Labs. But you can check out yourself some alternatives:
1. [MisfitTech Smart Stepper](http://misfittech.net/nema-17-smart-stepper/)
2. [https://github.com/thmjpr/nano\_stepper (advanced fork of MisfitTech Smart Stepper)](https://github.com/thmjpr/nano_stepper) - that might be interesting to try out later
3. MakerBase Servo42 (fork of MisfitTech Smart Stepper)
4. [Tropical Labs Mechaduino](https://tropical-labs.com/shop/mechaduino-0-2-pcb/)
5. [uStepper](https://ustepper.com/store/ustepper-boards/27-46-ustepper-s.html)
6. [Wembi](https://www.kickstarter.com/projects/109167261/wembi-closed-loop-motorupgrade-for-3d-printer?lang=fr)
7. Trinamic PANdrive
8. [All in one stepper motor](https://www.reichelt.de/all-in-one-schrittmotor-nema-17-1-8-2-55-v-act-17hs44172802-p260763.html?PROVID=2788&gclid=EAIaIQobChMInJnqr-je6QIVhKwYCh1-IgfuEAkYBSABEgJjhvD_BwE&&r=1#av_tabholder)
9. [ethersweep](https://github.com/Neumi/ethersweep)
Why so powerful stepper motors for the drives?
- The strongest Nema 17 motors (holding torque) were selected that we could find to avoid using heavier and more expensive Nema 23 motors
- it takes a lot of strength to build enough line tension while creating stable movements. Most Nema 17 motors are not that strong.
Why did you mount the spool drives vertically?
In Hangprinter v1-v3 the drives were mounted horizontally. Since Hangprinter v4 they are vertically aligned because Torbjorn uses BLDC motors. We decided too make them vertical too, even with the Nema 17 stepper motor, because in case the lines wind off accidentally it's much easier to remove knots. In general it's a question of design and space saving which is hard to answer. Maybe some features like drive brakes could be done better by doing the drives horizontally, or maybe not.
Why did you choose the Duet 2 Ethernet?
- because 32-bit electronics allow more signal processing and faster stepper movements than an old 8-bit controller based on the Mega 2560
- because the firmware for the Hangprinter is supported out of the box
- because there is more debugging / connection options via the Ethernet port
- there are various extensions (PT100, IR Probe) that fit perfectlyWhy are you not using the official RepRapFirmware v3?
- because the forked firmware version from Hangprinter project contains better algorithms for line buildup compensation and other things like doubled line feature. We would need to update the official firmware.
Why did you use an infrared Z probe?
- because infrared sensors are accurate and support many materials → glass, wood, tape, etc.
- it just mustn't reflect too muchWhy did you use a polycarbonate sheet for the ceiling plate?
- because it is transparent and therefore offers very good insight into all components. This is very helpful for maintenance
- because it just looks good
- because it’s flame retardant. Significantly better than wood
- because it is elastic and therefore holes and threads can be easily inserted into it (no brittle fracture behaviour)
- note that you should buy a UV resistant one!Why didn't you use a heated printing platform?
- Heated beds are major sources of errors. Printed parts peel off when the temperature is not right and the materials that are printed on heated printing platforms are usually also more expensive. Since we intend to produce large and lengthy 3D prints, we have agreed to print using more inexpensive PLA. No heating is required for this (but it would help alot, because also PLA warps in large scale parts)
- a heating bed of this size would be complex and expensive to build and to run (power requirements)
- rooms with underfloor heating may be interestingWhy cylindrical pins and PTFE segments instead of screws in the line guide assemblies?So that the reels are in place at all important points and do not shear or wobble to the side → Goal: Increase accuracy and reduce shearing of the lines by skippingWhy was a router installed on the ceiling plate?The router serves on the one hand as a mesh repeater, on the other hand as a switch and for knotting ethernet devices. This makes Trikarus extremely flexible. This saves the purchase of a single switch or a WLAN stick. With Freifunk, the printer can be integrated into external environments relatively easily (in regions around Chemnitz). The TP-Link router used was selected because the device was left over and was "recycled" for the project purpose. The smaller GL-ARM300M router we ordered failed to flash the Freifunk Gluon firmware (too old uboot bootloader prevented the 16MB memory block from flashing). We did not find a smaller router alternative with gluon compatibility and at least 2 LAN connections yet. An ideal device would contain Wifi, 2 or 3 ethernet ports and SIM card slot.Why did you install a Raspberry Pi?
- to run a server that simplifies remote maintenance. From the time the ceiling module hangs on the ceiling, any maintenance is difficult and only possible with a ladder. With Repetier Server and bash tools, almost all tasks can be done without having to constantly climb up and down except of eletrical or mechanical issues
- so that a 3D print server can be installed that can be scripted (API usage)
- so that different actuators and sensors via GPIO expand the functionality of the printer (gyro, IMU, filament feed encoder, relay controls) → by using the GPIO functionality, the module network consisting of UPS, Rasperry Pi and router cannot be easily disconnected from the printer. A wireless connection of the sensors to the Raspberry Pi would then be necessary to evaluate the information or to control the modules. By using Duet 2 Wifi, the Raspberry Pi and Duet would be linked via router. Decoupling so that the Raspberry Pi, UPS and router are located next to the printer would then be possible and would help to reduce the weight.
- The advantage of Raspberry Pi + Duet is that some tasks can run separately: cron scripts to automate switching on and off and monitoring while DWC controls the print job (Repetier Server is not a requirement, but an advantage). DWC can be used as a backup strategy, so to speakWhy did you use Repetier Server?
- because we have had basic experiences with it before. Otherwise we would have used Octoprint for sure
- Repetier Server has an advanced API connection that Duet Web Control does not (yet) have in that fully featured way
- because there you can exclude "broken" regions of a running print (GCode filter)
- because Repetier Server offers an extended functionality for saving and restoring failed prints
- because it supports custom macros to run python, bash or other scripts (extcommands.xml)Why did you use a UPS instead of a power bank?
- because power banks generally do not switch from mains to battery supply quickly enough (tested). This will cause the Raspberry Pi to restart unexpectedly. However, a UPS is specially designed for this.
- Many power banks cause "Under Voltage" event on the Raspberry Pi, as they do not deliver a clean 5V voltage or not enough power. This makes the Raspberry Pi unstable and leads to unforeseen crashesWhy the elaborate machine frame?
- so that we have something shapely, transportable (car), robust and unique in the industrial museum that fits the exhibition
- the maximum height of about 3 meters was a requirement on the part of the industrial museum. Therefore the frame was limited to a height of approx. 2.80 m. we built a steel square tube frame because it is significantly cheaper than an aluminum square tube frame.
- we wanted to keep vibration and bending as low as possible, which is why we deliberately chose a larger cross-section and mass (3 mm bending at 1.5 m long square tube beam 40x40x3 under 85 kg load)Why is the filament feeder connected via Bluetooth?
- In this way you save yourself a data cable, which should extend from the floor to the ceiling
- furthermore, the feeder unit can be supplied with power separately, which also saves a power cable to the ceiling. That keeps intact the Hangprinter idea
at the moment the feeder is not present because it's a work in progress thing
The electronics look confused!I am an engineer and not an electrician. I have made everything to the best of my knowledge and belief. Of course, much better. I talked to electricians from our FabLab and tried many tips to implement or take them to heart. Another iteration of the printer and with a little more time can be done much more with the cable scheme and the hardware selection. However, this was not possible for this prototype. I also did not know about caveats with SPI/I2C and really long wires. I later found out the harder way that long cables are no good idea for I2C or SPI interface. It can be managed, but you need more things. Have a look at [https://hackaday.com/2017/02/08/taking-the-leap-off-board-an-introduction-to-i2c-over-long-wires.](https://hackaday.com/2017/02/08/taking-the-leap-off-board-an-introduction-to-i2c-over-long-wires/)Why did you connect 5V relays to the Raspberry Pi, although these cause problems because the voltage level does not match?
- Because there were no ready to buy 3.3V modules in Germany and the delivery times from China were too long. In principle, good alternatives are commercially available: [https://www.ebay.de](https://www.ebay.de/itm/5Pcs-Optokoppler-Relaismodul-Relais-High-Level-Treibermodul-fur-Arduino-3V-3-3V/333469820543?_trkparms=aid%3D1110006%26algo%3DHOMESPLICE.SIM%26ao%3D1%26asc%3D225646%26meid%3D85e272423b384a4cadb4795cc4f4f12d%26pid%3D100005%26rk%3D2%26rkt%3D7%26mehot%3Dpf%26sd%3D233465825810%26itm%3D333469820543%26pmt%3D1%26noa%3D0%26pg%3D2047675%26algv%3DSimplAMLv5PairwiseWebWithImageNsfwFilter&_trksid=p2047675.c100005.m1851) (3.3V opto coupler modules)
- The now used modules in Trikarus were both connected via 5V USB from the Freifunk router because they consume too much power and exceed the permissible maximum limit of the Raspberry Pi. It is known that the modules used still do not work 100% reliably with 3.3V without magic tricks, since they have different logic voltages (logic level shifter may be necessary). See also [https://www.raspberrypi.org/forums/viewtopic.php?t=72862](https://www.raspberrypi.org/forums/viewtopic.php?t=72862). The solution lies in a couple of dirty Raspberry Pi software hacks which should be replaced by some better things.Why was filament monitoring not implemented with RepRapFirmware's on-board implementations?RRF only supports filament monitoring when printing from SD card. We have therefore considered that we monitor the filament at the exit (from the filament spool) and entrance (to the extruder). Because whether the filament is conveyed correctly can fail at various points from the path from the spool to the nozzle. The ground filament feed system monitors whether the weight changes (HX711 load cell), whether the filament winds off the spool (Force Sensor) and whether it moves through the extrusion tool as well (getting in contact with rotary encoder sensor). The evaluation takes place via Raspberry Pi GPIO (only digital inputs, no analog inputs) and the Bluetooth pairing with the Arduino Nano of the filament feeder on the ground. It is admittedly cumbersome, but meaningful! Events can be programmed via the Repetier API that transform the information into corresponding actions.Why didn't you use U shaped bearings?At the time of construction and implementation, I was not clear about the differences between V and U bearings in Hangprinter terms. A conversion to a U-bearing would certainly be a good idea.Why did you use such a thick cable from the head plate to the effector?The control cable is suitable for mechanical movements and contains several wires for the different sensors and actuators. Trikarus contains (experimental) sensors than a common Hangprinter, which is why more wires are necessary. A ribbon cable would have been unsuitable for the dimensioning and for shielding reasons (Trikarus cable is shielded and more suitable for I2C long wires). Unfortunately, the use of the control cable also results in a higher weight and a worse effect because the cable sags heavily. It must therefore be supported by some mechanical guiding solution.Why did you wire the Smart Stepper this way?
- because the used Duet does not provide an I2C interface to connect like Torbjørn did with his "convenience wiring" - that's what i thought a long time. Then i found out that this is not true because Duet has I2C too but marked as TWI (i was not aware because nobody documented it well)!
- because you can flash the Smart Steppers easily with Arduino IDE directly from Raspberry Pi by USB. So USB even makes sense when doing a convenience wiring!
- because you can pull date into InfluxDB monitoring quickly
- because you can control by USB interface. This is slower and less versatile then on Duet RTOS but its also much easier to develop. And it allows to easily interact with a sort of other tools like simple bash or python scripts.
Why did you choose those laser diodes?
The integrated laser in Trikarus help to adjust the mechanical parts of the printer. The ceiling module has three integrated red point lasers which are projecting dots to the effector and/or to the ground and/or to the print platform.
Good lasers for this job are
- focusable lens. collimated lasers may have a too widen point projection at the surface which makes it harder to do precise adjustments
- less < 1mW of output power. I tested 5 mW lasers first which are totally unsecure and overpowered for the job
- working minimum distance of 3 meters
I decided to use [Point Laser 635 nm LFD635-1-3(12x30.5) by Laserfuchs](https://old.stadtfabrikanten.org/display/TH/Point+Laser+635+nm+LFD635-1-3%2812x30.5%29+by+Laserfuchs) because they are compact and have low power consumption. They are secure to use beause they have not enough energy to damage eyes (class 2 laser device) and have a good visibility due to 635 nm instead of 650 nm wave length.
Please explain your choice of main cable support
Regular cable spool, igus twisterband, phone cable, stainless steel carabiner cable spring line or bungee cord will mess around when they get short and will create high load when getting long or are just too unflexible. The only good solution we found (tip from friends) was the VR cable retraction system.
Why you don't share 3D data of Trikarus?
Trikarus is meant be a unique non-industrial (non-commercial) artwork project which tries to address and solve (or to dig deeper) different Hangprinter problems in general. We want to contribute with ideas, graphics, measurement series, math formulas, software code, documentation and inpiration. We don't want to be the supporters for manufactured hardware parts which are getting produced an unintended way and which result in risky assemblies. If we would build it again we would change so much. We used a lot of different pieces from the spare parts box. The construction is just not convenient. You might collect totally different parts. The adoption would require complete remake.
Trikarus was made of a bunch of different software pieces like AutoDesk Fusion 360, FreeCAD, OpenSCAD and files from GrabCAD and Thingiverse. To push the Hangprinter main idea it's required to keep sources clean and to give understanding and knowledge to it. Please support Torbjørn's main repo with convenient OpenSCAD descriptors.
# Gallery of printed objects
## 13.05.2023 - Maker Bottle (450mm)
[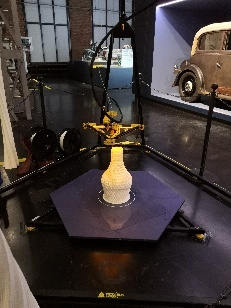](https://wiki.stadtfabrikanten.org/uploads/images/gallery/2026-06/Bn4DR9PNKTp8b92D-grafik.png) [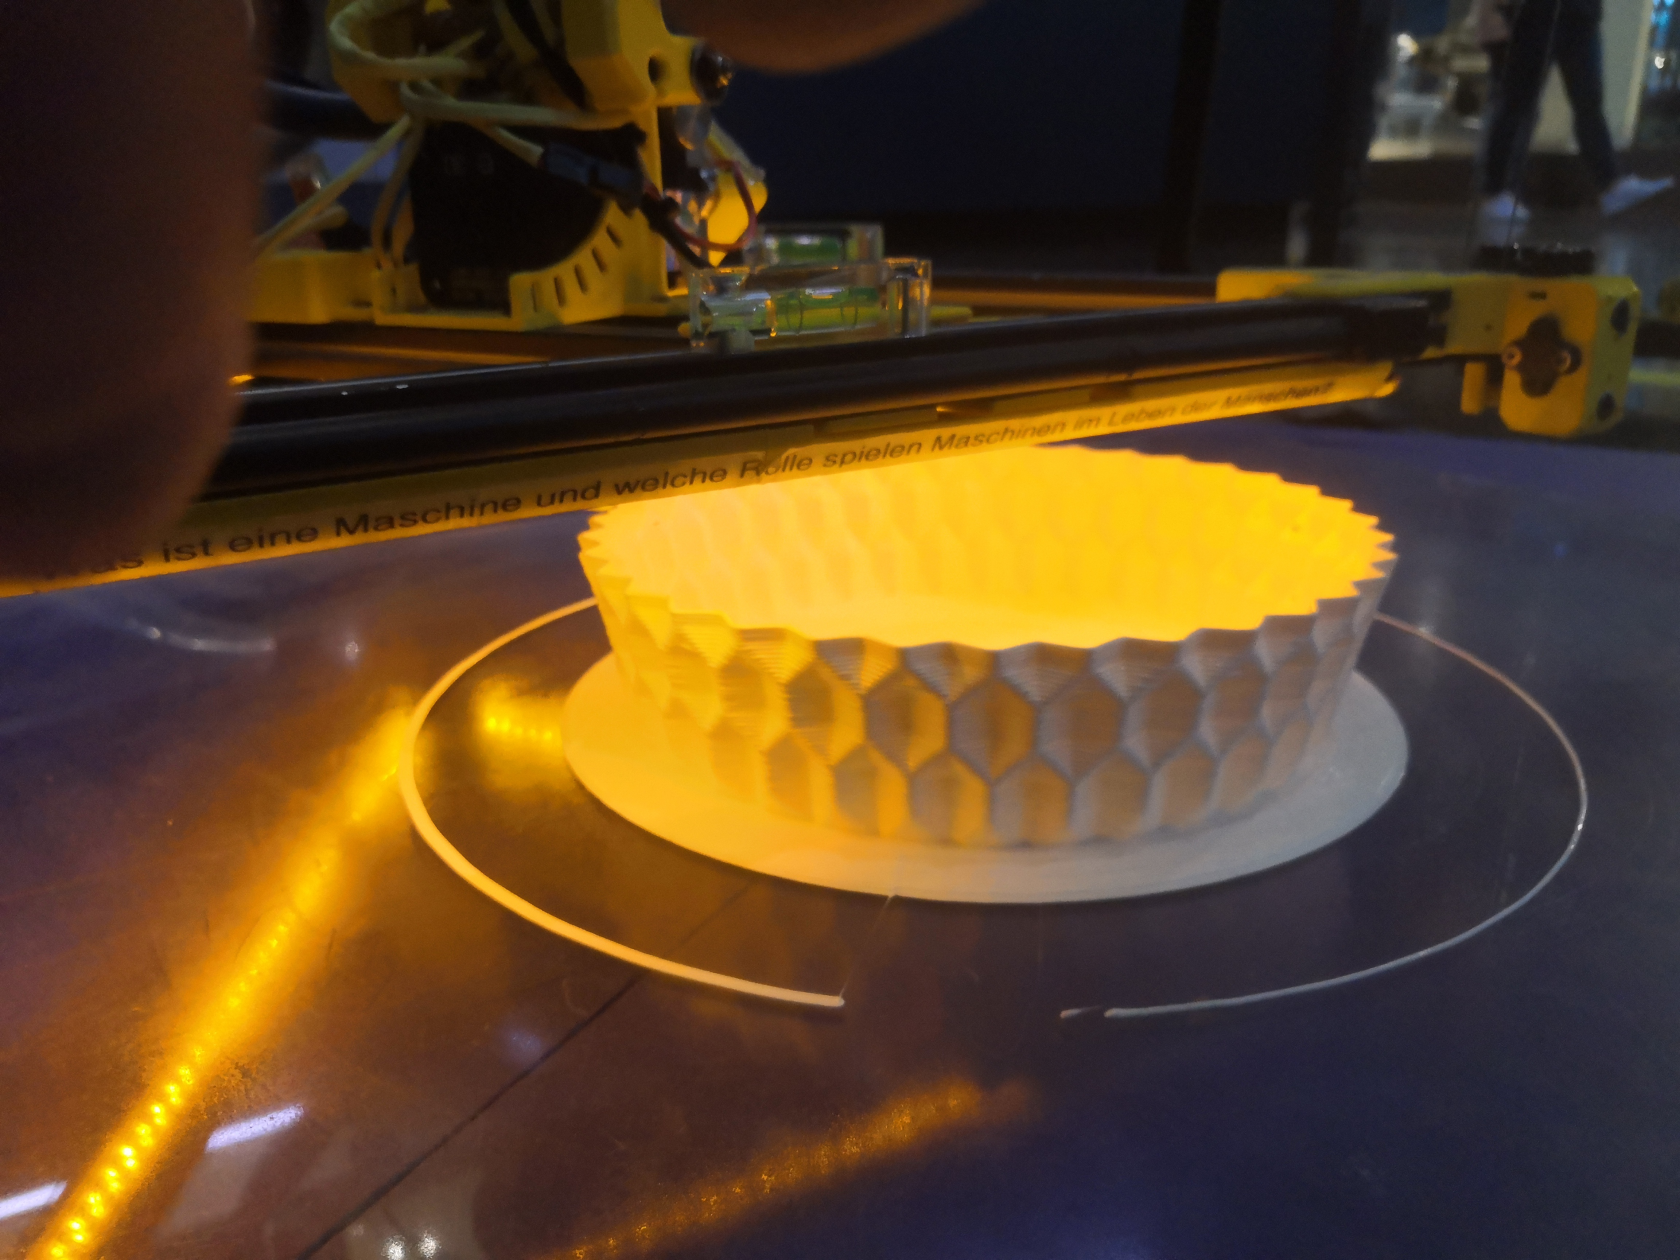](https://wiki.stadtfabrikanten.org/uploads/images/gallery/2026-06/3Ku4b1iN5ID33Dph-grafik.png) [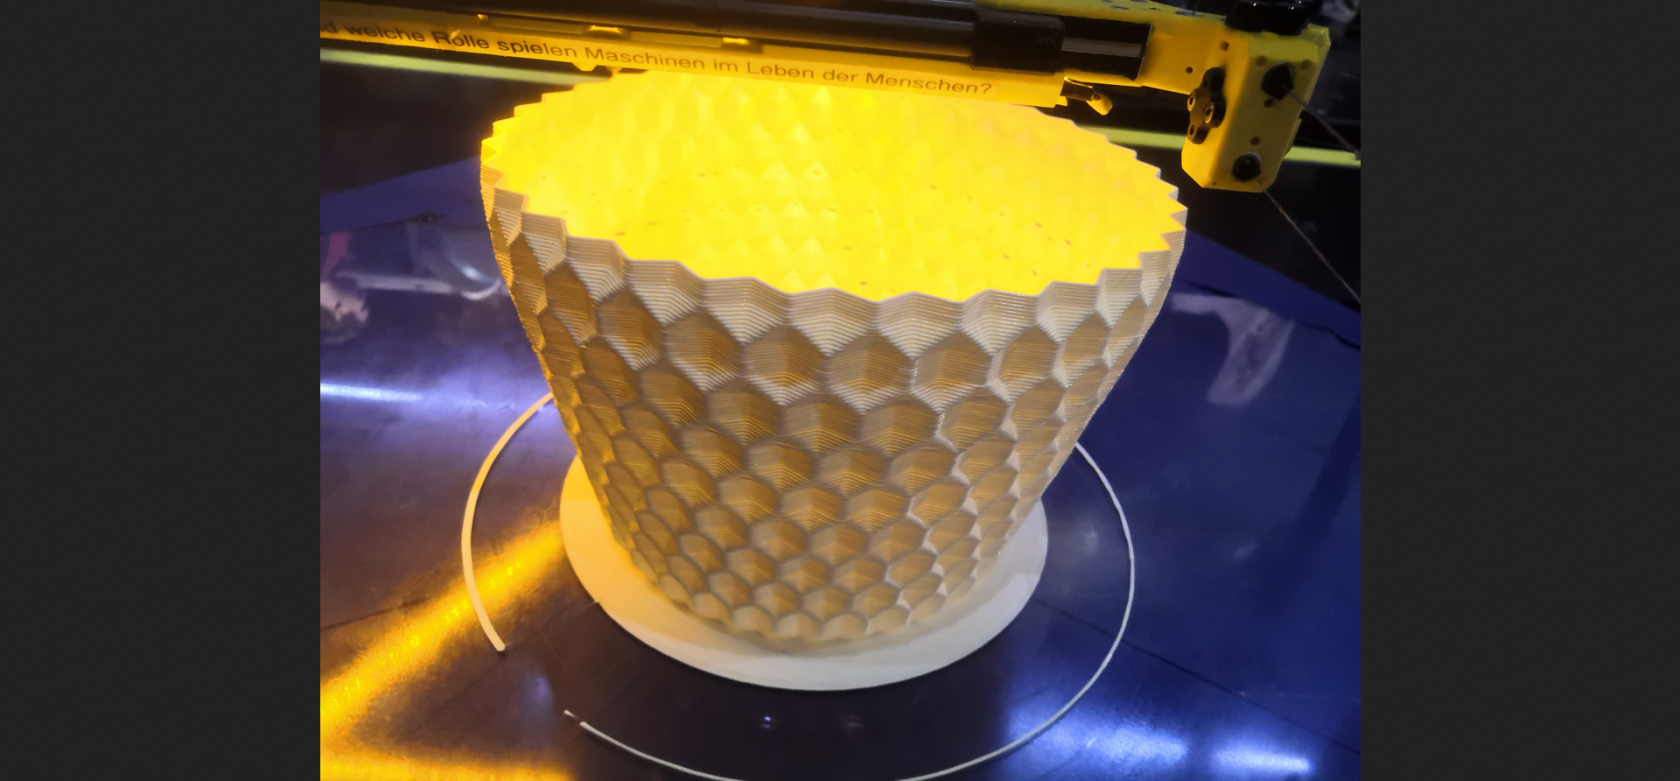](https://wiki.stadtfabrikanten.org/uploads/images/gallery/2026-06/x3YOuiLeqiyjaXxP-grafik.png)
## 16.04.2023 - Watering can
[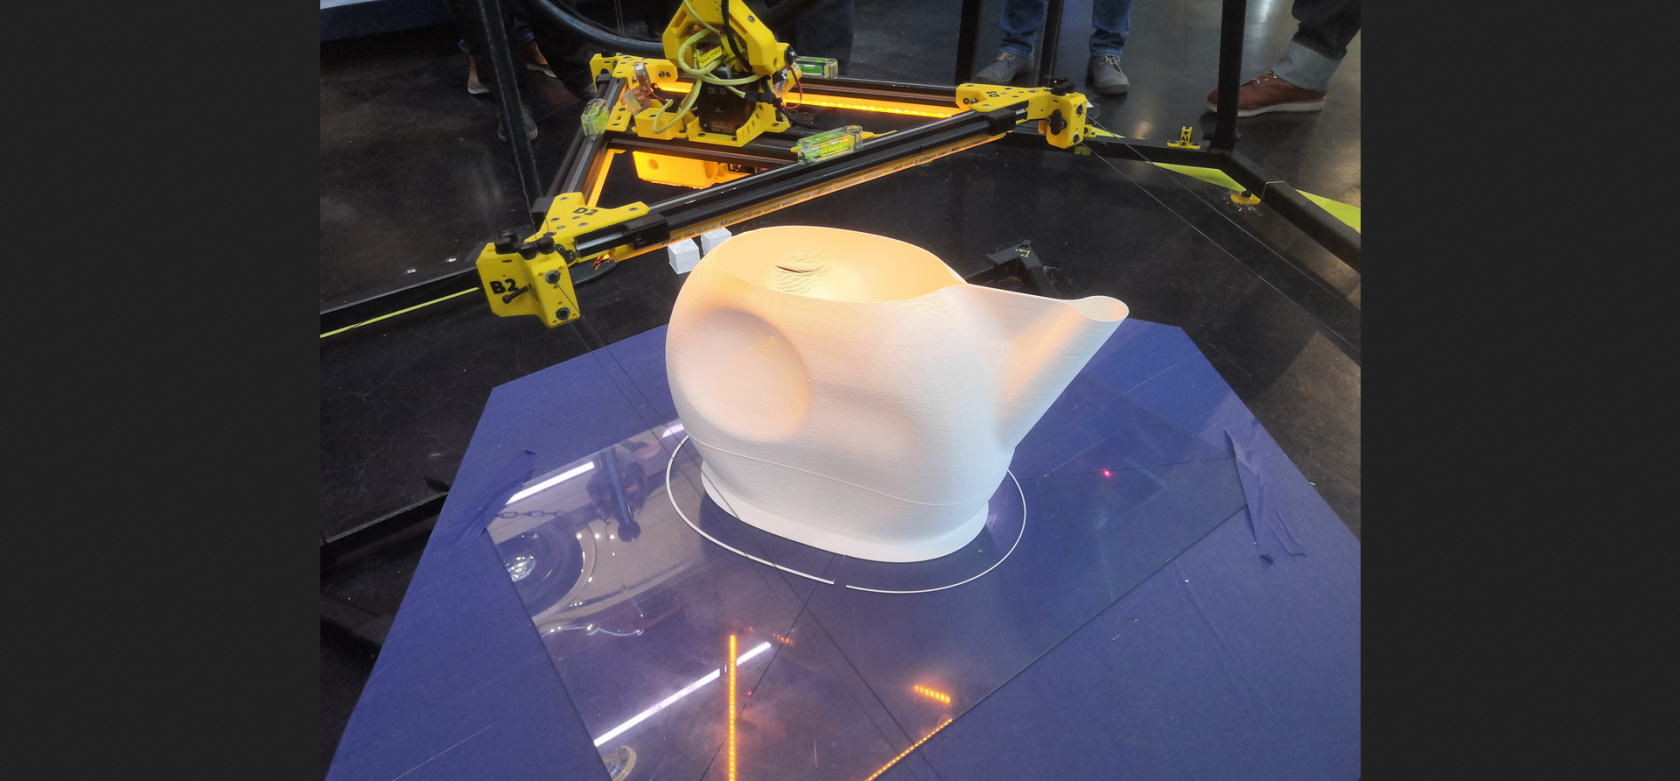](https://wiki.stadtfabrikanten.org/uploads/images/gallery/2026-06/BYVWxSiMxayvyxl6-grafik.png)
620g white PLA filament, 1mm layer height. The can is not solid to keep the water inside. We are trying to close the surface manually. Print time 6h46min.
## 20.08.2022 - Torso
## 24.07.2022 - [Another left hand](https://www.thingiverse.com/thing:196048/files) (409 mm)
[](https://wiki.stadtfabrikanten.org/uploads/images/gallery/2026-06/TGkX8QKaYx50Sjt7-grafik.png)
## 17.07.2022 - [Left Hand](https://www.thingiverse.com/thing:31331) (360mm)
[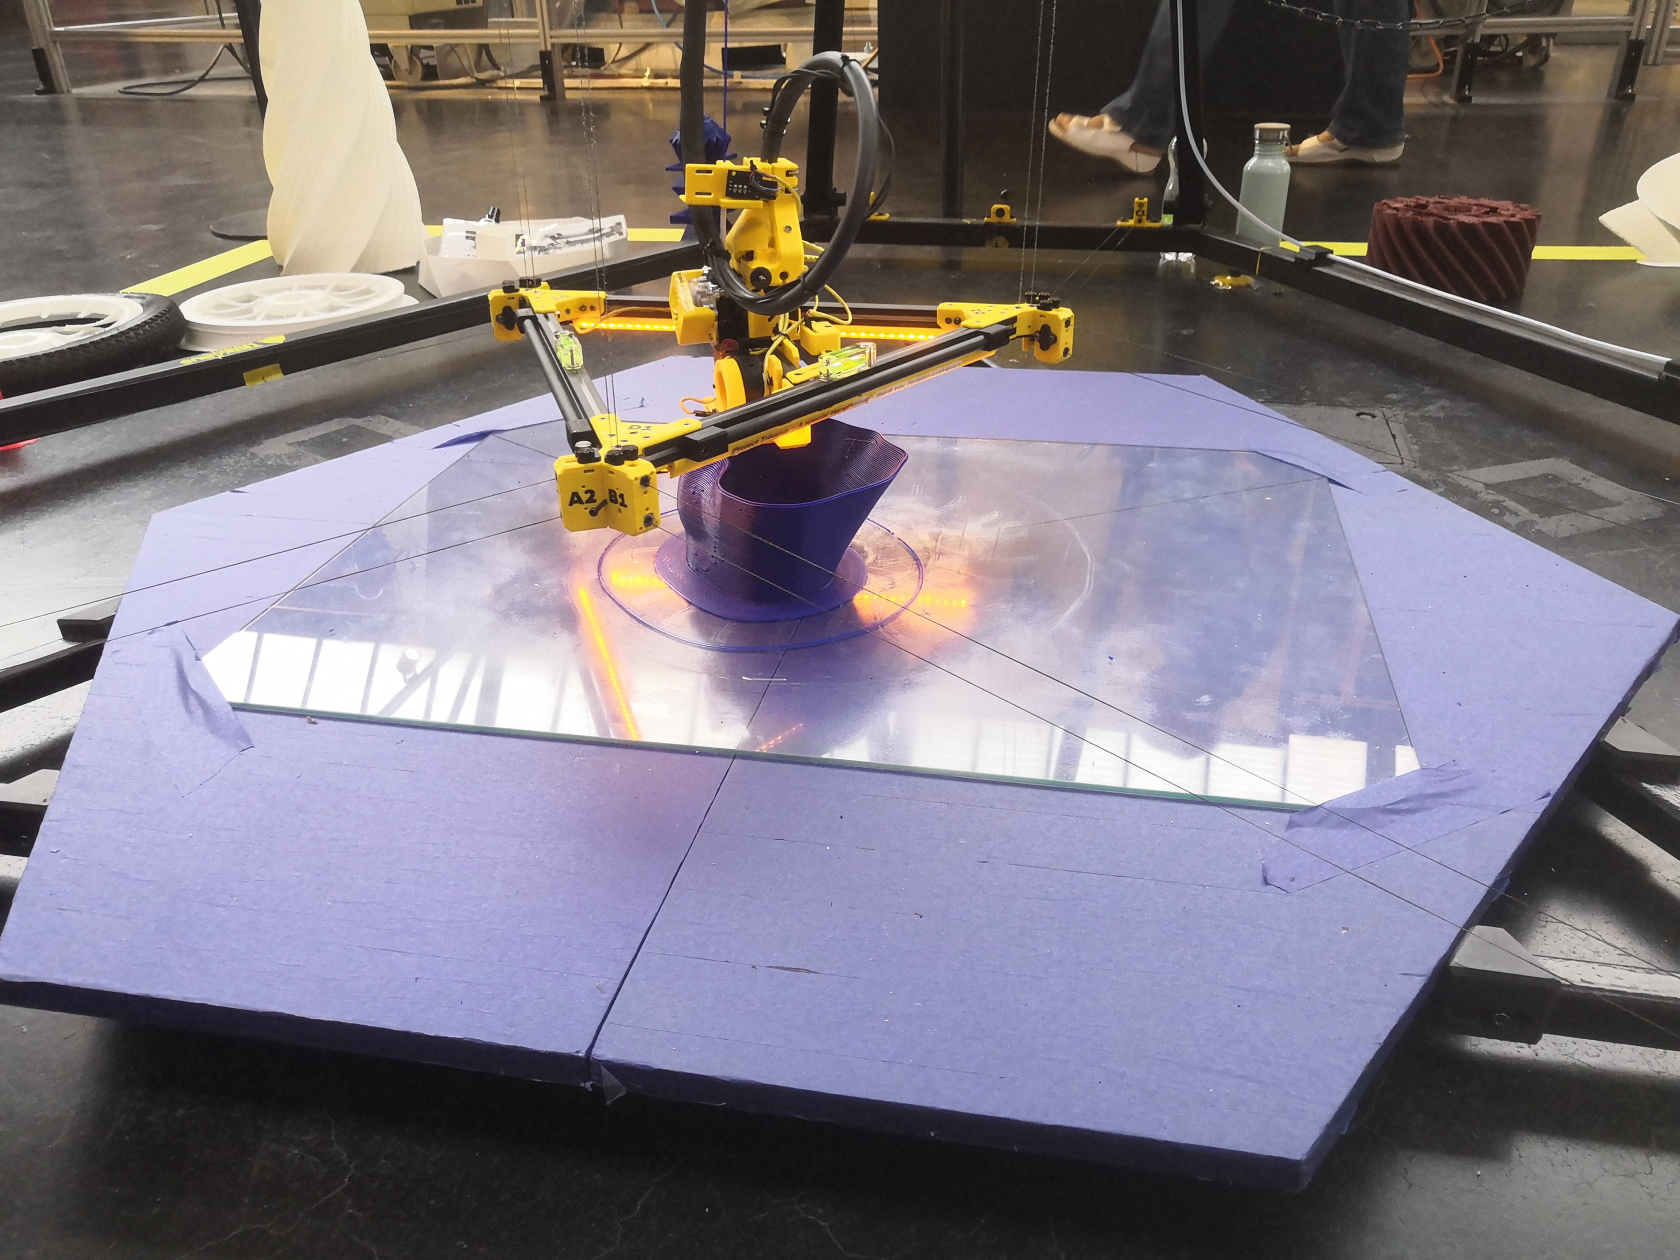](https://wiki.stadtfabrikanten.org/uploads/images/gallery/2026-06/lWMMPn0z1nHJXS49-grafik.png) [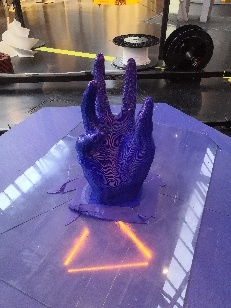](https://wiki.stadtfabrikanten.org/uploads/images/gallery/2026-06/SVImeww1mabKCyp1-grafik.png) [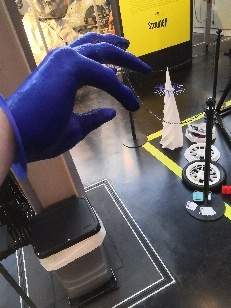](https://wiki.stadtfabrikanten.org/uploads/images/gallery/2026-06/Me06AnYGvTIcOSLW-grafik.png)
## 26.06.2022 - Turbine
This turbine surface is about 80mm tall, weighs around 300 g of PLA and printed in ~6 hours with a layer setting of 0.5 mm
## 26.06.2022 - Turbine
This turbine surface is about 80mm tall, weighs around 300 g of PLA and printed in ~6 hours with a layer setting of 0.5 mm
[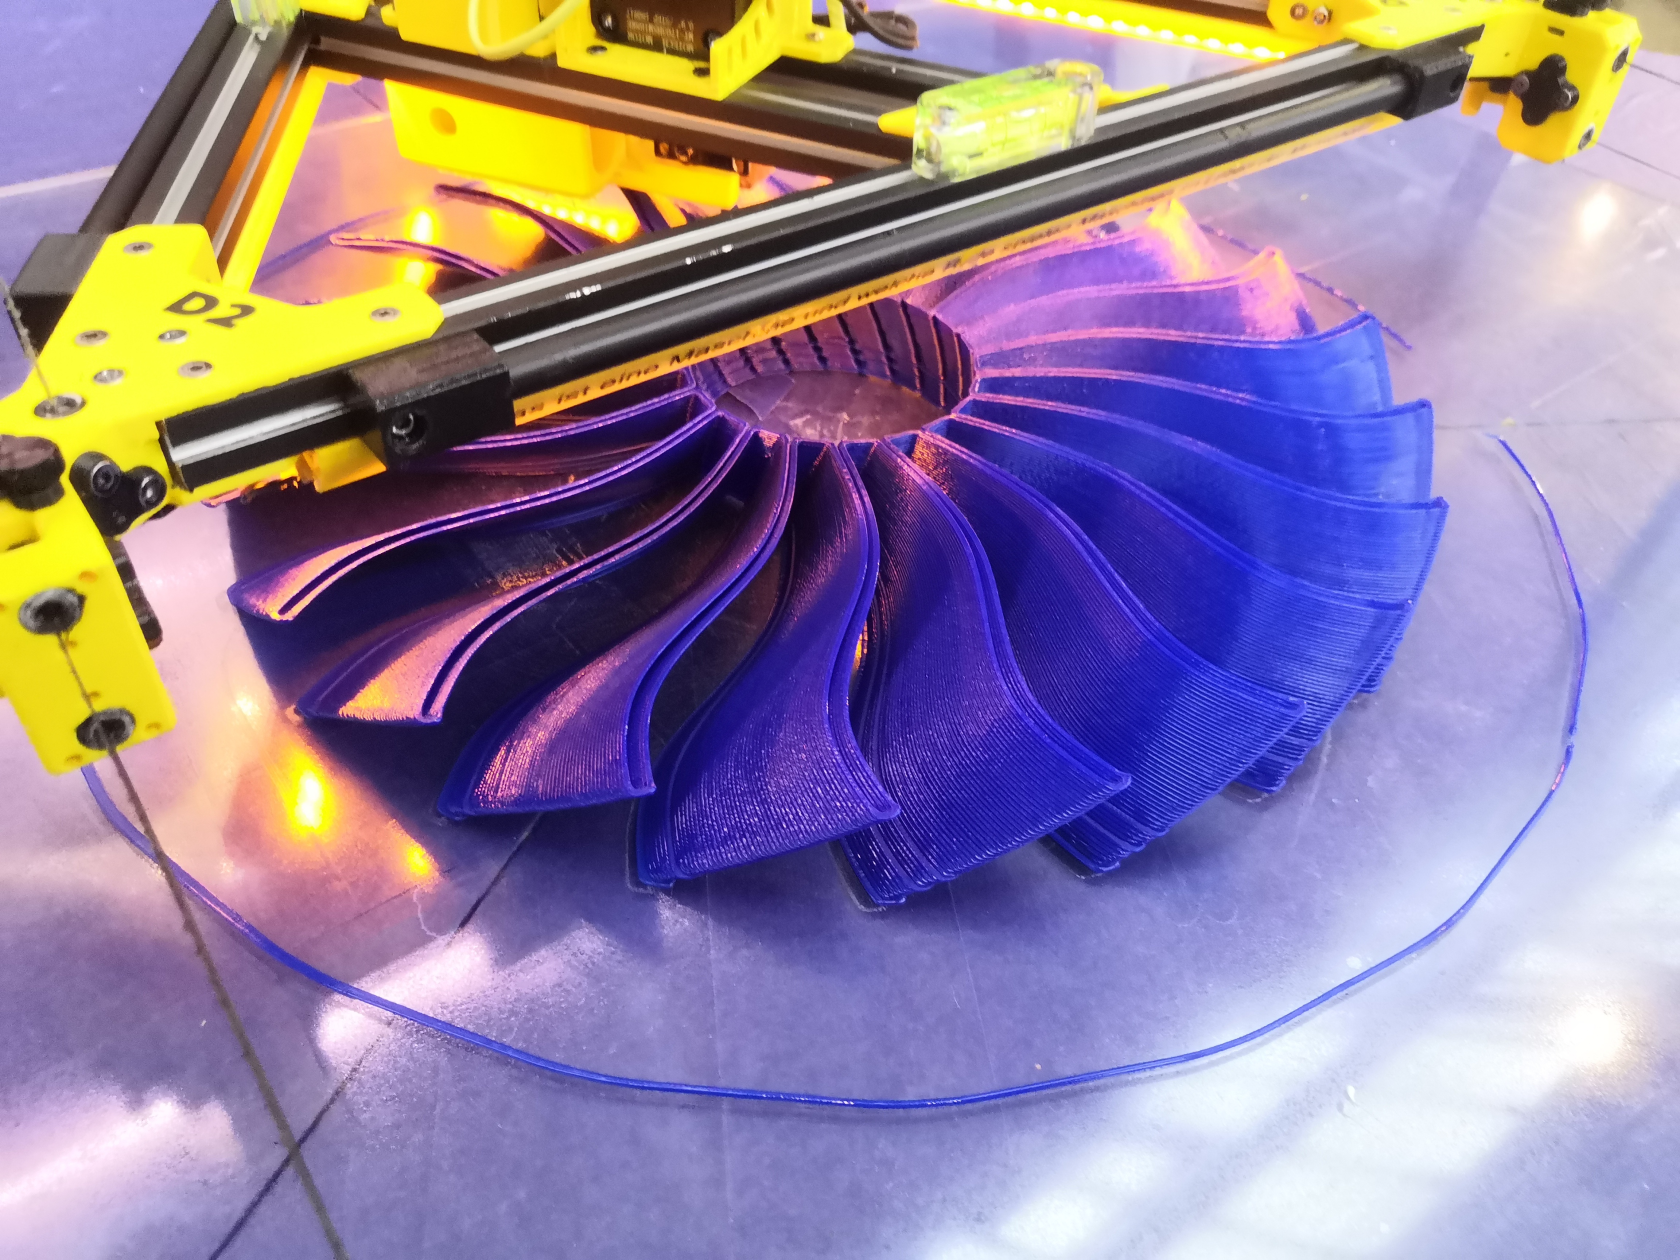](https://wiki.stadtfabrikanten.org/uploads/images/gallery/2026-06/Htpvm4lsJtk3Jquh-grafik.png) [](https://wiki.stadtfabrikanten.org/uploads/images/gallery/2026-06/XAyFYKIPs18hnxNN-grafik.png)
## 22.05.2022 - Carabiner
This hook is completely working! Weighs about 750 grams
[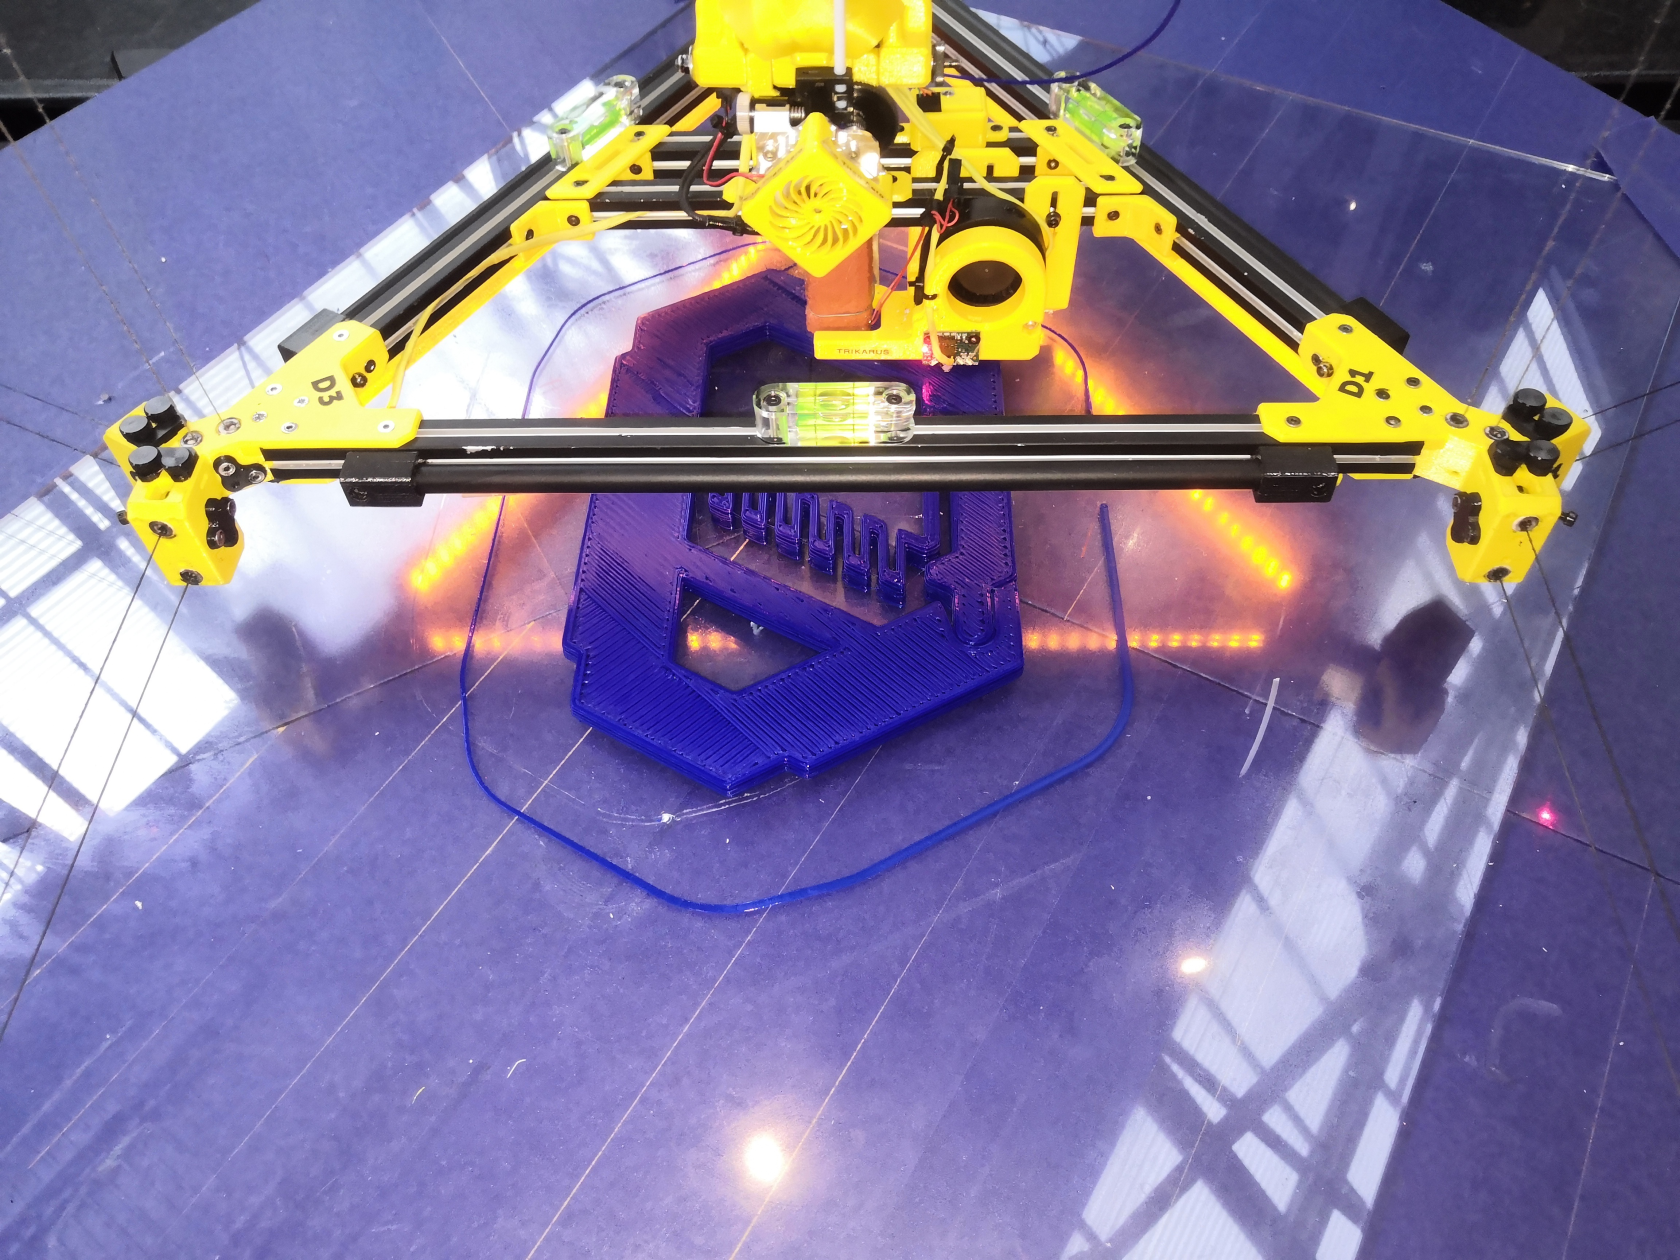](https://wiki.stadtfabrikanten.org/uploads/images/gallery/2026-06/1iTwQa9UMPoPlefm-grafik.png)
## 21.05.2022 - Complaint Flex Mechanism
This part is bendable about 180° degrees
[Flex-16: Large-Displacement Monolithic Compliant Rotational Hinge by BYU\_CMR - Thingiverse](https://www.thingiverse.com/thing:3524459)
[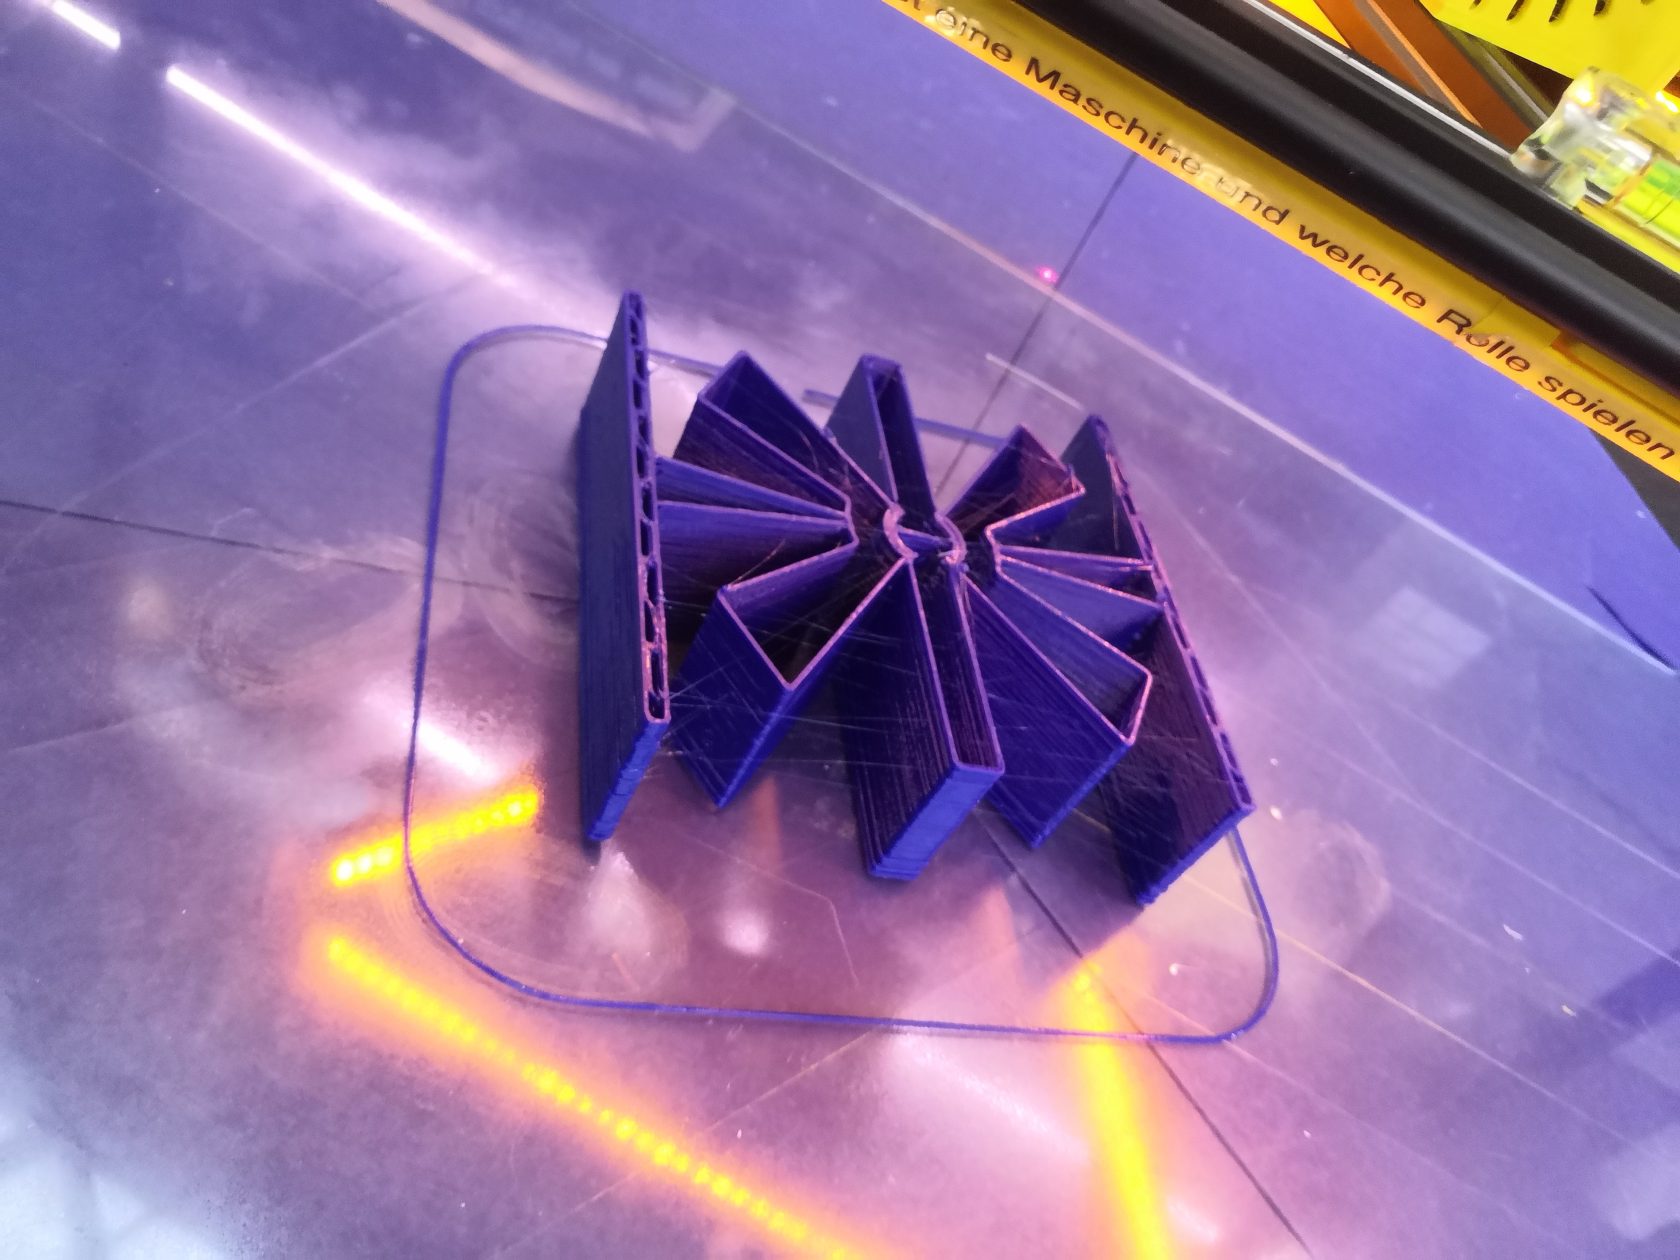](https://wiki.stadtfabrikanten.org/uploads/images/gallery/2026-06/256JOBWs0qMxq83K-grafik.png)
## 24.04.2022 - Interlocking Chain Segments
[Chain mail tri-mesh improved by dfyler - Thingiverse](https://www.thingiverse.com/thing:2611564)
## 27.03.2022 - Turbine
[](https://wiki.stadtfabrikanten.org/uploads/images/gallery/2026-06/yI9FV4z3A3DCPxmn-grafik.png) [](https://wiki.stadtfabrikanten.org/uploads/images/gallery/2026-06/yJ5xL5RBjMiIQ661-grafik.png)
## 04.03.2022 - Karl Marx (the little one)
[](https://wiki.stadtfabrikanten.org/uploads/images/gallery/2026-06/zicXV8o7xWhCheau-grafik.png)
## 27.10.2021 + 29.10.2021 + 31.10.2021 - Tree #2 (???mm)
[](https://wiki.stadtfabrikanten.org/uploads/images/gallery/2026-06/Aqd8w3b7wEa0cxli-grafik.png) [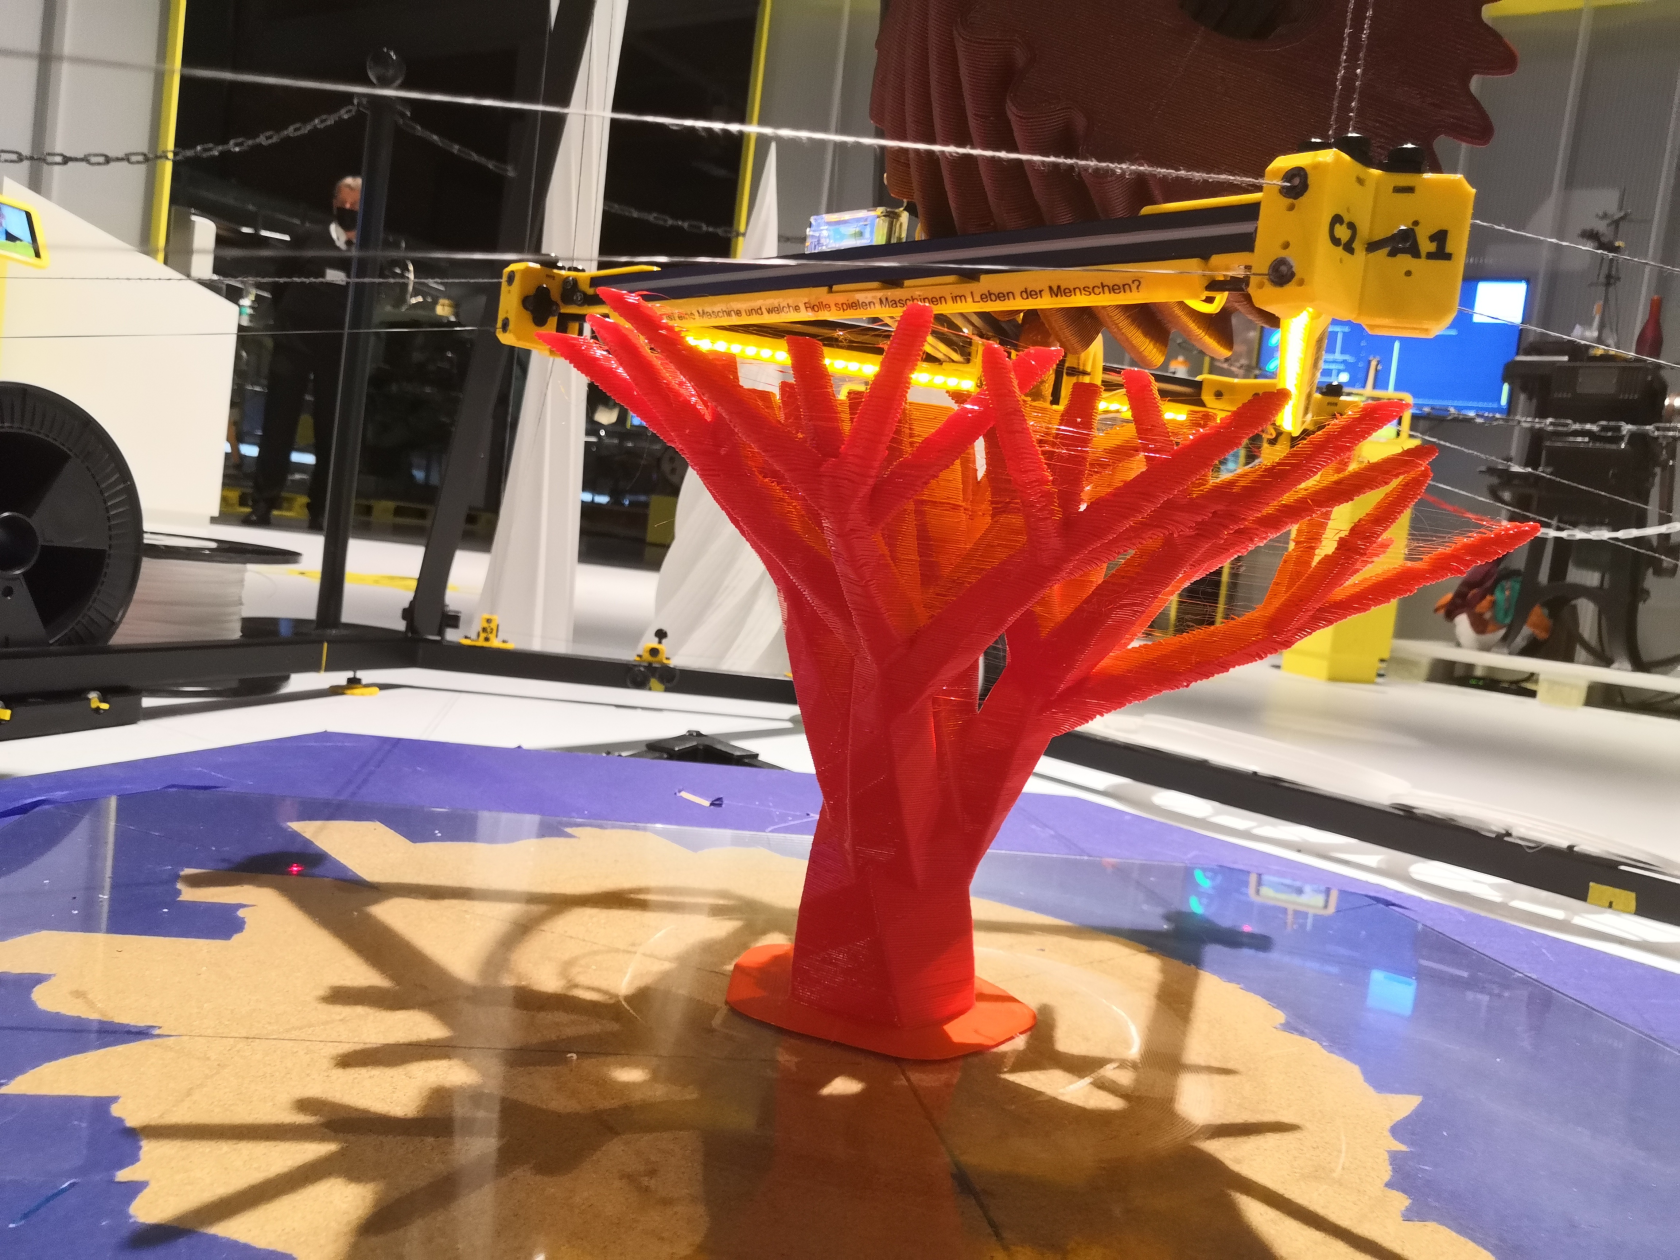](https://wiki.stadtfabrikanten.org/uploads/images/gallery/2026-06/Oku1SRIOEE1R6sH6-grafik.png) [](https://wiki.stadtfabrikanten.org/uploads/images/gallery/2026-06/kfvDVs1iapCjFFVm-grafik.png)
## 22.10.2021 + 24.10.2021 + 27.10.2021 - [Hand](https://www.thingiverse.com/thing:31331) (???mm)
This print has some cosmetic issues in terms of missing top surface layers (has some holes in it). Reason: wrong slicing. The printed model also has some z shiftings. It was printed over 3 days which longer pauses between. It seems that the D motor sagged down a little bit.
## 07.2021 - 09.2021 - The wheel series
See
- [Printing with fine layers and ruptured line](https://old.stadtfabrikanten.org/display/TH/Gallery+of+printed+objects)
- [Another round to fight against warping](https://old.stadtfabrikanten.org/display/TH/Gallery+of+printed+objects)
- [Reinventing the wheel :-P](https://old.stadtfabrikanten.org/display/TH/Gallery+of+printed+objects)
- [A series of print failures (and some adjustments!)](https://old.stadtfabrikanten.org/display/TH/Gallery+of+printed+objects)
[](https://wiki.stadtfabrikanten.org/uploads/images/gallery/2026-06/T3waqp9k8xehBKmg-grafik.png)
## 01.02.2021 Gear - (155 mm) - failed at Z ~ 115 mm (91% of progress)
Print time: 7h25m
This print failed because bridging failed. Filament layer curled up which produced collision. Good example to see how forces apply while effector is moving around and messing with obstacles. This way the printer really should not run unattended.
[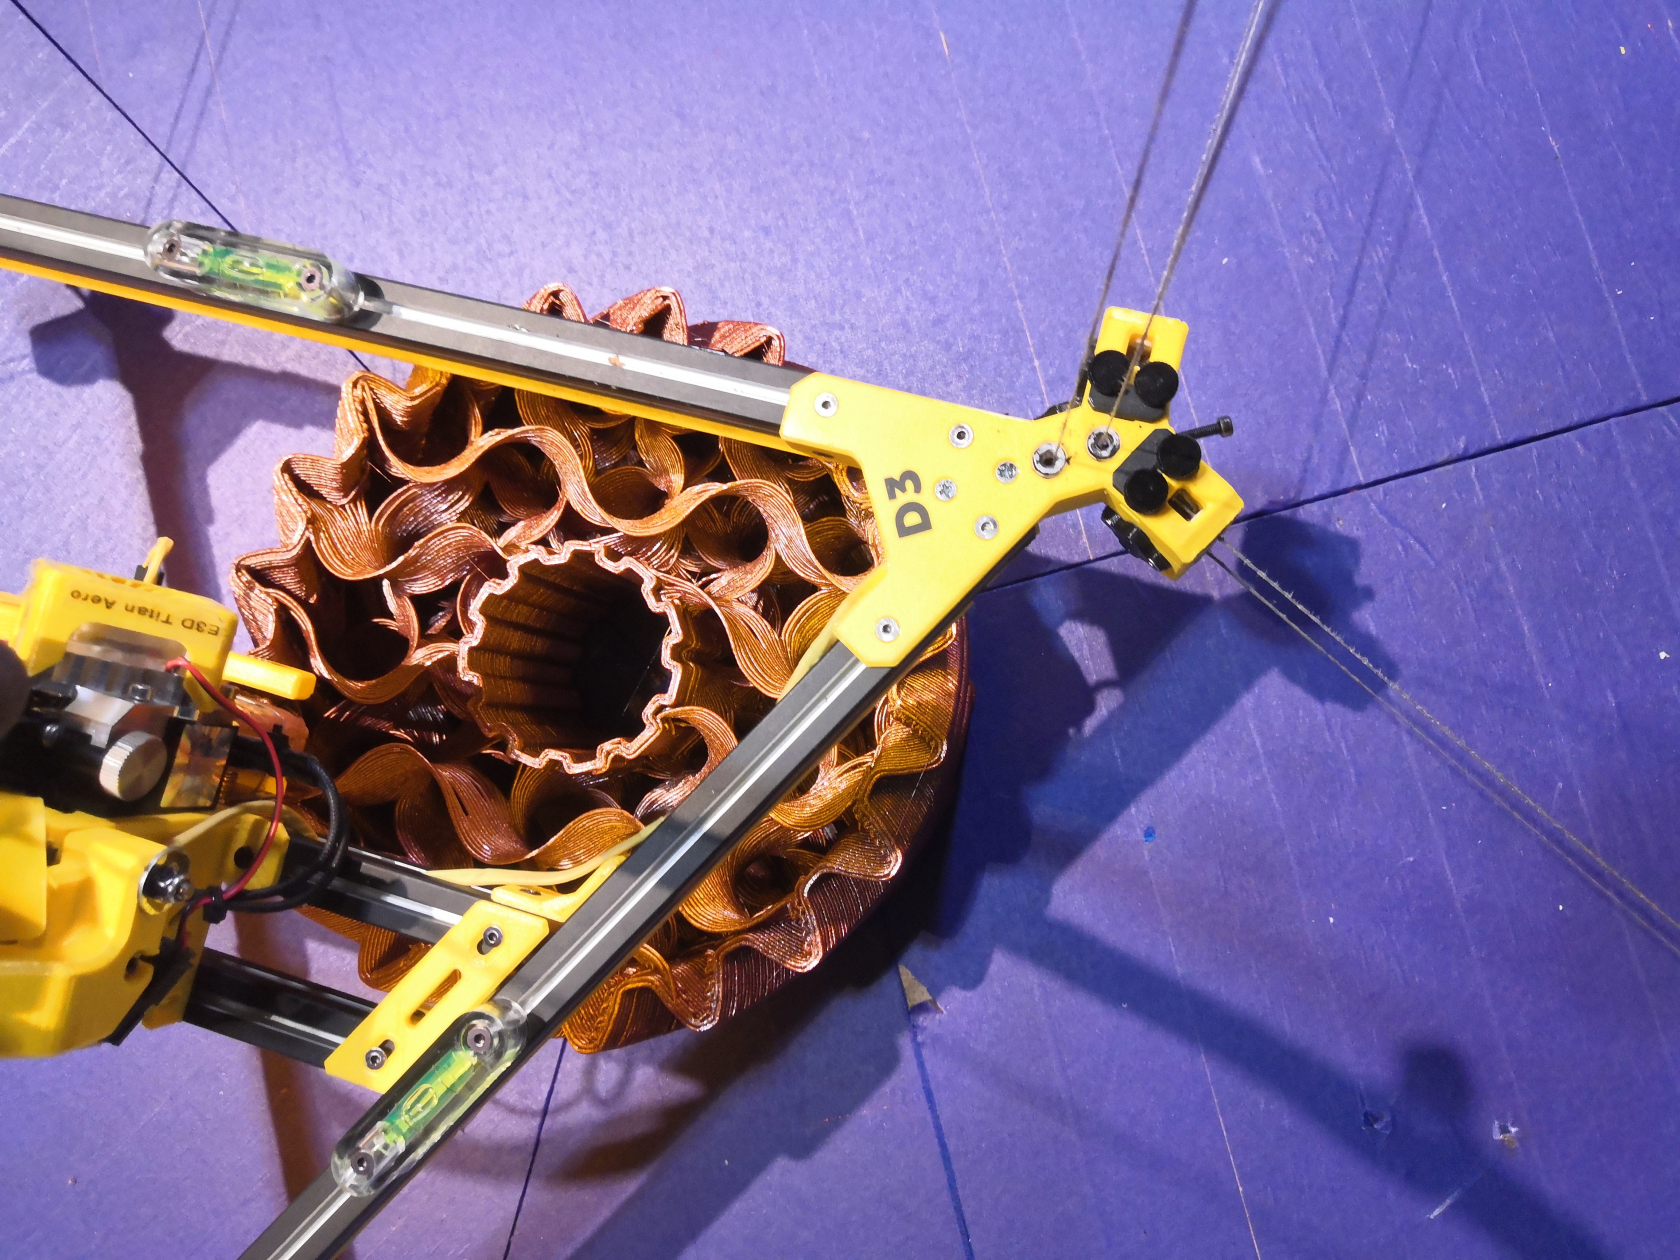](https://wiki.stadtfabrikanten.org/uploads/images/gallery/2026-06/vCTzauXGmlSdLtu9-grafik.png) [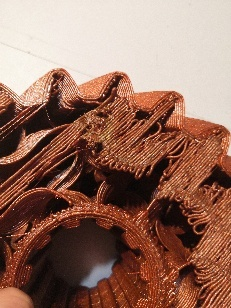](https://wiki.stadtfabrikanten.org/uploads/images/gallery/2026-06/q5DOaEqcjWRto4JE-grafik.png) [](https://wiki.stadtfabrikanten.org/uploads/images/gallery/2026-06/FqGzJNtOwrr6iJcM-grafik.png)
## 22.10.2021 + 24.10.2021 + 27.10.2021 - [Hand](https://www.thingiverse.com/thing:31331) (???mm)
This print has some cosmetic issues in terms of missing top surface layers (has some holes in it). Reason: wrong slicing. The printed model also has some z shiftings. It was printed over 3 days which longer pauses between. It seems that the D motor sagged down a little bit.
[](https://wiki.stadtfabrikanten.org/uploads/images/gallery/2026-06/6Nbux7fbZNGFm0qk-grafik.png) [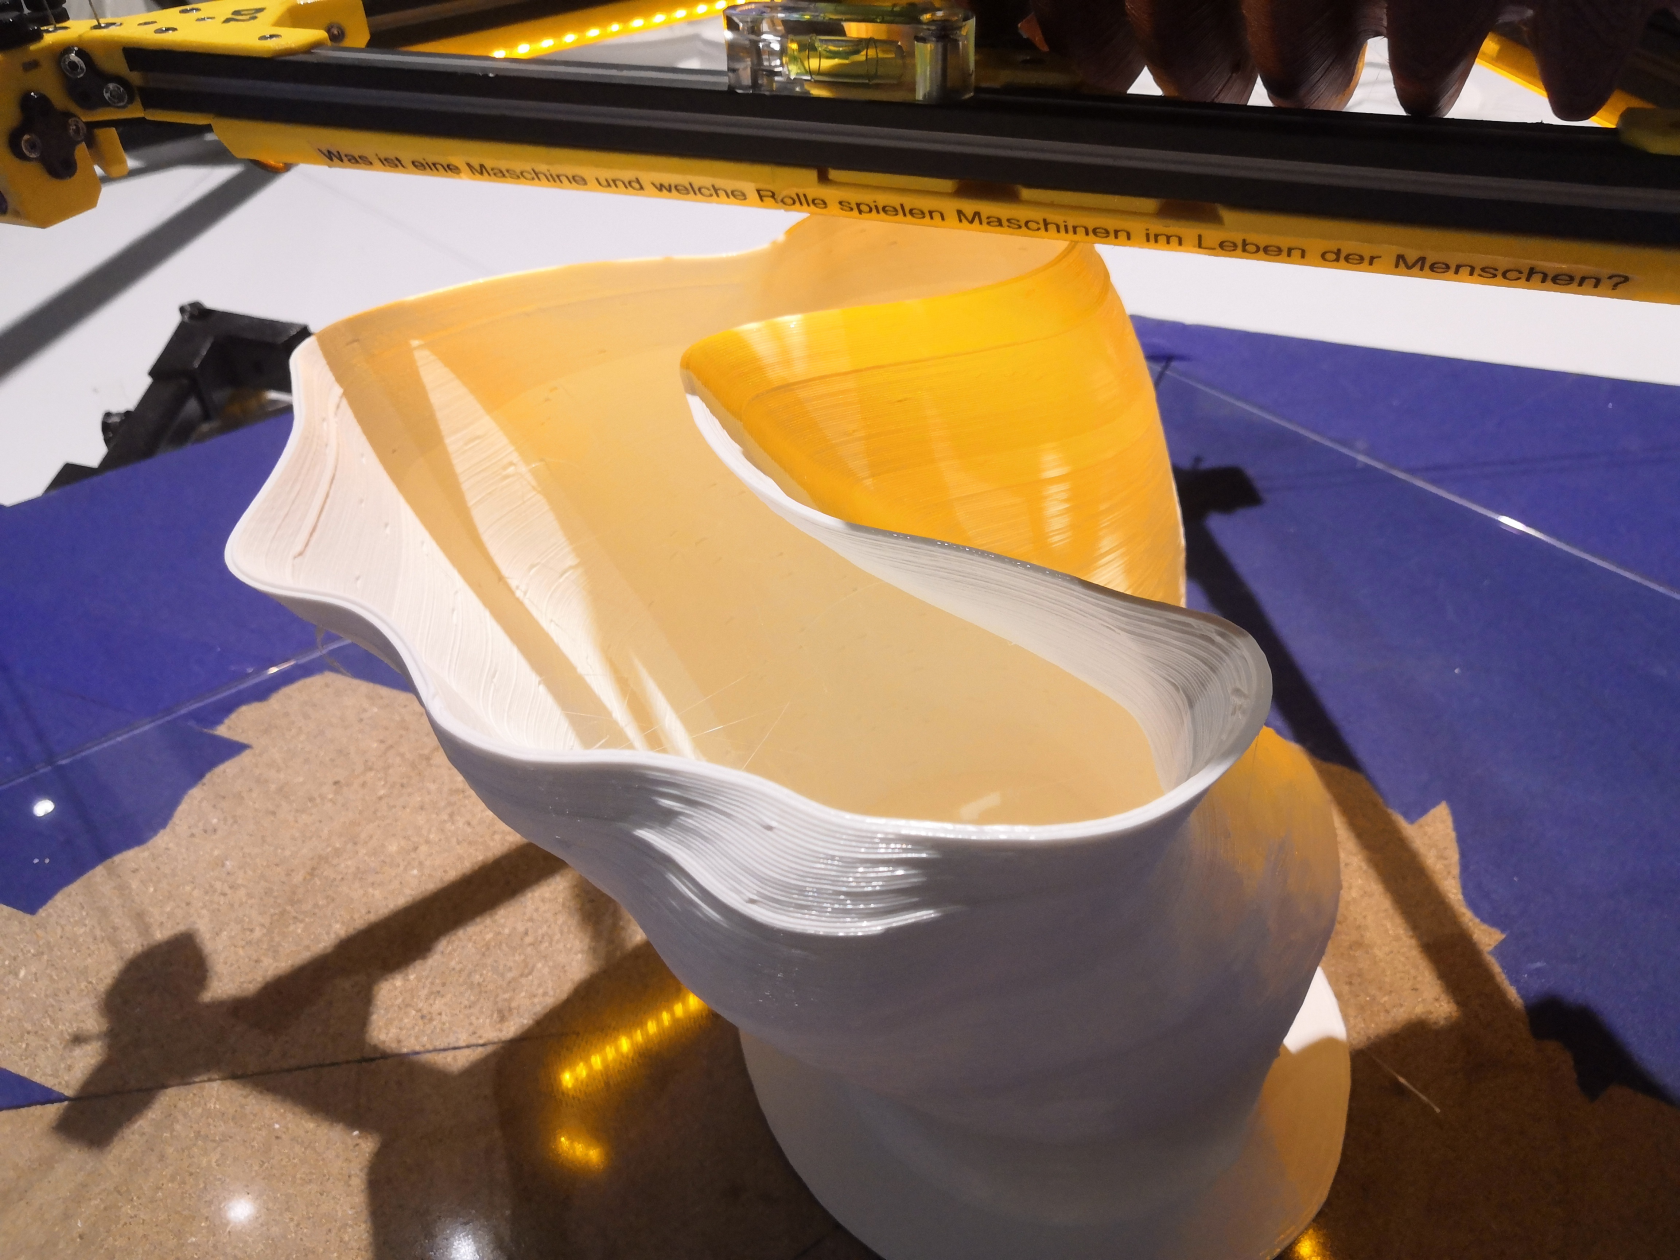](https://wiki.stadtfabrikanten.org/uploads/images/gallery/2026-06/U1BxFgDngTTg5MzU-grafik.png) [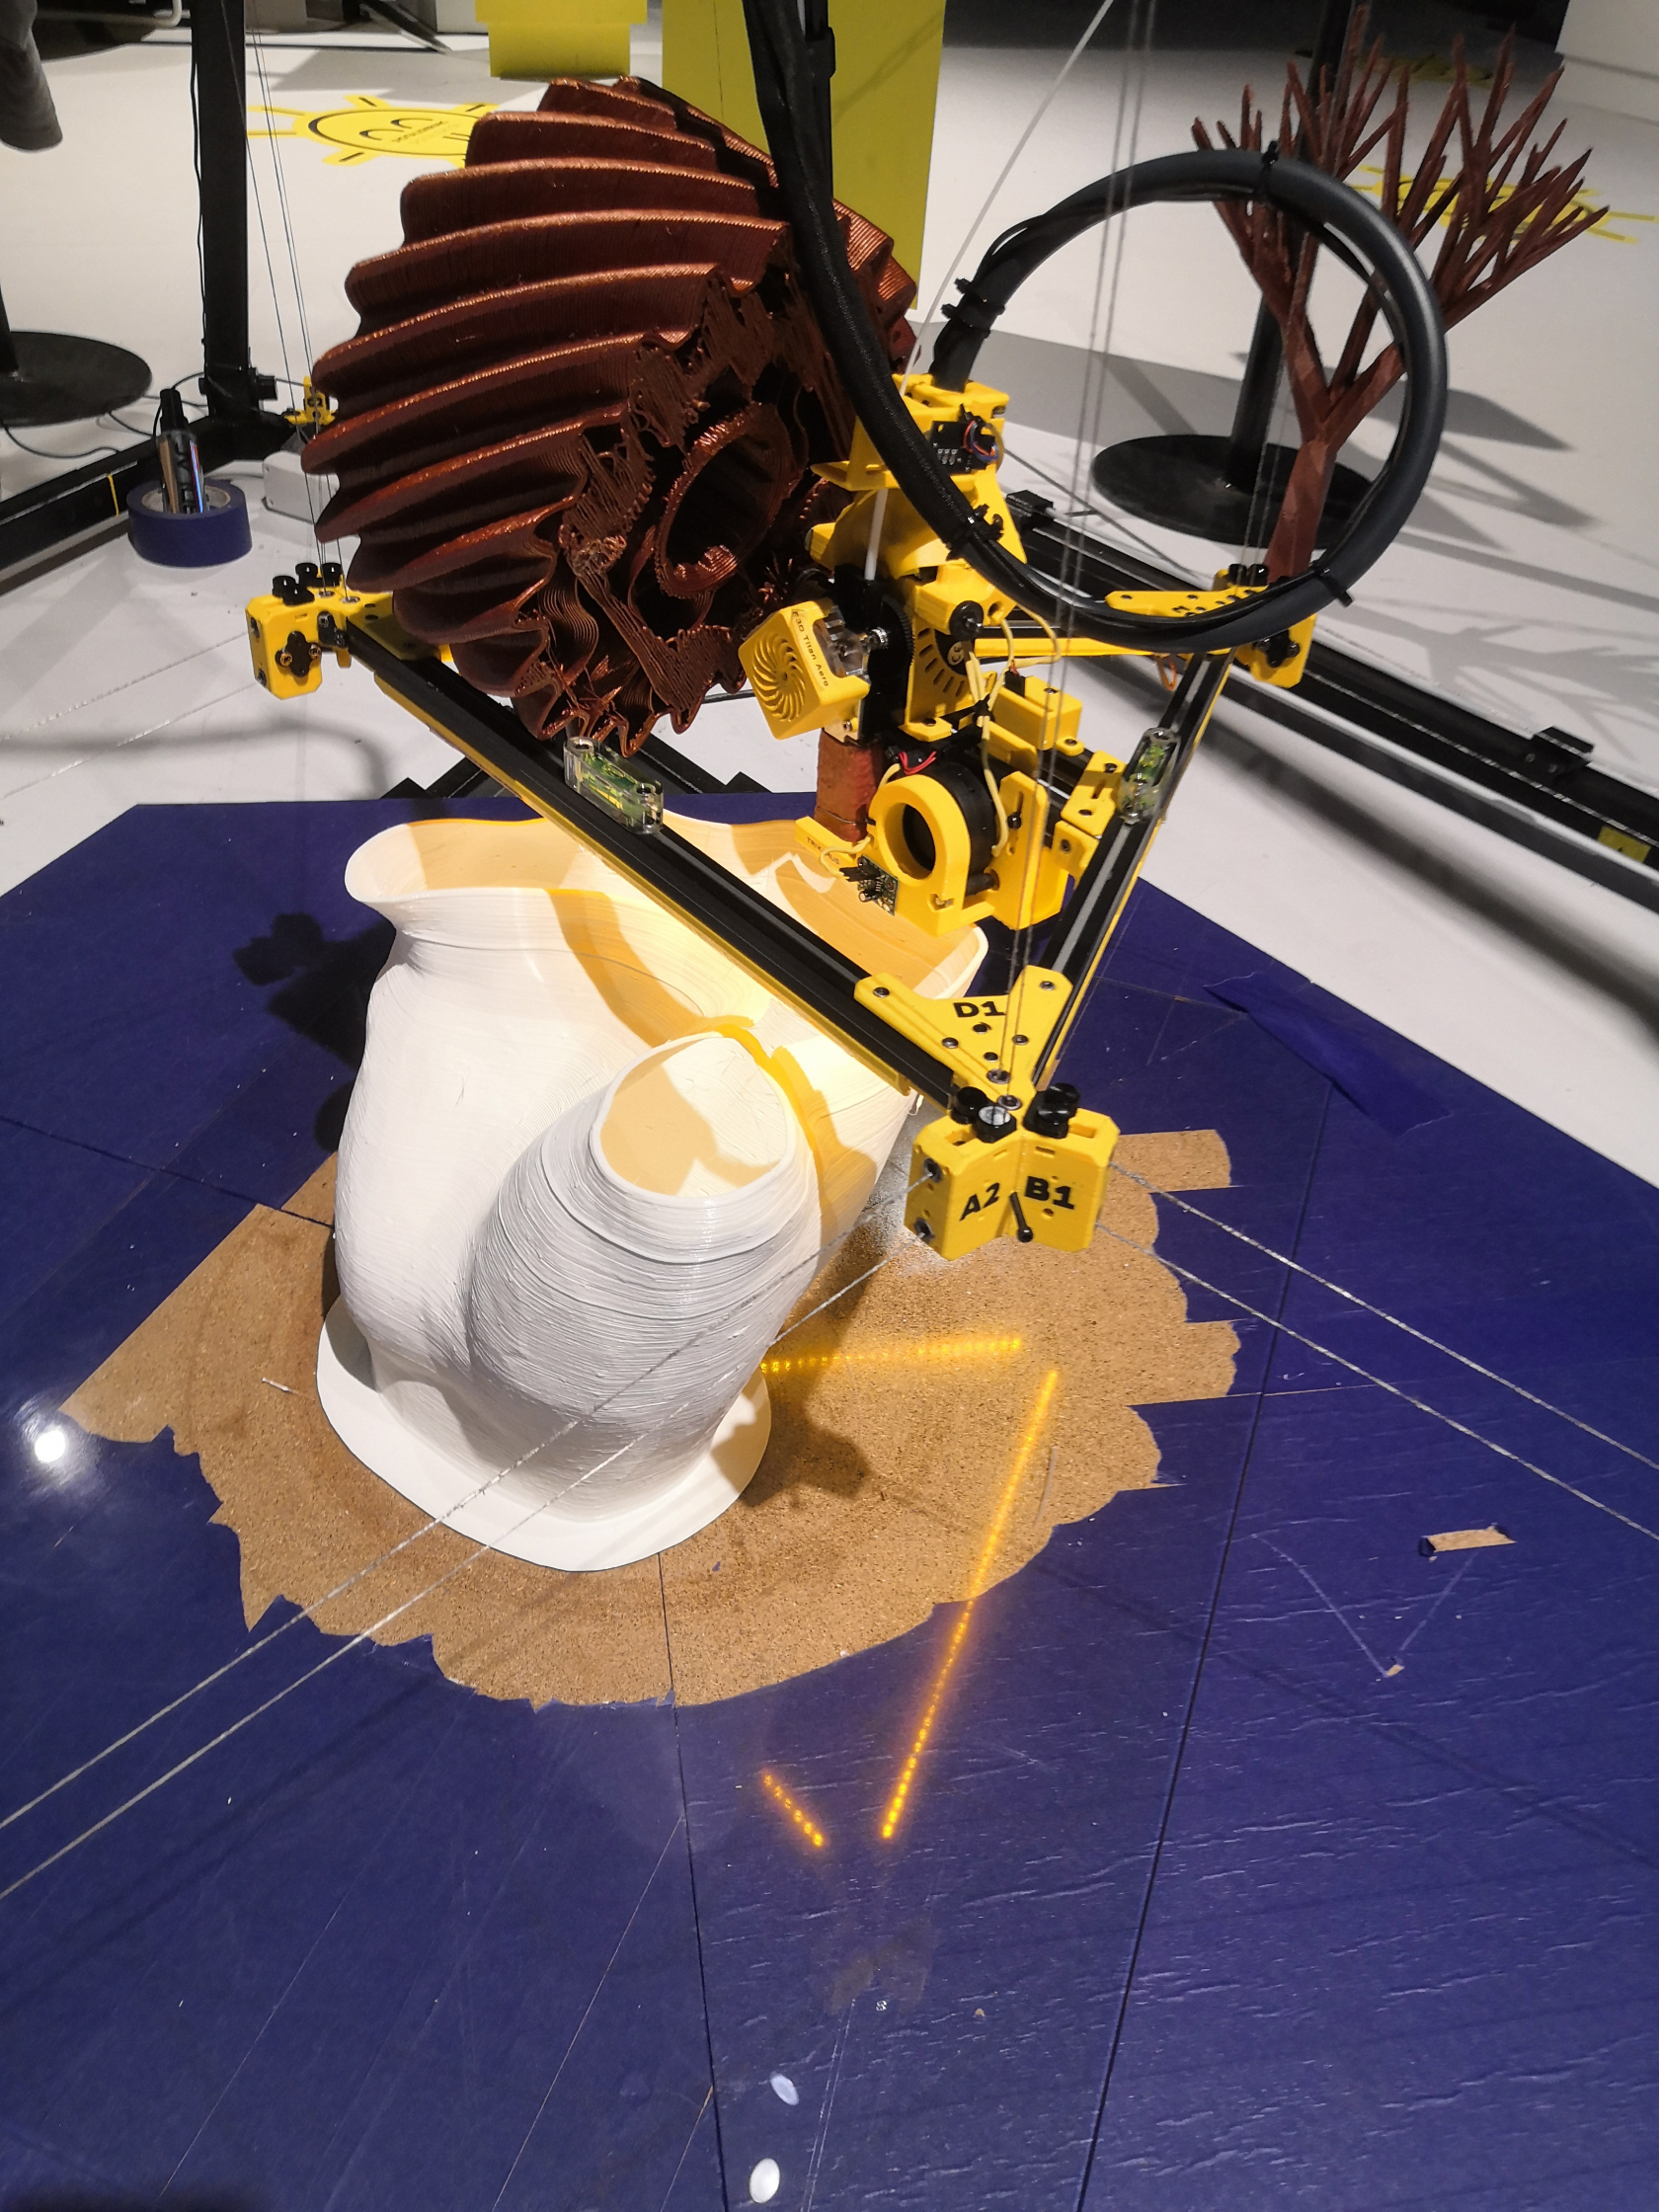](https://wiki.stadtfabrikanten.org/uploads/images/gallery/2026-06/ZUiSRN7h0678TKrH-grafik.png) [](https://wiki.stadtfabrikanten.org/uploads/images/gallery/2026-06/eDtOGfrC8J6Crod9-grafik.png) [](https://wiki.stadtfabrikanten.org/uploads/images/gallery/2026-06/fX7XigeZUwAWEYFj-grafik.png)
## 25.10.2020 - [Tree](https://www.thingiverse.com/thing:832278) (520 mm)
[](https://wiki.stadtfabrikanten.org/uploads/images/gallery/2026-06/2pDLPoCH08PoCvQp-grafik.png) [](https://wiki.stadtfabrikanten.org/uploads/images/gallery/2026-06/JNWkh4k93EoUmytY-grafik.png) [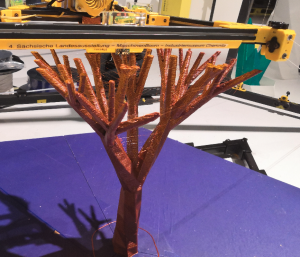](https://wiki.stadtfabrikanten.org/uploads/images/gallery/2026-06/kivHqzLiXsqjL1eM-grafik.png) [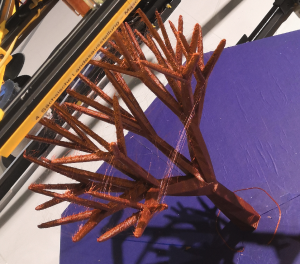](https://wiki.stadtfabrikanten.org/uploads/images/gallery/2026-06/T7tP8kLKmKuRPj0J-grafik.png)
## 17.10.2020 - [Tree](https://www.thingiverse.com/thing:1565099)
[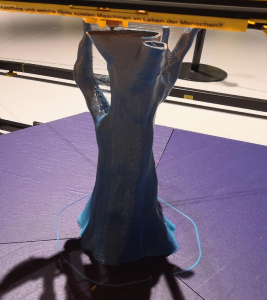](https://wiki.stadtfabrikanten.org/uploads/images/gallery/2026-06/fyuQdaI3CMzeFwA5-grafik.png) [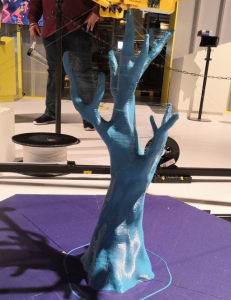](https://wiki.stadtfabrikanten.org/uploads/images/gallery/2026-06/EtFh1zYzopIRlHKA-grafik.png) [](https://wiki.stadtfabrikanten.org/uploads/images/gallery/2026-06/Fax4WTJYpjxaCy1v-grafik.png) [](https://wiki.stadtfabrikanten.org/uploads/images/gallery/2026-06/GD1QnKwVapZz5t99-grafik.png)
## 13.10.2020 - [Crystal](https://www.thingiverse.com/thing:3037485) Try #2
Print time: 7h28m
[](https://wiki.stadtfabrikanten.org/uploads/images/gallery/2026-06/S4qx2BHalx4Ug7AH-grafik.png) [](https://wiki.stadtfabrikanten.org/uploads/images/gallery/2026-06/eg9P3sjzCoMbZNXM-grafik.png) [](https://wiki.stadtfabrikanten.org/uploads/images/gallery/2026-06/RsUhEM73D8WcjrlA-grafik.png) [](https://wiki.stadtfabrikanten.org/uploads/images/gallery/2026-06/Z7HdpRYJn3DE8aAZ-grafik.png)
## 12.07.2020 - [Unicorn Icicle](https://www.thingiverse.com/thing:582797) (800 mm)
Print time: 7h1m
[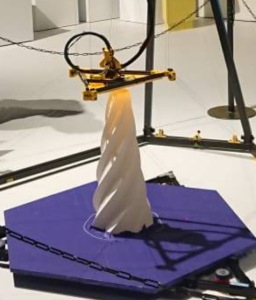](https://wiki.stadtfabrikanten.org/uploads/images/gallery/2026-06/kKyOapfSfaRNf0tu-grafik.png) [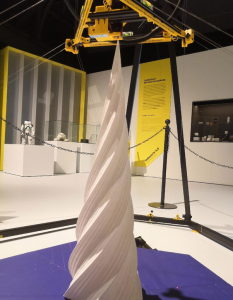](https://wiki.stadtfabrikanten.org/uploads/images/gallery/2026-06/6TMukvaoqTO52Pth-grafik.png)
## 11.07.2020 - [Twisted Extrude](https://www.thingiverse.com/thing:655098) (1300 mm)
Print time: 7h28m
[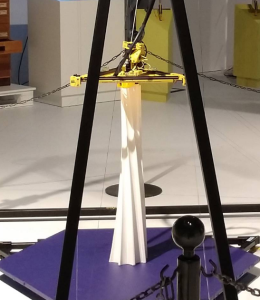](https://wiki.stadtfabrikanten.org/uploads/images/gallery/2026-06/ifeUOiI3LkS22Ll4-grafik.png)
## 0.07.2020 - [Twisted Spike](https://www.thingiverse.com/thing:3728268) (1890 mm)
Print time: 10h18m
[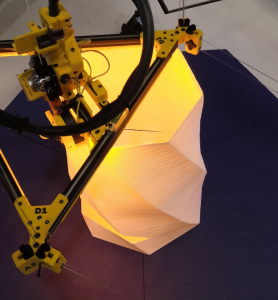](https://wiki.stadtfabrikanten.org/uploads/images/gallery/2026-06/GgUJPo2MZEOnqWQ3-grafik.png) [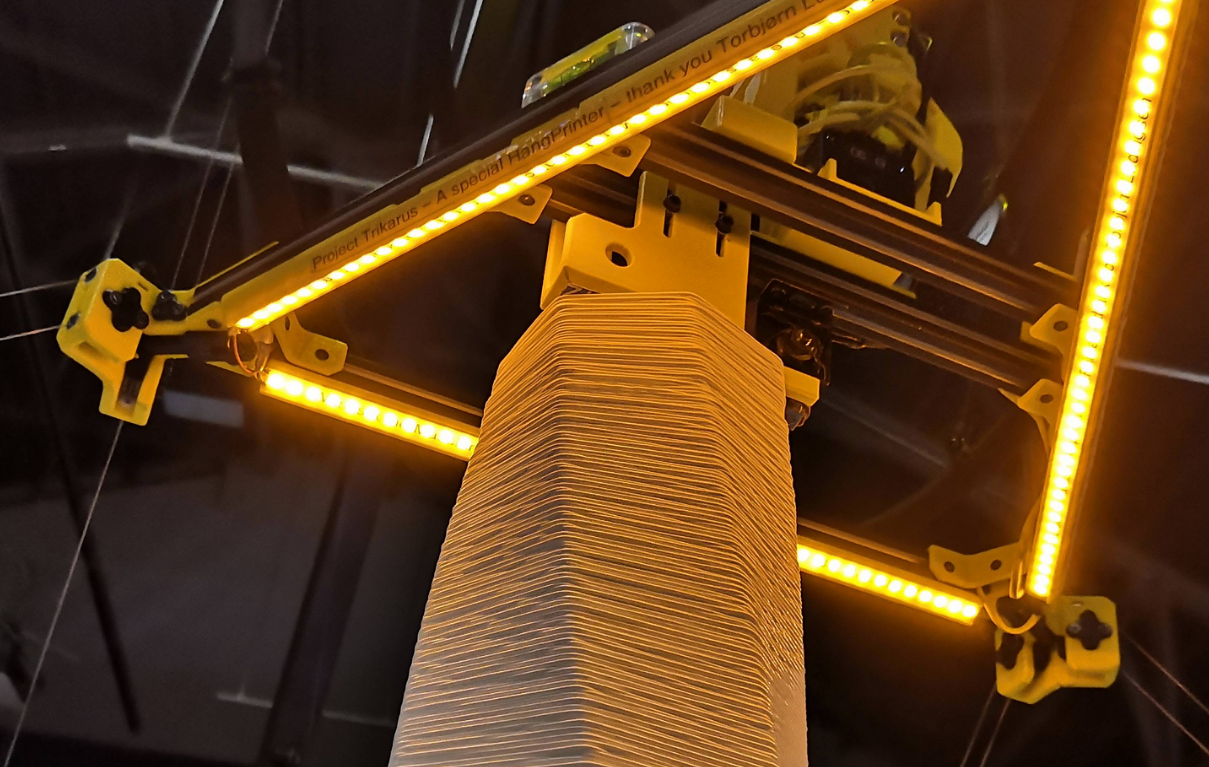](https://wiki.stadtfabrikanten.org/uploads/images/gallery/2026-06/UBaNS8IlMvfAWfvi-grafik.png)
## 07.07.2020 - [Column](https://www.thingiverse.com/thing:56740) (1000 mm)
Print time: 3h39m
[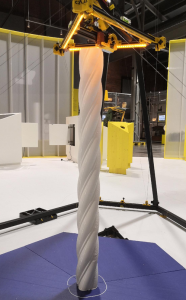](https://wiki.stadtfabrikanten.org/uploads/images/gallery/2026-06/xoS3S3TC6EZ0F8Dg-grafik.png)
## [Twisted Spike](https://www.thingiverse.com/thing:3728268)
This model was turned 180 degrees and cut-off to generate that shape
[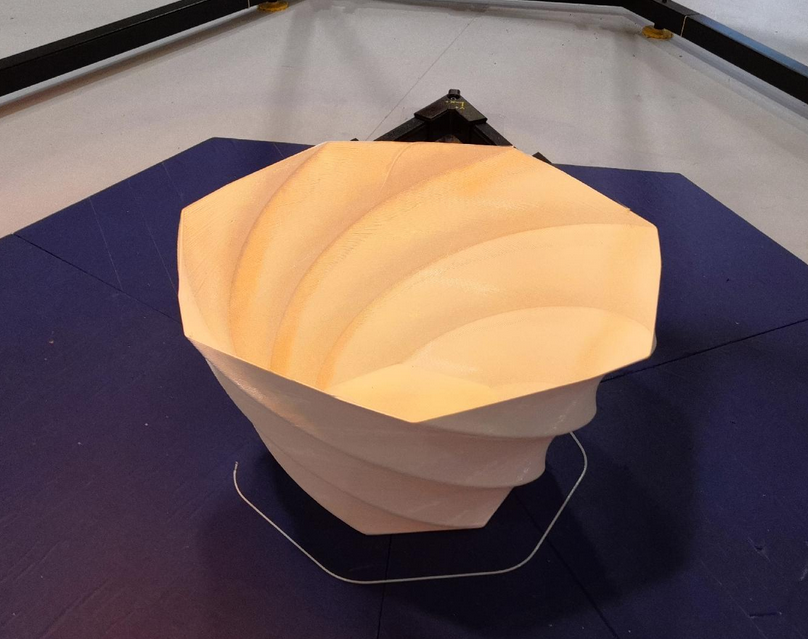](https://wiki.stadtfabrikanten.org/uploads/images/gallery/2026-06/Wmi8IXZNi2NeE1Ns-grafik.png) [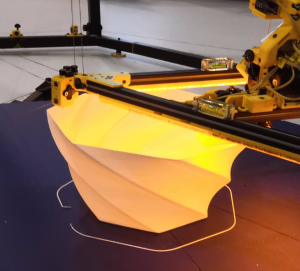](https://wiki.stadtfabrikanten.org/uploads/images/gallery/2026-06/vd01vc2OxibJFcbF-grafik.png)
## 24.06.2020 - [Julia Vase](https://www.thingiverse.com/thing:126567)
Print time: 2h25m
[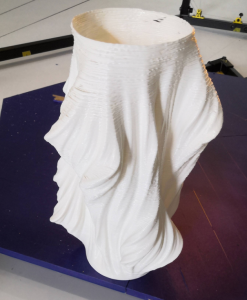](https://wiki.stadtfabrikanten.org/uploads/images/gallery/2026-06/0ALU1wois4mTNrTF-grafik.png)
## 19.06.2020 - [Crystal](https://www.thingiverse.com/thing:3037485) Try #1
Print time: 37m
[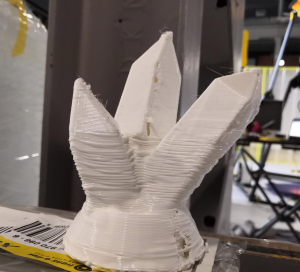](https://wiki.stadtfabrikanten.org/uploads/images/gallery/2026-06/WajUsNVUZVemqAcw-grafik.png)
# General power/wiring concept, consumptions and temperatures
# Duet to effector wiring
# General power/wiring concept, consumptions and temperatures
## Notes about Trikarus wiring
- PSU
- The switching power supply can be switched on and off via a relay. This saves power consumption, the life time can be improved, there is less audio noise and the safety of the machine is better. The PSU relay is switched **on** **by** **default**. It has to be switched off explicitly via GPIO. This prevents losing power while printing due to GPIO problems
- The [emergency stop switch](https://old.stadtfabrikanten.org/pages/createpage.action?spaceKey=TH&title=Emergency+push+button+and+opener+M22-K01+by+Eaton&linkCreation=true&fromPageId=56623748) turns off the power supply, but not the UPS. Why? The UPS only supplies server services. The power supply is solely responsible for supplying critical actuators (extruders, motors). The emergency halt physically also kills the Smart Stepppers so they cannot be accessed from Duet and not from Raspberry. So they are secure to be not abused by any USB serial script or enable/step signal.
- [Shanqiu Mini UPS FX5-48 / Vultec Continuity UPS30PW-DC](https://old.stadtfabrikanten.org/pages/viewpage.action?pageId=62685686) (Uninterruptible power supply (UPS)
- is necessary because the electricity in the industrial museum is possibly switched off at night. However, server services should be able to save status values cleanly and independently, so that prints can be continued later. Both Duet Web Control and Repetier Server can be used for this (print recovery)
- is required to power Freifunk router and Raspberry Pi + connected devices. This allows ...
- running a management network with network access over SSH
- flashing of Duet firmware
- flashing of Smart Stepper firmware
- clean start and shutdown of Raspberry Pi and running services like Repetier Server
- collecting and sending metrics for monitoring the allover system stability
- A UPS for motors is explicitly not wanted. That would come with a strong increase in weight of the device
- the UPS charges as long as mains voltage is present and it also charges when the [emergency stop switch](https://old.stadtfabrikanten.org/pages/createpage.action?spaceKey=TH&title=Emergency+push+button+and+opener+M22-K01+by+Eaton&linkCreation=true&fromPageId=56623748) has been actuated
- Smart Steppers
- The [4 Port USB Hub GL850G Genesys Logic + 24V DC/DC Converter Traco Power TMA 2405S](https://old.stadtfabrikanten.org/pages/createpage.action?spaceKey=TH&title=4+Port+USB+Hub+GL850G+Genesys+Logic+%2B+24V+DC%2FDC+Converter+Traco+Power+TMA+2405S&linkCreation=true&fromPageId=56623748) for the [Smart Stepper rev 1/20/2019 by MisfitTech](https://old.stadtfabrikanten.org/pages/viewpage.action?pageId=56623229) is externally supplied with 5V. In order not to unnecessarily burden the Raspberry Pi, the voltage comes directly from the power supply via DC / DC converter which is attached to the PSU. The USB hub originally had a backfeeding effect on the Raspberry Pi. The 5V lead in the cable was then cut to disable this volatile (unstable) transition state. So Smart Steppers are powered by 4 port USB hub and/or 24 V PSU voltage. In case the control relay turns off, the PSU or the main power cord is plugged off, all Smart Steppers will go offline. If PSU is off *lsusb* command will return no Smart Steppers
- The [Duet 2 Ethernet v1.04](http://fablabchemnitz.de) is supplied via USB (5 V) and via 24 V power supply.
## Raspberry Pi powering
While building Trikarus a lot of lessons were learned regarding power supplying. If the used power chords are too thin and/or too long the Raspberry Pi gets problems with undervoltage occurence (cheap wiring). This leads to failing USB device addressing while boot proecedure (dmesg) and randomly loosing devices from device tree (lsusb). So you can see things happen like unavailable webcam, flickering Smart Stepper displays and so on. Additionally USB backfeeding occured when using cheap USB hub with external voltage supply. This back-powered Raspberry Pi. In case the PSU was offline this meant that the hub was not powered externally but Raspberry Pi tried to power the power source of the hub. This led to useless large voltage drops.
The official Raspberry Pi power supply is rated at 5.1 V. The final way to fix powering issues using the given UPS was to use really short powering (explicitely "charging") cables (25cm). Even with short cables we did not get fully rid of undervoltage warning because UPS does not deliver 5.1 V and it's hard to find short USB cables. Ideally choose AWG24 cables (often labeled as "2.0 A" cables). A good chord has ~5 mm diameter (regular cables often have only 2 - 3 mm). Some users reported that's its even better to use AWG20 USB cables and solid power supplies with 3.0 A.
## Running at the exhibition
Due the fact that Trikarus runs at a location where security matters, the power might go offline from late afternoon till early morning. In this time the system may be inaccesible and the printer cannot print. To allow large prints over many days it's required to save the XYZ position of the effector to continue the print from day to day even if power was lost.
Power loss can happen
- spontaneously
- by hitting the emergency halt button (cuts PSU input so Duet and Smart Steppers go offline)
- by planned daily shutdown (staff/personnel)
**In an ideal world we would use a brake system**
Letting continue Hangprinter to print it's previous job it's a must to quickly react on power loss. All the time a power loss happens Hangprinter needs to store it's XYZ position and to stop the effector at a known position by triggering brakes at the drives without losing any steps. Otherwise the position will be not accurate and a continue of the print is hard (but not impossible). A separate, second UPS could be installed to safely power Duet and Smart Steppers until the effector parked into a known position. However it's not yet possible to do this the desired way because it requires much more electronics which would raise the weight of the ceiling module heavily. It's also expensive and needs additional control by GPIO. There are different working principles for brakes and it's a question of general concept. In theory there exist brakes which trigger if power is lost while there also exist brakes which trigger if power is available only. For Hangprinter it makes sense to have brakes which trigger in case no power is available. This will ensure that the effector cannot lower down unexpectedly. More details about future ideas can be found at [Drive motor brakes](https://old.stadtfabrikanten.org/pages/viewpage.action?pageId=56623748). **At the moment Trikarus has no brake system.**
## Cable supply from ceiling module to effector
The power and data supply between ceiling module and effector is done by a major [chainflex CF2.02.24 cable by igus](https://old.stadtfabrikanten.org/pages/createpage.action?spaceKey=TH&title=chainflex+CF2.02.24+cable+by+igus&linkCreation=true&fromPageId=56623748) and a separate wire for heater cartridge power. General Ohm's law in electronics says: the longer the wires or the smaller the wire section get, the larger the resistance gets. The cable length between top and effector is roughly about 3.5 meters (includes about 0.5 meters of dangling buffer dable length to extend the print size in height or diameter for example). So the voltage will drop noticeably and the wires require good dimensioning to prevent overheating or doing "russian style" wiring. They need good flexibility and high amount life cycle, but low weight. Trikarus uses a professional cable from igus. It's not that light weight sadly but it's more stable and less cable salad than other Hangprinters are used to have. It needs to support the cable to prevent collisions between printed objects on the platform and the cable. The used cable is also well isolated for wiring the I2C IMU sensor which is installed at the effector. Furthermore the thick cable acts as some simulation for Hangprinters which would have more than one extruder or contain more advanced tools. A regular Hangprinter with, let's say 4 extruders, could not be wired up by a bunch of flat ribbon cables.
[Sensor - Duet IR probe](https://old.stadtfabrikanten.org/pages/createpage.action?spaceKey=TH&title=Duet+IR+Probe+%28Mini+height+sensor+board%29+v1.3&linkCreation=true&fromPageId=56623748)
0,1W / 5V → 20mA
0.04 W / 3.3 V → 12mA
0.25 mm²
GND
2
Bundle 4 - 15 - white-yellow
[Sensor - Duet IR probe](https://old.stadtfabrikanten.org/pages/createpage.action?spaceKey=TH&title=Duet+IR+Probe+%28Mini+height+sensor+board%29+v1.3&linkCreation=true&fromPageId=56623748)
0,1W / 5V → 20mA
0.04 W / 3.3 V → 12mA
0.25 mm²
SIGNAL
2
Bundle 4 - 16 - yellow-brown
[Sensor - Duet IR probe](https://old.stadtfabrikanten.org/pages/createpage.action?spaceKey=TH&title=Duet+IR+Probe+%28Mini+height+sensor+board%29+v1.3&linkCreation=true&fromPageId=56623748)
## Power consumptions and temperatures - Overview by combination and running modes (idling, usual operation, boot, ...)
**Power complex (separate power sources)**
**Device**
**Running mode**
**Consumption**
**Max. available power**
**Hints for measurements**
1 (Power Supply Unit PSU)
[Switching Power Supply MW RSP-320-24](https://old.stadtfabrikanten.org/pages/createpage.action?spaceKey=TH&title=Switching+Power+Supply+MW+RSP-320-24&linkCreation=true&fromPageId=56623748)
default
6.7 W
320 W
- temperature at 24 °C room temperature is about 30 °C
1 (Power Supply Unit PSU)
[Stepper Motors MT-1705HS200AE by Motech Motors](https://old.stadtfabrikanten.org/pages/createpage.action?spaceKey=TH&title=Stepper+Motors+MT-1705HS200AE+by+Motech+Motors&linkCreation=true&fromPageId=56623748) & [Stepper Motor MT-1703HSM168RE by Motech Motors](https://old.stadtfabrikanten.org/pages/createpage.action?spaceKey=TH&title=Stepper+Motor+MT-1703HSM168RE+by+Motech+Motors&linkCreation=true&fromPageId=56623748)
default
4.25 W
-
- consumption is not total, it is per stepper motor
- temperature at 24 °C room temperature is about 30 °C (torque mode)
- temperature after 4 hours print at 25 °C room temperature approx. 60 ~ 70 °C (maximum of 80 °C allowed - otherwise PETG parts could melt slowly)
-
[Shanqiu Mini UPS FX5-48 / Vultec Continuity UPS30PW-DC](https://old.stadtfabrikanten.org/pages/viewpage.action?pageId=62685686)
fully charged, Raspberry Pi and router are attached and running
-
30 W
- temperature at 24 °C room temperature is about 30 °C
1 (Power Supply Unit PSU)
[Shanqiu Mini UPS FX5-48 / Vultec Continuity UPS30PW-DC](https://old.stadtfabrikanten.org/pages/viewpage.action?pageId=62685686)
charging
?
-
2 (USV)
[Raspberry Pi 3 B](https://old.stadtfabrikanten.org/display/TH/Raspberry+Pi+3+B)
boot
4.35 W
-
without any other connected devices
2 (USV)
[Raspberry Pi 3 B](https://old.stadtfabrikanten.org/display/TH/Raspberry+Pi+3+B)
idle
2.50 W
-
without any other connected devices; Bluetooth, SMD LEDs, WLAN, HDMI deactivated
2 (USV)
[Raspberry Pi 3 B](https://old.stadtfabrikanten.org/display/TH/Raspberry+Pi+3+B)
default
?
- bash output: "CPU temperature: 41.318°C" (after 15 hours of uptime and with all devices connected)
- around 78 °C at maximum stress
- for Raspberry Pi 3 B a PSU with minimum 10 W (2 A, 5 V) is required
2 (USV)
[Router TL-WR842N by TP-Link](https://old.stadtfabrikanten.org/pages/createpage.action?spaceKey=TH&title=Router+TL-WR842N+by+TP-Link&linkCreation=true&fromPageId=56623748)
default
1.60 to 2.60 W
-
2 (USV)
USB Port: USB-Stick USB 3.1 32 GB - SANDISK Ultra Luxe
0.27 W (~55 mA)
-
2 (USV)
USB Port: [Webcam C920 by Logitech](https://old.stadtfabrikanten.org/pages/createpage.action?spaceKey=TH&title=Webcam+C920+by+Logitech&linkCreation=true&fromPageId=56623748)
0.83 W (~170 mA)
-
1 (Power Supply UnitPSU) + 2 (USV)
USB Port: [4 Port USB Hub GL850G Genesys Logic + 24V DC/DC Converter Traco Power TMA 2405S](https://old.stadtfabrikanten.org/pages/createpage.action?spaceKey=TH&title=4+Port+USB+Hub+GL850G+Genesys+Logic+%2B+24V+DC%2FDC+Converter+Traco+Power+TMA+2405S&linkCreation=true&fromPageId=56623748)
0.39 W (~ 80 mA)
-
1 (Power Supply UnitPSU) + 2 (USV)
USB Port: [Duet 2 Ethernet v1.04](https://old.stadtfabrikanten.org/display/TH/Duet+2+Ethernet+v1.04)
1.05 to 1.20 W (~ 250 mA)
-
- MCU temperature (see Duet Web Control) approx. 35-45 ° C at ~ 25 ° C room temperature
1 (Power Supply UnitPSU)
[COB LED Spot 6000-6500K 260mA 10V](https://old.stadtfabrikanten.org/pages/createpage.action?spaceKey=TH&title=COB+LED+Spot+6000-6500K+260mA+10V&linkCreation=true&fromPageId=56623748)
- 2x spot connected in series. Therefore double the voltage!
- measured 0.03 A @17 V = 0,51 A
- final configuration at 260 mA @ 19 V = 0.5 A
1 (Power Supply Unit PSU)
[LED stripe 24V](https://old.stadtfabrikanten.org/pages/createpage.action?spaceKey=TH&title=LED+stripe+24V&linkCreation=true&fromPageId=56623748) - ceiling module
- ~522 LEDs SMD 3528)
- length 3x 27.5 cm + 3x 62.5 cm = 435 cm
37,6 W / 24 V = 1.57 A
approx. 32 ° C temperature after 30-60 minutes at ~ 13 ° C "room" temperature
approx. 28 ° C temperature after 30-60 minutes at ~ 13 ° C "room" temperature
1 (Power Supply Unit PSU)
[Aero Titan Extruder and SuperVolcano Hotend by E3D](https://old.stadtfabrikanten.org/pages/createpage.action?spaceKey=TH&title=Aero+Titan+Extruder+and+SuperVolcano+Hotend+by+E3D&linkCreation=true&fromPageId=56623748)
- PETG fan shroud keeps at room temperatur of ~ 18 °C when extruder reached temperatur 250°C for ~1 hour
- the surrounding metal bracket gets a temperature of ~ 30 - 50 °C
## 230V Source Power
Trikarus now has a fuse in the fuse box with the number **UV 1\_F6**, as well as an FI circuit breaker (above on the cable route). This is new due to the movement to the permanent exhibition in 2022.
## Total power consumption - sum up of power modes
1. PSU is on and Smart Steppers are idling around (enabled) → 47 Watts
2. PSU is on and Smart Steppers are idling around (enabled) + LED stripes on spot are switched on → 90 Watts
3. PSU is on and Smart Steppers are idling around (enabled) + LED stripes on spot are switched on + active hotend (heating up + active fan) → 182 Watts
4. PSU is on and Smart Steppers are idling around (enabled) + LED stripes on spot are switched on + active hotend (heating up + active fan) + active filament blower fan → 185 Watts
5. PSU is on and Smart Steppers are idling around (enabled) + LED stripes on spot are switched on + active hotend (target temperature reached + active fan) + active filament blower fan → 95 Watts
6. PSU is on and all Smart Steppers are moving + LED Stripes on Spot are switched on + active hotend (target temperature reached + active fan) + active filament blower fan → 109 Watts
## Wiring overview
- [Duet to effector wiring](https://old.stadtfabrikanten.org/display/TH/Duet+to+effector+wiring)
- [Main wiring (ceiling module)](https://old.stadtfabrikanten.org/pages/viewpage.action?pageId=72122569)
# Main wiring (ceiling module)
Note: The [Smart Steppers](https://old.stadtfabrikanten.org/display/TH/Smart+Stepper+-+Overview) are wired with 5V IN at the module side, but not at Duet. The power for the modules come from USB hub. For this reason the 5V wires are **not** shown in the following diagram:
# Hangprinter with Marlin (not used)
## Marlin Firmware for Hangprinter
Torbjørn also forked Marlin Firmware and pulled back a lot of stuff into official Marlin feature tree
- [https://github.com/MarlinFirmware/Marlin/pull/9180](https://github.com/MarlinFirmware/Marlin/pull/9180)
- [github.com/tobbelobb/hangprinter/blob/73a0cf91bbc04a59faccd6f042d30d5d22d170a9/firmware/Marlin/Marlin/Marlin\_main.cpp#L819](http://github.com/tobbelobb/hangprinter/blob/73a0cf91bbc04a59faccd6f042d30d5d22d170a9/firmware/Marlin/Marlin/Marlin_main.cpp#L819)
New gcodes:
- G6
- [G95 (torque mode) - G95 Set servo torque mode status. Accepts 0 or 1](http://github.com/tobbelobb/hangprinter/blob/73a0cf91bbc04a59faccd6f042d30d5d22d170a9/firmware/Marlin/Marlin/Marlin_main.cpp#L819)
- [ G96 (zero encoders) - G96 Tell sensor servo to mark its reference point](http://github.com/tobbelobb/hangprinter/blob/73a0cf91bbc04a59faccd6f042d30d5d22d170a9/firmware/Marlin/Marlin/Marlin_main.cpp#L819)
- [G97 (measure) - G97 Get sensor servo length travelled since last G96](http://github.com/tobbelobb/hangprinter/blob/73a0cf91bbc04a59faccd6f042d30d5d22d170a9/firmware/Marlin/Marlin/Marlin_main.cpp#L819)
Adapted gcodes that still use XYZE parameters:
- G0/G1 (inverse kinematics)
- G92
Adapted gcodes that use ABCDE parameters:
- M92
- M201
- M204
- M205
- M906
Adapted gcodes with other parameters
- M665 (set Hangprinter anchor positions / Auto Calibration Simulation Input Parameters)
- M114 S1 (read encoder mm movement since reference point was marked)
New features that also work on non-Hangprinter machines:
- `UNREGISTERED_MOVE_SUPPORT`
- `MECHADUINO_I2C_COMMANDS`
Features that are Hangprinter specific:
- `LINE_BUILDUP_COMPENSATION_FEATURE`
Other changes:
- Uses `NUM_AXIS[_N]` and `MOV_AXIS` instead of `XYZE[_N]` and `XYZ` for indexing and initializing arrays that refer to kinematic axes (movement axes on physical machine) rather than the cartesian axes of incoming gcode.
- Uses `E_CART` instead of `E_AXIS` for indexing arrays that refer to cartesian axes of incoming gcode.
```
G95 A10 ; Sets the A-motor in torque mode applying 10 units of torque
G95 B15 C15 D20 ; Sets B, C, and D-motors in torque mode
G95 A-35 B-35 C-35 D-35 ; torque mode lower force
G95 A-50 B-50 C-50 D-50 ; torque mode lower force
G95 A0 B0 C0 D0 ; Sets ABCD motors back into position mode
G96 A B C D ; tells Hangprinter to zero its encoder data on the A, B, C, and D axes.
G97 A B C D ; asks Hangprinter how many millimeters it has travelled since the previous G96 command along the A, B, C, and D axes.
G97 A B C D ; Doing again gives precise numbers about line lenght changes, namely that line A became 93 mm longer, B didn't change, C became 30.5 mm longer, and D became 345 mm shorter. These measurements include line buildup compensation.
G98 A B C D ; saves the same values into the internal line_lengths variable in firmware. It assumes G96 was issued in origo at a time when lines were tight
```
## Auto Calibration Simulation for Hangprinter (Python script)
The Hangprinter Project has a goal of auto-calibration. That requires locating anchor points by sampling relative line lengths with tight lines at unknown positions. This code tries to optimize the anchor positions to fit the samples of relative line lengths. Note that this code assumes that the B-anchor has a positive x-coordinate. If your machine's B-anchor is negative then your output anchors Bx and Cx will have the wrong signs.
The script will only work if you have closed loop steppers like Smart Stepper or Mechaduino installed. Only with I2C connected hardware a positional feedback is possible to get with M114 S1 command.
## Installation on Windows 10 (64 Bit) with Python 3.7.5
Download [https://gitlab.com/tobben/auto-calibration-simulation-for-hangprinter](https://gitlab.com/tobben/auto-calibration-simulation-for-hangprinter)
```bash
pip install mystic scipy numpy
cd C:\auto-calibration-simulation-for-hangprinter>
```
## Installation on raspbian (Python 2.7)
this does not work with older Python 3.5 which is on Raspbian Stretch (my case), so use old Python 2.7.
```bash
sudo apt-get install libatlas-base-dev python-scipy
pip2.7 install --user mystic # might take half an our to install ...
#get scipy by ready to use wheel file from https://www.piwheels.org/simple/scipy/ because it does not easily compile on a Raspberry Pi (scipy does not compile on raspi https://raspberrypi.stackexchange.com/questions/8308/how-to-install-latest-scipy-version-on-raspberry-pi)
wget https://www.piwheels.org/simple/scipy/scipy-1.3.3-cp35-cp35m-linux_armv7l.whl#sha256=da7755a09413176d91b50de8ce153721927b3e284928d6d86e9b2b1911bb1a69
pip3 install scipy-1.3.3-cp35-cp35m-linux_armv7l.whl
cd /opt
git clone https://gitlab.com/tobben/auto-calibration-simulation-for-hangprinter.git
cd auto-calibration-simulation-for-hangprinter/
```
## Test example (run the script)
```bash
python ./simulation.py
#Output
samples: 11
input xyz coords: 0
total cost: 0.271115
cost per sample: 0.024647
Warning: Data set might be too small.
The below values are unreliable unless input data is extremely accurate.
#define ANCHOR_A_Y -1160
#define ANCHOR_A_Z -141
#define ANCHOR_B_X 1004
#define ANCHOR_B_Y 588
#define ANCHOR_B_Z -119
#define ANCHOR_C_X -971
#define ANCHOR_C_Y 518
#define ANCHOR_C_Z -103
#define ANCHOR_D_Z 2892
M665 W-1160.35 E-141.49 R1003.98 T588.05 Y-118.60 U-971.42 I517.82 O-102.67 P2891.90
```
## How to Collect Data Points?
Data collection depends on Smart Stepper and well calibrated line buildup compensation.
- Go into torque mode on all motors and adjust torque magnitude as you prefer.
- Drag mover to the origin and zero counters: `G92 X0 Y0 Z0`
- Mark reference point for all encoders: `G96 A B C D` (Stock Marlin accepts `G96` as a short hand for `G96 A B C D`)
- Repeat 13 - ca 20 times:
- Drag mover to position of data point collection.
- Collect data point: `M114 S1` ([M114: Get Current Position](https://duet3d.dozuki.com/Wiki/Gcode#Section_M114_Get_Current_Position))
## How to Insert Data Points?
Before you run the simulation, open `simulation.py` and modify the main function, near the bottom of the file. Replace `??` with data points collected with your Hangprinter.
```bash
...
# Replace this with your collected data
samp = np.array([
[??, ??, ??, ??],
[??, ??, ??, ??]
])
...
```
When values are inserted, run again with
```bash
python ./simulation.py
```
## Output Explanation
The first block give some stats trying to describe the quality of the parameters that were found
```ini
samples: 11
total cost: 0.254896
cost per sample: 0.023172
```
It's recommended to use 13 samples or more. Using fewer samples makes it probable that the solver finds bogus anchor positions that still minimizes cost.
Ideal data points collected on an ideal machine would give `total cost: 0.000000` for any sample size above 10. In real life this does not happen. The `cost per sample` value let you compare results from your different data sets of unequal size.
The second block contains the anchor positions that the script found. They are formatted so they can be pasted directly into Marlin's `Configuration.h`.
```
#define ANCHOR_A_Y -1164
#define ANCHOR_A_Z -144
#define ANCHOR_B_X 999
#define ANCHOR_B_Y 585
#define ANCHOR_B_Z -115
#define ANCHOR_C_X -977
#define ANCHOR_C_Y 519
#define ANCHOR_C_Z -106
#define ANCHOR_D_Z 2875
```
The gcode line that is the third block can be used to set anchor calibration values on a running Hangprinter without re-uploading firmware.
```
M665 W-1164.31 E-143.53 R998.78 T585.33 Y-114.98 U-977.11 I518.88 O-105.60 P2874.87
```
If you have `EEPROM_SETTINGS` enabled you can save these values with `M500`. If you don't save them they will be forgotten when you power down your machine.
## Debug
The script accepts a `-d` or `--debug` flag. It calculates the difference between the output anchor positions and your manually measured ones:
```ini
Err_A_Y: -52.307
Err_A_Z: -28.532
Err_B_X: 28.781
Err_B_Y: 35.332
Err_B_Z: 0.022
Err_C_X: -7.113
Err_C_Y: -31.124
Err_C_Z: 9.399
Err_D_Z: 9.869
Method: L-BFGS-B
RUN TIME : 1.43998289108
```
For the `Err_ABCD_XYZ`-values to be meaningful you must have inserted your manually measured values into the `anchors` array in the script:
```
# Rough approximations from manual measuring.
# Does not affect optimization result. Only used for manual sanity check.
anchors = np.array([[ 0.0, ay?, az?],
[ bx?, by?, bz?],
[ cx?, cy?, cz?],
[ 0.0, 0.0, dz?]])
```
The debug check is only relevant if you suspect that the script outputs bogus values. Error larger than ca 100 mm is generally a sign that something's up.
## Alternative Optimization Algorithms
The script accepts a `-m` or `--method` argument. Try for example
```bash
python ./simulation.py --method SLSQP -d
```
... for the [ `SLSQP` ](https://en.wikipedia.org/wiki/Sequential_quadratic_programming) method that is faster, but requires more data points than the default [ `L-BFGS-B` ](https://en.wikipedia.org/wiki/Limited-memory_BFGS) method.
If you want to use the `PowellDirectionalSolver`, you also need Mystic:
```
git clone https://github.com/uqfoundation/mystic.git
cd mystic
python setup.py build
sudo python setup.py install
```
For more on usage, try
```bash
python ./simulation.py --help
usage: simulation.py [-h] [-d] [-c] [-m METHOD]
[-x XYZ_OF_SAMP [XYZ_OF_SAMP ...]]
[-s SAMPLE_DATA [SAMPLE_DATA ...]]
Figure out where Hangprinter anchors are by looking at line difference
samples.
optional arguments:
-h, --help show this help message and exit
-d, --debug Print debug information
-c, --cx_is_positive Use this flag if your C anchor should have a positive
X-coordinate
-m METHOD, --method METHOD
Available methods are L-BFGS-B (default),
PowellDirectionalSolver (requires a library called
Mystic), and SLSQP. As a shorthand, you can use 0, 1,
or 2, for referring to the three methods respectively.
-x XYZ_OF_SAMP [XYZ_OF_SAMP ...], --xyz_of_samp XYZ_OF_SAMP [XYZ_OF_SAMP ...]
Specify the XYZ-positions where samples were made as
numbers separated by spaces.
-s SAMPLE_DATA [SAMPLE_DATA ...], --sample_data SAMPLE_DATA [SAMPLE_DATA ...]
Specify the sample data you have found as numbers
separated by spaces
```
# Intro
[](https://wiki.stadtfabrikanten.org/uploads/images/gallery/2025-05/x9JbAFgATqS177qd-grafik.png)
## Welcome dear guest - this is the Trikarus Project homepage!
This is the public documentation space for the Hangprinter machine artwork implementation called "Trikarus". On this space you can find a lot of information about the project and how it is made off.
Trikarus is a custom Hangprinter (large-scale 3d printer), made in FabLab Chemnitz, specially designed for the 4th Saxon State Exhibition at the scene "Machinery Boom" (MaschinenBoom) of Chemnitz Museum of Industry to the anniverary "500 years of industrial heritage in Saxony" in 2020 and later happenings. It was postponed to be exhibited in late 2020 due to global Corona/Covid-19 crisis - i just call it the "coconut crisis" to have a better feeling about that situation. MaschinenBoom happened from 11 July 2020 until 30 December 2021.
[](https://wiki.stadtfabrikanten.org/uploads/images/gallery/2025-05/qo0VXrsGbEZVh7gT-grafik.png)
*Teaser image by [https://web.saechsisches-industriemuseum.com/chemnitz.html](https://web.saechsisches-industriemuseum.com/chemnitz.html)*
Neithertheless we did not give up to plan and build Trikarus. It's a completely non-commercial long-term experiment and project to focus on making Hangprinters more popular and more usable. It's the first Hangprinter implementation which comes with a massive documentation with focus on understanding the core principles (including failed experiments).
It comes with a lot of (experimental) features that "regular" Hangprinters do not have yet like gyro sensor, IMU sensor, Z limit switch, capsulated line guards (felts at the bearings), segmented print platform, a stable mounted hotend, filament feed sensor, IR Z probe, emergency halt, monitoring and other things. Things like parking the effector in position and a filament feeding unit at the bottom are going to be tested out as well (but are no existent yet).
Trikarus is also some "regular" kind of Industry 4.0 project because it utilizes different devices, sensors and actuators by exchanging data the IoT way. A mostly open source utilizing software stack is running 3d printing server, a visual data monitoring and a lot of scripts to automate and stabilize as much as possible. A great palette of things can be done completely remote and with less effort by a well configured client with proper access permissions (security cascade).
The project is called "Trikarus" because the printer's effector is a kind of flying thing. The name also fits to the to former airport "Ikarus" in Chemnitz. The "Tri" stands for the triangle shape of the effector as well as for the print platform and the anchor situation. There's also the old [greek story of "Ikarus"](https://de.wikipedia.org/wiki/Ikarus) where Ikaros, son of Daedalus, installed some wings and flown too near to the sun. His wings melted and he crashed into the ocean. Belonging to this project the sun is the extruder, mounted on the yellow lighted effector, and the ocean is the print bed with blue tape acting as adhesion promotor on it. Sometimes Trikarus comes too far to coordinates it cannot reach and will collide with it's lines.
Trikarus uses a Duet 2 Controller with official RepRapFirmware v3 and runs with Nema 17 stepper motors. It has closed loop control (servo motors) by installed Smart Steppers from MisfitTech, mounted on those Nema 17 motors. It can be set into so called "torque mode" by running commands from Repetier Server or serial console which is running on an Raspberry Pi. The Raspbery Pi is attached to Duet 2 by LAN and USB. To use torque mode the Smart Stepper run a special fork of Smart Stepper firmware which implements it (like Torbjørn did) but without I2C functionality. The Raspberry Pi works as remote multi tool for the complete machine and has to do a lot of important and cool jobs.
## Overview of content
Start with the [What is a Hangprinter and how does it work?](https://old.stadtfabrikanten.org/pages/viewpage.action?pageId=65405294) to get an orientation.
## Videos
Because videos help to understand we made a lot of clips for different problems and solutions. We put them on our self-hosted PeerTube instance.
[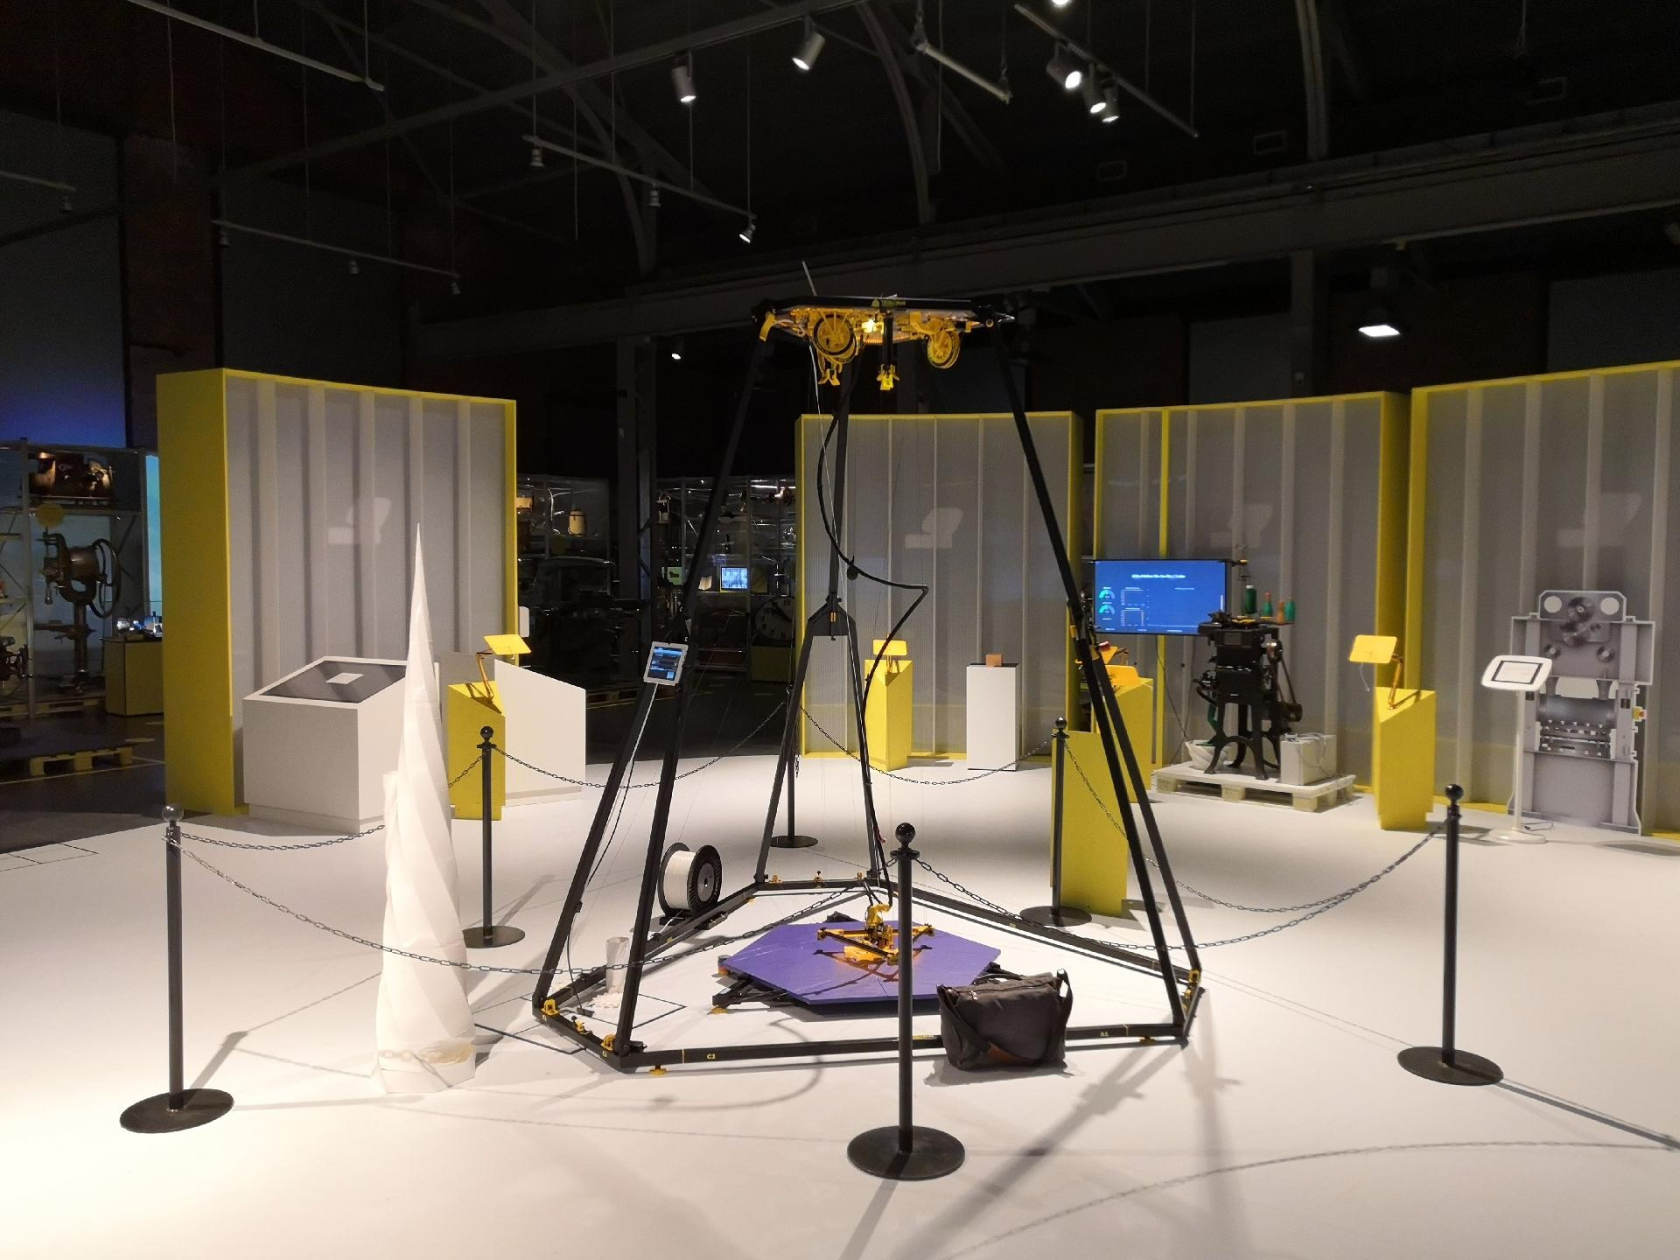](https://wiki.stadtfabrikanten.org/uploads/images/gallery/2025-05/J1h3zDjDS6qpU0y9-grafik.png) [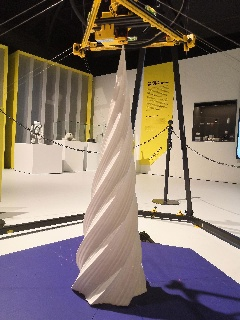](https://wiki.stadtfabrikanten.org/uploads/images/gallery/2025-05/aU2erIxqqq3eMd7I-grafik.png) [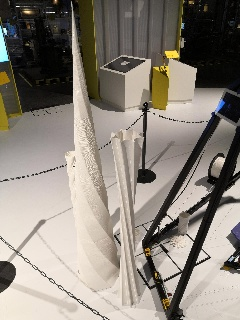](https://wiki.stadtfabrikanten.org/uploads/images/gallery/2025-05/VIb1JnPgrX9QyHP3-grafik.png) [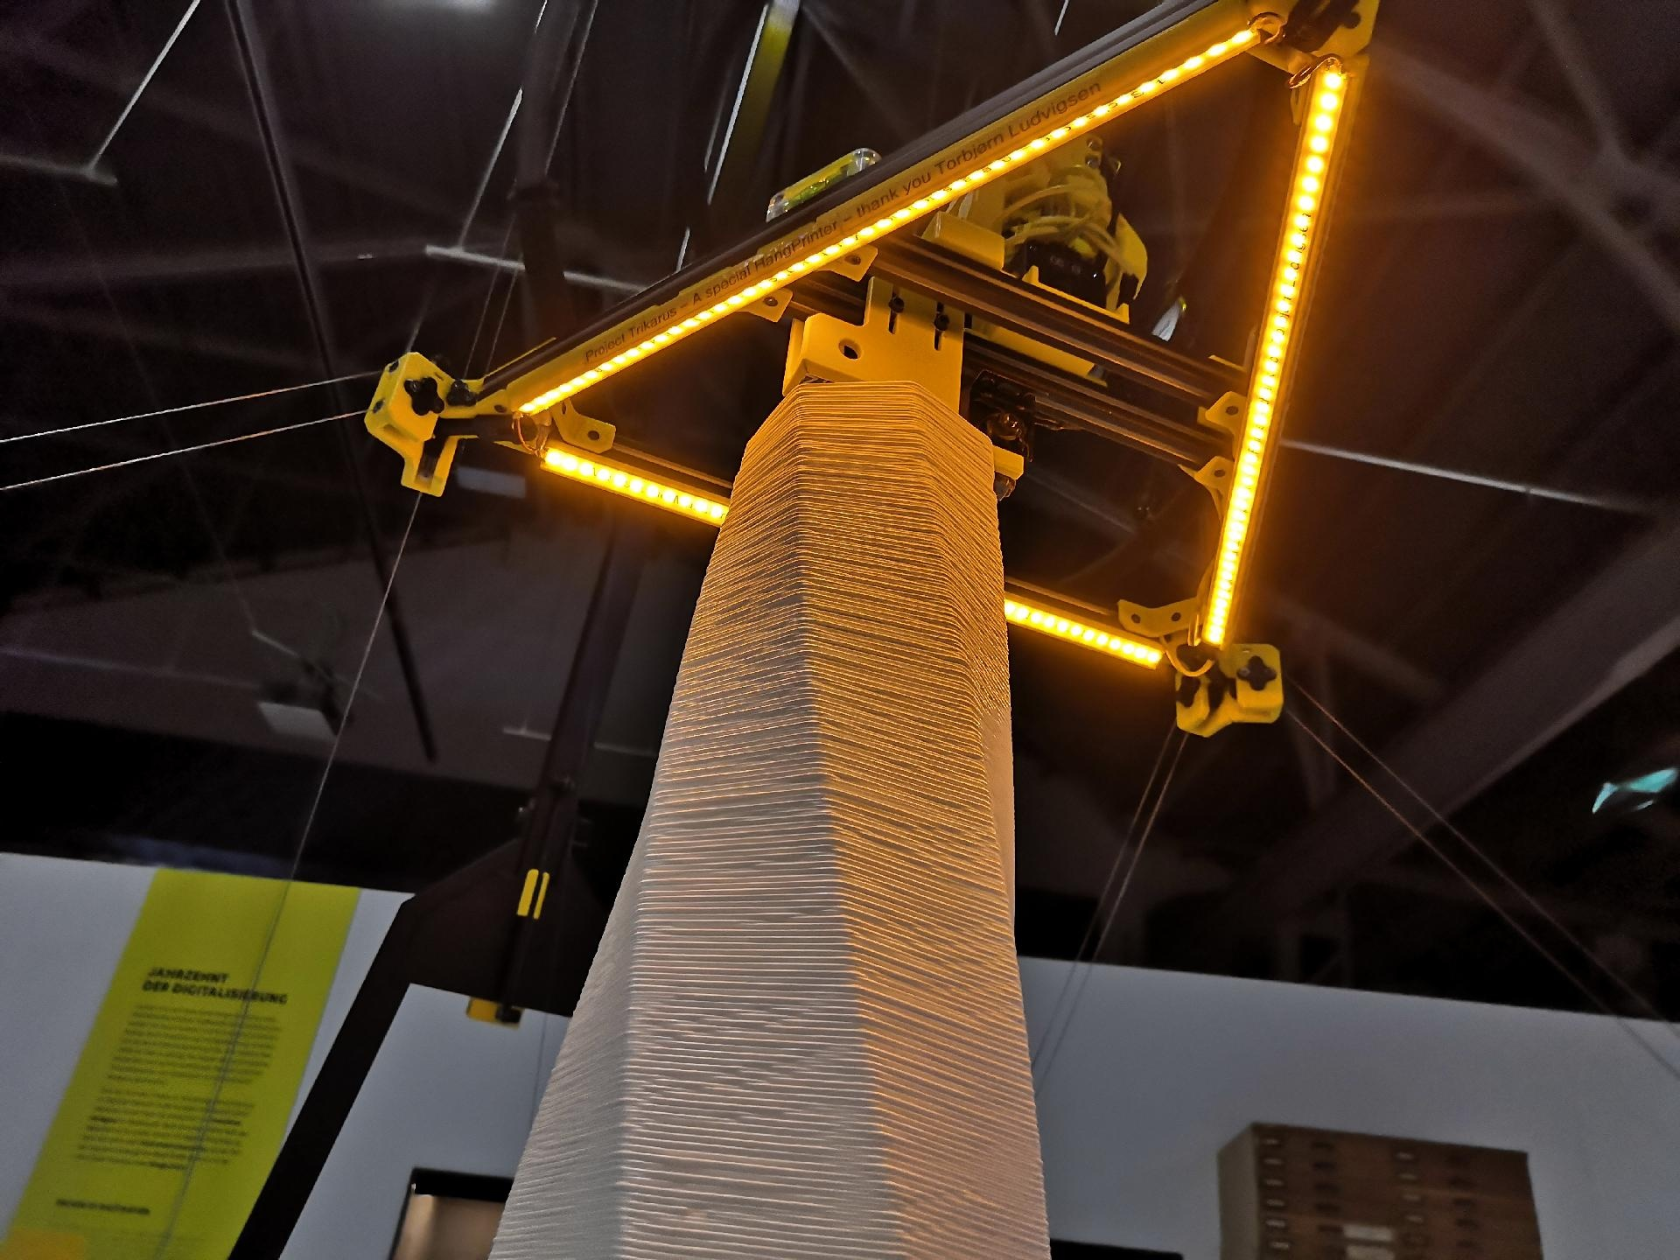](https://wiki.stadtfabrikanten.org/uploads/images/gallery/2025-05/G8yFJKIXIK8V1XTp-grafik.png)
[https://videos.stadtfabrikanten.org/video-channels/trikarus/videos](https://videos.stadtfabrikanten.org/video-channels/trikarus/videos)
## Hardware Features
- based on Hangprinter v1-v4 + own ideas and a lot of working and also failed baby experiments, existing knowlegde from the former past, and a lot of stuff from the widy spidy web
- key phrases
- frameless printer, hanging printer, Hangprinter, room printer, Freiraumdrucker, Seilwindendrucker, winch printer, rope printer, wire printer, cable-driven parallel 3D printer CDPP, redundantly constrained, line-on-spool, completely restrained positioning mechanism (CPRM), kinematically redundant
- typical layer heights 0.45 ~ 2.00 mm
- printable material: PLA (because no heated bed)
- consumed time: more that you can imagine
- a lot of lessons learned
- consumed filament: over 3 kg of wasted filament for failed prints, failed model geometry and better model iterations; around 10kg of filament in total
- destroyed parts which were replaced while building: rotary encoder, gyro sensor, stepper motor driver and much more
- Software & remote control → see [Network infrastructure and software](https://old.stadtfabrikanten.org/display/TH/Network+infrastructure+and+software)
- Duet Web Control (Duet 2 Ethernet/Wifi)
- Repetier Server & Repetier Server Monitor
- Monitoring with Grafana, InfluxDB and collectd
- mjpg\_streamer for Webcam
- UPS powered server infrastructure: Raspberry Pi and Freifunk can be maintained for 4 to 10 hours even after switching off the power in the museum (for neat evaluation of the metrics, saving of configs, etc.)
- GCode/Firmware: RepRepFirmware with configured HangPrinter kinematics mode and Marlin compatible dialect for slicing
- 32 Bit Duet 2 Ethernet electronics
- sensors
- Infrared sensor for auto leveling in the Z direction
- limit switch for maximum Z coordinate (not working stable yet because cable collisions can occure) - not integrated in routines yet
- Filament feed sensor on the extruder realised by generic knob encoder
- Filament feed sensor on the filament conveyor (double monitoring) - not integrated in routines yet due to hardware issue
- 3x analogue bubble levels for rough leveling the effector
- digital gyro MPU 6050 for checking of the surrounding room by measuring and collecting vibration and temperature data (more could be done with this data later) - not integrated in routines yet
- digital IMU MPU 9250 for precise leveling and measurement of the effector inclination (angle) and vibrations → helpful monitoring for printer calibration (loose / tight tension) or error behavior analysis (e.g. strong floor vibrations) - not integrated in routines yet
- actuators
- Aero Titan Extruder with Super Volcano Hotend for 1.75 mm filaments and 1.4 mm nozzle (approx. 10x higher output than normal desktop printers) - PT100 sensor
- Active filament unwinding device with monitor and integrated load cell (10kg) - under development
- emergency halt button (this is crucial for printing with safety. It was repeatedly validated to be the best idea you could have building up a large machine with higher forces in extrusion)
- closed loop servo motors (MisfitTech Smart Stepper)
- fancy yellow LED stripes at the effector and ceiling module
- three laser pointers for easy machine calibration (mechanically capsulated by mounting on the top side of the translucent polycarbonate ceiling plate)
- backup recovery of print (printer can be shutdown and revived later in case the power was not gone (no brake system existent yet)) - experimental
- different hardware features
- translucent UV resistant polycarbonate (Macrolon) ceiling plate for a good view of all components (for maintenance, laser pointers and design)
- more rigid lines (doubled lines for each axis) provide better flex compensation and keeping orientation than single lines
- fine adjustment of the lines with guitar tuners
- thumb screws for quick release of messed lines
- transport rings on the top side and grip handles on both sides for better handling of the ceiling module
- advanced side carriers at the spools to catch de-spooled lines (prevent lines to get into ball bearings) and for possibly later drive break implementation
- all parts portable with regular car for various events
- magnetic adjustable PTFE filament tube guiding from bottom to ceiling module
- magnetic line winders (reservoirs) for idling lines (bypassing)
- thick and well isolated main cable for wiring between ceiling module and effector (heavy weight). Acts also as some simulation for Hangprinters which would have more than one extruder or contain more advanced tools
- frame
- large frame with support for 3d printed parts up to approx. 2.5 m height x 1 m diameter
- total frame dimension ~2.8 height x 2.25 m diagonal
- stable frame parts printed from PETG
- collapsible frame that can be transported by car
- can be set up completely by 3 to 4 people
- can also be used partially (fork corners only)
- install ceiling module at the room's ceiling with some eyelets / spacers
- place the three anchors together with the frame corners (tubular steel assemblies) on the floor
- then it corresponds completely to the actual Hangprinter principle
- contains a lot of different recycled spare parts from different things like old computers, power supplies and cables
- black/yellow design
- low power consumption: max. 200 watts when everything is running (extruders, motors, lighting) - usual operating power is etween 50 and 100 watts
## Trikarus' core modules, dimensions and weights
See[ Bills of material and hardware compenent features](https://old.stadtfabrikanten.org/display/TH/Bills+of+material+and+hardware+compenent+features) to get more information about electronics.
**Effector (mover) assembly**
~3.9 kg - measured by luggage scale - weight includes ceiling cabling partially
[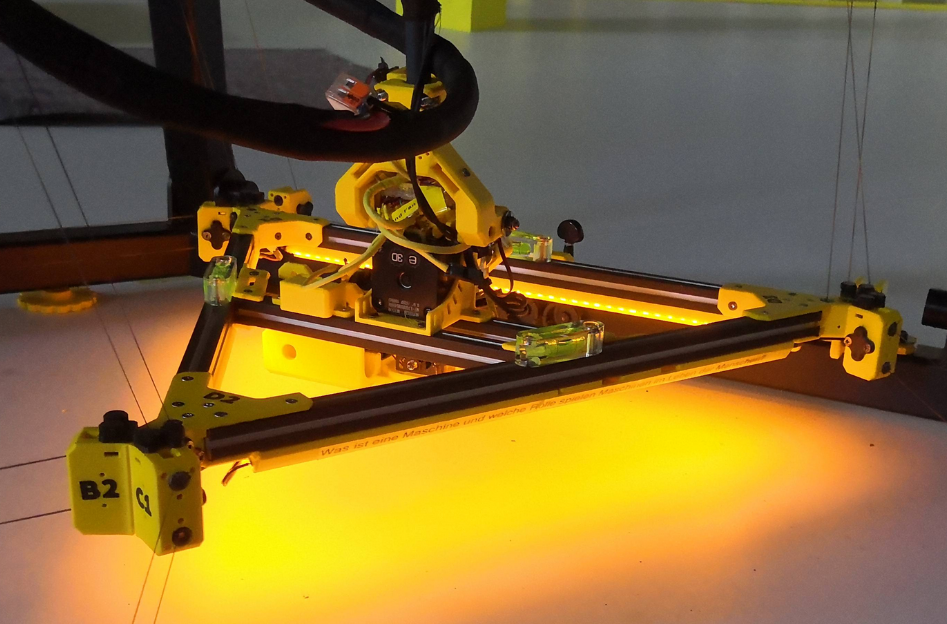](https://wiki.stadtfabrikanten.org/uploads/images/gallery/2025-05/VULXroKf0XOOYyWD-grafik.png)
**Ceiling mount assembly**
- ~16 kg - measured by luggage scale
- ceiling module with homed and fixed effector: dimensions roughly 1.0 m x 0.45 m (height)
[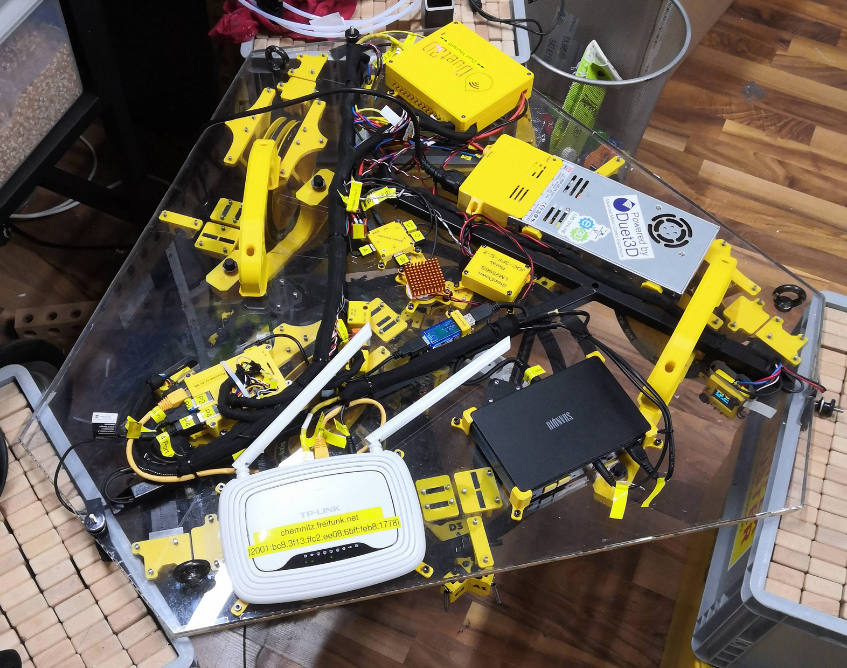](https://wiki.stadtfabrikanten.org/uploads/images/gallery/2025-05/zHh1XuOWzdhts2Lf-grafik.png)
**Exhibition frame**
- foldable heavy-weight steel frame
- max 1.6 m long beam segments
[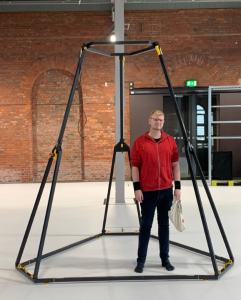](https://wiki.stadtfabrikanten.org/uploads/images/gallery/2025-05/lBQbYgHAibnptdD4-grafik.png)
**print platform**
- height + angle adjustable print platform
- max 1.3 m long beam segments
[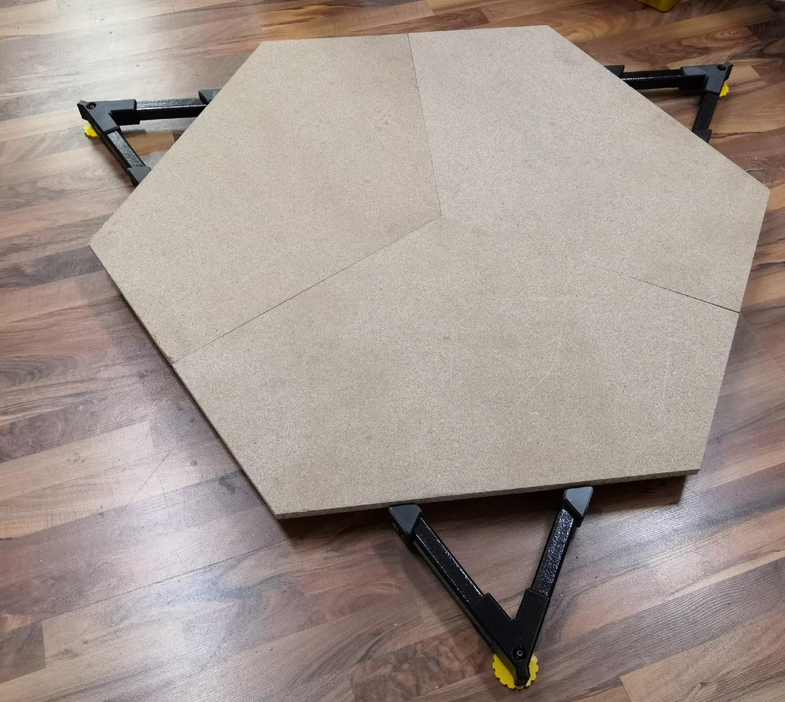](https://wiki.stadtfabrikanten.org/uploads/images/gallery/2025-05/ZTbEzoJCdAwtJN6W-grafik.png)
## Limitations / missing features / caveats
- high volume output extruder but maximum print speed is limited due to missing BLDC drives (faster, but more expensive)
- high weight of effector and main cable
- no heatbed
- [no I2C connectivity between Smart Steppers and Duet disables some special features of Hangprinter firmware](https://gitlab.com/tobben/hangprinter/-/issues/38)
- not all features working which could be needed, like the Z limit switch at the top
- old, unmaintained RRF v2 firmware
- a list with more missing things and feature requetsts can be found at [What next?](https://old.stadtfabrikanten.org/pages/viewpage.action?pageId=73040235)
## Targets and demands of Trikarus project
- not intended to be a high quality machine that ever could or should be mass-produced
- manufacture large objects. it's strength is in build volume, not speed or precision
- it's a printer with support for large spaces. Accordingly, an extruder was installed that has significantly more output. This means that the parts to be produced require more material and are therefore much more expensive than conventional 3D prints. Since misprints are priceless, the machine hardware has to be better. Therefore, more costs for closed loop steppers and Co. were estimated here. So it's not a cheap project
- was built for exhibiting → aims for stable function, quality and optics and is therefore not as inexpensive as regular hardware projects
- education (showing the procedure and the possibilities of Hangprinters and 3d printing) for visitors and other people
- learning by doing
- experimental & further development (open knowledge contribution)
- self-actualization
- maybe go mobile from exhibition to exhibition, such as MakerFaires
- validate, test, improve the Hangprinter working principle
- modern art / machine art / maker art / hacker art - every machine is also a work of art, an inspiration and an expression of creativity or original ideas or solutions
- create a good and more complete documentation for Hangprinters, which explains how to operate and maintain the machine. This documentation focuses on the usage of RepRapFirmware but it explains also some differences to Marlin Firmware
- extension to ceramics printing (postponed)
## Contribution and questions
Trikarus is not some kind of fork project to completely rebase on. It is made to contribute as much as possible to the main Hangprinter project. So please do not rely on this as main source and please commit your questions and developments to the ressources provided by the source repositories linked in the bottom section at[ What is a Hangprinter and how does it work?](https://old.stadtfabrikanten.org/pages/viewpage.action?pageId=65405294) ("Important web ressources for Hangprinter"). If you have questions and ideas for Trikarus you can drop us an [email](https://fablabchemnitz.de/impressum/). If it is related to Hangprinter in general you can drop us too or put it directly into the gitlab repositories of Torbjørn Ludvigsen.
 Some different project files were pushed into Gitea → [Trikarus @ Gitea](https://gitea.fablabchemnitz.de/vmario/Trikarus "Trikarus @ Gitea")
## Thanks!
Special thanks to Torbjørn Ludvigsen for all the time for years now investing into so much effort respecting experiments, coding and testing Hangprinter related knowledge. You got a special positions at the tool head.
[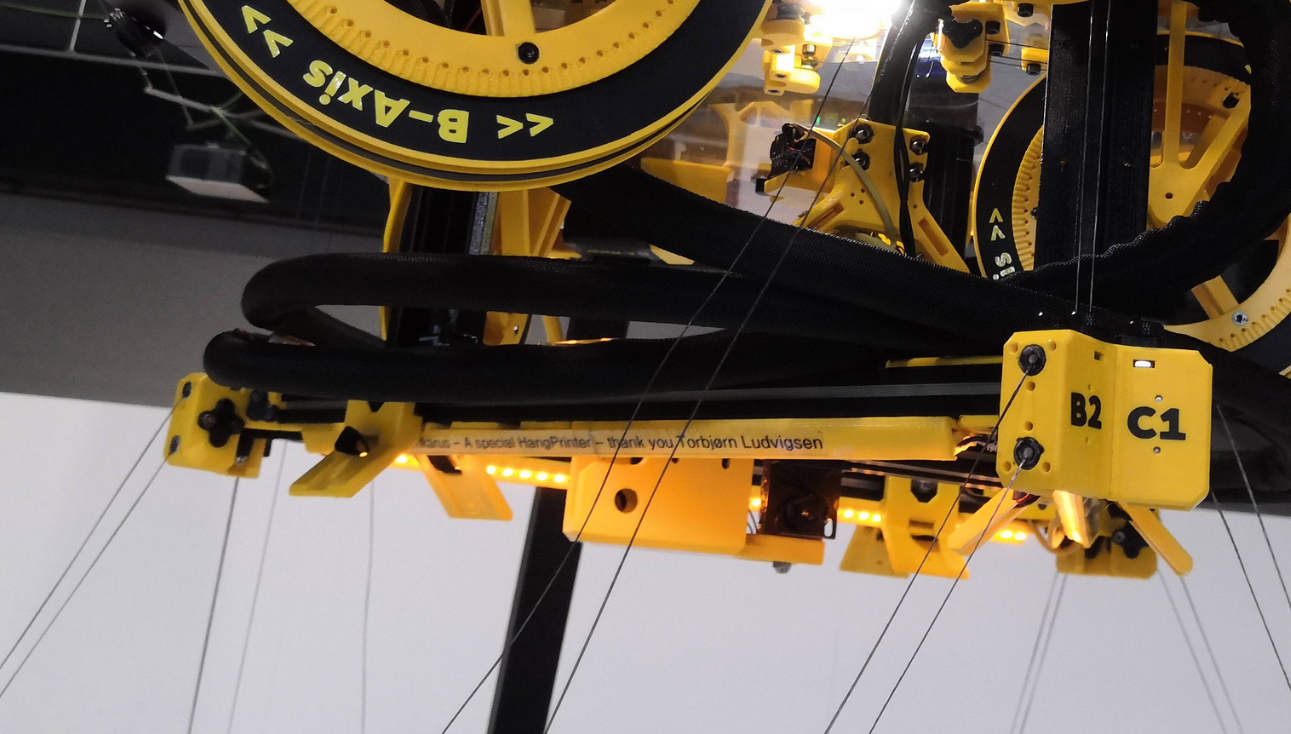](https://wiki.stadtfabrikanten.org/uploads/images/gallery/2025-05/3flQCBvXubbXZTBr-grafik.png)
Trikarus project would not have been possible to make without the FabLab Chemnitz people, machines, tools and knowledge. Thanks to Mathieu for the prototype frame of the printer, to Georg for giving 2 more hands while building up and testing at the museum and to Daniel for organizing and transporting a lot of different stuff. Cheers also to Jens, Steffen, Marcel, Jannis, Stefan, Sven and Tommy.
Another appreciation goes to Freifunk Chemnitz which delivers flexible infrastructure regarding to Wifi. Thanks again to Stefan and Martin helping out with technical stuff.
Thumbs up to the special idea i got from The Case Digital regarding cable guidings.
Finally for giving us the possibilty and space to make that project a huge Hallelujah is going to the Chemnitz Museum of Industry with Jürgen Kabus and Thomas Schmäschke for organizing and spending so much time.
[](https://wiki.stadtfabrikanten.org/uploads/images/gallery/2025-05/cBm4bUIrTqOjy4CT-grafik.png)
# Network infrastructure and software
# arp-scan
Monitoring the network neighbours can possibly help to find attack vectors in Freifunk Network. On Linux, the onboard arp tool will only show the IP/MAC combinations that the system has already used. So, it will only show the Raspberry Pi in that list if you have already 'contacted' it via it's IP address (via commands like ssh, telnet, ping, http, nc, etc). arp-scan, however, will actively search for unknown IP/MAC combinations on your LAN/WLAN.
## Linux
[https://github.com/royhills/arp-scan](https://github.com/royhills/arp-scan)
```bash
cd /opt
apt-get install automake libpcap-dev
git clone https://github.com/royhills/arp-scan.git
cd arp-scan/
aclocal
autoheader
autoreconf -i
automake
autoconf
./configure
make
ARP_SHARE="/usr/local/share/arp-scan/"
mkdir -p $ARP_SHARE
cp /opt/arp-scan/ieee-oui.txt $ARP_SHARE
cp /opt/arp-scan/ieee-iab.txt $ARP_SHARE
cp /opt/arp-scan/mac-vendor.txt $ARP_SHARE
cd /usr/bin && ln -sf /opt/arp-scan/arp-scan arp-scan
```
```bash
arp-scan --help
arp-scan --localnet --interface=eth0 > ./arp-scan.txt
Ending arp-scan 1.9.7: 4096 hosts scanned in 18.442 seconds (222.10 hosts/sec). 484 responded
```
## Windows
[https://github.com/QbsuranAlang/arp-scan-windows](https://github.com/QbsuranAlang/arp-scan-windows-/blob/master/arp-scan/Release(x64)/arp-scan.exe)
```
arp-scan.exe -t 10.149.2.89/16 > arp-scan.txt
```
# AutoHotkey Emergency Button script
We use this script in local mode to have a quick emergency halt possibilty. **Never use this over internet. Only use local network connection!**
## Download portable AutoHotKey
[https://www.autohotkey.com/download/](https://www.autohotkey.com/download/)
[https://github.com/Lexikos/AutoHotkey\_L/releases](https://github.com/Lexikos/AutoHotkey_L/releases)
[](https://wiki.stadtfabrikanten.org/uploads/images/gallery/2026-06/CpX252YQv2VpXeuX-grafik.png)
Extract the files to some safe place
## Download curl.exe for Windows
[https://curl.haxx.se/windows](https://curl.haxx.se/windows/)
## Create script directory and files
create TrikarusEmergencyStop.ahk
```
^j::
; use "`" to escape percent sign!
; you may need to apply this script to your firewall rules to work correctly because there's an outgoing connection
Run,curl.exe "https://hangdevice:3345/printer/api/Trikarus?apikey=THEKEY&a=emergencyStop&data=" --max-time 1 --insecure
MsgBox, Triggered emergency stop! Please wait ~15 seconds until Duet 2 recovered
return
```
This script uses curl command to send emergency halt command to Repetier Server (USB) connection. That means it will also work even if Duet is not reachable over ethernet (which sometimes fails).
## Put curl.exe and curl-ca-bundle.crt in script dir
[](https://wiki.stadtfabrikanten.org/uploads/images/gallery/2026-06/QV0c9Pp8DzaLkd5N-grafik.png)
## Create an icon file (optional step)
[](https://wiki.stadtfabrikanten.org/uploads/images/gallery/2026-06/SpmCwlGGLHI2Eh2f-grafik.png)
## Compile TrikarusEmergencyStop.exe
Run Ahk2Exe.exe to configure the output conversion parameters
[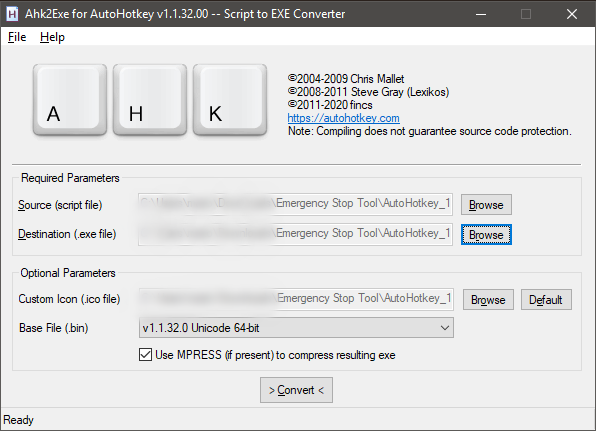](https://wiki.stadtfabrikanten.org/uploads/images/gallery/2026-06/AfF4rhhoEDeu9nNp-grafik.png)
## Use it
[](https://wiki.stadtfabrikanten.org/uploads/images/gallery/2026-06/5qq5nuk6Xqtw77Th-grafik.png)
**It will listen to CTRL + J**
[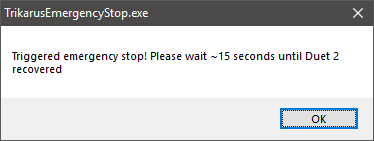](https://wiki.stadtfabrikanten.org/uploads/images/gallery/2026-06/OgKCXPwVwOrP7JIe-grafik.png)
**You might need to allow firewall exceptions to use this!**
If it works it will reset the controller accordingly
[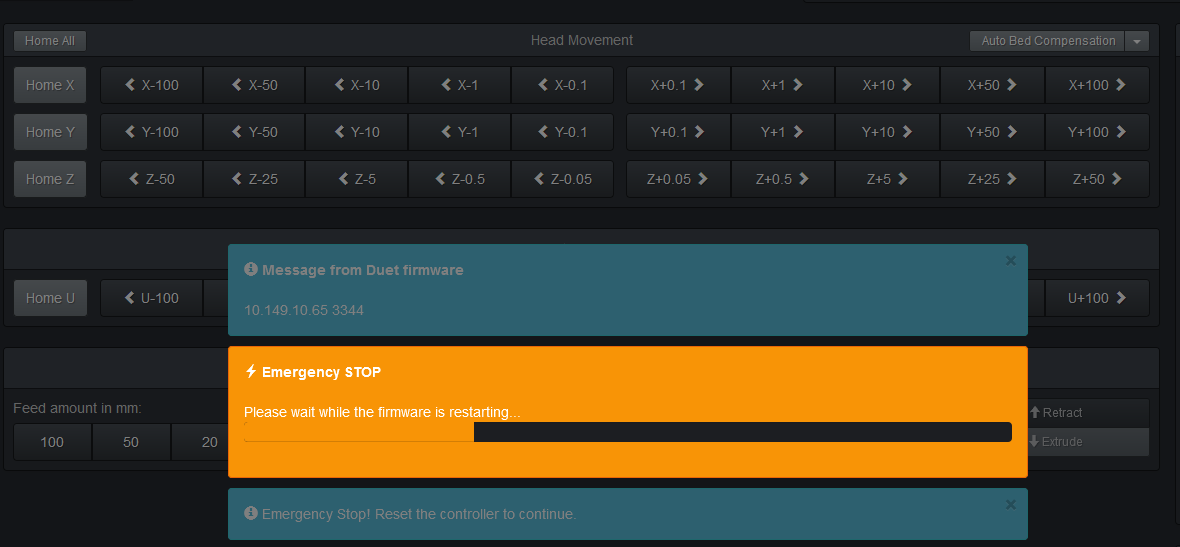](https://wiki.stadtfabrikanten.org/uploads/images/gallery/2026-06/ELVuqVTETl6WZSWi-grafik.png)
# Backups and misc cron jobs
## Mount USB stick (backup stick)
```bash
#format SD card
mkfs.ext4 /dev/sda
```
```bash
vim /etc/fstab
```
configure fstab to skip mount errors because if USB stick is not available boot fails or is really slow due to mount timeout (default seemsto be 90 seconds). More info at [https://www.blogperle.de/raspberry-pi-emergency-mode-and-root-account-locked-mounting-usb-disk-with-fstab/](https://www.blogperle.de/raspberry-pi-emergency-mode-and-root-account-locked-mounting-usb-disk-with-fstab/)
```
/dev/sda //mnt/external_usb32g ext4 defaults,nofail,x-systemd.device-timeout=5 0 0
```
```bash
mkdir -p /mnt/external_usb32g
mount -a
cd /
ln -sf /mnt/external_usb32g backup
```
## Troubleshooting USB stick file system
```bash
vim /opt/repairUSBstick.sh
```
```bash
#!/bin/bash
umount /mnt/external_usb32g
fsck -y /dev/sda
mount -a
```
```bash
chmod +x repairUSBstick.sh
```
**Daily repair cronjob**
```bash
vim /etc/cron.d/repairusbstick
```
```bash
SHELL=/bin/bash
PATH=/usr/lib/sysstat:/usr/sbin:/usr/sbin:/usr/bin:/sbin:/bin
#daily repairing of USB stick
0 6 * * * root /opt/repairUSBStick.sh > /dev/null 2>&1
```
## Daily Backup
Backup runs daily at 18:15 (after daily regular closing of the museum)
**/etc/cron.d/backuphost**
```bash
SHELL=/bin/bash
PATH=/usr/lib/sysstat:/usr/sbin:/usr/sbin:/usr/bin:/sbin:/bin
15 18 * * * root /opt/backuphost.sh > /dev/null 2>&1
```
**/opt/backuphost.sh**
```bash
#!/bin/bash
CUR="$( cd "$( dirname "${BASH_SOURCE[0]}" )" >/dev/null && pwd )"
DTS=$(date +"%Y%m%d_%H%M")
BUP="/backup"
#rsync switches
# D - keep device files
# o - copy owner rights
# g - copy group rights
# r - recursive
# R - copy with folder structure
# L - copy files behind symlinks
# t - keep timestamp
# l - copy symlinks
# p - keep file permissions
# a = Dgloprt
#installed packages
dpkg -l > "$BUP"/dpkg.list
#some extra options for all rsync - can be used to debug
#RP="-v --progress -stats"
RP=
RSYNC="rsync $RP"
#home, skel, postfix, apache, motd, ssl, init.d, systemd, resolv.conf, interfaces, ...
$RSYNC -lrR /home/ "$BUP"
$RSYNC -aRL /etc/ "$BUP"
$RSYNC -rptR /boot/ "$BUP"
#cron
$RSYNC -laRL /var/spool/cron/crontabs/ "$BUP"
#user
$RSYNC -lrptR /usr/local/ "$BUP"
#get host-specific backup jobs
$RSYNC -lrptR /var/lib/Repetier-Server/ "$BUP"
$RSYNC -lrptR /usr/local/Repetier-Server/ "$BUP"
$RSYNC -lrptR /usr/local/Repetier-Setup/ "$BUP"
$RSYNC -lrptR /usr/local/share/mjpg-streamer/ "$BUP"
#opt
$RSYNC -lrptR /opt/ "$BUP"
#sh usage of /backup
SIZE=$(cd "$BUP";echo $(du --apparent-size -sh)|cut -d ' ' -f1) #use apparent size to display correct size of NAS! otherwise ~200 MB will show as ~3.5 GB
#mail
printf "[$DTS] rsync-Backup of $(hostname -f) was done! \nSize:"$SIZE"" | mail -s "$(hostname -f)" target@mail.address
```
## Remote Backup
Additionally a remote host is copying the backup files by pulling with rsync over SSH.
## Cleaning old InfluxDB dumps
**/etc/cron.d/clean-influx-bup**
```
SHELL=/bin/bash
PATH=/usr/lib/sysstat:/usr/sbin:/usr/sbin:/usr/bin:/sbin:/bin
0 21 * * * root find /mnt/external_usb32g/db/ -mtime +14 -exec rm {} \; > /dev/null
```
## Troubleshooting Postfix (Restart Postfix)
Because sometimes mailq is not emptied we are going to force sending out mails every 5 minutes. Sometimes the message "postqueue: warning: Mail system is down -- accessing queue directly" is shown when typing command "mailq".
**/etc/cron.d/restartpostfix**
```bash
SHELL=/bin/bash
PATH=/usr/lib/sysstat:/usr/sbin:/usr/sbin:/usr/bin:/sbin:/bin
#*/5 * * * * root systemctl restart postfix
*/5 * * * * root postsuper -r ALL > /dev/null 2>&1
```
## Send dmesg log by mail
/etc# cat rc.local
```bash
#!/bin/sh -e
#
# rc.local
#
# This script is executed at the end of each multiuser runlevel.
# Make sure that the script will "exit 0" on success or any other
# value on error.
#
# In order to enable or disable this script just change the execution
# bits.
#
# By default this script does nothing.
# Print the IP address
_IP=$(hostname -I) || true
if [ "$_IP" ]; then
printf "My IP address is %s\n" "$_IP"
fi
# send dmesg log by mail once per reboot
dmesg | mail -s "dmesg log from session" target@mail.address
exit 0
```
Switch off LED stripes and spot from Trikarus
Saves energy and prolongs the life of the LEDs
**/etc/cron.d/led\_off\_trikarus**
```bash
# this script switches off the LED stripes and spot from Trikarus at 18:00 every day
SHELL=/bin/sh
PATH=/usr/local/sbin:/usr/local/bin:/sbin:/bin:/usr/sbin:/usr/bin
0 17 * * * root python3.7 /opt/gpio/ledspot-off.py
```
## Switch on LED stripes and spot from Trikarus
See [https://web.saechsisches-industriemuseum.com/chemnitz/infothek/oeffnungszeiten-preise-anfahrt/oeffnungszeiten.html](https://web.saechsisches-industriemuseum.com/chemnitz/infothek/oeffnungszeiten-preise-anfahrt/oeffnungszeiten.html)
This script switches on the LEDs once per hour. It should not autotrigger every minute because the userdefined request to turn them off should be respected too (from bash or from Repetier Server UI)!
**/etc/cron.d/led\_on\_trikarus**
```
# this script switches on the LED stripes and spot from Trikarus
#"At every minute past every hour from 9 through 17 on Tuesday, Wednesday, Thursday, Friday, Saturday, and Sunday."
SHELL=/bin/sh
PATH=/usr/local/sbin:/usr/local/bin:/sbin:/bin:/usr/sbin:/usr/bin
0 9-17 * * 2,3,4,5,6,7 root python3.7 /opt/gpio/ledspot-on.py
```
## Hourly calendar event upload
As we need to switch to Trikanet when running the printer locally, we use the predetermined calendar dates, parsed by main server, then uploaded to hangprinter raspberry pi. From this it get's synced to the Freifunk Router
**/etc/cron.d/hangprinter-shows**
```
SHELL=/bin/bash
PATH=/usr/lib/sysstat:/usr/sbin:/usr/sbin:/usr/bin:/sbin:/bin
#hourly try to upload calendar data from hangprinterbackup account. that file gets created on main server, CalDAV server
0 * * * * root scp -v -6 -i /root/.ssh/c-MaschinenBoom-FLC /home/hangprinterbackup/sonstiges.cron root@[2001:bc8:3f13:ffc2:ee08:6bff:feb8:1778]:/etc/crontabs/root > /dev/null 2>&1
```
See [FCI:Diverse Scripts ](https://old.stadtfabrikanten.org/pages/createpage.action?spaceKey=TH&title=neycerha&linkCreation=true&fromPageId=61702151) on how Neycerha pushed calendar data to hangprinter.
# Clearing the swap
```bash
vim /opt/swappy.sh
```
```bash
#!/bin/bash
free_data="$(free)"
mem_data="$(echo "$free_data" | grep 'Mem:')"
free_mem="$(echo "$mem_data" | awk '{print $4}')"
buffers="$(echo "$mem_data" | awk '{print $6}')"
cache="$(echo "$mem_data" | awk '{print $7}')"
total_free=$((free_mem + buffers + cache))
used_swap="$(echo "$free_data" | grep 'Swap:' | awk '{print $3}')"
echo -e "Free memory:\t$total_free kB ($((total_free / 1024)) MB)\nUsed swap:\t$used_swap kB ($((used_swap / 1024)) MB)"
if [[ $used_swap -eq 0 ]]; then
echo "Congratulations! No swap is in use."
elif [[ $used_swap -lt $total_free ]]; then
echo "Freeing swap..."
sudo swapoff -a #maybe useless line
sudo swapon -a #maybe useless line
service dphys-swapfile restart
else
echo "Not enough free memory. Exiting."
exit 1
fi
```
```bash
chmod +x /opt/swappy.sh
```
# Duet 2 and Duet Web Control
# Network configuration
The Duet controller is attached to Raspberry Pi by USB and by LAN to router. This gives great flexibility. The LAN settings can be done like described in [Duet 2 Ethernet Web Control (DWC).](https://duet3d.dozuki.com/Guide/1.)+Getting+Connected+to+your+Duet/7)
## Sample configuration for LAN
```ini
;Networking Stuff
;Web Interface / IP-Adress
M552 ; show status of network interface
M552 S0 ; disable network interface
M552 S1 P0.0.0.0 R565 ; wait 10-30 seconds to obtain an IP address (Port 565)
M586 ; show status of telnet interface
M586 P2 S1 T0 ; enable Telnet (SSH not implemented yet) (Port 23 if not changed)
```
## Telnet
Telnet is highly insecure that's why we do not use it. But we tested it. Only one Telnet connection can be established at a time. If the console output "telnet: Unable to connect to remote host: Connection refused", then it is likely that Repetier Server is trying to establish a connection. This can be easily disabled in Repetier Server.
[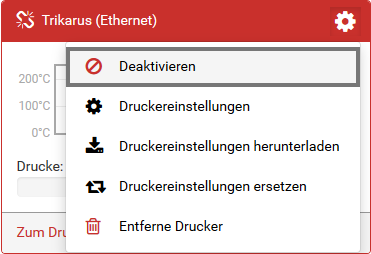](https://wiki.stadtfabrikanten.org/uploads/images/gallery/2026-06/GuiyQSQtk9f7fPz7-grafik.png) [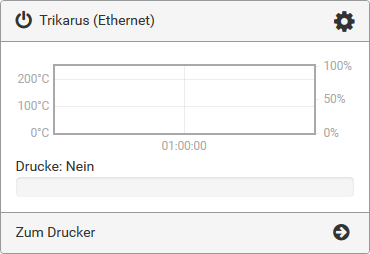](https://wiki.stadtfabrikanten.org/uploads/images/gallery/2026-06/pwUqIefoLTN5b7Kc-grafik.png)
Connecting by telnet is easy:
```bash
telnet duetboard.fritz.box 23
Trying 192.168.1.67...
Connected to due.fritz.box.
Escape character is '^]'.
RepRapFirmware Telnet interface
Please enter your password:
> ULTRAHARDTOCRACKPASSWORD
Log in successful!
```
**Telnet should not be used due to its plaintext unsecure communication → [https://netsyshorizon.blogspot.com/2015/03/capture-sniffing-telnet-password-capturing.html](https://netsyshorizon.blogspot.com/2015/03/capture-sniffing-telnet-password-capturing.html)**
## USB Serial Connection from bash
```bash
screen /dev/ttyUSB-DUET2ETHERNET 115200
#enter some GCode like M552 to test it
#unsvoled nasty thing: how to correctly set tty to do newlines? textual output is fragmented
#get regular temperature info from Duet by simple cat:
cat /dev/ttyUSB-DUET2ETHERNET
ok T:24.1 /0.0 T0:24.1 /0.0
```
## IP address, MAC address and device name
Sometimes Freifunk DNS or other services fail. It's required to access the devices by their IP address then. By using Freifunk it's not so easy to get the current IP address of Duet 2 Ethernet board.
A lot of commands were tested
- "batctl dc" on Freifunk Router does not always work. It sometimes returns no value for the known (fixed) device MAC address
- "batctl ping <MAC|IP>" on Freifunk Router does not work because it does not return results for clients but for originators
- "arp" on Freifunk Router does not return usable values (only in rare cases)
- "arp" on Raspberry Pi works only for known IP addresses
- "traceroute" on Freifunk Router does not work for MAC addresses but IP addresses. Without knowing the recent IP it's not useful
- "arp-scan" on Raspberry Pi works best, but comsumes a lot of CPU compute power
- Sending M-command to Duet and grab the result from Repetier Server console (remember that it's not possible to send M command to Duet's DWC API URL over network if it cannot be resolved. So the only proper way is to utilize the USB connection by Repetier Server!)
### Freifunk network mode switch and automatic mode detection
Duet 2 is configured to get an IP address from Freifunk dynamically. This IP address can also set to be static. Because it's sometimes instable to work in ffcmesh domain we have to make the LAN clients available to each other without lagging. This can be done by setting the router into switch mode. To have a network communication and to make Duet Web Control accesible it's advised to reconfigure Duet by command M552. It was tested that Duet does not automatically obtain an IP address from Freifunk router in case the switch mode was activated. So we apply a static IP address manually. This was added as Macro in Repetier Server. As soon as Duet obtained it's IP DWC interface will be available again. For better handling a cronjob was created which runs a script which checks the current network state and adjusts the mode automatically:
```bash
vim /etc/cron.d/duet_network_mode
```
```bash
SHELL=/bin/bash
PATH=/usr/lib/sysstat:/usr/sbin:/usr/sbin:/usr/bin:/sbin:/bin
* * * * * root /opt/duet_network_mode.sh > /dev/null 2>&1
```
```bash
vim /opt/duet_network_mode.sh
```
```bash
#!/bin/bash
#IP_ADDR=$(/sbin/ip route | awk '/default/ { print $3 }')
IP_ADDR=$(ip route | grep default | grep -oE '[0-9]{1,3}\.[0-9]{1,3}\.[0-9]{1,3}\.[0-9]{1,3}')
echo current hangdevice IP is $IP_ADDR
SCRIPT_FILE="$(basename "$(test -L "$0" && readlink "$0" || echo "$0")")"
CONCURRENT=$(ps -C ${SCRIPT_FILE} --no-headers | wc -l) #get the count of recently running script instances
if [[ $CONCURRENT != 0 ]]; then
echo "Already running. Cannot execute start script multiple times simultaneously"
exit 1
else
source /opt/repetier-conf.sh
#echo "Pinging Duet 2"
#if [[ $IP_ADDR == "169.254.XXX."* ]]; then #if local net (switch mode) ping must respond quickly
# ping -c 1 yourduet
#else #if mesh mode the latency might get huge so we allow timeout of 5 seconds
# ping -c 1 -w 5 yourduet
#fi
echo "Checking Duet state by curl within max 1 second"
CURL_DATA=$(curl --silent --max-time 1 "yourduet/rr_connect?password=thePassword")
if [[ -z ${CURL_DATA} ]]; then
ERROR_STATE=1
else
jq -r '.' <<< $(echo ${CURL_DATA})
ERROR_STATE=$?
fi
if [[ $ERROR_STATE != 0 ]]; then # Duet is not reachable or json output could not be parsable ("Warning: Binary output can mess up your terminal")
# by checking the mode we can send the correct network GCode to Duet to fix the network state
if [[ $IP_ADDR == "169.254.XXX."* ]]; then #check if IP begins with 169.254.XXX. This means switch mode
echo "Setting Duet to switch mode"
send_gcode "M552 S0 ;disable network"
send_gcode "M553 P255.255.255.0 ;set netmask"
send_gcode "M552 S1 P169.254.XXX.XXX ;set static IP"
echo "" | mail -s "Setting Duet to switch mode" some_mail@domain.de
#update etc hosts file accordingly
sed -i -e '7d' "/etc/hosts"
echo " 169.254.XXX.XXX yourduet.ffcmesh yourduet" >> "/etc/hosts" #define static IP in hosts
sleep 5 #wait some seconds until Duet is online
else
echo "Setting Duet to mesh mode. Please wait 60 seconds"
send_gcode "M552 S0 ;disable network"
send_gcode "M552 S1 P0.0.0.0"
echo "" | mail -s "Setting Duet to mesh mode" some_mail@domain.de
sleep 60 #wait a minute to let optain new public IP address
#sed -i -e '7d' "/etc/hosts" #clear old ip
ping -c 1 yourduet #trying another ping - this might still fail if /etc/hosts did not update in the meantime
fi
else
echo "Duet 2 was pinged successfully"
exit 0 #everyting is fine. Nothing to do
fi
fi
```
### Other scripts
```bash
#get MAC address -> M550 configures the device name yourduet
arp | grep yourduet.ffcmesh #might fail due to old cache on DNS server
#get IP address by ping / check state
ping yourduet.ffcmesh #might me not available if ffcmesh domain keeps older IP address for the device name
#Portscan on Duet - just to ensure some things against it's own configuration
apt install knocker
knocker --host $DUET_IP_ADDR
#manually update DNS if Duet is not available on ffcmesh domain
#delete line number 7 from hosts file; then add new host entry with recent IP address. Ensure it's always on line 7
sed -i -e '7d' /etc/hosts && DUET_IP_ADDR=$(arp -a | grep "" | awk -F ' ' '{print $2}') && DUET_IP_ADDR=${DUET_IP_ADDR:1:-1} && echo $DUET_IP_ADDR "yourduet.ffcmesh yourduet" >> /etc/hosts
#flush DNS cache
ip -s -s neigh flush all
arp -n
```
## Duet Web Control forwarding and security
```bash
vim ports.conf
```
```bash
# If you just change the port or add more ports here, you will likely also
# have to change the VirtualHost statement in
# /etc/apache2/sites-enabled/000-default.conf
Listen 81 # Duet Web Control
# vim: syntax=apache ts=4 sw=4 sts=4 sr noet
```
## Apache virtual host
See [mkcert & Go](https://old.stadtfabrikanten.org/pages/createpage.action?spaceKey=TH&title=mkcert+%26+Go&linkCreation=true&fromPageId=60915789) for SSL cert generation
```bash
vim /etc/apache2/sites-available/dwc.conf
```
```bash
ServerName localhost
ServerAdmin some_mail@domain.de
SSLEngine on
SSLCertificateFile /etc/ssl/certs/trikarus.pem
SSLCertificateKeyFile /etc/ssl/private/trikarus-key.pem
AuthType Basic
AuthName "Authentication Required"
AuthUserFile "/etc/apache2/htusers"
Require valid-user
ProxyPass http://yourduet.ffcmesh/
ProxyPassReverse http://yourduet.ffcmesh/
ErrorLog ${APACHE_LOG_DIR}/error-dwc.log
CustomLog ${APACHE_LOG_DIR}/access-dwc.log combined
```
```bash
#generate user
htpasswd -B -c /etc/apache2/htusers THEUSERNAME
```
The htuser is shared with Repetier Server. See [Repetier Server](https://old.stadtfabrikanten.org/display/TH/Repetier+Server)
[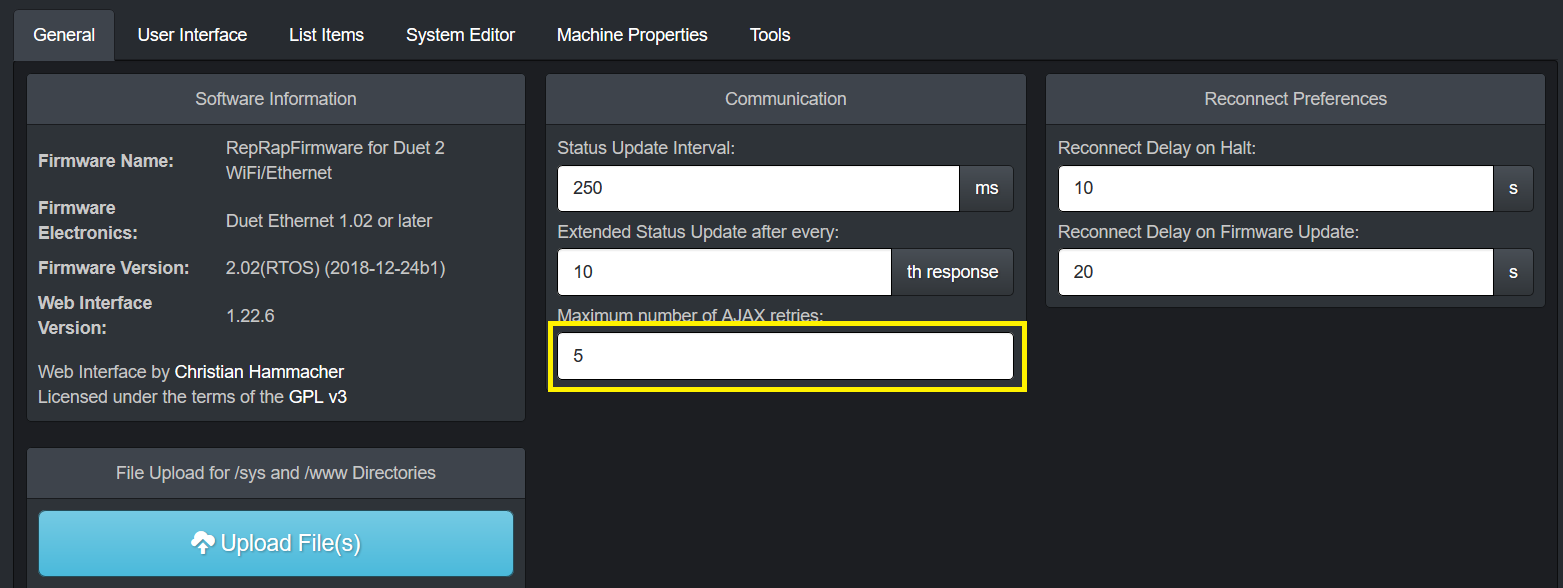](https://wiki.stadtfabrikanten.org/uploads/images/gallery/2026-06/E5Cfv1NvyJRbru6i-grafik.png) [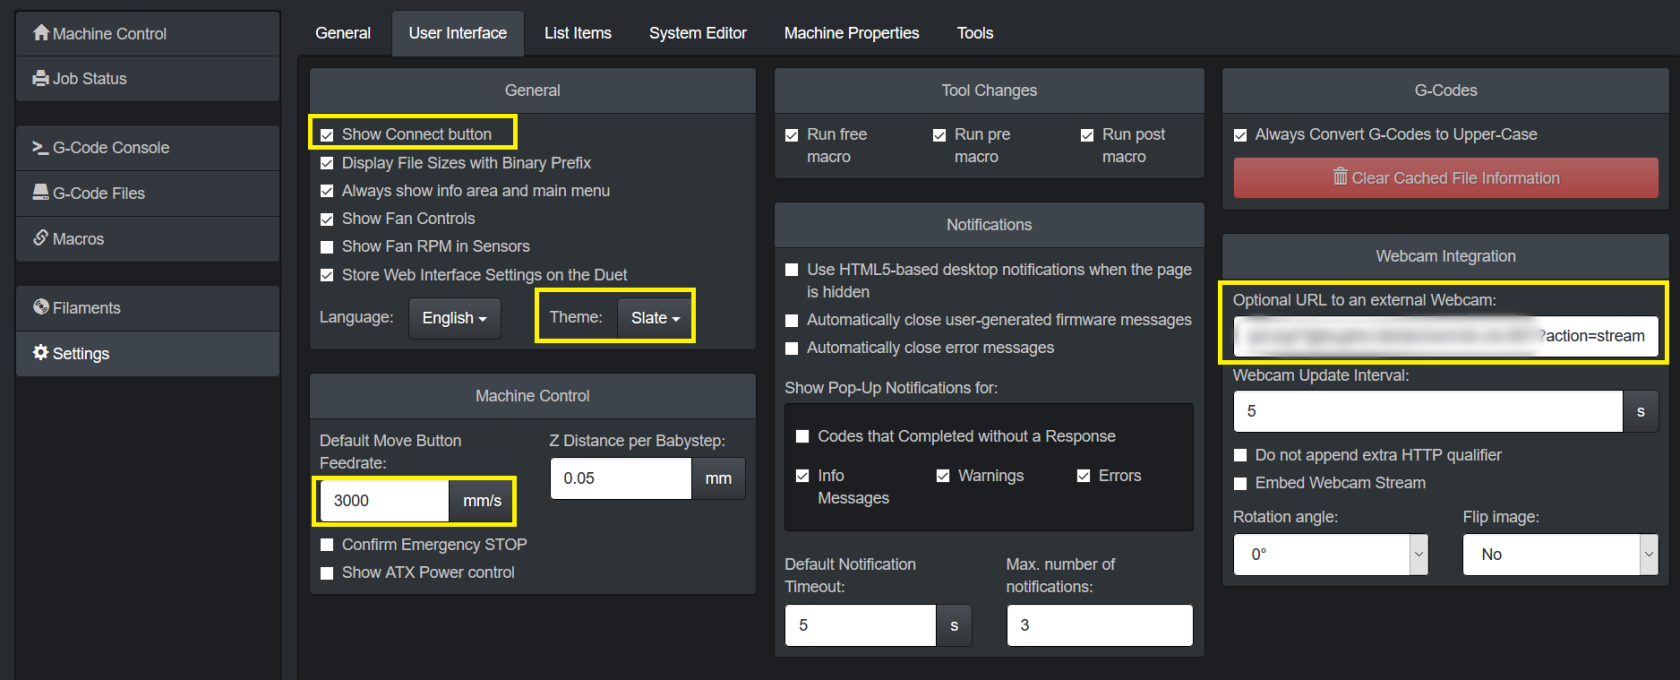](https://wiki.stadtfabrikanten.org/uploads/images/gallery/2026-06/pSoe7xOdSQfMLfu0-grafik.png) [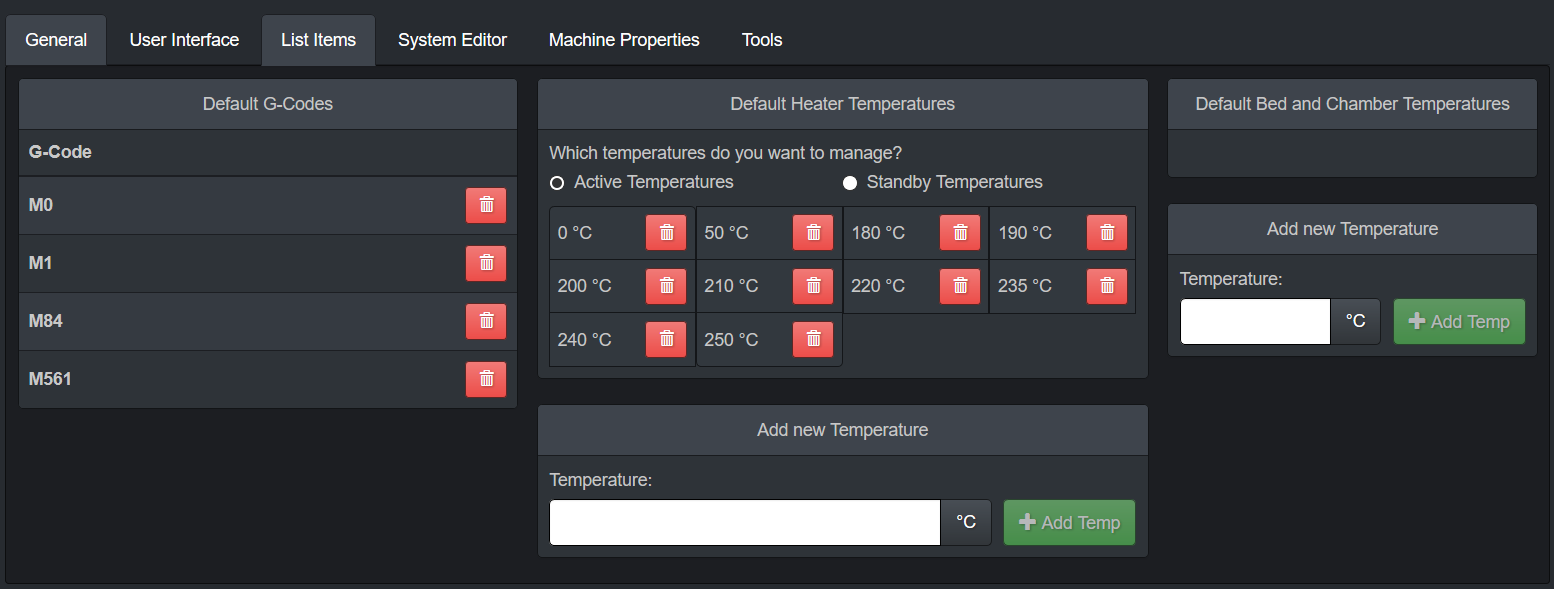](https://wiki.stadtfabrikanten.org/uploads/images/gallery/2026-06/cehdhQnXVxjH35Ei-grafik.png)
## Strange looking values
[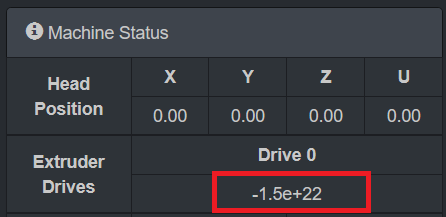](https://wiki.stadtfabrikanten.org/uploads/images/gallery/2026-06/6lWi2HvyqbnyjcaM-grafik.png)
This is normal → *"G92 E0 resets the virtual extruder position. This command is generated by slicers frequently when they use absolute extrusion, to avoid the build up of rounding error. However, the virtual extruder position is not useful to an end user, so DWC shows the total net extrusion instead, separately for each extruder. If you really want to check the virtual extruder position, use M114."*
## Troubleshooting "Error: Bad command"
This message sometimes happens permanently on every entered command after one command before was typed wrong. There is no known solution yet.
[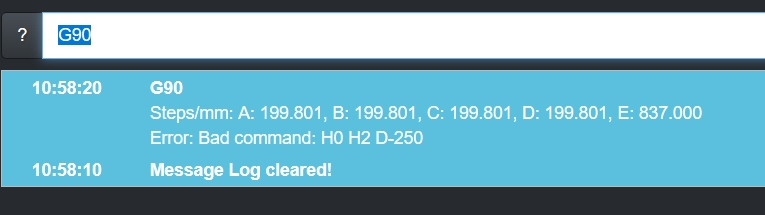](https://wiki.stadtfabrikanten.org/uploads/images/gallery/2026-06/waIIunCZLbeSXscY-grafik.png)
## Security and access by external tools
Duet can be secured by password to omit unauthorized access. This prevents unwanted re-configuring by person from the local network.
[](https://wiki.stadtfabrikanten.org/uploads/images/gallery/2026-06/sQcBmxrH6VGt8Un5-grafik.png)
```bash
# authorize first
curl -u 'someUser:somePassword' --insecure https://hangdevice:81/rr_connect?password=thePassword
# response from above should be:
"{"err":0,"sessionTimeout":8000,"boardType":"duetethernet102"}"
# do some things (examples)
curl -u 'user:password' --insecure http://yourduet.local/rr_gcode?gcode=M114
curl -u 'user:password' --insecure http://yourduet.local/rr_download?name=0:/sys/config.g
curl -u 'user:password' --insecure http://yourduet.local/rr_status?type=3
curl -u 'user:password' --insecure http://yourduet.local/rr_filelist?dir=sys
```
## Troubleshooting
"The connection between the browser and your machine has been interrupted."
Sometimes DWC can not be accessed because "Reason: Unknown (SyntaxError: JSON.parse: unterminated fractional number at line 1 column 125 of the JSON data)" occcures. This can be fixed by sending "G92 X0 Y0 Z0" by Repetier Server console or by DWC JSON API (required to be authenticated previously)
```bash
curl -k yourduet.ffcmesh/rr_gcode?gcode=G92+X0+Y0+Z0
```
You can check unparsable JSON at [https://jsonlint.com.](https://jsonlint.com/)
You are about to log in to the site "$" with the username "$", but the website does not require authentication. This may be an attempt to trick you
You are about to log in to the site "$" with the username "$", but the website does not require authentication. This may be an attempt to trick you
The following message might appear in Firefox
[](https://wiki.stadtfabrikanten.org/uploads/images/gallery/2026-06/iGn7zea2h6Avgw6t-grafik.png)
Solution:
1. Go to "about:config"
2. Enter "network.http.phishy-userpass-length" and create a new value with "Number". Put in "255"
1. [](https://wiki.stadtfabrikanten.org/uploads/images/gallery/2026-06/bsxJULLCJGaxHtkl-grafik.png)
2. [](https://wiki.stadtfabrikanten.org/uploads/images/gallery/2026-06/LHbRW4RVaKQWzeJK-grafik.png)
3. Restart Firefox
### Description
- Board is not available on LAN and does not update dynamic IP address, or
- Repetier does not show Duet fully available (if correctly available the symbol is green but in this case it is red "broken" or orange "trying to connect")
[](https://wiki.stadtfabrikanten.org/uploads/images/gallery/2026-06/9bfB73XmNIaERNpU-grafik.png) [](https://wiki.stadtfabrikanten.org/uploads/images/gallery/2026-06/HXXHaeRFG5rWXOwL-grafik.png)
### Solution
- turn off PSU and turn off USB - we need to perform hard reset
```bash
#we use the aliases of root user
psu_off
usb_off
#wait some time
psu_on
usb_on
```
## Communication to the firmware
- [https://devhub.io/repos/chrishamm-DuetWebControl](https://devhub.io/repos/chrishamm-DuetWebControl)
- [https://github.com/chrishamm/DuetWebControl/blob/master/src/store/machine/connector/PollConnector.js](https://github.com/chrishamm/DuetWebControl/blob/master/src/store/machine/connector/PollConnector.js)
Since RepRapFirmware can only process one HTTP request at a time (excluding rr\_fileinfo and rr\_upload on certain platforms), DuetWebControl should attempt to avoid parallel requests. In general, the communication between the web interface and RepRapFirmware looks like this:
1. Establish a connection (via rr\_connect)
2. Send an extended status request (rr\_status?type=2) and start status update loop
3. Load macros (rr\_filelist?dir=/macros)
4. (User switches to “G-Code Files” tab)
5. Stop automatic status updates
6. Load G-code filelist (rr\_filelist?dir=/gcodes)
7. File info about each file is requested (unless cached values are available)
8. Start automatic status requests again
9. (User does something else)
10. DWC disconnects (via rr\_disconnect)
Note the interrupt of live updates while multiple long requests are processed. DWC implements two particular functions (stopUpdates and startUpdates) which can - and should - be used to stop status requests while long-running HTTP requests are being executed. The update loop is stopped when file uploads are started, too, however it is not required to interrupt the update loop while short requests (e.g. rr\_gcode) are sent.
Some requests may send or expect date and time values. These values are represented by the format “YYYY-MM-DDTHH:MM:SS” similar to the ISO-8601 format.
## List of HTTP requests
All HTTP requests, except for rr\_upload, are simple GET requests that return JSON objects, which makes it easy to deal with them using JavaScript code. Here the list of all currently used requests:
#### rr\_connect?password=XXX&time=YYY
Create an initial connection between DWC and RRF. - On success, the firmware sends out a response like: {“err”:0,“sessionTimeout”:\[time in ms\],“boardType”:“\[board type\]”} This way DWC can adjust the AJAX timeout value and set board-specific options. The “time” value should represent the client’s date and time to set the on-board RTC if necessary. - If anything goes wrong, the firmware only responds with an {“err”:\[code\]} object. If code is 1, then the specified password is wrong. If it is 2, then the firmware cannot allocate enough resources to accomodate another session.
#### rr\_disconnect
Delete an existing HTTP session. This should be used to log off manually, however sessions are usually purged automatically if no communication takes place within the time specified in “sessionTimeout” above.
#### rr\_status?type=XXX
Request a status response from the firmware which usually includes all the machine parameters that are expected to change from time to time. This makes it possible to display live values like XYZ position and heater temperatures. This type of request is usually sent to the firmware in rather short intervals (250ms by default). At this time there are three different supported status request types, which may be polled in different intervals:
- Type 1: Regular status request. The response for this is usually rather compact and only includes values that are expected to change quickly. The following types 2 and 3 include those values under any circumstances to keep the web interface up-to-date.
- Type 2: Extended status request. This type of request is polled right after a connection has been established. This response provides information about the tool mapping and values that can change.
- Type 3: Print status request. Unlike type 2, this type of request is always polled when a file print is in progress. It provides print time estimations and other print-related information which can be shown on the print status page.
#### rr\_code?gcode=XXX
Send a G-code to the firmware. Since RepRapFirmware is generally only controlled by G-codes, this provides an interface to transmit codes from the web interface. This request returns the amount of currently available buffer space for incoming G-codes, however DWC does not actively use this response yet.
#### rr\_upload?name=XXX&time=YYY
Upload a file to path XXX with the last modified date and time using an HTTP POST request. This is the only supported POST request in RepRapFirmware, however be aware that the POST request is no standard HTTP request. To make this work in the firmware, the payload (ie. file) has to be send in one chunk right after the HTTP header without any encapsulation. This mechanism is used to speed up transfers. Once complete, the firmware responds with {“err”:\[code\]}. If everything goes well, the error code will be 0 and 1 on failure.
#### rr\_download?name=XXX
Download a specified file from the SD card.
#### rr\_delete?name=XXX
Delete a file from the SD card. The firmware responds again with `{"err":[code]}` and the error code will be 0 on success.
#### rr\_filelist?dir=XXX
Request a file list from the directory XXX. Unlike rr\_files, which was used in past web interface versions, this request returns a JSON object which encapsulates each file in the following format:
`{"type":[type],"name":"[name]","size":[size],"lastModified":"[datetime]"}`
Type can be either ’d’ if it is a directory or ‘f’ if it is a regular file. The size is reported in bytes.
If an error occurs, the firmware will respond with `{"err":[code]}`. If the code is 1, the directory doesn’t exist. If it is 2, the requested volume is not mounted.
#### rr\_fileinfo?name=XXX
Parse G-code file information from file XXX or return file information about the file being printed if the key is omitted. RepRapFirmware implements a dedicate function to retrieve information from a G-code file (see also M36) which may be used on the G-code file list and on the print status page.
#### rr\_move?old=XXX&new=YYY
Move a file on the SD card from XXX to YYY. Returns {“err”:\[code\]} after completion where code will be 0 if the request was successful.
#### rr\_mkdir?dir=XXX
Create a new directory. Returns {“err”:\[code\]} with code being 0 if the directory could be created.
#### rr\_config
Get the configuration response. Some printer information do not need to be requested for regular usag but to obtain machine properties and firmware versions this request can be used.
## Upload by PrusaSlicer
[](https://wiki.stadtfabrikanten.org/uploads/images/gallery/2026-06/I3IhxreWZb25fAbl-grafik.png)
For this job two syntax variants can be used
1. Enter [https://htupser:htpassword@your.domain.de/rr\_connect?password=yourpassword](https://htupser:htpassword@your.domain.de/rr_connect?password=yourpassword) in URL field and leave password field empty
2. Enter [https://htupser:htpassword@your.domain.de](https://htupser:htpassword@your.domain.de) and enter your Duet password in "password" field
# Duet Web Control and Repetier Server Macros
## Baby Stepping - clear (set zero)
```bash
M290 R0 S0 ;clear babystepping
```
## Baby Stepping - Down 0.1 mm
```bash
M290 S-0.1
```
## Show network config
```bash
M552
M540
```
## Change to static IP address (switch mode)
This macro makes only sense in Repetier Server!
For Duet of Trikarus we use **169.254.XXX.XXX**. This also could be integrated/replaced in config.g file.
```bash
M552 S0 ;disable network
;M553 P255.255.0.0
M553 P255.255.255.0 ;set netmask
M552 S1 P169.254.XXX.XXX ;set static IP
```
## Change to static IP address (mesh mode)
In mesh mode Duet receives a changing IP by DHCP all the time. But you can also set a static IP address if that IP is free and not conflicting with other devices. It can be a good idea to use IP addresses in **range 10.149.0.2 - 10.149.0.254**. For Duet of Trikarus we use **10.149.YYY.YYY**. This also could be integrated/replaced in config.g file. Please note that hangdevice needs to be in the **same network (e.g. 10.149.YYY.YYY),** otherwise it is not reachable!
## Why to use both software products?
Both software pieces have advantages and disadvantages over each other in the concrete setup. For example sometimes Duet fails to announce it's IP address in the network correctly while Repetier Server is still able to communicate with Duet by USB. DWC also sometimes crashes by some bugs which prevent to access the user interface. So it's good to have 2 independent solutions which do not block each other.
# Freifunk Mesh Repeater / Access Point
Trikarus uses Freifunk firmware router to build up a network which can be used remotely. The router can be accessed from outside by SSH or just by another Freifunk router, also by SSH. You can also access the Freifunk router by the connected Raspberry Pi which has external connection with wireguard. This allows to build a long communication road (client computer → Wireguard server → Wiregard client @ Raspberry Pi → Freifunk router)
```bash
ssh root@
```
## Reasons to access Trikarus devices from external / outside
- Access to the web services (Raspberry Pi, Repetier Server, Duet Web Control, Grafana, InfluxDB, webcam, ...)
- Access to the Freifunk node via SSH key
## SSH Access
Freifunk router can be accessed from wide web and from localhost network over IPv6. Using the IPv4 network does not work (either from localhost nor from outside). This was tested from different clients with result of a "permission denied". Guess it's a configuration setting in dropbear which i did not change and which i don't want or need to change.
Accessing Freifunk via Remmina might require to use password only, because it does not accept the right KEX algorithms (some strange behaviour with dropbear). We might also need to add "ssh-rsa" to host key types. While Remmina might fail regular gnome shell should work flawlessly.
[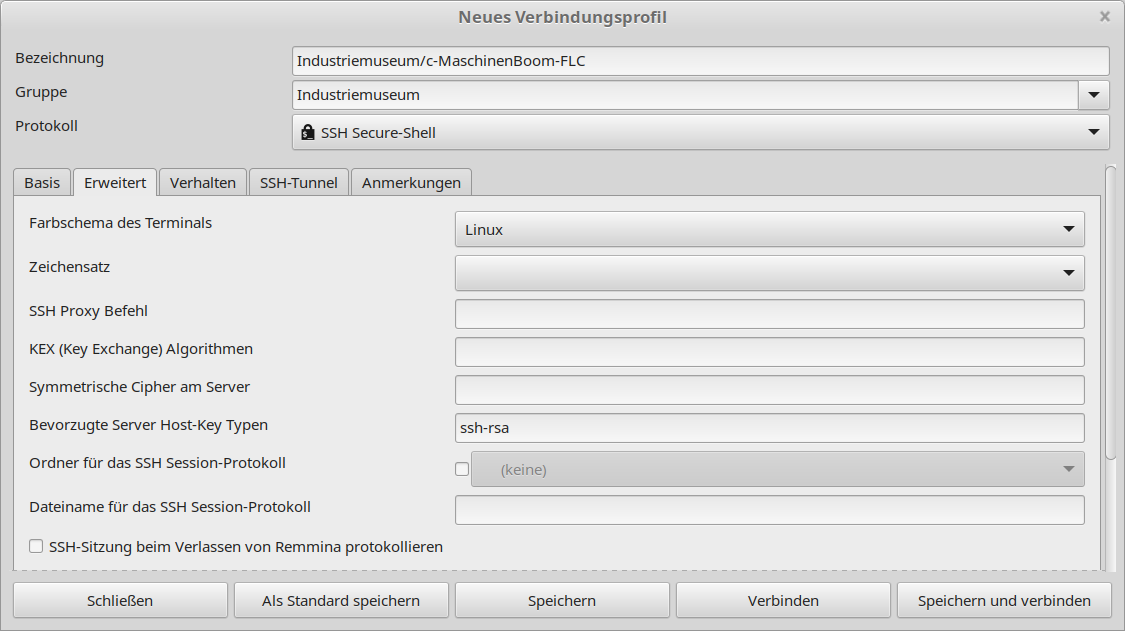](https://wiki.stadtfabrikanten.org/uploads/images/gallery/2026-06/4vzrdLxtmEJu4XHs-grafik.png)
```bash
#helpful debugging for KEX algorithms:
ssh -vvv root@
```
## Overview
- Hardware: [Router TL-WR842N by TP-Link](https://old.stadtfabrikanten.org/pages/createpage.action?spaceKey=TH&title=Router+TL-WR842N+by+TP-Link&linkCreation=true&fromPageId=56623789)
- Firmware: [firmware.chemnitz.freifunk.net/chemnitz/stable/factory/gluon-ffc-b20171101%2Brly20200120%2Bv2017.1.8-tp-link-tl-wr842n-nd-v3.bin](http://firmware.chemnitz.freifunk.net/chemnitz/stable/factory/gluon-ffc-b20171101%2Brly20200120%2Bv2017.1.8-tp-link-tl-wr842n-nd-v3.bin)
## Configuring device name
[https://wiki.freifunk.net/Konsole#Routernamen\_.C3.A4ndern](https://wiki.freifunk.net/Konsole#Routernamen_.C3.A4ndern)
```bash
uci set system.@system[0].hostname='theHostName'
uci commit system
reboot
```
## Setting datetime
It might happen that the router is up and running fine but time is not up to date. If the time is not set properly cronjobs will fail.
```bash
date
#Tue Aug 7 19:44:38 CEST 2018
#fix the time to match with recent time (enter manually). You could also sync with a time server
date --set '2020-06-21 00:38:00'
```
## GEO coordinates
We can get latitude and longitude by [mapcoordinates.net](https://www.mapcoordinates.net/de) for example.
```bash
uci set gluon-node-info.@location[0]='location'
uci set gluon-node-info.@location[0].share_location='0'
uci set gluon-node-info.@location[0].latitude='someValue'
uci set gluon-node-info.@location[0].longitude='someValue'
uci commit
```
```bash
#Flush firewall rules temporarily or allow everything
iptables -F
iptables -P INPUT ACCEPT
iptables -P FORWARD ACCEPT
iptables -P OUTPUT ACCEPT
#Some testings
ping -6
telnet 22
telnet 80
swconfig dev switch0 show | grep 'link:'
# Read global IPv6 address
ifconfig | grep Global
#Find IP addresses of devices with a given MAC address
batctl dc | grep "" | awk -F ' ' '{print $2}' #hangdevice
batctl dc | grep "" | awk -F ' ' '{print $2}' #Duet 2 Ethernet - see config.g
vim /etc/config/uhttpd
```
## Remove unrequired SSH keys from unkown admins
```bash
vim /etc/dropbear/authorized_keys
```
## Notes
- ") it seems that Ed25519 key pairs on Freifunk Gluon using dropbear, which were generated with KiTTY Keygen and uploaded to server + client, cause undefinable bugs with SSH connection. RSA key pairs work properly.
- IPv6 sometimes fails so router is not always available from regular web. SSH sometimes fails to access from outside which makes it harder to maintain.
- Freifunk Chemnitz does not work in other cities. It cannot easily mesh to other Freifunk nodes than. A better approach to be fully mobile would be use a router with SIM card or to have some WAN access to plug an uplink cable into the router. Maybe another device could be utilized with [IC-VPN](https://wiki.freifunk.net/IC-VPN)
- Meshing is often unstable when TQ (transfer quality) value is low. It results in dropping packages and lower bandwidth
[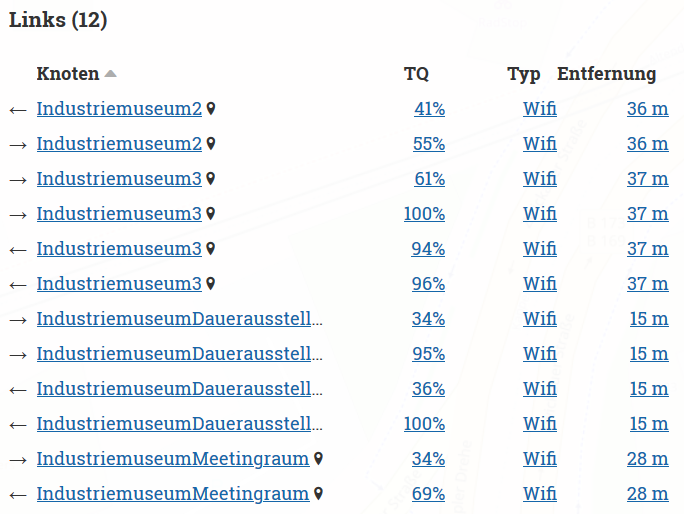](https://wiki.stadtfabrikanten.org/uploads/images/gallery/2026-06/FvSiRK2ubklle672-grafik.png)
## DNS / resolving of hostnames
device names / host names are not announced in Freifunk network to have better anonymity. There is only IPv4 and IPv6 to communicate (e.g. "nslookup 10.149.11.71" returns "Server: UnKnown"). To get all devices from .ffcmesh you can run [arp-scan](https://old.stadtfabrikanten.org/pages/createpage.action?spaceKey=TH&title=arp-scan&linkCreation=true&fromPageId=56623789) from any Windows or Linux client. This way it can be monitored device availibility from outside by comparing recent IP addresses with fixed MAC addresses.
## Private SSID (second SSID next to chemnitz.freifunk.net)
```bash
SSID="SSID"
KEY="KEY"
uci set wireless.wan_radio0=wifi-iface
uci set wireless.wan_radio0.device=radio0
uci set wireless.wan_radio0.network=wan
uci set wireless.wan_radio0.mode=ap
uci set wireless.wan_radio0.encryption=psk2
uci set wireless.wan_radio0.ssid="$SSID"
uci set wireless.wan_radio0.key="$KEY"
uci set wireless.wan_radio0.disabled=0
#uci set wireless.wan_radio0.hidden=1 #do NOT hide SSID because it won't be found
uci set wireless.wan_radio0.macaddr=$(lua -e "print(require('gluon.util').generate_mac(3))")
uci commit wireless
wifi
```
good tool to check SSIDs → [https://www.nirsoft.net/utils/wifi\_information\_view.html](https://www.nirsoft.net/utils/wifi_information_view.html)
## Switch mode vs mesh mode and over night security
In default mode the Freifunk router lets connect all Wifi and LAN clients to the Layer 2 switch of the Freifunk net. Sometimes this is unstable and even local clients cannot connect to each other on the same local switch. Furthermore it's possible to do port scans from all other Freifunk nodes to the locally connected devices (exposed hosts). To prevent attacks and port scans over night, the idea is to disable the Raspberry Pi and Duet devices to be in Freifunk network in a defined time slot. To do this we can move the eth0 interface from LAN to WAN. Then they will talk only like at a regular switch and they will have no access to the internet. The switching mode defaults the locally connected devices (Raspberry Pi, Duet, client computer) to be in IP range **169.254.XXX.XXX** instead of **10.149.XXX.XXX**.
See also
- [Network overview and hardening](#bkmrk-https%3A%2F%2Fforum.freifu)
- [Duet Web Control and Repetier Server Macros](https://old.stadtfabrikanten.org/display/TH/Duet+Web+Control+and+Repetier+Server+Macros)
- [Duet 2 and Duet Web Control](https://old.stadtfabrikanten.org/display/TH/Duet+2+and+Duet+Web+Control)
### Mode swichting manually
**Check the current state**
```bash
uci get network.client.ifname
uci get network.wan.ifname
```
**switch mode: WAN at all LAN ports (undo mesh mode)**
```bash
uci set network.client.ifname=bat0
uci set network.wan.ifname='eth0 eth1'
uci commit network
/etc/init.d/network restart
```
**Mesh mode (default mode): client network on LAN ports (undo switch mode)**
```bash
uci set network.client.ifname='bat0 eth0'
uci set network.wan.ifname=eth1
uci commit network
/etc/init.d/network restart
```
### As all-in-one command from hangdevice
```bash
vim /opt/switchmode.sh
```
```bash
source /opt/repetier-conf.sh
timeout 5 ssh -i /root/.ssh/theHostName "uci set network.client.ifname=bat0 && uci set network.wan.ifname='eth0 eth1' && uci commit network && /etc/init.d/network restart"
if [[ $? != 0 ]]; then #check error code. might return 255 for "no route to host" or similar
send_gcode 'M291 P\"Switch mode script failed\"'
echo "Switch mode script failed"
fi
```
```bash
chmod +x /opt/switchmode.sh
```
This is configured as alias "swimo" in `/root/.bash_aliases`
To switch back from switch mode to mesh mode you need to connect to the router from outside localhost! You should be able to do this by just connecting to chemnitz.freifunk.net by Wifi instead by LAN.
### Over night change to swichting mode
**The scripts as crontab**
**In Gluon there is no /etc/cron.d directory**
```bash
#edit crontab - do this always this way. otherwise a file named "crontab.update" is left over all the time and changes are not recognized. As long as the crontab.update file exists the crontab is not updated accordingly.
crontab -e
```
```bash
# Disable LAN devices to be part of Freifunk network after 20:00
0 20 * * * uci set network.client.ifname=bat0 && uci set network.wan.ifname='eth0 eth1' && uci commit network && /etc/init.d/network restart
# Enable LAN devices to be part of Freifunk network after 7:00
0 7 * * * uci set network.client.ifname='bat0 eth0' && uci set network.wan.ifname=eth1 && uci commit network && /etc/init.d/network restart
# debugging crontab - use this if crontab is not triggered accordingly
#* * * * * env > /tmp/env.output
```
For better debugging we can also try to grab the output by accessing Freifunk router externally using ssh. Because dropbear ssh has no rsync we cannot use rsync synchronization between hangdevice and Freifunk router. But we can use regular ssh command to do like this:
```bash
ssh -i /root/.ssh/theHostName 'cat /tmp/env.output'
```
## USB slot / mount point
Note: USB devices on the Freifunk router are not directly possible to workby default, but can be activated later via detours. This requires a deeper recofiguration.
## More info
- [https://forum.freifunk.net/t/zugriff-auf-geraet-hinterm-freifunk-router/10596/10](https://forum.freifunk.net/t/zugriff-auf-geraet-hinterm-freifunk-router/10596/10)
- [https://forum.freifunk-muensterland.de/t/was-bedeutet-der-tq-wert/975](https://forum.freifunk-muensterland.de/t/was-bedeutet-der-tq-wert/975)
- [https://forum.freifunk.net/t/gluon-keine-namensaufloesung-an-br-wan/15288/5](https://forum.freifunk.net/t/gluon-keine-namensaufloesung-an-br-wan/15288/5)
- [https://forum.ffrn.de/t/warum-funktioniert-das-dns-auf-meinem-knoten-nicht/587](https://forum.ffrn.de/t/warum-funktioniert-das-dns-auf-meinem-knoten-nicht/587)
- [https://kbu.freifunk.net/wiki/index.php?title=Pimp\_my\_Node](https://kbu.freifunk.net/wiki/index.php?title=Pimp_my_Node)
- [https://wiki.freifunk-3laendereck.net/Router:\_Manuelle\_Konfiguration#Router\_als\_Switch\_-\_WAN-\_und\_Switch](https://wiki.freifunk-3laendereck.net/Router:_Manuelle_Konfiguration#Router_als_Switch_-_WAN-_und_Switch-)
- [https://github.com/freifunk-gluon/gluon/wiki/Commandline-administration](https://github.com/freifunk-gluon/gluon/wiki/Commandline-administration)
# mkcert & Go
We use mkcert tool to make secure localhost connections. For mkcert we need Go language installed.
- [https://github.com/FiloSottile/mkcert](https://github.com/FiloSottile/mkcert)
- [https://golang.org/dl](https://golang.org/dl/)
## Installation
```bash
wget https://dl.google.com/go/go1.18.1.linux-armv6l.tar.gz
sudo tar -C /usr/local -xvf go1.18.1.linux-armv6l.tar.gz
cat >> ~/.bashrc << 'EOF'
export GOPATH=$HOME/go
export PATH=/usr/local/go/bin:$PATH:$GOPATH/bin
EOF
source ~/.bashrc
go version
sudo ln -sf /usr/local/go/bin/{go,godoc,gofmt} /usr/local/bin/
```
```bash
apt install libnss3-tools
cd /opt
git clone https://github.com/FiloSottile/mkcert && cd mkcert
go build -ldflags "-X main.Version=$(git describe --tags)"
#remove previously generated cert stuff if exist
cd ~/.local/share/mkcert/
rm rootCA-key.pem
rm rootCA.pem
#stay in this dir and generate new certs
/opt/mkcert/mkcert -install "hangdevice" "hangdevice.ffcmesh" "yourduet" "yourduet.ffcmesh" "localhost" "127.0.0.1"
mv hangdevice+*-key.pem trikarus-key.pem
mv hangdevice+*.pem trikarus.pem
#get the output for client (Firefox, Chrome, ...)
cat rootCA.pem
cat hangdevice+5-key.pem
cat hangdevice+5.pem
#the root CA can also be found by
ll /etc/ssl/certs | grep mkcert_development_CA_+
#put the generated certs into target dir
cp trikarus-key.pem /etc/ssl/private/
cp trikarus.pem /etc/ssl/certs/
#Using Root CA, cert and key you get the complete bundle
```
## Import custom cert into Windows client certificate storage
[](https://wiki.stadtfabrikanten.org/uploads/images/gallery/2026-06/K2x5PF2XBmrfYfqk-grafik.png) [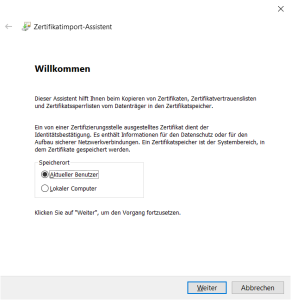](https://wiki.stadtfabrikanten.org/uploads/images/gallery/2026-06/v6af8S1Oq0cIJZs0-grafik.png) [](https://wiki.stadtfabrikanten.org/uploads/images/gallery/2026-06/0rRny2s8RkPqCNHA-grafik.png) [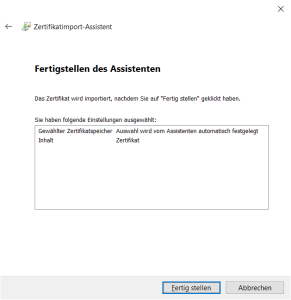](https://wiki.stadtfabrikanten.org/uploads/images/gallery/2026-06/NNa7BYZTY8GNdnSz-grafik.png) [](https://wiki.stadtfabrikanten.org/uploads/images/gallery/2026-06/qfSuyTZIOfJSC8Fk-grafik.png)
## Import custom cert into Firefox
[](https://wiki.stadtfabrikanten.org/uploads/images/gallery/2026-06/IaVk2mkBJi0hdvTX-grafik.png) [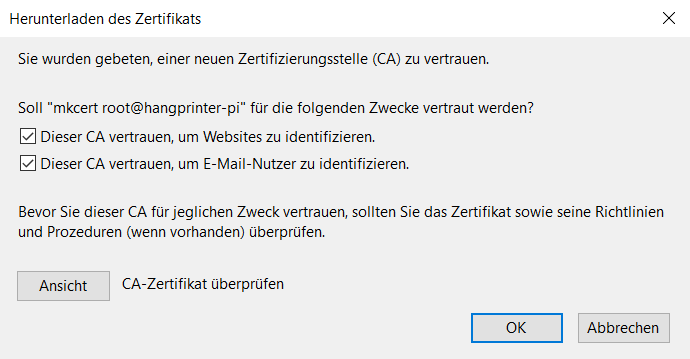](https://wiki.stadtfabrikanten.org/uploads/images/gallery/2026-06/7HTyqJjmmssdGg09-grafik.png)
[](https://wiki.stadtfabrikanten.org/uploads/images/gallery/2026-06/4WuDeN7bWRruHTWi-grafik.png)
## Import custom cert into Google Chrome
[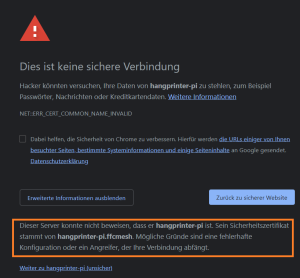](https://wiki.stadtfabrikanten.org/uploads/images/gallery/2026-06/31uTcnij061tvkWC-grafik.png) [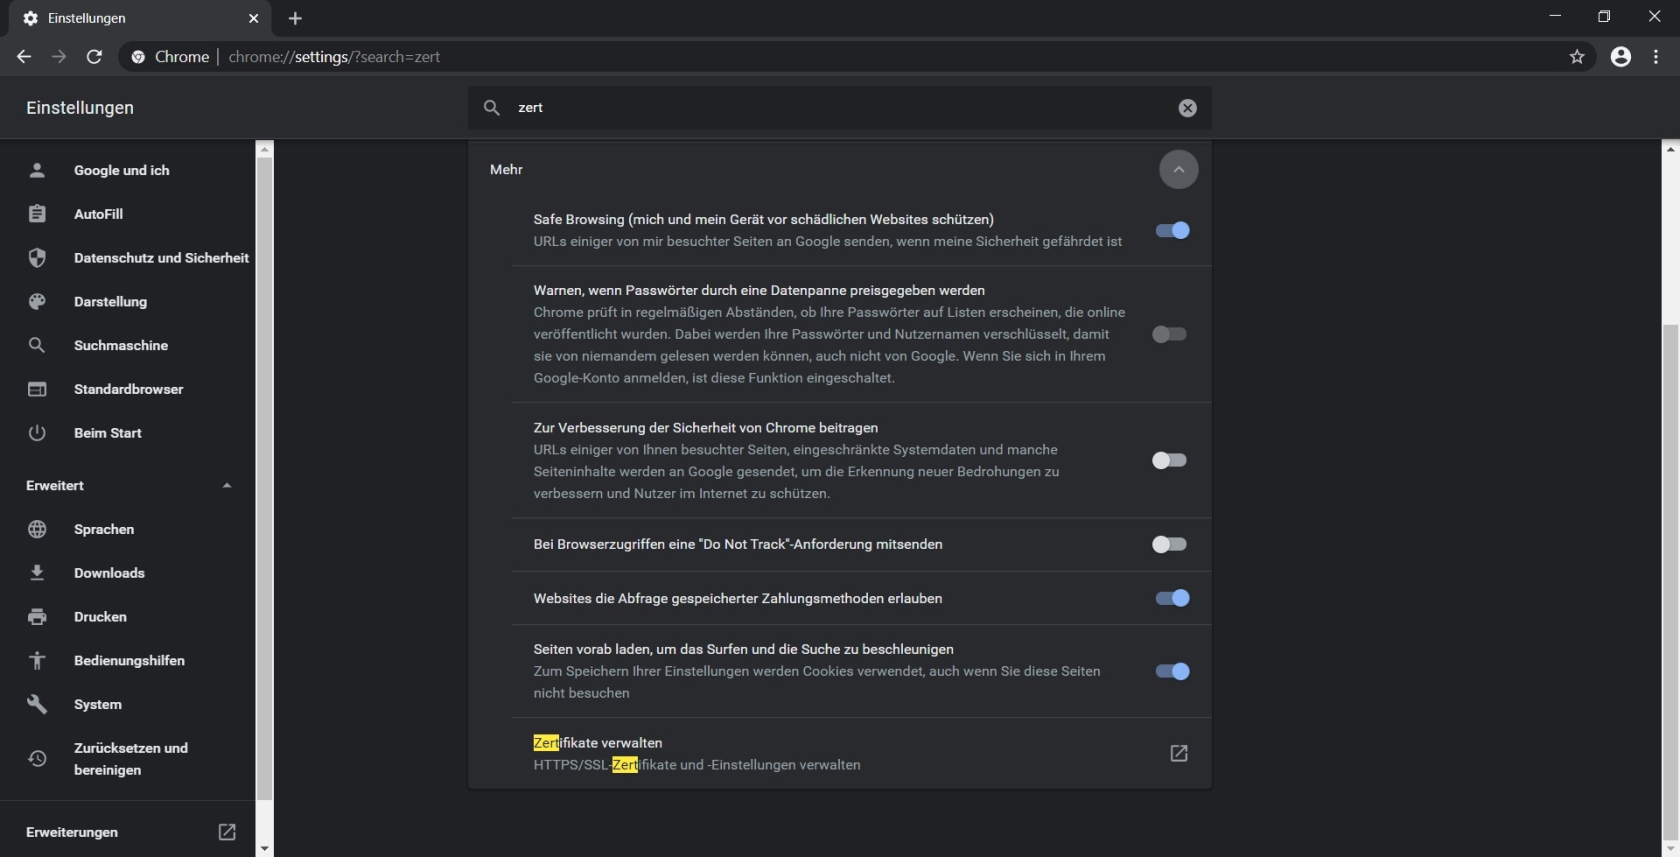](https://wiki.stadtfabrikanten.org/uploads/images/gallery/2026-06/tWKVT3tNU84B4XZn-grafik.png) [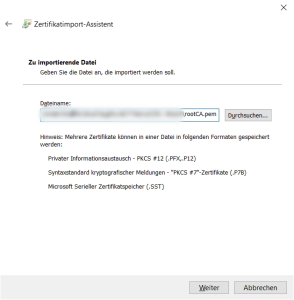](https://wiki.stadtfabrikanten.org/uploads/images/gallery/2026-06/Qv7xqY9R9n6PHV5m-grafik.png) [](https://wiki.stadtfabrikanten.org/uploads/images/gallery/2026-06/bPTPoQkii2Am7dD6-grafik.png)
[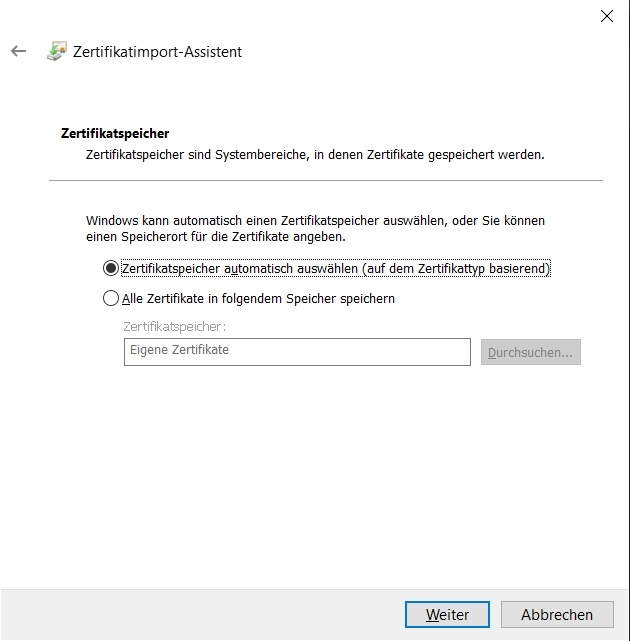](https://wiki.stadtfabrikanten.org/uploads/images/gallery/2026-06/Q50O6jjOOTT3cVeg-grafik.png) [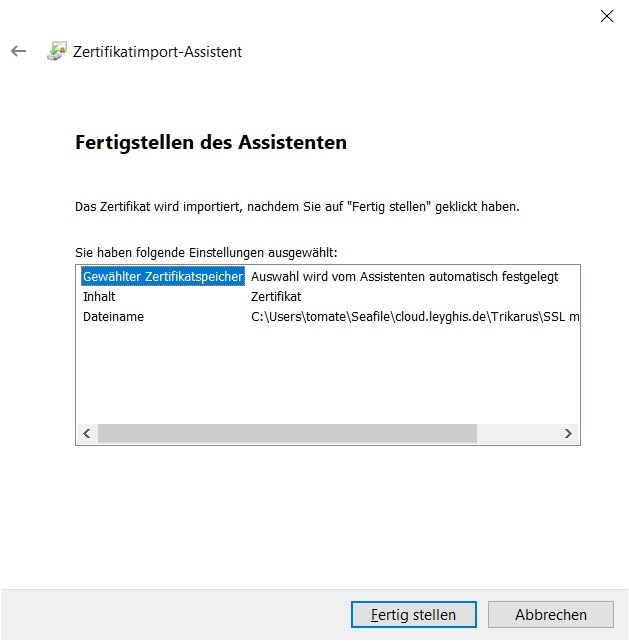](https://wiki.stadtfabrikanten.org/uploads/images/gallery/2026-06/Rq3WlCUw1B8jtwRl-grafik.png) [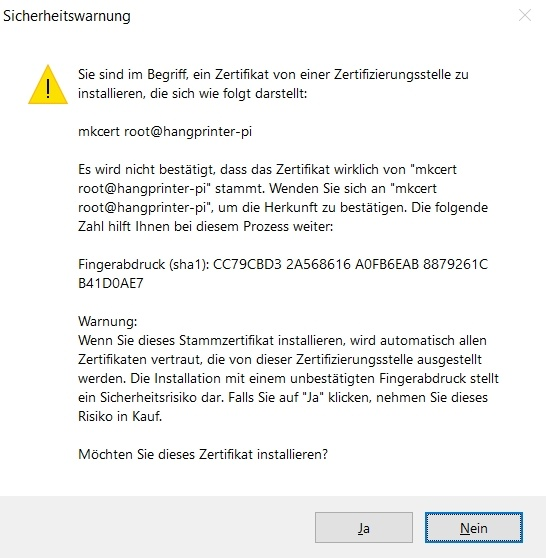](https://wiki.stadtfabrikanten.org/uploads/images/gallery/2026-06/8KW3oL1xtVfhUf2O-grafik.png) [](https://wiki.stadtfabrikanten.org/uploads/images/gallery/2026-06/cdt9DJwoJAb2SRu5-grafik.png) [](https://wiki.stadtfabrikanten.org/uploads/images/gallery/2026-06/3pcU55LLNJsHo0Yw-grafik.png)
# Mobile access using tablet
Trikarus uses a [Tablet Lifetab P9812 by Medion](https://old.stadtfabrikanten.org/pages/createpage.action?spaceKey=TH&title=Tablet+Lifetab+P9812+by+Medion&linkCreation=true&fromPageId=72122559) to show the Repetier Server frontend and Grafana. For security reason the tablet is fully encrypted and secured py PIN.
Android version is 5 (Lollipop) → Installed Update is P891x\_Update\_4.zip
[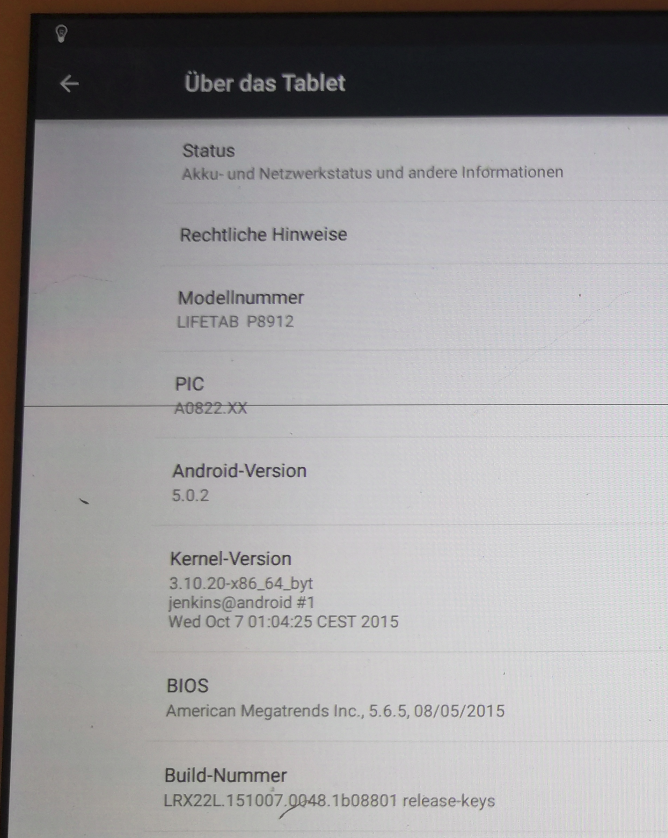](https://wiki.stadtfabrikanten.org/uploads/images/gallery/2026-06/iJQ60RYoousbRgWl-grafik.png)
## Network configuration
- The wifi on the device is configured to be connected to **local Wifi SSID from the router only.** If you connect to freifunk.chemnitz.net ensure that the network is not stored or auto connection to this network is disabled. Otherwise connection might fail.
- the tablet is intended **only for local use** (no network forwarded communication over Freifunk or Wireguard)
- IP configuration is static (because in DHCP mode it does not obtain an IP). For every device we connect to the SSID we have to configure static settings manually:
- IP: 169.254.XXX.XXX
- Gateway: 169.254.XXX.1
- DNS: 169.254.XXX.1
- Prefix length: 24
- using the static IP the device does not know about the host names of Raspberry Pi or Duet, but it can connect to IP addresses.
- using USB debugging the /etc/hosts file on the tablet could be adjusted manually
-
if the Wifi does not work
- go to the center of the printer. The Wifi range is so poor that it does not work for more than 2 meters distance sometimes
- correctly anymore reboot the tablet!
## F-Droid Classic Installer
[https://archive.org/details/eu.bubu1.fdroidclassic\_1106](https://archive.org/details/eu.bubu1.fdroidclassic_1106)
## Firefox Browser for Android
[https://m.apkpure.com/de/firefox-browser-fast-private-safe-web-browser/org.mozilla.firefox/download/2015839749-APK-8876d332c909e8ef19273eb099dab157?from=variants%2Fversion](https://m.apkpure.com/de/firefox-browser-fast-private-safe-web-browser/org.mozilla.firefox/download/2015839749-APK-8876d332c909e8ef19273eb099dab157?from=variants%2Fversion)
## DIY Unlocker
→ Stadtfabrikanten e.V. Bild anzeigen als Werbung
## MacroDroid
Automatically turn light on in the morning (and keep it) and turn off again when museum is closing.
# Monitoring and alerting
Hangprinter consists of a lot of electronic components which can be monitored in different ways. Due to its network infrastructure and device use there are some web pages to get metrics or general information from. The target of Trikarus infrastructure is to monitor different activities and to visualize the data in an easy way. The exact purpose is to use this data for analyzing and improving Hangprinter. A good overview of system stability and concurrent events which might interfere while doing prints or calibration is really important. So a lot of longterm data can be more helpful than volatile data (data in the moment it happens). We can see if devices reach the end of their life or components getting too hot for example. With certain sets of information we can handle advanced actions like triggering emergency halt, pause the print or do things like send warning emails (alerts), SMS or other push notifications. Mainly the data comes from collectd and InfluxDB storage. Different plugins and scripts (bash, Python) do the readout of regarding system states and store them to the according databases. Next to a standard monitoring of some basic system metrics like processes, CPU utilization, uptime, swap, etc. the following things are going to be monitored.
# Monitoring and alerting | Filament sensing with KY-040 Rotary Encoder
[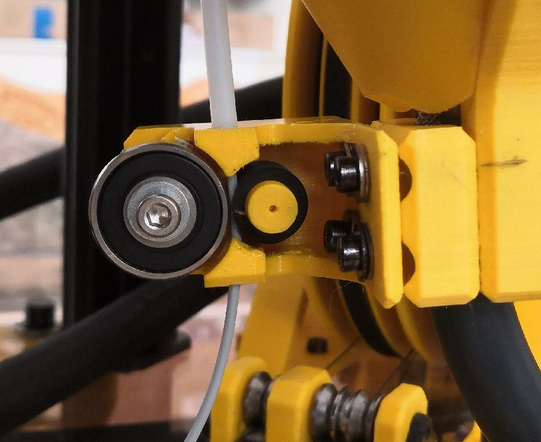](https://wiki.stadtfabrikanten.org/uploads/images/gallery/2026-06/4YNvKITYN3BO5fpI-grafik.png) [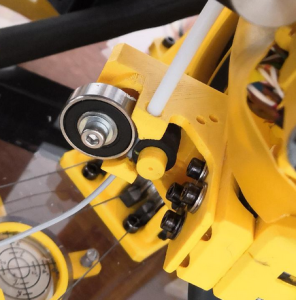](https://wiki.stadtfabrikanten.org/uploads/images/gallery/2026-06/KXsGXUyBIoXY1FUc-grafik.png) [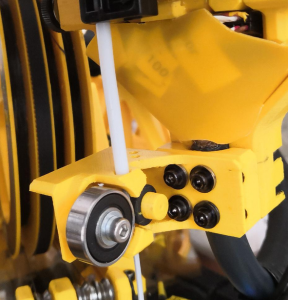](https://wiki.stadtfabrikanten.org/uploads/images/gallery/2026-06/NQoz0NXRNtLLBlga-grafik.png)
The encoder is not mounted at the moment because hardware failed (but software works well)
## Targets
The rotary encoder can be used to monitor the direction and speed of filament feeding or retracting (mm/s), or at least the amount of moved filament (mm). If it does not give rotational feedback while Trikarus is printing that will be useful information. The information can be used to trigger events like pausing the print job or similar:
- the hotend is not warm enough to extrude
- the filament is slipping or grinding at the gears
- filament is just empty
- filament diameter is too thick → clogged
- something else happened that prevents rotating the axis of the encoder. It might also be an encoder problem itself. The movement of the encoder axis is done by a small rubber cylinder. That rubber part might get rubbish after some kilometers of movement due to wear. It seems that the used rubber gets more softly when moving all the time. Thus leads to raw filament string slipping.
The filament sensor can also be used to analyse how much filament per second the extruder can push through the nozzle at a defined temperature and steps/mm. If you try to punch the filament through the nozzle with exceeding speeds, the encoder will not rotate like theoretically exspected. The deviation between real and desired value can be easily measured with this sensing tool. So it was done. It figured out that Super Volcano cannot push filament with 60 mm/s through nozzle at heating temperature of 240 °C. A good upper limit is around 30 mm/s. You can read about here too: [Printer profiles, slicing and filaments](https://old.stadtfabrikanten.org/pages/createpage.action?spaceKey=TH&title=Printer+profiles%2C+slicing+and+filaments&linkCreation=true&fromPageId=65405255)
Encoders are imperfect, there will be a position error that we just have to expect and accept. With a constant Δt approach, this translates into a constant worst-case speed error, independent of speed. The choice of Δt:
- If we choose a large Δt, we get a low bandwidth and large time lag, but we get very low speed error
- If we choose a small Δt, we get very high bandwidth and small time lag, but we get high speed estimation error
The rotary encoder is also used to switch the Smart Stepper modes. It's button is wired up and monitored by a python detection script which will change the modes accordingly. See [Smart Stepper - Overview](https://old.stadtfabrikanten.org/display/TH/Smart+Stepper+-+Overview) for more information on how to do this.
## Setting up
Based on [https://pypi.org/project/pigpio-encoder](https://pypi.org/project/pigpio-encoder/)
The switch (knob function) of the KY040 Encoder is wired up too, but it is not used. IT could be implemented to perform some gimmick like triggering an action if some specific trigger pattern or behaviour was recognized - for example (e.g. pressing 3 times could quickly put Smart Stepper into torque mode or back to normal operation).
To monitor slow filament feeding, the debouncing has to be really low. It was tested with default values which did not trigger properly. I ended up using 10 ms as a good woring value for feed speeds from 1 mm/s up to to 30 mm/s. The monitoring happens in different parts. At first a Python service script is created and running all the time to monitor filament movement. It will calculate data like rounds per minute, speed and more. The data will be written to journald (systemd unit). A second python script will grab that data by hooking up the journald output stream
```bash
apt install python3-pip
pip3.7 install pigpio
pip3.7 install influxdb
pip3.7 install systemd
```
```bash
vim /opt/gpio/rotaryEncoder.py
```
```python
import pigpio
from datetime import *
from time import sleep
import time, math
import logging
from systemd.journal import JournaldLogHandler
from influxdb import InfluxDBClient
import urllib3
urllib3.disable_warnings(urllib3.exceptions.InsecureRequestWarning)
logger = logging.getLogger('rotaryEncoder')
logger.addHandler(JournaldLogHandler())
logger.setLevel(logging.DEBUG)
sequence = []
sequence_up = ['dt1', 'clk1', 'dt0', 'clk0']
sequence_down = ['clk1', 'dt1', 'clk0', 'dt0']
debounce = 10
clk = 12
dt = 6
clk_input = pigpio.pi()
dt_input = pigpio.pi()
clk_input.set_glitch_filter(clk, debounce)
dt_input.set_glitch_filter(dt, debounce)
# process params
dist_meas_mm = 0.00
olddist_meas_mm = 0.00 # last loop
mm_per_s = 0
rpm = 0
elapse = 0
pulse = 0
gust = 0 # last gust
avg = 0 # last average
sleeptime = 0.1 # secs between reporting loop
gustint = 3 # secs to calc gust (>sleeptime)
avgint = 5 # secs to trigger average calc (>gustint)
secsnoread = 6 # number of seconds rotor is stationary before a 'no read' is declared and set result to zero
loopcount = 0 # a'nothing is happening' counter
d_eff = 11.5 # mm effective diameter of the rubber wheel where filament strives over
lmove = math.pi * d_eff / 12 # mm circumference which are rotated at the encoder by one tick
start_timer = time.time() # for interrupt function
gust_timer = time.time() # start of this gust timing
gustm_start = dist_meas_mm # start of this gust distance
avg_timer = time.time() # start of this average timing
avgm_start = dist_meas_mm # start of average distance
# build some database connection
client = InfluxDBClient(host='localhost', port=8086, username='username', password='password', ssl=False, verify_ssl=False)
#client.ping()
client.switch_database('trikarus')
#print(client.query('SHOW DATABASES'))
#print(client.query('SHOW MEASUREMENTS'))
def clk_fall(gpio, level, tick):
if len(sequence) > 2:
sequence.clear()
sequence.append('clk1')
# interrupt
def clk_rise(gpio, level, tick):
sequence.append('clk0')
if sequence == sequence_up:
sequence.clear()
calculate_elapse(1)
def dt_fall(gpio, level, tick):
if len(sequence) > 2:
sequence.clear()
sequence.append('dt1')
# interrupt
def dt_rise(gpio, level, tick):
sequence.append('dt0')
if sequence == sequence_down:
sequence.clear()
calculate_elapse(-1)
# callback function
def calculate_elapse(increment):
global pulse, start_timer, elapse
pulse += increment # increase/decrease pulse whenever interrupt occurred
elapse = time.time() - start_timer # elapsed time
start_timer = time.time() # let current time equals to start_timer
def calculate_speed():
global rpm, olddist_meas_mm, dist_meas_mm, mm_per_s
try:
rpm = 1 / elapse * 60
mm_per_s = lmove / elapse
dist_meas_mm = lmove * pulse # measure distance traverse
if dist_meas_mm == olddist_meas_mm:
mm_per_s = 0
rpm = 0
if dist_meas_mm < olddist_meas_mm: # this indicates the switch between cw and ccw rotation
mm_per_s = -1 * mm_per_s
return mm_per_s
except ZeroDivisionError:
pass
# gust is synonym for onrush
def calcgust():
global gust_timer, gustm_start, avg_timer, avgm_start, gust, avg
gustime = time.time() - gust_timer # how long since start of gust check?
if gustime >= gustint: # then calc average speed over gust time
gustmm = (dist_meas_mm - gustm_start) # how far since start of gust check
thisgust = gustmm / gustime
# print('gust', gustime, gustmm, thisgust, gust)
if thisgust > gust:
gust = thisgust
gust_timer = time.time() # reset
gustm_start = dist_meas_mm
avgtime = time.time() - avg_timer # how long since start of avg check?
if avgtime >= avgint: # then calc average speed over avg time
avgmm = (dist_meas_mm - avgm_start) # how far since start of avgcheck
thisavg = avgmm / avgtime
# print('avg', avgtime, avgint, avgmm, thisavg)
avg = thisavg
avg_timer = time.time() # reset
avgm_start = dist_meas_mm
gust_timer = time.time()
gustm_start = dist_meas_mm
if avg != 0:
report('average')
gust = 0 # reset max gust over average duration as well
avg = 0 # and reset avg in case of calm
def report(mode):
if mode == 'realtime':
json_body = [
{
"measurement": "rotary_encoder",
"tags": {
"host": "hangdevice.fablabchemnitz.de"
},
"time": datetime.utcnow().strftime('%Y-%m-%dT%H:%M:%SZ'),
"fields": {
"rpm": float(rpm),
"mm_per_s": float(mm_per_s),
"dist_meas_mm": float(dist_meas_mm),
"pulse": float(pulse),
"elapse": float(elapse * 1000.0) #report them as milliseconds to the InfluxDB
}
},
]
client.write_points(json_body)
logger.info("rpm:{0:.0f} mm_per_s:{1:.1f} dist_meas_mm:{2:.2f} pulse:{3} elapse:{4}".format(rpm, mm_per_s, dist_meas_mm, pulse, elapse))
elif mode == 'average':
json_body = [
{
"measurement": "rotary_encoder",
"tags": {
"host": "hangdevice.fablabchemnitz.de"
},
"time": datetime.utcnow().strftime('%Y-%m-%dT%H:%M:%SZ'),
"fields": {
"gust": float(gust),
"avg": float(avg)
}
},
]
client.write_points(json_body)
logger.info("{0:.1f} Gust (mm/s), {1:.1f} Average (mm/s)".format(gust, avg))
elif mode == 'error':
logger.info("dead calm or connection fault")
else:
logger.warning('bad report mode')
if __name__ == '__main__':
clk_falling = clk_input.callback(clk, pigpio.FALLING_EDGE, clk_fall)
clk_rising = clk_input.callback(clk, pigpio.RISING_EDGE, clk_rise)
dt_falling = dt_input.callback(dt, pigpio.FALLING_EDGE, dt_fall)
dt_rising = dt_input.callback(dt, pigpio.RISING_EDGE, dt_rise)
while True:
olddist_meas_mm = dist_meas_mm
calculate_speed()
calcgust()
if olddist_meas_mm != dist_meas_mm:
loopcount = 0
report('realtime')
else:
loopcount += 1
if loopcount == secsnoread / sleeptime: # its stopped
report('realtime')
if loopcount == 20 / sleeptime: # if secsnoread is reached report error
loopcount = secsnoread / sleeptime + 1 # reset loopcount
#report('error')
report('realtime') #always report realtime instead of error to have better output for InfluxDB
json_body = [
{
"measurement": "rotary_encoder",
"tags": {
"host": "hangdevice.fablabchemnitz.de"
},
"time": datetime.utcnow().strftime('%Y-%m-%dT%H:%M:%SZ'),
"fields": {
"gust": float(0),
"avg": float(0)
}
},
]
client.write_points(json_body)
sleep(sleeptime)
```
## Create and enable pigpiod daemon (required to run pigpio things)
```bash
apt install pigpiod
```
```bash
vim /etc/systemd/system/pigpiod.service
```
```ini
[Unit]
Description=Pigpio daemon
[Service]
Type=forking
#disallow port 8888 from outside
ExecStart=/usr/bin/pigpiod -l
[Install]
WantedBy=multi-user.target
```
```bash
systemctl enable pigpiod.service
systemctl start pigpiod.service
service pigpiod restart
```
## Run the encoder script for testing
```bash
python3.7 /opt/gpio/rotaryEncoder.py #do not use Python2 because it will fail
```
## Install encoder script as service
The service will automatically restart after 10 seconds in cause of failure, e.g. if InfluxDB is down or host not reachable. This will trigger things like refused connection. The data flows into [separately created InfluxDB](#bkmrk-the-rotaryencoder.py) database.
```bash
vim /opt/gpio/rotaryEncoder.service
```
```ini
[Unit]
After=network.target
Description=Rotary Encoder Service
[Service]
Type=simple
ExecStart=/usr/bin/python3.7 /opt/gpio/rotaryEncoder.py
KillMode=process
Restart=on-failure
RestartSec=10
RemainAfterExit=no
User=root
Group=root
[Install]
WantedBy= multi-user.target
```
```bash
systemctl enable /opt/gpio/rotaryEncoder.service
systemctl daemon-reload && service rotaryEncoder restart && journalctl -f -u rotaryEncoder.service
```
## Physical Measurements
To write the monitoring script and to check against it's good practice to do a lot of measurements.
Notes:
- KY-040: one full rotation is expressed by 12 pulses (low resolution encoder). So $n\_f = 12$. See [Encoder KY-040 by Keyes - filament monitor](https://old.stadtfabrikanten.org/pages/createpage.action?spaceKey=TH&title=Encoder+KY-040+by+Keyes+-+filament+monitor&linkCreation=true&fromPageId=65405255)
- the effective diameter $d\_{eff}$ of the rubber cylinder (filament feed) is ~11.5 mm
- values are sorted by count increments
$l\_{move} = \\pi \\cdot \\ d\_{eff} \\cdot \\frac{c\_{inc}}{n\_{f}}$
test results for 50 mm extrusion with 15 mm/s @ 240°C
test results for 50 mm extrusion with 15 mm/s @ 240°C
test results for 100 mm extrusion with 15 mm/s @ 240°C
test results for 100 mm extrusion with 15 mm/s @ 240°C
test results for 500 mm extrusion with 30 mm/s @ 240°C
test results for 500 mm extrusion with 30 mm/s @ 240°C
## Stress test macro on Duet Web Control / Repetier Server
You can use the following macro to test the wear of the rubber cylinder of the filament feed sensor. The macro will quickly move the filament up and down. Measure the filament at some defined point (e.g. 2 cm above entry of feed sensor) and check if the same measurement can be taken after running it. In parallel you can check the encoder values. If everything runs fine you start with zero and end with zero (or near zero).
```ini
;heat up the nozzle to 205 °C and wait for it
G10 P0 R140 S205
T0
M116
;50 times extrude and retract 5 mm with 60 mm/s
G1 E-5 F3600
G1 E+5 F3600
G1 E-5 F3600
G1 E+5 F3600
G1 E-5 F3600
G1 E+5 F3600
G1 E-5 F3600
G1 E+5 F3600
G1 E-5 F3600
G1 E+5 F3600
G1 E-5 F3600
G1 E+5 F3600
G1 E-5 F3600
G1 E+5 F3600
G1 E-5 F3600
G1 E+5 F3600
G1 E-5 F3600
G1 E+5 F3600
G1 E-5 F3600
G1 E+5 F3600
G1 E-5 F3600
G1 E+5 F3600
G1 E-5 F3600
G1 E+5 F3600
G1 E-5 F3600
G1 E+5 F3600
G1 E-5 F3600
G1 E+5 F3600
G1 E-5 F3600
G1 E+5 F3600
G1 E-5 F3600
G1 E+5 F3600
G1 E-5 F3600
G1 E+5 F3600
G1 E-5 F3600
G1 E+5 F3600
G1 E-5 F3600
G1 E+5 F3600
G1 E-5 F3600
G1 E+5 F3600
G1 E-5 F3600
G1 E+5 F3600
G1 E-5 F3600
G1 E+5 F3600
G1 E-5 F3600
G1 E+5 F3600
G1 E-5 F3600
G1 E+5 F3600
G1 E-5 F3600
G1 E+5 F3600
G1 E-5 F3600
G1 E+5 F3600
G1 E-5 F3600
G1 E+5 F3600
G1 E-5 F3600
G1 E+5 F3600
G1 E-5 F3600
G1 E+5 F3600
G1 E-5 F3600
G1 E+5 F3600
G1 E-5 F3600
G1 E+5 F3600
G1 E-5 F3600
G1 E+5 F3600
G1 E-5 F3600
G1 E+5 F3600
G1 E-5 F3600
G1 E+5 F3600
G1 E-5 F3600
G1 E+5 F3600
G1 E-5 F3600
G1 E+5 F3600
G1 E-5 F3600
G1 E+5 F3600
G1 E-5 F3600
G1 E+5 F3600
G1 E-5 F3600
G1 E+5 F3600
G1 E-5 F3600
G1 E+5 F3600
G1 E-5 F3600
G1 E+5 F3600
G1 E-5 F3600
G1 E+5 F3600
G1 E-5 F3600
G1 E+5 F3600
G1 E-5 F3600
G1 E+5 F3600
G1 E-5 F3600
G1 E+5 F3600
G1 E-5 F3600
G1 E+5 F3600
G1 E-5 F3600
G1 E+5 F3600
G1 E-5 F3600
G1 E+5 F3600
G1 E-5 F3600
G1 E+5 F3600
G1 E-5 F3600
G1 E+5 F3600
```
## Validation of single extrusion command against output of rotary encoder script
```ini
G1 E+25 F900 ; = 15mm/s
```
```bash
python3 /opt/gpio/rotaryEncoder_recent.py
Mon Apr 20 12:33:22 2020 rpm:0 mm_per_s:0.0 dist_meas_mm:0.00 pulse:0 elapse:0
Mon Apr 20 12:33:26 2020 rpm:6 mm_per_s:0.3 dist_meas_mm:3.01 pulse:1 elapse:10.136061668395996
Mon Apr 20 12:33:26 2020 rpm:300 mm_per_s:15.1 dist_meas_mm:6.02 pulse:2 elapse:0.19987750053405762
Mon Apr 20 12:33:26 2020 rpm:347 mm_per_s:17.4 dist_meas_mm:9.03 pulse:3 elapse:0.17283368110656738
Mon Apr 20 12:33:27 2020 rpm:315 mm_per_s:15.8 dist_meas_mm:12.04 pulse:4 elapse:0.19038128852844238
Mon Apr 20 12:33:27 2020 rpm:117 mm_per_s:5.9 dist_meas_mm:15.05 pulse:5 elapse:0.511589527130127
Mon Apr 20 12:33:27 2020 rpm:300 mm_per_s:15.1 dist_meas_mm:18.06 pulse:6 elapse:0.19991707801818848
Mon Apr 20 12:33:28 2020 rpm:308 mm_per_s:15.5 dist_meas_mm:21.07 pulse:7 elapse:0.19481205940246582
Mon Apr 20 12:33:31 2020 7.0 Gust (mm/s), 4.2 Average (mm/s)
Mon Apr 20 12:33:34 2020 rpm:0 mm_per_s:0.0 dist_meas_mm:21.07 pulse:7 elapse:0.19481205940246582
```
## Dropping old values
```sql
use trikarus
drop series from rotary_encoder
show series
show measurements
```
## Advanced script
The rotaryEncoder.py could be developed with some advanced code to store and restore values like pulse (position) to do accumulative or continuous reading which continues after restarting the service or whole Raspberry Pi. But due the fact the the feed sensor is not that exact, storing these values won't be that important to do so. However, saving previous values into json object seems to be straight forward and easy: [https://stackabuse.com/reading-and-writing-json-to-a-file-in-python.](https://stackabuse.com/reading-and-writing-json-to-a-file-in-python/) Additionally the script can be used to trigger actions by using Repetier Server API. It easily be used to perform pause or stop commands or to just print some information to print console or display. To keep the rotaryEncoder.py speedy just let the python script write it's values to journald like before but connect another script to read out the values again from journald. Or you can add some asynchronous procedures (e.h. nohup) to the rotaryEncoder.py script to make it work and keep it quick.
# Monitoring and alerting | GPIO Status of Relays
## Relay for the LED lighting
[](https://wiki.stadtfabrikanten.org/uploads/images/gallery/2026-06/aUKN2kpLfXS4rY6T-grafik.png) [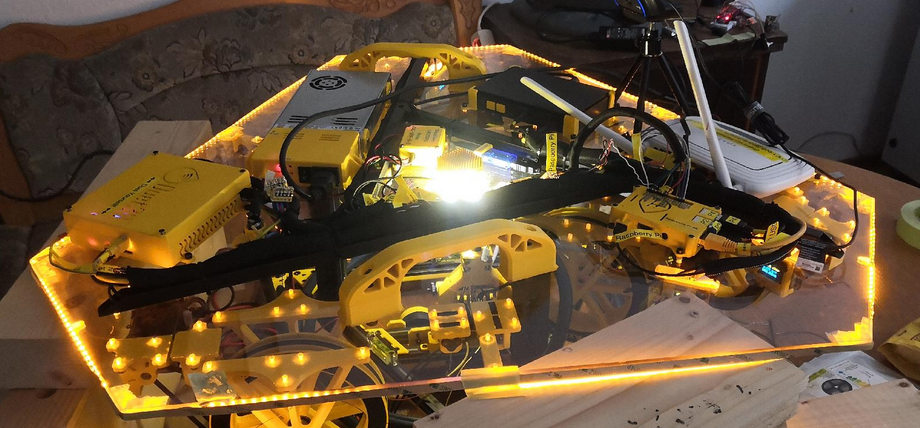](https://wiki.stadtfabrikanten.org/uploads/images/gallery/2026-06/VAwcduaGfiedM3Cv-grafik.png) [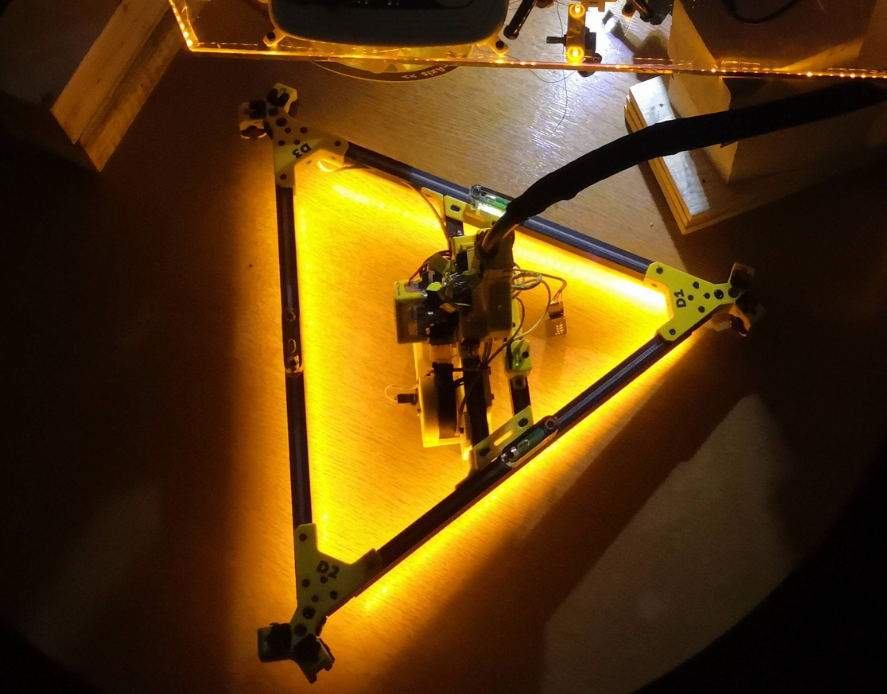](https://wiki.stadtfabrikanten.org/uploads/images/gallery/2026-06/915enjgbfdK864kq-grafik.png)
## Relay for the power supply unit
[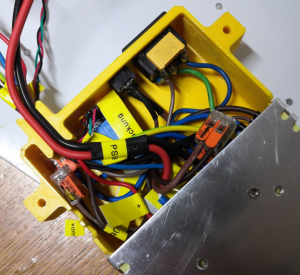](https://wiki.stadtfabrikanten.org/uploads/images/gallery/2026-06/Pifkhgv6jsto62zH-grafik.png)
## collectd Python plugin script
Use Python3 interpreter! It's not tested with old legacy Python 2.X. Please not that this script does not work by calling it manually with "python relay\_states.py" because the register\_\* functions lead to execution error if not called by collectd.
Preparations
```bash
#install collectd library
pip3.7 install collectd
```
## Create plugin file
```bash
mkdir -p /opt/collectd_plugins
cd /opt/collectd_plugins
vim relay_states.py
```
```bash
relay_states.py
import collectd
def read_func():
try:
with open ("/var/lib/Repetier-Server/GPIO_27.pinstate", "r") as GPIO_27:
P27=GPIO_27.readline().rstrip()
if P27 == '0':
pin_psu = 0
if P27 == '1':
pin_psu = 1
#collectd.info('relay_states GPIO pin plugin: pin_psu = %s' % pin_psu)
collectd.Values(plugin='relay_states', type='gauge', type_instance='pin_psu', values=[pin_psu]).dispatch()
#print(pin_psu)
except Exception as e:
print('exception: %s' % e)
pass
try:
with open ("/var/lib/Repetier-Server/GPIO_22.pinstate", "r") as GPIO_22:
P22=GPIO_22.readline().rstrip()
if P22 == '0':
pin_ledspot = 0
if P22 == '1':
pin_ledspot = 1
#collectd.info('relay_states GPIO pin plugin: pin_ledspot = %s' % pin_ledspot)
collectd.Values(plugin='relay_states', type='gauge', type_instance='pin_ledspot', values=[pin_ledspot]).dispatch()
#print(pin_psu)
except Exception as e:
#print('exception: %s' % e)
collectd.error('relay_states GPIO pin plugin: exception: %s' % e)
pass
collectd.register_read(read_func,1) # read every 1 seconds
#read_func()
```
Note that the states are written into /var/lib/Repetier-Server because the scripts to turn on/off PSU and LEDs are mostly called by Repetier Server frontend. Repetier Server cannot access directory /opt so just write the files to the user "repetierserver" home directory
## Configure collectd to add the script
```bash
vim /etc/collectd/collectd.conf
```
Add the following lines to the end of the config (or at the according place where Python plugins are put)
```xml
LoadPlugin python
ModulePath "/opt/collectd_plugins"
Import "relay_states"
```
## Restart collectd
```bash
service collectd restart
journald -f -u collectd.service
```
The following warning can be safely ignored
```bash
python plugin: Found a configuration for the "relay_states" plugin, but the plugin isn't loaded or didn't register a configuration callback.
```
## Check out if values from collectd correctly flow into InfluxDB
If you have access to the influxdb server you can run on the server directly (localhost)
```bash
# /opt/influxdb/influx
> USE collectd
> SHOW SERIES
> SHOW MEASUREMENTS
```
If you want to send a remote curl command, do the following
```
curl -cacert /etc/ssl/certs/site.de.ca.crt --cert /etc/ssl/certs/site.de.crt --key /etc/ssl/private/site.de.key https://site.de:8086/query --data-urlencode "db=collectd" --data-urlencode "q=SHOW SERIES" --user admin:password | jq . | grep relay
```
## Grafana query testing
some example queries
```sqlite
select last(value) from "relay_states_value" WHERE "type_instance" = 'pin_ledspot' AND "host" =~ /^$host$/ AND $timeFilter GROUP BY time($interval)
select last(value) from "relay_states_value" WHERE "type_instance" = 'pin_psu' AND "host" =~ /^$host$/ AND $timeFilter GROUP BY time($interval)
```
## Purge old data
If you want to reset data you can send some API call for example.
```bash
curl -cacert /etc/ssl/certs/site.de.ca.crt --cert /etc/ssl/certs/site.de.crt --key /etc/ssl/private/site.de.key https://site.de:8086/query --data-urlencode "db=collectd" --data-urlencode "q=DROP SERIES FROM relay_states_value" --user admin:password| jq . | grep relay
```
## Add some retention policy to keep clean your harddrive (optional)
Collecting a lot of data results in huge amount of needed memory. To avoid this think about adding some auto-clean policy (called retention policy) in InfluxDB.
This configuration is not part of Hangprinter project. At the moment the InfluxDB we use is one of the instances that FabLab Chemnitz uses. It's configured to keep 14 days of data
# Monitoring and alerting | InfluxDB
## Install InfluxDB instance
- local database on Raspberry Pi
A remote database, which is used also, allows to monitor Trikarus network status. The installation of this second database is not described in this documentation.
[https://www.influxdata.com/blog/getting-started-python-influxdb](https://www.influxdata.com/blog/getting-started-python-influxdb)
```bash
sudo su
curl -sL https://repos.influxdata.com/influxdb.key | sudo apt-key add -
echo "deb https://repos.influxdata.com/debian buster stable" | sudo tee /etc/apt/sources.list.d/influxdb.list
apt update
apt-get install influxdb
systemctl enable influxdb
systemctl start influxdb
#the service file can be found in
/lib/systemd/system/influxdb.service
chown -R influxdb:influxdb /etc/influxdb
chown -R influxdb:influxdb /var/lib/influxdb
service influxdb start
```
## Create trikarus database
A collectd database gets created automatically by collectd service. You only need to add database "trikarus", which is used by Python monitoring scripts for things like [Filament sensing with KY-040 Rotary Encoder](https://old.stadtfabrikanten.org/display/TH/Filament+sensing+with+KY-040+Rotary+Encoder) and much more.
```bash
#open InfluxDB shell
influx
```
```sql
CREATE USER trikaflux WITH PASSWORD 'password'
SHOW USERS
CREATE DATABASE trikarus
GRANT ALL ON "trikarus" TO "trikaflux"
```
## Retention policies for databases collectd and trikarus
This is used to automatically cleanup old data from database.
```sql
CREATE USER "admin" WITH PASSWORD 'password' WITH ALL PRIVILEGES
CREATE RETENTION POLICY "collectd_policy_14d" ON "collectd" DURATION 14d REPLICATION 1 DEFAULT
SHOW RETENTION POLICIES ON "collectd"
CREATE USER trikaflux WITH PASSWORD 'password'
SHOW USERS
CREATE DATABASE trikarus
GRANT ALL ON "trikarus" TO "trikaflux"
CREATE RETENTION POLICY "trikarus_policy_14d" ON "trikarus" DURATION 14d REPLICATION 1 DEFAULT
SHOW RETENTION POLICIES ON "trikarus"
```
## Purge old data
If you want to reset data you can send some API call for example.
```sql
use collectd
DROP SERIES FROM mpu6050_value
```
Or by API call:
```bash
curl -cacert /etc/ssl/certs/site.de.ca.crt --cert /etc/ssl/certs/site.de.crt --key /etc/ssl/private/site.de.key https://site.de:8086/query --data-urlencode "db=collectd" --data-urlencode "q=DROP SERIES FROM mpu6050_value" --user admin:password| jq . | grep mpu6050
```
# Monitoring and alerting | Longterm monitoring of Duet 2 and automatic Hotend PowerOff/Movement Stop
To monitor some important values from Duet Trikarus project is going to monitor different values like MCU temperature or general printer status. This is done by triggering **M408 S4** GCode. In Repetier Server a callback function is registered to monitor this command and append the output to the callback log / websocket stream. A bash script takes this information and parses it. The parsed data will be pushed into InfluxDB. The data is graphically evaluated by Grafana instance.
We are using this script to monitor if the printer idles but hotend is still active, too. In case Duet is running a GCode sequence, it's status is "busy". While heating up it's "idle". Because the old Duet firmware has no built-in watcher to check if the printer is heating while not printing. Our script is not 100% safe because we need to trust into a working network connection (we already defined an extra value "-2" for Duet polling). But it still helps to perform emergency shutdowns in case we forgot to turn off the printer correctly.
Another job is to monitor if Repetier Server is still sending job data even the printer controller got not enough voltage to run the motors (e.g. power loss or emergency stop button pushed). In this case the print job silently continues which creates unusuably situation and it would mean if the power comes back the printer would just move to some unknown weird position. We omit this by triggering the [@pause](https://forum.repetier.com/discussion/6690/pause-command) command which gets interpreted by Repetier Server to stop the gcode data feed. By the way "Warning: VIN under-voltage event" message get's written into log line by Duet.
We could also use Smart Stepper ABCD position data to check if the printer really moves while it is printing.
**Warning.** Under some circumstances "Warning: Communication timeout - resetting communication buffer." will appear. Then you might need to reset Duet by web interface (in case Repetier Server interface reset does not properly work and no USB response)
## Create Repetier Server callback
[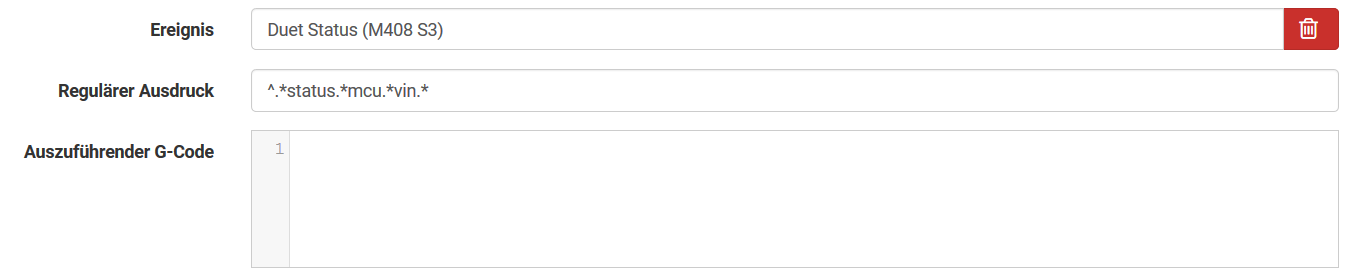](https://wiki.stadtfabrikanten.org/uploads/images/gallery/2026-06/d1OGiQ1Fz5PjXnM1-grafik.png)
## The bash script
```bash
vim /opt/duet_status.sh
```
```bash
#!/bin/bash
# this script will read the current IP Adress by using a pre-defined custom event in Repetier Server. Please see documentation for more details on how to do that
source "/opt/repetier-conf.sh" #source config for Repetier Server instance
PID_FILE="/opt/duet_status.pid"
case "$1" in
start)
#get the scripts own PID number
echo $$>"$PID_FILE"
IDLE_TIMEOUT=900 #We turn off the extruder after 15 minutes (15 * 60 = 900 seconds)
LAST_IDLE_TIME="" #we store the last timestamp where printer was in an idling state
while true; do
echo "_______________________________"
echo LAST_IDLE_TIME=$LAST_IDLE_TIME
#LAST_IDLE_TIME="" #we store the last timestamp where printer was in an idling state
STATUS="-999" #reset status because we are in a while loop
#authenticate
curl --silent "duetdevice/rr_connect?password=somePw" > /dev/null
if [ $? == 7 ]; then
STATUS="-2" #network connection could not be established
fi
#get status response from Duet (note that if previous authentication is some seconds too old it will fail because you need to re-authenticate) - regular output is "{"err":0,"sessionTimeout":8000,"boardType":"duetethernet102"}"
LOG_LINE=$(curl --silent "duetdevice/rr_status?type=2")
#echo $LOG_LINE
#status mapping (InfluxDB cannot store characters):
# -1=O=Offline
# 0=I=idle
# 1=P=printing from SD card
# 2=S=stopped (i.e. needs a reset)
# 3=C=running config file (i.e starting up)
# 4=A=paused
# 5=D=pausing
# 6=R=resuming from a pause
# 7=B=busy (e.g. running a macro)
# 8=F=performing firmware update
# 9=T=changing tool
# 10=M=simulating
# 11=H=halt
# Warning: the following lines will fail if the configuration of firmware changes (number of hotends for example)
if [[ ! $STATUS == "-2" ]]; then
STATUS=$(jq -r '.|{status}|.status' <<< ${LOG_LINE})
fi
MCU_TEMP=$(jq -r '.|{temps}|.[]|{extra}|.[]|.[]|.temp' <<< ${LOG_LINE})
HOTEND_ACTIVE=$(jq -r '.|{temps}|.[]|{tools}|.[]|{active}|.[]|.[]|.[]' <<< ${LOG_LINE})
HOTEND_TEMP=$(jq -r '.|{temps}|.[]|{current}|.[]|.[0]' <<< ${LOG_LINE})
SPEEDFACTOR=$(jq -r '.|{params}|.[]|{speedFactor}|.speedFactor' <<< ${LOG_LINE})
EXTRFACTOR=$(jq -r '.|{params}|.[]|{extrFactors}|.[]|.[0]' <<< ${LOG_LINE})
BABYSTEP=$(jq -r '.|{params}|.[]|{babystep}|.[]' <<< ${LOG_LINE})
VIN=$(jq -r '.|.vin|{cur}|.[]' <<< ${LOG_LINE})
Z_COORD=$(jq -r '.|{coords}|.[]|{xyz}|.[]|.[2]' <<< ${LOG_LINE})
#now replace Status with integer values for InfluxDB
STATUS=$(echo ${STATUS/O/-1})
STATUS=$(echo ${STATUS/I/0})
STATUS=$(echo ${STATUS/P/1})
STATUS=$(echo ${STATUS/S/2})
STATUS=$(echo ${STATUS/C/3})
STATUS=$(echo ${STATUS/A/4})
STATUS=$(echo ${STATUS/D/5})
STATUS=$(echo ${STATUS/R/6})
STATUS=$(echo ${STATUS/B/7})
STATUS=$(echo ${STATUS/F/8})
STATUS=$(echo ${STATUS/T/9})
STATUS=$(echo ${STATUS/M/10})
STATUS=$(echo ${STATUS/H/11})
# note that space white characters destroy the --data-binary. So watch them exactly!
# if errors occure values might need to be converted from int to float! (missing yet)
if [[ $STATUS == "-2" ]]; then
echo "Duet is not connected by LAN"
#MCU_TEMP=99999
#HOTEND_ACTIVE=99999
#HOTEND_TEMP=99999
#SPEEDFACTOR=99999
#EXTRFACTOR=99999
#BABYSTEP=99999
#VIN=99999
#Z_COORD=99999
# note that space white characters destroy the --data-binary. So watch them exactly!
curl --silent -k -XPOST "http://localhost:8086/write?db=trikarus" --data-binary "duet_ethernet,host=hangdevice.fablabchemnitz.de status=${STATUS}" --user dbUser:dbPass > /dev/null
else
#################
# Movement Watchdog (pause print iff Duet status is "OFFLINE" and VIN is below minimum
#################
if [[ $STATUS == -1 ]] && [[ $VIN < 23 ]]; then
echo "Current VIN is below the supply voltage required to be able to print. Pausing print (if a print job is running at the moment)"
send_gcode '@pause' #ToDo: add some check if already paused to avoid @pause spamming
fi
#################
# Hotend Watchdog
#################
echo "Hotend Watchdog is active"
if [[ $HOTEND_ACTIVE == "0" ]]; then
echo "ok" > /dev/null #everything fine. Hotend is off (target temperature is exactly zero).
echo "Hotend is off. everything fine"
LAST_IDLE_TIME="" #okidoki. We reset the timestamp again to clear the last information
else
echo "Hotend is active (target temperature is $HOTEND_ACTIVE degrees). Checking if i should turn off"
#Hotend is on. Checking whats up.
if [[ $STATUS == "0" ]] || [[ $STATUS == "2" ]] || [[ $STATUS == "8" ]]; then #Duet is still/again idling, stopped or is doing firmware upgrade.
echo "Duet is still/again idling"
if [[ -z "$LAST_IDLE_TIME" ]]; then #only if LAST_IDLE_TIME is empty we overwrite with a new time information
LAST_IDLE_TIME=$(date '+%s') #We store that timestamp
echo LASTIDLE_TIME=$LAST_IDLE_TIME
fi
else
if [[ $STATUS == "7" ]]; then
echo "Printer is printing at the moment!"
fi
LAST_IDLE_TIME="" #okidoki. We reset the timestamp again to clear the last information
fi
fi
if [[ ! -z "$LAST_IDLE_TIME" ]]; then #if LAST_IDLE_TIME is not empty
CURRENT_TIME=$(date '+%s')
TIME_DIFF=$(($CURRENT_TIME - $LAST_IDLE_TIME))
echo TIME_DIFF=$TIME_DIFF
if [[ "$TIME_DIFF" -gt "$IDLE_TIMEOUT" ]]; then #We turn off the extruder after reaching timeout
send_gcode "M104 S0" #turn off the extruder remotely
send_gcode "M106 S0" #turn off the part cooling fan remotely
echo "Heater was turned off by script (idle)"
echo "" | mail -s "Heater was turned off by script (idle)" somemail@somedomain.de
fi
fi
#################
# Write InfluxDB
#################
#echo "Writing regular Duet values to InfluxDB"
echo STATUS=$STATUS
echo MCU_TEMP=$MCU_TEMP
echo HOTEND_ACTIVE=$HOTEND_ACTIVE
echo HOTEND_TEMP=$HOTEND_TEMP
echo SPEEDFACTOR=$SPEEDFACTOR
echo EXTRFACTOR=$EXTRFACTOR
echo BABYSTEP=$BABYSTEP
echo VIN=$VIN
echo Z_COORD=$Z_COORD
curl --silent -k -XPOST "http://localhost:8086/write?db=trikarus" --data-binary "duet_ethernet,host=device.fablabchemnitz.de status=${STATUS},mcu_temp=${MCU_TEMP},hotend_temp=${HOTEND_TEMP},speedfactor=${SPEEDFACTOR},extrfactor=${EXTRFACTOR},babystep=${BABYSTEP},vin=${VIN},z_coord=${Z_COORD}" --user dbUser:dbPass> /dev/null
fi
sleep 1 #wait to generate not too much data
done #end of while loop
;;
stop)
pkill -P `cat "$PID_FILE"`
rm "$PID_FILE"
;;
restart)
$0 stop
$0 start
;;
status)
if [ -e "$PID_FILE" ]; then
echo Service is still running, pid=`cat "$PID_FILE"`
else
echo Service is NOT running
exit 1
fi
;;
*)
echo "Usage: $0 {start|stop|status|restart}"
esac
exit 0
```
```bash
chmod +x /opt/duet_status.sh
```
## Install as service
```bash
vim /opt/duet_status.service
```
```ini
[Unit]
After=network.target
Description=Duet Ethernet Controller Status Service
[Service]
Type=simple
ExecStart=/opt/duet_status.sh start
ExecStop=/opt/duet_status.sh stop
KillMode=process
Restart=on-failure
RestartSec=10
RemainAfterExit=no
User=root
Group=root
[Install]
WantedBy= multi-user.target
```
```bash
systemctl enable /opt/duet_status.service
service duet_status restart && journalctl -f -u duet_status.service
```
## Dropping old values
```sql
influx
use trikarus
drop series from duet_ethernet
show series
show measurements
```
## Create Grafana dashboard
[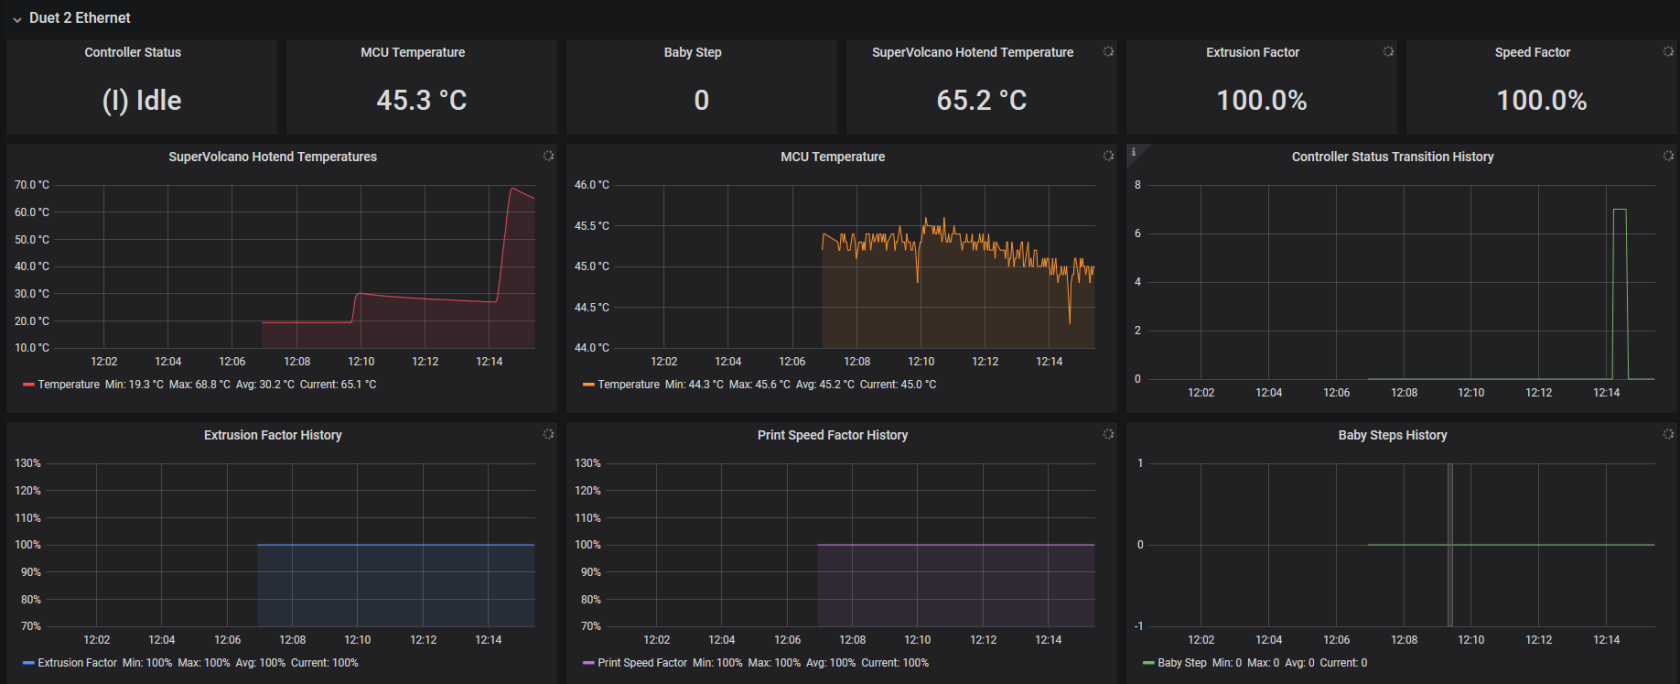](https://wiki.stadtfabrikanten.org/uploads/images/gallery/2026-06/1WXTc5PAqkeU1Ahr-grafik.png)
# Monitoring and alerting | MPU 6050 (GY-521) Gyro + Accelerometer monitoring
[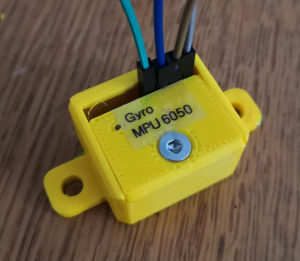](https://wiki.stadtfabrikanten.org/uploads/images/gallery/2026-06/N02UOwT7wp9o2mj9-grafik.png) [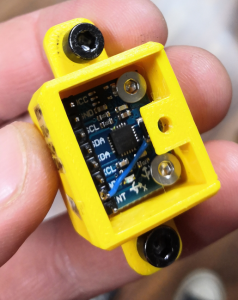](https://wiki.stadtfabrikanten.org/uploads/images/gallery/2026-06/g4vzgHl86H8jBPtE-grafik.png) [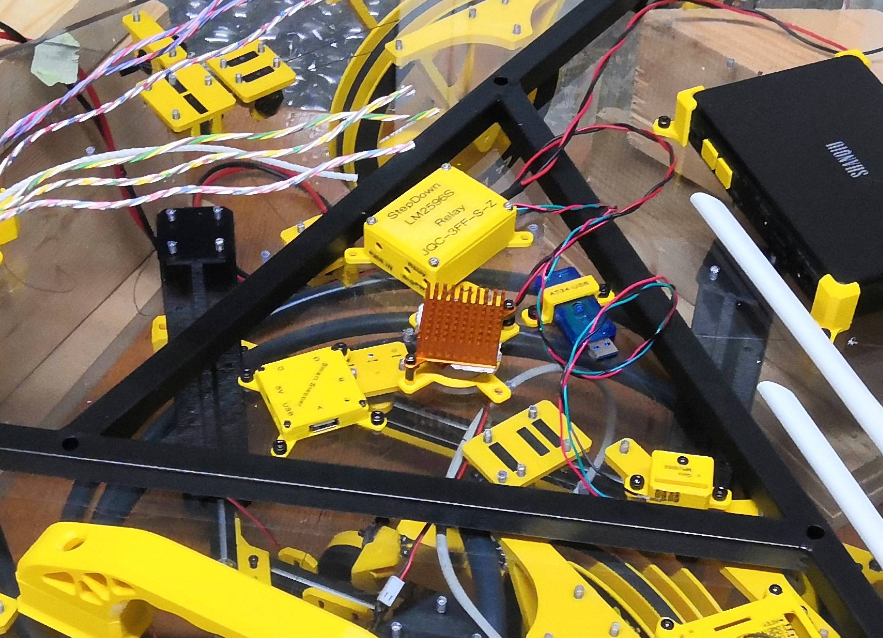](https://wiki.stadtfabrikanten.org/uploads/images/gallery/2026-06/z5w5UTpMPqxmGNpq-grafik.png) [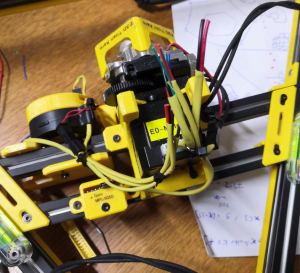](https://wiki.stadtfabrikanten.org/uploads/images/gallery/2026-06/bigADcjpP281Tydl-grafik.png)
## Hardware → [Gyroscope and acceleration sensor GY-521 (MPU6050)](#bkmrk-select-last%28value%29-f) and basic configuration for Raspberry Pi
## Features for Hangprinter
The MPU 6050 is a gyro which is used to measure room temperature and vibrations at the installation location. It helps to check for occured events like layer shifting by looking into the monitoring (InfluxDB + Grafana). It does not help to prevent them but is an experimental tool for analysing. Due to the very difficult exact positioning, a gyro is not suitable for longterm checking of absolute positions XYZ or absolute speeds, since the deviations add up over a short period of time. An angle error of even one degree will cause the estimated velocity to be off by some meters per seconds after a short period of elapsed time. After a single minute, one degree of angle error will cause the position estimate to be off by kilometers. For more details see [http://www.chrobotics.com/library/accel-position-velocity](http://www.chrobotics.com/library/accel-position-velocity). For this reason an [Inertial Measurement Unit MPU 9250 / GY-250 InvenSense](#bkmrk-select-last%28value%29-f) was installed on effector side.Having gyro sensors in Hangprinter means in theory that ...
1. the effector and frame can be better leveled when Hangprinter gets installed in a new location
2. the sensor helps with remote monitoring in the sense of simple motion tracking and emergency sensor for sensing out
- tilts / misalignments of effector while printing caused by lost lines from bearings (shearing off), unevenly line tripping, obstacles, winding spools or blocking drives (possibly despite the closed loop system)
- as soon as one this things or a mix of multiple causes happe, the sensor data will have really high and short peaks in relation to regular movements. Suche events usually are a mix of changed speed, acceleration and jerk, force and geometrical tilts
- If the minimum or maximum tilts are exceeded this can trigger events like emergency halt or baby stepping ABCD drives to fix the effector tilt when printing
- room vibrations (e.g. trams or trucks on the street) or other vibrations can be registered and visualized
3. analysing the surrounding temperature of the effector area is possible due to the simple fact that each GY-521 integrates a temperature sensor (could be as some kind of really cheap solution for fire hazard detection)
## Wiring address
The MPU 6050 has primary address 0x68 or secondary address 0x69, depending on it's pin configuration
- 0x69
## Troubleshooting
Module has wrong address
## Module has wrong address
The MPU 6050 is a sensible I2C module which was connected to Raspberry Pi by slightly longer, unshielded cables. It figured out that there may occure bad side effects, for example if the main power chord (230 V) is to near to the cables. Then it can happen that the module gets a wrong address like 0x0c or that the module will fail by other unkown effects.
[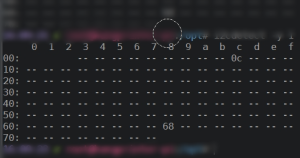](https://wiki.stadtfabrikanten.org/uploads/images/gallery/2026-06/r51QGMOeHXiOYDEB-grafik.png) [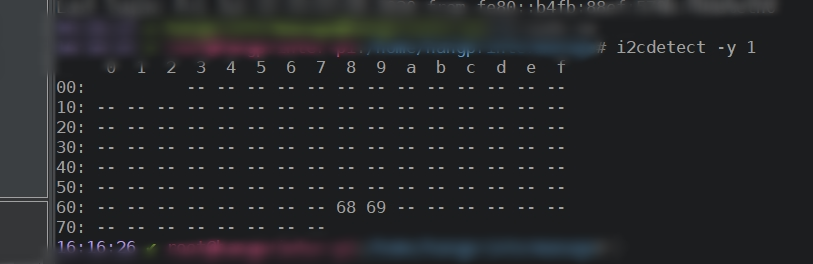](https://wiki.stadtfabrikanten.org/uploads/images/gallery/2026-06/QmfZXUu5Sz2O49IA-grafik.png)
## Python script to read the data
Trikarus uses a collectd script to collect the sensor data like regular system hardware metrics. This allows to visualize them in third party software. We use InfluxDB and Grafana to make graphs from sensor data and to make use of the data to perform printer relevant Repetier Server API calls.
Good sources to look at:
- [https://www.twobitarcade.net/article/3-axis-gyro-micropython](https://www.twobitarcade.net/article/3-axis-gyro-micropython)
- [https://pypi.org/project/mpu6050-raspberrypi/#files](https://pypi.org/project/mpu6050-raspberrypi/#files)
- [https://github.com/KavinduZoysa/arduino/blob/master/MPU\_6050/MPU\_6050.ino](https://github.com/KavinduZoysa/arduino/blob/master/MPU_6050/MPU_6050.ino)
- [https://how2electronics.com/measure-tilt-angle-using-mpu6050-gyro-accelerometer-arduino](https://how2electronics.com/measure-tilt-angle-using-mpu6050-gyro-accelerometer-arduino)
- [https://github.com/adamjezek98/MPU6050-ESP8266-MicroPython/blob/master/mpu6050.py](https://github.com/adamjezek98/MPU6050-ESP8266-MicroPython/blob/master/mpu6050.py)
- [https://github.com/rocheparadox/Kalman-Filter-Python-for-mpu6050/blob/master/AngleOMeter.py](https://github.com/rocheparadox/Kalman-Filter-Python-for-mpu6050/blob/master/AngleOMeter.py)
- h[ttps://github.com/rocheparadox/Kalman-Filter-Python-for-mpu6050/blob/master/Kalman.py](https://github.com/rocheparadox/Kalman-Filter-Python-for-mpu6050/blob/master/Kalman.py)
- [https://github.com/thisisG/MPU6050-I2C-Python-Class](https://github.com/thisisG/MPU6050-I2C-Python-Class)
- [https://github.com/richardghirst/PiBits/tree/master/MPU6050-Pi-Demo](https://github.com/richardghirst/PiBits/tree/master/MPU6050-Pi-Demo)
## collectd Python plugin script
Preparations
Use Python3 interpreter! It's not tested with old legacy Python 2.X. Please not that this script does not work by calling it manually with "python mpu6050.py" because the register\_\* functions lead to execution error if not called by collectd.
```bash
#install collectd library
pip3.7 install collectd smbus
#fix a nasty uppercase/lowercase issue in that module
/usr/local/lib/python3.5/dist-packages/collectd.py
#change "from Queue import Queue, Empty"
#to "from queue import Queue, Empty"
```
## Create plugin file
```bash
mkdir -p /opt/collectd_plugins
cd /opt/collectd_plugins
vim mpu6050.py
```
```python
#!/usr/bin/python
import smbus
import math
import collectd
address=0x68
ADLOWHIGH=0
bus = smbus.SMBus(1) # bus = smbus.SMBus(0) for revision 1
def config_func(config):
hw_address_set = False
for node in config.children:
key = node.key.lower()
val = node.values[0]
if key == 'adlowhigh':
global ADLOWHIGH
ADLOWHIGH = val
hw_adress_set = True
else:
collectd.info('mpu6050 plugin: Unknown config key "%s"' % key)
if hw_address_set:
collectd.info('mpu6050 plugin: Using overridden address %s' % ADLOWHIGH)
else:
collectd.info('mpu6050 plugin: Using default address %s' % ADLOWHIGH)
def read_byte(reg):
return bus.read_byte_data(address, reg)
def read_word(reg):
h = bus.read_byte_data(address, reg)
l = bus.read_byte_data(address, reg+1)
value = (h << 8) + l
return value
def read_word_2c(reg):
val = read_word(reg)
if (val >= 0x8000):
return -((65535 - val) + 1)
else:
return val
def dist(a,b):
return math.sqrt((a*a)+(b*b))
def get_y_rotation(x,y,z):
radians = math.atan2(x, dist(y,z))
return -math.degrees(radians)
def get_x_rotation(x,y,z):
radians = math.atan2(y, dist(x,z))
return math.degrees(radians)
def read_func():
#collectd.info("gyro plugin: ADLOWHIGH = %s" % ADLOWHIGH)
try:
# https://medium.com/@kavindugimhanzoysa/lets-work-with-mpu6050-gy-521-part1-6db0d47a35e6
scale_gyro = 131
scale_accel = 16384.0
earth_g = 9.80665 # m/s^2
# collectd.info('gyro plugin: hardware address = %s' % address)
bus = smbus.SMBus(1) # bus = smbus.SMBus(0) for revision 1
if ADLOWHIGH == '0':
address=0x68
else:
address=0x69
bus.write_byte_data(0x68, 0x6b, 0) # activate the module to talk to it
gyro_x = read_word_2c(0x43)
gyro_y = read_word_2c(0x45)
gyro_z = read_word_2c(0x47)
# this converts the gyro values with deg/s unit
gyro_x_scaled = gyro_x / scale_gyro
gyro_y_scaled = gyro_y / scale_gyro
gyro_z_scaled = gyro_z / scale_gyro
accel_x = read_word_2c(0x3b)
accel_y = read_word_2c(0x3d)
accel_z = read_word_2c(0x3f)
# this converts the gyro values with mm/s^2 unit
accel_x_scaled = accel_x / scale_accel * earth_g
accel_y_scaled = accel_y / scale_accel * earth_g
accel_z_scaled = accel_z / scale_accel * earth_g
temp = (read_word_2c(0x41) / 340) + 36.53
# put values to collectd
collectd.Values(plugin='mpu6050', plugin_instance='gyro0', type='gauge', type_instance='temp', values=[temp]).dispatch()
collectd.Values(plugin='mpu6050', plugin_instance='gyro0', type='gauge', type_instance='gyro_x', values=[gyro_x]).dispatch()
collectd.Values(plugin='mpu6050', plugin_instance='gyro0', type='gauge', type_instance='gyro_y', values=[gyro_y]).dispatch()
collectd.Values(plugin='mpu6050', plugin_instance='gyro0', type='gauge', type_instance='gyro_z', values=[gyro_z]).dispatch()
collectd.Values(plugin='mpu6050', plugin_instance='gyro0', type='gauge', type_instance='gyro_x_scaled', values=[gyro_x_scaled]).dispatch()
collectd.Values(plugin='mpu6050', plugin_instance='gyro0', type='gauge', type_instance='gyro_y_scaled', values=[gyro_y_scaled]).dispatch()
collectd.Values(plugin='mpu6050', plugin_instance='gyro0', type='gauge', type_instance='gyro_z_scaled', values=[gyro_z_scaled]).dispatch()
collectd.Values(plugin='mpu6050', plugin_instance='gyro0', type='gauge', type_instance='accel_x', values=[accel_x]).dispatch()
collectd.Values(plugin='mpu6050', plugin_instance='gyro0', type='gauge', type_instance='accel_y', values=[accel_y]).dispatch()
collectd.Values(plugin='mpu6050', plugin_instance='gyro0', type='gauge', type_instance='accel_z', values=[accel_z]).dispatch()
collectd.Values(plugin='mpu6050', plugin_instance='gyro0', type='gauge', type_instance='accel_x_scaled', values=[accel_x_scaled]).dispatch()
collectd.Values(plugin='mpu6050', plugin_instance='gyro0', type='gauge', type_instance='accel_y_scaled', values=[accel_y_scaled]).dispatch()
collectd.Values(plugin='mpu6050', plugin_instance='gyro0', type='gauge', type_instance='accel_z_scaled', values=[accel_z_scaled]).dispatch()
#collectd.info('gyro plugin: gyro_x = %s' % gyro_x)
print("XYZ gyroscope:","{:.0f}".format(gyro_x)," (" , gyro_x_scaled,") |","{:.0f}".format(gyro_y),"(",gyro_y_scaled,") |","{:.0f}".format(gyro_z),"(",gyro_z_scaled,") | XYZ acceleration:","{:.0f}".format(accel_x)," (" , accel_x_scaled,") |","{:.0f}".format(accel_y),"(",accel_y_scaled,") |","{:.0f}".format(accel_z),"(",accel_z_scaled,") | XY Rotations: " , get_x_rotation(accel_x_scaled, accel_y_scaled, accel_z_scaled), " | " , get_y_rotation(accel_x_scaled, accel_y_scaled, accel_z_scaled), " | temp ", temp)
except Exception as e:
collectd.error('mpu6050 plugin: exception: %s' % e)
pass
collectd.register_config(config_func)
collectd.register_read(read_func,1) # read every 1 seconds
```
## Configure collectd to add the script
```
vim /etc/collectd/collectd.conf
```
Add the following lines to the end of the config (or at the according place where Python plugins are put)
```xml
LoadPlugin python
ModulePath "/opt/collectd_plugins"
Import "mpu6050"
```
```bash
service collectd restart && journalctl -f -u collectd.service
```
## Check out if values from collectd correctly flow into InfluxDB
```sql
# /opt/influxdb/influx
> USE collectd
> SHOW SERIES
> SHOW MEASUREMENTS
```
If you want to send a remote curl command, do the following
```
curl -cacert /etc/ssl/certs/site.de.ca.crt --cert /etc/ssl/certs/site.de.crt --key /etc/ssl/private/site.de.key https://site.de:8086/query --data-urlencode "db=collectd" --data-urlencode "q=SHOW SERIES" --user admin:password | jq . | grep mpu6050
```
some example queries
```sql
SELECT last(value) FROM "mpu6050_value" WHERE "type_instance" = 'gyro_x' AND "host" =~ /^$host$/ AND $timeFilter GROUP BY time($interval)
SELECT last(value) FROM "mpu6050_value" WHERE "type_instance" = 'gyro_y' AND "host" =~ /^$host$/ AND $timeFilter GROUP BY time($interval)
SELECT last(value) FROM "mpu6050_value" WHERE "type_instance" = 'gyro_z' AND "host" =~ /^$host$/ AND $timeFilter GROUP BY time($interval)
SELECT last(value) FROM "mpu6050_value" WHERE "type_instance" = 'accel_x' AND "host" =~ /^$host$/ AND $timeFilter GROUP BY time($interval)
SELECT last(value) FROM "mpu6050_value" WHERE "type_instance" = 'accel_y' AND "host" =~ /^$host$/ AND $timeFilter GROUP BY time($interval)
SELECT last(value) FROM "mpu6050_value" WHERE "type_instance" = 'accel_z' AND "host" =~ /^$host$/ AND $timeFilter GROUP BY time($interval)
SELECT last(value) FROM "mpu6050_value" WHERE "type_instance" = 'temp' AND "host" =~ /^$host$/ AND $timeFilter GROUP BY time($interval)
```
# Monitoring and alerting | Repetier Server integrated monitoring
Repetier Server offers a new quick status monitoring of the system since version 0.94.0
[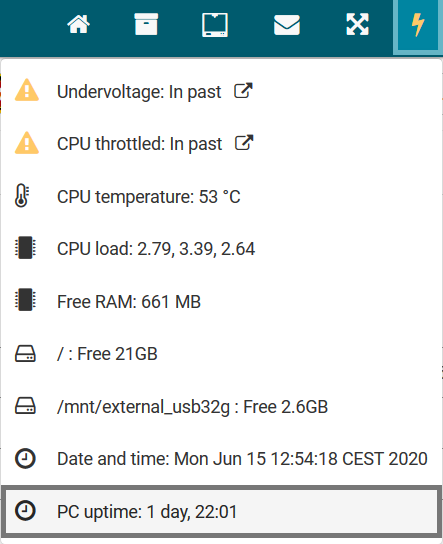](https://wiki.stadtfabrikanten.org/uploads/images/gallery/2026-06/LOnMIPKrtW3BEGk3-grafik.png)
# Monitoring and alerting | collectd
```bash
apt install collectd
```
```bash
vim /etc/collectd/collectd.conf
```
```xml
FQDNLookup true
BaseDir "/var/lib/collectd"
PluginDir "/usr/lib/collectd"
TypesDB "/usr/share/collectd/types.db"
LoadPlugin syslog
MaxPacketSize 1452
LogLevel info
LoadPlugin battery
LoadPlugin cpu
LoadPlugin df
LoadPlugin disk
LoadPlugin entropy
LoadPlugin interface
LoadPlugin irq
LoadPlugin load
LoadPlugin memory
LoadPlugin network
LoadPlugin ping
LoadPlugin processes
LoadPlugin rrdtool
LoadPlugin swap
LoadPlugin users
LoadPlugin uptime
FSType rootfs
FSType sysfs
FSType proc
FSType devtmpfs
FSType devpts
FSType tmpfs
FSType fusectl
FSType cgroup
IgnoreSelected true
Interface "eth0"
IgnoreSelected false
ReportRelative true
Server "localhost" "25826"
DataDir "/var/lib/collectd/rrd"
Filter "*.conf"
LoadPlugin python
ModulePath "/opt/collectd_plugins"
Import "mpu6050"
Import "cpu_temp"
Import "relay_states"
Import "pwr_states"
Host "yourduet"
Host "" #the Freifunk router
Interval 1
```
## Ping Plugin
We use this plugin to test if Duet and the gateway router are online. If one of the ping hosts is unavailable it will create a massive output in InfluxDB error log because collectd messes around with NaN values which InfluxDB cannot handle.
```ini
collectd name=ping_value error="NaN is an unsupported value for field value"
```
You can safely ignore this. See also [https://github.com/influxdata/influxdb/issues/4874](https://github.com/influxdata/influxdb/issues/4874)
# Monitoring and alerting | Grafana
## Setup
```bash
apt-get install -y adduser libfontconfig1
wget https://dl.grafana.com/oss/release/grafana_6.7.3_armhf.deb
dpkg -i grafana_6.7.3_armhf.deb
rm grafana_6.7.3_armhf.deb
```
## Enable as service
```bash
systemctl enable grafana-server.service
service grafana-server start
```
## Configuration
```bash
vim /etc/grafana/grafana.ini
```
```ini
[server]
root_url = someDomain
[security]
allow_embedding = true
[smtp]
enabled = true
host = smtp.host.de:25
user = user@host.de
password = password
from_address = printer@host.de
from_name = Grafana
[panels]
disable_sanitize_html = true
```
## Upgrading
visit [https://grafana.com/grafana/download?platform=arm](https://grafana.com/grafana/download?platform=arm)
```bash
#make backup of Grafana SQLite Database
sudo cp /var/lib/grafana/grafana.db ~/grafana.db.bak
#visit https://grafana.com/grafana/download/5.2.0-beta1?platform=arm
LATEST_RELEASE=$(curl --silent "https://api.github.com/repos/grafana/grafana/releases/latest" | jq -r .tag_name | sed -e 's/v//')
LATEST_RELEASE=${LATEST_RELEASE/\-/\~} #replace - with ~ to allow installation of beta packages
echo $LATEST_RELEASE
wget https://dl.grafana.com/oss/release/grafana_"$LATEST_RELEASE"_armhf.deb
sudo dpkg -i grafana_"$LATEST_RELEASE"_armhf.deb
rm grafana_"$LATEST_RELEASE"_armhf.deb
sudo service grafana-server restart
```
## Apache virtual host
See [mkcert & Go](https://old.stadtfabrikanten.org/pages/createpage.action?spaceKey=TH&title=mkcert+%26+Go&linkCreation=true&fromPageId=65406155) for SSL cert generation
```bash
vim /etc/apache2/sites-enabled/grafana.conf
```
```xml
ServerName localhost
ServerAdmin some_mail@domain.de
SSLEngine on
SSLCertificateFile /etc/ssl/certs/trikarus.pem
SSLCertificateKeyFile /etc/ssl/private/trikarus-key.pem
ProxyPass / http://localhost:3000/
ProxyPassReverse / http://localhost:3000/
ProxyPreserverHost On
ErrorLog ${APACHE_LOG_DIR}/error-grafana.log
CustomLog ${APACHE_LOG_DIR}/access-grafana.log combined
RewriteEngine On
RewriteCond %{HTTP:Upgrade} =websocket [NC]
RewriteRule /(.*) ws://localhost:3000/$1 [P,L]
```
```bash
vim /etc/apache2/ports.conf
```
```
Listen 3001
```
## Grafana Image renderer plugin
This is not included in Raspbian arm version of Grafana because usually arm devices have not the minimum requirements of [16 GB of RAM as official documentation says](https://grafana.com/docs/grafana/latest/administration/image_rendering/). So without image rendering plugin we cannot send alert images by email sadly. It could be done by remote rendering using another machine to run the renderer as service. At the moment this is not used but possible → [https://github.com/grafana/grafana-image-renderer/blob/master/docs/remote\_rendering\_using\_docker.md](https://github.com/grafana/grafana-image-renderer/blob/master/docs/remote_rendering_using_docker.md)
To compile as unsigned plugin is possible upon this but useless. This step documentation is based on [https://community.openhab.org/t/tutorial-grafana-rendering-on-raspberry-pi/71777](https://community.openhab.org/t/tutorial-grafana-rendering-on-raspberry-pi/71777)
[](https://wiki.stadtfabrikanten.org/uploads/images/gallery/2026-06/XU3mLZ9eEFKky3B4-grafik.png)
```bash
grafana-cli plugins install grafana-image-renderer #this command fails
#clone git repository of the plugin
cd /var/lib/grafana/plugins
git clone https://github.com/grafana/grafana-image-renderer
cd grafana-image-renderer
#install yarn
curl -sS https://dl.yarnpkg.com/debian/pubkey.gpg | sudo apt-key add -
echo "deb https://dl.yarnpkg.com/debian/ stable main" | sudo tee /etc/apt/sources.list.d/yarn.list
apt update
apt install yarn
#install nodejs
wget https://nodejs.org/dist/latest-v12.x/node-v12.18.0-linux-armv7l.tar.gz
tar -xvf node-v12.18.0-linux-armv7l.tar.gz
sudo mv node-v12.18.0-linux-armv7l /opt/
sudo ln -s /opt/node-v12.18.0-linux-armv7l /opt/node
sudo chown -R root:root /opt/node*
sudo ln -s /opt/node/bin/node /usr/bin/node
sudo ln -s /opt/node/bin/npm /usr/bin/npm
#compile the plugin
yarn global add typescript
yarn install
yarn run build
#rename to match the archictecture
cp plugin_start_linux_amd64 plugin_start_linux_arm
```
```
vim /etc/grafana/grafana.ini
```
```bash
#restart Grafana and check if the plugin is available in the plugin list
systemctl restart grafana-server.service
```
Error:
```
t=2020-06-06T01:44:31+0200 lvl=eror msg="Render request failed" logger=plugins.backend pluginId=grafana-image-renderer error="Error: Failed to launch chrome!\n/var/lib/grafana/plugins/grafana-image-renderer/node_modules/puppeteer/.local-chromium/linux-706915/chrome-linux/chrome: 1: /var/lib/grafana/plugins/grafana-image-renderer/node_modules/puppeteer/.local-chromium/linux-706915/chrome-linux/chrome: Syntax error: \")\" unexpected\n\n\nTROUBLESHOOTING: https://github.com/GoogleChrome/puppeteer/blob/master/docs/troubleshooting.md\n" url="http://localhost:3000/d-solo/xW5kn7zRz/collectd-influxdb-metrics?orgId=1&panelId=48&render=1"
```
# Monitoring and alerting | Monitoring iostat
A simple script is checking if the Smart Steppers are connected by USB.
```bash
vim /opt/iostat.sh
```
```bash
#!/bin/bash
while true; do
VAL_USER=$(iostat -c|awk '/^ /{print $1}')
VAL_NICE=$(iostat -c|awk '/^ /{print $2}')
VAL_SYSTEM=$(iostat -c|awk '/^ /{print $3}')
VAL_IOWAIT=$(iostat -c|awk '/^ /{print $4}')
VAL_STEAL=$(iostat -c|awk '/^ /{print $5}')
VAL_IDLE=$(iostat -c|awk '/^ /{print $6}')
curl -k -XPOST "http://localhost:8086/write?db=trikarus" --data-binary "iostat,host=hangdevice.fablabchemnitz.de val_user=${VAL_USER},val_nice=${VAL_NICE},val_system=${VAL_SYSTEM},val_iowait=${VAL_IOWAIT},val_steal=${VAL_STEAL},val_idle=${VAL_IDLE}" --user user:password
sleep 10
done
```
```bash
chmod +x /opt/iostat.sh
```
```bash
vim /opt/iostat.service
```
```ini
[Unit]
After=network.target
Description=iostat Monitoring Service
[Service]
Type=simple
ExecStart=/opt/iostat.sh
KillMode=process
Restart=on-failure
RestartSec=10
RemainAfterExit=no
User=root
Group=root
[Install]
WantedBy= multi-user.target
```
```bash
systemctl enable /opt/iostat.service
service start iostat.service && journalctl -f -u iostat.service
```
# Monitoring and alerting | Monitoring systemctl units
```bash
vim /opt/monitorSystemctl.sh
```
```bash
#!/bin/bash
MAIL="/opt/monitorSystemctl.mail"
FAILED=$(systemctl list-units --failed)
if [[ $FAILED == *"failed"* ]]; then
systemctl list-units --failed > $MAIL
cat $MAIL | mail -s "systemctl service(s) failed @ hangprinter" project_hangprinter@fablabchemnitz.de
else
echo "systemctl units are fine ..."
fi
```
```bash
vim /etc/cron.d/monitor-systemctl
```
```bash
SHELL=/bin/sh
PATH=/usr/local/sbin:/usr/local/bin:/sbin:/bin:/usr/sbin:/usr/bin
* * * * * root /opt/monitorSystemctl.sh > /dev/null
```
# Monitoring and alerting | Monitoring USB device availability
A simple script is checking if the Smart Steppers are connected by USB.
```bash
vim /opt/monitorUSBdevices.sh
```
```bash
#!/bin/bash
while true; do
A_MOT=$(ls -alF /dev |grep "ttyUSB-SMART-A-AXIS")
B_MOT=$(ls -alF /dev |grep "ttyUSB-SMART-B-AXIS")
C_MOT=$(ls -alF /dev |grep "ttyUSB-SMART-C-AXIS")
D_MOT=$(ls -alF /dev |grep "ttyUSB-SMART-D-AXIS")
DUET=$(ls -alF /dev |grep "ttyUSB-DUET2ETHERNET")
WEBCAM=$(ls -alF /dev |grep "ttyUSB-LOGITECH-C920")
HUB=$(ls -alF /dev |grep "ttyUSB-MINI-4PORT-HUB")
if [[ ! -z $A_MOT ]]; then
A_AVAIL=1
else
A_AVAIL=0
fi
if [[ ! -z $B_MOT ]]; then
B_AVAIL=1
else
B_AVAIL=0
fi
if [[ ! -z $C_MOT ]]; then
C_AVAIL=1
else
C_AVAIL=0
fi
if [[ ! -z $D_MOT ]]; then
D_AVAIL=1
else
D_AVAIL=0
fi
if [[ ! -z $DUET ]]; then
DUET_AVAIL=1
else
DUET_AVAIL=0
fi
if [[ ! -z $WEBCAM ]]; then
WEBCAM_AVAIL=1
else
WEBCAM_AVAIL=0
fi
if [[ ! -z $HUB ]]; then
HUB_AVAIL=1
else
HUB_AVAIL=0
fi
curl -k -XPOST "http://localhost:8086/write?db=trikarus" --data-binary "usb_devices,host=hangdevice.fablabchemnitz.de a_avail=${A_AVAIL},b_avail=${B_AVAIL},c_avail=${C_AVAIL},d_avail=${D_AVAIL},duet_avail=${DUET_AVAIL},webcam_avail=${WEBCAM_AVAIL},hub_avail=${HUB_AVAIL}" --user user:password
sleep 1
done
```
```bash
chmod +x /opt/monitorUSBdevices.sh
```
```bash
vim /opt/monitorUSBdevices.service
```
```ini
[Unit]
After=network.target
Description=USB device availability Monitoring Service
[Service]
Type=simple
ExecStart=/opt/monitorUSBdevices.sh
KillMode=process
Restart=on-failure
RestartSec=10
RemainAfterExit=no
User=root
Group=root
[Install]
WantedBy= multi-user.target
```
```bash
systemctl enable /opt/monitorUSBdevices.service
service restart monitorUSBdevices && journalctl -f -u monitorUSBdevices.service
```
# Monitoring and alerting | Raspberry Pi CPU temperature
This is a bare copy of [https://github.com/dbrgn/collectd-python-plugins/blob/master/cpu\_temp.py](https://github.com/dbrgn/collectd-python-plugins/blob/master/cpu_temp.py)
## /opt/collectd\_plugins/cpu\_temp.py
```python
import collectd
PATH = '/sys/class/thermal/thermal_zone0/temp'
def config_func(config):
path_set = False
for node in config.children:
key = node.key.lower()
val = node.values[0]
if key == 'path':
global PATH
PATH = val
path_set = True
else:
collectd.info('cpu_temp plugin: Unknown config key "%s"' % key)
if path_set:
collectd.info('cpu_temp plugin: Using overridden path %s' % PATH)
else:
collectd.info('cpu_temp plugin: Using default path %s' % PATH)
def read_func():
# Read raw value
with open(PATH, 'rb') as f:
temp = f.read().strip()
# Convert to degrees celsius
deg = float(int(temp)) / 1000
# Dispatch value to collectd
val = collectd.Values(type='temperature')
val.plugin = 'cpu_temp'
val.dispatch(values=[deg])
collectd.register_config(config_func)
collectd.register_read(read_func)
```
## Configure collectd
```xml
ModulePath "/opt/collectd_plugins"
Import "cpu_temp"
```
## Grafana query from InfluxDB
```sql
SELECT last(value) FROM "cpu_temp_value" WHERE "type" = 'temperature' AND "host" =~ /^$host$/ AND $timeFilter GROUP BY time($interval)
```
The CPU temperature is also monitored by [Repetier Server integrated monitoring](https://old.stadtfabrikanten.org/display/TH/Repetier+Server+integrated+monitoring)
# Monitoring and alerting | Repetier Server Monitor Desktop App
This application is perfect for multiple servers or just for displaying some stats remotely or doing quick control. For Trikarus it is used just sometimes, for example for some testing purposess. It does not replace the browser view completely because it does not deal with the printer's control tab - you will need to open this as a popup. Repetier Server Monitor can connect to local addresses like [http://raspberrypi:3344](http://raspberrypi:3344) but it's more intended to deal with remote-only ressources.
[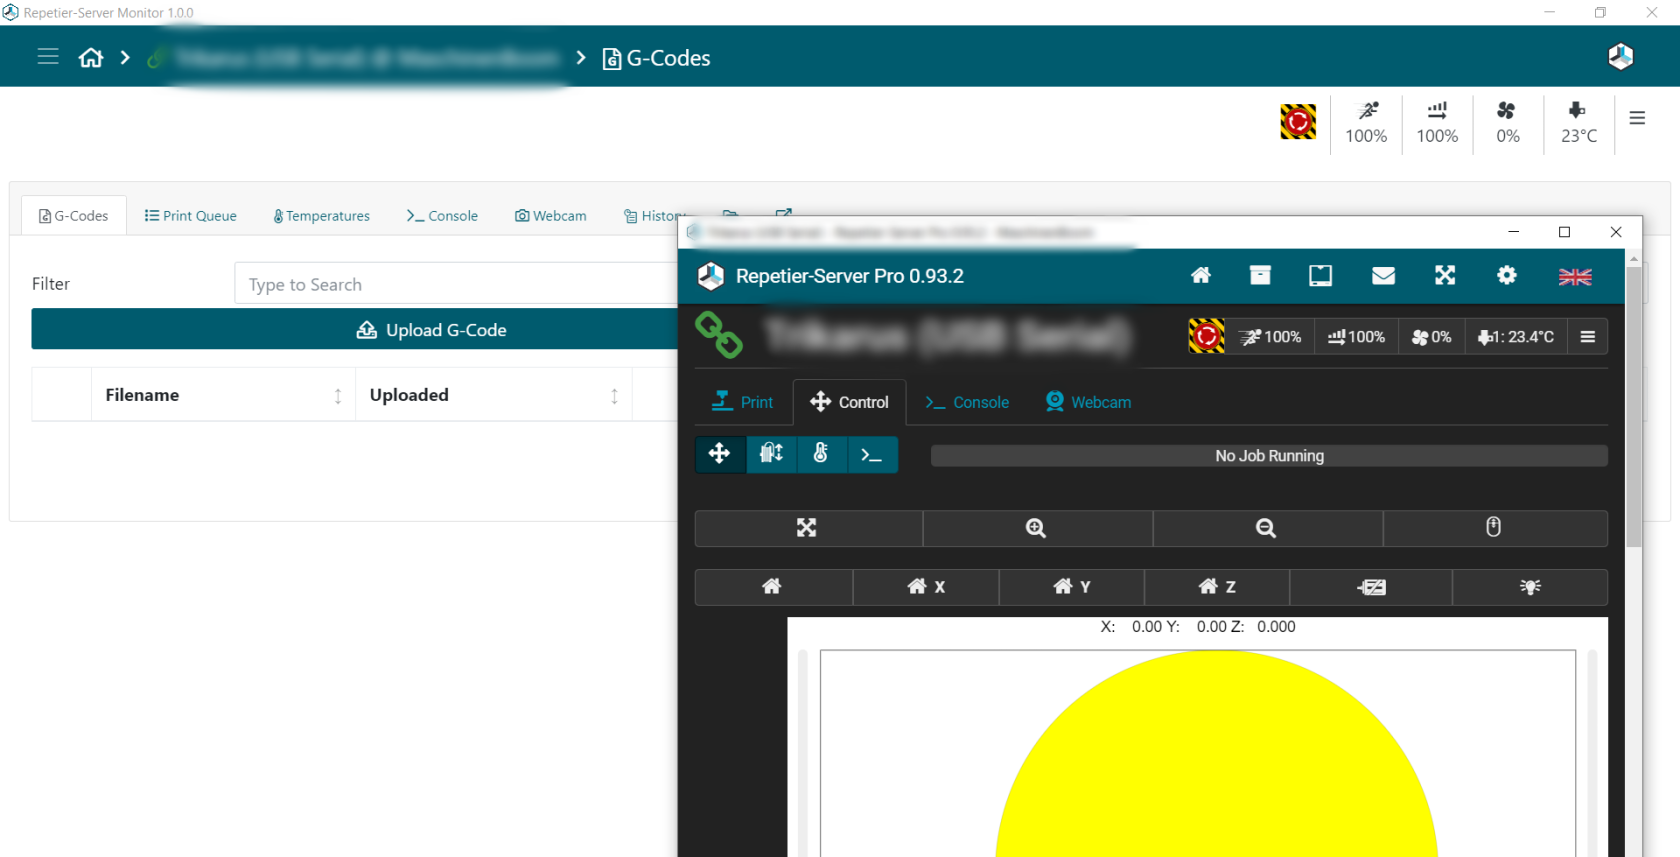](https://wiki.stadtfabrikanten.org/uploads/images/gallery/2026-06/ihrS2bDgb3Czutur-grafik.png)
## Caveats of Repetier Server Monitor 1.1.0
- At the moment one Repetier Server instance cannot be configured multiple times by different addresses (like external address and local address at the same time). This makes it sometimes choosing not the quickest route
- local address does not work if encrypted by insecure SSL (like https://raspberrrypi:3345)
## Configuration
`%AppData%\Repetier-Server-Monitor\serverlist.json`
# Monitoring and alerting | Smart Stepper value monitoring
For debugging purposes we monitor Smart Stepper values by the provided Python control service. See [Smart Stepper - calibration and control modes (sPID mode, pPID mode and torque mode)](https://old.stadtfabrikanten.org/pages/viewpage.action?pageId=70811759) for code.
[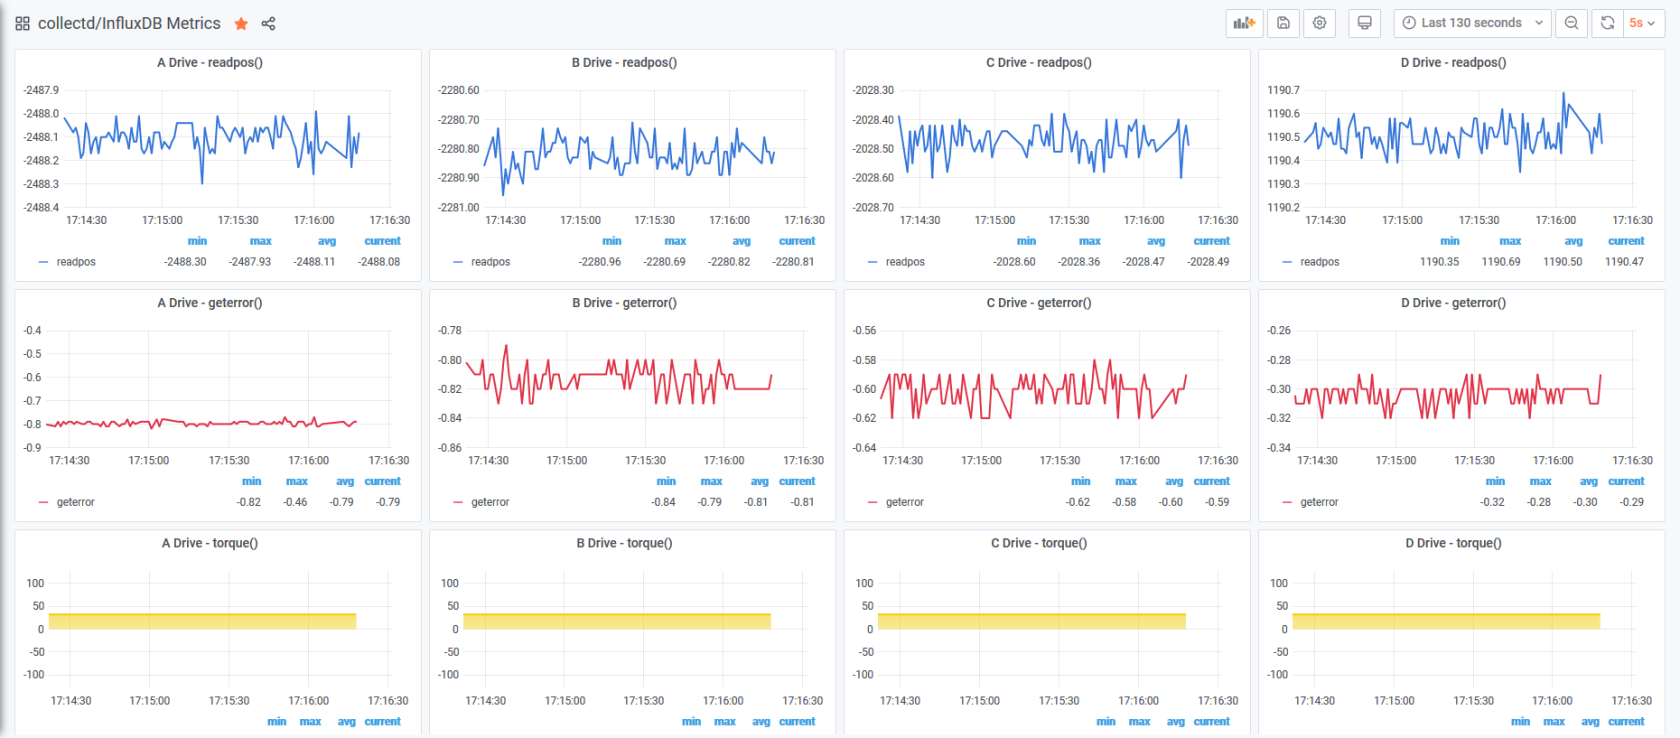](https://wiki.stadtfabrikanten.org/uploads/images/gallery/2026-06/4llx21Lf1x5KN61A-grafik.png)
# Monitoring and alertings | Raspberry Pi Power States
This is based on [https://harlemsquirrel.github.io/shell/2019/01/05/monitoring-raspberry-pi-power-and-thermal-issues.html](https://harlemsquirrel.github.io/shell/2019/01/05/monitoring-raspberry-pi-power-and-thermal-issues.html)
## Make vcgencmd available
```bash
apt install libraspberrypi-bin
```
## /opt/collectd\_plugins/pwr\_states.py
```python
'''
Returns the throttled state of the system. This is a bit pattern - a bit being set indicates the following meanings:
0x50000 = 0101 0000 0000 0000 0000
Adding the bit numbers along the top we get:
19 18 17 16 15 14 13 12 11 10 9 8 7 6 5 4 3 2 1 0
0 1 0 1 0 0 0 0 0 0 0 0 0 0 0 0 0 0 0 0
From this we can see that bits 18 and 16 are set, indicating that the Pi has previously been throttled due to under-voltage, but is not currently throttled for any reason.
'''
import collectd
import subprocess
def read_func():
undervoltage = 0
armfreq_capped = 0
throttled = 0
soft_temp_limit = 0
GET_THROTTLED_CMD = 'vcgencmd get_throttled'
MESSAGES = {
0: 'Under-voltage!',
1: 'ARM frequency capped!',
2: 'Currently throttled!',
3: 'Soft temperature limit active',
16: 'Under-voltage has occurred since last reboot.',
17: 'Throttling has occurred since last reboot.',
18: 'ARM frequency capped has occurred since last reboot.',
19: 'Soft temperature limit has occurred'
}
throttled_output = subprocess.check_output(GET_THROTTLED_CMD, shell=True)
throttled_binary = bin(int(throttled_output.decode('utf8').split('=')[1], 0))
# print general information
#for position, message in MESSAGES.items():
# Check for the binary digits to be "on" for each warning message
#if len(throttled_binary) > position and throttled_binary[0 - position - 1] == '1':
#print(message)
# relevant for monitoring are only the current possible states, which are 0,1,2,3 (16,17,18,19 are past values)
for position, message in MESSAGES.items():
if len(throttled_binary) > position and throttled_binary[0 - position - 1] == '1':
if position == 0:
undervoltage = 1
if position == 1:
armfreq_capped = 1
if position == 2:
throttled = 1
if position == 3:
soft_temp_limit = 1
collectd.Values(plugin='pwr_states', type='gauge', type_instance='undervoltage', values=[undervoltage]).dispatch()
collectd.Values(plugin='pwr_states', type='gauge', type_instance='armfreq_capped', values=[armfreq_capped]).dispatch()
collectd.Values(plugin='pwr_states', type='gauge', type_instance='throttled', values=[throttled]).dispatch()
collectd.Values(plugin='pwr_states', type='gauge', type_instance='soft_temp_limit', values=[soft_temp_limit]).dispatch()
# debug print
#collectd.info("undervoltage = %s" % undervoltage)
#collectd.info("armfreq_capped = %s" % armfreq_capped)
#collectd.info("throttled = %s" % throttled)
#collectd.info("soft_temp_limit = %s" % soft_temp_limit)
#print("undervoltage = ", undervoltage)
#print("armfreq_capped = ", armfreq_capped)
#print("throttled = ", throttled)
#print("soft_temp_limit = ", soft_temp_limit)
collectd.register_read(read_func,1) # read every 1 seconds
#read_func()
```
## Configure collectd
```xml
ModulePath "/opt/collectd_plugins"
Import "pwr_states"
```
## Restart collectd
```bash
service collectd restart
journald -f -u collectd.service
```
The following warning can be safely ignored
```bash
python plugin: Found a configuration for the "pwr_states" plugin, but the plugin isn't loaded or didn't register a configuration callback.
```
## Grafana query from InfluxDB
```sql
select last(*) from "pwr_states_value" WHERE "type_instance" = 'throttled' AND "host" =~ /^$host$/ AND $timeFilter GROUP BY time($interval)
select last(*) from "pwr_states_value" WHERE "type_instance" = 'armfreq_capped' AND "host" =~ /^$host$/ AND $timeFilter GROUP BY time($interval)
select last(*) from "pwr_states_value" WHERE "type_instance" = 'undervoltage' AND "host" =~ /^$host$/ AND $timeFilter GROUP BY time($interval)
select last(*) from "pwr_states_value" WHERE "type_instance" = 'soft_temp_limit' AND "host" =~ /^$host$/ AND $timeFilter GROUP BY time($interval)
```
The power states are also monitored by [Repetier Server integrated monitoring](https://old.stadtfabrikanten.org/display/TH/Repetier+Server+integrated+monitoring)
# Python 3.7
Trikarus uses Python 3.7 scripts. Before using Raspbian buster release the stretch version was used. It did not include Python 3.7, but Python 3.5
## Fixes
might be obsolete
```bash
ln -s /usr/share/pyshared/lsb_release.py /usr/local/lib/python3.7/site-packages/lsb_release.py
```
## Reconfigure environment
```
cd /usr/bin
ln -sf /usr/local/bin/pip3.7 pip3
```
## Install required libraries for Trikarus
```bash
pip3.7 install collectd
pip3.7 install gevent_ticker
pip3.7 install influxdb
pip3.7 install numpy
pip3.7 install smbus
pip3.7 install smbus2
pip3.7 install systemd
pip3.7 install pigpio
pip3.7 install pigpio_encoder
pip3.7 install pyserial
pip3.7 install RPi.GPIO
pip3.7 install websockets
```
# Raspberry Pi 3 B - GPIO config
[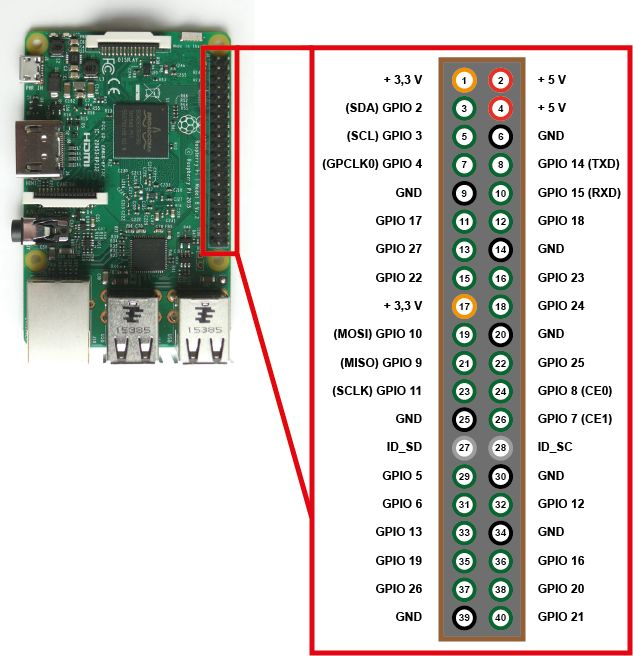](https://wiki.stadtfabrikanten.org/uploads/images/gallery/2026-06/7Hkazdz0ozMRQSte-grafik.png)
## GPIO (General Purpose Input/Output) pins on the Raspberry Pi
[https://www.raspberrypi.org/documentation/hardware/raspberrypi/gpio/README.md](https://www.raspberrypi.org/documentation/hardware/raspberrypi/gpio/README.md)
GPIO pins - also called General Purpose Input Output - are the central interface between the Raspberry Pi to external devices and digital circuits. In addition to simple control, certain pins also perform certain functions such as communication via I2C, UART or SPI.
## Overview
This page expands on the technical features of the GPIO pins available on BCM2835 in general. For usage examples, see [GPIO usage ](https://www.raspberrypi.org/documentation/usage/gpio/README.md). When reading this page, reference should be made to the BCM2835 ARM peripherals [data sheet](https://www.raspberrypi.org/documentation/hardware/raspberrypi/bcm2835/README.md), section 6. GPIO pins can be configured as either general-purpose input, general-purpose output, or as one of up to six special alternate settings, the functions of which are pin-dependent. There are three GPIO banks on BCM2835. Each of the three banks has its own VDD input pin. On Raspberry Pi, all GPIO banks are supplied from 3.3V. **Connection of a GPIO to a voltage higher than 3.3V will likely destroy the GPIO block within the SoC.** A selection of pins from Bank 0 is available on the P1 header on Raspberry Pi.
## GPIO pads
The GPIO connections on the BCM2835 package are sometimes referred to in the peripherals data sheet as "pads" — a semiconductor design term meaning 'chip connection to outside world'. The pads are configurable CMOS push-pull output drivers/input buffers. Register-based control settings are available for:
- Internal pull-up / pull-down enable/disable
- Output [drive strength](https://www.raspberrypi.org/documentation/hardware/raspberrypi/gpio/gpio_pads_control.md)
- Input Schmitt-trigger filtering
## Power-on states
All GPIO pins revert to general-purpose inputs on power-on reset. The default pull states are also applied, which are detailed in the alternate function table in the ARM peripherals datasheet. Most GPIOs have a default pull applied.
## Interrupts
Each GPIO pin, when configured as a general-purpose input, can be configured as an interrupt source to the ARM. Several interrupt generation sources are configurable:
- Level-sensitive (high/low)
- Rising/falling edge
- Asynchronous rising/falling edge
Level interrupts maintain the interrupt status until the level has been cleared by system software (e.g. by servicing the attached peripheral generating the interrupt). The normal rising/falling edge detection has a small amount of synchronisation built into the detection. At the system clock frequency, the pin is sampled with the criteria for generation of an interrupt being a stable transition within a three-cycle window, i.e. a record of '1 0 0' or '0 1 1'. Asynchronous detection bypasses this synchronisation to enable the detection of very narrow events.
## Alternative functions
Almost all of the GPIO pins have alternative functions. Peripheral blocks internal to BCM2835 can be selected to appear on one or more of a set of GPIO pins, for example the I2C busses can be configured to at least 3 separate locations. Pad control, such as drive strength or Schmitt filtering, still applies when the pin is configured as an alternate function.
## Voltage specifications
The following table gives the various voltage specifications for the GPIO pins, it was extracted from the Compute Module datasheet [here](https://www.raspberrypi.org/documentation/hardware/computemodule/datasheet.md).
**Symbol**
**Parameter**
**Conditions**
**Min**
**Typical**
**Max**
**Unit**
VIL
Input Low Voltage
VDD IO = 1.8V
-
-
0.6
V
VDD IO = 2.7V
-
-
0.8
V
VDD IO = 3.3V
-
-
0.9
V
VIH
Input high voltagea
VDD IO = 1.8V
1.0
-
-
V
VDD IO = 2.7V
1.3
-
-
V
VDD IO = 3.3V
1.6
-
-
V
IIL
Input leakage current
TA = +85◦C
-
-
5
µA
CIN
Input capacitance
-
-
5
-
pF
VOL
Output low voltageb
VDD IO = 1.8V, IOL = -2mA
-
-
0.2
V
VDD IO = 2.7V, IOL = -2mA
-
-
0.15
V
VDD IO = 3.3V, IOL = -2mA
-
-
0.14
V
VOH
Output high voltageb
VDD IO = 1.8V, IOH = 2mA
1.6
-
-
V
VDD IO = 2.7V, IOH = 2mA
2.5
-
-
V
VDD IO = 3.3V, IOH = 2mA
3.0
-
-
V
IOL
Output low currentc
VDD IO = 1.8V, VO = 0.4V
12
-
-
mA
VDD IO = 2.7V, VO = 0.4V
17
-
-
mA
VDD IO = 3.3V, VO = 0.4V
18
-
-
mA
IOH
Output high currentc
VDD IO = 1.8V, VO = 1.4V
10
-
-
mA
VDD IO = 2.7V, VO = 2.3V
16
-
-
mA
VDD IO = 3.3V, VO = 2.3V
17
-
-
mA
RPU
Pullup resistor
-
50
-
65
kΩ
RPD
Pulldown resistor
-
50
-
65
kΩ
a Hysteresis enabled
b Default drive strength (8mA)
c Maximum drive strength (16mA)
# wiringPi and GPIO connection overview
max. allowed power consumption for GPIO in **total is 50 mA and a maximum of 16 mA per pin**
**Device**
**Consumption**
**Notes**
**wiringPi / GPIO commands for connected devices**
[Gyroscope and acceleration sensor GY-521 (MPU6050)](https://old.stadtfabrikanten.org/pages/createpage.action?spaceKey=TH&title=Gyroscope+and+acceleration+sensor+GY-521+%28MPU6050%29&linkCreation=true&fromPageId=59506924) @ 3.3V
- 3.9 mA Gyroscope + Accelerometer + DMP
- 3.8 mA Gyroscope + Accelerometer
- 3.7 mA Gyroscope only
- 0.5 mA Accelerometer only
- Values from official data sheet
- Hardware address 0x69 changed by soldered AD0 pin
```bash
i2detect -y 1
#gpio i2detect #or using wiringPi
```
[Inertial Measurement Unit MPU 9250 / GY-250 InvenSense](https://old.stadtfabrikanten.org/pages/createpage.action?spaceKey=TH&title=Inertial+Measurement+Unit+MPU+9250+%2F+GY-250+InvenSense&linkCreation=true&fromPageId=59506924) @ 3.3V
?
- Values from official data sheet
- Hardware address default 0x68
```bash
i2detect -y 1
#gpio i2detect #or using wiringPi
```
- 70 mA - Power supply per 5V from Freifunk Router, because permissible values of Raspberry Pi exceeded
```bash
pip3.7 install RPi.GPIO
```
**Way 1 (preferred)**
`vim opt/gpio/psu-off.py`
```python
#This program is used to dirtily turn off the relay module because basic statements do NOT work (seems to fail due to some logic level issue with 3.3V from Raspberry Pi and 5V from the module). The modules themselves vary slightly (JQC-3FF-S-Z vs JQC3F-05VDC-C).
import RPi.GPIO as GPIO
GPIO.setwarnings(False)
GPIO.setmode(GPIO.BCM)
#TURN ON
GPIO.setup(27, GPIO.OUT)
with open('/var/lib/Repetier-Server/GPIO_27.pinstate', 'w') as the_file:
the_file.write('1')
```
`vim opt/gpio/psu-on.py`
```python
#This program is used to dirtily turn off the relay module because basic statements do NOT work (seems to fail due to some logic level issue with 3.3V from Raspberry Pi and 5V from the module). The modules themselves vary slightly (JQC-3FF-S-Z vs JQC3F-05VDC-C).
import RPi.GPIO as GPIO
GPIO.setwarnings(False)
GPIO.setmode(GPIO.BCM)
#TURN OFF - both commands are required!
GPIO.setup(27, GPIO.OUT)
GPIO.cleanup()
with open('/var/lib/Repetier-Server/GPIO_27.pinstate', 'w') as the_file:
the_file.write('0')
```
**Use the scripts**
```bash
python3.7 /opt/gpio/psu-on.py
python3.7 /opt/gpio/psu-off.py
```
**Way 2**
```bash
gpio export 27 out #switch off PSU
gpio export 27 in #switch on PSU
```
**Way 3**
```bash
gpio -g mode 27 out #switch off PSU
gpio -g mode 27 in #switch on PSU
```
**Failed**
```bash
gpio -g mode 27 out
gpio -g mode 27 in
gpio -g write 27 1
gpio -g write 27 0
```
**Status**
```bash
gpio -g read 27
watch -n0,001 gpio -g read 27
```
[Filament sensing with KY-040 Rotary Encoder](https://old.stadtfabrikanten.org/pages/createpage.action?spaceKey=TH&title=Filament+sensing+with+KY-040+Rotary+Encoder&linkCreation=true&fromPageId=59506923)
?
Encoder for filament monitor on extruder and for switchting into manual torque mode
Have a look at
- [Encoder KY-040 by Keyes - filament monitor](https://old.stadtfabrikanten.org/pages/createpage.action?spaceKey=TH&title=Encoder+KY-040+by+Keyes+-+filament+monitor&linkCreation=true&fromPageId=59506924)
- [Filament sensing with KY-040 Rotary Encoder](https://old.stadtfabrikanten.org/pages/createpage.action?spaceKey=TH&title=Filament+sensing+with+KY-040+Rotary+Encoder&linkCreation=true&fromPageId=59506923)
- 70 mA - Power supply per 5V from Freifunk Router, because permissible values of Raspberry Pi exceeded
Relay to switch on/off center LED spot
There's a sepcial abusing python script for this because the relay has a logic level issue with Raspberry Pi (voltage differences) → See [https://raspberrypi.stackexchange.com](https://raspberrypi.stackexchange.com/questions/83494/rpi-gpio-pins-high-level-signal-possibly-not-high-enough-to-switch-off-the-5v-r)
```
pip3.7 install RPi.GPIO
```
`vim /opt/gpio/ledspot-on.py`
```bash
#This program is used to dirtily turn off the relay module because basic statements do NOT work (seems to fail due to some logic level issue with 3.3V from Raspberry Pi and 5V from the module). The modules themselves vary slightly (JQC-3FF-S-Z vs JQC3F-05VDC-C).
import RPi.GPIO as GPIO
GPIO.setwarnings(False)
GPIO.setmode(GPIO.BCM)
#TURN ON
GPIO.setup(22, GPIO.OUT)
with open('/var/lib/Repetier-Server/GPIO_22.pinstate', 'w') as the_file:
the_file.write('1')
```
`vim /opt/gpio/ledspot-off.py`
```bash
#This program is used to dirtily turn off the relay module because basic statements do NOT work (seems to fail due to some logic level issue with 3.3V from Raspberry Pi and 5V from the module). The modules themselves vary slightly (JQC-3FF-S-Z vs JQC3F-05VDC-C).
import RPi.GPIO as GPIO
GPIO.setwarnings(False)
GPIO.setmode(GPIO.BCM)
#TURN OFF - both commands are required!
GPIO.setup(22, GPIO.OUT)
GPIO.cleanup()
with open('/var/lib/Repetier-Server/GPIO_22.pinstate', 'w') as the_file:
the_file.write('0')
```
**Use the scripts**
```bash
python3.7 /opt/gpio/ledspot-on.py
python3.7 /opt/gpio/ledspot-off.py
```
**Failed**
```bash
gpio -g mode 22 out
gpio -g mode 22 in
gpio -g write 22 1
gpio -g write 22 0
```
**Status**
```bash
gpio -g read 22
watch -n0,001 gpio -g read 22
```
## wiringPi GPIO and pintest utility
- [http://wiringpi.com/the-gpio-utility](http://wiringpi.com/the-gpio-utility/)
- [http://wiringpi.com/reference/core-functions](http://wiringpi.com/reference/core-functions/)
pintest: this is to check the pins at onc
## Install wiringPi
```bash
apt install wiringpi
```
## Get pintest
Install this tool manually because the the apt repo for wiringPi does not contain the utility "pintest".
```bash
#install wiringPi manually because the apt repo does not contain the utility "pintest" ...
cd
#git clone git://git.drogon.net/wiringPi #failed due to offline state
git clone https://github.com/WiringPi/WiringPi.git
cd ~/WiringPi
./build
cd ~/WiringPi/gpio
chmod +x pintest
./pintest
```
## Review the result
```bash
PinTest
=======
This is a simple utility to test the GPIO pins on your Raspberry Pi.
NOTE: All GPIO peripherals must be removed to perform this test. This
includes serial, I2C and SPI connections. You may get incorrect results
if something is connected and it interferes with the test.
This test can only test the input side of things. It uses the internal
pull-up and pull-down resistors to simulate inputs. It does not test
the output drivers.
You will need to reboot your Pi after this test if you wish to use the
serial port as it will be left in GPIO mode rather than serial mode.
This test only tests the original pins present on the Rev A and B. It
does not test the extra pins on the Revision A2, B2 nor the A+ or B+
Please make sure everything is removed and press the ENTER key to continue,
or Control-C to abort...
The main 8 GPIO pins 0: 7: OK
The 5 SPI pins 10:14: OK
The serial pins 15:16: OK
The I2C pins 8: 9: OK
```
```bash
reboot
```
## Helpful commands
```bash
gpio readall
gpio exports #list all exported pin (also lists pins which were not exported with the GPIO tool itself)
```
## Bash commands
This was not tested yet!
```bash
#unexport GPIO pins without external tools or libraries
sudo bash -c "for ((i=0; i<32; i++)); do echo \$i; echo in >/sys/class/gpio/gpio\$i/direction; echo \$i >/sys/class
/gpio/unexport; done"
```
# Raspberry Pi 3 B - power optimizations and boot adjustments
## Raspberry Pi overview
[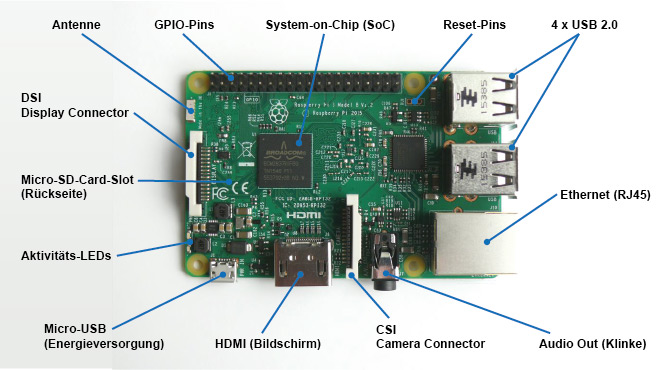](https://wiki.stadtfabrikanten.org/uploads/images/gallery/2026-06/720fYpu5oCapYPYi-grafik.png)
Image source: [https://www.elektronik-kompendium.de/sites/raspberry-pi/1905251.htm](https://www.elektronik-kompendium.de/sites/raspberry-pi/1905251.htm)
## HDMI deactivation
HDMI is disabled by default if no monitor is connected. If a monitor is connected this can be either enabled or disabled manually by the following commands
```bash
/opt/vc/bin/tvservice -o
#or sh vcgencmd display_power 1
#re-enable with
sudo /opt/vc/bin/tvservice -p
```
## Bluetooth and WiFi deactivation (this is not going to be applied to Trikarus!)
```bash
vim /boot/config.txt
```
```ini
#dtoverlay=disable-wifi #enabled again! (backup remote connection)
#dtoverlay=disable-bt #enabled again! (filament weigh sub project requires to have it enabled)
```
## Status LED deactivation (saves ~30 mA)
**Red PWR LED**
- on if power OK
- flashes (or goes out) if the power drops below about 4.63V
**Green ACT LED**
- steady on if no SD card during boot
- irregular flashes for SD card access
**Ethernet Socket Left LED (yellow)**
- on 100-Mbps connection
- off 10-Mbps connection
**Ethernet Socket Right LED (green)**
- on if link established
- flashes for port activity
- off if no link is established
### Version 1 (is not used)
```bash
vim /boot/config.txt
```
```ini
dtparam=act_led_trigger=none
dtparam=act_led_activelow=on
```
### Version 2 (is used)
```bash
vim /opt/disable_leds.sh
```
```bash
#!/bin/bash
echo none > /sys/class/leds/led0/trigger
echo none > /sys/class/leds/led1/trigger
echo 0 > /sys/class/leds/led0/brightness
echo 0 > /sys/class/leds/led1/brightness
```
```bash
chmod +x /opt/disable_leds.sh
```
```bash
vim /etc/cron.d/disable_leds
```
```bash
# this script disables Raspberry Pi LEDs after bootup
SHELL=/bin/sh
PATH=/usr/local/sbin:/usr/local/bin:/sbin:/bin:/usr/sbin:/usr/bin
*/1 * * * * root /opt/disable_leds.sh
```
## CPU throttling (this is not going to be applied to Trikarus!)
- [https://learn.pi-supply.com/make/how-to-save-power-on-your-raspberry-pi/#throttle-cpu](https://learn.pi-supply.com/make/how-to-save-power-on-your-raspberry-pi/#throttle-cpu)
- [https://www.raspberrypi.org/documentation/configuration/config-txt/overclocking.md](https://www.raspberrypi.org/documentation/configuration/config-txt/overclocking.md)
```bash
vim /boot/config.txt
```
```ini
arm_freq_min=250
core_freq_min=100
sdram_freq_min=150
over_voltage_min=0
```
## USB deactivation
See [Smart Stepper - USB, Soft and hard reset](https://old.stadtfabrikanten.org/display/TH/Smart+Stepper+-+USB%2C+Soft+and+hard+reset) for USB scripts
## Audio deactivation
```bash
vim /boot/config.txt
```
```ini
dtparam=audio=off
```
## USB power and Raspberry Pi undervoltage
It seems possible to reduce the total allowed load from 1200 mA to 600 mA → [https://www.raspberrypi.org/documentation/configuration/config-txt/misc.md](https://www.raspberrypi.org/documentation/configuration/config-txt/misc.md)
It was tested but seems to make no difference. So it was not applied to Trikarus configuration
```ini
max_usb_current=1 #1200 mA
max_usb_current=0 #600 mA
```
### Problem description
- dmesg shows detected undervoltage at startup
- Monitoring shows the same undervoltage peak
Webcam might not be available due to error while adressing USB devices
```bash
[ 55.651885] usb 1-1.5: device not accepting address 11, error -110
[ 55.751888] usb 1-1.5: new high-speed USB device number 13 using dwc_otg
[ 66.291906] usb 1-1.5: device not accepting address 13, error -110
[ 66.292050] usb 1-1-port5: unable to enumerate USB device
```
### Solution
- not known yet. USV is built to deliver more than 10 Watt at USB but Raspberry Pi never draws more than 4.35 W (see [General power/wiring concept, consumptions and temperatures](https://old.stadtfabrikanten.org/pages/createpage.action?spaceKey=TH&title=General+power%2Fwiring+concept%2C+consumptions+and+temperatures&linkCreation=true&fromPageId=60915778) for measurements values)
## GPU memory and troubleshooting "failed to open VCHI service (-1)"
This is okay/harmless message. The GPU memory was set to 16 MB in /boot/config.txt so some services are not available with such low memory.
## /boot/config.txt Overview
Some default values were changed to the following:
```ini
dtparam=i2c_arm=on
dtparam=audio=off
gpu_mem=16 #GUI not used so use the memory for better things
boot_delay=3 #did not really help to omit the once per bootup occuring undervoltage but may help to wait for connected USB Stick
```
# Raspberry Pi 3 B - system wide USB handling
## Persisting connected USB devices
The following external hardware is connected to hangdevice
```bash
#sudo mknod /dev/ttyUSB0 c 188 0
#sudo mknod /dev/ttyUSB1 c 188 1
lsusb -t #list the devices as tree
lsusb -v | grep 'idVendor\|idProduct\|iProduct\|iSerial' #get some more info
```
[Logitech, Inc. HD Pro Webcam C920](https://old.stadtfabrikanten.org/pages/createpage.action?spaceKey=TH&title=Webcam+C920+by+Logitech&linkCreation=true&fromPageId=62685215)
[4 Port USB Hub GL850G Genesys Logic + 24V DC/DC Converter Traco Power TMA 2405S](https://old.stadtfabrikanten.org/pages/createpage.action?spaceKey=TH&title=4+Port+USB+Hub+GL850G+Genesys+Logic+%2B+24V+DC%2FDC+Converter+Traco+Power+TMA+2405S&linkCreation=true&fromPageId=62685215)
[Generic MisfitTech Nano Zero #D Axis](https://old.stadtfabrikanten.org/pages/createpage.action?spaceKey=TH&title=Smart+Stepper+rev+1%2F20%2F2019+by+MisfitTech&linkCreation=true&fromPageId=62685215)
Useful tips:
- [https://www.domoticz.com/wiki/PersistentUSBDevices](https://www.domoticz.com/wiki/PersistentUSBDevices)
- [https://www.domoticz.com/wiki/Assign\_fixed\_device\_name\_to\_USB\_port](https://www.domoticz.com/wiki/Assign_fixed_device_name_to_USB_port)
- [https://www.freva.com/2019/06/20/assign-fixed-usb-port-names-to-your-raspberry-pi/](https://www.freva.com/2019/06/20/assign-fixed-usb-port-names-to-your-raspberry-pi/)
") Problem: Vendor ID and Product IDs are the same for each Smart Stepper. So they cannnot be assigned by Serial ID. The solution is to use devpath instead of Product ID and Vendor ID. The following USB port mapping was found for my Raspberr Pi 3B (browsing on the web this seems to be indivually different for each Raspberry Pi). You also can change the IDs by re-flashing the Smart Steppers. See [Smart Stepper - flashing the firmware](https://old.stadtfabrikanten.org/display/TH/Smart+Stepper+-+flashing+the+firmware) for details.
[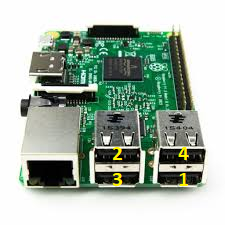](https://wiki.stadtfabrikanten.org/uploads/images/gallery/2026-06/fNrTad2194rkjg5T-grafik.png)
```
sudo vim /etc/udev/rules.d/99-usb-serial.rules
```
```ini
SUBSYSTEM=="tty", ATTRS{idVendor}=="1d50", ATTRS{idProduct}=="60ec", SYMLINK+="ttyUSB-DUET2ETHERNET"
SUBSYSTEM=="video4linux", ATTRS{idVendor}=="046d", ATTRS{idProduct}=="082d", ATTRS{serial}=="EF9B0F4F", SYMLINK+="ttyUSB-LOGITECH-C920"
SUBSYSTEM=="tty", ATTRS{idVendor}=="05e3", ATTRS{idProduct}=="0608", SYMLINK+="ttyUSB-MINI-4PORT-HUB" #this will disappear if all Smart Steppers are disconnected because the hub itself has no tty. It gets one when at least one device is attached to the hub
#ATTRS{devpath}=="3.1" -> 1 is the Port at Raspberry Pi, 1 is the Port of the connected Mini USB Hub
SUBSYSTEM=="tty", ATTRS{idVendor}=="1209", ATTRS{idProduct}=="8087", ATTRS{devpath}=="1.4.1", SYMLINK+="ttyUSB-SMART-A-AXIS"
SUBSYSTEM=="tty", ATTRS{idVendor}=="1209", ATTRS{idProduct}=="8087", ATTRS{devpath}=="1.4.2", SYMLINK+="ttyUSB-SMART-B-AXIS"
SUBSYSTEM=="tty", ATTRS{idVendor}=="1209", ATTRS{idProduct}=="8087", ATTRS{devpath}=="1.4.3", SYMLINK+="ttyUSB-SMART-C-AXIS"
SUBSYSTEM=="tty", ATTRS{idVendor}=="1209", ATTRS{idProduct}=="8087", ATTRS{devpath}=="1.4.4", SYMLINK+="ttyUSB-SMART-D-AXIS"
```
The device **ttyUSB-MINI-4PORT-HUB is not shown** by **ls /dev** if no single Smart Stepper is only!
```bash
udevadm trigger #apply the rules
ls /dev
```
## Overview of busses, ports, devices
USB ports are sometimes confusing.
```bash
#list USB by /sys/bus/usb/drivers/usb
cd /sys/bus/usb/drivers/usb
ls -alF
lrwxrwxrwx 1 root root 0 Apr 29 12:32 1-1 -> ../../../../devices/platform/soc/3f980000.usb/usb1/1-1/
lrwxrwxrwx 1 root root 0 Apr 29 12:32 1-1.1 -> ../../../../devices/platform/soc/3f980000.usb/usb1/1-1/1-1.1/
lrwxrwxrwx 1 root root 0 Apr 29 12:32 1-1.2 -> ../../../../devices/platform/soc/3f980000.usb/usb1/1-1/1-1.2/
lrwxrwxrwx 1 root root 0 Apr 29 12:32 1-1.3 -> ../../../../devices/platform/soc/3f980000.usb/usb1/1-1/1-1.3/
lrwxrwxrwx 1 root root 0 Apr 29 12:32 1-1.4 -> ../../../../devices/platform/soc/3f980000.usb/usb1/1-1/1-1.4/
lrwxrwxrwx 1 root root 0 Apr 29 12:32 1-1.4.1 -> ../../../../devices/platform/soc/3f980000.usb/usb1/1-1/1-1.4/1-1.4.1/
lrwxrwxrwx 1 root root 0 Apr 29 12:32 1-1.4.2 -> ../../../../devices/platform/soc/3f980000.usb/usb1/1-1/1-1.4/1-1.4.2/
lrwxrwxrwx 1 root root 0 Apr 29 12:32 1-1.4.3 -> ../../../../devices/platform/soc/3f980000.usb/usb1/1-1/1-1.4/1-1.4.3/
lrwxrwxrwx 1 root root 0 Apr 29 12:32 1-1.4.4 -> ../../../../devices/platform/soc/3f980000.usb/usb1/1-1/1-1.4/1-1.4.4/
lrwxrwxrwx 1 root root 0 Apr 29 12:32 1-1.5 -> ../../../../devices/platform/soc/3f980000.usb/usb1/1-1/1-1.5/
```
```bash
#list USB by lsusb -t
lsusb -t
/: Bus 01.Port 1: Dev 1, Class=root_hub, Driver=dwc_otg/1p, 480M
|__ Port 1: Dev 2, If 0, Class=Hub, Driver=hub/5p, 480M
|__ Port 1: Dev 3, If 0, Class=Vendor Specific Class, Driver=smsc95xx, 480M
|__ Port 2: Dev 4, If 0, Class=Mass Storage, Driver=usb-storage, 480M
|__ Port 3: Dev 5, If 0, Class=Communications, Driver=cdc_acm, 12M
|__ Port 3: Dev 5, If 1, Class=CDC Data, Driver=cdc_acm, 12M
|__ Port 4: Dev 6, If 0, Class=Hub, Driver=hub/4p, 480M
|__ Port 1: Dev 8, If 0, Class=Communications, Driver=cdc_acm, 12M
|__ Port 1: Dev 8, If 1, Class=CDC Data, Driver=cdc_acm, 12M
|__ Port 2: Dev 9, If 1, Class=CDC Data, Driver=cdc_acm, 12M
|__ Port 2: Dev 9, If 0, Class=Communications, Driver=cdc_acm, 12M
|__ Port 3: Dev 10, If 0, Class=Communications, Driver=cdc_acm, 12M
|__ Port 3: Dev 10, If 1, Class=CDC Data, Driver=cdc_acm, 12M
|__ Port 4: Dev 11, If 0, Class=Communications, Driver=cdc_acm, 12M
|__ Port 4: Dev 11, If 1, Class=CDC Data, Driver=cdc_acm, 12M
|__ Port 5: Dev 7, If 0, Class=Video, Driver=uvcvideo, 480M
|__ Port 5: Dev 7, If 1, Class=Video, Driver=uvcvideo, 480M
|__ Port 5: Dev 7, If 2, Class=Audio, Driver=snd-usb-audio, 480M
|__ Port 5: Dev 7, If 3, Class=Audio, Driver=snd-usb-audio, 480M
```
**Mapping looks like this**
```
1-1 Bus 01.Port 1: Dev 1, Class=root_hub, Driver=dwc_otg/1p, 480M
1-1 |__ Port 1: Dev 2, If 0, Class=Hub, Driver=hub/5p, 480M
1-1.1 |__ Port 1: Dev 3, If 0, Class=Vendor Specific Class, Driver=smsc95xx, 480M
1-1.2 |__ Port 2: Dev 4, If 0, Class=Mass Storage, Driver=usb-storage, 480M
1-1.3 |__ Port 3: Dev 5, If 0, Class=Communications, Driver=cdc_acm, 12M
1-1.3 |__ Port 3: Dev 5, If 1, Class=CDC Data, Driver=cdc_acm, 12M
1-1.4 |__ Port 4: Dev 6, If 0, Class=Hub, Driver=hub/4p, 480M
1-1.4.1 |__ Port 1: Dev 8, If 0, Class=Communications, Driver=cdc_acm, 12M
1-1.4.1 |__ Port 1: Dev 8, If 1, Class=CDC Data, Driver=cdc_acm, 12M
1-1.4.2 |__ Port 2: Dev 9, If 0, Class=Communications, Driver=cdc_acm, 12M
1-1.4.2 |__ Port 2: Dev 9, If 1, Class=CDC Data, Driver=cdc_acm, 12M
1-1.4.3 |__ Port 3: Dev 10, If 0, Class=Communications, Driver=cdc_acm, 12M
1-1.4.3 |__ Port 3: Dev 10, If 1, Class=CDC Data, Driver=cdc_acm, 12M
1-1.4.4 |__ Port 4: Dev 11, If 0, Class=Communications, Driver=cdc_acm, 12M
1-1.4.4 |__ Port 4: Dev 11, If 1, Class=CDC Data, Driver=cdc_acm, 12M
1-1.5 |__ Port 5: Dev 7, If 0, Class=Video, Driver=uvcvideo, 480M
1-1.5 |__ Port 5: Dev 7, If 1, Class=Video, Driver=uvcvideo, 480M
1-1.5 |__ Port 5: Dev 7, If 2, Class=Audio, Driver=snd-usb-audio, 480M
1-1.5 |__ Port 5: Dev 7, If 3, Class=Audio, Driver=snd-usb-audio, 480M
```
## Troubleshooting USB errors
A lot of different USB errors can occure (like "device not accepting address"). Most times a reset of the USB hub helps. We can turn off, keep off some seconds and turn on again the hub to re-init the devices in case there are no powering issues. See [https://paulphilippov.com/articles/how-to-fix-device-not-accepting-address-error](https://paulphilippov.com/articles/how-to-fix-device-not-accepting-address-error). See [Smart Stepper - USB, Soft and hard reset](https://old.stadtfabrikanten.org/display/TH/Smart+Stepper+-+USB%2C+Soft+and+hard+reset) for some tested out handling methods (works for webcam too).
# Raspberry Pi 3 B - watchdog
## Install
```
apt-get install watchdog
```
Warning: Do never call "cat /dev/watchdog" because it will restart your Raspberry Pi 15 seconds after! :-(
## Configure
```bash
vim /etc/watchdog.conf
```
```ini
watchdog-device = /dev/watchdog
max-load-1 = 24
watchdog-timeout = 15
```
## Enable as permanent service
```bash
sudo /etc/init.d/watchdog start
#[ ok ] Starting watchdog (via systemctl): watchdog.service.
```
# Raspbian buster basic OS configuration
The OS is installed on [Raspberry Pi 3 B](https://old.stadtfabrikanten.org/pages/createpage.action?spaceKey=TH&title=Raspberry+Pi+3+B&linkCreation=true&fromPageId=65405963) featuring a [High Endurance Micro-SDHC card 32 GB 100 MB/s UHS Class 3 by SANDISK](https://old.stadtfabrikanten.org/pages/createpage.action?spaceKey=TH&title=High+Endurance+Micro-SDHC+card+32+GB+100+MB%2Fs+UHS+Class+3+by+SANDISK&linkCreation=true&fromPageId=65405963).
## Get model information
```bash
cat /sys/firmware/devicetree/base/model
```
## Set time
in case the Raspberry Pi has no internet connection we need to adjust the time manually. It's important for InfluxDB, collectd and Grafana
```bash
sudo date --set '2020-06-19 11:31:00'
```
## Standard configuration
```bash
sudo su
apt remove unattended-upgrades
apt-get install keyboard-configuration
cat << EOF > /etc/default/keyboard
# KEYBOARD CONFIGURATION FILE
# Consult the keyboard(5) manual page.
XKBMODEL="pc105"
XKBLAYOUT="de"
XKBVARIANT=""
XKBOPTIONS=""
BACKSPACE="guess"
EOF
sudo dpkg-reconfigure -f noninteractive keyboard-configuration
sudo ln -fs /usr/share/zoneinfo/Europe/Berlin /etc/localtime
sudo dpkg-reconfigure -f noninteractive tzdata
#Passwort ändern
passwd
#Enable ssh
dpkg-reconfigure openssh-server
sudo systemctl enable ssh
systemctl start ssh
```
## Install languages + set default
```bash
sudo su
vim /etc/locale.gen
locale-gen de_DE.UTF-8
locale-gen en_GB.UTF-8
locale-gen en_US.UTF-8
update-locale LANG=en_US.UTF-8
cat /etc/default/locale
```
## Configure hostname
```bash
#Hostname ändern und an allen wichtigen Stellen anpassen
hostname -b hangdevice
cat /etc/hostname
sudo vim /etc/hosts
127.0.0.1 localhost.ffcmesh localhost #fritz.box oder speedport.ip oder ffcmesh (Freifunk)
127.0.1.1 hangdevice.fablabchemnitz.de hangdevice.ffcmesh hangdevice
YourIP hangdevice.fablabchemnitz.de hangdevice.ffcmesh hangdevice
```
## Additional Packages
```bash
sudo su
apt-get install cifs-utils collectd console-data console-setup curl deborphan gcc git grc htop iftop jq make dos2unix dnsutils fail2ban molly-guard lsof mailutils mosh mtr ncdu net-tools postfix python-pip rkhunter ruby ruby-dev screen sysstat tcpdump telnet traceroute vim
sudo update-alternatives --set editor /usr/bin/vim.basic
#fail2ban config
cp /etc/fail2ban/jail.conf /etc/fail2ban/jail.local
systemctl restart fail2ban.service
gem install colorls
pip install --upgrade pip
#logout and login again before running the speedtest-cli installation:
pip install speedtest-cli
```
## Make ping accesible from other users than root
```bash
setcap cap_net_raw+ep /bin/ping
```
## Postfix Mail Server
```bash
cd /etc/postfix
vim sasl_passwd
smtp.stadtfabrikanten.org the@address.server:thePassword
chown root:root /etc/postfix/sasl_passwd && chmod 600 /etc/postfix/sasl_passwd
postmap hash:/etc/postfix/sasl_passwd
```
## Troubleshooting: System mails are not sent
### Problem description
```bash
(delivery temporarily suspended: Host or domain name not found. Name service error for name=smtp.stadtfabrikanten.org type=MX: Host not found, try again
```
### Solution
- check Freifunk connection (maybe restart the router and the meshing "mother" router also. Restarting the mesh points helped)
- restart postfix service
- adjust postfix config (not sure if this really changes anything)
```bash
vim /etc/postfix/
disable_dns_lookups = yes
```
## Permissions: The admin user hangprintermanage
```bash
sudo su
rm /etc/sudoers.d/010_pi-nopasswd
echo "hangprintermanage ALL=(ALL) NOPASSWD: ALL" >> /etc/sudoers.d/010_hangprintermanage-nopasswd
#make hangprintermanage to sudo user - if not already done by renaming "pi" user to "hangprintermanage". in this case hangprintermanage is already a sudoer
sudo usermod -aG sudo hangprintermanage
sudo -iu hangprintermanage
```
## SSH Key hangprintermanage
```bash
cd /home/hangprintermanage
chown -R hangprintermanage:hangprintermanage .ssh/
chmod 700 /home/hangprintermanage/.ssh
chmod 600 /home/hangprintermanage/.ssh/authorized_keys
```
## SSH User for remote rsync backups
```bash
sudo su
adduser --gecos "" --shell /bin/bash --home /home/hangprinterbackup hangprinterbackup
mkdir -p /home/hangprinterbackup/.ssh/
chmod 700 /home/hangprinterbackup/.ssh/
touch /home/hangprinterbackup/.ssh/authorized_keys
echo "ssh-ed25519 THEPUBLICKEY ssh backup hangprinter" >> /home/hangprinterbackup/.ssh/authorized_keys
chmod 600 /home/hangprinterbackup/.ssh/authorized_keys
chown -R hangprinterbackup:hangprinterbackup /home/hangprinterbackup/
```
## How to setup systemd-networkd/systemd-resolved + remove legacy (ifupdown, networking & networkManager services)
This makes unavailable some old nasty stuff like ifup, ifdown, service networking, service networkManager, resolvconf
```bash
systemctl stop networking.service
systemctl stop NetworkManager.service
systemctl disable networking.service
systemctl disable NetworkManager.service
#PLEASE DO NOT REMOVE "openresolv" - this is required for Wireguard Service!
apt-get remove ifupdown resolvconf
cd /etc
rm -rf network netplan.io
systemctl enable systemd-networkd.service
systemctl enable systemd-resolved.service
rm /etc/resolv.conf
ln -s /run/systemd/resolve/resolv.conf /etc/resolv.conf
service systemd-networkd restart
service systemd-networkd status
service systemd-resolved restart
service systemd-resolved status
networkctl #print general info
networkctl status eth0 #print detail info for eth0
systemd-resolve --status
cat /etc/resolv.conf
traceroute -i eth0 google.de
traceroute -i ewg0 google.de
```
## systemd adjustments
omit "a stop job is running for " warnings
```bash
vim /etc/systemd/system.conf
DefaultTimeoutStopSec=30s
```
## Removed snoopy again
Snoopy was removed again because it creates a huge log file in `/var/log/auth.log` (up to 4 GB after some days)
```bash
apt remove snoopy
```
## Disable rsyslog
This prevents to have large files in /var/log (kern.log, daemon.log, syslog). This made about 4 GB after a few weeks because monitoring services write to InfluxDB for example
```bash
systemctl disable rsyslog.service
```
# Repetier Server
## Installation of Repetier Server
[https://www.repetier-server.com/manuals/0.85/index.html](https://www.repetier-server.com/manuals/0.85/index.html)
```bash
sudo su
#There are sometimes some unreleases fixes which are not on the main repo. so manually try some release files:
wget http://download.repetier.com/files/server/debian-armhf/Repetier-Server-0.94.1-Linux.deb
dpkg -i Repetier-Server-0.94.1-Linux.deb
rm Repetier-Server-0.94.1-Linux.deb
```
## Config File /usr/local/Repetier-Server/etc/RepetierServer.xml
```bash
/usr/local/Repetier-Server//var/lib/Repetier-Server/en3344truetrue1000http://download.repetier-server.com/files/server/debian-armel/updateinfo.txt/modules/front2/www/app.html/
```
## Restart Repetier Server
```bash
service RepetierServer status
service RepetierServer restart
```
## Apache virtual host
See [mkcert & Go](https://old.stadtfabrikanten.org/pages/createpage.action?spaceKey=TH&title=mkcert+%26+Go&linkCreation=true&fromPageId=57770066) for SSL cert generation
```bash
sudo a2enmod proxy proxy_wstunnel proxy_http
```
```bash
vim /etc/apache2/sites-enabled/repetier-server.conf
```
```bash
ServerName localhost
ServerAdmin some_mail@domain.de
SSLEngine on
SSLCertificateFile /etc/ssl/certs/trikarus.pem
SSLCertificateKeyFile /etc/ssl/private/trikarus-key.pem
RewriteEngine on
ProxyRequests Off
ProxyPreserveHost on
ProxyPass /socket/ ws://localhost:3344/socket/
ProxyPassReverse /socket/ ws://localhost:3344/socket/
ProxyPass / http://localhost:3344/
ProxyPassReverse / http://localhost:3344/
ErrorLog ${APACHE_LOG_DIR}/error-repetier-server.log
CustomLog ${APACHE_LOG_DIR}/access-repetier-server.log combined
AuthType Basic
AuthName "Authentication Required"
AuthUserFile "/etc/apache2/htusers"
Require valid-user
AuthType Basic
AuthName "Authentication Required"
AuthUserFile "/etc/apache2/htusers"
Require valid-user
```
The `htuser` is shared with Duet Web Control. See [Duet 2 and Duet Web Control](https://old.stadtfabrikanten.org/pages/createpage.action?spaceKey=TH&title=Duet+2+and+Duet+Web+Control&linkCreation=true&fromPageId=57770066)
the front2 web view is accesible by **/modules/front2/www/app.html** which automatically redirects to **/modules/front2/app/app.html**. If you enter **/modules/front2/app/app.html** it will not load the view correctly. So always use the /www/ variant. **Preceding user:password@** in URL string also sometimes fails to load the inner content.
```bash
vim /etc/apache2/ports.conf
```
```
Listen 3345
```
## Updates/Upgrades
.... can be done within the application frontend!
[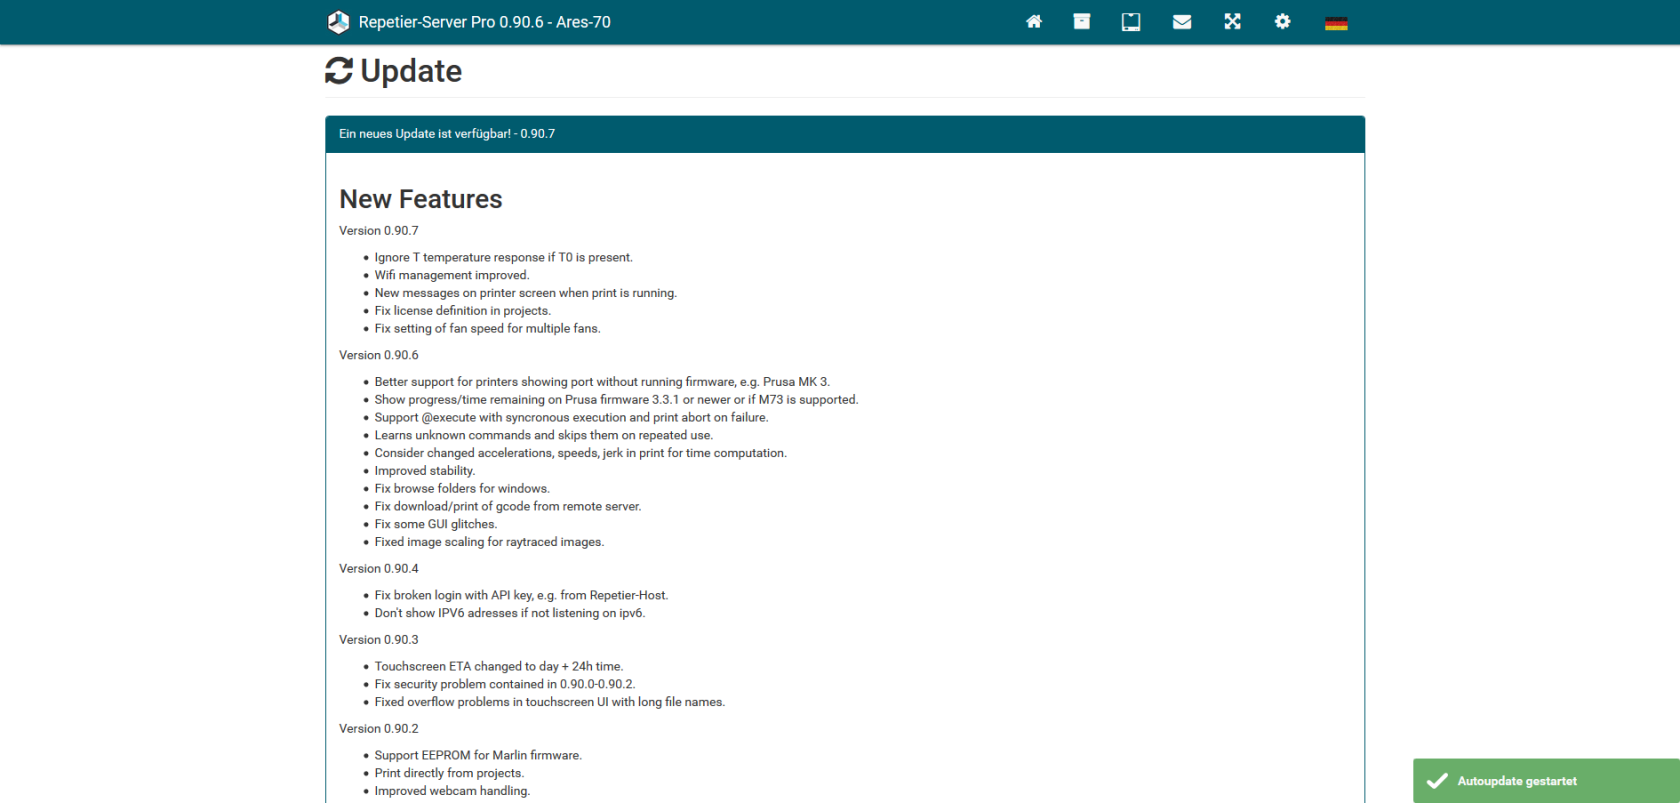](https://wiki.stadtfabrikanten.org/uploads/images/gallery/2026-06/QexgQxfGOwx2bbm4-grafik.png)
## Trikarus (USB Serial) Printer config
- Duet used RTS/DTR values each "high to low" and communicates by baud rate 115200
[](https://wiki.stadtfabrikanten.org/uploads/images/gallery/2026-06/S2HwMMuOUsfrt1d7-grafik.png)
- Duet is connected by USB Serial. The network connection is used to allow internal/external (secured) access to Duet Web Control. Access by network from Repetier Server is not really useful because it can only communicate over unsecure Telnet protocol (SSH not yet implemented)
- Repetier communicates in **Ping Pong mode**. The buffer size of 127 bytes (cache) is not used. We want to omit large movements in case the printer was stopped or paused (changed from cache mode to ping pong mode at )
## PlugIns
At the moment there are not plugins installed. General information about plugins can be found at [https://www.repetier-server.com/monitoring-plugins](https://www.repetier-server.com/monitoring-plugins/)
## RepRapFirmware support
Repetier Server console output is configured by RepRapFirmware.xml. This file contains information on how to parse Controller output.
Commands like M350 or M666 do not show full output lines because Repetier filters out too much. See [https://forum.repetier.com/discussion/comment/32471#Comment\_32471](https://forum.repetier.com/discussion/comment/32471#Comment_32471). To see "bug free" output check the console output from Duet Web Control instead.
If colons (:) are to be transferred in M117 or M118, please note:
```
#this change might affect other settings and is not used right now
vim /usr/local/Repetier-Server/firmware/RepRapFirmware.xml
#change from
#to
```
## API Scripting with curl
[https://www.repetier-server.com/manuals/programming/API/index.html](https://www.repetier-server.com/manuals/programming/API/index.html)
For sending commands to Repetier Server API some URL encode/decode functions are required. It can be done directly with curl argument or with the following bash script which needs to be sourced with "source" command to execute it's functions from command line.
```bash
#https://gist.github.com/cdown/1163649
vim /opt/urlcoder.sh
```
```bash
urlencode() {
# urlencode
old_lc_collate=$LC_COLLATE
LC_COLLATE=C
local length="${#1}"
for (( i = 0; i < length; i++ )); do
local c="${1:i:1}"
case $c in
[a-zA-Z0-9.~_-]) printf "$c" ;;
*) printf '%%%02X' "'$c" ;;
esac
done
LC_COLLATE=$old_lc_collate
}
urldecode() {
# urldecode
local url_encoded="${1//+/ }"
printf '%b' "${url_encoded//%/\\x}"
}
```
```bash
#make functions available and test the output
source /opt/urlcoder.sh && urlencode "G1 X0 Y10"
```
```bash
#add to .bashrc at the bottom (root/flcmanage)
source /opt/urlcoder.sh
```
**/opt/repetier-conf.sh**
```bash
#!/bin/bash
export API_KEY="KEY" # some valid API key
export HOST="localhost" # default: localhost
export PORT="3344" # default: 3344
export WS="ws" # might also be wss
export SLUG="myPrinter" # the printer name (see URLs in browser to get the slug name)
export HTTP_PROTO="http"
source "/opt/urlcoder.sh" # source methods to use them in this script
send_gcode() {
CMD='{"cmd":"'$1'"}'
CMD=${CMD// /%20} #replace regular whitespaces with pre-encoded %20 whitespace because urlencode does not work with normal whi tespaces correctly
ENC_CMD=$(urlencode $CMD) # build some encoded command
ENC_CMD=${ENC_CMD//%2520/%20} #repair the previously encoeded whitespaces
curl --silent "${HTTP_PROTO}://${HOST}:${PORT}/printer/api/${SLUG}?apikey=${API_KEY}&a=send&data=$ENC_CMD" > /dev/null
}
```
The script has the method "send\_gcode" to send GCodes while ignoring their output
```bash
source /opt/repetier-conf.sh
send_gcode 'M291 P\"Everything done. Ready to print!\"'
```
For printing messages to Repetier Server console we use M291 instead of M117 or M118 because those commands seem to block the system buffer ("Mesg:15:12:09.888: Buffer used:73 Enforced free byte:71 lines stored:1"). This makes Repetier Server unresponsible. The disadvantage of M291 is the fact that the messages will not be displayed while printing. It only works in an idling state.
For all other purposes we can use example requests like
```bash
#List all models
curl "http://localhost:3344/printer/api/Trikarus?apikey=SOMEAPIKEY&a=listModels" | jq
#Log File Overview
curl "http://localhost:3344/printer/api/Trikarus?apikey=SOMEAPIKEY&a=listLogs" | jq
#Printer states
curl "http://localhost:3344/printer/api/Trikarus?apikey=4SOMEAPIKEY&a=stateList" | jq
```
```bash
best way: add # before line
#colons will be printed on console:
CMD='{"cmd":"#M118 P0 S\"Smart Stepper '${AXIS}': ctrlmode: '${CTRLMODE}' | \""}'
#colons will be ignored if preceding "#" is not used
CMD='{"cmd":"M118 P0 S\"Smart Stepper '${AXIS}': ctrlmode: '${CTRLMODE}' | \""}'
```
## API scripting with websockets and bash
Better do it directly using Python instead of using bash and websockets!
Install websocat tool
```bash
cd /usr/bin
wget https://github.com/vi/websocat/releases/download/v2.0.0-alpha0/websocat_arm-linux
chmod +x websocat_arm-linux
ln -sf websocat_arm-linux websocat
```
Check some basic commands
```bash
# call the websocket from Repetier Server instance - some basic command
./websocat ws://localhost:3344/socket
# the result:
{"callback_id":-1,"data":[{"data":{"session":"&e!gy3fXxXBOdb^HO80QwDqV%Tnu76AF"},"event":"loginRequired","printer":""}],"eventList":true}
#So Just attach the apikey to login accordingly:
websocat ws://localhost:3344/socket?apikey=SOMEAPIKEY
# And to send something to Repetier, use thins for instance:
echo '{"callback_id":-1,"data":{},"action":"stateList","printer":"myPrinter"}' | websocat ws://localhost:3344/socket?apikey=SOMEAPIKEY
# To grep out some event just do
websocat ws://localhost:3344/socket?apikey=SOMEAPIKEY | grep IP
```
And if you want to run websocat feedback loop all the time you can pipe all the output into screen session
```bash
vim /opt/repetier-monitor/repetier-monitor.sh
```
```bash
#!/bin/bash
#this script will get all the websocket output from Repetier Server by writing it into log file
# define some basic stuff
API_KEY="YOURKEY" # some valid API key
HOST="localhost" # default: localhost
PORT="3344" # default: 3344
WS="ws" # might also be wss
SLUG="myPrinter" # the printer name (see URLs in browser to get the slug name)
LOG_FILE="/opt/repetier-monitor/websocat_out.log"
#make a new screen to deal with websocat session. nohup and & background streaming did not work
screen -d -m sh -c "websocat '${WS}://${HOST}:${PORT}/socket?apikey=${API_KEY}' | tee ${LOG_FILE}"
```
```bash
#run the script
chmod +x /opt/repetier-monitor/repetier-monitor.sh
/opt/repetier-monitor/repetier-monitor.sh
screen -list #check if it's running. If you want to show the screen itself run screen -R to attach to the detached screen session
# check output log (what you really want)
tail -f /opt/repetier-monitor/websocat_out.log
```
## Events
See [/#!/printerConfig/Trikarus/gcodes](#!/printerConfig/Trikarus/gcodes) → tab "advanced"
Use [https://regex101.com](https://regex101.com/) to check if the entered regex is working correctly
### IP Address
### This works for DHCP addresses and static IP addresses
```ini
^.*Network is enabled, configured IP address:.*, actual IP address.*$
```
### Duet Status (M408 S3)
```ini
^.*status.*mcu.*vin.*
```
### Z Probe at min stop
```ini
^Endstops.X*.*Y.*Z.*probe: at min stop
```
### Print Pause Trigger
```ini
G91 ;set relative coords
G1 Z50 ;move +50 mm up
;M104 S0;turn off extruder - we don't do that because on continue we do not know the previous temperature value
G90; set absolute coords
```
## External Commands - configuration, permissions, icons
[https://www.repetier-server.com/manuals/0.94/index.html](https://www.repetier-server.com/manuals/0.94/index.html)
Sometimes it is usefull to be able to call some external commands from the web interface. For example if you are running the server from a Raspberry-PI and want to shut it down, it would b econvenient to do so savely without opening a ssh terminal. For that reason you can extend the top right menu with external commands, which then appear there. On the other side you might want to run some commands on special positions of the print. The server therefor has the @execute command allowing to call an external programm. For security reasons it is not possible to call arbitrary commands. Instead you have to write a extcommands.xml file which you drop in your databbase subdirectory inside your storage directory (see installation where this is for your os).
Below you see an example of such a code. After adding/changing the file, you need to restart the server. Make sure your file keeps valid!
### External commands list
```
vim /var/lib/Repetier-Server/database/extcommands.xml
```
```xml
Shutdown Serversudo /sbin/shutdown -h nowReally shut down the server?truetruetruetruetruetrueReboot Serversudo /sbin/shutdown -r nowReally reboot the server?LED Spot onpython3.7 /opt/gpio/ledspot-on.pytruetruetrueLED Spot offReally turn off the lights? :-(python3.7 /opt/gpio/ledspot-off.pytruetruetruePower Supply onpython3.7 /opt/gpio/psu-on.pytruetruetruePower Supply offReally shut down PSU?python3.7 /opt/gpio/psu-off.pytruetruetrueSend Webcam Screenshot by mailsudo /opt/sendcamimage.shtruetrueWebcam 100% Zoomsudo /opt/webcam-default.shtruetrueWebcam 500% Zoomsudo /opt/webcam-zoomed.shtruetrueInternal RPI 4 Port Hub - Power offReally switch off USB Power from onboard ports? It's required to turn PSU off before!sudo /opt/uhubctl/uhubctl -r 500 -l 1-1 -p 2 -a offtruetruetrueInternal RPI 4 Port Hub - Power onPlease remember to turn on PSU again separately!sudo /opt/uhubctl/uhubctl -l 1-1 -p 2 -a ontruetruetrueUpdate /etc/hosts with recent Duet IP/opt/sendDeviceIPsByMail.shtruetruetruePrepare for printingsudo /opt/sms_modes/sms_prepare.shtruetruetrueRandom positions mode - onReally turn on random mode? :-(sudo /opt/sms_modes/sms_random.sh starttruetruetrueRandom positions mode - offsudo /opt/sms_modes/sms_random.sh stoptruetruetrueSmart Stepper - Torque allsudo /opt/sms_modes/sms_torque_all.shtruetruetrueSmart Stepper - Torque Asudo /opt/sms_modes/sms_torque_a.shtruetruetrueSmart Stepper - Torque Bsudo /opt/sms_modes/sms_torque_b.shtruetruetrueSmart Stepper - Torque Csudo /opt/sms_modes/sms_torque_c.shtruetruetrueSmart Stepper - Torque Dsudo /opt/sms_modes/sms_torque_d.shtruetruetrueSmart Stepper - sPID allsudo /opt/sms_modes/sms_spid_all.shtruetruetrueSmart Stepper - Tighten ABCsudo /opt/sms_modes/sms_tighten_abc.shtruetruetrueSmart Stepper - Tighten Dsudo /opt/sms_modes/sms_tighten_d.shtruetruetrueSmart Stepper - Release ABCsudo /opt/sms_modes/sms_release_abc.shtruetruetrueSmart Stepper - Release Dsudo /opt/sms_modes/sms_release_d.shtruetruetrueSmart Stepper - Smooth allsudo /opt/sms_modes/sms_smooth_all.shtruetruetrueSmart Stepper - Smooth Asudo /opt/sms_modes/sms_smooth_a.shtruetruetrueSmart Stepper - Smooth Bsudo /opt/sms_modes/sms_smooth_b.shtruetruetrueSmart Stepper - Smooth Csudo /opt/sms_modes/sms_smooth_c.shtruetruetrueSmart Stepper - Smooth Dsudo /opt/sms_modes/sms_smooth_d.shtruetruetrueSmart Stepper - Z Upsudo /opt/sms_modes/sms_zup.shtruetruetrueSmart Stepper - Z Downsudo /opt/sms_modes/sms_zdown.shtruetruetrueSmart Stepper - Set Zerosudo /opt/sms_modes/sms_setzero.shtruetruetrueSmart Stepper - Rebootsudo /opt/sms_modes/sms_reboot.shtruetruetrue/usr/bin/afplay
```
The commands in execute tag are executed asynchronously by default. That means the server will not wait for them to finish and directly continous sending g-code. Normally a good thing as it does not disturb the print. In case you want the server to wait for the command to finish, e.g. because you wait for some starting condition you can add the attribute sync="true". In that case you also have the option to stop the print if the returned error code is not 0. To enable this add attribute stopOnFail="true".
") to make the commands work you need to check the permissions (e.g. chmod 755) on the according files and folders
### sudo permissions
All commands get executed with the user account and privileges the server daemon runs. So if you want to allow it to shutdown your computer, you need to add RepetierServer to the list of allowed users. To do this, open a shell and enter the following commands:
```bash
vim /etc/sudoers.d/repetierserver-perms
```
```bash
repetierserver ALL=NOPASSWD: /usr/local/Repetier-Setup/bin/manageWifiAccess
repetierserver ALL=NOPASSWD: /usr/local/Repetier-Setup/bin/installWebcam2
repetierserver ALL=NOPASSWD: /usr/local/Repetier-Setup/bin/screensaver
repetierserver ALL=NOPASSWD: /opt/sendcamimage.sh
repetierserver ALL=NOPASSWD: /opt/webcam-default.sh
repetierserver ALL=NOPASSWD: /opt/webcam-zoomed.sh
repetierserver ALL=NOPASSWD: /sbin/shutdown
repetierserver ALL=NOPASSWD: /opt/uhubctl/uhubctl
repetierserver ALL=NOPASSWD: /opt/sms_modes/sms_reboot.sh
repetierserver ALL=NOPASSWD: /opt/sms_modes/sms_setzero.sh
repetierserver ALL=NOPASSWD: /opt/sms_modes/sms_smooth_all.sh
repetierserver ALL=NOPASSWD: /opt/sms_modes/sms_smooth_a.sh
repetierserver ALL=NOPASSWD: /opt/sms_modes/sms_smooth_b.sh
repetierserver ALL=NOPASSWD: /opt/sms_modes/sms_smooth_c.sh
repetierserver ALL=NOPASSWD: /opt/sms_modes/sms_smooth_d.sh
repetierserver ALL=NOPASSWD: /opt/sms_modes/sms_spid_all.sh
repetierserver ALL=NOPASSWD: /opt/sms_modes/sms_torque_all.sh
repetierserver ALL=NOPASSWD: /opt/sms_modes/sms_torque_a.sh
repetierserver ALL=NOPASSWD: /opt/sms_modes/sms_torque_b.sh
repetierserver ALL=NOPASSWD: /opt/sms_modes/sms_torque_c.sh
repetierserver ALL=NOPASSWD: /opt/sms_modes/sms_torque_d.sh
repetierserver ALL=NOPASSWD: /opt/sms_modes/sms_tighten_abc.sh
repetierserver ALL=NOPASSWD: /opt/sms_modes/sms_tighten_d.sh
repetierserver ALL=NOPASSWD: /opt/sms_modes/sms_release_abc.sh
repetierserver ALL=NOPASSWD: /opt/sms_modes/sms_release_d.sh
repetierserver ALL=NOPASSWD: /opt/sms_modes/sms_zdown.sh
repetierserver ALL=NOPASSWD: /opt/sms_modes/sms_zup.sh
repetierserver ALL=NOPASSWD: /opt/sms_modes/sms_prepare.sh
repetierserver ALL=NOPASSWD: /opt/sms_modes/sms_random.sh start
repetierserver ALL=NOPASSWD: /opt/sms_modes/sms_random.sh stop
```
### Icons
```bash
vim /var/lib/Repetier-Server/database/RepetierServer.xml
```
```xml
/var/lib/Repetier-Server/shadow
```
```bash
cd /var/lib/Repetier-Server/
mkdir shadow/
chown repetierserver:dialout shadow/
```
Now put the icons into that directory and restart Repetier Server
### Finally make use of the commands
[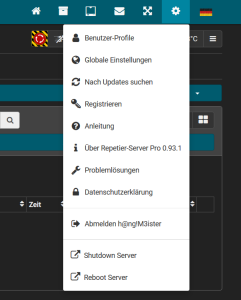](https://wiki.stadtfabrikanten.org/uploads/images/gallery/2026-06/oyi74zZeEmVpRCgU-grafik.png) [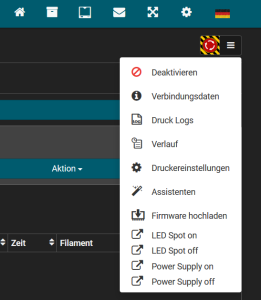](https://wiki.stadtfabrikanten.org/uploads/images/gallery/2026-06/AAqHYZvLip3Qx7kT-grafik.png)
This is an older screenshot!
Note: if the buttons are not visible in frontend, check your user permissions in case you are not logged in as an admin. Only users with permission to configure the server are able to see and execute.
Often users have problems adding new commands on linux. Here are some common pitfals that we know users run into:
- Changes are only available after a restart of Repetier-Server, see installation section for how to do this.
- Commands are executed with the username Repetier-Server runs. On Linux this is normally repetierserver. Make sure the complete path to your executeable is accessible for other users.
- Use an absolute path to the executeable. It gets started from a different path so local or relative path will often not work.
- The script must be executeable, so make sure the executeable flag is set: chmod a+x filename
- If a script requires root permission start it with sudo and make sure that command is in the list of allowed sudoers for repetierserver just as shown in the shutdown example.
- If you add parameters to teh script in @execute, you need to set allowParams true. This can be a security risk if you execute gcodes from external sources!
**Alternative Startup Configuration Settings**
By default the installer creates a startup configuration file **RepetierServer.xml**, which defines most important start parameter like storage location and a port to listen to. Because this gets overwritten with each update, we provide a mechanism to change these parameters permanently. In addition to this config file, the server tries to load two more config files if present. These files are **RepetierServer-extra.xml** at the same location where **RepetierServer.xml** resides (installation directory/bin/ for Windows and intsallation directory/etc/ for Linux and Mac) and **storage directory/database/RepetierServer.xml**.
## Logs
The log files can be found in
- /var/lib/Repetier-Server/logs, or
- since Repetier Server 0.94.0 you can view them directly in the user interface
## UI Control of Trikarus
- Left control is the hotend fan
- center control is the print fan (blower)
- right control are the three laser pointers
[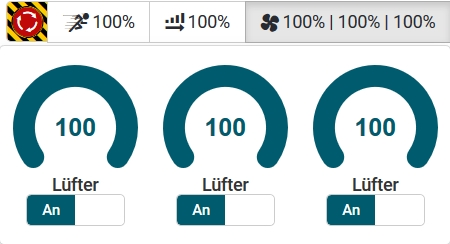](https://wiki.stadtfabrikanten.org/uploads/images/gallery/2026-06/NYxbLKF6XYbpoXxn-grafik.png)
# Smart Stepper - calibration and control modes (sPID mode, pPID mode and torque mode)
## Smart Stepper command line interface
Docs from [https://github.com/Misfittech/nano\_stepper](https://github.com/Misfittech/nano_stepper)
The smart stepper uses a command line interface where the prompt is “:>”
help
The help command will return a list of commands that the smart stepper supports.
getcal
This command will print out the 200 point calibration table. This is useful if you are doing firmware development and do not want to calibrate each time you update firmware. You can take this table and copy it into the nonvolatile.cpp file as shown below
calibrate
This will run a 200 point calibration of the encoder. Should be done with motor disconnected from machine
testcal
This will test the calibration and report the maximum error in degrees.
microsteps
This command gets/sets the number of microsteps the smart stepper will use for the step command and the step pin. The number of microsteps does not affect the resolution of the controller but rather how fine you can set the position.
step
This will move the motor one step clockwise, the step size is based on the current microstep setting. To move the motor counterclockwise use “step 1”. To move the motor clockwise 16 steps used “step 0 16” to move motor counterclockwise 16 steps use “step 1 16”
feedback
This commands disable/enables feedback control loop. 'feedback 0' - disables, 'feedback 1' - enables
The plan is to discountinue this command in the future and use the “controlmode” command to put controller in open or one of the many closed loop operational modes.
readpos
Reads the current motor position and reports it as degrees (current angle as 16bit number) applies calibration if valid
encoderdiag
This command will read and report the AS5047D internal registers for diagnostic purposes.
spid
This command sets the Kp, Ki, and Kd terms for the simple positional PID controller. The default values are:
- Kp 0.900
- Ki 0.000
- Kd 0.010
ppid
This command sets the Kp, Ki, and Kd terms for the positional PID controller. The default values are:
- Kp 1.000
- Ki 0.000
- Kd 0.000
vpid
This command sets the Kp, Ki, and Kd terms for the velocity PID controller. The default values are:
- args 0
- Kp 2.000
- Ki 1.000
- Kd 1.000
velocity
This sets the velocity in RPMs to rotate motor when unit is configured for velocity PID mode of operation.
boot
This command will put the microprocessor in the boot loader mode. Alternatively this can be done by double pressing the reset button.
factoryreset
This erases the calibration and other system and motor parameters such that unit is reset to the factory ship state. After this command the unit will need to be calibrated to the motor again.
dirpin
This command sets which direction the motor will rotate when direction pin is pulled high. The direction pin is only sampled when the step pin has a rising edge. ‘dirpin 0’ will set the motor to rotate clockwise when dir pin is high ‘dirpin 1’ will set the motor to rotate counter-clockwise when dir pin is high
errorlimit
Gets/sets the maximum number of degrees of error that is acceptable.
Any posistioning error about the error limit will assert the error pin, when error pin is set as error output. For example:
```
:>errorlimit 1.8
```
Will set the error limit to 1.8 degrees.
ctrlmode
Gets/Sets the feedback controller mode of operation. The command takes an integer from 0 through 4 to set the control mode per table below:
- Controller off - 0 -- this is not currently used
- Open-Loop - 1 -- this is open loop with no feedback
- Simple PID - 2 -- simple positional PID, which is factory default
- Positional PID - 3 -- current based PID mode, requires tuning for your machine
- Velocity PID - 4 -- velocity based PID, requires tuning for your machine and speed range
If you are unsure what you are doing leave unit in the Simple PID mode of operation.
maxcurrent
This sets the maximum current that will be pushed into the motor. To set the current for maximum of 2.0A you would use command “maxcurrent 2000” as the argument is in milliAmps.
holdcurrent
For the Simple Positional PID mode the minimal current (ie current with no positional error) is the hold current. You set this current based on the required holding torque you need for your application. The higher the hold current, the hotter and noisier the motor will be but also the larger the holding torque. For the Positional PID mode the PID tuning params have to be set correctly such that the control loop will dynamically determine the holding torque. This tuning of the PID can be difficult, hence the simple PID mode will work most of the time out of the box by setting maximum current and holding current.
motorwiring
The firmware always uses a positive angle as a clockwise rotation. A stepper motor however could have wiring done with one coil reversed wired, which will cause motor to normally operate in opposite direction. The Smart Stepper firmware will detect the motor wiring direction, using the encoder, and the firmware will compensate for a reverse wired motor. The reverse or forward wiring of a motor is detected on first power up after factory reset. If the wiring changes after that you can compensate using this command. HOWEVER it is better to do a factory reset and recalibrate motor if wiring changes.
stepsperrotation
The Smart Stepper firmware will with first power on after factory reset detect the number of full steps per rotation for the stepper motor and store in flash memory. This command will read this parameter from flash and allow user to change this parameter if motor is changed. HOWEVER it is better to do a factory reset and recalibrate motor if motorchanges.
move
The move command will request the motor to move to an absolute angle position. Optionally the user can specify the rotational speed (RPMs) by which the move should happen. For example if the current motor position is at angle 0 and you issue ‘move 3600” the motor will turn 10 rotations clockwise to angle of 3600 degrees. If issue the ‘move 3600’ again nothing will happen as motor is already at angle 3600. If motor is at angle 0 and user issues the command ‘move 3600 20’ then motor will move to 10 rotations clockwise to angle of 3600 at a rate of 20 RPMs.
stop
If user issues a move command that takes a long time and wants to stop the move before completion then user can issue the stop command command which will stop a move operation. This stops the motion planner
setzero
This command will take the current motor position and set it to absolute (reference) angle of zero. Note that if you are in the middle move it will take the position at the time of the command and use it, thus it is recommend a move be stopped or wait for completion before issuing the setzero.
Note: this does not reset the error which gets reporterd by geterror. If you want to null this value you need to reboot the motor!
data
This command will toggle output of binary data.
looptime
This command will display the time it takes for a single processing (control) loop to execute.
eepromerror
This command displays the motor error in degrees difference from the stored eeprom value at motor power up.
eepromloc
Displays the location of the shaft angle in degrees at motor power on.
eepromwrite
Forces the eeprom to store all current values (location) in ram to eeprom.
eepromsetloc
Forces the eeprom to write the current shaft angle overwriting the stored location from powerup.
setpos
Overwrites the current shaft angle (degrees) in the motion planner.
reboot
Forces the smart stepper to reboot
homecurrent
If using built in homing routine (command "home") this will specify the amount of current applied when motor is moving during homing operation when homepin is logic active.**EXPERIMENTAL USE WITH CAUTION**
gets/set the motor moving and holding currents that will be used when pin A3 is low
homepin
Allows setting of pin for current limited enable for homing. This triggers a current drop during homing movements. Current set using command "homecurrent". This pin is pulled low to activate. **EXPERIMENTAL USE WITH CAUTION**
homeangledelay
sets the angle delay in dropping to homing current
Currently unused.
home
Tells the motion controller to move motor until the home switch (enable pin) is pulled low. (Only on boards 3/21/2017 or newer) (Must be enabled in firmware). For example:
```
:>home 360 0.5
```
Will move up to 360 degrees at 0.5 RPM. **EXPERIMENTAL USE WITH CAUTION**
pinread
reads pins as binary (bit 0-step, bit 1 - Dir, bit 2 - Enable, bit 3 - Error, bit 4 - A3, bit 5- TX, bit 6 - RX
errorpinmode
Sets or displays the error pin mode. Allows someone to swap usage of the error pin as an enable pin on older boards. (Not compiled for use on boards 3/21/2017 or newer since they have separate enable and error pins) (Must be enabled in firmware) Modes are:
- "0" - Enable mode, active high (digital input).
- "1" - Enable mode, active low (digital input).
- "2" - Error mode, active low (digital output). Active level is reached when there is an angle error.
- "3" - Error mode, bi-directional, (digital input/output open collector). (Not currently used).
errorpin
Sets or displays the binary state of the enable pin. Acceptable values are 0 or 1 For example:
```
:>errorpin 1
```
Will set the error pin on the terminal block to output a logic high when the error level is reached
enablepinmode
Sets or displays the enable pin mode. Allows someone to swap usage of the enable pin as an error pin on older boards. (Only on boards 3/21/2017 or newer since they have separate enable and error pins) (Must be enabled in firmware) Modes are:
- "0" - Enable mode, active high (digital input).
- "1" - Enable mode, active low (digital input).
- "2" - Error mode, active low (digital output). Active level is reached when there is an angle error.
- "3" - Error mode, bi-directional, (digital input/output open collector). (Not currently used).
geterror
Displays the current motor shaft error in degrees.
getsteps
Displays the number of steps that have been seen from the DIR pin.
debug
Sets if syslog debugging will be output on USB serial. Allowed values are 0 for disable, 1 for enable.
torque
prints torque parameter, with argument sets 'torque t' Where torque is an integer between -128 and 127. The special value
**CUSTOM COMMAND FROM FORK REPO**
## How to access Smart Stepper by USB serial from bash
### Using "screen"
If the backspace button does not work, then the control key in PuTTY/KiTTY has to be switched to "Control-H". Otherwise "screen /dev/ttyUSB-SMART-A-AXIS" does not work correctly, because entered input cannot be deleted.
[](https://wiki.stadtfabrikanten.org/uploads/images/gallery/2026-06/vTRpQx8h2bRUx3yR-grafik.png)
This script is not used for Trikarus project but it was worked out while trying to find working solutions with Smart Steppers.
[https://unix.stackexchange.com/questions/13953/sending-text-input-to-a-detached-screen](https://unix.stackexchange.com/questions/13953/sending-text-input-to-a-detached-screen)
**repetier-smartstepper.sh**
```bash
#!/bin/bash
# this script sends commands to MisfitTech Smart Stepper controller via USB. screen tool is used because passing and reading values is not that easy with cat and echo. There is place to make it better e.g. using minicom or cu. tmux was tested but it figured out that there's no serial device support.
source "/opt/repetier-conf.sh" # source config for Repetier Server instance
source "/opt/urlcoder.sh" # source methods to use them in this script
AXIS=$1 # should be A,B,C or D
SCREEN_NAME="screen_AXIS"
LOG_FILE="/opt/${SCREEN_NAME}_${AXIS}.log"
# remove old log file if existent
rm "${LOG_FILE}" > /dev/null 2>&1
# send "smart stepper command + enter (^M) keystroke" to first window (-p 0 could be applied) in a new screen called "screen_AXIS_" by stuffing (https://www.gnu.org/software/screen/manual/html_node/Command-Summary.html) the string into input; log the output to file
screen -d -m -L ${LOG_FILE} -S ${SCREEN_NAME}_${AXIS} /dev/ttyUSB-SMART-${AXIS}-AXIS 115200
declare -a cmdArray=("getcal" "microsteps" "readpos" "encoderdiag" "spid" "vpid" "ppid" "dirpin" "enablepinmode" "errorlimit" "ctrlmode" "maxcurrent" "holdcurrent" "homecurrent" "motorwiring" "stepsperrotation" "velocity" "looptime" "eepromerror" "eepromloc" "geterror" "getsteps" "torque" "pinread")
for val in ${cmdArray[@]}; do
screen -S ${SCREEN_NAME}_${AXIS} -X stuff "${val}^M"
done
sleep 1
screen -S ${SCREEN_NAME}_${AXIS} -X quit
# clean up the log with ^M symbols
sed -i 's/\r//g' ${LOG_FILE}
```
### Manual parallel working with multiple sessions
Using sreen sometimes misses some input/output with the used configuration. Some fine tuning for input and output buffers and timeouts is required!
```bash
#general
screen /dev/ttyUSB-SMART-A-AXIS
#all in one - #attaches to the created session with 4 tabs
vim /opt/controlSmartSteppers.sh
#/bin/bash
screen -AdmS SmartStepperControlScreen -t A /dev/ttyUSB-SMART-A-AXIS
sleep 1
screen -S SmartStepperControlScreen -X screen -t B /dev/ttyUSB-SMART-B-AXIS
sleep 1
screen -S SmartStepperControlScreen -X screen -t C /dev/ttyUSB-SMART-C-AXIS
sleep 1
screen -S SmartStepperControlScreen -X screen -t D /dev/ttyUSB-SMART-D-AXIS
sleep 1
screen -r SmartStepperControlScreen
chmod +x /opt/controlSmartSteppers.sh
/opt/controlSmartStepper.sh
#now press 1x enter per tab to get input/output ":>"
#do some commands
#to leave
"CTRL + A", then "\" to quit all tabs (acknowledge with "Y"), or
"CTRL + A", then "SHIFT + K" to quit current tab (acknowledge with "Y")
```
## Using PySerial and Python 3.7
This is the thing we use in production. The following script can be used as service (one service per motor) or as regular script.
To make this script working we need different timeouts for serial input/output buffering. Good working values are
- timeout=0.1 (lowest fine working value is 0.2) → changed from 0.4 at
- write\_timeout=0.5 (lowest fine working value is 1.0) → changed from 1.5 at
- wait\_interval = 0.1 (lowest fine working value is 0.05 )→ changed from 0.4 at
```
pip3.7 install pyserial
```
```
vim /opt/smartStepper.py
```
```python
import serial
import sys
import argparse
import time
import termios # workaround for IOError on resetting input/output buffers
import re
import os
import logging
from systemd.journal import JournaldLogHandler
from influxdb import InfluxDBClient
from datetime import datetime # required for InfluxDB data pushing
from time import sleep # required for InfluxDB data pushing
# note that when defining serial.Serial will automatically open the port!
ser = None
parser = argparse.ArgumentParser()
parser.add_argument(
"-d",
"--dev",
help=
"specify the Smart Stepper /dev/tty* by entering the axis letter --dev "
)
parser.add_argument(
"-c",
"--getcal",
action='store_true',
help="print calibration values from Smart Stepper and exit the program"
)
parser.add_argument(
"-m",
"--manual",
action="store_true",
help="console mode"
)
args = parser.parse_args()
#too short intervals result in failing to pass the information to serial which leads to no returning values
#lowest fine working value is 0.05
wait_interval = 0.4
#exit if no device was given
if args.dev == None:
print("Missing drive input. Please use --dev argument")
quit()
#init logger
logger = logging.getLogger("Smart Stepper - Drive " + args.dev)
logger.addHandler(JournaldLogHandler())
logger.addHandler(logging.StreamHandler(sys.stdout))
#logger.setLevel(logging.DEBUG)
logger.setLevel(logging.INFO)
logger.info("Logger initialized for Drive " + args.dev)
# build some database connection with max 1 seconds timeout (lowest value possible)
client = InfluxDBClient(host='localhost', port=8086, username='username', password='password', timeout=1, ssl=False, verify_ssl=False)
#client.ping()
client.switch_database('trikarus')
#print(client.query('SHOW DATABASES'))
#print(client.query('SHOW MEASUREMENTS'))
def createSerial():
global ser, args
time.sleep(
1) # always wait one second before re-opening. This prevents hiccups
try:
#print("trying to open serial connection")
logger.info("Trying to create serial connection")
ser = serial.Serial(
port="/dev/ttyUSB-SMART-" + args.dev + "-AXIS",
baudrate=115200,
bytesize=serial.EIGHTBITS,
parity=serial.PARITY_NONE,
stopbits=serial.STOPBITS_ONE,
timeout=
#the lower this is set the quicker you can read values but with higher drop rate - lowest tested fine value is 0.01
0.2,
xonxoff=False,
rtscts=False,
write_timeout=1.5,
dsrdtr=False,
inter_byte_timeout=None,
exclusive=True
) # force to get behaviour "Cannot open line '/dev/ttyUSB-SMART-A-AXIS' for R/W: open() blocked, aborted." or "Error: read failed: device reports readiness to read but returned no data (device disconnected or multiple access on port?)"
except IOError as e: # the serial creation may fail if device not connected or not ready
logger.error("Error:" + str(e))
json_body = [{
"measurement":
"SmartStepper" + args.dev,
"tags": {
"host": "hangdevice.fablabchemnitz.de"
},
"time":
datetime.utcnow().strftime('%Y-%m-%dT%H:%M:%SZ'),
"fields": {
"serialError": 1
}
}]
try:
client.write_points(json_body)
except NameError as e: #catch if db connection is null and body cannot be written
pass
pass
if args.dev:
# remove old command list file on this script restart to prevent catastrophes
try:
os.remove(args.dev + ".cmdlist")
logger.info("Removed old cmdlist file")
except FileNotFoundError as e:
pass #do nothing
while True:
logger.debug("Jumping into the main loop")
if ser == None:
#print("serial is set to None. Creating new serial connection")
createSerial()
else:
try: # main loop
if args.getcal:
ser.reset_input_buffer() #maybe obsolete
ser.reset_output_buffer() #maybe obsolete
ser.write("getcal".encode() + b'\r')
time.sleep(wait_interval)
while ser.inWaiting() > 0:
line = ser.readline().decode()
p = re.compile(r'[0-9].*', re.M)
m = p.search(line)
if m:
logger.info("getcal = " + m.group(0))
quit()
if args.manual:
while True:
cmd = input(":>")
if cmd == 'exit':
ser.close()
quit()
else:
ser.write(cmd.encode() + b'\r')
out = ''
time.sleep(wait_interval)
while ser.inWaiting() > 0:
out += ser.read(1).decode()
if out != '':
print(":>" + out)
# cycle through given cmd lists > this should be prioritized always (interrupt other monitoring calls then!)
try:
cmd_list_file = open(args.dev + ".cmdlist", 'r')
cmd_list = cmd_list_file.readlines()
cmd_list_file.close()
# first read the file, then "consume" it be deleting it
os.remove(args.dev + ".cmdlist")
for cmd in cmd_list:
logger.info("command from list: " + cmd)
ser.reset_input_buffer() #maybe oboslete
ser.reset_output_buffer() #maybe obsolete
ser.write(cmd.encode() + b'\r')
time.sleep(wait_interval)
except FileNotFoundError as e:
pass # do nothing
#-----------------------------------------------------------
# readpos
ser.reset_input_buffer() #maybe oboslete
ser.reset_output_buffer() #maybe obsolete
ser.write("readpos".encode() + b'\r')
time.sleep(wait_interval)
#logger.info(ser.inWaiting()) - prints the number of bytes in the output buffer
while ser.inWaiting() > 0:
#logger.info("getting readpos")
line = ser.readline().decode()
#print(line)
p = re.compile(
r'^encoder\s(([0-9]+\.?[0-9]*)|([0-9]*\.[0-9]+)|([-][0-9]+\.?[0-9]*)|([-][0-9]*\.[0-9]+))$',
re.M)
m = p.search(line)
if m:
logger.info("readpos = " + m.group(1))
json_body = [{
"measurement":
"SmartStepper" + args.dev,
"tags": {
"host": "hangdevice.fablabchemnitz.de"
},
"time":
datetime.utcnow().strftime('%Y-%m-%dT%H:%M:%SZ'),
"fields": {
"readpos": float(m.group(1))
}
}]
try:
client.write_points(json_body)
except NameError as e: #catch if db connection is null and body cannot be written
pass
#-----------------------------------------------------------
# geterror
ser.reset_input_buffer() #maybe oboslete
ser.reset_output_buffer() #maybe obsolete
ser.write("geterror".encode() + b'\r')
time.sleep(wait_interval)
while ser.inWaiting() > 0:
#logger.info("getting geterror")
line = ser.readline().decode()
#print(line)
p = re.compile(
r'^error\s(([0-9]+\.?[0-9]*)|([0-9]*\.[0-9]+)|([-][0-9]+\.?[0-9]*)|([-][0-9]*\.[0-9]+))\sdeg$',
re.M)
m = p.search(line)
if m:
logger.info("geterror = " + m.group(0).split(' ')[1])
json_body = [{
"measurement":
"SmartStepper" + args.dev,
"tags": {
"host": "hangdevice.fablabchemnitz.de"
},
"time":
datetime.utcnow().strftime('%Y-%m-%dT%H:%M:%SZ'),
"fields": {
"geterror": float(m.group(0).split(' ')[1])
}
}]
try:
client.write_points(json_body)
except NameError as e: #catch if db connection is null and body cannot be written
pass
#-----------------------------------------------------------
# torque
ser.reset_input_buffer() #maybe oboslete
ser.reset_output_buffer() #maybe obsolete
ser.write("torque".encode() + b'\r')
time.sleep(wait_interval)
while ser.inWaiting() > 0:
#logger.info("getting torque")
line = ser.readline().decode()
#print(line)
p = re.compile(
r'^torque\s(([0-9]+\.?[0-9]*)|([0-9]*\.[0-9]+)|([-][0-9]+\.?[0-9]*)|([-][0-9]*\.[0-9]+))$',
re.M)
m = p.search(line)
if m:
logger.info("torque = " + m.group(1))
json_body = [{
"measurement":
"SmartStepper" + args.dev,
"tags": {
"host": "hangdevice.fablabchemnitz.de"
},
"time":
datetime.utcnow().strftime('%Y-%m-%dT%H:%M:%SZ'),
"fields": {
"torque": float(m.group(1)),
}
}]
try:
client.write_points(json_body)
except NameError as e: #catch if db connection is null and body cannot be written
pass
#-----------------------------------------------------------
except (
IOError, termios.error
) as e: # in case the USB device was removed or buffer reset fails try to close and re-open serial port
logger.error("Error:" + str(e))
ser.close()
ser = None #unset
createSerial()
pass
else:
sys.exit(2)
```
## Remove old/unrequired InfluxDB data
```sql
influx
use trikarus
show series
drop series from SmartStepperA
drop series from SmartStepperB
drop series from SmartStepperC
drop series from SmartStepperD
show measurements
```
## General information about control modes for Hangprinters
Hangprinters do not have absolute position control. Modern Hangprinters use closed loop systems to ensure exact relative positions using encoders and to have better handling in general. By using such closed loop systems it's easy to implement a special **torque mode** (custom firmware implementation from Torbjørn Ludvigsen) for each motor. This enables to tension all lines to a constant tension. Then you can drag the effector around with your hands and save a lot of time calibrating the machine. So the torque mode is a special calibration mode. Trikarus uses Smart Stepper from MisfitTech. It makes use of torque mode with the following mimimum and maximum values: +127 / -128 (the sign inverts the direction of movement - clockwise or counterclockwise). The special value 0 exits the torque mode to jump back to regular mode (sPID or pPID).
Smart Stepper usually run in Simple/Hybrid PID mode when shipped ("spid" → this can be enabled by serial interface command "ctrlmode 2"). However, it is also a good idea to use Positional PID mode instead of the factory setting ("ppid" → this can be enabled by serial interface command "ctrlmode 3"). To use ppid mode the PID values have to be adjusted properly.
More information about Smart Stepper modes can be found at [Smart Stepper rev 1/20/2019 by MisfitTech](https://old.stadtfabrikanten.org/pages/createpage.action?spaceKey=TH&title=Smart+Stepper+rev+1%2F20%2F2019+by+MisfitTech&linkCreation=true&fromPageId=70811773) documentation manuals.
### Swichting between default mode (simple PID) and torque mode
The switching the modes is explained in [Smart Stepper - flashing the firmware and polling data.](https://fablabchemnitz.de/display/HAN/Smart+Stepper+-+flashing+the+firmware+and+polling+data)
- This action can be done either by
- clicking the rotary encoder knob at the effector **5 times in a row quickly (1.0 second)**, or by
- triggering the button from Repetier Server GUI, or by
- calling the torque command on USB serial (e.g. using "screen /dev/ttyUSB-SMART-?-AXIS"
- To switch between torque mode and sPID mode we simply call only a single command: "torque 0" (to go back to sPID) or "torque <value != 0>" (to enter torque mode). Please explicitely do not set ctrlmode from 2 to 5 by hand using that "ctrlmode" command, because this leads to unforeseen stepper movements at the switch, which can ruin your line guidings (painfully tested). The cause might be some previously saved position values.
**The behaviour in your hands →** Moving the stepper motor shaft back and forth by hand, you can feel little "ticks" as you move across motor poles. Getting rid of those would make fully automatic data collection much easier.
### The regular torque mode for effector dragging
Torque mode for "clean" effector dragging only works fine if it is enabled to **all four drives**. If you forget any of them it will do not perform. Dragging the effector by hand may require a bit of manual power because this mode is really strong. If you use doubled lines feature and a lot of bearings and ceramic inserts the friction is much higher than using single lines. Move the effector with love and touch it safely. The value you choose for torque highly depends on your installed motors and the configured currents. While having motor current at 800 mA torque of 50 is good, but changing to 1500 mA a torque value of 35 is already enough to have the same force in your hands.
Do not ever use torque mode if drives are not mounted correctly. In case the motors are not mounted to spools and/or the spool lines are not tied, the motors will turn infinite without stopping. In this scenario you will reach the maximum of encoder pos. This cannot be resetted using the "setzero" command. Instead you need to perform a full reboot of the Smart Stepper which is the same like having a power loss. It's a high risk to set torque values higher than the given counter weight. The higher the value the quicker the drive will move. It might cause unwinding all the line from your spools.
## Calibration and important adjustments for Smart Steppers
**Basic calibration**
Remember to run "calibrate" and "testcal" to have clean settings for each Smart Stepper. Otherwise the Stepper will run bad or it will stand still. The documentation says that a maximum angle degree error is 0.1 deg. If the motor current is set too low the motor will not move correctly (e.g. motor steps forward and backward alternating) and is going to miss steps. This will also lead to bad calibration values. If you adjust the motor current a re-calibration might be a good idea.
### Adjusting the motor currents
Basically the current values are all the same because all drives have same motors attached, with nearly same amount of line on it. They drive in the same direction by wiring and roughly symmetric forces grab on it except D drive (a little higher force). Higher torque values work for different situations but have no better effect on the regular torque mode for effector dragging. But you can use higher torque values for moving up and down the effector without any GCode command. I successfully tested torque mode up to +127 without any parts falling off the machine and no cracking sounds. So everything looks really stable. This was tested with default Smart Stepper values maxcurrent = 800 mA and holdcurrent = 500 mA. The [mounted stepper motors can run up to 2.0 A](https://stadtfabrikanten.org/display/TH/Stepper+Motors+MT-1705HS200AE+by+Motech+Motors) so there's a lot more power possible. The torque mode settings depend on your motor power. if you raise the current it will behave not the same as before. if you adjust one motor you will need to adjust all other motors too to get equivalent behaviour (having the same motor types for all four drives. Trikarus uses [Stepper Motors MT-1705HS200AE by Motech Motors](https://old.stadtfabrikanten.org/pages/createpage.action?spaceKey=TH&title=Stepper+Motors+MT-1705HS200AE+by+Motech+Motors&linkCreation=true&fromPageId=70811773)).
Finally after some tests with Trikarus the configuration is
- **maxcurrent = 1600 mA** (Adjusted the max current from 1500 to 1600 mA at , set back from 1600 mA to 1500 mA again at )
- **holdcurrent = 800 mA**
The currents are preconfigured and can easily be applied using **sms\_preconfigure.sh** (the smartStepper Python services need to run)
```bash
vim /opt/sms_modes/sms_preconfigure.sh
```
```bash
#!/bin/bash
#same max current for ABCD - we use default of 1500
CUR_MAX=1500
#hold current for ABC and D - we use default of 800
CUR_HOLD_ABC=800
CUR_HOLD_D=800
#default error is 1.8
ERRORLIMIT=5.0
#spid values - defaults ae 0.900 0.000 0.010
SPID="0.050 0.000 0.300"
echo "maxcurrent $CUR_MAX" > /opt/A.cmdlist
echo "holdcurrent $CUR_HOLD_ABC" >> /opt/A.cmdlist
echo "errorlimit $ERRORLIMIT" >> /opt/A.cmdlist
echo "spid $SPID" >> /opt/A.cmdlist
echo "maxcurrent $CUR_MAX" > /opt/B.cmdlist
echo "holdcurrent $CUR_HOLD_ABC" >> /opt/B.cmdlist
echo "errorlimit $ERRORLIMIT" >> /opt/B.cmdlist
echo "spid $SPID" >> /opt/B.cmdlist
echo "maxcurrent $CUR_MAX" > /opt/C.cmdlist
echo "holdcurrent $CUR_HOLD_ABC" >> /opt/C.cmdlist
echo "errorlimit $ERRORLIMIT" >> /opt/C.cmdlist
echo "spid $SPID" >> /opt/C.cmdlist
echo "maxcurrent $CUR_MAX" > /opt/D.cmdlist
echo "holdcurrent $CUR_HOLD_D" >> /opt/D.cmdlist
echo "errorlimit $ERRORLIMIT" >> /opt/D.cmdlist
echo "spid $SPID" >> /opt/D.cmdlist
echo "Please rerun calibrate + testcal"
```
### PID values
As we do not make use of pPID but sPID we do not need any PID value adjustments
**Error limit**
The default value each Smart Stepper tolerates 1.8 degrees of error until it triggers the error pin. Trikarus does not make use of that function but it could be used for brake mechanisms for example!
```bash
vim /opt/sms_modes/sms_calibrate.sh
```
```bash
#!/bin/bash
echo "calibrate" > /opt/A.cmdlist
echo "calibrate" > /opt/B.cmdlist
echo "calibrate" > /opt/C.cmdlist
echo "calibrate" > /opt/D.cmdlist
```
## Bash scripts for daily use (mode switches)
The following scripts are worked out to be really useful for calibration and printing. They can be used by command line, by Repetier Server GUI command list drop down menu (see [Repetier Server](https://old.stadtfabrikanten.org/pages/createpage.action?spaceKey=TH&title=Repetier+Server&linkCreation=true&fromPageId=70811759)) or by the rotary encoder button (mode switch).
```bash
mkdir -p /opt/sms_modes
cd /opt/sms_modes
```
**sms\_reboot.sh**
```bash
#!/bin/bash
echo "reboot" > /opt/A.cmdlist
echo "reboot" > /opt/B.cmdlist
echo "reboot" > /opt/C.cmdlist
echo "reboot" > /opt/D.cmdlist
```
**sms\_setzero.sh**
Setting zero does only reset positions to 0. It does not set the error to 0. Cleaning the error can be done by recalibrating and/or rebooting the motor!
```bash
#!/bin/bash
#reset the encoders to pos 0
echo "setzero" > /opt/A.cmdlist
echo "setzero" > /opt/B.cmdlist
echo "setzero" > /opt/C.cmdlist
echo "setzero" > /opt/D.cmdlist
```
**sms\_smooth\_all.sh**
```bash
#!/bin/bash
#make all drives behave totaly smooth (no feelable force on it)
echo "torque 1" > /opt/A.cmdlist
echo "torque 1" > /opt/B.cmdlist
echo "torque 1" > /opt/C.cmdlist
echo "torque 1" > /opt/D.cmdlist
```
**sms\_smooth\_a.sh**
```bash
#!/bin/bash
# this smoothes Drive A for line winding issue fixing
echo "torque 1" > /opt/A.cmdlist
```
**sms\_smooth\_b.sh**
```bash
#!/bin/bash
# this smoothes Drive B for line winding issue fixing
echo "torque 1" > /opt/B.cmdlist
```
**sms\_smooth\_c.sh**
```bash
#!/bin/bash
# this smoothes Drive C for line winding issue fixing
echo "torque 1" > /opt/C.cmdlist
```
**sms\_smooth\_d.sh**
```bash
#!/bin/bash
# this smoothes Drive D for line winding issue fixing
echo "torque 1" > /opt/D.cmdlist
```
**sms\_spid\_a.sh**
```bash
#!/bin/bash
echo "torque 0" > /opt/A.cmdlist
```
**sms\_spid\_b.sh**
```bash
#!/bin/bash
echo "torque 0" > /opt/B.cmdlist
```
**sms\_spid\_c.sh**
```bash
#!/bin/bash
echo "torque 0" > /opt/C.cmdlist
```
**sms\_spid\_d.sh**
```bash
#!/bin/bash
echo "torque 0" > /opt/D.cmdlist
```
**sms\_spid\_all.sh**
```bash
#!/bin/bash
echo "torque 0" > /opt/A.cmdlist
echo "torque 0" > /opt/B.cmdlist
echo "torque 0" > /opt/C.cmdlist
echo "torque 0" > /opt/D.cmdlist
```
**sms\_torque\_all.sh**
If you cannot properly drag the effector into origin reduce the torque values. It's possible that you configured to high values. When you push down the effector it might bump up again. You might also check the motor currents.
```bash
#!/bin/bash
#regular torque mode
echo "torque 42" > /opt/A.cmdlist
echo "torque 42" > /opt/B.cmdlist
echo "torque 42" > /opt/C.cmdlist
echo "torque 28" > /opt/D.cmdlist #slightly lower value to leave effector at the bottom
source "/opt/repetier-conf.sh" #source config for Repetier Server instance
send_gcode "M106 P2 S255" #turn on the laser pointers for placing
```
**sms\_torque\_a.sh**
```bash
#!/bin/bash
#regular torque mode
echo "torque 42" > /opt/A.cmdlist
```
**sms\_torque\_b.sh**
```bash
#!/bin/bash
#regular torque mode
echo "torque 42" > /opt/B.cmdlist
```
**sms\_torque\_c.sh**
```bash
#!/bin/bash
#regular torque mode
echo "torque 42" > /opt/C.cmdlist
```
**sms\_torque\_d.sh**
```bash
#!/bin/bash
#regular torque mode
echo "torque 42" > /opt/D.cmdlist
```
**sms\_tighten\_abc.sh**
```bash
#!/bin/bash
echo "step 1 50" > /opt/A.cmdlist
echo "step 1 50" > /opt/B.cmdlist
echo "step 1 50" > /opt/C.cmdlist
```
**sms\_tighten\_d.sh**
```bash
#!/bin/bash
echo "step 0 50" > /opt/D.cmdlist
```
**sms\_release\_abc.sh**
```bash
#!/bin/bash
echo "step 0 50" > /opt/A.cmdlist
echo "step 0 50" > /opt/B.cmdlist
echo "step 0 50" > /opt/C.cmdlist
```
**sms\_release\_d.sh**
```bash
#!/bin/bash
echo "step 0 50" > /opt/D.cmdlist
```
**sms\_zdown.sh**
```bash
#!/bin/bash
#lower Z quickly
echo "torque 35" > /opt/A.cmdlist
echo "torque 35" > /opt/B.cmdlist
echo "torque 35" > /opt/C.cmdlist
echo "torque 1" > /opt/D.cmdlist
```
**sms\_zup.sh**
```bash
#!/bin/bash
#raise +Z by pro-actively winding down drives - do not get lower than -10 (e.g. -30 will remove windings from the spools without any pull force). Note that these settings highly depend on your motor currents
echo "torque -10" > /opt/A.cmdlist
echo "torque -10" > /opt/B.cmdlist
echo "torque -10" > /opt/C.cmdlist
echo "torque 90" > /opt/D.cmdlist
```
## Make them executable
```
chmod +x *.sh
```
## Script as service
Install this script four times by just replacing the Drive letter accordingly
```bash
vim /opt/smartStepperA.service
```
```ini
[Unit]
After=network.target
Description=Smart Stepper - A Drive - PySerial
[Service]
Type=simple
#this might also be "/usr/local/bin/python3.7". Check "which python3.7"
ExecStart=/usr/bin/python3.7 /opt/smartStepper.py --dev A
WorkingDirectory=/opt/
KillMode=process
Restart=on-failure
RestartSec=10
RemainAfterExit=no
User=root
Group=root
[Install]
WantedBy= multi-user.target
```
```bash
systemctl enable /opt/smartStepperA.service
systemctl start smartStepperA.service
#restart
systemctl stop smartStepperA.service && systemctl start smartStepperA.service
journalctl -f -u smartStepperA.service
```
**Output checking**
```bash
#get specific Drive information - example for A drive
journalctl -f -u smartStepperA.service | grep "Drive.*geterror"
journalctl -f -u smartStepperA.service | grep "Drive.*readpos"
journalctl -f -u smartStepperA.service | grep "Drive.*torque"
#filter out all regular stuff - this will filter out "command from list" too if same type
journalctl -f -u smartStepperA.service | grep -v "readpos*\|torque*\|geterror*"
#filter out processed commands from /opt/A.cmdlist
journalctl -f -u smartStepperA.service | grep "command from list"
#filter errors/exceptions
journalctl -f -u smartStepperA.service | grep "error\|Error" | grep -v "geterror = "
```
## Mode switch recognizing with the [KY040 rotary encoder](https://old.stadtfabrikanten.org/pages/createpage.action?spaceKey=TH&title=Encoder+KY-040+by+Keyes+-+filament+monitor&linkCreation=true&fromPageId=70811773) button
The button of the encoder is used to always put Trikarus into torque mode after pressing the button 3 times in a row quickly (less than 1.0 second). For security reasons it does only turn into torque mode but not back to previous mode because if the printer possibly receives print commands from print queue the printer could be moving while you stand in the working area of the machine. That might cause unwanted trouble with you and the lines.
```bash
vim /opt/gpio/rotaryButton.py
```
```python
import pigpio
import time
import sys
import subprocess
import logging
from systemd.journal import JournaldLogHandler
#init logger
logger = logging.getLogger("Smart Stepper mode switch button listeneristener")
logger.addHandler(JournaldLogHandler())
logger.addHandler(logging.StreamHandler(sys.stdout))
logger.setLevel(logging.DEBUG)
sw_debounce = 300
sw = 5 #GPIO Pin
hit_last_time = time.time()
hit_elapse = 0
hit_counter = 0 #init counter. gets resetted after each trigger
hit_time = 1.0 #the time the hits have to happen to trigger
hit_target = 5 #the amount until it triggers (e.g. 5 times in 1 second)
sw_input = pigpio.pi()
sw_input.set_pull_up_down(sw, pigpio.PUD_UP)
sw_input.set_glitch_filter(sw, sw_debounce)
def sw_fall(gpio, level, tick):
global hit_counter, hit_target, hit_last_time, hit_elapse
this_time = time.time()
hit_elapse = this_time - hit_last_time
hit_last_time = this_time
if hit_elapse < hit_time:
hit_counter = hit_counter + 1
if hit_counter >= hit_target:
short_press()
hit_counter = 0 #reset
else:
hit_counter = 0 #reset
sw_falling = sw_input.callback(sw, pigpio.FALLING_EDGE, sw_fall)
def short_press():
logger.info("mode switch recognized")
subprocess.call("/opt/sms_modes/sms_torque_all.sh")
while True:
a=0 #just some line to allow while loop
time.sleep(1)
#print("hello")
```
```bash
vim /opt/gpio/rotaryButton.service
```
```ini
[Unit]
After=network.target
Description=Rotary Button Service (Smart Stepper Mode Switch)
[Service]
Type=simple
ExecStart=/usr/bin/python3.7 /opt/gpio/rotaryButton.py
WorkingDirectory=/opt/
KillMode=process
Restart=on-failure
RestartSec=10
RemainAfterExit=no
User=root
Group=root
[Install]
WantedBy= multi-user.target
```
```bash
systemctl enable /opt/gpio/rotaryButton.service
systemctl start rotaryButton.service
#restart
systemctl stop rotaryButton.service && systemctl start rotaryButton.service
journalctl -f -u rotaryButton.service
```
# Smart Stepper - flashing the firmware
## How to change Vendor / Product ID?
For a better control of the [dev rules](https://old.stadtfabrikanten.org/pages/createpage.action?spaceKey=TH&title=Raspberry+Pi+3+B+-+system+wide+USB+handling&linkCreation=true&fromPageId=70811756) for Smart Stepper the Vendor IDs and product IDs can be changed! This omits to connect to static / fixed ports.
[https://github.com/Misfittech/nano\_stepper/issues/47#issuecomment-583914737](https://github.com/Misfittech/nano_stepper/issues/47#issuecomment-583914737)
```bash
vim %appdata%\..\Local\Arduino15\packages\misfittech\hardware\samd\1.0.0\boards.txt
nano_zero.vid.0=0x1209
nano_zero.pid.0=0x8087
nano_zero.vid.1=0x1209
nano_zero.pid.1=0x8086
nano_zero.build.vid=0x1209
nano_zero.build.pid=0x8087
```
## Trikarus custom firmware fork modifications
Trikarus uses custom firmware which is a mix of hangprinter smart stepper fork and recent misfit tech repo (fw 0.40) - ci [https://github.com/Misfittech/nano\_stepper/commit/ddaf3ad388c0788647d27a625718b9728841248b](https://github.com/Misfittech/nano_stepper/commit/ddaf3ad388c0788647d27a625718b9728841248b)
1. [https://gitlab.com/tobben/Smart-Stepper-for-Hangprinter/issues/1](https://gitlab.com/tobben/Smart-Stepper-for-Hangprinter/issues/1)
2. i2c stuff not implemented:
1. [https://gitlab.com/tobben/Smart-Stepper-for-Hangprinter/commit/47369f7ec7f921d845d138c8990ac040f617614e](https://gitlab.com/tobben/Smart-Stepper-for-Hangprinter/commit/47369f7ec7f921d845d138c8990ac040f617614e)
2. [https://gitlab.com/tobben/Smart-Stepper-for-Hangprinter/commit/4d296668e11170089cbb9fd477c03788c4c5b3a0](https://gitlab.com/tobben/Smart-Stepper-for-Hangprinter/commit/4d296668e11170089cbb9fd477c03788c4c5b3a0)
3. [https://gitlab.com/tobben/Smart-Stepper-for-Hangprinter/commit/8fecdd1dda00aae269401cd1b4c4951bb27ae762](https://gitlab.com/tobben/Smart-Stepper-for-Hangprinter/commit/8fecdd1dda00aae269401cd1b4c4951bb27ae762)
4. [https://gitlab.com/tobben/Smart-Stepper-for-Hangprinter/commit/e547967287961c84273519bf4dc00aaefabdf21f](https://gitlab.com/tobben/Smart-Stepper-for-Hangprinter/commit/e547967287961c84273519bf4dc00aaefabdf21f)
5. [https://gitlab.com/tobben/Smart-Stepper-for-Hangprinter/commit/367fc4db3d0e22351c8864890462f9dd021fe2ee](https://gitlab.com/tobben/Smart-Stepper-for-Hangprinter/commit/367fc4db3d0e22351c8864890462f9dd021fe2ee)
## Flashing directly from Windows client
[http://misfittech.net/blog/arduino-package-install](http://misfittech.net/blog/arduino-package-install/)
[https://github.com/microsoft/uf2](https://github.com/microsoft/uf2)
## Install Arduino IDE
Version 1.6.4 or greater is required → [Download](https://www.arduino.cc/en/Main/Software)
## Add custom boards manager URL
Now we add the Misfit Tech package by URL. To do this open the preferences page on the IDE by going to File → Preferences. Add "[https://github.com/Misfittech/arduino-board-index/raw/master/package\_misfittech\_index.json](https://github.com/Misfittech/arduino-board-index/raw/master/package_misfittech_index.json)"
[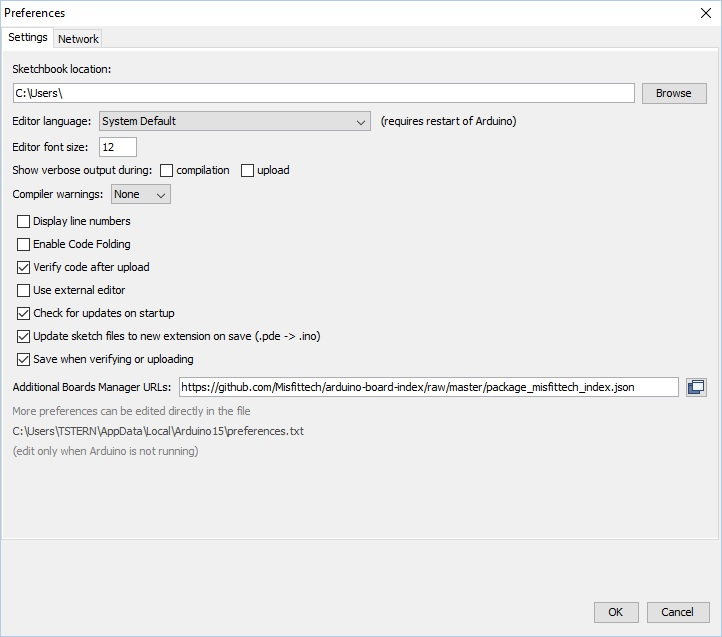](https://wiki.stadtfabrikanten.org/uploads/images/gallery/2026-06/ASRaOTIemwfdJAP4-grafik.png)
## Install Board Manager "MisfitTech SAMD Boards"
[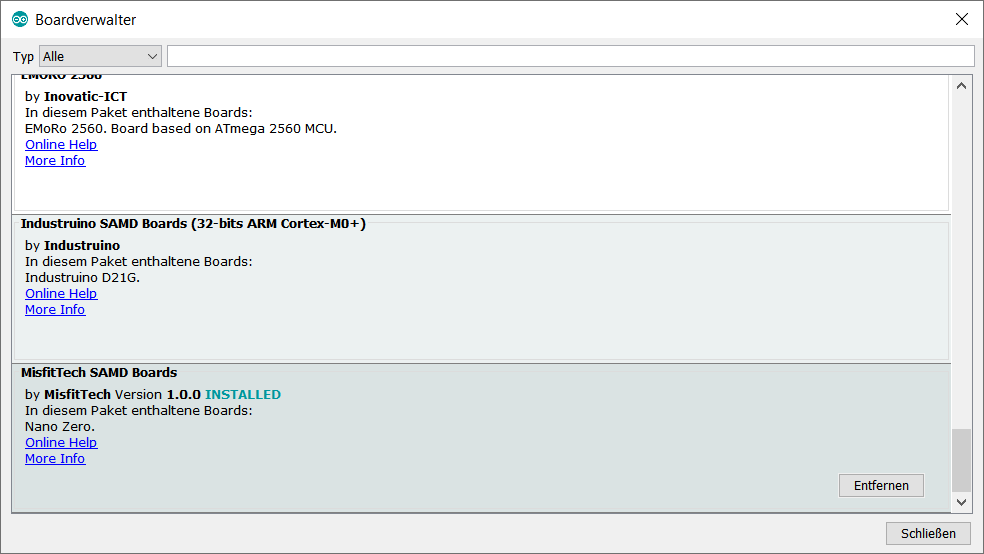](https://wiki.stadtfabrikanten.org/uploads/images/gallery/2026-06/pUEZzVG5FT7QlxvW-grafik.png)
## Flash
[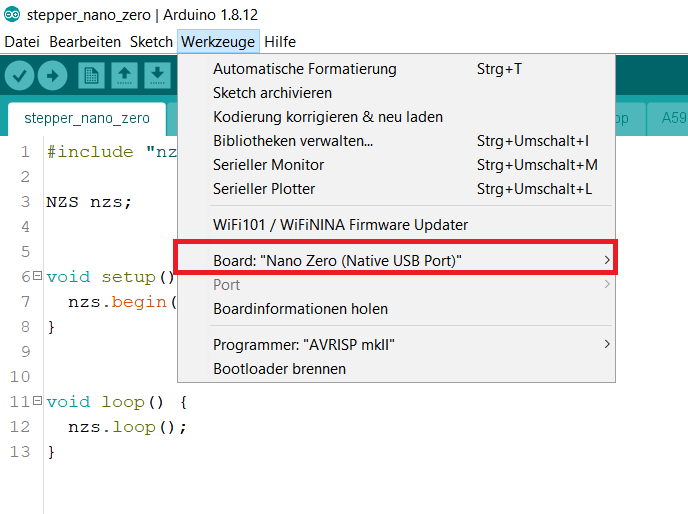](https://wiki.stadtfabrikanten.org/uploads/images/gallery/2026-06/pxJQxIbheUI5whfb-grafik.png)
## Flashing directly from Raspberry Pi (where the motors are connected to by USB serial)
## Install Arduino IDE
```bash
#install arduino
apt install arduino
```
Please note that arduino command requires X11 forward to work because it's a windowed application.
## Check if arduino-cli is existent
if not: install it using the following command. It will be installed into **/usr/bin/arduino-cl**
```bash
cd /usr
curl -fsSL https://raw.githubusercontent.com/arduino/arduino-cli/master/install.sh | sh
```
## Initialize and configure
```bash
arduino-cli config init
#edit the newly generated config file
vim ~/.arduino15/arduino-cli.yaml
```
```ini
board_manager:
additional_urls:
- "https://github.com/Misfittech/arduino-board-index/raw/master/package_misfittech_index.json"
daemon:
port: "50051"
directories:
data: /root/.arduino15
downloads: /root/.arduino15/staging
user: /root/Arduino
logging:
file: ""
format: text
level: info
telemetry:
addr: :9090
enabled: true
```
## Update Index
```bash
arduino-cli core update-index
```
```ini
Downloading missing tool builtin:ctags@5.8-arduino11...
builtin:ctags@5.8-arduino11 downloaded
Installing builtin:ctags@5.8-arduino11...
builtin:ctags@5.8-arduino11 installed
Downloading missing tool builtin:serial-discovery@1.0.0...
builtin:serial-discovery@1.0.0 downloaded
Installing builtin:serial-discovery@1.0.0...
builtin:serial-discovery@1.0.0 installed
Updating index: library_index.json downloaded
Updating index: package_index.json downloaded
Updating index: package_misfittech_index.json downloaded
```
## Install Smart Stepper Board Support
```bash
#this may take up to 5 minutes
arduino-cli core install misfittech:samd
```
```ini
Downloading packages...
arduino:arm-none-eabi-gcc@4.8.3-2014q1 downloaded
arduino:bossac@1.6.1-arduino downloaded
arduino:openocd@0.9.0-arduino downloaded
arduino:CMSIS@4.0.0-atmel downloaded
misfittech:samd@1.0.0 downloaded
Installing arduino:arm-none-eabi-gcc@4.8.3-2014q1...
arduino:arm-none-eabi-gcc@4.8.3-2014q1 installed
Installing arduino:bossac@1.6.1-arduino...
arduino:bossac@1.6.1-arduino installed
Installing arduino:openocd@0.9.0-arduino...
arduino:openocd@0.9.0-arduino installed
Installing arduino:CMSIS@4.0.0-atmel...
arduino:CMSIS@4.0.0-atmel installed
Installing misfittech:samd@1.0.0...
Error during install: extracting archive: open /home/hangprintermanage/.arduino15/tmp/package-880721797: is a directory
```
This fails with error. You can fix it manually:
```bash
mkdir -p ~/.arduino15/packages/misfittech/hardware/samd/
cd ~/.arduino15/packages/misfittech/hardware/samd/
wget https://github.com/Misfittech/arduino-board-index/raw/master/boards/misfittech_samd-1.0.0.tar.bz2
tar jxf misfittech_samd-1.0.0.tar.bz2
rm misfittech_samd-1.0.0.tar.bz2
mv misfittech_samd-1.0.0/ 1.0.0/
```
## Check if installed properly
```bash
arduino-cli core list
```
```ini
ID Installed Latest Name
misfittech:samd 1.0.0 1.0.0 MisfitTech SAMD Boards
```
## For information only: get device list
Get the list of real /dev devices. The ttyUSB-SMART\* are only symlinks
```bash
ls -l /dev/serial/by-id
ls -alF /dev |grep ttyUSB-SMART
python3.7 -m serial.tools.list_ports
arduino-cli board list #get the connected USB device
```
## Compile ad upload fresh .bin files to Smart Stepper devices
Do the following steps as the user who installed arduino and configured arduino-cli
```bash
mkdir -p /home/hangprintermanage/firmware_smartstepper_trikarus/stepper_nano_zero
#copy *.ino and sketch files into /home/hangprintermanage/stepper_nano_zero/
#at the top level of the directory
cd /home/hangprintermanage/firmware_smartstepper_trikarus/stepper_nano_zero/
#compile the sketch (get stepper_nano_zero.misfittech.samd.nano_zero.bin file)
arduino-cli compile --fqbn misfittech:samd:nano_zero
#upload the sketch - note that /dev/ttyUSB-SMART* symlinks do not work. You need the real tty names. You can use readlink to find correct tty behind symlinks
arduino-cli upload -p $(readlink -f /dev/ttyUSB-SMART-A-AXIS) --fqbn misfittech:samd:nano_zero && sleep 4 && screen /dev/ttyUSB-SMART-A-AXIS
arduino-cli upload -p $(readlink -f /dev/ttyUSB-SMART-B-AXIS) --fqbn misfittech:samd:nano_zero && sleep 4 && screen /dev/ttyUSB-SMART-B-AXIS
arduino-cli upload -p $(readlink -f /dev/ttyUSB-SMART-C-AXIS) --fqbn misfittech:samd:nano_zero && sleep 4 && screen /dev/ttyUSB-SMART-C-AXIS
arduino-cli upload -p $(readlink -f /dev/ttyUSB-SMART-D-AXIS) --fqbn misfittech:samd:nano_zero && sleep 4 && screen /dev/ttyUSB-SMART-D-AXIS
```
## More advanced compilation and upload with known calibration values
In case the Smart Steppers should not be moved it's a good idea to prevent Smart Steppers requiring re-calibration after new firmware upload. In this case you can compile with known values. Using the "getcal" command in Smart Stepper interface you can get the motor specific calibration values. Those values will be put in nonvolatile.cpp file on line 53 which is commented out in default mode.
You can also get the calibration values calling using the Python Serial parser described at [Smart Stepper - calibration and control modes (sPID mode, pPID mode and torque mode)](https://old.stadtfabrikanten.org/pages/viewpage.action?pageId=70811759)
```bash
python3.7 /opt/smartStepper.py --dev A --getcal
```
Typical calibration errors are around 0.1 degree or better. If your calibration is worse than this make sure your board is tightened down to motor on all four screws and run the calibration and test again. If the error is still high then you might want to check and make sure magnet is glued to the shaft properly.
Do the following steps as the user who installed arduino and configured arduino-cli
```bash
cd /home/hangprintermanage/firmware_smartstepper_trikarus/stepper_nano_zero/
# Drive A - getcal: "Max error is 0.043 degrees"
sed -i '53s/.*/18109,18426,18752,19066,19387,19714,20037,20353,20672,20994,21316,21632,21953,22278,22600,22919,23239,23567,23892,24209,24532,24865,25188,25509,25839,26167,26496,26820,27151,27485,27816,28135,28467,28801,29132,29456,29785,30118,30440,30763,31091,31420,31749,32069,32395,32728,33050,33368,33694,34024,34347,34669,34991,35320,35641,35959,36287,36615,36943,37263,37587,37921,38247,38569,38897,39228,39561,39881,40213,40551,40881,41208,41540,41874,42214,42542,42874,43212,43551,43878,44212,44549,44888,45215,45548,45882,46223,46550,46882,47209,47543,47872,48198,48527,48862,49181,49511,49837,50163,50483,50808,51135,51460,51778,52103,52428,52753,53073,53393,53719,54044,54362,54682,55010,55336,55653,55980,56305,56628,56952,57275,57602,57931,58258,58582,58911,59238,59567,59892,60221,60556,60878,61207,61541,61873,62201,62529,62861,63189,63513,63843,64175,64507,64827,65161,65486,283,603,935,1262,1589,1907,2237,2560,2889,3208,3535,3864,4189,4510,4839,5166,5495,5821,6146,6480,6811,7134,7463,7801,8130,8461,8792,9129,9462,9795,10129,10466,10802,11137,11470,11811,12149,12477,12813,13157,13490,13819,14154,14490,14823,15153,15479,15814,16145,16470,16794,17124,17452,17771,/' nonvolatile.cpp
arduino-cli compile --fqbn misfittech:samd:nano_zero
arduino-cli upload -p $(readlink -f /dev/ttyUSB-SMART-A-AXIS) --fqbn misfittech:samd:nano_zero && sleep 4 && screen /dev/ttyUSB-SMART-A-AXIS
# Drive B - getcal: "Max error is 0.049 degrees"
sed -i '53s/.*/1007,1325,1650,1976,2315,2644,2973,3297,3630,3960,4289,4615,4947,5277,5610,5933,6264,6596,6927,7250,7583,7914,8242,8569,8903,9233,9561,9889,10222,10552,10880,11206,11540,11867,12201,12525,12857,13190,13516,13841,14173,14502,14829,15151,15485,15812,16142,16466,16793,17122,17452,17773,18101,18425,18755,19076,19405,19731,20061,20381,20711,21035,21363,21680,22010,22336,22662,22984,23311,23638,23966,24285,24615,24940,25269,25588,25919,26247,26573,26895,27224,27550,27880,28202,28534,28862,29190,29516,29845,30175,30504,30826,31158,31488,31814,32137,32468,32798,33122,33448,33779,34107,34428,34754,35087,35417,35744,36067,36398,36725,37054,37377,37709,38036,38368,38687,39018,39345,39676,39998,40328,40659,40988,41313,41643,41974,42303,42625,42959,43288,43618,43943,44269,44603,44932,45261,45590,45921,46248,46572,46905,47232,47560,47882,48213,48544,48873,49194,49523,49852,50178,50500,50825,51152,51481,51801,52130,52457,52780,53104,53431,53760,54085,54404,54732,55059,55383,55707,56033,56359,56688,57010,57336,57664,57992,58316,58644,58969,59299,59624,59952,60280,60612,60934,61264,61595,61922,62248,62578,62906,63238,63567,63895,64225,64551,64878,65211,7,340,660,/' nonvolatile.cpp
arduino-cli compile --fqbn misfittech:samd:nano_zero
arduino-cli upload -p $(readlink -f /dev/ttyUSB-SMART-B-AXIS) --fqbn misfittech:samd:nano_zero && sleep 4 && screen /dev/ttyUSB-SMART-B-AXIS
# Drive C - getcal: "Max error is 0.054 degrees"
sed -i '53s/.*/25926,26245,26573,26897,27228,27554,27881,28211,28540,28873,29203,29526,29862,30191,30521,30849,31183,31513,31843,32169,32503,32832,33162,33486,33816,34143,34467,34789,35120,35444,35767,36091,36424,36753,37082,37408,37748,38078,38409,38735,39074,39405,39733,40056,40387,40713,41033,41351,41679,42002,42322,42641,42970,43296,43617,43939,44277,44605,44929,45255,45596,45925,46257,46582,46918,47246,47575,47898,48230,48557,48886,49203,49532,49860,50182,50505,50833,51157,51480,51801,52133,52458,52782,53100,53430,53751,54070,54383,54706,55023,55339,55651,55972,56291,56608,56918,57242,57560,57877,58192,58521,58843,59169,59487,59816,60140,60464,60785,61120,61442,61771,62095,62428,62758,63086,63417,63753,64082,64413,64742,65077,65407,204,530,866,1196,1524,1851,2185,2515,2840,3163,3496,3822,4150,4471,4807,5133,5460,5785,6120,6446,6780,7106,7443,7776,8106,8431,8769,9097,9429,9749,10087,10417,10746,11077,11409,11741,12073,12399,12740,13070,13402,13728,14067,14399,14732,15059,15398,15734,16067,16397,16734,17068,17401,17729,18069,18395,18726,19048,19385,19716,20045,20371,20705,21032,21361,21685,22016,22345,22673,22994,23329,23654,23980,24301,24632,24954,25281,25601,/' nonvolatile.cpp
arduino-cli compile --fqbn misfittech:samd:nano_zero
arduino-cli upload -p $(readlink -f /dev/ttyUSB-SMART-C-AXIS) --fqbn misfittech:samd:nano_zero && sleep 4 && screen /dev/ttyUSB-SMART-C-AXIS
# Drive D - getcal: "Max error is 0.054 degrees"
sed -i '53s/.*/2426,2760,3087,3420,3742,4077,4401,4728,5054,5384,5708,6030,6352,6681,6997,7317,7635,7957,8271,8592,8909,9233,9555,9878,10202,10528,10864,11192,11523,11857,12187,12518,12851,13180,13519,13841,14174,14501,14833,15165,15493,15831,16159,16490,16818,17145,17481,17818,18148,18466,18796,19116,19445,19769,20099,20414,20735,21050,21370,21686,21999,22315,22628,22934,23245,23558,23867,24183,24491,24809,25126,25441,25760,26082,26404,26725,27048,27380,27705,28030,28358,28695,29020,29349,29682,30014,30346,30680,31016,31350,31674,32002,32337,32674,33006,33337,33670,34005,34334,34662,35001,35334,35663,35993,36319,36650,36972,37298,37619,37944,38269,38590,38912,39240,39559,39882,40204,40530,40855,41180,41504,41836,42160,42491,42818,43156,43478,43813,44144,44476,44809,45140,45472,45805,46135,46466,46797,47137,47472,47789,48116,48449,48780,49107,49436,49769,50099,50422,50748,51071,51399,51734,52057,52392,52713,53039,53360,53693,54018,54345,54667,55001,55320,55646,55973,56302,56627,56956,57279,57610,57936,58265,58585,58913,59239,59564,59889,60218,60546,60878,61207,61544,61875,62214,62541,62882,63218,63561,63896,64237,64577,64920,65252,65,404,741,1076,1408,1743,2081,/' nonvolatile.cpp
arduino-cli compile --fqbn misfittech:samd:nano_zero
arduino-cli upload -p $(readlink -f /dev/ttyUSB-SMART-D-AXIS) --fqbn misfittech:samd:nano_zero && sleep 4 && screen /dev/ttyUSB-SMART-D-AXIS
#reset the original nonvolatile.cpp file to prevent uploading wrong calibration values to some Smart Stepper at some point
sed -i '53s/.*/ /' nonvolatile.cpp
```
Working with the smart steppers over a long time it's possible that you need to recalibrate at a later point to reduce the error. A higher error can be caused by different physical triggers like temperature / climate change at the place where the components are installed to.
## Re-apply your custom motor settings
After flashing previous values get lost like maxcurrent and holdcurrent.
Run **/opt/sms\_modes/sms\_preconfigure.sh** to set them again. Please see [Smart Stepper - calibration and control modes (sPID mode, pPID mode and torque mode)](https://old.stadtfabrikanten.org/pages/viewpage.action?pageId=70811759)
## Or upload pre-compiled \*.bin files to Smart Stepper devices
this requires the bossac command. This command comes frome misfittech package! no need to install the package "bossa".
```bash
#set the Smart Steppers into boot loader mode by sending "boot" command. Therefore open some screen terminal for each smart stepper
screen /dev/ttyACM1
screen /dev/ttyACM2
screen /dev/ttyACM3
screen /dev/ttyACM4
cd /home/hangprintermanage/firmware_smartstepper_trikarus/stepper_nano_zero/
~/.arduino15/packages/arduino/tools/bossac/1.6.1-arduino/bossac -i -d --port=ttyACM1 -U true -i -e -w -v ./stepper_nano_zero.misfittech.samd.nano_zero.bin -R
~/.arduino15/packages/arduino/tools/bossac/1.6.1-arduino/bossac -i -d --port=ttyACM2 -U true -i -e -w -v ./stepper_nano_zero.misfittech.samd.nano_zero.bin -R
~/.arduino15/packages/arduino/tools/bossac/1.6.1-arduino/bossac -i -d --port=ttyACM3 -U true -i -e -w -v ./stepper_nano_zero.misfittech.samd.nano_zero.bin -R
~/.arduino15/packages/arduino/tools/bossac/1.6.1-arduino/bossac -i -d --port=ttyACM4 -U true -i -e -w -v ./stepper_nano_zero.misfittech.samd.nano_zero.bin -R
```
# Smart Stepper - USB, Soft and hard reset
## USB Reset way #1 - bind/unbind
The following unbind command will kill complete USB chip for session if you type only "1-1". It will cut through SSH so you need to reboot manually. You only want to kill certain parts. So at first list all usb devices and then do some echo "1-1.2" to kill port 2 only. Unbinding will power off the devices like uhubctl does!
```bash
#list USB
cd /sys/bus/usb/drivers/usb
ls -alF
#turn OFF USB chip
echo '1-1.2' |sudo tee /sys/bus/usb/drivers/usb/unbind
#turn ON USB chip
echo '1-1.2' |sudo tee /sys/bus/usb/drivers/usb/bind
```
## USB Reset way #2 - uhubctl
This tool can power on / power off / cycle USB devices. This was successfully tested on Raspberry Pi 3B
**Very useful and important information: [https://github.com/mvp/uhubctl](https://github.com/mvp/uhubctl)**
```bash
apt install libusb-1.0-0-dev
cd /opt
git clone https://github.com/mvp/uhubctl
cd uhubctl/
make
```
```bash
/opt/uhubctl/uhubctl -r 500 -l 1-1 -p 2 -a off #works to make devices completely dead (power off).
/opt/uhubctl/uhubctl -l 1-1 -p 2 -a on #revive (power on)
```
Warnings
- Using the wrong number for -p switch might kill Ethernet device. This will destroy SSH availability. Then you will need to power off Raspberry Pi. This has to be done be climbing up to the top of the printer because USV is running!
- Use the -r switch due to the fact that otherwise it will revive itself after some seconds. See github documentation! vaule 500 works in this case
- Use the -l switch to get the correct device path. You can have a better look with:
```bash
lsusb
lsusb -t
lsusb -v -d 0x1209: > stepperDump.log
```
- hard reboot: Smart Stepper can be reset using unbind/bind commands or uhubctl (this will only work if the PSU is off so the only supplied power comes from USB. If USB + PSU connected nothing will happen! So power off PSU controlling the power relay with Duet)
- soft reboot: Smart Stepper can be reboot by bash script (/opt/serialsend.sh A "reboot")
# Updating software
- Backup the SD card image for larger upgrade → see [High Endurance Micro-SDHC card 32 GB 100 MB/s UHS Class 3 by SANDISK](https://wiki.stadtfabrikanten.org/books/trikarus-project-hangprinter/page/ceiling-module-high-endurance-micro-sdhc-card-32-gb-100-mbs-uhs-class-3-by-sandisk "Ceiling Module | High Endurance Micro-SDHC card 32 GB 100 MB/s UHS Class 3 by SANDISK")
- Update Repetier Server (using software frontend)
- Update Grafana → use `/opt/upgrade-grafana.sh` script
```bash
apt update
apt upgrade
#fix some broken keys if required:
curl -sS https://dl.yarnpkg.com/debian/pubkey.gpg | sudo apt-key add -
#An error occurred during the signature verification. The repository is not updated and the previous index files will be used. GPG error: http://deb.debian.org/debian unstable InRelease: The following signatures couldn't be verified because the public key is not available: NO_PUBKEY 648ACFD622F3D138 NO_PUBKEY 0E98404D386FA1D9
sudo apt-key adv --keyserver keyserver.ubuntu.com --recv-keys 648ACFD622F3D138
```
# Used Software / Firmware stack
# Overview of used firmware and software + where to donate
- using the great STL thumbnail generator for Windows Explorer → [https://marlin3dprintertool.se/stl-thumbnail/](https://marlin3dprintertool.se/stl-thumbnail/)
## Not used / not tested but interesting to make use of
- [https://github.com/wilriker/rfm](https://github.com/wilriker/rfm)
- [https://github.com/gtjoseph/DueUI/wiki](https://github.com/gtjoseph/DueUI/wiki)
- [https://github.com/kungergely92/RBD](https://github.com/kungergely92/RBD)
- Slicer
- Simplify3D
- Cura
- [IceSL](https://icesl.loria.fr/about/)
- Server
- Octoprint
# Webcam streaming with mjpg-streamer
The webcam used at Trikarus is used to deal for monitoring purposes and timelapse videos. Public embedding of the screen would create much traffic so we keep it for internal use only. It's stream is embedded into Repetier Server, Duet Web Control, Grafana, Instar Mobile App and screenshots are sent by email once per day. The main target is to make timelapse videos while printing large objects or for testing. This shall help to analyse the printing routines.
## Installation of mjpg\_streamer (Repetier Server script)
[https://www.repetier-server.com/setting-webcam-repetier-server-linux](https://www.repetier-server.com/setting-webcam-repetier-server-linux)
```bash
sudo apt-get update
sudo apt-get install libjpeg8-dev imagemagick libv4l-dev v4l-utils make gcc git cmake g++
git clone https://github.com/jacksonliam/mjpg-streamer.git
cd mjpg-streamer/mjpg-streamer-experimental/
cmake -G "Unix Makefiles"
make
sudo make install
#test
/usr/local/bin/mjpg_streamer -i "input_uvc.so -r 1280x720 -d /dev/video0 -f 30" -o "output_http.so -p 8080 -w /usr/local/share/mjpg-streamer/www"
#access it on http://hangdevice:8080
sudo su
cd /usr/local
wget http://download.repetier-server.com/files/server/extras/mjpgstreamer-init-debian/Repetier-Setup.zip
unzip Repetier-Setup.zip
```
```bash
v4l2-ctl --list-formats-ext
vim /usr/local/Repetier-Setup/etc/webcam.conf
```
```ini
# Framerate and capture size. Bigger sizes and frequencies need more storage/ram and bandwidth so consider if
# you can handle better values or not.
WEBCAM_FRAMERATE=10
WEBCAM_WIDTH=1920
WEBCAM_HEIGHT=1080
# Default jpg quality is 85%
WEBCAM_QUALITY=100
# Extra paremeter for pi module when started.
WEBCAM_PICAM_PARAMS=""
# Extra parameter for usb module when started.
WEBCAM_USB_PARAMS=""
# Is this a pi where a picam could be connected? yes or no
IS_PI="no"
# Path to
MJPG_STREAMER=/usr/local/bin/mjpg_streamer
MJPG_PLUGIN_DIR=/usr/local/lib/mjpg-streamer
MJPG_WWW_DIR=/usr/local/share/mjpg-streamer/www
# WEBCAM_DIR is used for naming video devices
# /dev/v4l/by-id/* Is to use the device names. It is not important where you plug it in
# /dev/v4l/by-path/* Is to use th eusb port plugged in to identify webcams. Use this if you have identical names
WEBCAM_DIR=/dev/v4l/by-path/*
```
Do not raise the fps to values higher than 10 because Firefox starts lagging/freezing. Details can be found at [https://forum.repetier.com/discussion/comment/32058#Comment\_32058](https://forum.repetier.com/discussion/comment/32058#Comment_32058). In Chrome it was tested to rn with 30 fps totally fluent.
```bash
cd /usr/local/Repetier-Setup/bin
chmod 755 installWebcam2
./installWebcam2 install
```
## Repetier Server settings
Configure
- shoot images every 10 seconds
- framerate: 30 fps
- bitrate: 8000 kbps
[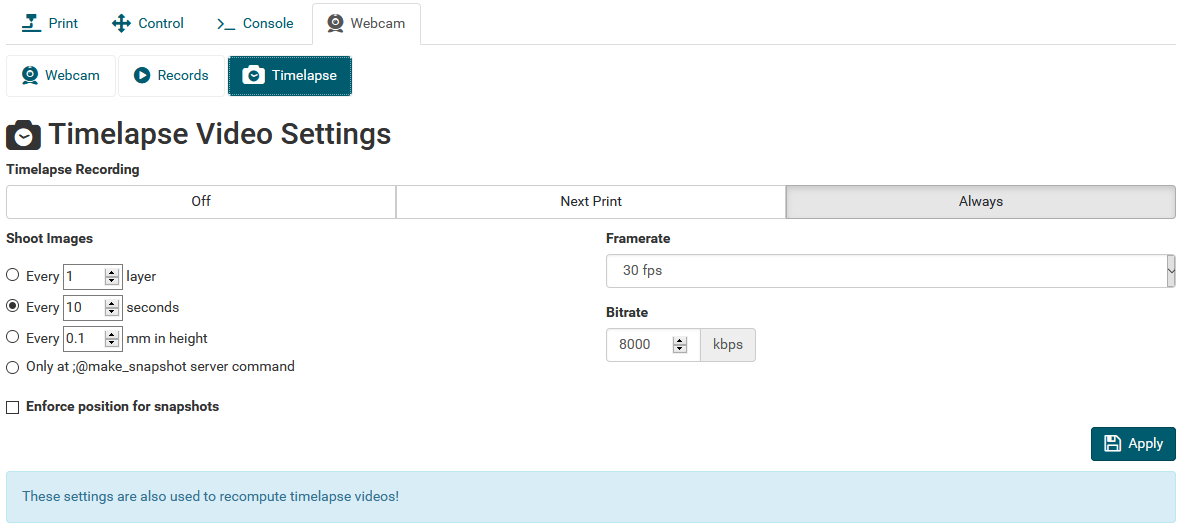](https://wiki.stadtfabrikanten.org/uploads/images/gallery/2026-06/KrcHpsXdqUL78mah-grafik.png)
Warning: after a finished print the Raspberry Pi has higher system load because it will generate a timelapse video file. This can take into account more than an hour. The CPU temperature will rise
## Adjusting webcam parameters (zoom, fokus, etc.)
[https://www.kurokesu.com/main/2016/01/16/manual-usb-camera-settings-in-linux](https://www.kurokesu.com/main/2016/01/16/manual-usb-camera-settings-in-linux/)
```bash
#get modes of camera
v4l2-ctl -d /dev/video0 --list-ctrls
brightness (int) : min=0 max=255 step=1 default=128 value=128
contrast (int) : min=0 max=255 step=1 default=128 value=128
saturation (int) : min=0 max=255 step=1 default=128 value=128
white_balance_temperature_auto (bool) : default=1 value=1
gain (int) : min=0 max=255 step=1 default=0 value=255
power_line_frequency (menu) : min=0 max=2 default=2 value=2
white_balance_temperature (int) : min=2000 max=6500 step=1 default=4000 value=2645 flags=inactive
sharpness (int) : min=0 max=255 step=1 default=128 value=128
backlight_compensation (int) : min=0 max=1 step=1 default=0 value=0
exposure_auto (menu) : min=0 max=3 default=3 value=3
exposure_absolute (int) : min=3 max=2047 step=1 default=250 value=666 flags=inactive
exposure_auto_priority (bool) : default=0 value=1
pan_absolute (int) : min=-36000 max=36000 step=3600 default=0 value=0
tilt_absolute (int) : min=-36000 max=36000 step=3600 default=0 value=0
focus_absolute (int) : min=0 max=250 step=5 default=0 value=0 flags=inactive
focus_auto (bool) : default=1 value=1
zoom_absolute (int) : min=100 max=500 step=1 default=100 value=100
#get specific value only
v4l2-ctl -d /dev/video0 --get-ctrl=zoom_absolute
zoom_absolute: 100
#set new values
v4l2-ctl -d /dev/video0 --set-ctrl=focus_auto=0
v4l2-ctl -d /dev/video0 --set-ctrl=focus_absolute=150
v4l2-ctl -d /dev/video0 --set-ctrl=zoom_absolute=100
```
The same settings can also be done with
```bash
apt-get install uvcdynctrl
uvcdynctrl -c
```
## Embedding of the webcam
The used webcam does not allow to flip the image by software settings. For this reason we have to rotate the image afterwards. In the different software (Repetier Server, DWC, Grafana) this can be done different ways. For embedding in Grafana a simple CSS transformation ca be used:
```xml
```
## (Re)start mjpg\_streamer
```
service mjpg_streamer status
lsof -i tcp:8080
service mjpg_streamer restart
#in failure case (unclosed web sockets) - force webcam kill
pkill -9 mjpg_streamer
```
Raspbian Buster v4l-utils fix (0 fps, 0x0 resolution) →Since Buster the output of "/usr/bin/v4l2-ctl --list-formats-ext -d /dev/video0" is different than on Jessie or Stretch. See [https://forum.repetier.com/discussion/7144/repetier-server-linux-webcam-script-chokes-on-raspian-buster/p1](https://forum.repetier.com/discussion/7144/repetier-server-linux-webcam-script-chokes-on-raspian-buster/p1) for fix.
## mjpgStart script modification
While resetting USB devices it sometimes happens that /dev/video$NR number changes. This leads to wrong port mapping for mjpg\_streamer. The following modification was done to ensure that the webcam always appears on port 8080 and accepts random device number
```bash
#!/bin/bash
DIR="$( cd "$( dirname "${BASH_SOURCE[0]}" )" && pwd )"
cd $DIR
. ../etc/webcam.conf
DEV=$(ls -l /dev/v4l/by-id | grep "C920" | head -n1 | awk -F ' ' '{print $11}' | cut -c12)
PORT=8080
IFS=$'\n'
VIDEO="/dev/video${DEV}"
VIDEO_TEST=$(/usr/bin/v4l2-ctl --list-formats-ext -d $VIDEO)
MJPG_TEST=$(echo "$VIDEO_TEST" | /bin/grep "Pixel Format: 'MJPG' (compressed)")
MJPG_PARAM_YUYV=""
PIXEL_FORMAT="MJPG"
if [ "$MJPG_TEST" == "" ]; then
MJPG_PARAM_YUYV=" -y"
PIXEL_FORMAT="YUYV"
echo "Webcam does not support MJPG - using slower YUYV instead!"
fi
echo $PIXEL_FORMAT
BEST_WIDTH=0
BEST_HEIGHT=0
BEST_FRAMERATE=0
BEST_ERROR=$(($WEBCAM_WIDTH * $WEBCAM_HEIGHT))
IN_FORMAT=0
for AP in $VIDEO_TEST; do
if [[ $AP =~ Pixel[[:space:]]Format:.*\'(.*)\' ]]; then
CUR_FORMAT=${BASH_REMATCH[1]}
IN_FORMAT=0
if [[ "$CUR_FORMAT" == "$PIXEL_FORMAT" ]]; then
IN_FORMAT=1
IN_FR=0
fi
fi
if (( $IN_FORMAT == 1 )); then
if [[ "$AP" =~ Size:.Discrete.([0-9]+)x([0-9]+) ]]; then
ACT_W=${BASH_REMATCH[1]}
ACT_H=${BASH_REMATCH[2]}
ACT_ERROR=$(( ($WEBCAM_WIDTH * $WEBCAM_HEIGHT) - ($ACT_W * $ACT_H) ))
if (( $ACT_ERROR < 0 )); then
ACT_ERROR=$(( -$ACT_ERROR ))
fi
if (( $ACT_ERROR < $BEST_ERROR )); then
BEST_ERROR=$ACT_ERROR
BEST_FRAMERATE=0
BEST_WIDTH=$ACT_W
BEST_HEIGHT=$ACT_H
IN_FR=1
else
IN_FR=0
fi
fi
if (( $IN_FR == 1 )); then
if [[ "$AP" =~ Interval.*\(([0-9]+)\.000 ]]; then
ACT_FR=${BASH_REMATCH[1]}
if (( $ACT_FR >= $WEBCAM_FRAMERATE )) || (( $BEST_FRAMERATE == 0 )); then
BEST_FRAMERATE="${ACT_FR}"
fi
fi
fi
fi
done
echo "Best resolution: $BEST_WIDTH x $BEST_HEIGHT at $BEST_FRAMERATE"
echo "${MJPG_STREAMER} -i \"${MJPG_PLUGIN_DIR}/input_uvc.so -d ${VIDEO} --fps ${BEST_FRAMERATE} -q ${WEBCAM_QUALITY} -r ${BEST_WIDTH}x${BEST_HEIGHT}${MJPG_PARAM_YUYV} ${WEBCAM_USB_PARAMS}\" -o \"${MJPG_PLUGIN_DIR}/output_http.so -p ${PORT} -w ${MJPG_WWW_DIR}\" -b"
${MJPG_STREAMER} -i "${MJPG_PLUGIN_DIR}/input_uvc.so -d ${VIDEO} --fps ${BEST_FRAMERATE} -q ${WEBCAM_QUALITY} -r ${BEST_WIDTH}x${BEST_HEIGHT}${MJPG_PARAM_YUYV} ${WEBCAM_USB_PARAMS}" -o "${MJPG_PLUGIN_DIR}/output_http.so -p ${PORT} -w ${MJPG_WWW_DIR}" -b
```
## Install ffmpeg and configure (for timelapse use on Repetier Server)
[https://www.repetier-server.com/knowledgebase/timelapse-problems](https://www.repetier-server.com/knowledgebase/timelapse-problems/)
```bash
apt install ffmpeg
which ffmpeg
# /usr/bin/ffmpeg
```
## mjpg Webstream on SSL with password (required for Duet Web Control and Grafana)
Port 8080 is blocked by iptables. We use SSL and password secured port 8081
`vim /etc/apache2/ports.conf` → enable port 8081
```xml
ServerName localhost
ServerAdmin project_hangprinter@fablabchemnitz.de
SSLEngine on
SSLCertificateFile /etc/ssl/certs/trikarus.pem
SSLCertificateKeyFile /etc/ssl/private/trikarus-key.pem
AuthType Basic
AuthName "Authentication Required"
AuthUserFile "/etc/apache2/htusers"
Require valid-user
ProxyPass http://localhost:8080/
ProxyPassReverse http://localhost:8080/
ErrorLog ${APACHE_LOG_DIR}/error-mjpeg.log
CustomLog ${APACHE_LOG_DIR}/access-mjpeg.log combined
```
## mjpg Webstream with Instar Vision App for Android (disabled)
```xml
>
ServerName domain.de
ServerAdmin address@mail.server
ErrorLog ${APACHE_LOG_DIR}/error-trikarus-mjpeg.log
CustomLog ${APACHE_LOG_DIR}/access-trikarus-mjpeg.log combined
ProxyRequests Off
ProxyPreserveHost On
ProxyPass / http://192.168.11.2:8080/ flushpackets=on Keepalive=On
AuthType Basic
AuthName "Authentication Required"
AuthUserFile "/etc/apache2/htusers"
Require valid-user
```
Instar supports mpjeg streams only with http - https does not work! Also the picture can not be rotated here!
[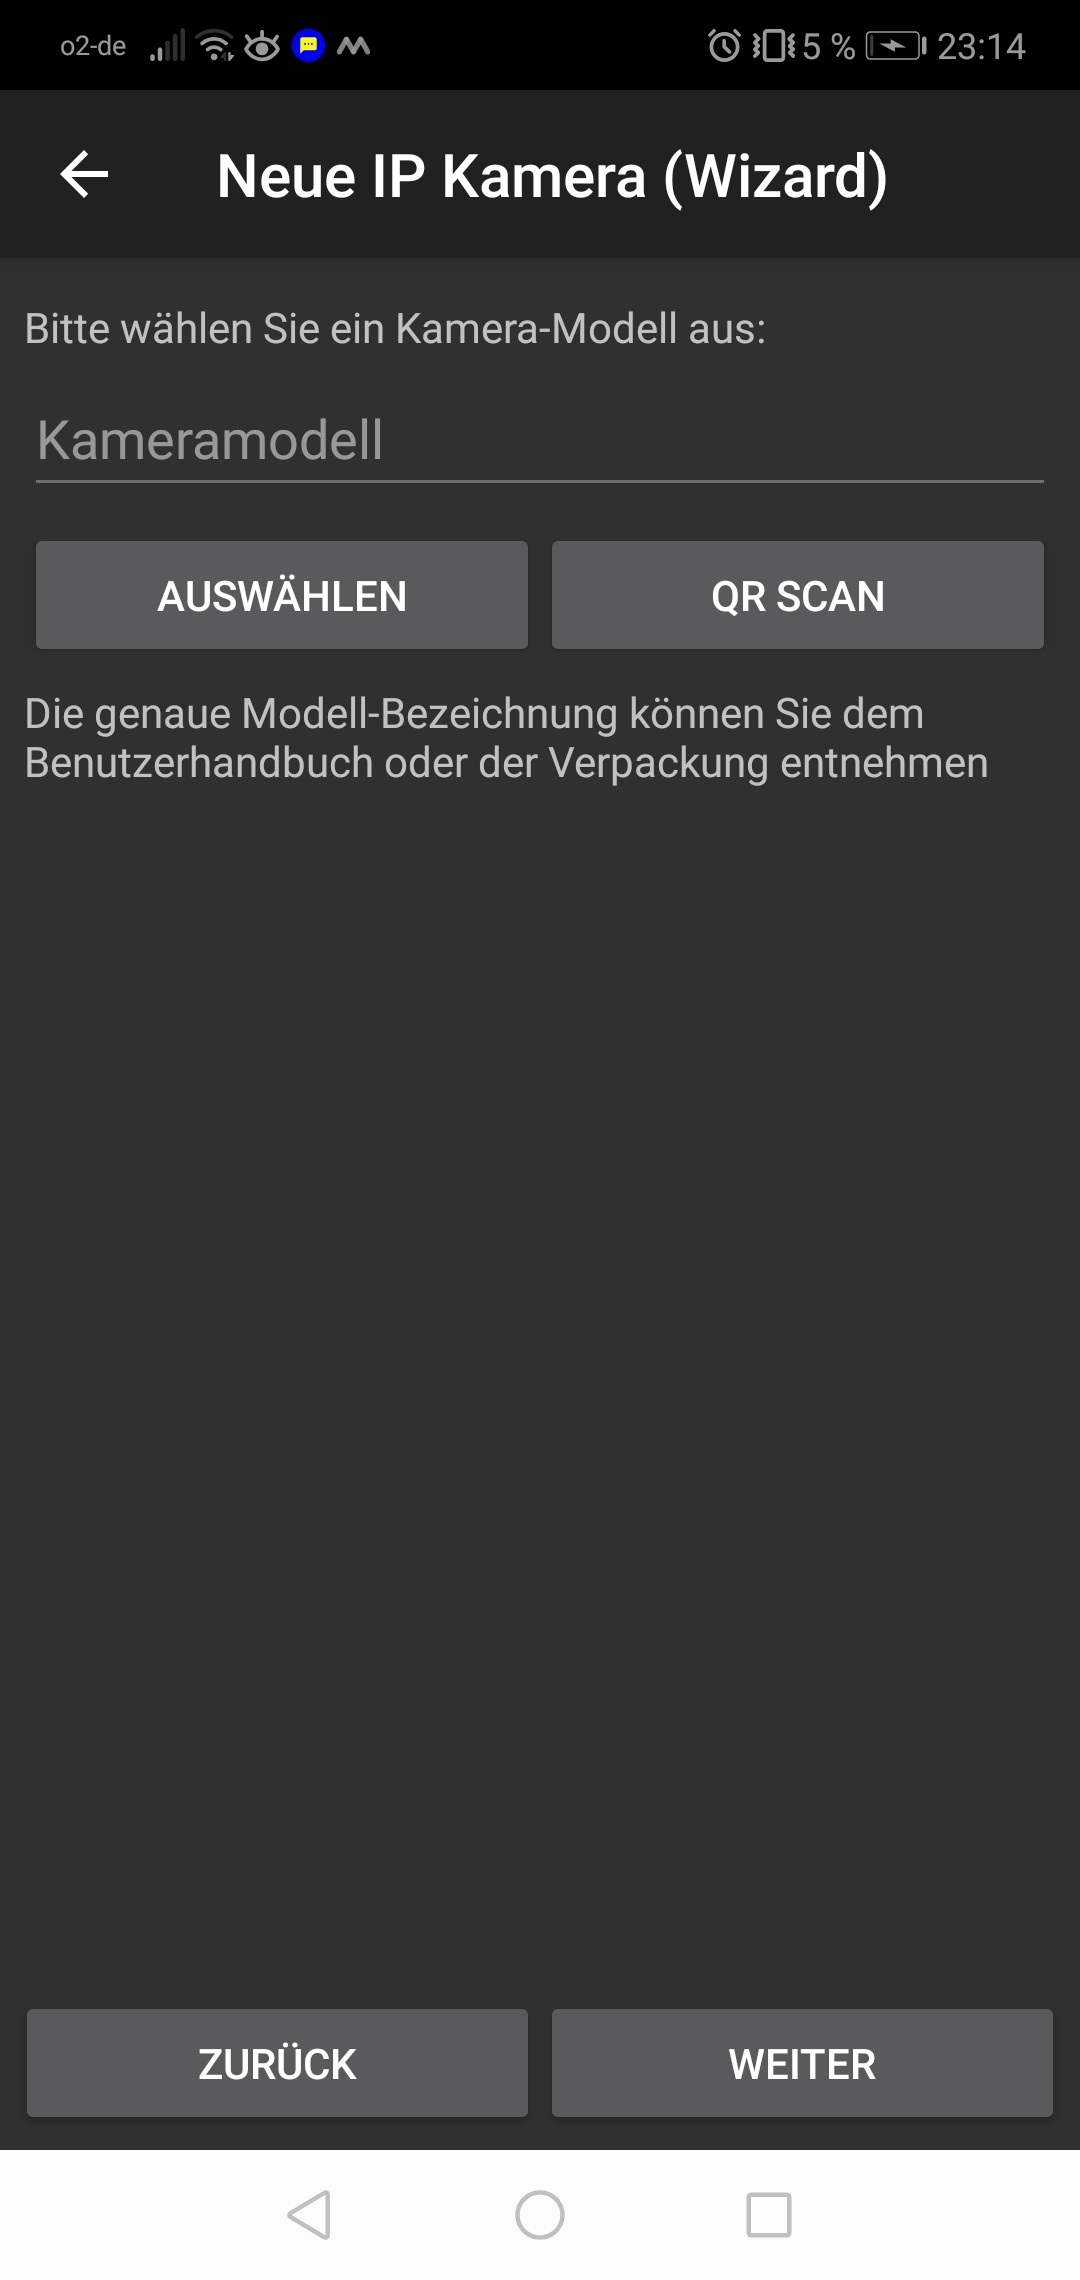](https://wiki.stadtfabrikanten.org/uploads/images/gallery/2026-06/d7V0DXqN1XEegudA-grafik.png) [](https://wiki.stadtfabrikanten.org/uploads/images/gallery/2026-06/wDzcWQf0j906wcBz-grafik.png) [](https://wiki.stadtfabrikanten.org/uploads/images/gallery/2026-06/UPoxUdGrJW3BIS0c-grafik.png) [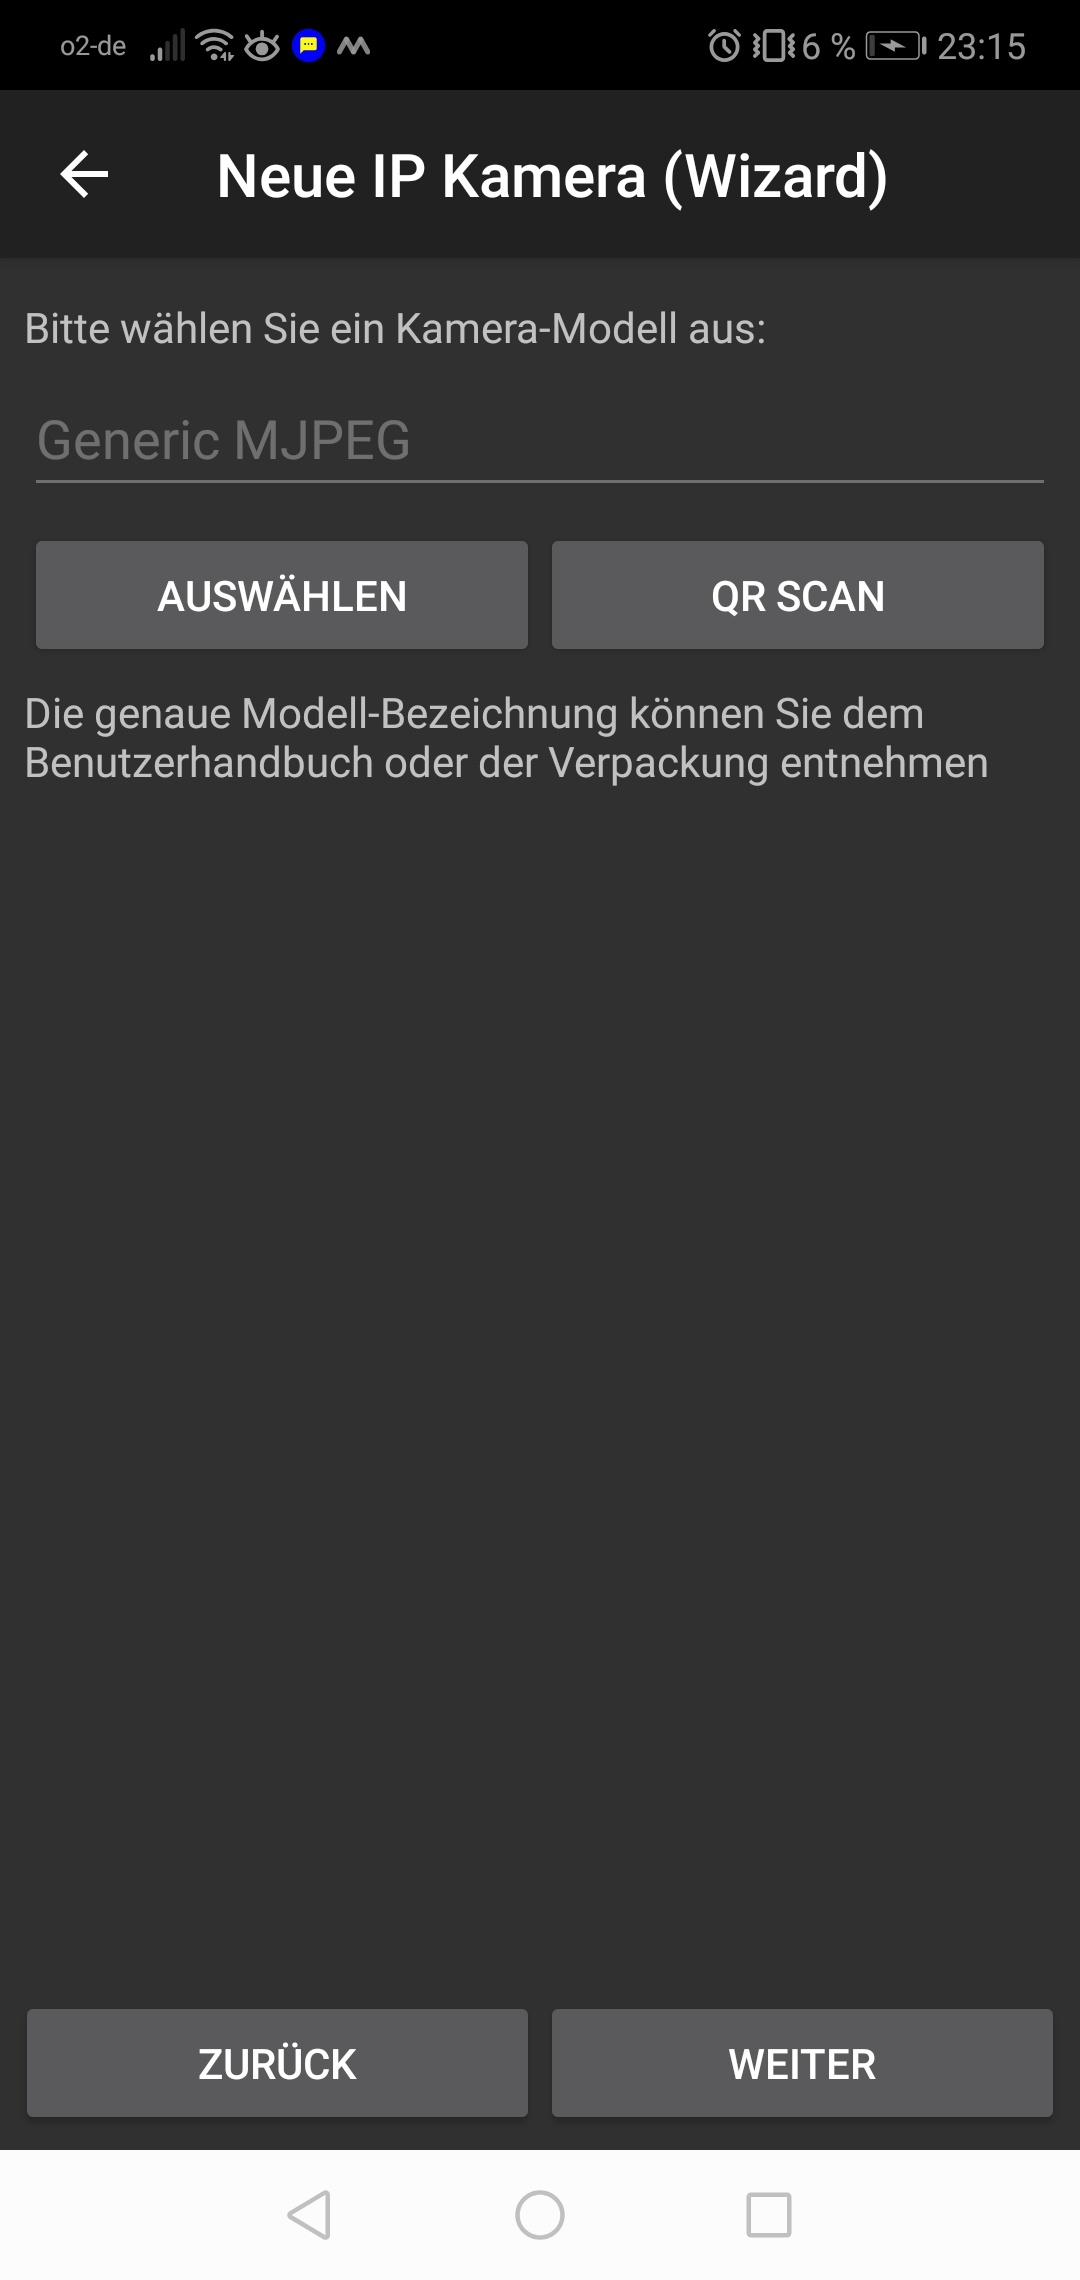](https://wiki.stadtfabrikanten.org/uploads/images/gallery/2026-06/EJfN6ZC4NNugSQym-grafik.png) [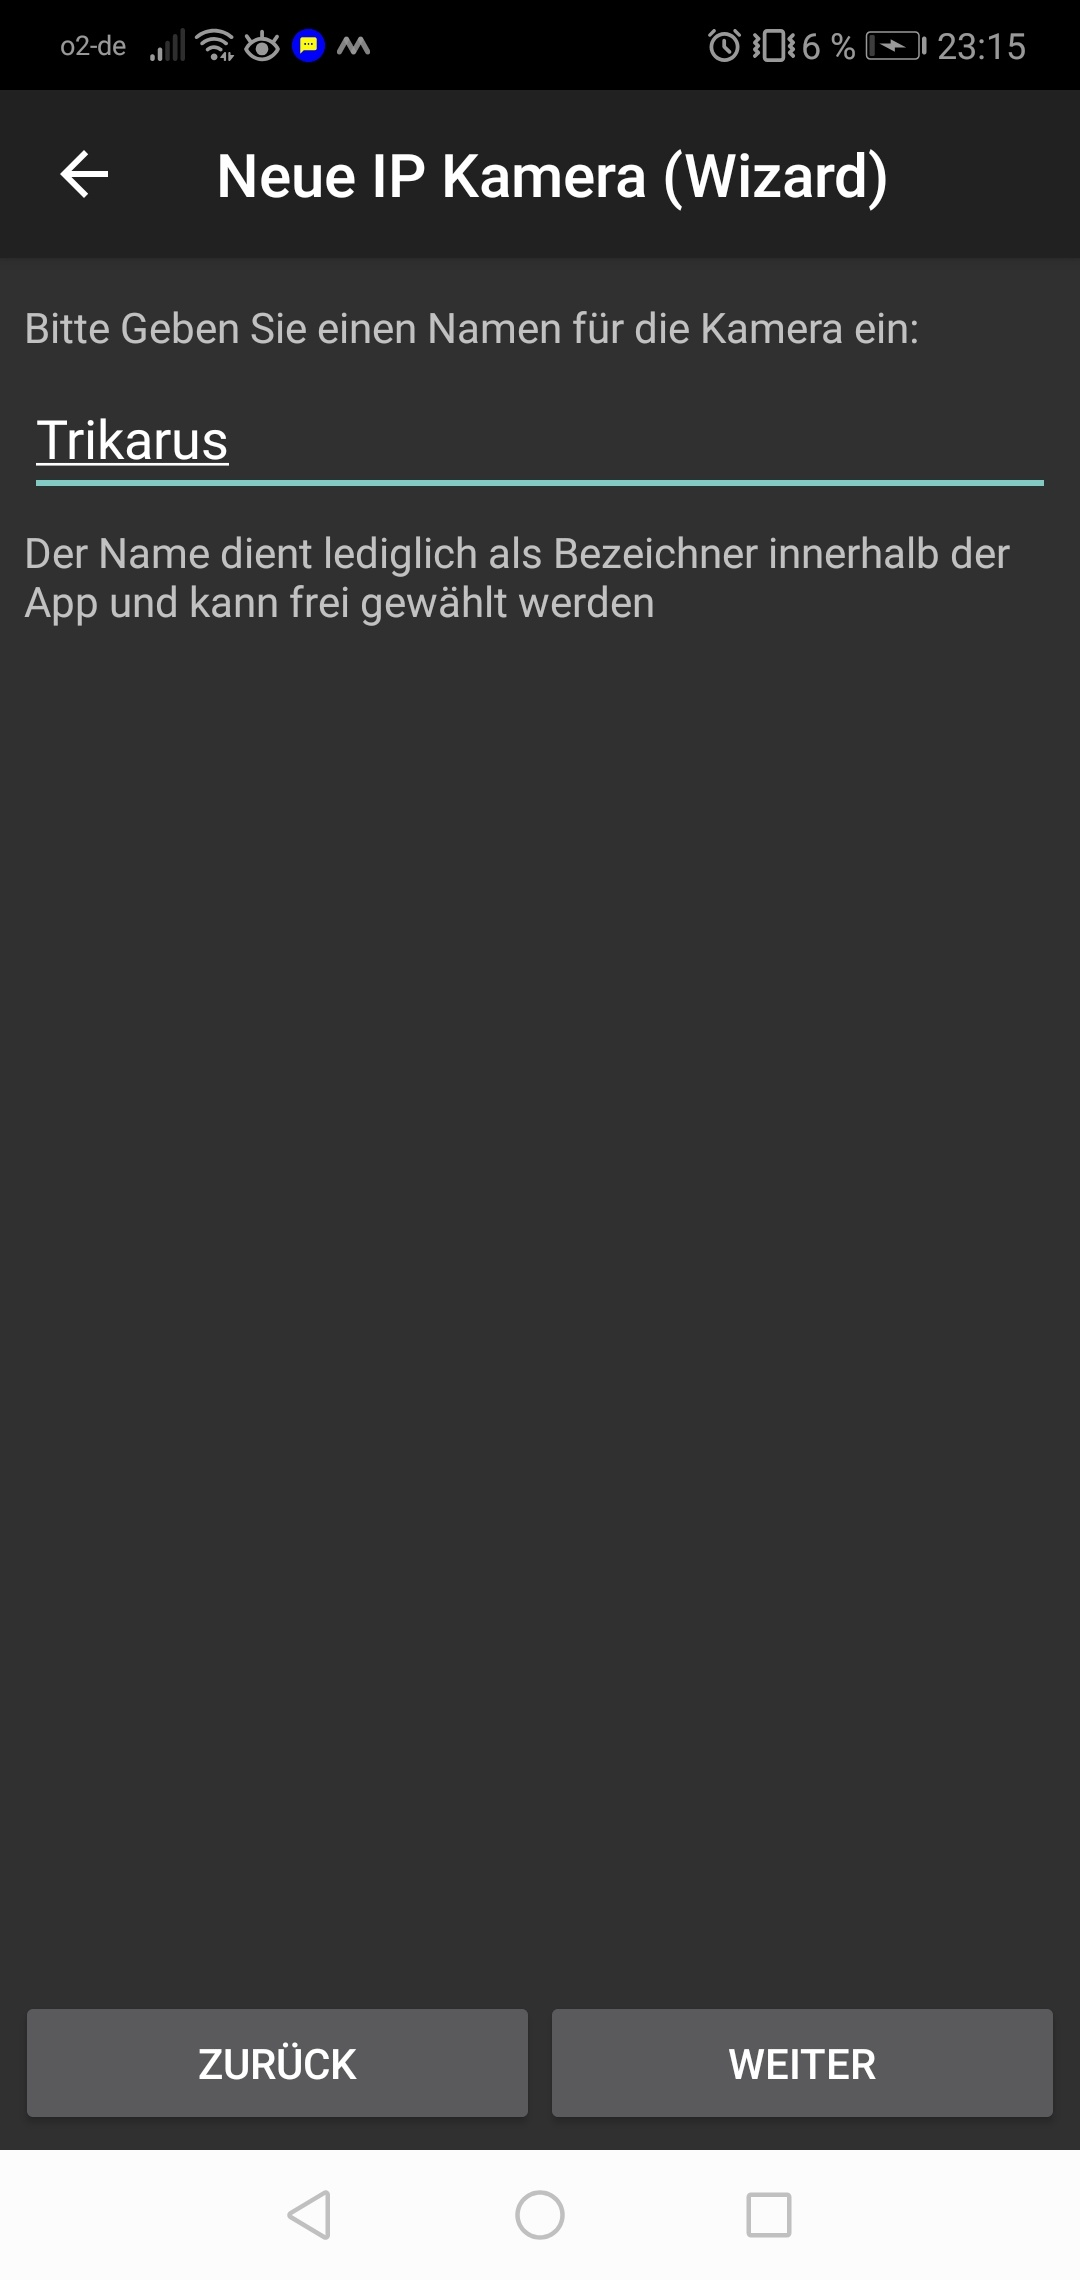](https://wiki.stadtfabrikanten.org/uploads/images/gallery/2026-06/NtUWG5RbKFuF46Bn-grafik.png) [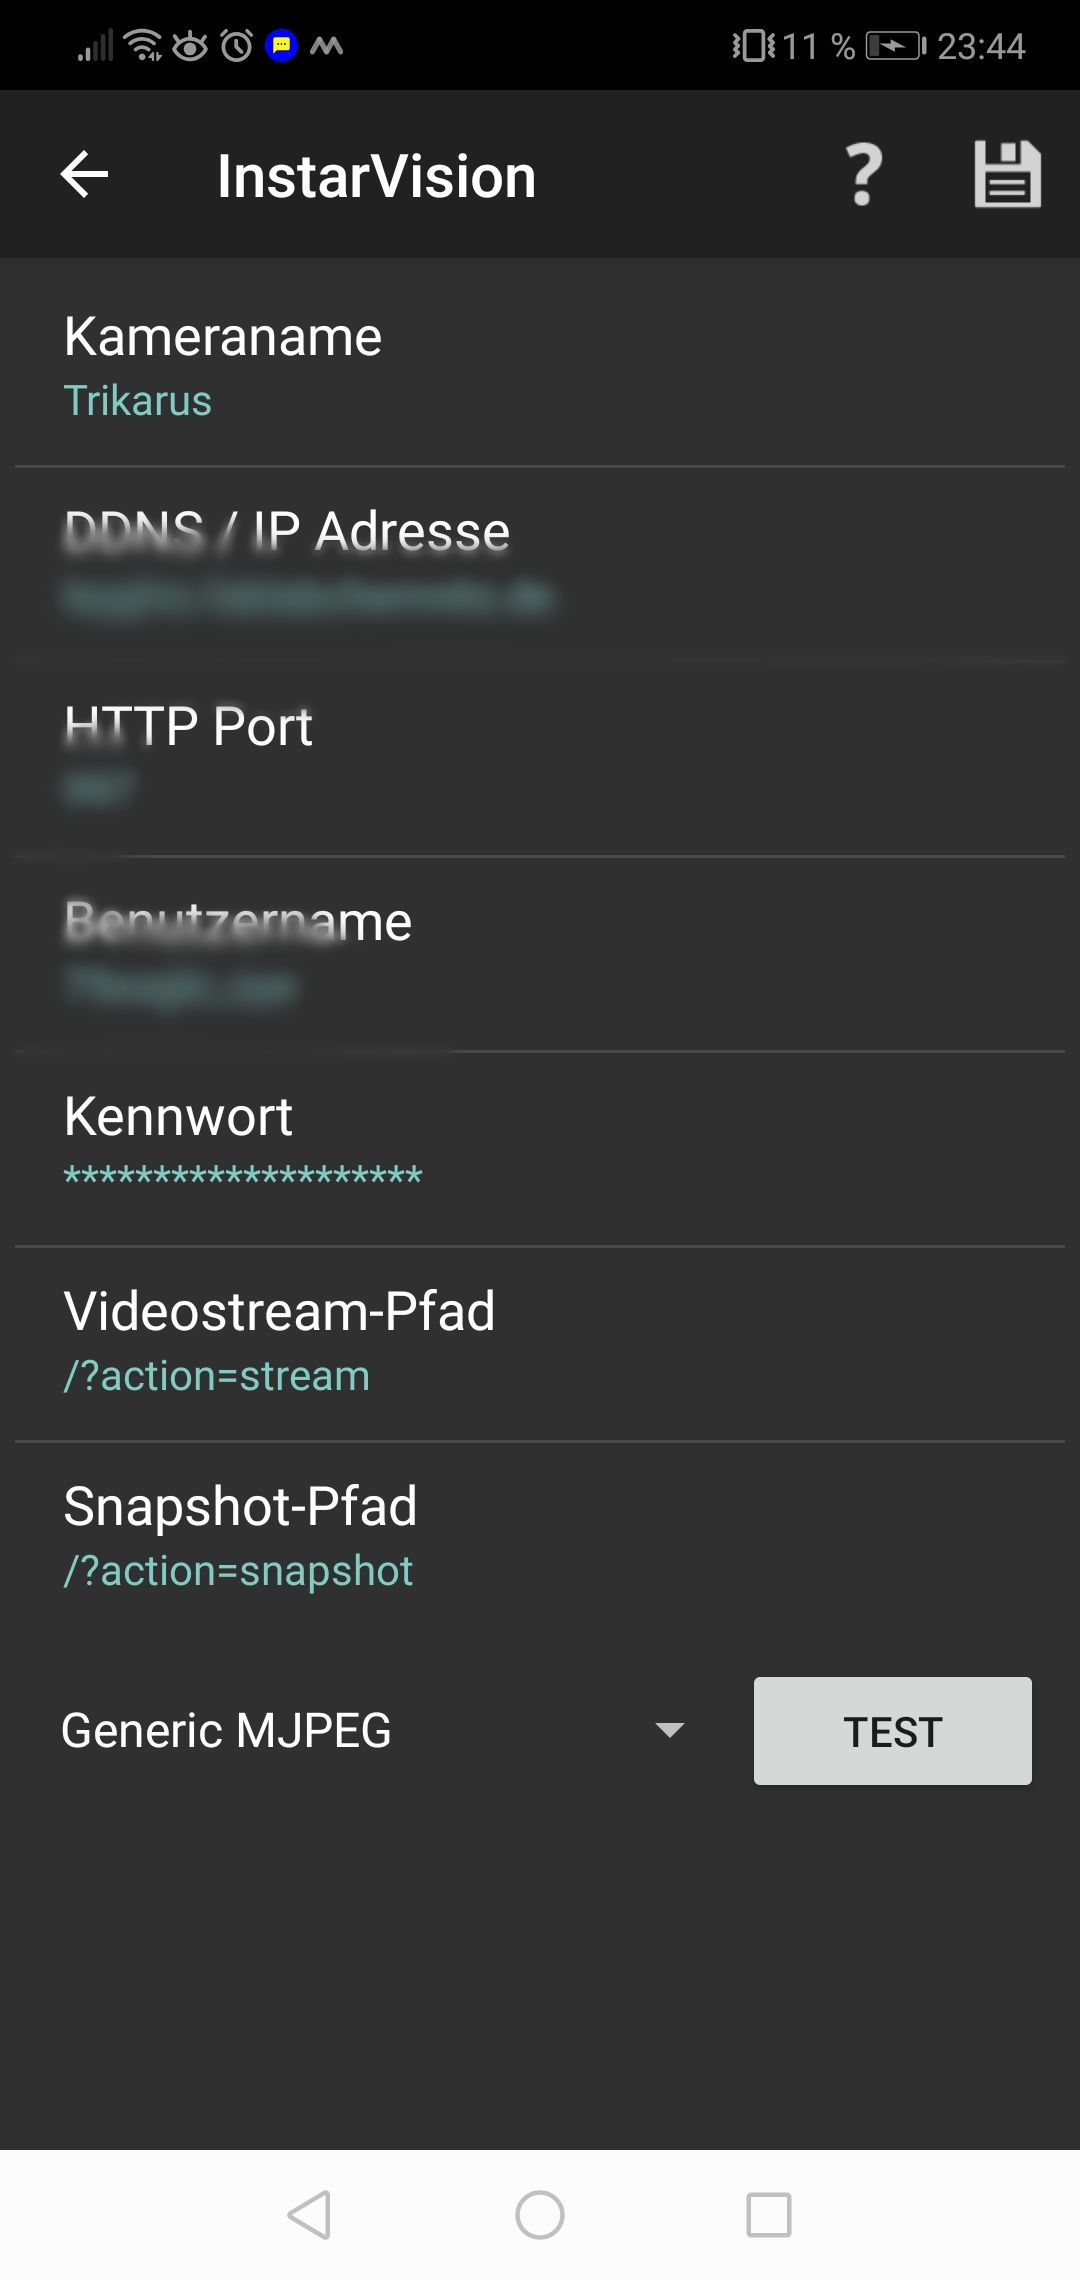](https://wiki.stadtfabrikanten.org/uploads/images/gallery/2026-06/5EDHEKnMBF2Hbjku-grafik.png)
## Webcam images by mail
This script sends a webcam snapshot embedded into Email. It's just some kind of reminder to have a look at the print ")
**/etc/cron.d/sendcamimage**
```bash
SHELL=/bin/bash
PATH=/usr/lib/sysstat:/usr/sbin:/usr/sbin:/usr/bin:/sbin:/bin
*/10 * * * * root /opt/sendcamimage.sh > /dev/null 2>&1
```
**/opt/sendcamimage.sh**
```bash
#/bin/bash
#generate some random hash
HASH=$(cat /dev/urandom | tr -dc 'A-Z0-9' | fold -w 25 | head -n 1)
HASH2=$(cat /dev/urandom | tr -dc 'A-Z0-9' | fold -w 8 | head -n 1)
HASH3=$(cat /dev/urandom | tr -dc 'A-Z0-9' | fold -w 8 | head -n 1)
#send it with sendmail using a static template (except the dynamic base64 statement)
TO="project_hangprinter@fablabchemnitz.de"
FROM="project_hangprinter@fablabchemnitz.de"
SUBJECT="mjpeg_streamer $(date +"%d.%m.%Y %T")"
#check cam availability
ls /dev/ttyUSB-LOGITECH-C920
status=$?
if ! [ $status -eq 0 ]; then
ERRMSG="Error: Webcam is not online! Please check USB device!"
echo $ERRMSG
echo "" | mail -s "$ERRMSG" $TO
exit 1
fi
#else continue sending the snapshot
curl http://localhost:8080/?action=snapshot --output /tmp/snapshot.jpg
#rotate the image by 180 degrees using imagemagick's convert tool
convert -rotate "180" /tmp/snapshot.jpg /tmp/snapshot.jpg
sendmail -t <