# HowTo's

# About Inkscape extensions in general

Extension calls are possible in different ways. You may find some description at [http://wiki.inkscape.org/wiki/index.php/Extension\_requirements](http://wiki.inkscape.org/wiki/index.php/Extension_requirements). Inkscape can run extension from a lot of different interpreters and executors like Python, Ruby, Perl, binary executables, bash scripts and so on.

## The "..." dots indicator in Inkscape user interface (menus)

Please note that extensions with "..." indicate the extension will have some GUI / menu to use. Extensions with out will perform action directly on current selection or the whole document!

# Clone and build Inkscape executable for noobs

Based on the [official building sources](https://gitlab.com/inkscape/inkscape/-/blob/master/INSTALL.md?ref_type=heads) of Inkscape on how to compile, this is some extended note on how to clone a specific commit of another branch, for instance when trying to test a developer's feature implementation, which is not yet merged into master branch.

## Clone the repository

```
cd ~/
git clone https://gitlab.com/inkscape/inkscape.git
```

## Install prequisites

[https://gitlab.com/inkscape/inkscape-ci-docker/-/raw/master/install\_dependencies.sh?inline=false](https://gitlab.com/inkscape/inkscape-ci-docker/-/raw/master/install_dependencies.sh?inline=false)

## Get the desired commit / branch

```
cd ~/inkscape/
git remote add pbs https://gitlab.com/pbs3141/inkscape.git
git fetch pbs

#look for the branch if its available npw
git branch -r | grep "split-nonintersecting"
git checkout pbs/split-nonintersecting
git status
git log
git pull --recurse-submodules && git submodule update
```

## Build

```
mkdir build
cd build
cmake -S .. -B . -DCMAKE_INSTALL_PREFIX=${PWD}/install_dir -DCMAKE_C_COMPILER_LAUNCHER=ccache -DCMAKE_CXX_COMPILER_LAUNCHER=ccache
make -j8
make install
```

## Run

```
~/inkscape/build/bin/inkscape
```

# Contribute documentation to Inkscape (reStructuredText)

<p class="callout info">This page is also available on [https://wiki.inkscape.org/wiki/Contribute\_to\_Documentation\_with\_reStructuredText](https://wiki.inkscape.org/wiki/Contribute_to_Documentation_with_reStructuredText)</p>

To contribute to recent Inkscape documentations, we have to write our docs in [reStructuredText](https://de.wikipedia.org/wiki/ReStructuredText) file format (`*.rst`). It's similar to Markdown, but still different.

The Inkscape documentation is built up on [Sphinx](https://github.com/sphinx-doc/sphinx), which is some kind of special engine. To easily contribut without being a professional developer, we can use VSCodium and some plugin to edit those `*.rst` files and preview (render) them.

## Install VS Code or VSCodium

With VSCodium we can edit `*.rst` files with ease. There's native syntax highlighting. But we cannot render the final result by default (needs a separate extension).

Downloads:

- [https://code.visualstudio.com](https://code.visualstudio.com)
- [https://vscodium.com](https://vscodium.com) (same like Visual Studio Code, but fully Open Source!)

## Install Esbonia Extension

This extension is required to render `*.rst` files. Rendering helps to validate, that the code we wrote is valid before we commit and push to Inkscape repositories. It can show a live HTML preview of the documentation, so the preview contents change whenever the document is updated. Syncronised scrolling between the source and preview is also supported.

Download/Install: [https://marketplace.visualstudio.com/items?itemName=swyddfa.esbonio](https://marketplace.visualstudio.com/items?itemName=swyddfa.esbonio)

[![grafik.png](https://wiki.stadtfabrikanten.org/uploads/images/gallery/2025-05/scaled-1680-/LVvnwxh7fv32lZGv-grafik.png)
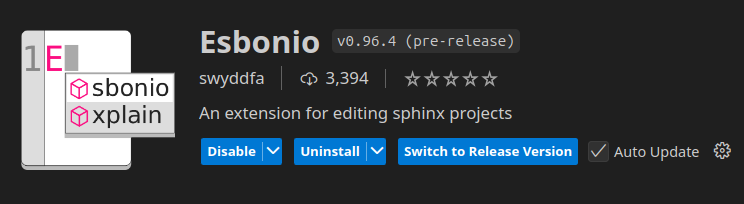
](https://wiki.stadtfabrikanten.org/uploads/images/gallery/2025-05/LVvnwxh7fv32lZGv-grafik.png)

## Install additional requirements

**Ubuntu:**

We install Sphinx globally to system, that's why we use the `python3-*` packages:

```
sudo apt install python3-sphinx python3-doc8
```

After this, we have following commands available for CLI also:

```
sphinx-apidoc
sphinx-autogen
sphinx-build
sphinx-quickstart
```

<p class="callout info">See also [https://www.sphinx-doc.org/en/master/usage/installation.html](https://www.sphinx-doc.org/en/master/usage/installation.html)</p>

## Clone the documentation

```
cd ~/
git clone https://gitlab.com/inkscape/extensions.git
```

## Open the folder within VSCodium and begin contribute

[![grafik.png](https://wiki.stadtfabrikanten.org/uploads/images/gallery/2025-05/scaled-1680-/pLGtA9ysfDRUzgfY-grafik.png)](https://wiki.stadtfabrikanten.org/uploads/images/gallery/2025-05/pLGtA9ysfDRUzgfY-grafik.png)

## Troubleshooting

<details id="bkmrk-my-opened-%2A.rst-file"><summary>My opened \*.rst file is not rendered</summary>

Opening a single file without an active workspace is not currently supported and will lead to errors, which might not be communicated to the user visually. Open the folder containing your documentation project in VSCode instead!

</details>

# Lint and validate *.inx files

For validation purposes of all inx files we can use the following step:

```bash
sudo apt update && sudo apt install libxml2-utils # install require stuff  

cd ~/.config/inkscape/extensions/mightyscape-1.2/extensions/fablabchemnitz
./000_validate.sh # does not support linting for deeper folders (no recurse)

# or lint a single file in an extensions' dir:
cd <yourExtension>
curl --silent https://gitlab.com/inkscape/extensions/-/raw/master/inkex/tester/inkscape.extension.rng?ref_type=heads -o inkscape.extension.rng
xmllint --noout --relaxng inkscape.extension.rng *.inx
```

If there is an error message instead of the export/import dialog, check the file or console log from Inkscape:

```bash
#Windows
%AppData%\Roaming\inkscape\extension-errors.log

#Linux
~/.config(inkscape/extension-errors.log
```

Counting INX files and folders:

```bash
cd ~/.config/inkscape/extensions/mightyscape-1.2/extensions/fablabchemnitz
find ./ -type f -name "*.inx" | wc -l
ls -d */ | wc -l
```

<p class="callout info">This information was also contributed to [https://inkscape.gitlab.io/extensions/documentation/authors/inx-overview.html#relax-ng-xml-schema-and-inx-file-validation](https://inkscape.gitlab.io/extensions/documentation/authors/inx-overview.html#relax-ng-xml-schema-and-inx-file-validation)</p>

# SVG Attribute reference

<div class="page view" id="bkmrk-a-very-good-svg-rere"><article>A very good SVG rerefence to read on → [https://developer.mozilla.org/en-US/docs/Web/SVG/Attribute](https://developer.mozilla.org/en-US/docs/Web/SVG/Attribute)

<div class="wiki-content" id="bkmrk-"></div></article></div>

# Where to find more Inkscape extensions?

Inkscape extensions are spread over the net. Some good soures to find new stuff:

- [https://inkscape.org/de/gallery/=extension](https://inkscape.org/de/gallery/=extension/)
- [https://inkscape.org/gallery/?q=extensio](https://inkscape.org/gallery/?q=extension)
- [https://inkscape.org/de/community](https://inkscape.org/de/community/)
- [http://wiki.inkscape.org/wiki/index.php/Extension\_repository](http://wiki.inkscape.org/wiki/index.php/Extension_repository)
- [http://wiki.inkscape.org/wiki/index.php/Inkscape\_Extensions](http://wiki.inkscape.org/wiki/index.php/Inkscape_Extensions)
- [https://github.com/search?o=desc&amp;p=30&amp;q=inkscape&amp;s=stars&amp;type=Repositories](https://github.com/search?o=desc&p=30&q=inkscape&s=stars&type=Repositories)
- [https://github.com/topics/inkscape](https://github.com/topics/inkscape)
- [https://github.com/search?o=desc&amp;p=60&amp;q=%3Cinkscape-extension+xmlns%3D%22http%3A%2F%2Fwww.inkscape.org%2Fnamespace%2Finkscape%2Fextension%22%3E&amp;s=indexed&amp;type=Code](https://github.com/search?o=desc&p=60&q=%3Cinkscape-extension+xmlns%3D%22http%3A%2F%2Fwww.inkscape.org%2Fnamespace%2Finkscape%2Fextension%22%3E&s=indexed&type=Code)
- [https://gitlab.com/Moini/ink\_extensions](https://gitlab.com/Moini/ink_extensions)
- [https://sourceforge.net/directory/?q=inkscape](https://sourceforge.net/directory/?q=inkscape)
- [https://www.thingiverse.com/search?q=inkscape](https://www.thingiverse.com/search?q=inkscape&dwh=765dc9ac0c85763)
- [https://pypi.org/search/?q=inkscape](https://pypi.org/search/?q=inkscape)
- Google
    
    
    - "inkscape extension site:gist.github.com"
    - "inkscape plugin site:gist.github.com"
- Gitlab 
    - [https://gitlab.com/explore/projects/starred?name=inkscape&amp;non\_archived=true&amp;page=1&amp;search=inkscape&amp;sort=latest\_activity\_desc](https://gitlab.com/explore/projects/starred?name=inkscape&non_archived=true&page=1&search=inkscape&sort=latest_activity_desc)
    - searching in gitlab does'nt make fun. We cannot browse for more than 50 pages and we see all forks in the search
    - **Tip**: skip all repo's with Inkscape icon in repo because they are forks only).
    - Better search gitlab using google with a filter like:
        
        ```ini
        site:gitlab.com inkscape extension -"Python extensions for Inkscape core" -"issues" -"Inkscape / extensions" -"src/extension/" -"merge" -"contains the stock" -"extension-manager"
        ```

# Use Inkscape with Flatpak

This is a trick from ZAM Erlangen to run Inkscape with Flatpak and having permissions to USB devices (e.g. to use Inkscape with AxiDraw or EggBot)

```bash
flatpak run --device=all org.inkscape.Inkscape
```

See also [https://flathub.org/apps/com.github.tchx84.Flatseal](https://flathub.org/apps/com.github.tchx84.Flatseal) about adjusting permissions

# Install Inkscape from trunk

Problem:

> Inkscape-trunk-data : Conflicts: inkscape but 1:1.4.2+202505120737+ebf0e940d0~ubuntu24.04.1 is to be installed

Solution:

```bash
sudo apt purge inkscape-trunk
sudo apt update
sudo apt upgrade
sudp apt install inkscape
```

# Beispiel Grafikreparatur Erzgebirgischer Schwibbogen

Fies sind Grafiken, die augenscheinlich super geeignet für's Laserschneiden erscheinen, aber technisch doch Probleme machen. Wir haben ein perfektes Beispiel gefunden für „optisch top, aber XML flop“. Wir zeigen mit Hilfe von Inkscape, wie man auch schwierigere Dateien nutzbar machen kann. Schauen wir uns folgende Wikimedia Commons Grafik an: [https://de.wikibooks.org/wiki/Datei:Erzgebirgischer\_schwibbogen\_2.svg](https://de.wikibooks.org/wiki/Datei:Erzgebirgischer_schwibbogen_2.svg "https://de.wikibooks.org/wiki/Datei:Erzgebirgischer_schwibbogen_2.svg") (Autor:[https://commons.wikimedia.org/wiki/User:Merkel](https://commons.wikimedia.org/wiki/User:Merkel "https://commons.wikimedia.org/wiki/User:Merkel"))

[![grafik.png](https://wiki.stadtfabrikanten.org/uploads/images/gallery/2025-08/scaled-1680-/AmZp3u8KAKHcSyov-grafik.png)](https://wiki.stadtfabrikanten.org/uploads/images/gallery/2025-08/AmZp3u8KAKHcSyov-grafik.png)

In der Vorschau ließe sich erahnen, dass diese Grafik aus feinen Linien besteht, die einfach geschnitten werden können. Leider trügt der Schein. Beim Öffnen ink Inkscape tauchten schnell Schwierigkeiten auf. Wir nutzen hierfür den Umrissmodus unter Ansicht → Anzeigemodus → Umriss. Zoomen wir näher an die Kontur ran, so erkennen wir, dass die Linien aus einzelnen geschlossenen Kontursegmenten bestehen. Das heißt platt, dass wir schon mindestens doppelt solange lasern müssten als nötig, um einen fertigen Bogen aus Sperrholz zu erhalten.

[![grafik.png](https://wiki.stadtfabrikanten.org/uploads/images/gallery/2025-08/scaled-1680-/p1SnFu6Lz6aQeUAB-grafik.png)](https://wiki.stadtfabrikanten.org/uploads/images/gallery/2025-08/p1SnFu6Lz6aQeUAB-grafik.png)

Aber wie lösen konvertieren wir diese Grafik so, dass sie laserbar wird? Zunächst skalieren wir die Grafik auf ca. 800 mm Arbeitsbreite, denn sie ist ca. 30×19,6 Meter groß und sprengt den Rahmen in Inkscape.

[![grafik.png](https://wiki.stadtfabrikanten.org/uploads/images/gallery/2025-08/scaled-1680-/sa27D4c7trlkYTj7-grafik.png)](https://wiki.stadtfabrikanten.org/uploads/images/gallery/2025-08/sa27D4c7trlkYTj7-grafik.png)

Dann entfernen die farbigen Pfeile, welche die Stellen für die Beleuchtung markieren. Diese sind für unsere Zwecke nicht notwendig.

[![grafik.png](https://wiki.stadtfabrikanten.org/uploads/images/gallery/2025-08/scaled-1680-/QVSnbitBpjX4HQD8-grafik.png)](https://wiki.stadtfabrikanten.org/uploads/images/gallery/2025-08/QVSnbitBpjX4HQD8-grafik.png)

Als nächstes exportieren wir die Vektorgrafik als hochaufgelöste PNG-Datei, die wir im Anschluss mit dem sog. „Centerline Trace“ vektorisieren, um Mittelpfade zu erhalten. Wir verwenden pauschal eine Breite von 5000px. Je größer, desto besser. Denn durch jede Konvertierung verlieren wir an Genauigkeit.

[![grafik.png](https://wiki.stadtfabrikanten.org/uploads/images/gallery/2025-08/scaled-1680-/xYueprfUJGY9uVEC-grafik.png)](https://wiki.stadtfabrikanten.org/uploads/images/gallery/2025-08/xYueprfUJGY9uVEC-grafik.png)

Wir leeren anschließend das Canvas in Inkscape und importieren die gerade eben exportierte Datei. Wir zommen und erkennen die Verpixelung:

[![grafik.png](https://wiki.stadtfabrikanten.org/uploads/images/gallery/2025-08/scaled-1680-/3jlE6d12UPo17PEn-grafik.png)](https://wiki.stadtfabrikanten.org/uploads/images/gallery/2025-08/3jlE6d12UPo17PEn-grafik.png)

 Mit der Tastenkombination UMSCHALT + ALT + B gelangen wir und das Menü „Bitmap nachzeichnen.“ Hier wählen wir unter „Einmaliger Scan“ die Option „Strichzeichnung vektorisieren (autotrace)“. Dadurch erhalten wir letztlich vereinfachte Linienstrukturen:

[![grafik.png](https://wiki.stadtfabrikanten.org/uploads/images/gallery/2025-08/scaled-1680-/F7ZdlDeehONDCsNU-grafik.png)](https://wiki.stadtfabrikanten.org/uploads/images/gallery/2025-08/F7ZdlDeehONDCsNU-grafik.png)

 In der Gesamtübersicht sieht es dann so aus. Die Vektorgrafik hat 1806 Knoten

[![grafik.png](https://wiki.stadtfabrikanten.org/uploads/images/gallery/2025-08/scaled-1680-/FC3lqS5Q8mr4W9im-grafik.png)](https://wiki.stadtfabrikanten.org/uploads/images/gallery/2025-08/FC3lqS5Q8mr4W9im-grafik.png)

 Teilweise sind noch Fehler enthalten. Diese lassen sich jedoch manuell relativ einfach beseitigen. Wir empfehlen außerdem das mit autotrace nachgezeichnete Motiv mit der Tastenkombination STRG + UMSCHALT + K in einzelne Konturen zu zerlegen und diese jeweils auf Geschlossenheit zu prüfen. Wenn das Motiv aus 100% geschlossenen Konturen besteht, ist prinzipiell sichergestellt, dass alle Bauteile beim Laser komplett vom Trägermaterial getrennt werden und sich somit keine Stegstellen verstecken.

[![grafik.png](https://wiki.stadtfabrikanten.org/uploads/images/gallery/2025-08/scaled-1680-/hy3EXDcHxPUmqZnZ-grafik.png)](https://wiki.stadtfabrikanten.org/uploads/images/gallery/2025-08/hy3EXDcHxPUmqZnZ-grafik.png)

 Mit der Erweiterung [Contour Scanner and Trimmer](https://wiki.stadtfabrikanten.org/books/fablab-chemnitz/page/contour-scanner-and-trimmer "Contour Scanner And Trimmer") lässt sich einfach optisch überprüfen, welche Pfade offen und welche geschlossen sind (rot = offen, grün = geschlossen):

[![grafik.png](https://wiki.stadtfabrikanten.org/uploads/images/gallery/2025-08/scaled-1680-/8F0RxqT0c9EICN8H-grafik.png)](https://wiki.stadtfabrikanten.org/uploads/images/gallery/2025-08/8F0RxqT0c9EICN8H-grafik.png)

Mit der Erweiterung [Chain Paths](https://wiki.stadtfabrikanten.org/books/fablab-chemnitz/page/chain-paths "Chain Paths") können wir weitere Konturen automatisch schließen. Scannen wir die Konturen anschließend erneut, sind deutlich mehr Konturen grün markiert. Mit verschiedenen Optionen im Contour Scanner lassen sich auch weitere Probleme feststellen, wie zum Beispiel selbstschneidende Konturen (grau) und die Stellen, an denen diese Selbstüberschneidungen auftreten (blaue Punkte)

[![grafik.png](https://wiki.stadtfabrikanten.org/uploads/images/gallery/2025-08/scaled-1680-/G0ZNcjRnOnn4ZfZ4-grafik.png)](https://wiki.stadtfabrikanten.org/uploads/images/gallery/2025-08/G0ZNcjRnOnn4ZfZ4-grafik.png)

[![grafik.png](https://wiki.stadtfabrikanten.org/uploads/images/gallery/2025-08/scaled-1680-/hq2o2pndV0XJZTTM-grafik.png)](https://wiki.stadtfabrikanten.org/uploads/images/gallery/2025-08/hq2o2pndV0XJZTTM-grafik.png)

<span style="font-family: inherit; font-size: inherit; color: inherit; background-color: inherit;">Die restlichen Konturen können weiterhin manuell geschlossen bzw. repariert werden.</span>

# Large-scale PDF Export

<div class="page view" id="bkmrk-inkscape-kann-nur-pd"><article>Inkscape kann nur PDFs in Version 1.5 oder 1.6 exportieren. Leider können sehr große Vektorgrafiken deshalb im offiziellen Acrobat Reader nicht korrekt geöffnet werden, weil Dinge abgeschnitten werden. Es gibt interne Größenbegrenzungen:

<div class="wiki-content">- bis Version 3 auf 45 Zoll × 45 Zoll (1,143 m × 1,143 m)
- bis Version 6 auf 200 Zoll × 200 Zoll (5,08 m × 5,08 m)
- ab Version 7 auf 15.000.000 Zoll × 15.000.000 Zoll (381 km × 381 km)

</div>siehe [https://de.wikipedia.org/wiki/Portable\_Document\_Format](https://de.wikipedia.org/wiki/Portable_Document_Format)

<p class="callout success">Lösung: Export in Skalierungsfaktor, z.B. 1:10 oder 1:100</p>

<div class="wiki-content" id="bkmrk-"></div></article></div>

# Invert Path Direction

[![grafik.png](https://wiki.stadtfabrikanten.org/uploads/images/gallery/2026-04/scaled-1680-/RvhVBnL65UdRZM5M-grafik.png)](https://wiki.stadtfabrikanten.org/uploads/images/gallery/2026-04/RvhVBnL65UdRZM5M-grafik.png)

[![grafik.png](https://wiki.stadtfabrikanten.org/uploads/images/gallery/2026-04/scaled-1680-/Mqsj9dXsKnVlADll-grafik.png)](https://wiki.stadtfabrikanten.org/uploads/images/gallery/2026-04/Mqsj9dXsKnVlADll-grafik.png)

[![grafik.png](https://wiki.stadtfabrikanten.org/uploads/images/gallery/2026-04/scaled-1680-/ugCZVHFadnlntbfR-grafik.png)](https://wiki.stadtfabrikanten.org/uploads/images/gallery/2026-04/ugCZVHFadnlntbfR-grafik.png)

[![grafik.png](https://wiki.stadtfabrikanten.org/uploads/images/gallery/2026-04/scaled-1680-/uKbSRWW1gJJ9PuJM-grafik.png)](https://wiki.stadtfabrikanten.org/uploads/images/gallery/2026-04/uKbSRWW1gJJ9PuJM-grafik.png)

# Invert SVG graphics b/w

## Take some drawing

[![grafik.png](https://wiki.stadtfabrikanten.org/uploads/images/gallery/2026-04/scaled-1680-/NVghPohB9RxR0pmp-grafik.png)](https://wiki.stadtfabrikanten.org/uploads/images/gallery/2026-04/NVghPohB9RxR0pmp-grafik.png)

## Duplicate the drawing

CTRL + D

**Leave the items selected!**

## Break apart the selection

CTRL + K

**Leave the items selected!**

[![grafik.png](https://wiki.stadtfabrikanten.org/uploads/images/gallery/2026-04/scaled-1680-/skyD9Up66zYoZGz7-grafik.png)](https://wiki.stadtfabrikanten.org/uploads/images/gallery/2026-04/skyD9Up66zYoZGz7-grafik.png)

## Union the selection

Doing this we will get the complete outline of the objects.

**Leave the items selected!**

[![grafik.png](https://wiki.stadtfabrikanten.org/uploads/images/gallery/2026-04/scaled-1680-/faD8yD9WGTiwh6QB-grafik.png)](https://wiki.stadtfabrikanten.org/uploads/images/gallery/2026-04/faD8yD9WGTiwh6QB-grafik.png) [![grafik.png](https://wiki.stadtfabrikanten.org/uploads/images/gallery/2026-04/scaled-1680-/6SaOdSCzMSV4jxFt-grafik.png)](https://wiki.stadtfabrikanten.org/uploads/images/gallery/2026-04/6SaOdSCzMSV4jxFt-grafik.png)

## Run exclusion

Select the original object and the new outline merge object from previous step, then run Exclusion on both. The z ordner does not matter.

[![grafik.png](https://wiki.stadtfabrikanten.org/uploads/images/gallery/2026-04/scaled-1680-/Bte5XpHFvtUOrzeL-grafik.png)](https://wiki.stadtfabrikanten.org/uploads/images/gallery/2026-04/Bte5XpHFvtUOrzeL-grafik.png) [![grafik.png](https://wiki.stadtfabrikanten.org/uploads/images/gallery/2026-04/scaled-1680-/FRFd4pVDPHq9QNUi-grafik.png)](https://wiki.stadtfabrikanten.org/uploads/images/gallery/2026-04/FRFd4pVDPHq9QNUi-grafik.png)

# Color palettes in Inkscape

Import famous color palettes from vendors into Inkscape using [https://github.com/fundevogel/we-love-colors](https://github.com/fundevogel/we-love-colors)

- [PANTONE](https://www.pantone.com)
- [RAL](https://www.ral-farben.de)
- [Dulux](https://www.dulux.com.au)
- [Copic](https://www.copicmarker.com)
- [Prismacolor](https://www.prismacolor.com)

```bash
cd ~
git clone https://github.com/fundevogel/we-love-colors.git
cd we-love-colors/
python -m venv ./
~/we-love-colors/bin/pip3 install farben
~/we-love-colors/bin/farben fetch ral pantone -p gpl
cp ~/we-love-colors/palettes/ral/sets/ral.gpl ~/.config/inkscape/palettes/
cp ~/we-love-colors/palettes/pantone/sets/*.gpl ~/.config/inkscape/palettes/
rm -rf ~/we-love-colors/
```

# FAQs

## Wie kann ich ein Rasterbild mit weißem Hintergrund an jeder Stelle anklicken und verschieben?

Indem du beim Auswählen und Verschieben die `Alt`-Taste gedrückt hälst!

Rastergrafiken mit weißem Hintergrund werden in Inkscape speziell behandelt. Alle Pixel, die weiß sind, versagen dem Mauszeiger die Auswahl, farbige Pixel jedoch nicht. Die `Alt`-Taste weitet die Auswahl auf den gesamten Bildbereich aus, unabhängig von der Pixelfarbe.