# FabLab Chemnitz

# About/Upgrade MightyScape

**Get MightyScape by Git**

<div class="text-muted break-text" id="bkmrk-primary%3A%C2%A0readme-%2B-do">- Primary: [Readme + Download + Issues (Github)](https://github.com/eridur-de/mightyscape-1.2)
- Secondary: [Readme + Download (Gitea)](https://gitea.fablabchemnitz.de/FabLab_Chemnitz/mightyscape-1.2)

</div>**Alternative downloads available**. Check the **README.md** on Git

[![upgrade-extension.png](https://wiki.stadtfabrikanten.org/uploads/images/gallery/2025-08/scaled-1680-/X1WrKMOsicmK0HT1-upgrade-extension.png)](https://wiki.stadtfabrikanten.org/uploads/images/gallery/2025-08/X1WrKMOsicmK0HT1-upgrade-extension.png)

## Spread the word

[![grafik.png](https://wiki.stadtfabrikanten.org/uploads/images/gallery/2025-08/scaled-1680-/NnGXl0RuQwc2NctG-grafik.png)](https://wiki.stadtfabrikanten.org/uploads/images/gallery/2025-08/NnGXl0RuQwc2NctG-grafik.png)

- [https://y.stadtfabrikanten.org/mightyscape.qr](https://y.stadtfabrikanten.org/mightyscape.qr)
- [https://y.stadtfabrikanten.org/mightyscape](https://y.stadtfabrikanten.org/mightyscape)

# Animation

# Animate Order

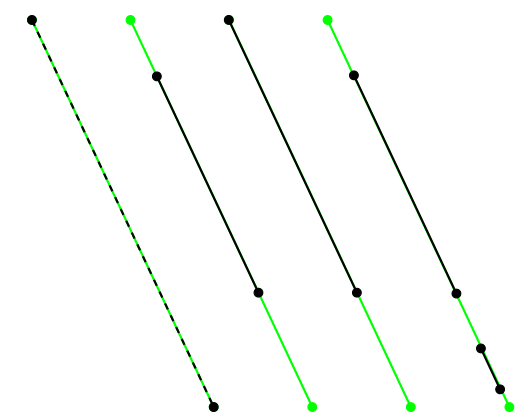
Create animated SVG preview file and show it in browser. Helps to quickly evaluate line order for cutting processes. Only applies for the complete Inkscape document.

<iframe allowfullscreen="allowfullscreen" frameborder="0" height="315" sandbox="allow-same-origin allow-scripts allow-popups" src="https://videos.stadtfabrikanten.org/videos/embed/cb6ab83b-e598-4038-9434-8269357bdf95?loop=1&autoplay=1" width="560"></iframe>

<iframe allowfullscreen="allowfullscreen" frameborder="0" height="315" sandbox="allow-same-origin allow-scripts allow-popups" src="https://videos.stadtfabrikanten.org/videos/embed/6768c45a-1c39-4fd9-a016-e6b0d140dc37?loop=1&autoplay=1" width="560"></iframe>

## Tips

- Do **not** use "-inkscape-stroke:hairline" attribute for your paths. It will not render. Your page might be blank!
- If multiple paths are animated simultaneously, break apart paths into sub paths. **Each sub path will start a new animation in parallel.**
- **start your browser indepently from Inkscape before running this extension**. Each call we open a new browser tab then. If your browser is closed initially, the Inkscape extension will call a new process window, but Inkscape is blocked until browser is closed again.

## Config / Troubleshooting

### Browser in path

Select your desired browser (must be installed and must exist in %PATH% variable). If this is not the case, configure it:

**Windows (Systemsteuerung\\Alle Systemsteuerungselemente\\System → Umgebungsvariablen)**

### Firefox adjustments

If SVG does not animate, check if file access is enabled

Visit **about:config** → set "**privacy.file\_unique\_origin**" to "**false**"

### Still no animation?

- break apart paths to sub paths
- Raise duration time to larger value

## More Info

- [https://github.com/maxwellito/vivus](https://github.com/maxwellito/vivus)
- [https://github.com/maxwellito/vivus-instant](https://github.com/maxwellito/vivus-instant)
- h[ttp://maxwellito.github.io/vivus](http://maxwellito.github.io/vivus/)
- [https://maxwellito.github.io/vivus-instan](https://maxwellito.github.io/vivus-instant/)t

See also [Line Animator](https://wiki.stadtfabrikanten.org/books/fablab-chemnitz/page/line-animator "Line Animator")

```
C:\Program Files\Mozilla Firefox\
```

## Convert animated SVG to Videos/GIFs

There are a lot of tools on the net but most do not work properly. Best is to use a screen capturing tool like [https://wiki.ubuntuusers.de/Kazam](https://wiki.ubuntuusers.de/Kazam/) to capture. This video can be converted to animated gif afterwards.

Install Kazam on Fedora:

```bash
sudo dnf install keybinder
sudo dnf install python3-xlib
wget https://raw.githubusercontent.com/rpmsphere/noarch/master/k/kazam-1.5.3-1.1.noarch.rpm
sudo rpm -Uvh kazam-1.5.3-1.1.noarch.rpm
```

<div class="code panel pdl conf-macro output-block" data-hasbody="true" data-macro-name="code" id="bkmrk--1" style="border-width: 1px;"><div class="codeContent panelContent pdl"><div><div class="syntaxhighlighter sh-confluence nogutter  java" id="bkmrk--2"></div></div></div></div>Install Kazam on Ubuntu:

```bash
sudo apt install kazam
```

# Frame Animation Sequence

Source: [https://github.com/yttiktak/inkscape\_extension\_animate](https://github.com/yttiktak/inkscape_extension_animate)

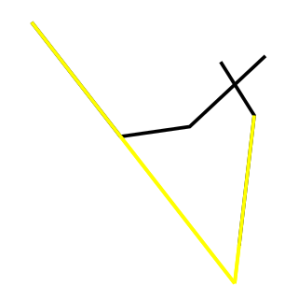
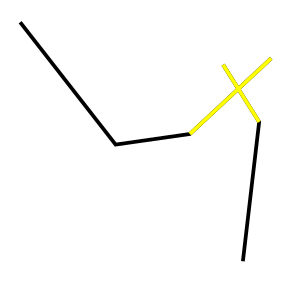
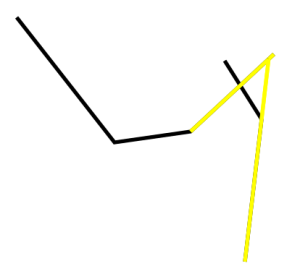
Create svg path animation from frames: Place each frame of the animation in a layer named 'frame'. Each of these layers should have the same number of paths, and each path should have the same number of points as the corresponding path in other layers. The animation is applied to the paths in the first layer in the sequence, so the properties of that layer are used. Animations with different numbers of frames can be put into different sequences, named 'sequence', using sub-groups:

## Layers structure example

```ini
 not_animated_layer1
 sequence
  frame
   path1a
   path2a
  frame
   path1b
   path2b
  frame
   path1c
   path2c
  frame
   path1d
   path2d
 sequence
  frame
  frame
  frame 
```

<p class="callout warning">Use layer named exactly 'frame' and groups named exactly 'sequence', not, eg, frame1 frame2 frame3 !</p>

## SVG Example

The svg:animate elements were created using this extension

```xml
<?xml version="1.0" encoding="UTF-8" standalone="no"?>
<!-- Created with Inkscape (http://www.inkscape.org/) -->
 
<svg
   sodipodi:docname="test.svg"
   inkscape:version="1.1 (c68e22c387, 2021-05-23)"
   id="svg5"
   version="1.1"
   viewBox="0 0 196.29599 203.26439"
   height="203.26439mm"
   width="196.29599mm"
   xmlns:inkscape="http://www.inkscape.org/namespaces/inkscape"
   xmlns:sodipodi="http://sodipodi.sourceforge.net/DTD/sodipodi-0.dtd"
   xmlns="http://www.w3.org/2000/svg"
   xmlns:svg="http://www.w3.org/2000/svg">
  <sodipodi:namedview
     id="namedview7"
     pagecolor="#ffffff"
     bordercolor="#666666"
     borderopacity="1.0"
     inkscape:pageshadow="2"
     inkscape:pageopacity="0.0"
     inkscape:pagecheckerboard="0"
     inkscape:document-units="mm"
     showgrid="false"
     inkscape:zoom="0.63250561"
     inkscape:cx="222.92292"
     inkscape:cy="560.46934"
     inkscape:window-width="1920"
     inkscape:window-height="1011"
     inkscape:window-x="0"
     inkscape:window-y="0"
     inkscape:window-maximized="1"
     inkscape:current-layer="3" />
  <defs
     id="defs2" />
  <g
     inkscape:label="sequence"
     inkscape:groupmode="layer"
     id="sequence"
     transform="translate(-13.540733,-0.43540987)">
    <g
       inkscape:groupmode="layer"
       id="1"
       inkscape:label="frame">
      <path
         style="fill:none;stroke:#000000;stroke-width:0.264583px;stroke-linecap:butt;stroke-linejoin:miter;stroke-opacity:1"
         d="m 53.238722,112.56222 c -0.427144,2.82588 -39.597237,48.85805 -39.597237,48.85805"
         id="path1a">
        <animate
           attributeName="d"
           attributeType="XML"
           begin="0"
           dur="9.1"
           repeatCount="indefinite"
           values="m 53.238722,112.56222 c -0.427144,2.82588 -39.597237,48.85805 -39.597237,48.85805;
M 90.991176,37.047614 C 90.564032,39.873491 51.393939,85.905662 51.393939,85.905662" />
      </path>
      <path
         style="fill:none;stroke:#000000;stroke-width:0.264583px;stroke-linecap:butt;stroke-linejoin:miter;stroke-opacity:1"
         d="m 58.62681,152.54616 24.761296,51.09595"
         id="path2a">
        <animate
           attributeName="d"
           attributeType="XML"
           begin="0"
           dur="9.1"
           repeatCount="indefinite"
           values="m 58.62681,152.54616 24.761296,51.09595;
M 96.379264,77.031553 121.14056,128.1275" />
      </path>
    </g>
    <g
       inkscape:groupmode="layer"
       id="2"
       inkscape:label="frame">
      <path
         style="fill:none;stroke:#000000;stroke-width:0.264583px;stroke-linecap:butt;stroke-linejoin:miter;stroke-opacity:1"
         d="M 90.991176,37.047614 C 90.564032,39.873491 51.393939,85.905662 51.393939,85.905662"
         id="path1b" />
      <path
         style="fill:none;stroke:#000000;stroke-width:0.264583px;stroke-linecap:butt;stroke-linejoin:miter;stroke-opacity:1"
         d="M 96.379264,77.031553 121.14056,128.1275"
         id="path2b" />
      <g
         id="3"
         inkscape:groupmode="layer"
         inkscape:label="frame">
        <path
           style="fill:none;stroke:#000000;stroke-width:0.264583px;stroke-linecap:butt;stroke-linejoin:miter;stroke-opacity:1"
           d="M 179.5683,0.455182 C 179.14115,3.281059 139.97106,49.31323 139.97106,49.31323"
           id="path1c" />
        <path
           style="fill:none;stroke:#000000;stroke-width:0.264583px;stroke-linecap:butt;stroke-linejoin:miter;stroke-opacity:1"
           d="m 184.95639,40.439121 24.76129,51.095947"
           id="path2c" />
      </g>
    </g>
  </g>
</svg>
```

Visual Output:

<iframe allowfullscreen="allowfullscreen" frameborder="0" height="315" sandbox="allow-same-origin allow-scripts allow-popups allow-forms" src="https://videos.stadtfabrikanten.org/videos/embed/wFrd9Hi1wDeW4GRDTXg2WC" title="Frame Animation Sequence" width="560"></iframe>

# Line Animator

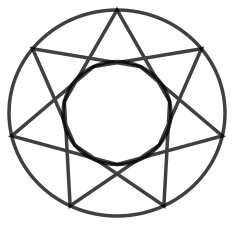
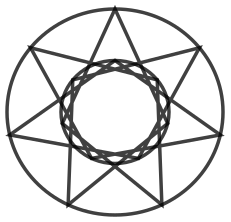
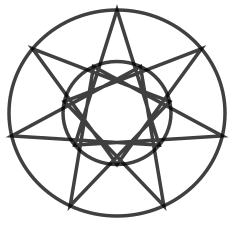
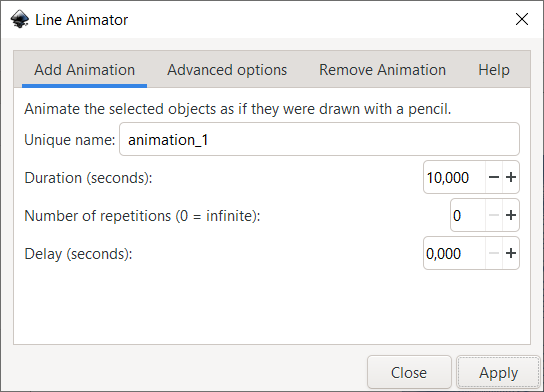
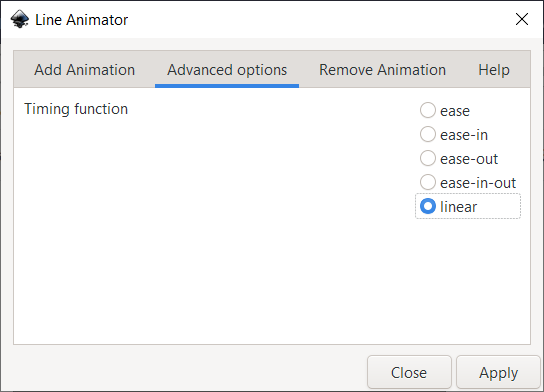
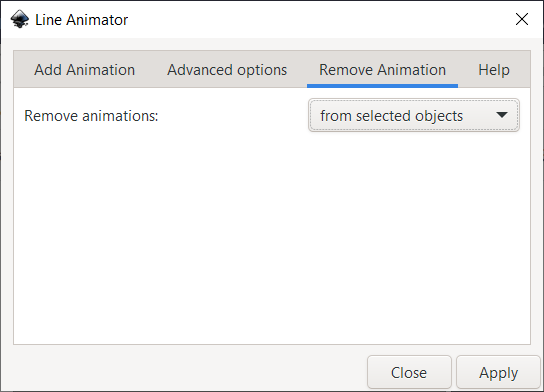
Inkscape extension for animating paths, so it looks as if they were being drawn by hand, using CSS3 animations.

Source: [<span>https://gitlab.com/Moini/ink\_line\_animator</span>](https://gitlab.com/Moini/ink_line_animator)

[![grafik.png](https://wiki.stadtfabrikanten.org/uploads/images/gallery/2025-05/scaled-1680-/pZzzlom63CbdF8Pc-grafik.png)](https://wiki.stadtfabrikanten.org/uploads/images/gallery/2025-05/pZzzlom63CbdF8Pc-grafik.png) [![grafik.png](https://wiki.stadtfabrikanten.org/uploads/images/gallery/2025-05/scaled-1680-/Wfhj8YrxK2Tx246A-grafik.png)](https://wiki.stadtfabrikanten.org/uploads/images/gallery/2025-05/Wfhj8YrxK2Tx246A-grafik.png) [![grafik.png](https://wiki.stadtfabrikanten.org/uploads/images/gallery/2025-05/scaled-1680-/euJzbP5VHTCQFVsU-grafik.png)](https://wiki.stadtfabrikanten.org/uploads/images/gallery/2025-05/euJzbP5VHTCQFVsU-grafik.png)
# Example

<iframe allowfullscreen="allowfullscreen" frameborder="0" height="315" sandbox="allow-same-origin allow-scripts allow-popups allow-forms" src="https://videos.stadtfabrikanten.org/videos/embed/iw1y84UtASaWkwjZG6p3cM" title="Line Animator Extension Example" width="560"></iframe>

See also [Animate Order](https://wiki.stadtfabrikanten.org/books/fablab-chemnitz/page/animate-order "Animate Order")

# Colors/Gradients/Filters

# Cleanup Styles

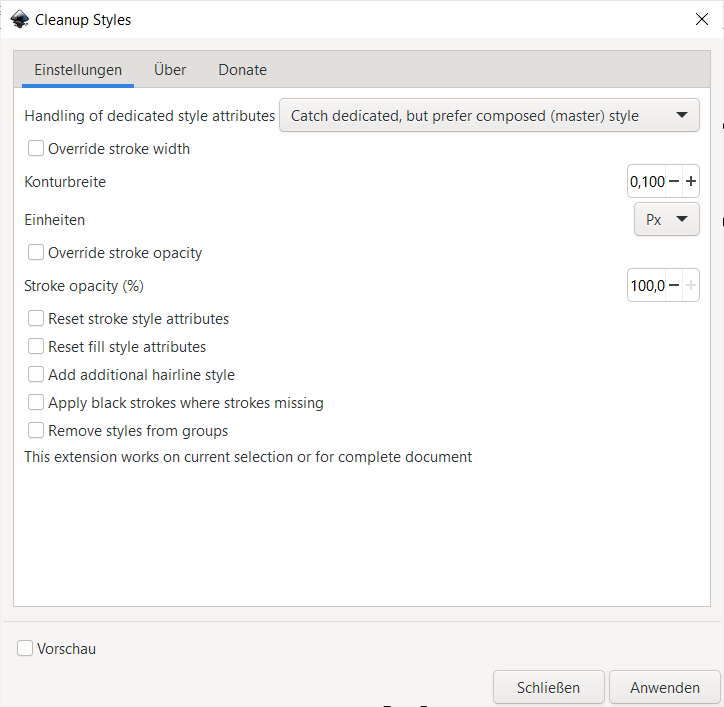
This plugin is a bit similar to [Blueprint Maker](https://wiki.stadtfabrikanten.org/books/fablab-chemnitz/page/blueprint-maker "Blueprint Maker") but has a more special use case and a lot of options! It is useful for adjusting the stroke width and opacity of large groups. Usually for good laser cutting the line width has to match a maximum width to be recognized as a **hairline**. Additionally, often opacity issues cause that lines are missed by laser cutter.

**Conversion information**

- 1 pt = 0,352 mm = 0,0138889 in
- 0,0283 pt = 0,01 mm

[![grafik.png](https://wiki.stadtfabrikanten.org/uploads/images/gallery/2025-05/scaled-1680-/RaYVwKYTJgNe5aXe-grafik.png)](https://wiki.stadtfabrikanten.org/uploads/images/gallery/2025-05/RaYVwKYTJgNe5aXe-grafik.png)
[![grafik.png](https://wiki.stadtfabrikanten.org/uploads/images/gallery/2025-05/scaled-1680-/CXYZ96hIBapcrmuk-grafik.png)](https://wiki.stadtfabrikanten.org/uploads/images/gallery/2025-05/CXYZ96hIBapcrmuk-grafik.png)
# Color Harmony

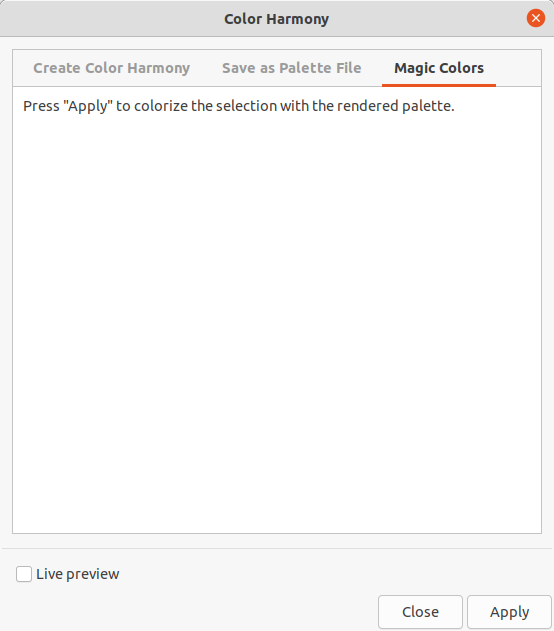
[![grafik.png](https://wiki.stadtfabrikanten.org/uploads/images/gallery/2025-05/scaled-1680-/obIcAFUNlACMWpDb-grafik.png)](https://wiki.stadtfabrikanten.org/uploads/images/gallery/2025-05/obIcAFUNlACMWpDb-grafik.png) [![grafik.png](https://wiki.stadtfabrikanten.org/uploads/images/gallery/2025-05/scaled-1680-/ZgoPwC6z0Xg41t0U-grafik.png)](https://wiki.stadtfabrikanten.org/uploads/images/gallery/2025-05/ZgoPwC6z0Xg41t0U-grafik.png) [![grafik.png](https://wiki.stadtfabrikanten.org/uploads/images/gallery/2025-05/scaled-1680-/9TeSlckB4vtJElIt-grafik.png)](https://wiki.stadtfabrikanten.org/uploads/images/gallery/2025-05/9TeSlckB4vtJElIt-grafik.png)
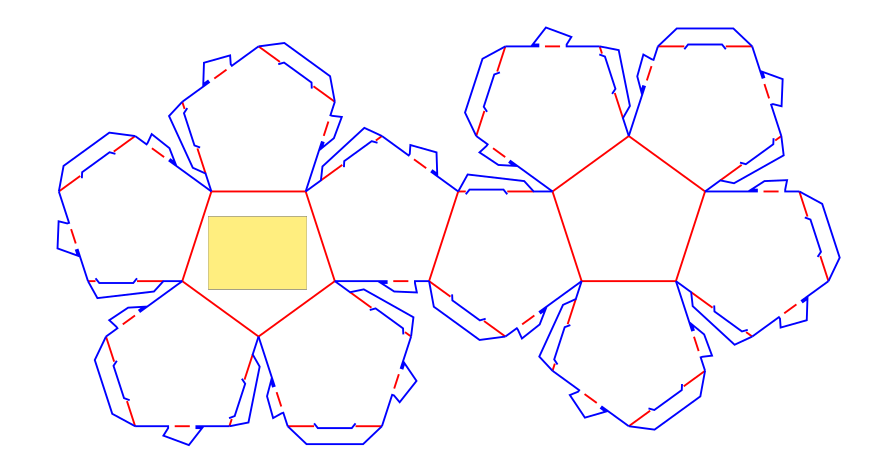
## Open some document and select an object

[![grafik.png](https://wiki.stadtfabrikanten.org/uploads/images/gallery/2025-05/scaled-1680-/IKMXt2909HqqGjbf-grafik.png)](https://wiki.stadtfabrikanten.org/uploads/images/gallery/2025-05/IKMXt2909HqqGjbf-grafik.png)
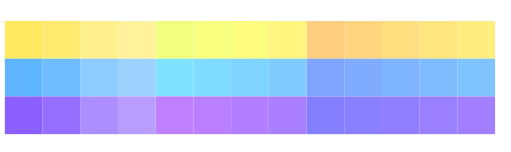
## Result

[![grafik.png](https://wiki.stadtfabrikanten.org/uploads/images/gallery/2025-05/scaled-1680-/XyGPeiUcwEue5ZjA-grafik.png)](https://wiki.stadtfabrikanten.org/uploads/images/gallery/2025-05/XyGPeiUcwEue5ZjA-grafik.png)
# Generate Palette

Source: [<span>https://github.com/olibia/inkscape-generate-palette</span>](https://github.com/olibia/inkscape-generate-palette)

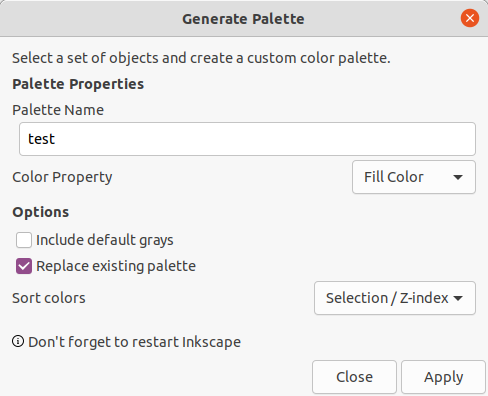
[![grafik.png](https://wiki.stadtfabrikanten.org/uploads/images/gallery/2025-05/scaled-1680-/Kq4iavpF3b9ItP3V-grafik.png)](https://wiki.stadtfabrikanten.org/uploads/images/gallery/2025-05/Kq4iavpF3b9ItP3V-grafik.png)
## Usage

- Create objects with color properties set, can be fill and/or stroke color.
- Select them and from the Extensions menu choose Palette and Generate.
- Provide a name and select the color property to grab colors from.

<p class="callout info">You can also include Inkscape's default black to white colors or replace an existing palette.</p>

### Notes

- Inkscape must be restarted for a new palette to appear.
- Generated palettes are located at `~/.config/inkscape/palettes` or `~\AppData\Roaming\inkscape\palettes` on Windows. You can delete them accessing that folder

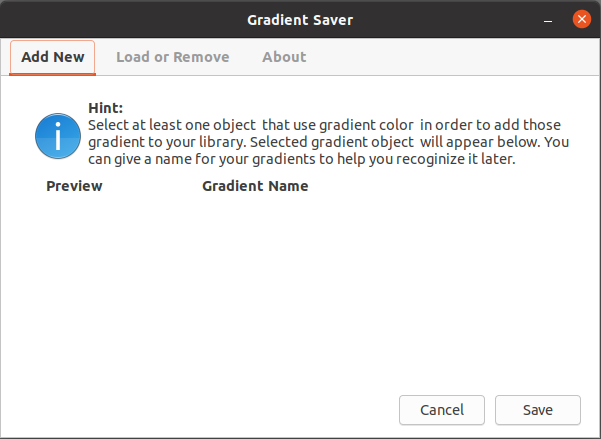
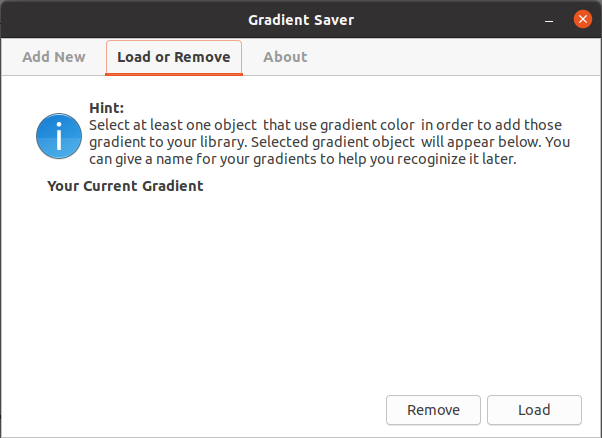
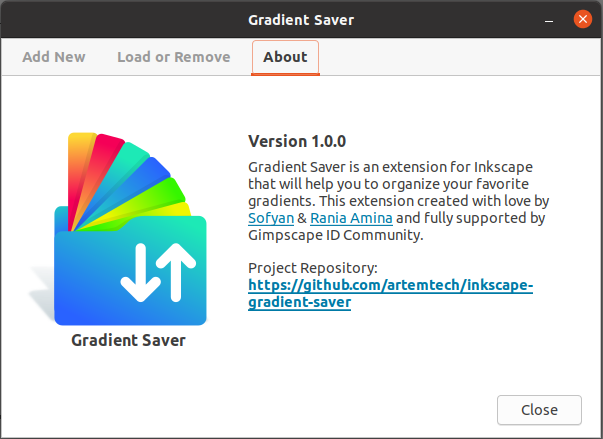
# Gradient Saver

[![grafik.png](https://wiki.stadtfabrikanten.org/uploads/images/gallery/2025-05/scaled-1680-/ADBx34xyYfZRl0Wr-grafik.png)](https://wiki.stadtfabrikanten.org/uploads/images/gallery/2025-05/ADBx34xyYfZRl0Wr-grafik.png) [![grafik.png](https://wiki.stadtfabrikanten.org/uploads/images/gallery/2025-05/scaled-1680-/uNNDrPJs91RpDoaW-grafik.png)](https://wiki.stadtfabrikanten.org/uploads/images/gallery/2025-05/uNNDrPJs91RpDoaW-grafik.png) [![grafik.png](https://wiki.stadtfabrikanten.org/uploads/images/gallery/2025-05/scaled-1680-/jXd1ILBrtWYl91y4-grafik.png)](https://wiki.stadtfabrikanten.org/uploads/images/gallery/2025-05/jXd1ILBrtWYl91y4-grafik.png)
# Grey to MonoAlpha

<div class="page view" id="bkmrk-converts-a-greyscale"><article>- Converts a greyscale vector graphic to monochrome with variable opacity.
- Threshold setting to avoid solid colors
- Can be applied to stroke, fill or both

<p class="callout warning">Does not work for gradients!  
Does not work for groups. You need to pick single elements!</p>

</article></div><div class="page view" id="bkmrk-example-output-%28left"><article>[![grafik.png](https://wiki.stadtfabrikanten.org/uploads/images/gallery/2025-05/scaled-1680-/QjIbDqKsuHwe4Adg-grafik.png)](https://wiki.stadtfabrikanten.org/uploads/images/gallery/2025-05/QjIbDqKsuHwe4Adg-grafik.png) [![grafik.png](https://wiki.stadtfabrikanten.org/uploads/images/gallery/2025-05/scaled-1680-/dprxMNcmB4csqdYI-grafik.png)](https://wiki.stadtfabrikanten.org/uploads/images/gallery/2025-05/dprxMNcmB4csqdYI-grafik.png)

## Example Output (left image is original, right is modified)

[![grafik.png](https://wiki.stadtfabrikanten.org/uploads/images/gallery/2025-05/scaled-1680-/Nzl2zRghizRMdC7p-grafik.png)](https://wiki.stadtfabrikanten.org/uploads/images/gallery/2025-05/Nzl2zRghizRMdC7p-grafik.png) [![grafik.png](https://wiki.stadtfabrikanten.org/uploads/images/gallery/2025-05/scaled-1680-/a3d6NXBOVq58zFb2-grafik.png)](https://wiki.stadtfabrikanten.org/uploads/images/gallery/2025-05/a3d6NXBOVq58zFb2-grafik.png)

</article></div>

# Jitter Gradients

Source: [https://inkscape.org/~vermette/%E2%98%85jitter-gradients](https://inkscape.org/~vermette/%E2%98%85jitter-gradients)

[![grafik.png](https://wiki.stadtfabrikanten.org/uploads/images/gallery/2025-05/scaled-1680-/hB2JHxMXIq2feGac-grafik.png)](https://wiki.stadtfabrikanten.org/uploads/images/gallery/2025-05/hB2JHxMXIq2feGac-grafik.png)

Take a large selection of elements with gradients and randomly move their endpoints. Ideal when working with a large number of tiles, placing a large overarching gradient, then jittering to add texture.

[![grafik.png](https://wiki.stadtfabrikanten.org/uploads/images/gallery/2025-05/scaled-1680-/ej8hKTxnQUrA3T1I-grafik.png)](https://wiki.stadtfabrikanten.org/uploads/images/gallery/2025-05/ej8hKTxnQUrA3T1I-grafik.png) [![grafik.png](https://wiki.stadtfabrikanten.org/uploads/images/gallery/2025-05/scaled-1680-/c08UTHlCoaVQ45yb-grafik.png)](https://wiki.stadtfabrikanten.org/uploads/images/gallery/2025-05/c08UTHlCoaVQ45yb-grafik.png)

# Replace Color And Alpha

This is a plugin working for vector stuff. It's not intended to use on raster images. It's a legacy extension.

## Draw some path with infill (example Color #510000)

[![grafik.png](https://wiki.stadtfabrikanten.org/uploads/images/gallery/2025-05/scaled-1680-/Dsxu2tzBOtJ5HpXL-grafik.png)](https://wiki.stadtfabrikanten.org/uploads/images/gallery/2025-05/Dsxu2tzBOtJ5HpXL-grafik.png)

## Run the extension

[![grafik.png](https://wiki.stadtfabrikanten.org/uploads/images/gallery/2025-05/scaled-1680-/rTL2hLxnKL7jUtaW-grafik.png)](https://wiki.stadtfabrikanten.org/uploads/images/gallery/2025-05/rTL2hLxnKL7jUtaW-grafik.png)

## Get the result

[![grafik.png](https://wiki.stadtfabrikanten.org/uploads/images/gallery/2025-05/scaled-1680-/uLi1D5ntJqbcMcFn-grafik.png)](https://wiki.stadtfabrikanten.org/uploads/images/gallery/2025-05/uLi1D5ntJqbcMcFn-grafik.png)

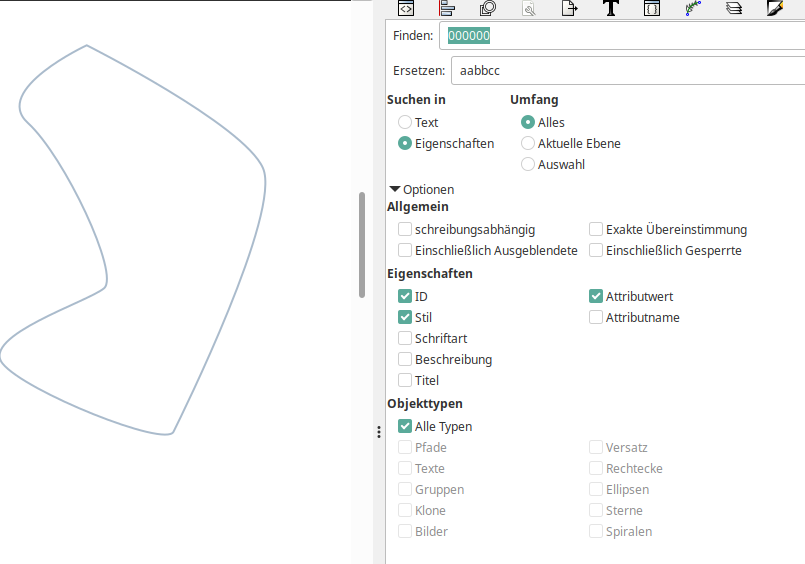
<p class="callout info">Just use the default Inkscape search+replace. This works much better!</p>

[![grafik.png](https://wiki.stadtfabrikanten.org/uploads/images/gallery/2025-05/scaled-1680-/vnKhnjx1PyO5aZhW-grafik.png)](https://wiki.stadtfabrikanten.org/uploads/images/gallery/2025-05/vnKhnjx1PyO5aZhW-grafik.png)

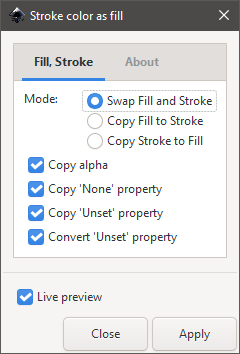
# Stroke Color As Fill

## [![grafik.png](https://wiki.stadtfabrikanten.org/uploads/images/gallery/2025-05/scaled-1680-/yGqKP4NfkCaSzl4B-grafik.png)](https://wiki.stadtfabrikanten.org/uploads/images/gallery/2025-05/yGqKP4NfkCaSzl4B-grafik.png)
## Example Output

[![grafik.png](https://wiki.stadtfabrikanten.org/uploads/images/gallery/2025-05/scaled-1680-/Qa0tLLCOSn7HAWEZ-grafik.png)](https://wiki.stadtfabrikanten.org/uploads/images/gallery/2025-05/Qa0tLLCOSn7HAWEZ-grafik.png)
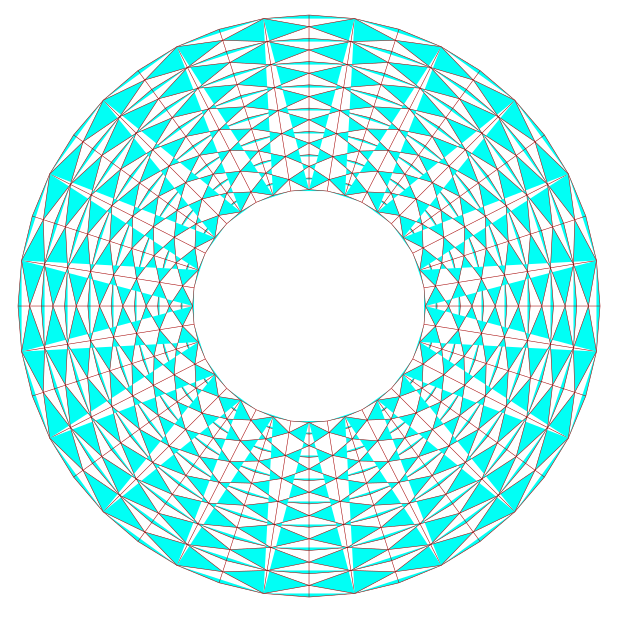
[![grafik.png](https://wiki.stadtfabrikanten.org/uploads/images/gallery/2025-05/scaled-1680-/SRKEA3VYNeRIrFDU-grafik.png)](https://wiki.stadtfabrikanten.org/uploads/images/gallery/2025-05/SRKEA3VYNeRIrFDU-grafik.png)
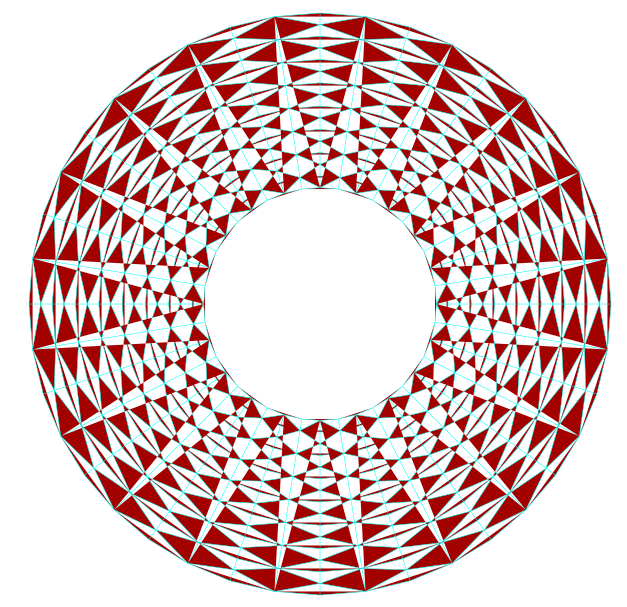
# Cutting/Plotting/Printing

# Inventory Sticker

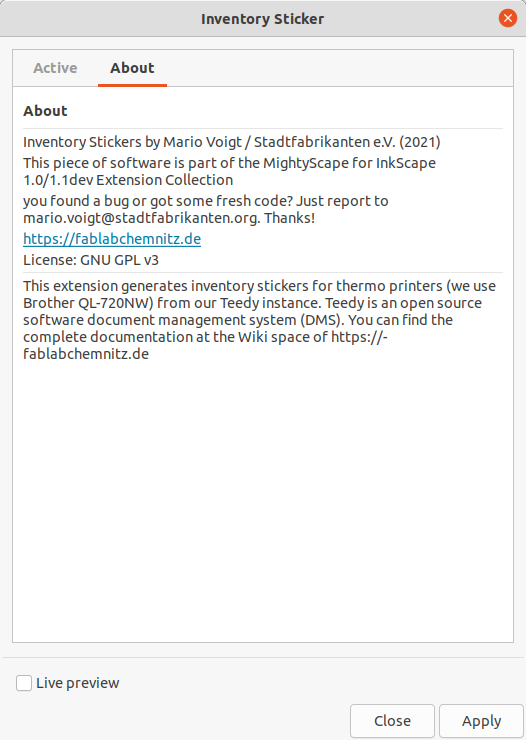
This extension generates inventory stickers for thermo printers (we use Brother QL-720NW) from our Teedy instance. Teedy is an open source software document management system (DMS). Complete details can be found at [2. Etikettenkonzept](https://wiki.stadtfabrikanten.org/books/inventar-und-handbucher/page/2-etikettenkonzept) and [3. Druckerkonzept](https://wiki.stadtfabrikanten.org/books/inventar-und-handbucher/page/3-druckerkonzept). This extension is tested in Linux (Ubuntu 20 LTS) and Windows 10.

Source code can be found in [https://gitea.fablabchemnitz.de/FabLab\_Chemnitz/mightyscape-1.2/src/branch/master/extensions/fablabchemnitz](https://gitea.fablabchemnitz.de/FabLab_Chemnitz/mightyscape-1.2/src/branch/master/extensions/fablabchemnitz)

The required python module `brother_ql` will be installed by MightyScape requirements automatically. It might be required to add additional permissions for the user. See [3. Druckerkonzept](https://wiki.stadtfabrikanten.org/books/inventar-und-handbucher/page/3-druckerkonzept).

[![grafik.png](https://wiki.stadtfabrikanten.org/uploads/images/gallery/2025-05/scaled-1680-/h25FugwIQLAg87yk-grafik.png)](https://wiki.stadtfabrikanten.org/uploads/images/gallery/2025-05/h25FugwIQLAg87yk-grafik.png) [![grafik.png](https://wiki.stadtfabrikanten.org/uploads/images/gallery/2025-05/scaled-1680-/Gd9osVIiY2g6KJjH-grafik.png)](https://wiki.stadtfabrikanten.org/uploads/images/gallery/2025-05/Gd9osVIiY2g6KJjH-grafik.png)
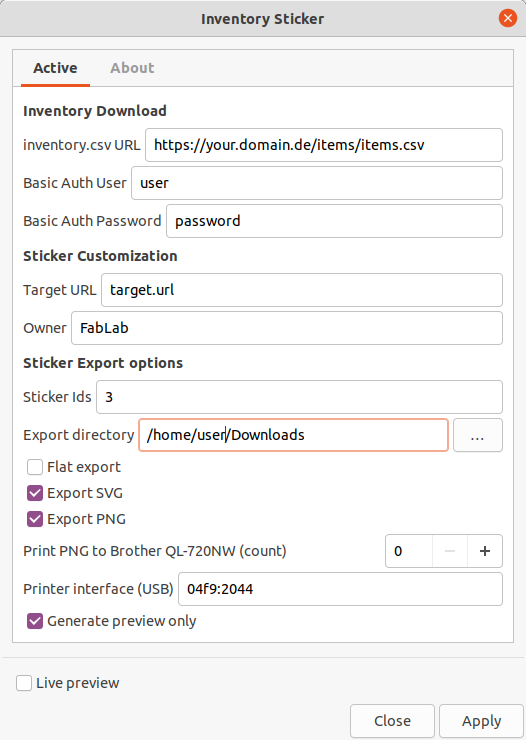
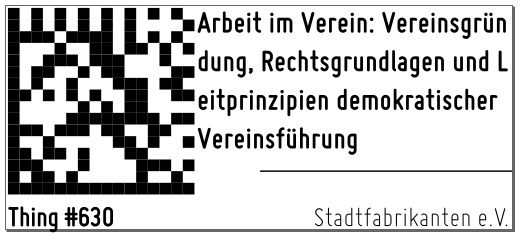
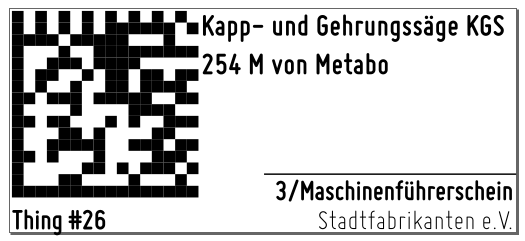
<table border="1" id="bkmrk-100-characters-in-th" style="border-collapse: collapse; width: 99.9734%;"><colgroup><col style="width: 50%;"></col><col style="width: 50%;"></col></colgroup><thead><tr><td>**100 characters in the title (maximum possible)**</td><td>**42 characters in the title (usual lengths)**</td></tr></thead><tbody><tr><td>[![grafik.png](https://wiki.stadtfabrikanten.org/uploads/images/gallery/2025-05/scaled-1680-/rOyHaakHIa2zzq92-grafik.png)](https://wiki.stadtfabrikanten.org/uploads/images/gallery/2025-05/rOyHaakHIa2zzq92-grafik.png)

</td><td>[![grafik.png](https://wiki.stadtfabrikanten.org/uploads/images/gallery/2025-05/scaled-1680-/02quDOx9INRgRffJ-grafik.png)](https://wiki.stadtfabrikanten.org/uploads/images/gallery/2025-05/02quDOx9INRgRffJ-grafik.png)

</td></tr></tbody></table>

# Laser Check

[![grafik.png](https://wiki.stadtfabrikanten.org/uploads/images/gallery/2025-05/scaled-1680-/o3RXKTuJDxyxGG7g-grafik.png)](https://wiki.stadtfabrikanten.org/uploads/images/gallery/2025-05/o3RXKTuJDxyxGG7g-grafik.png)

# Printing Marks Dotted

This extension is an older legacy version of "Extensions → Render → Layout → Printing Marks" with small difference for offering dotted crop marks

[![grafik.png](https://wiki.stadtfabrikanten.org/uploads/images/gallery/2025-05/scaled-1680-/wvCQyEF9yJv0WF0m-grafik.png)](https://wiki.stadtfabrikanten.org/uploads/images/gallery/2025-05/wvCQyEF9yJv0WF0m-grafik.png)

[![grafik.png](https://wiki.stadtfabrikanten.org/uploads/images/gallery/2025-05/scaled-1680-/2tt1JhllRGrn13gY-grafik.png)](https://wiki.stadtfabrikanten.org/uploads/images/gallery/2025-05/2tt1JhllRGrn13gY-grafik.png)

[![grafik.png](https://wiki.stadtfabrikanten.org/uploads/images/gallery/2025-05/scaled-1680-/lhEiS9Vyd4T6x7Eg-grafik.png)](https://wiki.stadtfabrikanten.org/uploads/images/gallery/2025-05/lhEiS9Vyd4T6x7Eg-grafik.png)

# Silhouette Cameo Registration Marks

Source: [<span>https://github.com/miLORD1337/silhouette-regmarks</span>](https://github.com/miLORD1337/silhouette-regmarks)

[![grafik.png](https://wiki.stadtfabrikanten.org/uploads/images/gallery/2025-05/scaled-1680-/36VjxakiRGJWPcnP-grafik.png)](https://wiki.stadtfabrikanten.org/uploads/images/gallery/2025-05/36VjxakiRGJWPcnP-grafik.png)

[![grafik.png](https://wiki.stadtfabrikanten.org/uploads/images/gallery/2025-05/scaled-1680-/VPMsrrb6nNMY7QYH-grafik.png)](https://wiki.stadtfabrikanten.org/uploads/images/gallery/2025-05/VPMsrrb6nNMY7QYH-grafik.png)

# Simple Registration

# Dimensioning/Measuring

# Colorize Path Lengths / Slants

This tool will help to identify paths of certain lengths to maybe delete or modify them. Please also see [Filter By Length/Area](https://wiki.stadtfabrikanten.org/books/fablab-chemnitz/page/filter-by-lengtharea "Filter By Length/Area") which behaves similar but non-visual.

[![grafik.png](https://wiki.stadtfabrikanten.org/uploads/images/gallery/2025-05/scaled-1680-/2wTJ2KG7u44GYctT-grafik.png)](https://wiki.stadtfabrikanten.org/uploads/images/gallery/2025-05/2wTJ2KG7u44GYctT-grafik.png)

## Example output (left original, right is extension result)

[![grafik.png](https://wiki.stadtfabrikanten.org/uploads/images/gallery/2025-05/scaled-1680-/ruc2RG4Bl0GV5GWc-grafik.png)](https://wiki.stadtfabrikanten.org/uploads/images/gallery/2025-05/ruc2RG4Bl0GV5GWc-grafik.png) [![grafik.png](https://wiki.stadtfabrikanten.org/uploads/images/gallery/2025-05/scaled-1680-/aR0kj8AJdMj4Pi5z-grafik.png)](https://wiki.stadtfabrikanten.org/uploads/images/gallery/2025-05/aR0kj8AJdMj4Pi5z-grafik.png)

# Dimensioning (Replaced by LPE)

[![grafik.png](https://wiki.stadtfabrikanten.org/uploads/images/gallery/2025-05/scaled-1680-/BcFZgoxd8SlMY6h2-grafik.png)](https://wiki.stadtfabrikanten.org/uploads/images/gallery/2025-05/BcFZgoxd8SlMY6h2-grafik.png) [![grafik.png](https://wiki.stadtfabrikanten.org/uploads/images/gallery/2025-05/scaled-1680-/7LhYXWLzk3lrFKPm-grafik.png)](https://wiki.stadtfabrikanten.org/uploads/images/gallery/2025-05/7LhYXWLzk3lrFKPm-grafik.png) [![grafik.png](https://wiki.stadtfabrikanten.org/uploads/images/gallery/2025-05/scaled-1680-/MZmc1dFQ3k3EqzWt-grafik.png)](https://wiki.stadtfabrikanten.org/uploads/images/gallery/2025-05/MZmc1dFQ3k3EqzWt-grafik.png)

[![grafik.png](https://wiki.stadtfabrikanten.org/uploads/images/gallery/2025-05/scaled-1680-/MT83Kf8QIMU6AYnF-grafik.png)](https://wiki.stadtfabrikanten.org/uploads/images/gallery/2025-05/MT83Kf8QIMU6AYnF-grafik.png)

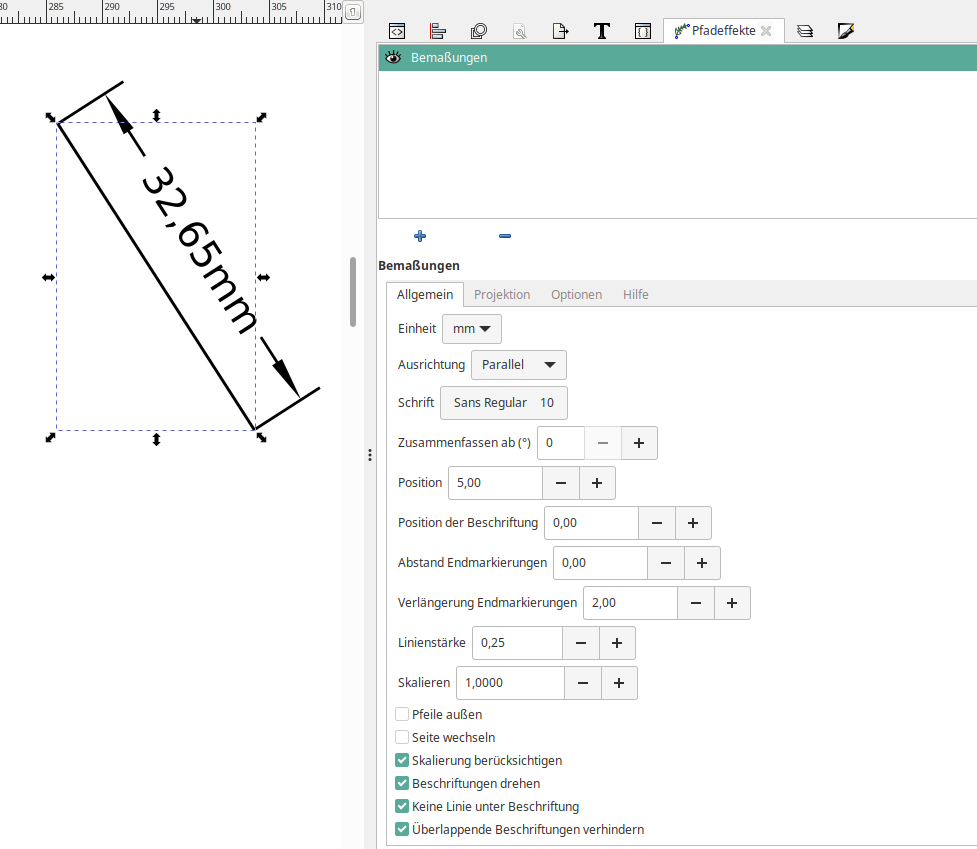
<p class="callout info">We can use the same feature by Live Path Effect:</p>

[![grafik.png](https://wiki.stadtfabrikanten.org/uploads/images/gallery/2025-05/scaled-1680-/ETCH2rGtcPqJrvfi-grafik.png)](https://wiki.stadtfabrikanten.org/uploads/images/gallery/2025-05/ETCH2rGtcPqJrvfi-grafik.png)

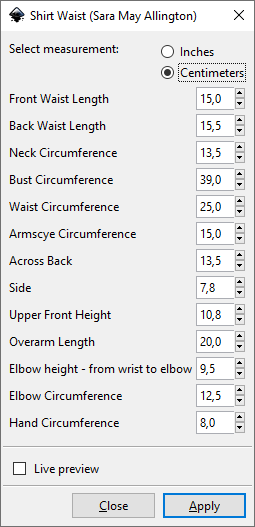
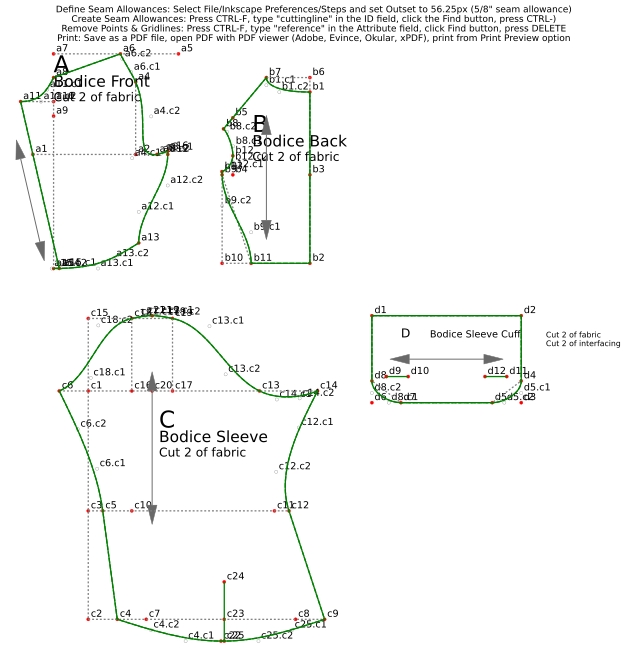
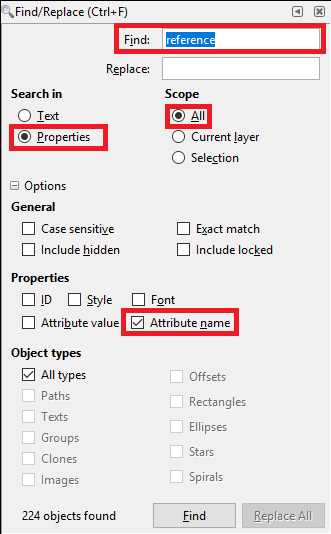
# Shirt Waist (Sara May Allington)

[![grafik.png](https://wiki.stadtfabrikanten.org/uploads/images/gallery/2025-05/scaled-1680-/saoSwNKyXd9ZQMnh-grafik.png)](https://wiki.stadtfabrikanten.org/uploads/images/gallery/2025-05/saoSwNKyXd9ZQMnh-grafik.png)
[![grafik.png](https://wiki.stadtfabrikanten.org/uploads/images/gallery/2025-05/scaled-1680-/Ds8y5TFeQVifQBOK-grafik.png)](https://wiki.stadtfabrikanten.org/uploads/images/gallery/2025-05/Ds8y5TFeQVifQBOK-grafik.png)
[![grafik.png](https://wiki.stadtfabrikanten.org/uploads/images/gallery/2025-05/scaled-1680-/rRDePXO42frFLkKR-grafik.png)](https://wiki.stadtfabrikanten.org/uploads/images/gallery/2025-05/rRDePXO42frFLkKR-grafik.png)
[![grafik.png](https://wiki.stadtfabrikanten.org/uploads/images/gallery/2025-05/scaled-1680-/4oa9tQtpmfmj2myV-grafik.png)](https://wiki.stadtfabrikanten.org/uploads/images/gallery/2025-05/4oa9tQtpmfmj2myV-grafik.png)
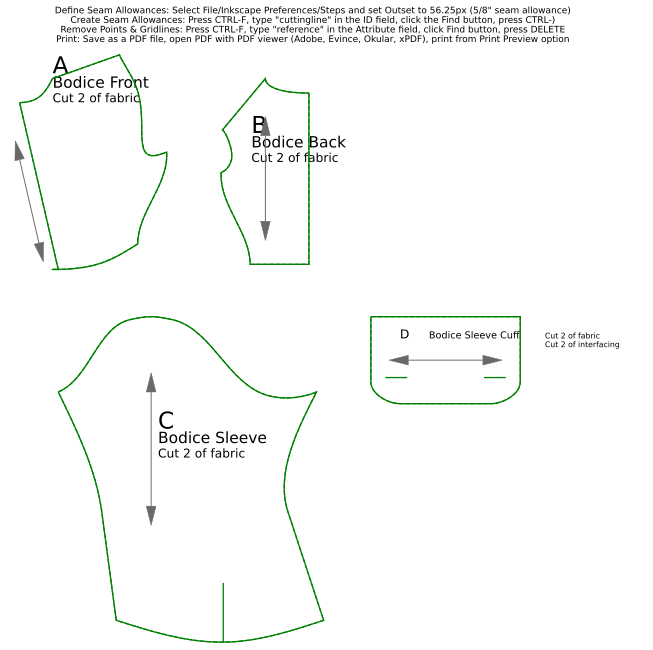
[![grafik.png](https://wiki.stadtfabrikanten.org/uploads/images/gallery/2025-05/scaled-1680-/NdNlkv43AWy6AWak-grafik.png)](https://wiki.stadtfabrikanten.org/uploads/images/gallery/2025-05/NdNlkv43AWy6AWak-grafik.png)
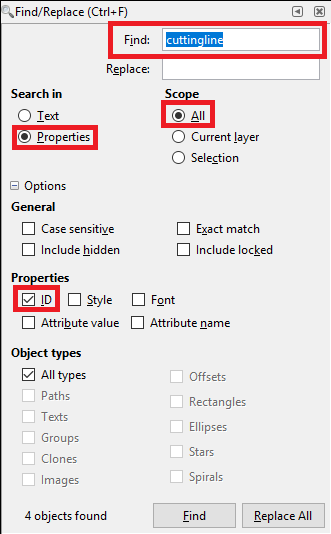
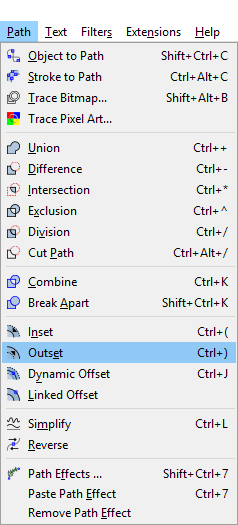
## Outline the cutting lines → Ctrl + )

[![grafik.png](https://wiki.stadtfabrikanten.org/uploads/images/gallery/2025-05/scaled-1680-/qU4APwUJT53dH2KW-grafik.png)](https://wiki.stadtfabrikanten.org/uploads/images/gallery/2025-05/qU4APwUJT53dH2KW-grafik.png)
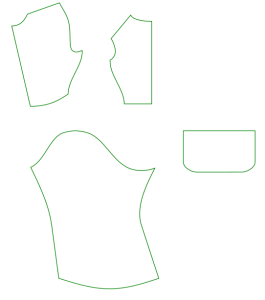
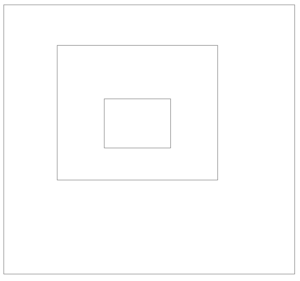
## Move the outlines next to the current selection to see the solid lines

[![grafik.png](https://wiki.stadtfabrikanten.org/uploads/images/gallery/2025-05/scaled-1680-/YV0nI0qX9J9nML3C-grafik.png)](https://wiki.stadtfabrikanten.org/uploads/images/gallery/2025-05/YV0nI0qX9J9nML3C-grafik.png)
# Show Path Coordinates

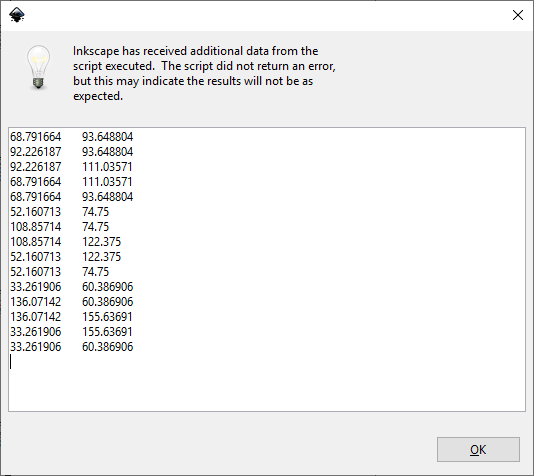
This extension prints X,Y coordinates of selected path nodes. Can be helpful for debugging things.

## Draw some path

[![grafik.png](https://wiki.stadtfabrikanten.org/uploads/images/gallery/2025-05/scaled-1680-/7jZmsySJOOZVVlRy-grafik.png)](https://wiki.stadtfabrikanten.org/uploads/images/gallery/2025-05/7jZmsySJOOZVVlRy-grafik.png)
## Run extension

[![grafik.png](https://wiki.stadtfabrikanten.org/uploads/images/gallery/2025-05/scaled-1680-/AapAOKx1lNMRUM0M-grafik.png)](https://wiki.stadtfabrikanten.org/uploads/images/gallery/2025-05/AapAOKx1lNMRUM0M-grafik.png)
# Grids/Guides

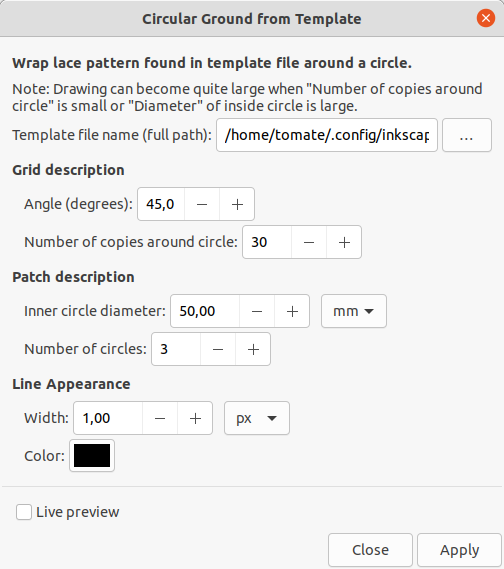
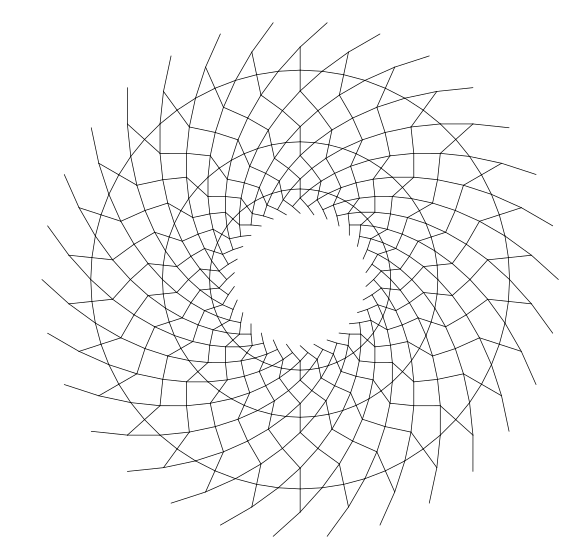
# Bobbin Lace - Circular Ground From Template

Source of documentation: [https://d-bl.github.io/inkscape-bobbinlace/Ground-from-Template](https://d-bl.github.io/inkscape-bobbinlace/Ground-from-Template)

[![grafik.png](https://wiki.stadtfabrikanten.org/uploads/images/gallery/2025-05/scaled-1680-/b8KOvGaQQe2WHCQO-grafik.png)](https://wiki.stadtfabrikanten.org/uploads/images/gallery/2025-05/b8KOvGaQQe2WHCQO-grafik.png)
## Example Output

[![grafik.png](https://wiki.stadtfabrikanten.org/uploads/images/gallery/2025-05/scaled-1680-/CgADI4AgQxHp4a6u-grafik.png)](https://wiki.stadtfabrikanten.org/uploads/images/gallery/2025-05/CgADI4AgQxHp4a6u-grafik.png)
See also

- [Bobbin Lace - Regular Grid](https://wiki.stadtfabrikanten.org/books/fablab-chemnitz/page/bobbin-lace-regular-grid)
- [Bobbin Lace - Ground From Template](https://wiki.stadtfabrikanten.org/books/fablab-chemnitz/page/bobbin-lace-ground-from-template)
- [Bobbin Lace - Polar Grid](https://wiki.stadtfabrikanten.org/books/fablab-chemnitz/page/bobbin-lace-polar-grid)

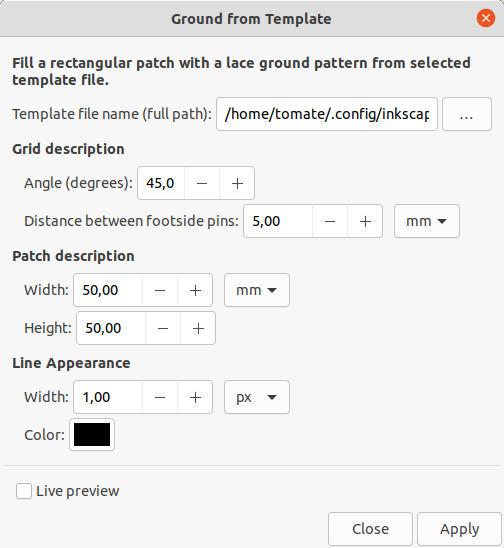
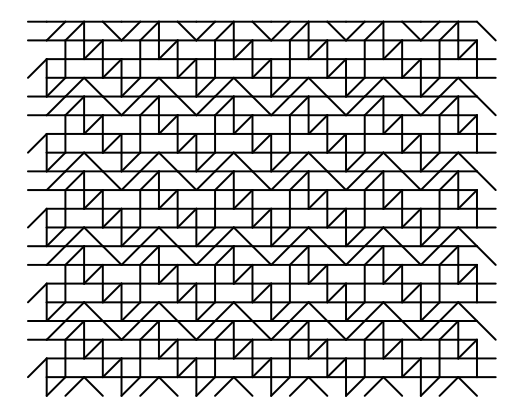
# Bobbin Lace - Ground From Template

Source of documentation: [https://d-bl.github.io/inkscape-bobbinlace/Ground-from-Template](https://d-bl.github.io/inkscape-bobbinlace/Ground-from-Template)

Nice to have: good templates from [https://tesselace.com/tools/inkscape-extension](https://tesselace.com/tools/inkscape-extension/)

[![grafik.png](https://wiki.stadtfabrikanten.org/uploads/images/gallery/2025-05/scaled-1680-/vKZYYezHKMDaxwd4-grafik.png)](https://wiki.stadtfabrikanten.org/uploads/images/gallery/2025-05/vKZYYezHKMDaxwd4-grafik.png) [![grafik.png](https://wiki.stadtfabrikanten.org/uploads/images/gallery/2025-05/scaled-1680-/ttuGhoFTzKApl48K-grafik.png)](https://wiki.stadtfabrikanten.org/uploads/images/gallery/2025-05/ttuGhoFTzKApl48K-grafik.png)
See also

- [Bobbin Lace - Regular Grid](https://wiki.stadtfabrikanten.org/books/fablab-chemnitz/page/bobbin-lace-regular-grid)
- [Bobbin Lace - Circular Ground From Template](https://wiki.stadtfabrikanten.org/books/fablab-chemnitz/page/bobbin-lace-circular-ground-from-template)
- [Bobbin Lace - Polar Grid](https://wiki.stadtfabrikanten.org/books/fablab-chemnitz/page/bobbin-lace-polar-grid)

# Bobbin Lace - Polar Grid

Source of documentation: [https://d-bl.github.io/inkscape-bobbinlace/Polar-Grids](https://d-bl.github.io/inkscape-bobbinlace/Polar-Grids)

[![grafik.png](https://wiki.stadtfabrikanten.org/uploads/images/gallery/2025-05/scaled-1680-/P3FJPxgAZfx4qNAd-grafik.png)](https://wiki.stadtfabrikanten.org/uploads/images/gallery/2025-05/P3FJPxgAZfx4qNAd-grafik.png)
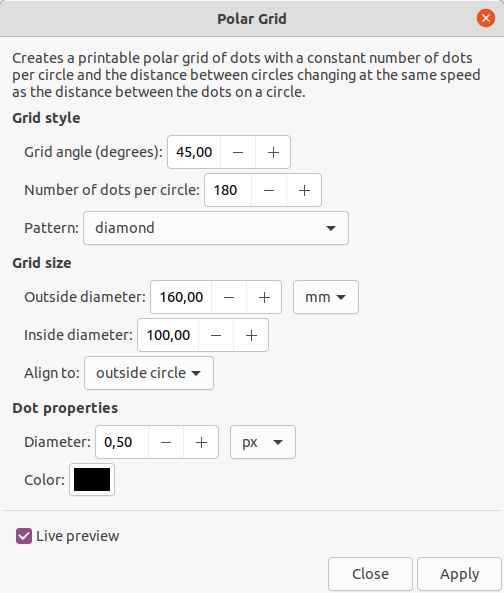
## Example Output

[![grafik.png](https://wiki.stadtfabrikanten.org/uploads/images/gallery/2025-05/scaled-1680-/qatIGoRurN4IyfPd-grafik.png)](https://wiki.stadtfabrikanten.org/uploads/images/gallery/2025-05/qatIGoRurN4IyfPd-grafik.png)

See also

- [Bobbin Lace - Regular Grid](https://wiki.stadtfabrikanten.org/books/fablab-chemnitz/page/bobbin-lace-regular-grid)
- [Bobbin Lace - Circular Ground From Template](https://wiki.stadtfabrikanten.org/books/fablab-chemnitz/page/bobbin-lace-circular-ground-from-template)
- [Bobbin Lace - Ground From Template](https://wiki.stadtfabrikanten.org/books/fablab-chemnitz/page/bobbin-lace-ground-from-template)

# Bobbin Lace - Regular Grid

Source of documentation: [https://d-bl.github.io/inkscape-bobbinlace/Regular-Grids](https://d-bl.github.io/inkscape-bobbinlace/Regular-Grids)

[![grafik.png](https://wiki.stadtfabrikanten.org/uploads/images/gallery/2025-05/scaled-1680-/M8VT24kXVhWhU9fg-grafik.png)](https://wiki.stadtfabrikanten.org/uploads/images/gallery/2025-05/M8VT24kXVhWhU9fg-grafik.png)
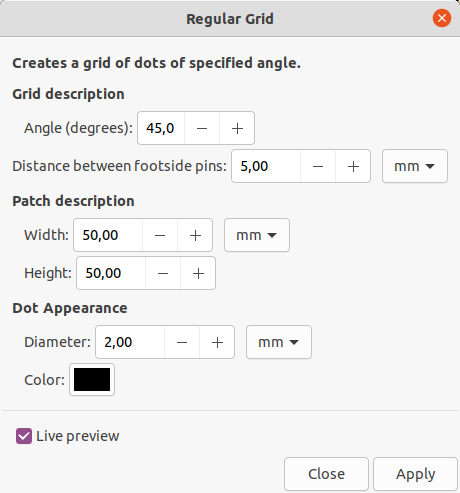
## Example Output

[![grafik.png](https://wiki.stadtfabrikanten.org/uploads/images/gallery/2025-05/scaled-1680-/xxYntH5Y5Jz6jBXW-grafik.png)](https://wiki.stadtfabrikanten.org/uploads/images/gallery/2025-05/xxYntH5Y5Jz6jBXW-grafik.png)

See also

- [Bobbin Lace - Circular Ground From Template](https://wiki.stadtfabrikanten.org/books/fablab-chemnitz/page/bobbin-lace-circular-ground-from-template)
- [Bobbin Lace - Ground From Template](https://wiki.stadtfabrikanten.org/books/fablab-chemnitz/page/bobbin-lace-ground-from-template)
- [Bobbin Lace - Polar Grid](https://wiki.stadtfabrikanten.org/books/fablab-chemnitz/page/bobbin-lace-polar-grid)

# Card Layout Guides

[![grafik.png](https://wiki.stadtfabrikanten.org/uploads/images/gallery/2025-05/scaled-1680-/11csBlZbsudFVJIG-grafik.png)](https://wiki.stadtfabrikanten.org/uploads/images/gallery/2025-05/11csBlZbsudFVJIG-grafik.png)
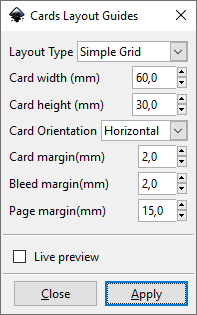
## Example Output

[![grafik.png](https://wiki.stadtfabrikanten.org/uploads/images/gallery/2025-05/scaled-1680-/jDl15LkY0HTsrG64-grafik.png)](https://wiki.stadtfabrikanten.org/uploads/images/gallery/2025-05/jDl15LkY0HTsrG64-grafik.png)
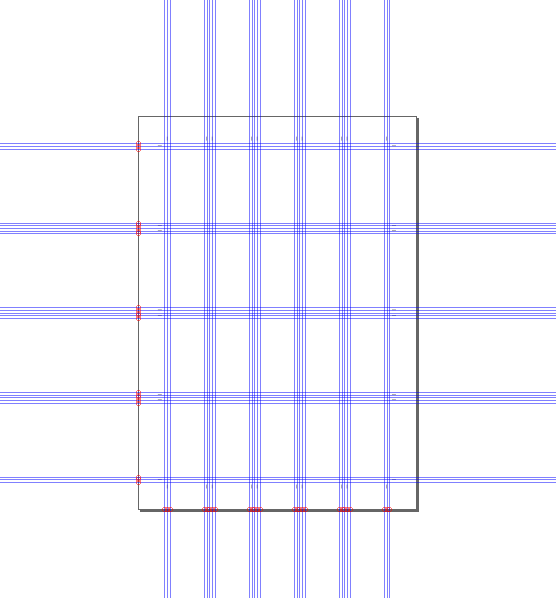
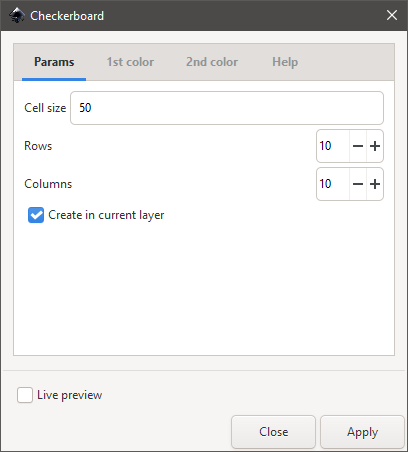
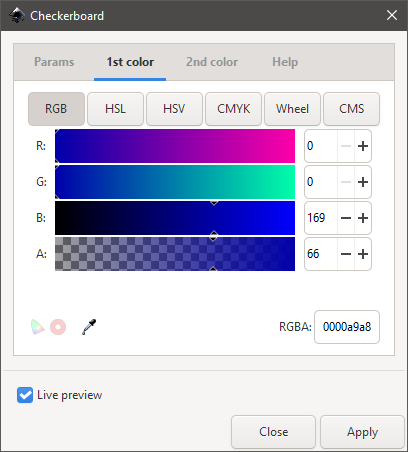
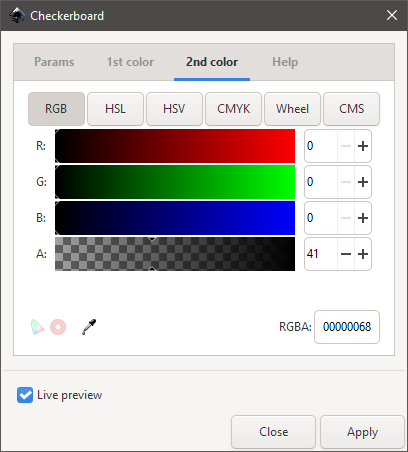
# Checkerboard

[![grafik.png](https://wiki.stadtfabrikanten.org/uploads/images/gallery/2025-05/scaled-1680-/xD3ZzgLYYirrk3D2-grafik.png)](https://wiki.stadtfabrikanten.org/uploads/images/gallery/2025-05/xD3ZzgLYYirrk3D2-grafik.png) [![grafik.png](https://wiki.stadtfabrikanten.org/uploads/images/gallery/2025-05/scaled-1680-/dYIBc088rOxohZSG-grafik.png)](https://wiki.stadtfabrikanten.org/uploads/images/gallery/2025-05/dYIBc088rOxohZSG-grafik.png) [![grafik.png](https://wiki.stadtfabrikanten.org/uploads/images/gallery/2025-05/scaled-1680-/pmvw3VMj8P1xE4hh-grafik.png)](https://wiki.stadtfabrikanten.org/uploads/images/gallery/2025-05/pmvw3VMj8P1xE4hh-grafik.png)
## Example Output

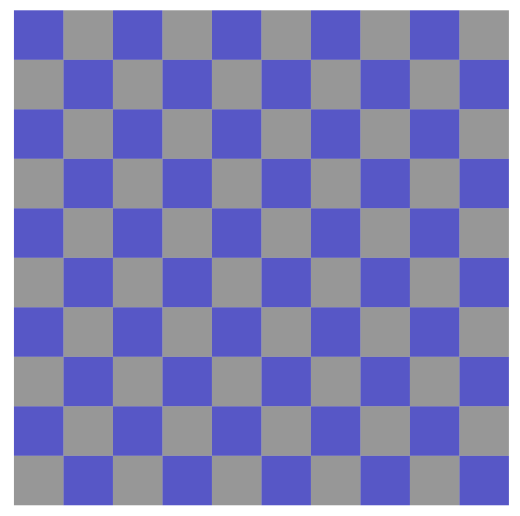
[![grafik.png](https://wiki.stadtfabrikanten.org/uploads/images/gallery/2025-05/scaled-1680-/6DNBkDImLyqzX3o2-grafik.png)](https://wiki.stadtfabrikanten.org/uploads/images/gallery/2025-05/6DNBkDImLyqzX3o2-grafik.png)
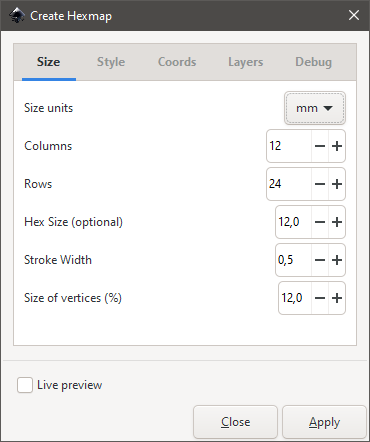
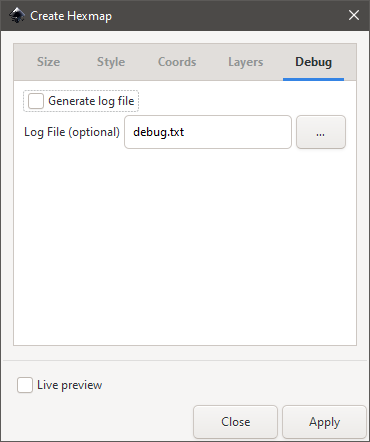
# Create Hexmap

<p class="callout info">See also [Hex Tiles](https://wiki.stadtfabrikanten.org/books/fablab-chemnitz/page/hex-tiles)</p>

[![grafik.png](https://wiki.stadtfabrikanten.org/uploads/images/gallery/2025-05/scaled-1680-/3nwRnTqdG2VoySUb-grafik.png)](https://wiki.stadtfabrikanten.org/uploads/images/gallery/2025-05/3nwRnTqdG2VoySUb-grafik.png) [![grafik.png](https://wiki.stadtfabrikanten.org/uploads/images/gallery/2025-05/scaled-1680-/oPd9Z6q2F5e1AVDf-grafik.png)](https://wiki.stadtfabrikanten.org/uploads/images/gallery/2025-05/oPd9Z6q2F5e1AVDf-grafik.png) [![grafik.png](https://wiki.stadtfabrikanten.org/uploads/images/gallery/2025-05/scaled-1680-/4IR4x6BbifAL0gMY-grafik.png)](https://wiki.stadtfabrikanten.org/uploads/images/gallery/2025-05/4IR4x6BbifAL0gMY-grafik.png) [![grafik.png](https://wiki.stadtfabrikanten.org/uploads/images/gallery/2025-05/scaled-1680-/UVgsgj1oyFKOep6t-grafik.png)](https://wiki.stadtfabrikanten.org/uploads/images/gallery/2025-05/UVgsgj1oyFKOep6t-grafik.png) [![grafik.png](https://wiki.stadtfabrikanten.org/uploads/images/gallery/2025-05/scaled-1680-/7HqgsaQGdcLDc4Bk-grafik.png)](https://wiki.stadtfabrikanten.org/uploads/images/gallery/2025-05/7HqgsaQGdcLDc4Bk-grafik.png)
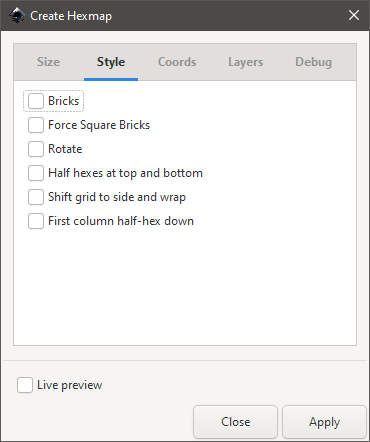
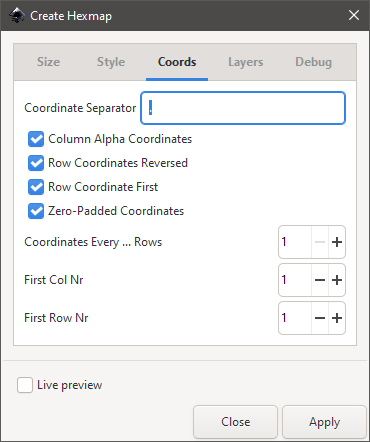
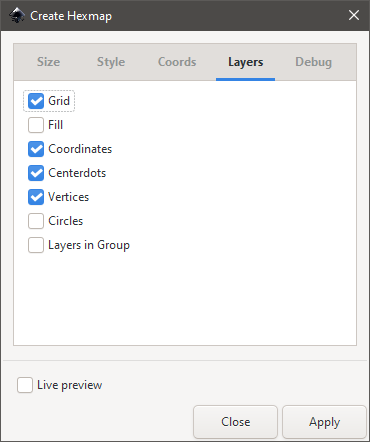
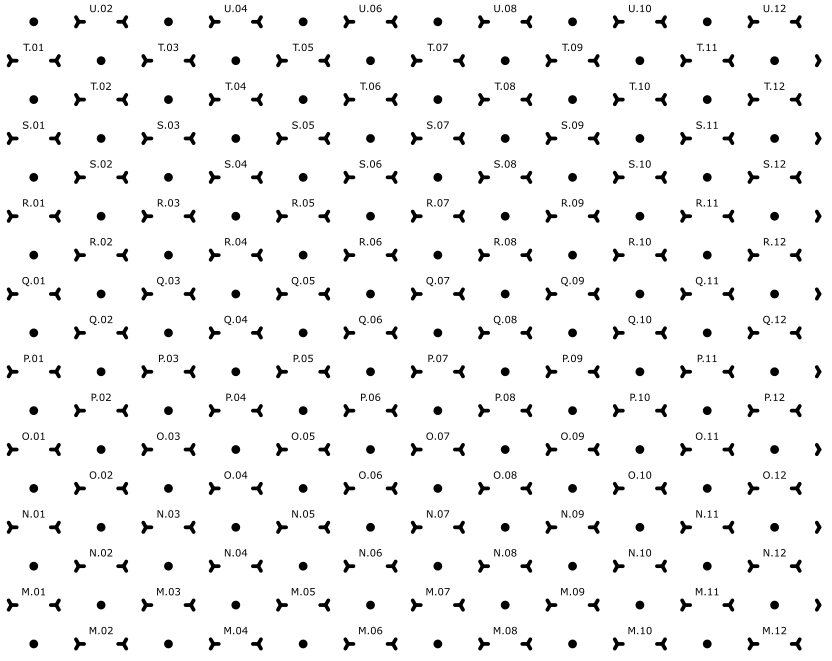
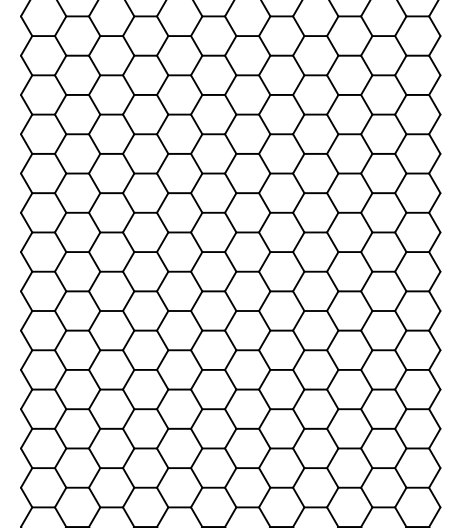
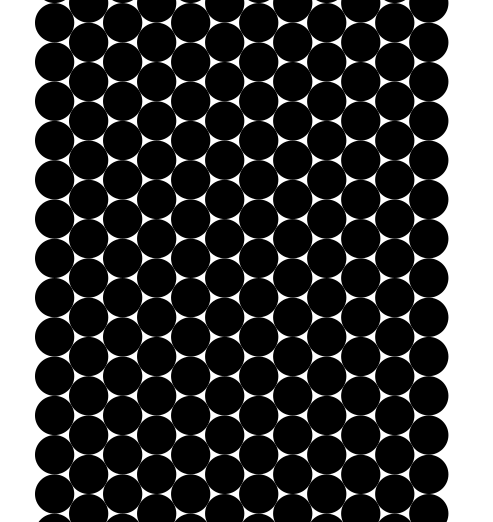
## Example Output

[![grafik.png](https://wiki.stadtfabrikanten.org/uploads/images/gallery/2025-05/scaled-1680-/Juhf9OBTXO6nrBdF-grafik.png)](https://wiki.stadtfabrikanten.org/uploads/images/gallery/2025-05/Juhf9OBTXO6nrBdF-grafik.png) [![grafik.png](https://wiki.stadtfabrikanten.org/uploads/images/gallery/2025-05/scaled-1680-/ZRB4JWnnbP2vKW9L-grafik.png)](https://wiki.stadtfabrikanten.org/uploads/images/gallery/2025-05/ZRB4JWnnbP2vKW9L-grafik.png) [![grafik.png](https://wiki.stadtfabrikanten.org/uploads/images/gallery/2025-05/scaled-1680-/OnV7rFngt4oyQyfv-grafik.png)](https://wiki.stadtfabrikanten.org/uploads/images/gallery/2025-05/OnV7rFngt4oyQyfv-grafik.png)
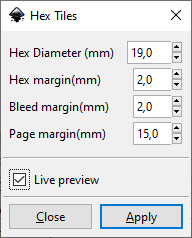
# Hex Tiles

## [![grafik.png](https://wiki.stadtfabrikanten.org/uploads/images/gallery/2025-05/scaled-1680-/BWdHzZbAYGZ3xUaJ-grafik.png)](https://wiki.stadtfabrikanten.org/uploads/images/gallery/2025-05/BWdHzZbAYGZ3xUaJ-grafik.png)
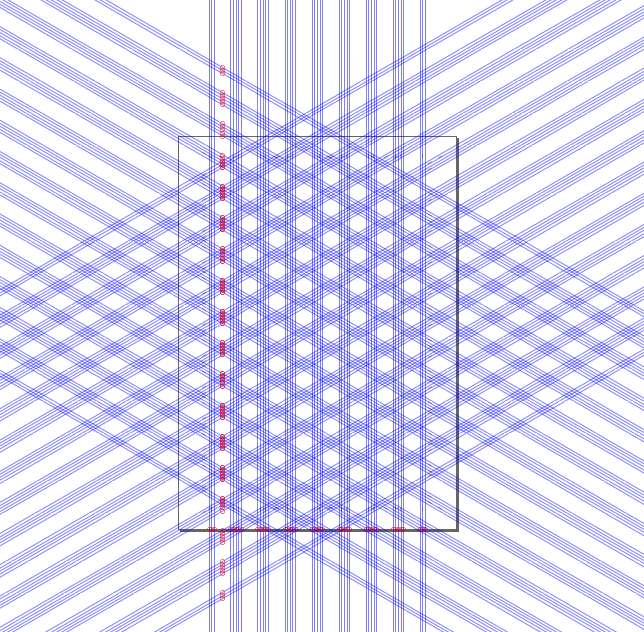
## Example Output

[![grafik.png](https://wiki.stadtfabrikanten.org/uploads/images/gallery/2025-05/scaled-1680-/2kIkgJFBDPM8hW5J-grafik.png)](https://wiki.stadtfabrikanten.org/uploads/images/gallery/2025-05/2kIkgJFBDPM8hW5J-grafik.png)
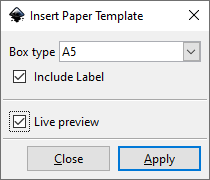
# Insert Paper Template

[![grafik.png](https://wiki.stadtfabrikanten.org/uploads/images/gallery/2025-05/scaled-1680-/fsrmlQlq4iRLY1il-grafik.png)](https://wiki.stadtfabrikanten.org/uploads/images/gallery/2025-05/fsrmlQlq4iRLY1il-grafik.png)
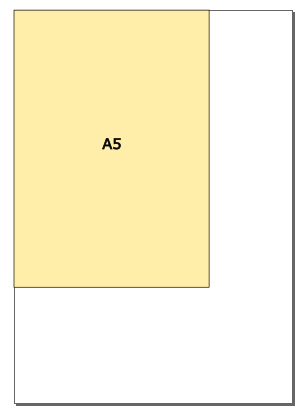
## Example Output

[![grafik.png](https://wiki.stadtfabrikanten.org/uploads/images/gallery/2025-05/scaled-1680-/RUTOXeYPpxfhxXZQ-grafik.png)](https://wiki.stadtfabrikanten.org/uploads/images/gallery/2025-05/RUTOXeYPpxfhxXZQ-grafik.png)
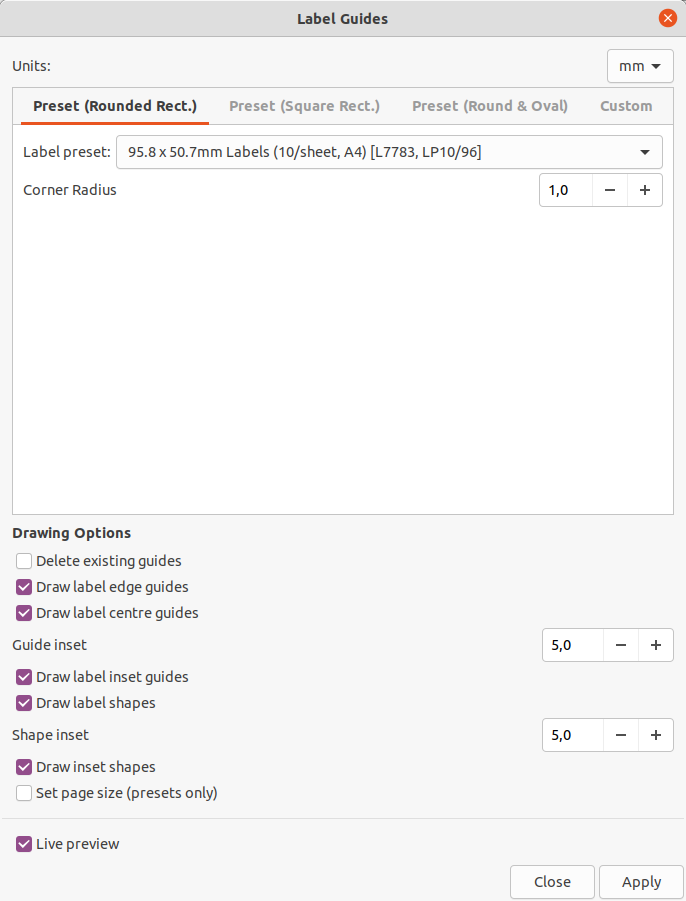
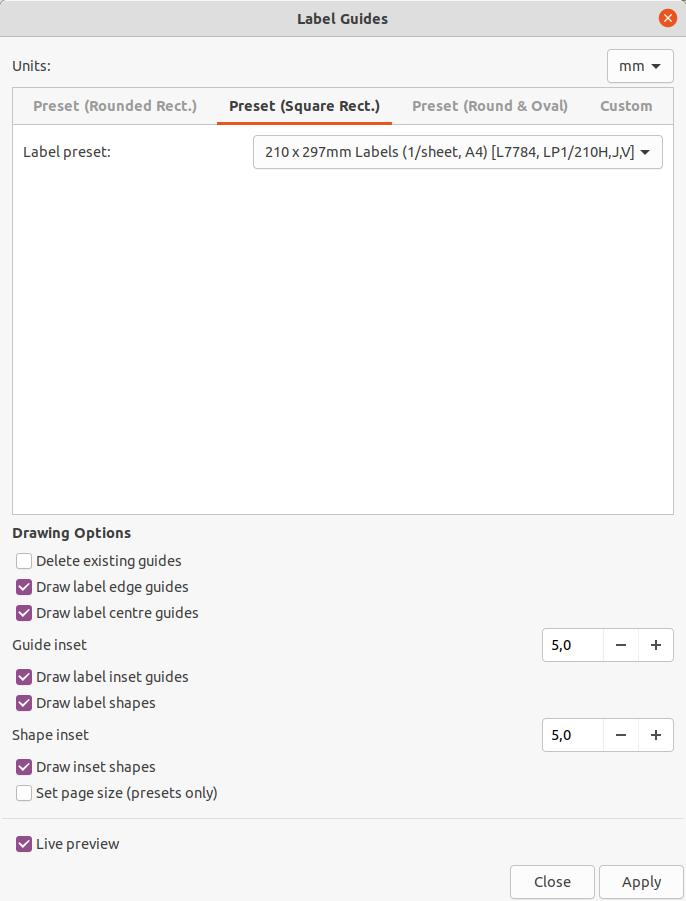
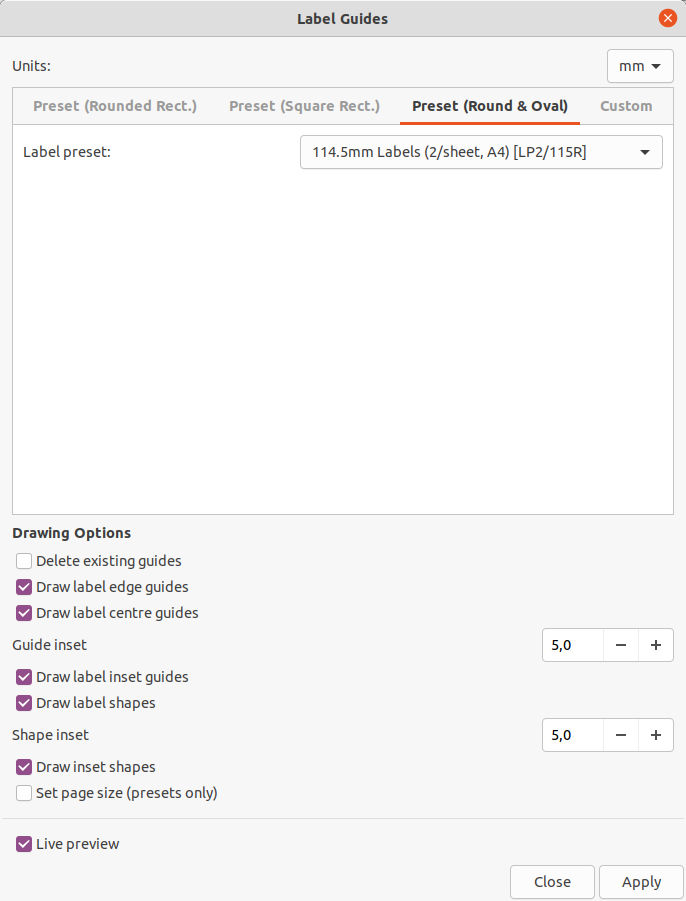
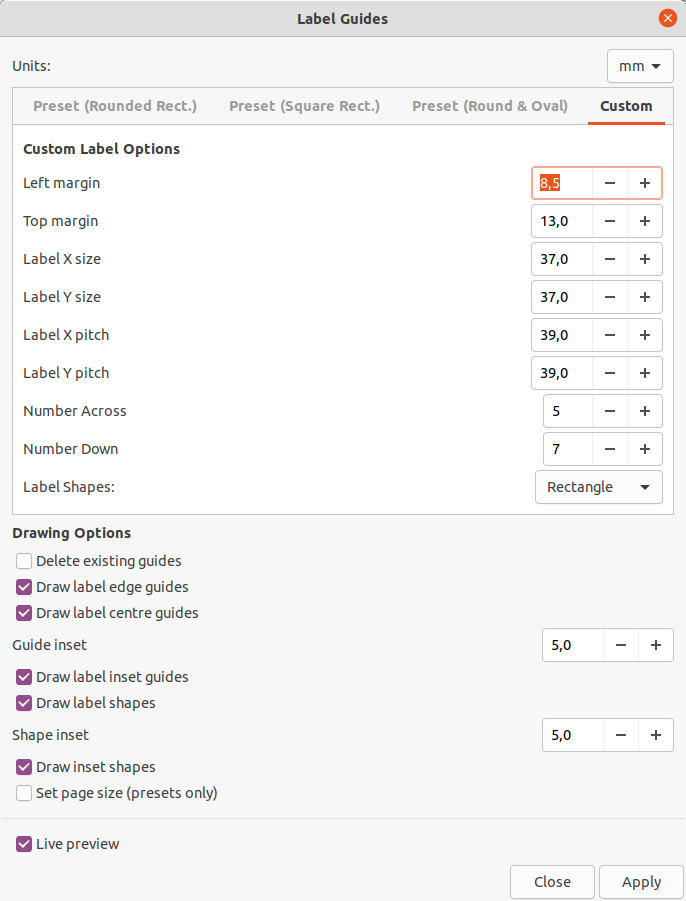
# Label Guides

Source: [<span>https://github.com/johnbeard/inkscape-label-guides</span>](https://github.com/johnbeard/inkscape-label-guides)

[![grafik.png](https://wiki.stadtfabrikanten.org/uploads/images/gallery/2025-05/scaled-1680-/hbKosmntn22DNeNb-grafik.png)](https://wiki.stadtfabrikanten.org/uploads/images/gallery/2025-05/hbKosmntn22DNeNb-grafik.png) [![grafik.png](https://wiki.stadtfabrikanten.org/uploads/images/gallery/2025-05/scaled-1680-/RVuRlRqE2jkYkvUJ-grafik.png)](https://wiki.stadtfabrikanten.org/uploads/images/gallery/2025-05/RVuRlRqE2jkYkvUJ-grafik.png) [![grafik.png](https://wiki.stadtfabrikanten.org/uploads/images/gallery/2025-05/scaled-1680-/M61Cak3zgiUf0wTE-grafik.png)](https://wiki.stadtfabrikanten.org/uploads/images/gallery/2025-05/M61Cak3zgiUf0wTE-grafik.png) [![grafik.png](https://wiki.stadtfabrikanten.org/uploads/images/gallery/2025-05/scaled-1680-/1wepPWq2wstx6cxT-grafik.png)](https://wiki.stadtfabrikanten.org/uploads/images/gallery/2025-05/1wepPWq2wstx6cxT-grafik.png)
## Example Output

[![grafik.png](https://wiki.stadtfabrikanten.org/uploads/images/gallery/2025-05/scaled-1680-/1TDSdsSZEkP3jXlK-grafik.png)](https://wiki.stadtfabrikanten.org/uploads/images/gallery/2025-05/1TDSdsSZEkP3jXlK-grafik.png)
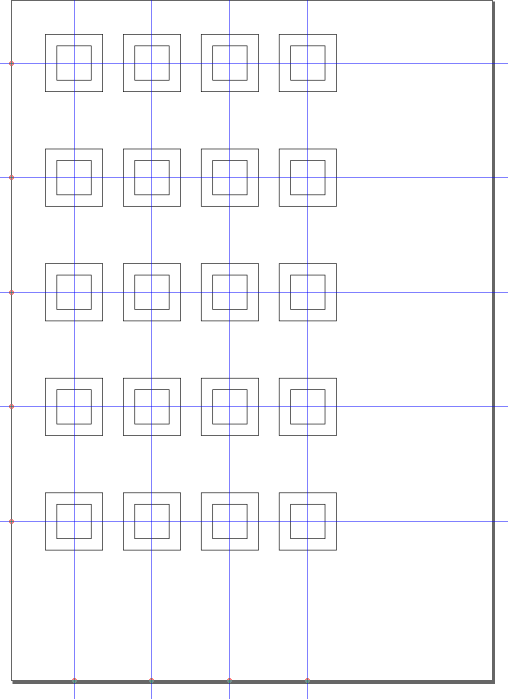
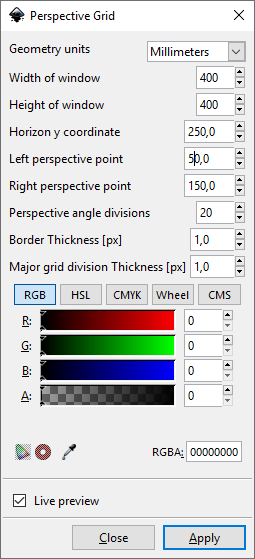
# Perspective Grid

[![grafik.png](https://wiki.stadtfabrikanten.org/uploads/images/gallery/2025-05/scaled-1680-/SICB690JTbwAperE-grafik.png)](https://wiki.stadtfabrikanten.org/uploads/images/gallery/2025-05/SICB690JTbwAperE-grafik.png)
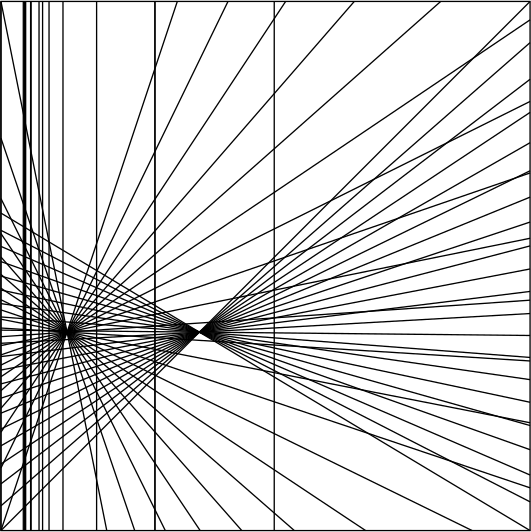
## Example Output

[![grafik.png](https://wiki.stadtfabrikanten.org/uploads/images/gallery/2025-05/scaled-1680-/rk3CXwFYtj6YQI3x-grafik.png)](https://wiki.stadtfabrikanten.org/uploads/images/gallery/2025-05/rk3CXwFYtj6YQI3x-grafik.png)
# Remove Duplicate Guides

This extension removes guides which are identical (overlapping), means they have the same position and orientation. You can test it the following way:

## Draw some line and duplicate it using CTRL + D

[![grafik.png](https://wiki.stadtfabrikanten.org/uploads/images/gallery/2025-05/scaled-1680-/UEhE3WIYHkO0Q9iL-grafik.png)](https://wiki.stadtfabrikanten.org/uploads/images/gallery/2025-05/UEhE3WIYHkO0Q9iL-grafik.png)

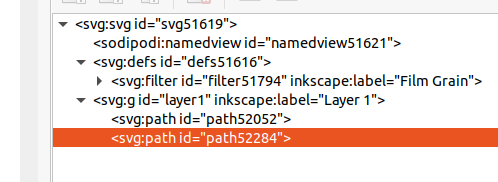
## Check XML structure having 2 paths now

[![grafik.png](https://wiki.stadtfabrikanten.org/uploads/images/gallery/2025-05/scaled-1680-/e3ZSBcawHQOeCRlu-grafik.png)](https://wiki.stadtfabrikanten.org/uploads/images/gallery/2025-05/e3ZSBcawHQOeCRlu-grafik.png)
## Convert both paths to guides pressing SHIFT + G

[![grafik.png](https://wiki.stadtfabrikanten.org/uploads/images/gallery/2025-05/scaled-1680-/lDbsdjAEdYtcr1zv-grafik.png)](https://wiki.stadtfabrikanten.org/uploads/images/gallery/2025-05/lDbsdjAEdYtcr1zv-grafik.png) [![grafik.png](https://wiki.stadtfabrikanten.org/uploads/images/gallery/2025-05/scaled-1680-/MBLJ8dkAevIcdWVu-grafik.png)](https://wiki.stadtfabrikanten.org/uploads/images/gallery/2025-05/MBLJ8dkAevIcdWVu-grafik.png)
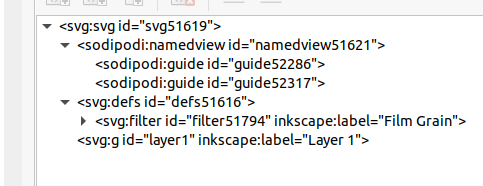
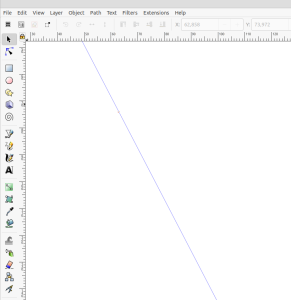
## Now run the extension

We will see that one guide was removed

[![grafik.png](https://wiki.stadtfabrikanten.org/uploads/images/gallery/2025-05/scaled-1680-/2CCW2XAOGNIBuG2i-grafik.png)](https://wiki.stadtfabrikanten.org/uploads/images/gallery/2025-05/2CCW2XAOGNIBuG2i-grafik.png)
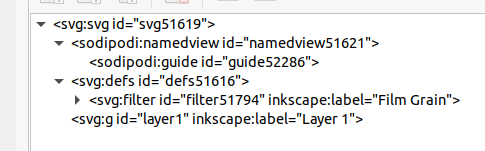
# Triangular Grid

[![grafik.png](https://wiki.stadtfabrikanten.org/uploads/images/gallery/2025-05/scaled-1680-/smoJjS3Htld38esS-grafik.png)](https://wiki.stadtfabrikanten.org/uploads/images/gallery/2025-05/smoJjS3Htld38esS-grafik.png) [![grafik.png](https://wiki.stadtfabrikanten.org/uploads/images/gallery/2025-05/scaled-1680-/gnJmjg5hIOnO4Ry8-grafik.png)](https://wiki.stadtfabrikanten.org/uploads/images/gallery/2025-05/gnJmjg5hIOnO4Ry8-grafik.png) [![grafik.png](https://wiki.stadtfabrikanten.org/uploads/images/gallery/2025-05/scaled-1680-/mud0pFfZV8tDmNNc-grafik.png)](https://wiki.stadtfabrikanten.org/uploads/images/gallery/2025-05/mud0pFfZV8tDmNNc-grafik.png) [![grafik.png](https://wiki.stadtfabrikanten.org/uploads/images/gallery/2025-05/scaled-1680-/XmRsuvkKFMBmIoaZ-grafik.png)](https://wiki.stadtfabrikanten.org/uploads/images/gallery/2025-05/XmRsuvkKFMBmIoaZ-grafik.png) [![grafik.png](https://wiki.stadtfabrikanten.org/uploads/images/gallery/2025-05/scaled-1680-/uB3aJbdLOGJleOld-grafik.png)](https://wiki.stadtfabrikanten.org/uploads/images/gallery/2025-05/uB3aJbdLOGJleOld-grafik.png)
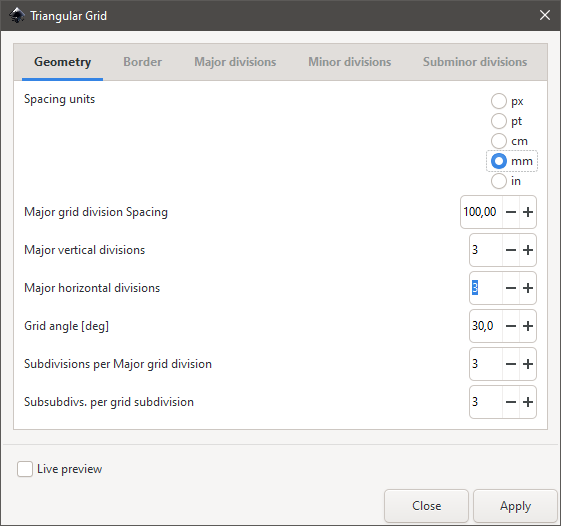
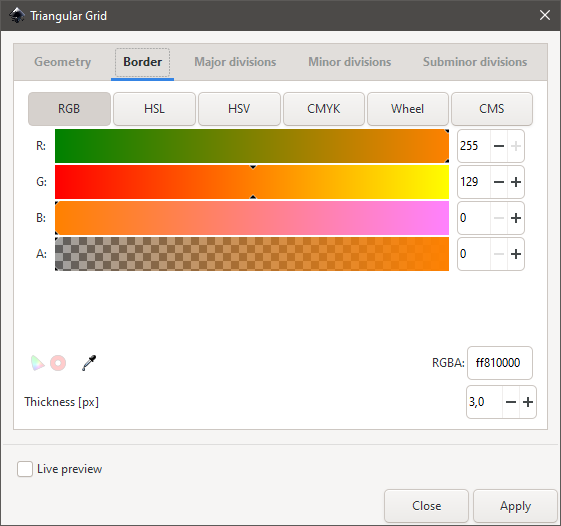
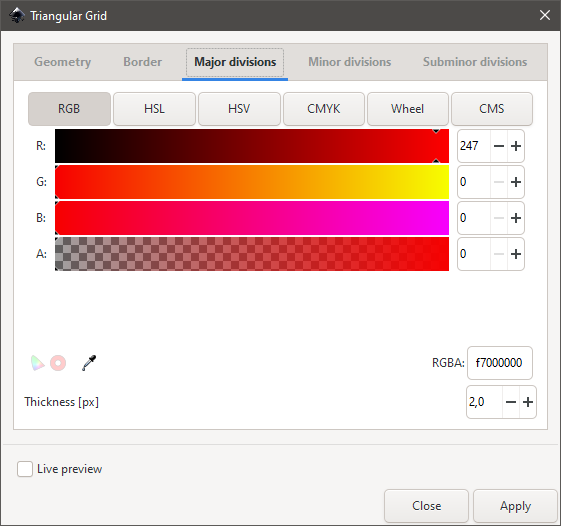
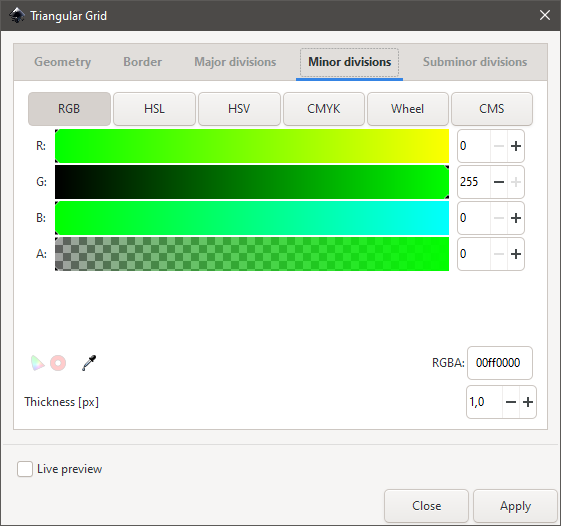
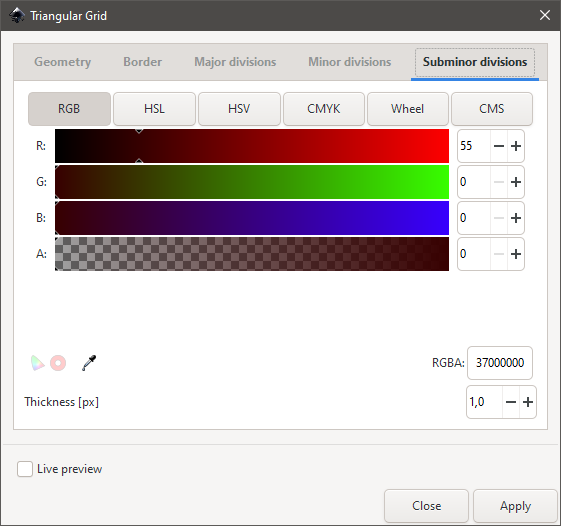
## Example Output

[![grafik.png](https://wiki.stadtfabrikanten.org/uploads/images/gallery/2025-05/scaled-1680-/XIc3HBmbAuxy6EDN-grafik.png)](https://wiki.stadtfabrikanten.org/uploads/images/gallery/2025-05/XIc3HBmbAuxy6EDN-grafik.png)
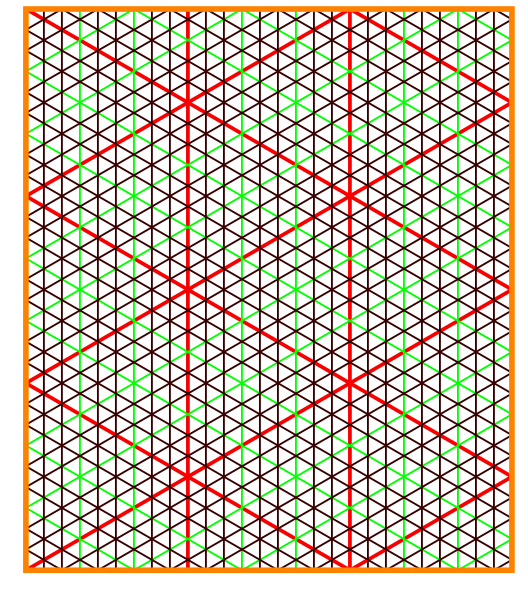
You can convert this to regular grid ("Objects to Guides") pressing SHIFT + G to get

[![grafik.png](https://wiki.stadtfabrikanten.org/uploads/images/gallery/2025-05/scaled-1680-/T5QUVBTkWfCOi256-grafik.png)](https://wiki.stadtfabrikanten.org/uploads/images/gallery/2025-05/T5QUVBTkWfCOi256-grafik.png)
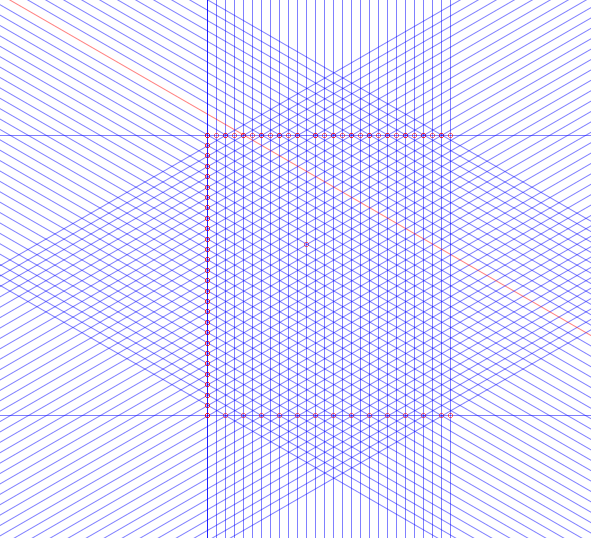
# Groups and Layers

# Eraser Layer

This plugin will erase selected shapes in same layer. Ueful for objects! It won't remove the original objects

## Draw some objects and put them on the same layer

[![grafik.png](https://wiki.stadtfabrikanten.org/uploads/images/gallery/2025-05/scaled-1680-/tKwMu5AvfSJkobPE-grafik.png)](https://wiki.stadtfabrikanten.org/uploads/images/gallery/2025-05/tKwMu5AvfSJkobPE-grafik.png)
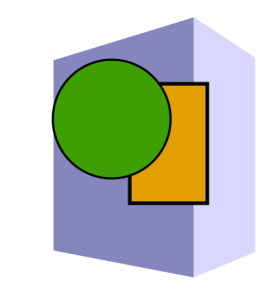
## Select some objects to erase (leave a hole in layer) and run extension

[![grafik.png](https://wiki.stadtfabrikanten.org/uploads/images/gallery/2025-05/scaled-1680-/T5hRfDaKFdWPcZKa-grafik.png)](https://wiki.stadtfabrikanten.org/uploads/images/gallery/2025-05/T5hRfDaKFdWPcZKa-grafik.png)

[![grafik.png](https://wiki.stadtfabrikanten.org/uploads/images/gallery/2025-05/scaled-1680-/FcAtM65jY6YtSNSW-grafik.png)](https://wiki.stadtfabrikanten.org/uploads/images/gallery/2025-05/FcAtM65jY6YtSNSW-grafik.png)
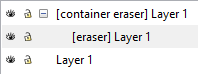
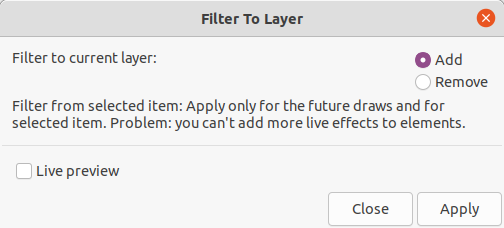
# Filter To Layer

Source: [<span>https://inkscape.org/~jabiertxof/%E2%98%85filter-layer</span>](https://inkscape.org/~jabiertxof/%E2%98%85filter-layer)

[![grafik.png](https://wiki.stadtfabrikanten.org/uploads/images/gallery/2025-05/scaled-1680-/4Z67yi1hLQFreu9C-grafik.png)](https://wiki.stadtfabrikanten.org/uploads/images/gallery/2025-05/4Z67yi1hLQFreu9C-grafik.png)
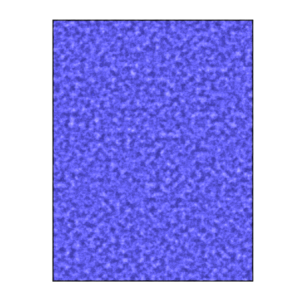
## Draw some object and and apply some filter

[![grafik.png](https://wiki.stadtfabrikanten.org/uploads/images/gallery/2025-05/scaled-1680-/gBnU4RBF3hA9KVKt-grafik.png)](https://wiki.stadtfabrikanten.org/uploads/images/gallery/2025-05/gBnU4RBF3hA9KVKt-grafik.png)
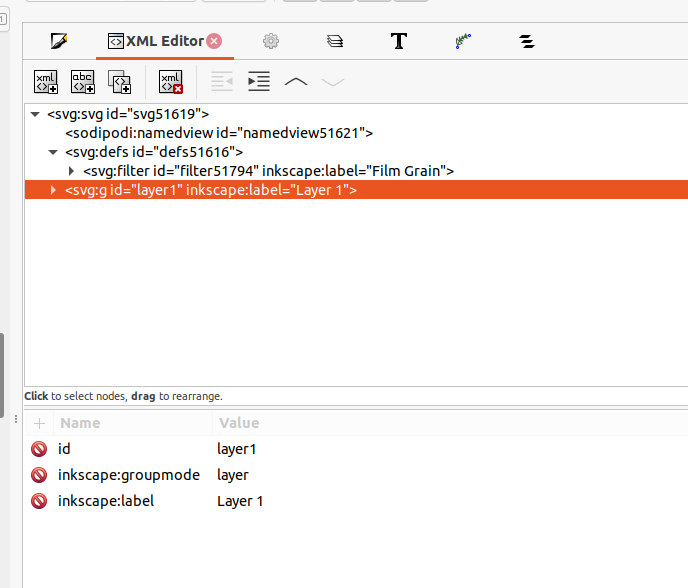
## Check the XML structure

[![grafik.png](https://wiki.stadtfabrikanten.org/uploads/images/gallery/2025-05/scaled-1680-/MzaatLxL9gDOckiX-grafik.png)](https://wiki.stadtfabrikanten.org/uploads/images/gallery/2025-05/MzaatLxL9gDOckiX-grafik.png)
## Run the extension and get results

"Filter to current layer" → choose "add"

[![grafik.png](https://wiki.stadtfabrikanten.org/uploads/images/gallery/2025-05/scaled-1680-/3S57WOrs1ZEULiDS-grafik.png)](https://wiki.stadtfabrikanten.org/uploads/images/gallery/2025-05/3S57WOrs1ZEULiDS-grafik.png)
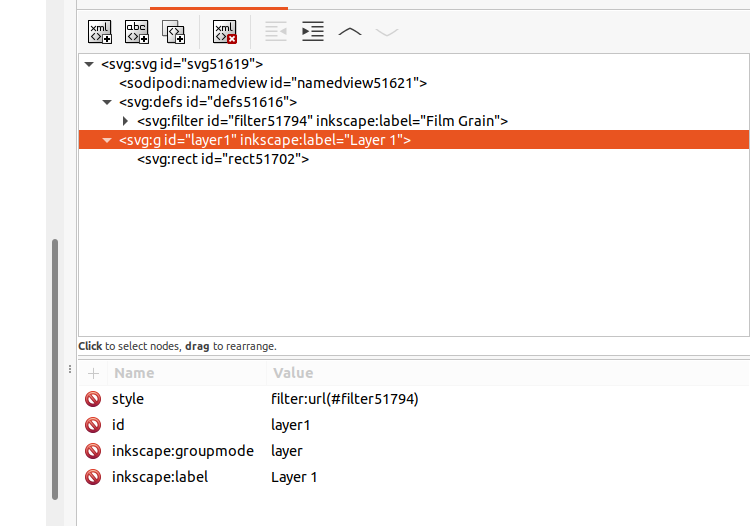
The layer got some new attribute "style" with filter:url content

# Group To Layer

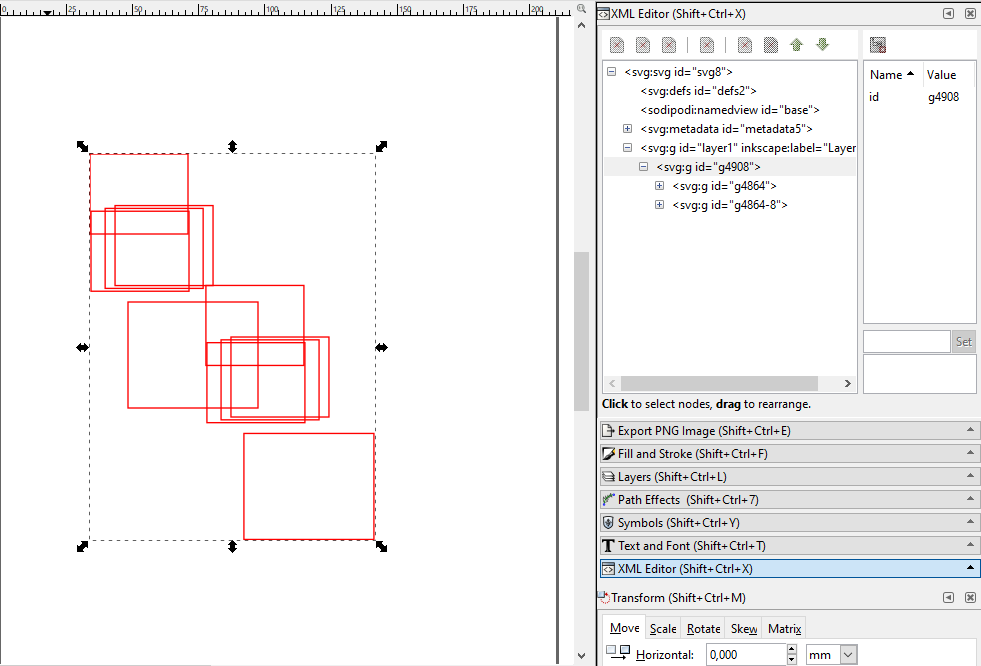
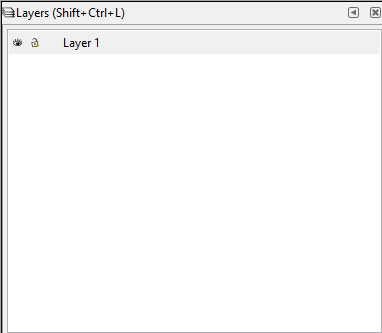
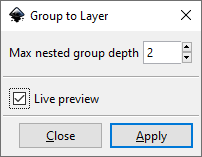
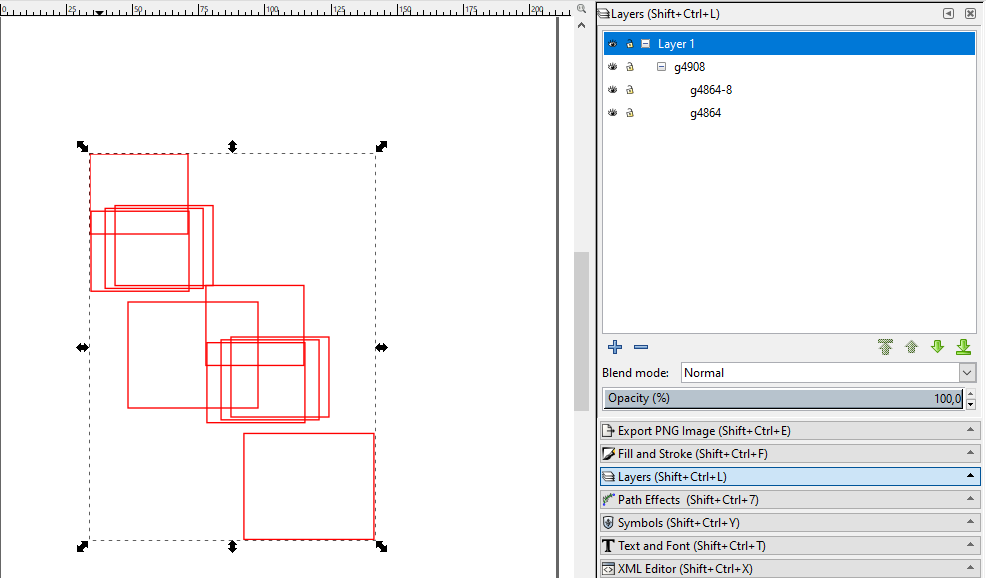
This extension converts groups to layers. You can pick the desired depth.

## Draw some objects and make some groups

[![grafik.png](https://wiki.stadtfabrikanten.org/uploads/images/gallery/2025-05/scaled-1680-/kFPppuz8om8W4kIB-grafik.png)](https://wiki.stadtfabrikanten.org/uploads/images/gallery/2025-05/kFPppuz8om8W4kIB-grafik.png)
[![grafik.png](https://wiki.stadtfabrikanten.org/uploads/images/gallery/2025-05/scaled-1680-/Z4LBkEdsUAsmtKQE-grafik.png)](https://wiki.stadtfabrikanten.org/uploads/images/gallery/2025-05/Z4LBkEdsUAsmtKQE-grafik.png)
## Run the extension

[![grafik.png](https://wiki.stadtfabrikanten.org/uploads/images/gallery/2025-05/scaled-1680-/H2VjcsZcs7kuHrjZ-grafik.png)](https://wiki.stadtfabrikanten.org/uploads/images/gallery/2025-05/H2VjcsZcs7kuHrjZ-grafik.png)
[![grafik.png](https://wiki.stadtfabrikanten.org/uploads/images/gallery/2025-05/scaled-1680-/0PSoQvSE7syyfA9H-grafik.png)](https://wiki.stadtfabrikanten.org/uploads/images/gallery/2025-05/0PSoQvSE7syyfA9H-grafik.png)
# Remove Empty Groups

<div class="page view" id="bkmrk-this-extension-is-to"><article>This extension is totally minimal. It will just clean the whole document from groups without content (dangling groups). That usually happens if you have a group but remove it's paths for example. The group will possibly stay in the XML tree. This also applies for layers because layers are just special types of groups.

<p class="callout info">See also [Optimized with svgo (\*.svg)](https://wiki.stadtfabrikanten.org/books/integrated-into-default-importexport-menu/page/optimized-with-svgo-svg)</p>

<div class="wiki-content" id="bkmrk-"></div></article></div>

# Styles To Layers

<div class="page-metadata-wrapper" id="bkmrk-"><div class="page-metadata">  
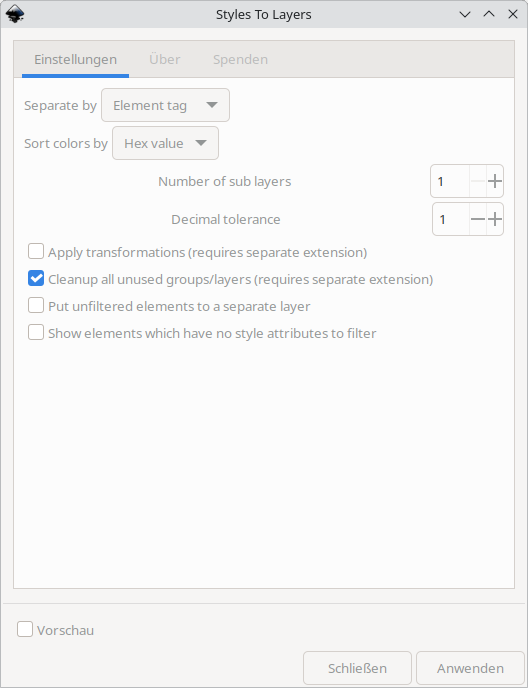
</div></div><div class="page view" id="bkmrk-this-extension-will-"><article>This extension will re-layer your selected items or the whole document according to their color (stroke or fill). Each style will be put onto it's own layer. This way you can devide elements by their colors with ease. If you have empty layers after sorting with different types (strokes, then first or vice versa) you can use [Remove Empty Groups](https://wiki.stadtfabrikanten.org/books/fablab-chemnitz/page/remove-empty-groups) to cleanup.

You can use the separate [Cleanup Styles](https://wiki.stadtfabrikanten.org/books/fablab-chemnitz/page/cleanup-styles) extension to migrate these separated attributes into style attribute.

<p class="callout info">This extension has possible parallels with [https://wiki.evilmadscientist.com/Inkscape\_and\_WaterColorBot#Snap\_Colors\_to\_Layers\_.28beta.29](https://wiki.evilmadscientist.com/Inkscape_and_WaterColorBot#Snap_Colors_to_Layers_.28beta.29)</p>

[![grafik.png](https://wiki.stadtfabrikanten.org/uploads/images/gallery/2025-05/scaled-1680-/M91gIoqwY4APlaiV-grafik.png)](https://wiki.stadtfabrikanten.org/uploads/images/gallery/2025-05/M91gIoqwY4APlaiV-grafik.png)

<div class="wiki-content" id="bkmrk--1"></div></article></div>

# Ungrouper And Element Migrator/Filter

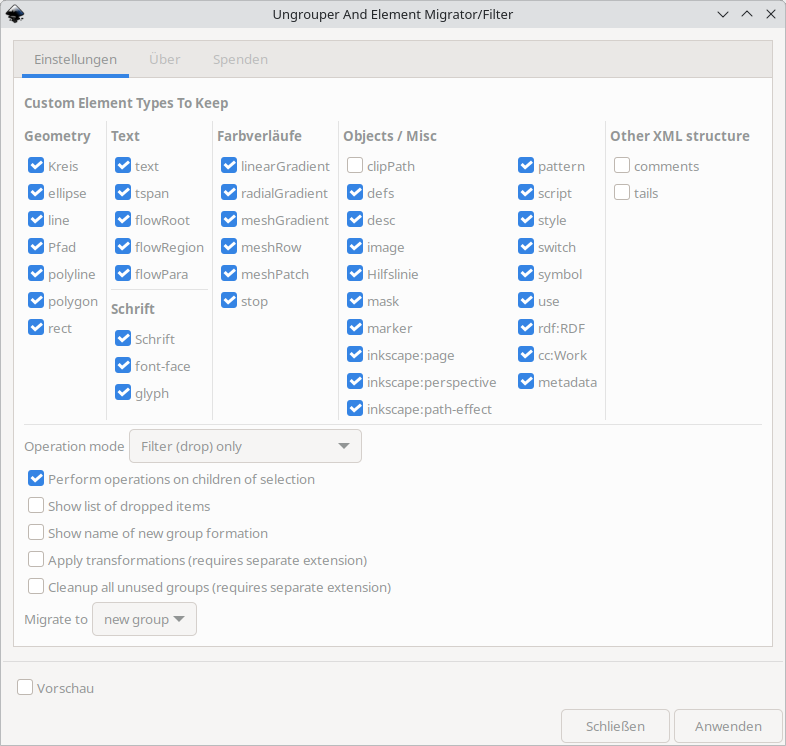
This extension parses the selection and will put all elements into one single group. If you have a cluster with lots of groups and elements you will clean up this way (one top level group, all elements below it). If you select a single element or a set of elements you just wrap it like using CTRL + G (like making a usual group). You can also use this extension to filter out unwanted SVG elements at all. If your drawing gets wasted by running this extension please use [Apply Transformations](https://wiki.stadtfabrikanten.org/books/fablab-chemnitz/page/apply-transformations) before because your groups just may contain some unwanted transformations like scalings and shiftings. If you have empty layers after sorting with different types (strokes, then first or vice versa) you can use [Remove Empty Groups](https://wiki.stadtfabrikanten.org/books/fablab-chemnitz/page/remove-empty-groups) to cleanup.

<p class="callout info">See also [Optimized with svgo (\*.svg)](https://wiki.stadtfabrikanten.org/books/integrated-into-default-importexport-menu/page/optimized-with-svgo-svg)</p>

[![grafik.png](https://wiki.stadtfabrikanten.org/uploads/images/gallery/2025-05/scaled-1680-/SS3AZgUcme2NB4L8-grafik.png)](https://wiki.stadtfabrikanten.org/uploads/images/gallery/2025-05/SS3AZgUcme2NB4L8-grafik.png)

# Import/Export/Transfer

# Clip Out

Source: [https://gitlab.com/inklinea/clip-out](https://gitlab.com/inklinea/clip-out)

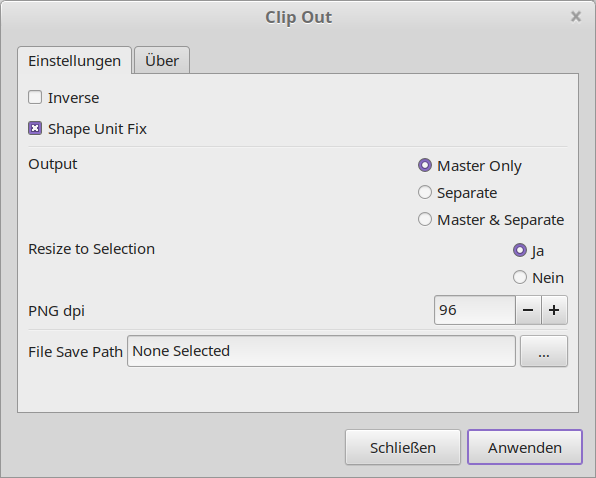
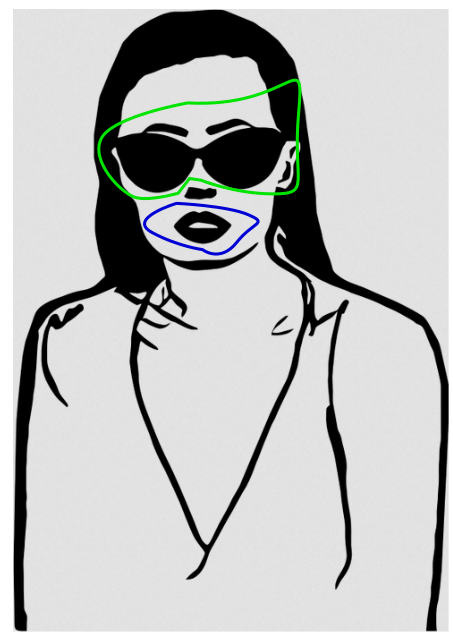
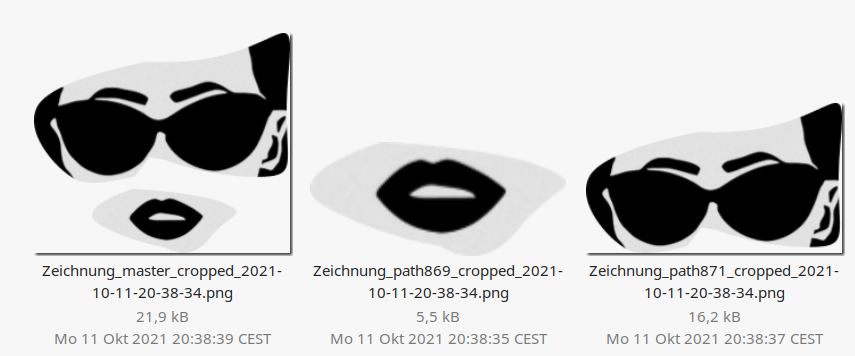
Inkscape Extension to clip a background image by object outlines then export to multiple png.

Supports:

- Exporting individual clipped objects ( normal and inverse )
- Export master of all clipped objects ( normal and inverse )
- Cropping to resulting image size, or exporting to background image size.

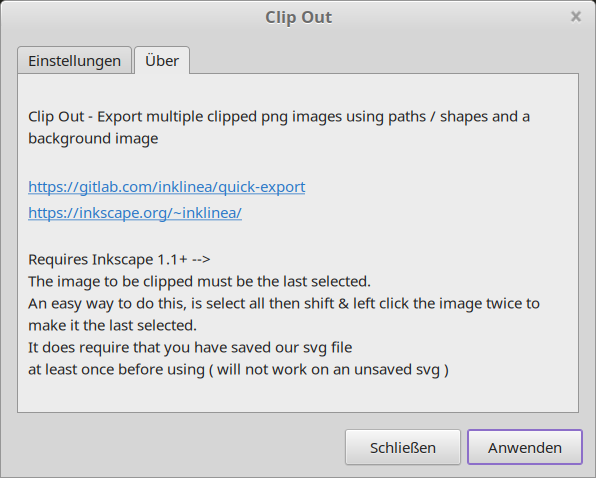
The image to be clipped must be the last selected. An easy way to do this, is select all then shift &amp; left click the image twice to make it the last selected. It does require that you have saved our svg file at least once before using (will not work on an unsaved svg).

[![grafik.png](https://wiki.stadtfabrikanten.org/uploads/images/gallery/2025-05/scaled-1680-/fv9kINZkBbEYeRMJ-grafik.png)](https://wiki.stadtfabrikanten.org/uploads/images/gallery/2025-05/fv9kINZkBbEYeRMJ-grafik.png) [![grafik.png](https://wiki.stadtfabrikanten.org/uploads/images/gallery/2025-05/scaled-1680-/v4DlsZmYCwIZriw0-grafik.png)](https://wiki.stadtfabrikanten.org/uploads/images/gallery/2025-05/v4DlsZmYCwIZriw0-grafik.png)
## Example

[![grafik.png](https://wiki.stadtfabrikanten.org/uploads/images/gallery/2025-05/scaled-1680-/gft5PUy4EPvnFavg-grafik.png)](https://wiki.stadtfabrikanten.org/uploads/images/gallery/2025-05/gft5PUy4EPvnFavg-grafik.png)
[![grafik.png](https://wiki.stadtfabrikanten.org/uploads/images/gallery/2025-05/scaled-1680-/hHzfFuwLf23YXQRo-grafik.png)](https://wiki.stadtfabrikanten.org/uploads/images/gallery/2025-05/hHzfFuwLf23YXQRo-grafik.png)
# DXF/DWG Importer

[![grafik.png](https://wiki.stadtfabrikanten.org/uploads/images/gallery/2025-05/scaled-1680-/30C0kDpZBWUvYEjy-grafik.png)](https://wiki.stadtfabrikanten.org/uploads/images/gallery/2025-05/30C0kDpZBWUvYEjy-grafik.png) [![grafik.png](https://wiki.stadtfabrikanten.org/uploads/images/gallery/2025-05/scaled-1680-/Ht1G8NtKVd67QPVB-grafik.png)](https://wiki.stadtfabrikanten.org/uploads/images/gallery/2025-05/Ht1G8NtKVd67QPVB-grafik.png) [![grafik.png](https://wiki.stadtfabrikanten.org/uploads/images/gallery/2025-05/scaled-1680-/v9pxzFYPno6njQXL-grafik.png)](https://wiki.stadtfabrikanten.org/uploads/images/gallery/2025-05/v9pxzFYPno6njQXL-grafik.png)
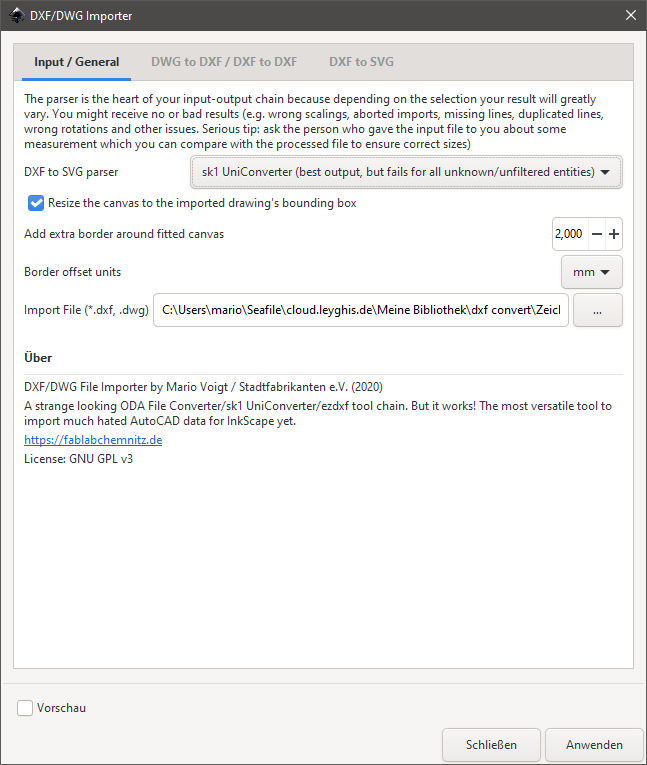
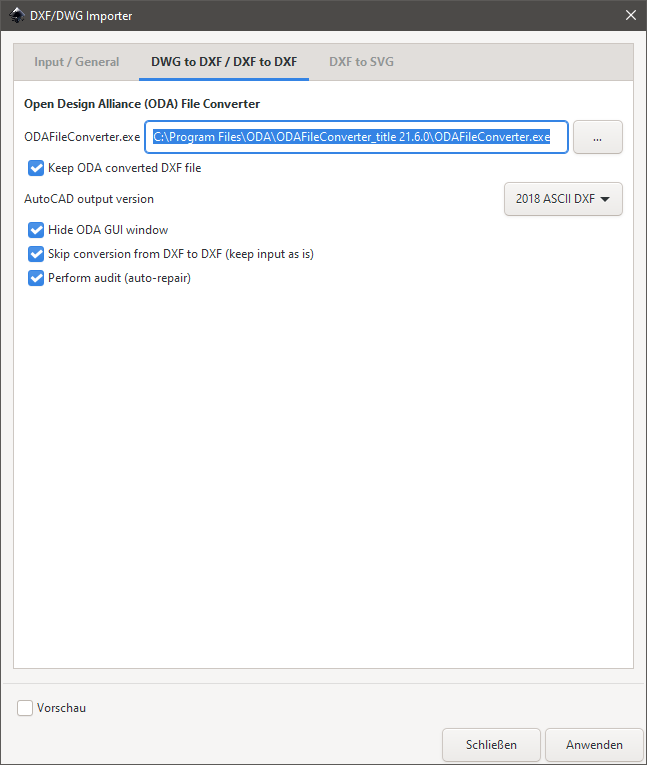
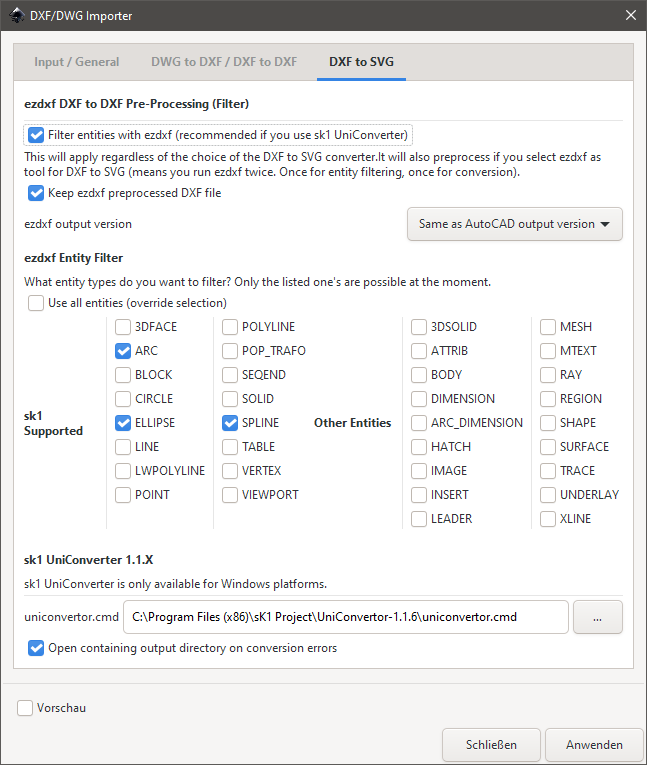
## About

This is an extension which allows to import DWG and DXF files into InkScape (working with Linux and Windows). DWG files are getting converted into DXF and then the DXF gets processed into SVG. The SVG result will be pushed into InkScape. Because there are so much different DXF versions a lot of files fail with the default DXF import tool from InkScape. Other solutions are there. While making this extension i stumbled upon ezdxf library, which is a powerful python implementation to deal with AutoCAD DXF format really well. To support great variety there are options for pre-processing the data by filtering out entities, because some tools like sk1 UniConvertor fail to make an SVG from DXF if there occure entities which it cannot handle.

<p class="callout info">\\\*\\\*Belonging to your toolchain configuration beware. There can happen issues like:\\\*\\\*</p>

- wrong transformations (width, height, viewport) and scales. Some can be fixed with [Apply Transformations](https://old.stadtfabrikanten.org/display/IFM/Apply+Transformations)
- unselectable elements. Check the XML tree for strange clipping paths and other defs. You can try to use [Ungrouper And Element Migrator/Filter](https://old.stadtfabrikanten.org/pages/createpage.action?spaceKey=IFM&title=Ungrouper+And+Element+Migrator%2FFilter&linkCreation=true&fromPageId=78807535)
- large time consumption. Take one or two cups of coffee if you are going to import DWG or DXF files with 10, 100 or maybe 1000 MB size.
- InkScape might crash (often happens when bjnortier DXF tool is used. Try to filter entity types like ARC if this occures)

## Converters

The following conversion tools are integrated or used by DXF/DWG Importer:

1. [https://github.com/bjnortier/dxf](https://github.com/bjnortier/dxf) (bundled)
2. [ODA File Converter](https://www.opendesign.com/guestfiles/oda_file_converter) (if you want to convert DWG to DXF or DXF to another DXF version) **- this is not bundled with. You need to install it! For minimum stress with Linux, just use the AppImage version of ODA File Converter!**
    - available for Linux and Windows - install if you want to import DWG or if you also want to re-convert DXF files (downgrading, repairing (auditing))
    - You might need to install a certain Qt framework version manually and to adjust the command in Linux system to make it work. Some details doing this are also included in plugin GUI. The installation files can be found at [https://download.qt.io/archive/qt](https://download.qt.io/archive/qt/5.14/5.14.2/) - install to /opt/ directory for example. Note that you need some free account for registering to continue the installation of Qt

```bash
vim /usr/bin/ODAFileConverter

```

```bash
#!/bin/sh
LD_LIBRARY_PATH=$LD_LIBRARY_PATH:/opt/Qt5.14.2/5.14.2/gcc_64/lib/ #we add this line to satisfy the Qt framework location
SV_LD_LIBRARY_PATH=$LD_LIBRARY_PATH
export LD_LIBRARY_PATH=/usr/bin/ODAFileConverter_21.7.0.0:$LD_LIBRARY_PATH
/usr/bin/ODAFileConverter_21.7.0.0/ODAFileConverter "$@"
export LD_LIBRARY_PATH=$SV_LD_LIBRARY_PATH

```

[![grafik.png](https://wiki.stadtfabrikanten.org/uploads/images/gallery/2025-05/scaled-1680-/EiBe7tNsk0DyTdEV-grafik.png)](https://wiki.stadtfabrikanten.org/uploads/images/gallery/2025-05/EiBe7tNsk0DyTdEV-grafik.png)
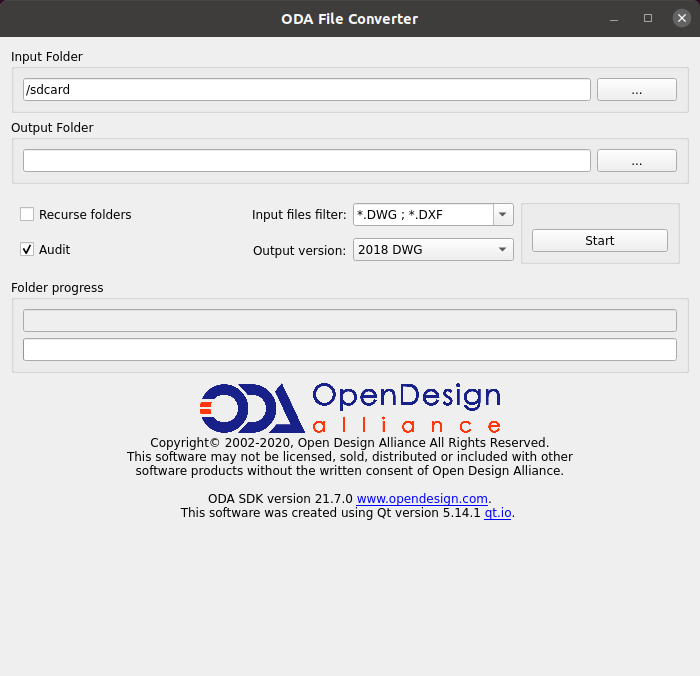
- [sk1 UniConvertor 1.1.6](https://old.stadtfabrikanten.org/display/ZWEID/sk1+UniConvertor+1.1.6+und+UniConverter+2.0.X) **- this is not bundled with. You need to install it!**
    
    
    1. if you want to import high quality DXF shapes. You need to install 1.1.X version because 2.0 dropped support. On newer Linux system it's hard or impossible to install the old UniConvertor so this feature is only available for Windows users yet
- [ezdxf](https://pypi.org/project/ezdxf/) and matplotlib (python modules) → check [MightyScape Extension Collection](https://old.stadtfabrikanten.org/display/IFM/MightyScape+Extension+Collection) for instructions regarding custom Python modules with Inkscape
    
    ```bash
    pip3 install ezdxf matplotlib
    ```
- [kabeja](https://github.com/fuzziness/kabeja) DXF to SVG converter
    
    
    1. to use it you need to install Java
- [vpype](https://github.com/abey79/vpype) + [vpype-dxf](https://github.com/tatarize/vpype-dxf/)
    
    ```
    pip3 install vpype vpype-dxf
    ```

## How to test/use DXF/DWG Importer extension?

Q-CAD provides some example DWG files to download: [https://www.q-cad.com/samples/autocad-2d/samples](https://www.q-cad.com/samples/autocad-2d/samples/). You can process those files with the DXF/DWG extension to quickly check if you made proper configuration.

I tested some of them and they worked really well. Example:

<table border="1" id="bkmrk-q-cad-sample-bjnorti" style="border-collapse: collapse; width: 99.9734%; height: 521.883px;"><colgroup><col style="width: 33.289%;"></col><col style="width: 33.289%;"></col><col style="width: 33.289%;"></col></colgroup><thead><tr style="height: 38.1167px;"><td style="height: 38.1167px;">**Q-CAD Sample**</td><td style="height: 38.1167px;">**bjnortier**</td><td style="height: 38.1167px;">**sk1 UniConverter (with ezdxf preprocessing)**</td></tr></thead><tbody><tr style="height: 445.65px;"><td style="height: 445.65px;">[![grafik.png](https://wiki.stadtfabrikanten.org/uploads/images/gallery/2025-05/scaled-1680-/Ao5CTHWODYmQuJpO-grafik.png)](https://wiki.stadtfabrikanten.org/uploads/images/gallery/2025-05/Ao5CTHWODYmQuJpO-grafik.png)

</td><td style="height: 445.65px;">[![grafik.png](https://wiki.stadtfabrikanten.org/uploads/images/gallery/2025-05/scaled-1680-/gec7t3WGlZGxxuAV-grafik.png)](https://wiki.stadtfabrikanten.org/uploads/images/gallery/2025-05/gec7t3WGlZGxxuAV-grafik.png)The result looks really good but is inverted

</td><td style="height: 445.65px;">  
</td></tr><tr style="height: 38.1167px;"><td style="height: 38.1167px;">[![grafik.png](https://wiki.stadtfabrikanten.org/uploads/images/gallery/2025-05/scaled-1680-/bKPjnpsPQzwc3Mub-grafik.png)](https://wiki.stadtfabrikanten.org/uploads/images/gallery/2025-05/bKPjnpsPQzwc3Mub-grafik.png)

</td><td style="height: 38.1167px;">[![grafik.png](https://wiki.stadtfabrikanten.org/uploads/images/gallery/2025-05/scaled-1680-/S3ULGieQQL2mvD85-grafik.png)](https://wiki.stadtfabrikanten.org/uploads/images/gallery/2025-05/S3ULGieQQL2mvD85-grafik.png)

with filtered entity of tye "ARC" because otherwise InkScape crashes. Result is inverted

</td><td style="height: 38.1167px;">[![grafik.png](https://wiki.stadtfabrikanten.org/uploads/images/gallery/2025-05/scaled-1680-/yXh2nKIrtA2HlstY-grafik.png)](https://wiki.stadtfabrikanten.org/uploads/images/gallery/2025-05/yXh2nKIrtA2HlstY-grafik.png)

Some entities like lines and images are missing

</td></tr></tbody></table>

## Why you did'nt put this extension into default menu?

Because we would need to delete the existing dxf\_input extension which is still helpful too. Without deletion we cannot register .dxf with another plugin (at least it did not work for me)

## Some more hints for ODA File Converter

- [<span>https://ezdxf.readthedocs.io/en/stable/addons/odafc.html</span>](https://ezdxf.readthedocs.io/en/stable/addons/odafc.html)

```bash
C:\Program Files\ODA\ODAFileConverter_title 21.6.0\ODAFileConverter.exe --help
```

[![grafik.png](https://wiki.stadtfabrikanten.org/uploads/images/gallery/2025-05/scaled-1680-/rClAe69pxHJPgcSF-grafik.png)](https://wiki.stadtfabrikanten.org/uploads/images/gallery/2025-05/rClAe69pxHJPgcSF-grafik.png)

## Further reading

Being constrained by proprietary software sucks. Please help to make import of DWG/DXF even more open. There are some good libraries to do this:

- DWG handling with Python → [LibreDWG](https://www.gnu.org/software/libredwg/manual/LibreDWG.html#index-python)
- DXF handling with Python → [ezdxf](https://ezdxf.readthedocs.io/en/stable/)

Note that the used DXF to SVG converters are mostly outdated. kabeja and sk1 UniConverter 1.1.X are in a high state of legacy.

# Export selection as ...

Extension to export the current selection into different formats like SVG, DXF or PDF.

This extension is a modified version of the original source code. Original Source: [https://github.com/mireq/inkscape-export-selection-as-svg](https://github.com/mireq/inkscape-export-selection-as-svg)

### Usage from commandline:

```bash
inkscape --actions="select-by-id:object_id; verb:sk.linuxos.export_selection.noprefs" --batch-process input.svg
```

### Important Notes

- Replace by png: Please convert strokes to paths. Otherwise the bounding box of the object is wrong. That leads to larger graphics in relation to the original, while the borders are cut off

## Example

### Create some objects

[![grafik.png](https://wiki.stadtfabrikanten.org/uploads/images/gallery/2025-05/scaled-1680-/JZHmMsUHzJu57pw0-grafik.png)](https://wiki.stadtfabrikanten.org/uploads/images/gallery/2025-05/JZHmMsUHzJu57pw0-grafik.png)

### Run extension and get the result

[![grafik.png](https://wiki.stadtfabrikanten.org/uploads/images/gallery/2025-05/scaled-1680-/jnIfRedvvoCSUJXm-grafik.png)](https://wiki.stadtfabrikanten.org/uploads/images/gallery/2025-05/jnIfRedvvoCSUJXm-grafik.png)

[![grafik.png](https://wiki.stadtfabrikanten.org/uploads/images/gallery/2025-05/scaled-1680-/qj40eQyutswidFGA-grafik.png)](https://wiki.stadtfabrikanten.org/uploads/images/gallery/2025-05/qj40eQyutswidFGA-grafik.png)

# Guillotine Plus

Improved basic Inkscape guillotine extension → Added: DPI input to export window for Guillotine extension.

[![grafik.png](https://wiki.stadtfabrikanten.org/uploads/images/gallery/2025-05/scaled-1680-/M6ze7SQVSH3VZNSs-grafik.png)](https://wiki.stadtfabrikanten.org/uploads/images/gallery/2025-05/M6ze7SQVSH3VZNSs-grafik.png)

Please see [Guillotine (Papierschneidemaschine / Segmentieren)](https://old.stadtfabrikanten.org/pages/viewpage.action?pageId=55017978) on how to use Guillotine generally.

# Import 3D Mesh

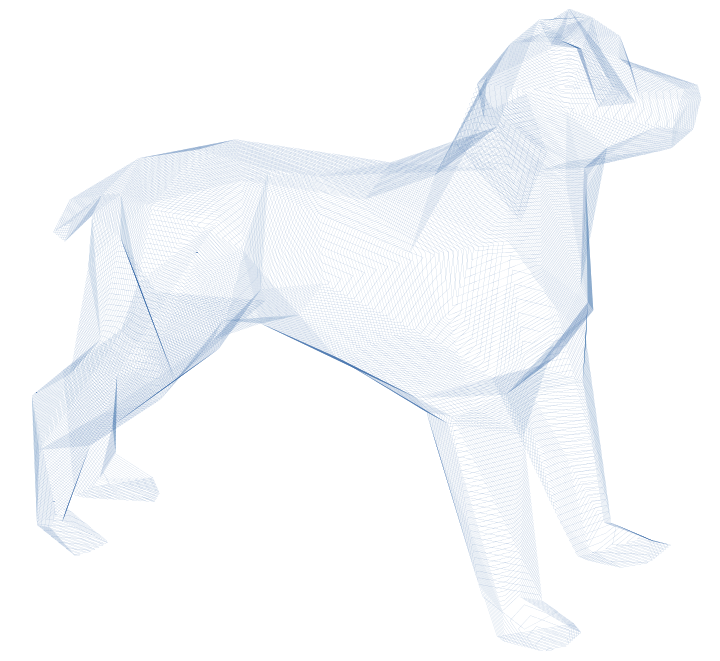
Import STL/PLY/OBJ/OFF Files and make some cool low-poly looking vector graphics out of it.

See also

- [Low Poly](https://old.stadtfabrikanten.org/display/IFM/Low+Poly)
- [Low Poly 2](https://old.stadtfabrikanten.org/display/IFM/Low+Poly+2)
- [Slic3r STL Input](https://old.stadtfabrikanten.org/display/IFM/Slic3r+STL+Input)
- [Paperfold](https://old.stadtfabrikanten.org/pages/createpage.action?spaceKey=IFM&title=Paperfold&linkCreation=true&fromPageId=108625925)
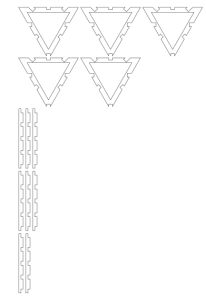
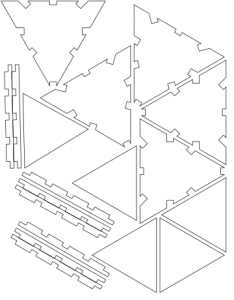
- [Koplanare Flächen migrieren](https://old.stadtfabrikanten.org/pages/createpage.action?spaceKey=AFUS&title=Koplanare+Fl%C3%A4chen+migrieren) → quick tips for saving triangles in OBJ file format by converting flat connected triangles to larger polygons.

[![grafik.png](https://wiki.stadtfabrikanten.org/uploads/images/gallery/2025-05/scaled-1680-/ETFTualkz8MjyxfR-grafik.png)](https://wiki.stadtfabrikanten.org/uploads/images/gallery/2025-05/ETFTualkz8MjyxfR-grafik.png) [![grafik.png](https://wiki.stadtfabrikanten.org/uploads/images/gallery/2025-05/scaled-1680-/O8w1RXaD4OkFqJfB-grafik.png)](https://wiki.stadtfabrikanten.org/uploads/images/gallery/2025-05/O8w1RXaD4OkFqJfB-grafik.png) [![grafik.png](https://wiki.stadtfabrikanten.org/uploads/images/gallery/2025-05/scaled-1680-/3ZFmezG3U6ULgdK2-grafik.png)](https://wiki.stadtfabrikanten.org/uploads/images/gallery/2025-05/3ZFmezG3U6ULgdK2-grafik.png)

## Example

[![grafik.png](https://wiki.stadtfabrikanten.org/uploads/images/gallery/2025-05/scaled-1680-/ytyIsOiBjyI75vZ9-grafik.png)](https://wiki.stadtfabrikanten.org/uploads/images/gallery/2025-05/ytyIsOiBjyI75vZ9-grafik.png)

# Inkcut

See [USB-Anschluss und Inkcut Setup](https://wiki.stadtfabrikanten.org/books/equipment/page/usb-anschluss-und-inkcut-setup "USB-Anschluss und Inkcut Setup") for more details about InkCut

[![grafik.png](https://wiki.stadtfabrikanten.org/uploads/images/gallery/2025-05/scaled-1680-/g5WfLGQDOsESCK1q-grafik.png)](https://wiki.stadtfabrikanten.org/uploads/images/gallery/2025-05/g5WfLGQDOsESCK1q-grafik.png)

# J Tech Photonics Laser Tool

# Source of documentation:

- [https://jtechphotonics.com/?page\_id=2012](https://jtechphotonics.com/?page_id=2012)
- [https://jtechphotonics.com/?page\_id=1980](https://jtechphotonics.com/?page_id=1980)
- [https://github.com/JTechPhotonics/J-Tech-Photonics-Laser-Tool](https://github.com/JTechPhotonics/J-Tech-Photonics-Laser-Tool)

```bash
pip install svg-to-gcode
```

[![grafik.png](https://wiki.stadtfabrikanten.org/uploads/images/gallery/2025-05/scaled-1680-/vVIXn2Khi2g3W8P0-grafik.png)](https://wiki.stadtfabrikanten.org/uploads/images/gallery/2025-05/vVIXn2Khi2g3W8P0-grafik.png) [![grafik.png](https://wiki.stadtfabrikanten.org/uploads/images/gallery/2025-05/scaled-1680-/6eQ6bNEgs2XAKean-grafik.png)](https://wiki.stadtfabrikanten.org/uploads/images/gallery/2025-05/6eQ6bNEgs2XAKean-grafik.png) [![grafik.png](https://wiki.stadtfabrikanten.org/uploads/images/gallery/2025-05/scaled-1680-/jJMH6yEohbnPdbjc-grafik.png)](https://wiki.stadtfabrikanten.org/uploads/images/gallery/2025-05/jJMH6yEohbnPdbjc-grafik.png) [![grafik.png](https://wiki.stadtfabrikanten.org/uploads/images/gallery/2025-05/scaled-1680-/xSXIhvJt11Q9r9HU-grafik.png)](https://wiki.stadtfabrikanten.org/uploads/images/gallery/2025-05/xSXIhvJt11Q9r9HU-grafik.png)

For InkScape 1.0 you will need to remove all path transformation before using this tool!

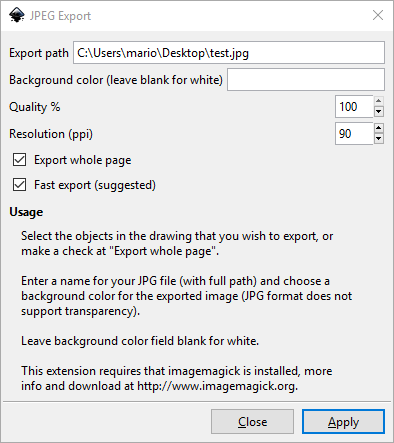
# JPEG Export

- requires 
    - Setup ImageMagick-7.0.9-1-Q16-x64-dll.exe
    - magick.exe should be put in %PATH% system variable

<p class="callout warning">jpg, webp, png, tiff formats are supported natively since Inkscape 1.1; no need for this extension anymore</p>

[![grafik.png](https://wiki.stadtfabrikanten.org/uploads/images/gallery/2025-05/scaled-1680-/8mNMwM3LD3PdvVqY-grafik.png)](https://wiki.stadtfabrikanten.org/uploads/images/gallery/2025-05/8mNMwM3LD3PdvVqY-grafik.png)

# NextGenerator

<div class="page-metadata-wrapper" id="bkmrk-"></div><div class="page view" id="bkmrk-this-plugin-replaces"><article>This plugin replaces text strings and other XML data from a generic SVG template to make a set of parametric files for output. It replaces strings in template with data from a CSV file and exports to multiple file formats (png, svg, ps, eps, pdf). This can be useful for automatically generating conference badges and similar items.

Some additional hints:

<div class="wiki-content">- link any image that you want to use as a placeholder (don't embed)
- put the replacement images into the same directory as the placeholder, so you only need to replace the name (didn't work for full file paths, for some reason sed complained, even with backslashes and quotes (also without))
- the CSV file must end with an empty line
- Source of old documentation: [https://www.rgb-labs.com/inkscape-161-generator-plugin-tip/](https://www.rgb-labs.com/inkscape-161-generator-plugin-tip/)
- Source of new documentaion (Moini's Fork): [https://gitlab.com/Moini/nextgenerator/-/tree/master/example](https://gitlab.com/Moini/nextgenerator/-/tree/master/example)
- If you like to use symbols like &amp; &lt; &gt; in your text you need to **escape** them in your CSV like this: "1. Stellvertreter &amp;amp; Schriftführer" → this get's "1. Stellvertreter &amp; Schriftführer"

</div>## Enter your parameters

We use [https://gitlab.com/Moini/nextgenerator/-/blob/master/example](https://gitlab.com/Moini/nextgenerator/-/blob/master/example) data to test out the plugin

[![grafik.png](https://wiki.stadtfabrikanten.org/uploads/images/gallery/2025-05/scaled-1680-/qsqeU9RYNUyachcM-grafik.png)](https://wiki.stadtfabrikanten.org/uploads/images/gallery/2025-05/qsqeU9RYNUyachcM-grafik.png)

## Create / adjust your input CSV file for replacements

example

```ini
name, occupation, bg_col, photo
"Ada Lovelace", Programmer, #3accd1, 1.png
"Alan Turing", Code Breaker, "#e78940", 2.png
"Linus Torvalds", "Kernel Developer, Linux Founder", #de88d9, 3.png
Tux, Mascot, #bed7ff, 4.png
```

## Example output

According to your selected output format you will receive PNG, PDF or other files

[![grafik.png](https://wiki.stadtfabrikanten.org/uploads/images/gallery/2025-05/scaled-1680-/t7qjEgwRo1wYSSmk-grafik.png)](https://wiki.stadtfabrikanten.org/uploads/images/gallery/2025-05/t7qjEgwRo1wYSSmk-grafik.png) [![grafik.png](https://wiki.stadtfabrikanten.org/uploads/images/gallery/2025-05/scaled-1680-/wf1A6drH3tqyNDnG-grafik.png)](https://wiki.stadtfabrikanten.org/uploads/images/gallery/2025-05/wf1A6drH3tqyNDnG-grafik.png) [![grafik.png](https://wiki.stadtfabrikanten.org/uploads/images/gallery/2025-05/scaled-1680-/xas436hywhhUEJSh-grafik.png)](https://wiki.stadtfabrikanten.org/uploads/images/gallery/2025-05/xas436hywhhUEJSh-grafik.png) [![grafik.png](https://wiki.stadtfabrikanten.org/uploads/images/gallery/2025-05/scaled-1680-/VvUAjEFHd9H4Cx7j-grafik.png)](https://wiki.stadtfabrikanten.org/uploads/images/gallery/2025-05/VvUAjEFHd9H4Cx7j-grafik.png)

<div class="wiki-content" id="bkmrk--1"></div></article></div>

# Open in Roland CutStudio

- requires Setup 
    - [CutStudio 1.27 Setup ](https://www.technoplot.de/service/downloads/category/35-cut-studio)
    - [CutStudio 3.10 Update](https://www.rolanddga.com/support/products/software/cutstudio/article?pm=cutstudio&articleId=803)
- tested with CutStudio Version 3.10

Installation notes can be found at [Software Setup - Roland CutStudio](https://wiki.stadtfabrikanten.org/books/equipment/page/roland-cutstudio "Software Setup - Roland CutStudio")

[![grafik.png](https://wiki.stadtfabrikanten.org/uploads/images/gallery/2025-05/scaled-1680-/i2DTJl4u8Sgjhr2F-grafik.png)](https://wiki.stadtfabrikanten.org/uploads/images/gallery/2025-05/i2DTJl4u8Sgjhr2F-grafik.png)

[![grafik.png](https://wiki.stadtfabrikanten.org/uploads/images/gallery/2025-05/scaled-1680-/QtOmh5n5uT5BvQ4U-grafik.png)](https://wiki.stadtfabrikanten.org/uploads/images/gallery/2025-05/QtOmh5n5uT5BvQ4U-grafik.png)

# Open in VisiCut

<div class="page view" id="bkmrk-this-extension-will-"><article>This extension will add or replace the current Inkscape canvas content in VisiCut instance. Documentation can be found at

<div class="wiki-content">- [https://hci.rwth-aachen.de/visicut-inkscape-plugin](https://hci.rwth-aachen.de/visicut-inkscape-plugin)
- [https://github.com/t-oster/VisiCut/tree/master/tools/inkscape\_extension](https://github.com/t-oster/VisiCut/tree/master/tools/inkscape_extension)
- [http://visicut.org](http://visicut.org/)

</div>This extension requires to install the VisiCut application itself → [https://github.com/t-oster/VisiCut/releases](https://github.com/t-oster/VisiCut/releases). On Fedora it's easy to use the platform independent ZIP version ([https://download.visicut.org](https://download.visicut.org/)). We just download, move to some system dir and add it to `$PATH` variable, e.g. in `.basrhrc`.

<div class="wiki-content" id="bkmrk-"></div></article></div>

# Output Pro for Inkscape

Output Pro helps implementing professional output of files for printing graphics.

Links:

- [https://inkscape.org/de/~wout/%E2%98%85output-pro](https://inkscape.org/de/~wout/%E2%98%85output-pro)
- [https://github.com/jonata/Inkscape-OUTPUT-PRO](https://github.com/jonata/Inkscape-OUTPUT-PRO)
- [https://github.com/vmario89/Inkscape-OUTPUT-PRO/blob/master/outputpro.py](https://github.com/vmario89/Inkscape-OUTPUT-PRO/blob/master/outputpro.py)
- [http://www.cimcomunica.com/site2/index.html](http://www.cimcomunica.com/site2/index.html)

## Requirements

- You need to install `imagemagick`. Commands like **`convert`**, **`identify`** Should be available in `%PATH%` variable
- PyQt framework

```bash
pip3 install PyQt5
```

[![grafik.png](https://wiki.stadtfabrikanten.org/uploads/images/gallery/2025-05/scaled-1680-/jYjjo8gWnmHd4J8M-grafik.png)](https://wiki.stadtfabrikanten.org/uploads/images/gallery/2025-05/jYjjo8gWnmHd4J8M-grafik.png) [![grafik.png](https://wiki.stadtfabrikanten.org/uploads/images/gallery/2025-05/scaled-1680-/6VHys0TOkDvmnrKr-grafik.png)](https://wiki.stadtfabrikanten.org/uploads/images/gallery/2025-05/6VHys0TOkDvmnrKr-grafik.png) [![grafik.png](https://wiki.stadtfabrikanten.org/uploads/images/gallery/2025-05/scaled-1680-/RhdrK49bs9zIcIJ1-grafik.png)](https://wiki.stadtfabrikanten.org/uploads/images/gallery/2025-05/RhdrK49bs9zIcIJ1-grafik.png) [![grafik.png](https://wiki.stadtfabrikanten.org/uploads/images/gallery/2025-05/scaled-1680-/bkf60LmqdpE8M6Nb-grafik.png)](https://wiki.stadtfabrikanten.org/uploads/images/gallery/2025-05/bkf60LmqdpE8M6Nb-grafik.png)

# Paths to OpenSCAD

[<span>https://wiki.fablab-nuernberg.de/w/Ding:Zahnr%C3%A4der\_mit\_Inkscape#Werkzeug-Korrektur</span>](https://wiki.fablab-nuernberg.de/w/Ding:Zahnr%C3%A4der_mit_Inkscape#Werkzeug-Korrektur)

[![grafik.png](https://wiki.stadtfabrikanten.org/uploads/images/gallery/2025-05/scaled-1680-/hhI9x2NRvfV5g2Wb-grafik.png)](https://wiki.stadtfabrikanten.org/uploads/images/gallery/2025-05/hhI9x2NRvfV5g2Wb-grafik.png) [![grafik.png](https://wiki.stadtfabrikanten.org/uploads/images/gallery/2025-05/scaled-1680-/7WBWuz32cYc30ZWa-grafik.png)](https://wiki.stadtfabrikanten.org/uploads/images/gallery/2025-05/7WBWuz32cYc30ZWa-grafik.png) [![grafik.png](https://wiki.stadtfabrikanten.org/uploads/images/gallery/2025-05/scaled-1680-/Wwa7WiMdfL9AqrVx-grafik.png)](https://wiki.stadtfabrikanten.org/uploads/images/gallery/2025-05/Wwa7WiMdfL9AqrVx-grafik.png) [![grafik.png](https://wiki.stadtfabrikanten.org/uploads/images/gallery/2025-05/scaled-1680-/1Jz0UOfMj4KS5oRH-grafik.png)](https://wiki.stadtfabrikanten.org/uploads/images/gallery/2025-05/1Jz0UOfMj4KS5oRH-grafik.png) [![grafik.png](https://wiki.stadtfabrikanten.org/uploads/images/gallery/2025-05/scaled-1680-/EffH4Irn7lhw7SCR-grafik.png)](https://wiki.stadtfabrikanten.org/uploads/images/gallery/2025-05/EffH4Irn7lhw7SCR-grafik.png)

## Example

### Draw a new gear

[![grafik.png](https://wiki.stadtfabrikanten.org/uploads/images/gallery/2025-05/scaled-1680-/LgA9jOSXuul8xrxm-grafik.png)](https://wiki.stadtfabrikanten.org/uploads/images/gallery/2025-05/LgA9jOSXuul8xrxm-grafik.png)

[![grafik.png](https://wiki.stadtfabrikanten.org/uploads/images/gallery/2025-05/scaled-1680-/tSjP7KVow6LCySTa-grafik.png)](https://wiki.stadtfabrikanten.org/uploads/images/gallery/2025-05/tSjP7KVow6LCySTa-grafik.png)

### Union paths and fill the area

[![grafik.png](https://wiki.stadtfabrikanten.org/uploads/images/gallery/2025-05/scaled-1680-/ch2dqp3MNN2pjRYY-grafik.png)](https://wiki.stadtfabrikanten.org/uploads/images/gallery/2025-05/ch2dqp3MNN2pjRYY-grafik.png)

### Save the file with a name

### Run "Paths to OpenSCAD" Plugin

- Download + Installation OpenSCAD: [https://www.openscad.org/downloads.html](https://www.openscad.org/downloads.html)
- Adjust settings if not already happened:
    
    ```bash
    Output file: "C:\Users\<YOU>\Desktop\output.scad"
    View in OpenSCAD: "<yourpath>\openscad-2019.05\openscad.exe" "output.scad"
    Convert to STL: "<yourpath>\openscad-2019.05\openscad.exe" "{NAME}.scad" -o "output.stl"
    ```
- <p class="callout warning">please use " " instead of ' ' - it won't work in a Windows environment</p>
- <p class="callout warning">please be consistent with the output file name!</p>
- "Output file" has to be named correctly with path and file name. Otherwise it will try to save under InkScape folder (which might only work if running in Administrator mode if installed in Program Files directory)
- "Apply" → export the .svg vector file to a .scad file (and additionally to a .stl file if "Convert to STL" is enabled)

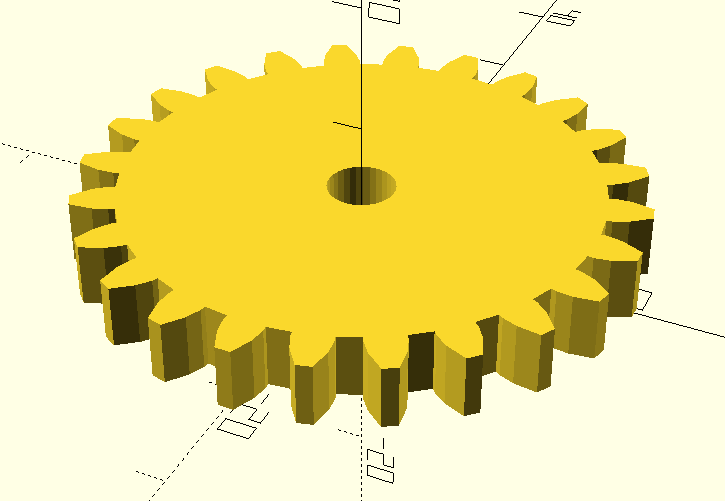
### View the .scad (OpenSCAD)

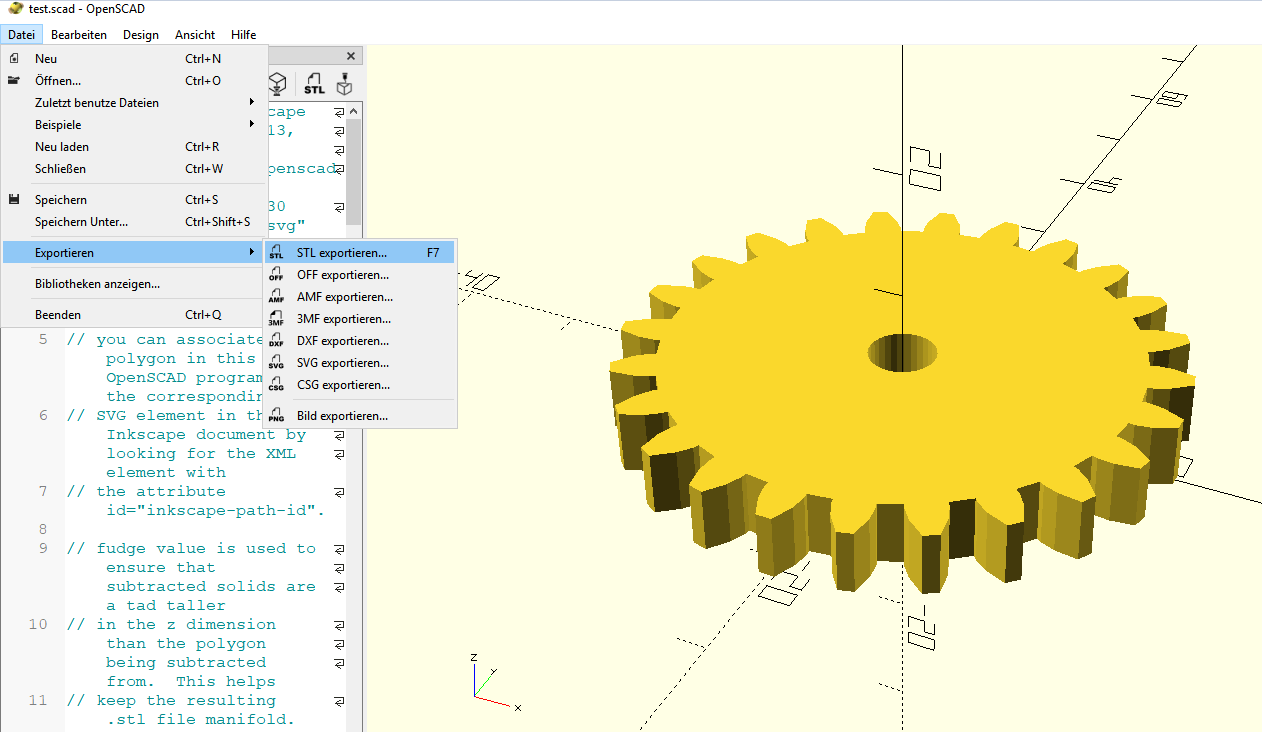
and maybe export to STL manually, or do it automatically by the Inkscape Plugin

1. Open  
    [![grafik.png](https://wiki.stadtfabrikanten.org/uploads/images/gallery/2025-05/scaled-1680-/4NwlVS3VP0uihjoe-grafik.png)](https://wiki.stadtfabrikanten.org/uploads/images/gallery/2025-05/4NwlVS3VP0uihjoe-grafik.png)
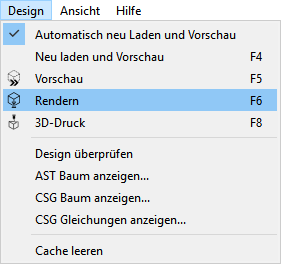
2. Rendering  
    [![grafik.png](https://wiki.stadtfabrikanten.org/uploads/images/gallery/2025-05/scaled-1680-/OflI6BnR139p4LOM-grafik.png)](https://wiki.stadtfabrikanten.org/uploads/images/gallery/2025-05/OflI6BnR139p4LOM-grafik.png)
3. Export  
    [![grafik.png](https://wiki.stadtfabrikanten.org/uploads/images/gallery/2025-05/scaled-1680-/twxBC3qg37hVtTYW-grafik.png)](https://wiki.stadtfabrikanten.org/uploads/images/gallery/2025-05/twxBC3qg37hVtTYW-grafik.png)
    
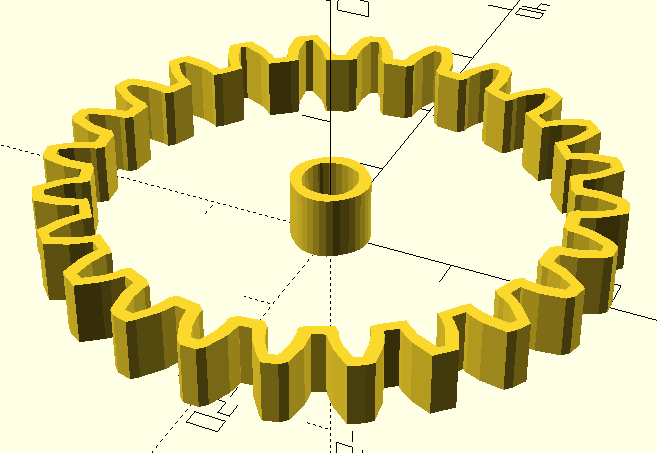
    If you forget to fill in the area in InkScape, you will see it as follows:  
    [![grafik.png](https://wiki.stadtfabrikanten.org/uploads/images/gallery/2025-05/scaled-1680-/5klhsqNnf4giypb6-grafik.png)](https://wiki.stadtfabrikanten.org/uploads/images/gallery/2025-05/5klhsqNnf4giypb6-grafik.png)
### View the STL STL Export / 3D Print

[http://www.freestlview.com](http://www.freestlview.com/)

[![grafik.png](https://wiki.stadtfabrikanten.org/uploads/images/gallery/2025-05/scaled-1680-/ZLXerfqrbopk1CBR-grafik.png)](https://wiki.stadtfabrikanten.org/uploads/images/gallery/2025-05/ZLXerfqrbopk1CBR-grafik.png)
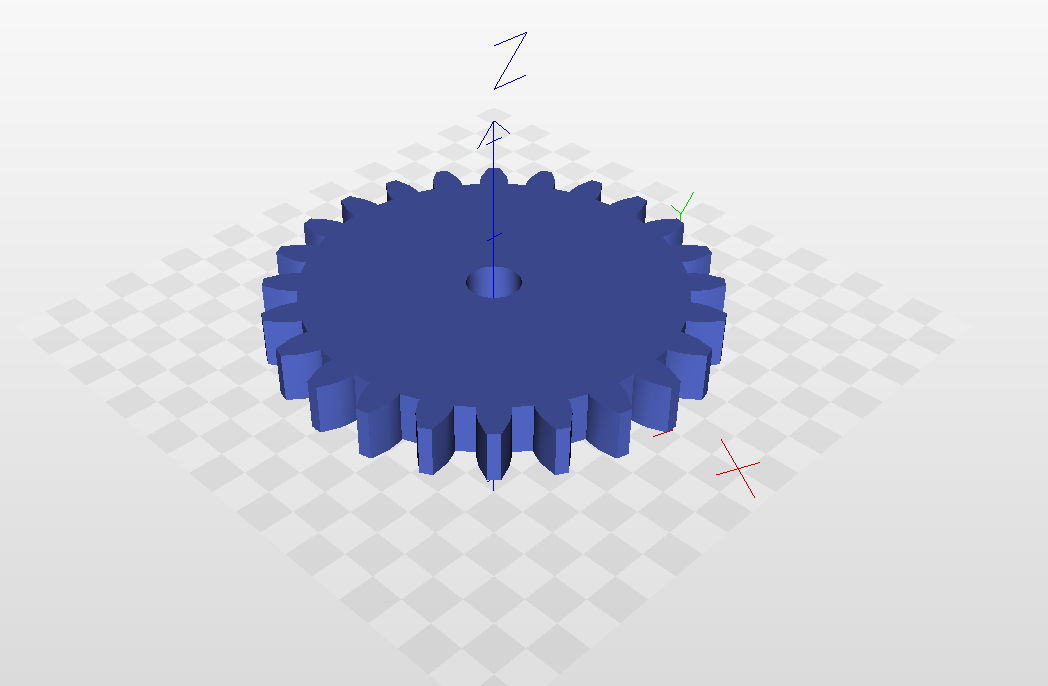
# Slic3r STL Input

STL Sliced Import (by Slic3r). Supports OBJ/OFF/PLY/STL as input file formats. It requires OpenMesh:

## Prepare to install openmesh

To run this extension you need to install OpenMesh bindings with python pip. When installing Paperfold by installing MighyScape, this will already be done for you on Linux systems. Else:

**Ubuntu**

```bash
sudo apt install cmake
sudo apt install g++
sudo apt install python3-dev
pip3 install openmesh
```

**Fedora**

```bash
sudo dnf install cmake
sudo dnf install g++
sudo dnf install python3-devel
pip3 install cmake
pip3 install pybind11
pip3 install openmesh
```

**Windows**

1. Windows **requires** [CMake executable](https://cmake.org/download/)
2. Install MS Visual Studio Community Edition → If you receive an error like "NMake Makefiles does not support platform specification, but platform x64 was specified." In case the instalation fails you can also try to install precompiled Windows binaries from [https://gitlab.vci.rwth-aachen.de:9000/OpenMesh/OpenMesh](https://gitlab.vci.rwth-aachen.de:9000/OpenMesh/OpenMesh)
3. Install openmesh bindings
    
    ```bash
    pip3 install openmesh
    ```


# How it works

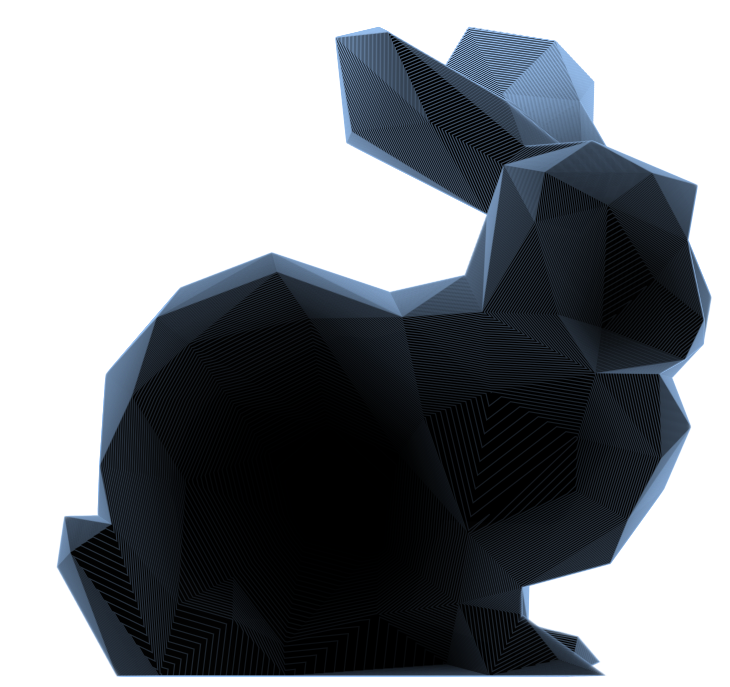
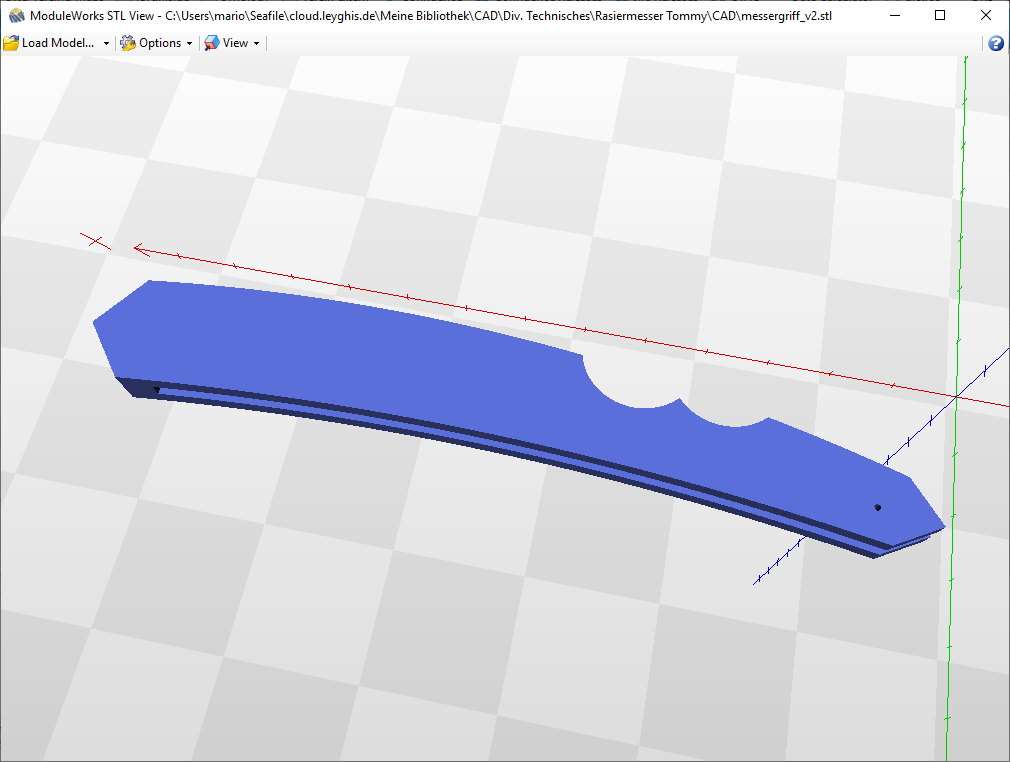
- projects an STL file on the X-Y plane by cutting the objects into "slices"
- each "slice" is a group of polygons, with a label indicating its z position
- the polygons are converted to paths for better editing in inkscape
- use Object → Rows &amp; Columns → distribute the slices in a grid

<p class="callout warning">**Warning:** Requires Slicer 1.3.1-dev (the really latest build possible)</p>

## Examples

[![grafik.png](https://wiki.stadtfabrikanten.org/uploads/images/gallery/2025-05/scaled-1680-/z4Nw8yXZjSXBoEBz-grafik.png)](https://wiki.stadtfabrikanten.org/uploads/images/gallery/2025-05/z4Nw8yXZjSXBoEBz-grafik.png) [![grafik.png](https://wiki.stadtfabrikanten.org/uploads/images/gallery/2025-05/scaled-1680-/P3GdywBzIL4nds0R-grafik.png)](https://wiki.stadtfabrikanten.org/uploads/images/gallery/2025-05/P3GdywBzIL4nds0R-grafik.png)
## Download Slic3r

You need the latest development version from [<span>https://slic3r.org/download</span>](https://slic3r.org/download). You can directly get them from [https://www.dropbox.com/scl/fo/gxoj6ei7vt95p3ggzy9c6/AJBn6GpI4H-7kJbx\_P8cZic/dev?dl=0&amp;rlkey=usb5fvt9mhpqizm3269dhg036&amp;subfolder\_nav\_tracking=1](https://www.dropbox.com/scl/fo/gxoj6ei7vt95p3ggzy9c6/AJBn6GpI4H-7kJbx_P8cZic/dev?dl=0&rlkey=usb5fvt9mhpqizm3269dhg036&subfolder_nav_tracking=1)

## Example to Import

[![grafik.png](https://wiki.stadtfabrikanten.org/uploads/images/gallery/2025-05/scaled-1680-/GLxLjlBosmksh1xP-grafik.png)](https://wiki.stadtfabrikanten.org/uploads/images/gallery/2025-05/GLxLjlBosmksh1xP-grafik.png)
### Import Procedure

[![grafik.png](https://wiki.stadtfabrikanten.org/uploads/images/gallery/2025-05/scaled-1680-/azlYP3aVs1pUIxGH-grafik.png)](https://wiki.stadtfabrikanten.org/uploads/images/gallery/2025-05/azlYP3aVs1pUIxGH-grafik.png) [![grafik.png](https://wiki.stadtfabrikanten.org/uploads/images/gallery/2025-05/scaled-1680-/pARE87FehLa8iiBA-grafik.png)](https://wiki.stadtfabrikanten.org/uploads/images/gallery/2025-05/pARE87FehLa8iiBA-grafik.png)
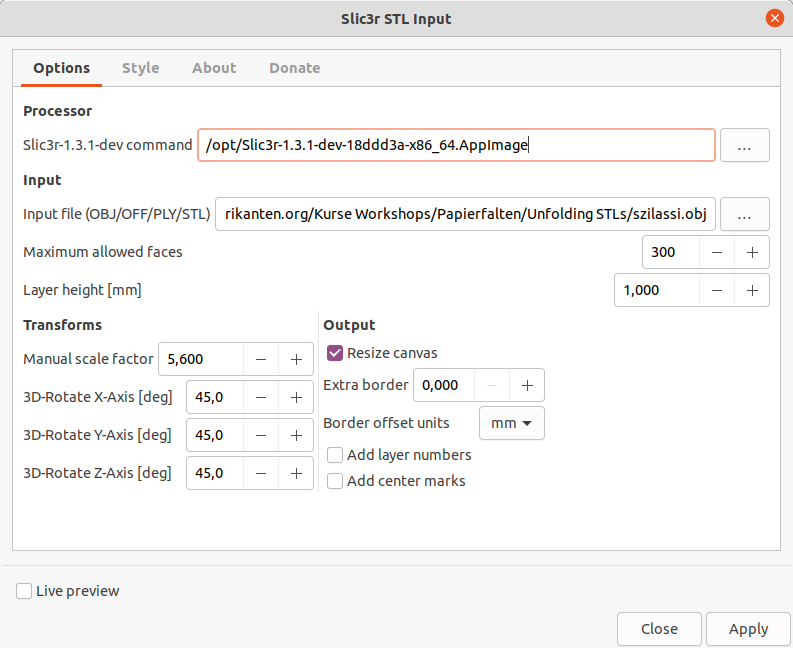
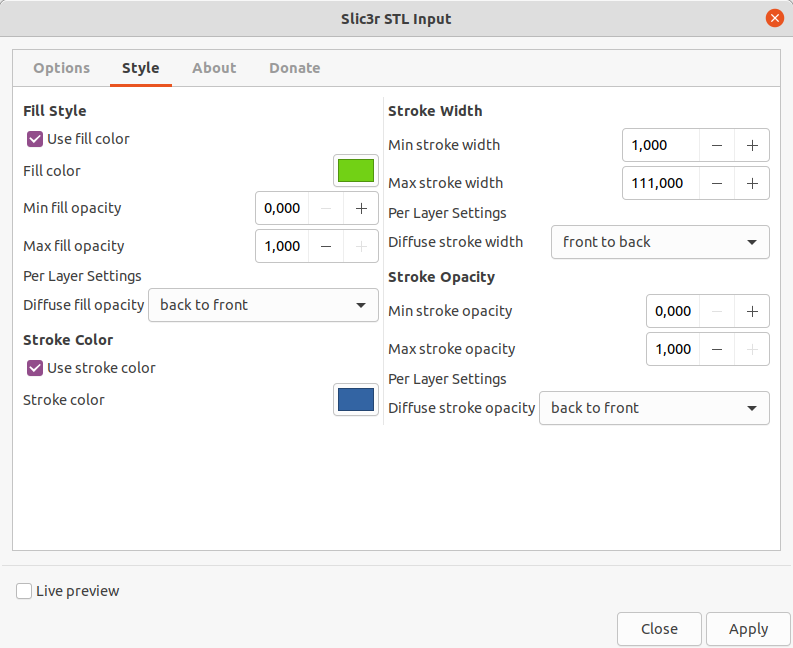
[![grafik.png](https://wiki.stadtfabrikanten.org/uploads/images/gallery/2025-05/scaled-1680-/LqlvvLR15modUxfs-grafik.png)](https://wiki.stadtfabrikanten.org/uploads/images/gallery/2025-05/LqlvvLR15modUxfs-grafik.png)
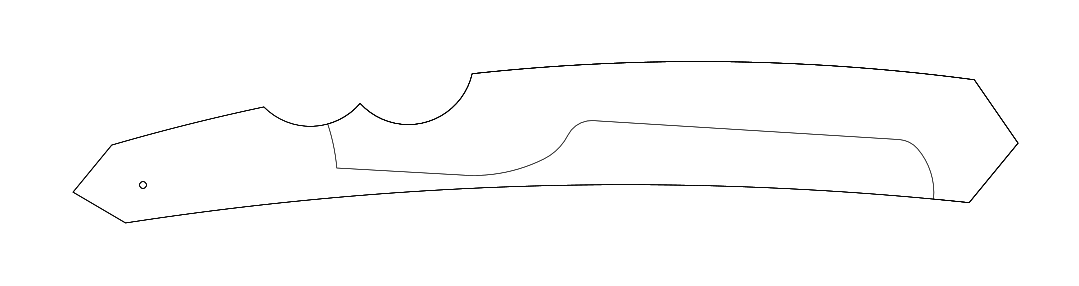
# Svg2Shenzhen

Source of documentation: [<span>https://github.com/badgeek/svg2shenzhen</span>](https://github.com/badgeek/svg2shenzhen)

[![grafik.png](https://wiki.stadtfabrikanten.org/uploads/images/gallery/2025-05/scaled-1680-/0SKYRfWLwlmzCHVT-grafik.png)](https://wiki.stadtfabrikanten.org/uploads/images/gallery/2025-05/0SKYRfWLwlmzCHVT-grafik.png)
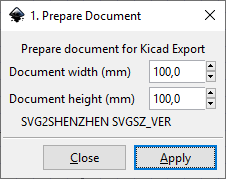
[![grafik.png](https://wiki.stadtfabrikanten.org/uploads/images/gallery/2025-05/scaled-1680-/YpjSryrsOU7zFRon-grafik.png)](https://wiki.stadtfabrikanten.org/uploads/images/gallery/2025-05/YpjSryrsOU7zFRon-grafik.png)
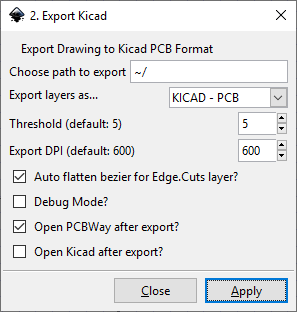
# Layer Clip

- Original idea from [http://www.pernsteiner.org/inkscape/layerclip/](http://www.pernsteiner.org/inkscape/layerclip/)
- Ported to Inkscape 1.0 by [https://gitlab.com/jczapla79/inkscape-extension-layer-clip](https://gitlab.com/jczapla79/inkscape-extension-layer-clip)
- Fixed and ported to Inkscape 1.2+ by Mario Voigt

## Usage

[See an example with screenshots](http://www.pernsteiner.org/inkscape/layerclip/demo.html)

1. Clip containing layer 
    - Select a single object and then run this extension to set that object as the clip path for the layer that contains it.
    - This will mark the layer with "(c\*)" to indicate that the layer contains an object that is being used to clip its containing layer,   
        and with "(C)" to indicate that the layer has a clip path applied to it. (These markers are simply added to the layer name to make it easier to tell when clip paths are in use.)
2. Clip layer above 
    - Like "Clip containing layer", but sets the object as the clip path for the layer above the one that contains it
    - The layer containing the object will be marked with "(c+)" (instead of "(c\*)" for "Clip containing layer").
3. Clip layer below 
    - Like "Clip containing layer", but on the layer below the layer containing the selected object.
    - Marks the object's layer with "(c-)".
4. Clip parent layer 
    - Like "Clip containing layer", but on the parent layer of the layer containing the selected object.
    - Marks the object's layer with "(c\*\*)".
5. Remove layer clip 
    - Select an object in a clipped layer and then run this extension to remove the clip path from a layer.
    - The "(C)" marker will also be removed, if one is present.
    - The marker on the layer that held the actual clip path will not be removed, but you can remove it yourself by manually editing the layer name.
6. Reset clippath transforms 
    - If you move an object that is being used as a clip path for a layer, the layer will still be clipped based on the old position. Run this extension to fix the problem.

# Modify existing Path(s)

# Blueprint Maker

[![grafik.png](https://wiki.stadtfabrikanten.org/uploads/images/gallery/2025-05/scaled-1680-/oAxNaiDURYCTeXkt-grafik.png)](https://wiki.stadtfabrikanten.org/uploads/images/gallery/2025-05/oAxNaiDURYCTeXkt-grafik.png)
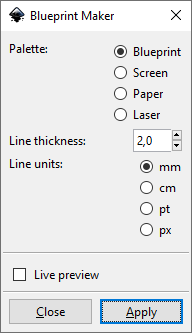
## Example Output

[![grafik.png](https://wiki.stadtfabrikanten.org/uploads/images/gallery/2025-05/scaled-1680-/y7XIEZBryu5EFYgw-grafik.png)](https://wiki.stadtfabrikanten.org/uploads/images/gallery/2025-05/y7XIEZBryu5EFYgw-grafik.png) [![grafik.png](https://wiki.stadtfabrikanten.org/uploads/images/gallery/2025-05/scaled-1680-/3XRGWwRO5Ah30oS7-grafik.png)](https://wiki.stadtfabrikanten.org/uploads/images/gallery/2025-05/3XRGWwRO5Ah30oS7-grafik.png)


# Close Paths

This is similar to [Chain Paths](https://old.stadtfabrikanten.org/pages/createpage.action?spaceKey=IFM&title=Chain+Paths&linkCreation=true&fromPageId=55019335) extension but it has less features and only "one job". It helps to close open contours. This will connect the first point and the last point of a path which has no "Z" flag (which indicates for a closed path). If the first and the last point are already coincident it will just add the Z flag to the end of the path. If there's a distance left between the points a new line segment will be created to close the path. "Close Paths" extensions is also similar to [Join Paths / Create Tabs And Dimples](https://wiki.stadtfabrikanten.org/books/fablab-chemnitz/page/join-paths-create-tabs-and-dimples) and [Line Merging (Combine Paths)](https://wiki.stadtfabrikanten.org/books/fablab-chemnitz/page/line-merging-combine-paths "Line Merging (Combine Paths)").

**This plugin does not apply for paths in groups. Please ungroup before!**

## Draw some path

[![grafik.png](https://wiki.stadtfabrikanten.org/uploads/images/gallery/2025-05/scaled-1680-/jIBiKu3hjdsz177y-grafik.png)](https://wiki.stadtfabrikanten.org/uploads/images/gallery/2025-05/jIBiKu3hjdsz177y-grafik.png)
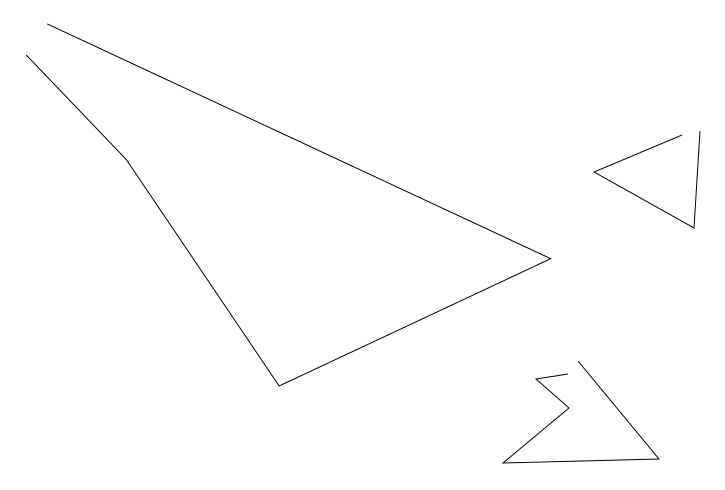
## Make the path ends overlapping

This won't close these contours automatically. That's the reason to use this plugin

[![grafik.png](https://wiki.stadtfabrikanten.org/uploads/images/gallery/2025-05/scaled-1680-/Bs1RJzHMpDyEnQZ5-grafik.png)](https://wiki.stadtfabrikanten.org/uploads/images/gallery/2025-05/Bs1RJzHMpDyEnQZ5-grafik.png)
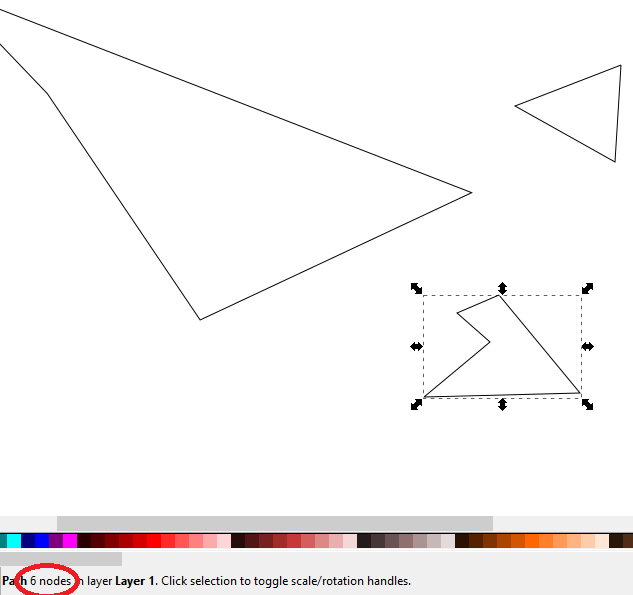
## Select the paths you want to close and run extension

[![grafik.png](https://wiki.stadtfabrikanten.org/uploads/images/gallery/2025-05/scaled-1680-/HLFCPb9bfQlRKN1x-grafik.png)](https://wiki.stadtfabrikanten.org/uploads/images/gallery/2025-05/HLFCPb9bfQlRKN1x-grafik.png)
[![grafik.png](https://wiki.stadtfabrikanten.org/uploads/images/gallery/2025-05/scaled-1680-/wsPUej6mQ2JlwjHn-grafik.png)](https://wiki.stadtfabrikanten.org/uploads/images/gallery/2025-05/wsPUej6mQ2JlwjHn-grafik.png)
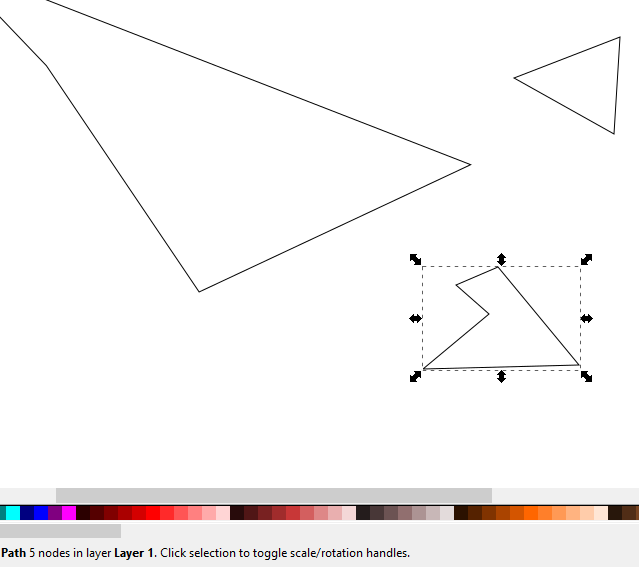
Notice that the path was reduced from 6 to 5 nodes. This happened to the other selected paths too.

# Convert To Polylines

This extension takes the points of a path and make a straight polyline out of it. Nothing less, nothing more. ou can do the same with default Inkscape UI (select the path → Node Tool → Straighten lines) but it might be quicker to use in some use cases. This extension handles duplicate points on a path by removing them. This extension is similar to [Approximate Curves by Straight Lines (Flatten Beziers)](https://wiki.stadtfabrikanten.org/books/in-house-extensions/page/approximate-curves-by-straight-lines-flatten-beziers) but works much easier (but has less control over elements).

##   


## Example 1

Red outline is original curve, black one is the converted one

[![grafik.png](https://wiki.stadtfabrikanten.org/uploads/images/gallery/2025-05/scaled-1680-/sd5LMDOIdDTbxoDq-grafik.png)](https://wiki.stadtfabrikanten.org/uploads/images/gallery/2025-05/sd5LMDOIdDTbxoDq-grafik.png)
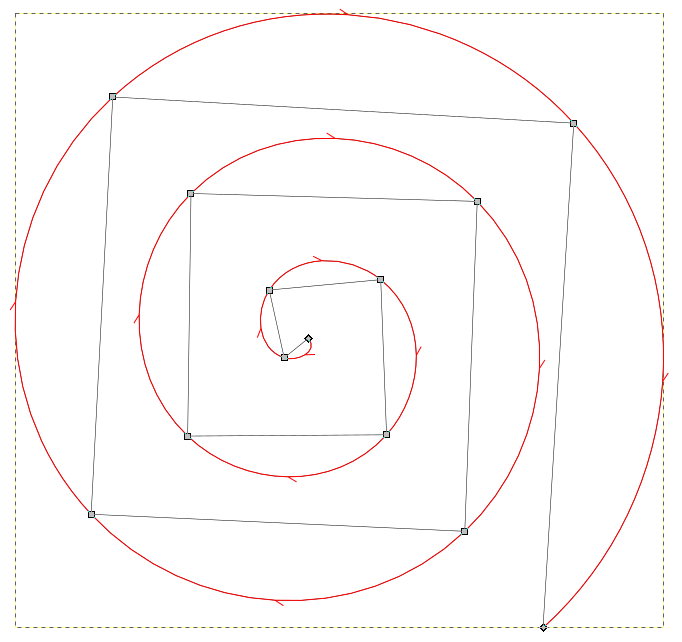
## Example 2

Left is before, right is after conversion

[![grafik.png](https://wiki.stadtfabrikanten.org/uploads/images/gallery/2025-05/scaled-1680-/nLBSsXQv6FIefTV0-grafik.png)](https://wiki.stadtfabrikanten.org/uploads/images/gallery/2025-05/nLBSsXQv6FIefTV0-grafik.png)
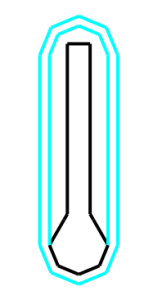
# Convert Vertical/Horizontal To Line

This extension converts an SVG path's d attribute the following way: find each V (vertical line) and each H (horizontal line) and replace it by a generic line (L type). A lot of extensions do not work with V and H, but with L commands. So this is just a helper extension for other extensions. It behaves similar to [To Absolute](https://wiki.stadtfabrikanten.org/books/in-house-extensions/page/to-absolute "To Absolute")

## Example conversion

from:

```
M 60.403,71.0937 V 89.268022 135.773
```

to:

```
M 60.403 71.0937 L 60.403 89.268 L 60.403 135.773
```

# Ellipse by Five Points (Replaced by LPE)

Note that this feature is obsolete / legacy in InkScape 0.92 and higher because of [https://wiki.inkscape.org/wiki/index.php/LPE:\_Ellipse\_from\_Points](https://wiki.inkscape.org/wiki/index.php/LPE:_Ellipse_from_Points)

## Usage (with a workaround)

### Draw some path with 5 control points

[![grafik.png](https://wiki.stadtfabrikanten.org/uploads/images/gallery/2025-05/scaled-1680-/eZiMXnXL5UvJKQf8-grafik.png)](https://wiki.stadtfabrikanten.org/uploads/images/gallery/2025-05/eZiMXnXL5UvJKQf8-grafik.png)
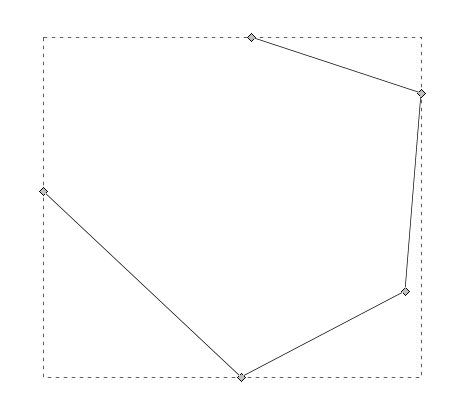
### Select the object and run extension → the plugin will rotate the object

[![grafik.png](https://wiki.stadtfabrikanten.org/uploads/images/gallery/2025-05/scaled-1680-/PjZLuC5v2mNe8zso-grafik.png)](https://wiki.stadtfabrikanten.org/uploads/images/gallery/2025-05/PjZLuC5v2mNe8zso-grafik.png)
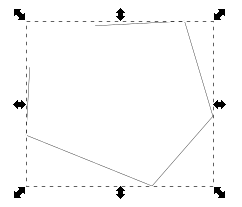
### Input vs Output

[![grafik.png](https://wiki.stadtfabrikanten.org/uploads/images/gallery/2025-05/scaled-1680-/rP1un7m0JOpBClLf-grafik.png)](https://wiki.stadtfabrikanten.org/uploads/images/gallery/2025-05/rP1un7m0JOpBClLf-grafik.png)
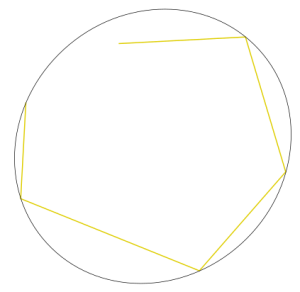
<div class="rwui_steps conf-macro output-block" data-hasbody="true" data-macro-name="ui-steps" id="bkmrk--3"><div class="rwui_step conf-macro output-block" data-hasbody="true" data-macro-name="ui-step">  
<div class="rwui_item_content">  
</div></div></div>

# Fillet And Chamfer (Replaced by LPE)

This extension is similar to the built-in Live Path Effect "**Corners (Fillet/Chamfer)**" of Inkccape and similar to [Round Corners (Replaced by LPE)](https://wiki.stadtfabrikanten.org/books/fablab-chemnitz/page/round-corners-replaced-by-lpe) but it's great advantage is the possibility to quickly chamfer complete paths. This extension requires python library *svgpathtools*.

## Method description

[![grafik.png](https://wiki.stadtfabrikanten.org/uploads/images/gallery/2025-05/scaled-1680-/6CZAapH7rjUAfsPt-grafik.png)](https://wiki.stadtfabrikanten.org/uploads/images/gallery/2025-05/6CZAapH7rjUAfsPt-grafik.png)

Source of image: [http://launchpadlibrarian.net/12692602/rcp.svg](http://launchpadlibrarian.net/12692602/rcp.svg)

## Draw some path

[![grafik.png](https://wiki.stadtfabrikanten.org/uploads/images/gallery/2025-05/scaled-1680-/aw2UETy1fxe35oS6-grafik.png)](https://wiki.stadtfabrikanten.org/uploads/images/gallery/2025-05/aw2UETy1fxe35oS6-grafik.png)

## Run the exension and get the result

[![grafik.png](https://wiki.stadtfabrikanten.org/uploads/images/gallery/2025-05/scaled-1680-/4s1RdG2fDmZ8O7xS-grafik.png)](https://wiki.stadtfabrikanten.org/uploads/images/gallery/2025-05/4s1RdG2fDmZ8O7xS-grafik.png)

[![grafik.png](https://wiki.stadtfabrikanten.org/uploads/images/gallery/2025-05/scaled-1680-/HUsnUNLefN9G25YQ-grafik.png)](https://wiki.stadtfabrikanten.org/uploads/images/gallery/2025-05/HUsnUNLefN9G25YQ-grafik.png)

# Flevobezier

Documentation for approximation algorithm can be found at [https://gitlab.com/parclytaxel/Kinross/-/blob/master/programs/arp.pdf](https://gitlab.com/parclytaxel/Kinross/-/blob/master/programs/arp.pdf)

## Draw some paths

[![grafik.png](https://wiki.stadtfabrikanten.org/uploads/images/gallery/2025-05/scaled-1680-/5io26wLpnn28KdXz-grafik.png)](https://wiki.stadtfabrikanten.org/uploads/images/gallery/2025-05/5io26wLpnn28KdXz-grafik.png)

## Apply the extension and get result

[![grafik.png](https://wiki.stadtfabrikanten.org/uploads/images/gallery/2025-05/scaled-1680-/hxC1zcPghgHoHDM6-grafik.png)](https://wiki.stadtfabrikanten.org/uploads/images/gallery/2025-05/hxC1zcPghgHoHDM6-grafik.png)

# Guilloche Contour

This extension creates a Guilloche Contour from a regular path. It is needed for [Guilloche Pattern](https://wiki.stadtfabrikanten.org/books/fablab-chemnitz/page/guilloche-pattern "Guilloche Pattern") extension.

[![grafik.png](https://wiki.stadtfabrikanten.org/uploads/images/gallery/2025-05/scaled-1680-/4wUhvCWkxzW662VG-grafik.png)](https://wiki.stadtfabrikanten.org/uploads/images/gallery/2025-05/4wUhvCWkxzW662VG-grafik.png)

[![grafik.png](https://wiki.stadtfabrikanten.org/uploads/images/gallery/2025-05/scaled-1680-/0aUtZhQ3WtbEXw2l-grafik.png)](https://wiki.stadtfabrikanten.org/uploads/images/gallery/2025-05/0aUtZhQ3WtbEXw2l-grafik.png)

[![grafik.png](https://wiki.stadtfabrikanten.org/uploads/images/gallery/2025-05/scaled-1680-/XqHOenenBTsxysS3-grafik.png)](https://wiki.stadtfabrikanten.org/uploads/images/gallery/2025-05/XqHOenenBTsxysS3-grafik.png)

# Guilloche Pattern

This extension allows to create patterns like this:

[![grafik.png](https://wiki.stadtfabrikanten.org/uploads/images/gallery/2025-05/scaled-1680-/M2w3ztm6WpEGjnFw-grafik.png)](https://wiki.stadtfabrikanten.org/uploads/images/gallery/2025-05/M2w3ztm6WpEGjnFw-grafik.png)

## Example

Draw a rectangle and some [Guilloche Contour](https://wiki.stadtfabrikanten.org/books/fablab-chemnitz/page/guilloche-contour "Guilloche Contour"):

[![grafik.png](https://wiki.stadtfabrikanten.org/uploads/images/gallery/2025-05/scaled-1680-/sTXuevFBlRYhjarf-grafik.png)](https://wiki.stadtfabrikanten.org/uploads/images/gallery/2025-05/sTXuevFBlRYhjarf-grafik.png)

## Run the extension and get the result

[![grafik.png](https://wiki.stadtfabrikanten.org/uploads/images/gallery/2025-05/scaled-1680-/NSIoDmogEJwOTHqh-grafik.png)](https://wiki.stadtfabrikanten.org/uploads/images/gallery/2025-05/NSIoDmogEJwOTHqh-grafik.png)

[![grafik.png](https://wiki.stadtfabrikanten.org/uploads/images/gallery/2025-05/scaled-1680-/D5TABxnD0L0x1Aj8-grafik.png)](https://wiki.stadtfabrikanten.org/uploads/images/gallery/2025-05/D5TABxnD0L0x1Aj8-grafik.png)

# Open Closed Path

<div class="page-metadata-wrapper" id="bkmrk-"><div class="page-metadata"></div></div><div class="page view" id="bkmrk-source%3A%C2%A0https%3A%2F%2Fgitl"><article>Source: [https://gitlab.com/EllenWasbo/inkscape-extension-openpaths](https://gitlab.com/EllenWasbo/inkscape-extension-openpaths)

This extension will open up closed paths by removing all z-commands from the selected paths. Possible purposes: to save single line svg-fonts as otf or ttf fonts. These font formats require closed paths and will add a closing command to the glyphs. This closing can be removed by converting the text to paths, ungroup and then using this extension.

[![grafik.png](https://wiki.stadtfabrikanten.org/uploads/images/gallery/2025-05/scaled-1680-/OYS9mtq8Zw9sGcN9-grafik.png)](https://wiki.stadtfabrikanten.org/uploads/images/gallery/2025-05/OYS9mtq8Zw9sGcN9-grafik.png) [![grafik.png](https://wiki.stadtfabrikanten.org/uploads/images/gallery/2025-05/scaled-1680-/GL9T8v7JjcLwvr1V-grafik.png)](https://wiki.stadtfabrikanten.org/uploads/images/gallery/2025-05/GL9T8v7JjcLwvr1V-grafik.png)

<div class="wiki-content" id="bkmrk--1"></div></article></div>

# Paths To Lowlevel Strokes

<div class="page view" id="bkmrk-this-extensions-does"><article>This extensions does the opposite of "Strokes To Paths"

<div class="wiki-content" id="bkmrk-"></div></article></div>

# Round Corners (Replaced by LPE)

Source: [https://github.com/jnweiger/inkscape-round-corners](https://github.com/jnweiger/inkscape-round-corners)

This extension is similar to the built-in Live Path Effect of InkScape and similar to [Fillet And Chamfer (Replaced by LPE)](https://wiki.stadtfabrikanten.org/books/fablab-chemnitz/page/fillet-and-chamfer-replaced-by-lpe) but it's great advantage is the easy selection of individual path nodes (points) instead the whole path element. More details about this extension can be found in the source repository.

**Warning: the results may be error prone. See [https://github.com/jnweiger/inkscape-round-corners/issues/9](https://github.com/jnweiger/inkscape-round-corners/issues/9)**

## Example

### Draw some path

**[![grafik.png](https://wiki.stadtfabrikanten.org/uploads/images/gallery/2025-05/scaled-1680-/EltkfMDYTKRBgeaP-grafik.png)](https://wiki.stadtfabrikanten.org/uploads/images/gallery/2025-05/EltkfMDYTKRBgeaP-grafik.png)**

### Run the extension and get the result

[![grafik.png](https://wiki.stadtfabrikanten.org/uploads/images/gallery/2025-05/scaled-1680-/cLgXkbCGFlYq8y03-grafik.png)](https://wiki.stadtfabrikanten.org/uploads/images/gallery/2025-05/cLgXkbCGFlYq8y03-grafik.png)

[![grafik.png](https://wiki.stadtfabrikanten.org/uploads/images/gallery/2025-05/scaled-1680-/rMpbAN3ZvAcmiH53-grafik.png)](https://wiki.stadtfabrikanten.org/uploads/images/gallery/2025-05/rMpbAN3ZvAcmiH53-grafik.png)

# Rounder

Round internal SVG data to a fixed decimal positions. Added options to also round stroke width X ,Y, Width and Height, opacity and more. Does only apply to **svg:path** elements.

Source: [<span>https://inkscape.org/~jabiertxof/%E2%98%85rounder-04</span>](https://inkscape.org/~jabiertxof/%E2%98%85rounder-04)

## <span>Draw some example</span>

[![grafik.png](https://wiki.stadtfabrikanten.org/uploads/images/gallery/2025-05/scaled-1680-/42hyfyAbYLrrdBtO-grafik.png)](https://wiki.stadtfabrikanten.org/uploads/images/gallery/2025-05/42hyfyAbYLrrdBtO-grafik.png)

Have a view on the 'd' attribute of the path:

[![grafik.png](https://wiki.stadtfabrikanten.org/uploads/images/gallery/2025-05/scaled-1680-/4TpYNhifIdBd7n9Q-grafik.png)](https://wiki.stadtfabrikanten.org/uploads/images/gallery/2025-05/4TpYNhifIdBd7n9Q-grafik.png)

## Run the extension and get the result

[![grafik.png](https://wiki.stadtfabrikanten.org/uploads/images/gallery/2025-05/scaled-1680-/T7qriWDj7mRTdq5T-grafik.png)](https://wiki.stadtfabrikanten.org/uploads/images/gallery/2025-05/T7qriWDj7mRTdq5T-grafik.png)

Have a view on the 'd' attribute of the path again:

[![grafik.png](https://wiki.stadtfabrikanten.org/uploads/images/gallery/2025-05/scaled-1680-/J0q0Oo0OtngDLTlv-grafik.png)](https://wiki.stadtfabrikanten.org/uploads/images/gallery/2025-05/J0q0Oo0OtngDLTlv-grafik.png)

# Snap Object Points

This effect snaps points in each selected object to nearby points in other selected objects.

Source: [<span>https://inkscape.org/de/~pakin/%E2%98%85snap-object-points</span>](https://inkscape.org/de/~pakin/%E2%98%85snap-object-points)

## Draw some objects

[![grafik.png](https://wiki.stadtfabrikanten.org/uploads/images/gallery/2025-05/scaled-1680-/WCyN7JXKEUbmQmPC-grafik.png)](https://wiki.stadtfabrikanten.org/uploads/images/gallery/2025-05/WCyN7JXKEUbmQmPC-grafik.png)

## Run the extension and get the result

[![grafik.png](https://wiki.stadtfabrikanten.org/uploads/images/gallery/2025-05/scaled-1680-/fjeN4WiMo39zDcf3-grafik.png)](https://wiki.stadtfabrikanten.org/uploads/images/gallery/2025-05/fjeN4WiMo39zDcf3-grafik.png)

[![grafik.png](https://wiki.stadtfabrikanten.org/uploads/images/gallery/2025-05/scaled-1680-/YZUzV6q3BXc0m5wc-grafik.png)](https://wiki.stadtfabrikanten.org/uploads/images/gallery/2025-05/YZUzV6q3BXc0m5wc-grafik.png)

# Music

# Fret Ruler

[![grafik.png](https://wiki.stadtfabrikanten.org/uploads/images/gallery/2025-05/scaled-1680-/byuKzhJSm1ttsu3N-grafik.png)](https://wiki.stadtfabrikanten.org/uploads/images/gallery/2025-05/byuKzhJSm1ttsu3N-grafik.png) [![grafik.png](https://wiki.stadtfabrikanten.org/uploads/images/gallery/2025-05/scaled-1680-/Xs58JO1IBoyNkfGR-grafik.png)](https://wiki.stadtfabrikanten.org/uploads/images/gallery/2025-05/Xs58JO1IBoyNkfGR-grafik.png) [![grafik.png](https://wiki.stadtfabrikanten.org/uploads/images/gallery/2025-05/scaled-1680-/CEU1862z8O4LAhfB-grafik.png)](https://wiki.stadtfabrikanten.org/uploads/images/gallery/2025-05/CEU1862z8O4LAhfB-grafik.png) [![grafik.png](https://wiki.stadtfabrikanten.org/uploads/images/gallery/2025-05/scaled-1680-/qwPVsgUELqmixSdt-grafik.png)](https://wiki.stadtfabrikanten.org/uploads/images/gallery/2025-05/qwPVsgUELqmixSdt-grafik.png) [![grafik.png](https://wiki.stadtfabrikanten.org/uploads/images/gallery/2025-05/scaled-1680-/fMuo3r1ZavzTT8Ix-grafik.png)](https://wiki.stadtfabrikanten.org/uploads/images/gallery/2025-05/fMuo3r1ZavzTT8Ix-grafik.png) [![grafik.png](https://wiki.stadtfabrikanten.org/uploads/images/gallery/2025-05/scaled-1680-/CjRHhEsVhJ6OFDGc-grafik.png)](https://wiki.stadtfabrikanten.org/uploads/images/gallery/2025-05/CjRHhEsVhJ6OFDGc-grafik.png)

## Example Output

[![grafik.png](https://wiki.stadtfabrikanten.org/uploads/images/gallery/2025-05/scaled-1680-/jWIPImknLUNmoBQX-grafik.png)](https://wiki.stadtfabrikanten.org/uploads/images/gallery/2025-05/jWIPImknLUNmoBQX-grafik.png)

# Guitar Fretboard

Source: [<span>https://github.com/tomate44/GuitarFretboard</span>](https://github.com/tomate44/GuitarFretboard)

[![grafik.png](https://wiki.stadtfabrikanten.org/uploads/images/gallery/2025-05/scaled-1680-/tTopcGNHo23SMDV7-grafik.png)](https://wiki.stadtfabrikanten.org/uploads/images/gallery/2025-05/tTopcGNHo23SMDV7-grafik.png)

[![grafik.png](https://wiki.stadtfabrikanten.org/uploads/images/gallery/2025-05/scaled-1680-/zlr15CjtUk59pI2E-grafik.png)](https://wiki.stadtfabrikanten.org/uploads/images/gallery/2025-05/zlr15CjtUk59pI2E-grafik.png)

# Piano Scale

Source: [https://inkscape.org/~Neon22/%E2%98%85pianoscale](https://inkscape.org/~Neon22/%E2%98%85pianoscale)

[![grafik.png](https://wiki.stadtfabrikanten.org/uploads/images/gallery/2025-05/scaled-1680-/O4cGkxVyy1Gh2RwW-grafik.png)](https://wiki.stadtfabrikanten.org/uploads/images/gallery/2025-05/O4cGkxVyy1Gh2RwW-grafik.png)

[![grafik.png](https://wiki.stadtfabrikanten.org/uploads/images/gallery/2025-05/scaled-1680-/Q7yfhQHmUOq1fKMN-grafik.png)](https://wiki.stadtfabrikanten.org/uploads/images/gallery/2025-05/Q7yfhQHmUOq1fKMN-grafik.png)

# Open Current File Directory

Similar to [Open Extension Directory](https://wiki.stadtfabrikanten.org/books/fablab-chemnitz/page/open-extension-directory "Open Extension Directory")

# Open Extension Directory

<div class="page view" id="bkmrk-just-what-it-says-to"><article>Just what it says to be! ... Opens the MightyScape main folder.

Similar to [Open Current File Directory](https://wiki.stadtfabrikanten.org/books/fablab-chemnitz/page/open-current-file-directory).

<div class="wiki-content" id="bkmrk-"></div></article></div>

# PathOps

A tool suite to run boolean operations multiple times, like Combine, Cut Path, Division, Exclusion, Intersection, Difference, Union. This extension takes a selection of one or more groups, or of several elements (paths, shapes, text), or a mix of both, and applies a chosen path operation with the top-most valid object in paint order and each other valid object which is part of the selection (directly or as member of a processed group) that is lower in Z-order. Objects which are considered "valid" for path operations are paths, shapes and text. Other graphic elements like clones or bitmap images are silently ignored.

More info about the usage can be found at [<span>https://gitlab.com/moini\_ink/inx-pathops</span>](https://gitlab.com/moini_ink/inx-pathops)

[![grafik.png](https://wiki.stadtfabrikanten.org/uploads/images/gallery/2025-02/scaled-1680-/tIH9CSej0bkHGPWC-grafik.png)](https://wiki.stadtfabrikanten.org/uploads/images/gallery/2025-02/tIH9CSej0bkHGPWC-grafik.png)

# Paths - Cut/Intersect/Purge

# Contour Scanner And Trimmer

## Scanning

This tool helps you to find nasty contours which might bug you and prevent your work from being ready for production. It will find open contours, closed contours and self-intersecting contours and checks for a set of other attributes. [Bentley-Ottmann algorithm](https://github.com/ideasman42/isect_segments-bentley_ottmann) is used to check for those intersections. The algorithm works with the accuracy of the selected paths (epsilons). Self-intersections usually happen if you just have large overlaps where the contour crosses itself like an 'eight' character for example. Using the highlighting it's easy to find contours with unproper path handles. While in a CAD system an area of of a surface can only be calculated if the contour is closed and clean, finding self intersections in Inkscape is not required to do so. SVG format allows to calculate areas on open contours and self-twisted curves. This "artwork behaviour" makes it harder for handling machinery-like drawings for laser cutting, vinyl cutting or whatever. That's why we need to have extra sanity checks but we also have the great freedom of InkScape.

Finding self-intersecting contours does only work for curves with straight line segments (polylines) because it just calculates with a set of given XY points. It does not respect bezier curve segments. Bezier curves have no regular points but special handles, which define the slope of the curve per handle side (left and right). To properly handle a bezier curve we need to split the bezier curve in a lot of small linear lines (acting like infinitessimal solution). We can use the tool [Approximate Curves by Straight Lines (Flatten Beziers)](https://wiki.stadtfabrikanten.org/books/in-house-extensions/page/approximate-curves-by-straight-lines-flatten-beziers "Approximate Curves by Straight Lines (Flatten Beziers)") to do this by hand or we use the built-in method if Contour Scanner and Trimmer (will make your curve looking edgy or ugly possible). If you want to leave the shape of the line clean (bezier type, no edgy approximation) we can also use [Split Bezier (Subdivide Path)](https://wiki.stadtfabrikanten.org/books/fablab-chemnitz/page/split-bezier-subdivide-path "Split Bezier (Subdivide Path)") or [Add Nodes](https://wiki.stadtfabrikanten.org/books/in-house-extensions/page/add-nodes) instead. But remember that your calculated self-intersection points will only be an approximation then. The higher the subdivide count is the higher the precision of the calculated self-intersecting points coordinates will be.

After performing operations, which flatten or split the bezier curve, we we can or should use [Chain Paths](https://wiki.stadtfabrikanten.org/books/fablab-chemnitz/page/chain-paths) to put the pieces together again.

## Trimming

By having a set of flattened straight line and finding global intersections we can also trim the paths using python library called "shapely". This allows to receive cut segments. Some basic tools to remove duplicates, are integrated.

## The result

Using Contour Scanner correctly, we get a planar graph style drawing, like the definition gives: "In graph theory, a planar graph is a graph that can be embedded in the plane, i.e., it can be drawn on the plane in such a way that its edges intersect only at their endpoints. In other words, **it can be drawn in such a way that no edges cross each other**. Such a drawing is called a plane graph or planar embedding of the graph. A plane graph can be defined as a planar graph with a mapping from every node to a point on a plane, and from every edge to a plane curve on that plane, such that the extreme points of each curve are the points mapped from its end nodes, and all curves are disjoint except on their extreme points. " ([https://en.wikipedia.org/wiki/Planar\_graph](https://en.wikipedia.org/wiki/Planar_graph))

## Tips

- If nothings is selected, the whole document will be processed, regardless of groups. In contrast, if you made a custom selection, check to handle or not to handle groups.
- Works with paths which have Live Path Effects (LPE)
- Convert your strokes and objects to paths before
- Does not work for clones. You will need to unlink them before
- Use extensions to filter short/unrequired paths
- Use extensions to purge or repair invalid paths
- Use 'Path → Simplify' or hit 'CTRL + L' to simplify the trimmed result. With a fine quantization setting the simplified paths will be nearly identical to the original path (except the position of control points)
- Do not select too much paths at once if you have got a fine settings for quantization. This extension is slow and might calculate hours on ultra high configurations.

## See also (similar extensions)

- [Incadiff](https://wiki.stadtfabrikanten.org/books/fablab-chemnitz/page/incadiff)
- [Occult Plugin (Hidden / Superimposed Line Removal)](https://wiki.stadtfabrikanten.org/books/fablab-chemnitz/page/occult-plugin-hidden-superimposed-line-removal)
- [Purge Duplicate Path Nodes](https://wiki.stadtfabrikanten.org/books/fablab-chemnitz/page/purge-duplicate-path-nodes)
- [Purge Duplicate Path Segments](https://wiki.stadtfabrikanten.org/books/fablab-chemnitz/page/purge-duplicate-path-segments)
- [Purge Pointy Paths](https://wiki.stadtfabrikanten.org/books/fablab-chemnitz/page/purge-pointy-paths)
- [Mutual Cut Line](https://wiki.stadtfabrikanten.org/books/fablab-chemnitz/page/mutual-cut-line)
- [Convert To Polylines](https://wiki.stadtfabrikanten.org/books/fablab-chemnitz/page/convert-to-polylines)
- [Deduplicate Plugin](https://wiki.stadtfabrikanten.org/books/fablab-chemnitz/page/deduplicate-plugin)

## The user interface

[![grafik.png](https://wiki.stadtfabrikanten.org/uploads/images/gallery/2025-05/scaled-1680-/JUAPRpiXEqvh3L2u-grafik.png)](https://wiki.stadtfabrikanten.org/uploads/images/gallery/2025-05/JUAPRpiXEqvh3L2u-grafik.png) [![grafik.png](https://wiki.stadtfabrikanten.org/uploads/images/gallery/2025-05/scaled-1680-/fAUGqwpW81opci7O-grafik.png)](https://wiki.stadtfabrikanten.org/uploads/images/gallery/2025-05/fAUGqwpW81opci7O-grafik.png) [![grafik.png](https://wiki.stadtfabrikanten.org/uploads/images/gallery/2025-05/scaled-1680-/Ipci7ZyyOm4HoPC8-grafik.png)](https://wiki.stadtfabrikanten.org/uploads/images/gallery/2025-05/Ipci7ZyyOm4HoPC8-grafik.png) [![grafik.png](https://wiki.stadtfabrikanten.org/uploads/images/gallery/2025-05/scaled-1680-/fumAPZcNrzbFz1vc-grafik.png)](https://wiki.stadtfabrikanten.org/uploads/images/gallery/2025-05/fumAPZcNrzbFz1vc-grafik.png) [![grafik.png](https://wiki.stadtfabrikanten.org/uploads/images/gallery/2025-05/scaled-1680-/1w42sLkDrsFRAIoo-grafik.png)](https://wiki.stadtfabrikanten.org/uploads/images/gallery/2025-05/1w42sLkDrsFRAIoo-grafik.png)

## Quick example

Using Contour Scanner and Trimmer we can check the different contours and their behaviour. Usually a contour can be open or closed and it can intersect with itself or not. This will give us 4 different combinations and we can use this information to find out where the intersections are using Bentley-Ottmann algorithm. Short examples:

<table border="1" id="bkmrk-4-different-basic-li" style="border-collapse: collapse; width: 99.9734%;"><colgroup><col style="width: 49.9668%;"></col><col style="width: 49.9668%;"></col></colgroup><thead><tr><td>**4 different basic line "types"**</td><td>**Marked paths by running the extension using colors and dot modifiers**</td></tr></thead><tbody><tr><td>[![grafik.png](https://wiki.stadtfabrikanten.org/uploads/images/gallery/2025-05/scaled-1680-/xxHPLGvrSXWzRuD1-grafik.png)](https://wiki.stadtfabrikanten.org/uploads/images/gallery/2025-05/xxHPLGvrSXWzRuD1-grafik.png)

</td><td>[![grafik.png](https://wiki.stadtfabrikanten.org/uploads/images/gallery/2025-05/scaled-1680-/GlY381ReaeqrNo5a-grafik.png)](https://wiki.stadtfabrikanten.org/uploads/images/gallery/2025-05/GlY381ReaeqrNo5a-grafik.png)

</td></tr></tbody></table>

## Real example

### Load sove graphic you want to fix

Depending on the steps you want to perform with the file maybe create some duplicate.

[![grafik.png](https://wiki.stadtfabrikanten.org/uploads/images/gallery/2025-05/scaled-1680-/6Gb0Iu84eHD9RCuH-grafik.png)](https://wiki.stadtfabrikanten.org/uploads/images/gallery/2025-05/6Gb0Iu84eHD9RCuH-grafik.png)

### Run the extension

Configure the setting depending on what you want.

[![grafik.png](https://wiki.stadtfabrikanten.org/uploads/images/gallery/2025-05/scaled-1680-/gOD4GTVkV73TFAfS-grafik.png)](https://wiki.stadtfabrikanten.org/uploads/images/gallery/2025-05/gOD4GTVkV73TFAfS-grafik.png)

### Fix the desired paths

Select the path to see the handles. The dot indicates that there might be something faulty. In the following example there are two handles at the same coordinate. We can pick one of them to drag it away from the other one. You can now delete the marking point

[![grafik.png](https://wiki.stadtfabrikanten.org/uploads/images/gallery/2025-05/scaled-1680-/g1G7T6gfbw6P701u-grafik.png)](https://wiki.stadtfabrikanten.org/uploads/images/gallery/2025-05/g1G7T6gfbw6P701u-grafik.png) [![grafik.png](https://wiki.stadtfabrikanten.org/uploads/images/gallery/2025-05/scaled-1680-/ATpKCgtzJgwAH6QH-grafik.png)](https://wiki.stadtfabrikanten.org/uploads/images/gallery/2025-05/ATpKCgtzJgwAH6QH-grafik.png)

After rerunning the extension the dot will not appear again:

[![grafik.png](https://wiki.stadtfabrikanten.org/uploads/images/gallery/2025-05/scaled-1680-/WYYv74dAZhBEufig-grafik.png)](https://wiki.stadtfabrikanten.org/uploads/images/gallery/2025-05/WYYv74dAZhBEufig-grafik.png)

## Overlapping lines

Contour Scanner is powerful. It can find and merge overlapping lines in the set of flattened sub split lines. We find those line intersections between lines where the same slope exists and which cover each other fully or partially (collinear overlapping lines). See the graphic to understand the problem.

<p class="callout info">At the moment Contour Scanner cannot remove those overlaps in original paths.</p>

[![grafik.png](https://wiki.stadtfabrikanten.org/uploads/images/gallery/2025-05/scaled-1680-/fUPrvEqKDwK1KnXk-grafik.png)](https://wiki.stadtfabrikanten.org/uploads/images/gallery/2025-05/fUPrvEqKDwK1KnXk-grafik.png)

From left to right:

- 1st: path 1 is equal to path 2 (they share start point and end point and have the same direction)
- 2nd: path 1 and path 2 share direction, but not the start or end points
- 3rd: path 1 and path 2 share one point and direction
- 4rd: multiple overlapping lones

## Issues

**Trimming bezier curves**

There is no algorithm done to split the original bezier curve after finding intersection points and t parameters yet.

[![grafik.png](https://wiki.stadtfabrikanten.org/uploads/images/gallery/2025-05/scaled-1680-/UcWxQCJc1Ok064uI-grafik.png)](https://wiki.stadtfabrikanten.org/uploads/images/gallery/2025-05/UcWxQCJc1Ok064uI-grafik.png)
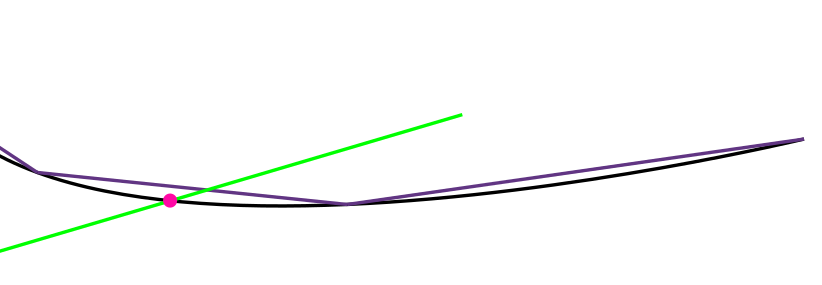
- green = a cutting line
- black = original bezier curve
- purple = approximated polyline
- magenta = intersection point between cutting line and original path (the intersection between cutting line and approximated curve would be far away as you can see)

# Create Links (Breakaway Connectors)

To create tabs in Inkscape, we cannot properly use the integrated eraser tool. It will clip only in a cosmetic fashion but we do not get the real paths we need. Creating links (also known as *microtabs, tabs, bridges, breakaway connectors, links*, *perforations)* is sometimes required for laser cutting or vinyl cutting. This extension allows to pinch paths to create according segments - no cosmetic one's, but real segments. It will split up open or closed contours with user defined rules. To get best output please try to close open paths before using. This extensions is ideal to cut cloth/textile stuff in the laser!

<p class="callout info">Also have a look at</p>

- [Convert to Dashes](https://wiki.stadtfabrikanten.org/books/in-house-extensions/page/convert-to-dashes)
- [Lasercut bridges without using extensions](https://old.stadtfabrikanten.org/display/IFM/Lasercut+bridges+without+using+extensions)
- [Ein- und Auslaufschnitte, Stege, Brücken, Laschen, Perforationen](https://old.stadtfabrikanten.org/pages/viewpage.action?pageId=55019931)

[![grafik.png](https://wiki.stadtfabrikanten.org/uploads/images/gallery/2025-05/scaled-1680-/PzZhsU4tNKwNe1aa-grafik.png)](https://wiki.stadtfabrikanten.org/uploads/images/gallery/2025-05/PzZhsU4tNKwNe1aa-grafik.png)
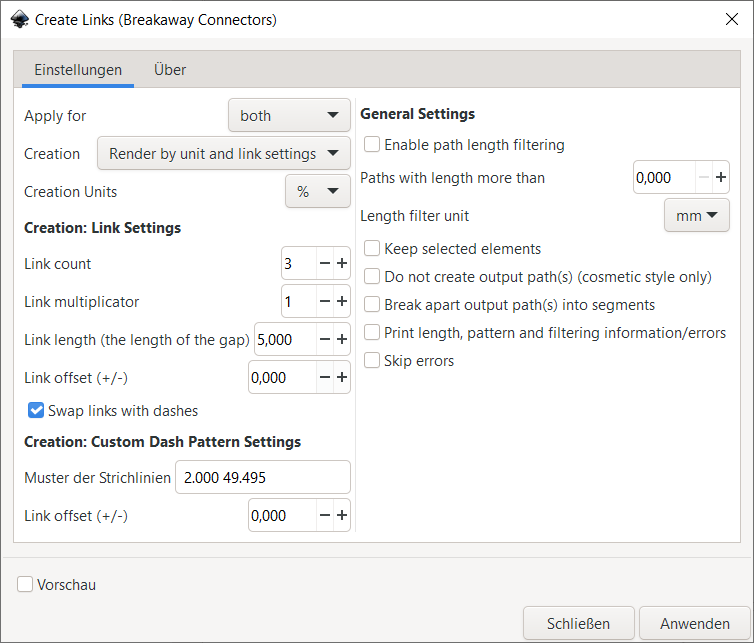
## Draw some contours

[![grafik.png](https://wiki.stadtfabrikanten.org/uploads/images/gallery/2025-05/scaled-1680-/xJ5oB0XzNjiAerDR-grafik.png)](https://wiki.stadtfabrikanten.org/uploads/images/gallery/2025-05/xJ5oB0XzNjiAerDR-grafik.png)
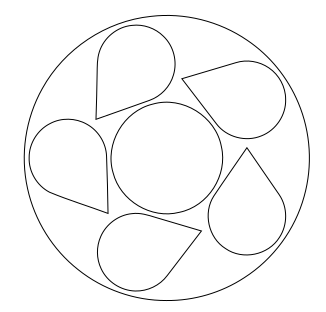
## Run the extension and get result

[![grafik.png](https://wiki.stadtfabrikanten.org/uploads/images/gallery/2025-05/scaled-1680-/QynstOa6PaLaayry-grafik.png)](https://wiki.stadtfabrikanten.org/uploads/images/gallery/2025-05/QynstOa6PaLaayry-grafik.png)
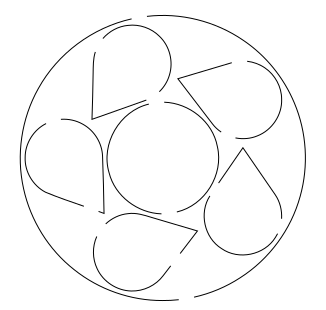
## Known issues

The path is not split up? Then please check if your path contains any connected Live Path Effect (LEP) which is associated with it. Like this:

[![grafik.png](https://wiki.stadtfabrikanten.org/uploads/images/gallery/2025-05/scaled-1680-/wRfLqmQvWPeYL8VW-grafik.png)](https://wiki.stadtfabrikanten.org/uploads/images/gallery/2025-05/wRfLqmQvWPeYL8VW-grafik.png)
You can remove it by using [Apply Transformations](https://wiki.stadtfabrikanten.org/books/fablab-chemnitz/page/apply-transformations) extension for example.

## Further development

<p class="callout info">See [https://wiki.selfhtml.org/wiki/SVG/Farben/Kontur](https://wiki.selfhtml.org/wiki/SVG/Farben/Kontur) and [https://svgwg.org/specs/strokes/#StrokeDashing](https://svgwg.org/specs/strokes/#StrokeDashing)</p>

Create Links Extension does not support **stroke-dashadjust** SVG attribute yet. But if it is implemented in Inkscape, we can adjust the dash pattern

- none: default value
- **stretch**: if the pattern does not fully merge into the path length, strokes and gaps are stretched
- **compress**: if the pattern does not fully merge into the path length, strokes and gaps are compressed
- **dashes**: If the pattern does not fully merge into the path length, dashes are adjusted, gaps remain in the selected setting
- **gaps**: if the pattern does not fully merge into the path length, gaps are adjusted, strokes remain in the selected setting

# Destructive Clip

An Inkscape Extension which works like Object|Clip|Set except that the paths clipped are actually **modified**. Thus the clipping is included when exported, for example as a DXF file. Select two or more **paths** then choose Extensions|Modify path|Destructive clip. The topmost path will be used to clip the others.

## Make some path and draw clipping border

<p class="callout warning">Curves (including Arcs) in paths are not supported (use Extensions → Modify path → Flatten Beziers) and non-path objects in the selection will be ignored. Use Object → Ungroup.</p>

Maybe you need to combine multiple contours with CTRL + K before running the extension

[![grafik.png](https://wiki.stadtfabrikanten.org/uploads/images/gallery/2025-05/scaled-1680-/4VBhn23bSNQaRumJ-grafik.png)](https://wiki.stadtfabrikanten.org/uploads/images/gallery/2025-05/4VBhn23bSNQaRumJ-grafik.png)
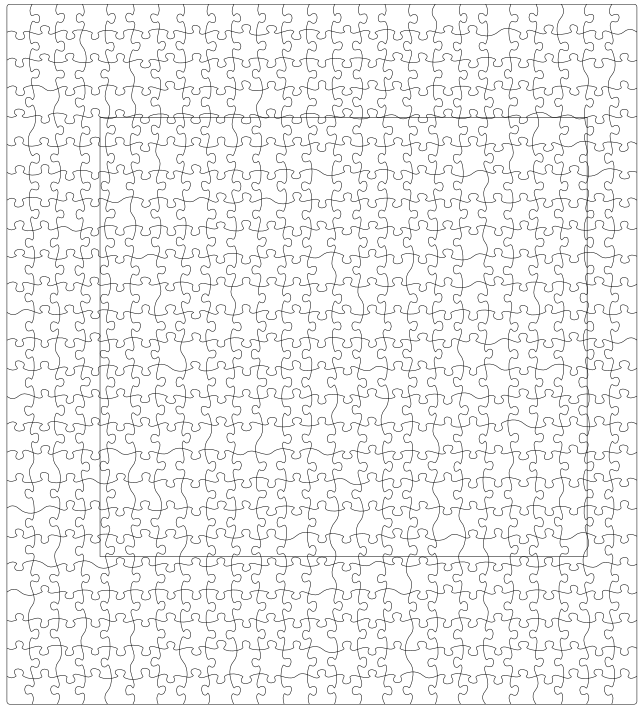
## Run the extension and get the result

The order of selection defines what is clipped by which contour.

[![grafik.png](https://wiki.stadtfabrikanten.org/uploads/images/gallery/2025-05/scaled-1680-/XYD2SZTV9oE1i1Sf-grafik.png)](https://wiki.stadtfabrikanten.org/uploads/images/gallery/2025-05/XYD2SZTV9oE1i1Sf-grafik.png)
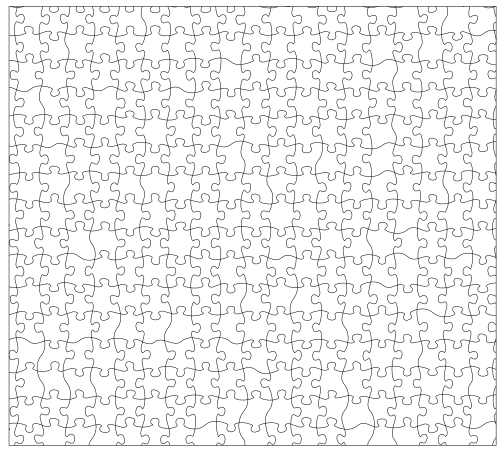
# Filter By Length/Area

Paths with value smaller than the given threshold will be deleted. This extension might require to break up your object before.

## Take some image

<p class="callout info">This is not a good example but shows the effect</p>

[![grafik.png](https://wiki.stadtfabrikanten.org/uploads/images/gallery/2025-05/scaled-1680-/plj3pE8Dfej8UKRL-grafik.png)](https://wiki.stadtfabrikanten.org/uploads/images/gallery/2025-05/plj3pE8Dfej8UKRL-grafik.png)

## Run the extension

[![grafik.png](https://wiki.stadtfabrikanten.org/uploads/images/gallery/2025-05/scaled-1680-/lXGwFg3nvK0bgIYA-grafik.png)](https://wiki.stadtfabrikanten.org/uploads/images/gallery/2025-05/lXGwFg3nvK0bgIYA-grafik.png)
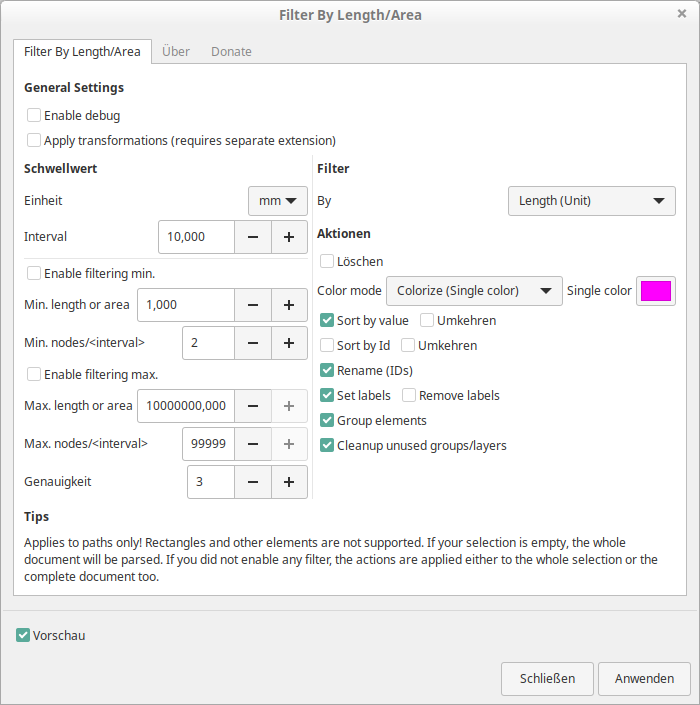
## Result

[![grafik.png](https://wiki.stadtfabrikanten.org/uploads/images/gallery/2025-05/scaled-1680-/hnYpkEwjmNGgzH3e-grafik.png)](https://wiki.stadtfabrikanten.org/uploads/images/gallery/2025-05/hnYpkEwjmNGgzH3e-grafik.png)
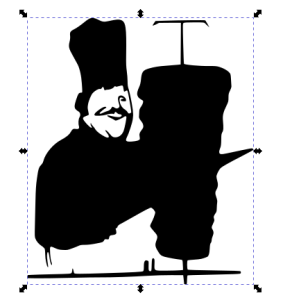
# Incadiff

An Inkscape extension which applies successive difference operations on superimposed paths. Useful for plotter addicts as it removes hidden strokes. Incadiff works on paths and objects. It does not work for open paths. Incadiff does not operate like [Contour Scanner And Trimmer](https://wiki.stadtfabrikanten.org/books/fablab-chemnitz/page/contour-scanner-and-trimmer) and it does not remove duplicate lines if existing.

See also

- [PathOps](https://wiki.stadtfabrikanten.org/books/fablab-chemnitz/page/pathops)
- [Mutual Cut Line](https://wiki.stadtfabrikanten.org/books/fablab-chemnitz/page/mutual-cut-line)
- [Contour Scanner And Trimmer](https://wiki.stadtfabrikanten.org/books/fablab-chemnitz/page/contour-scanner-and-trimmer)
- [Purge Duplicate Path Segments](https://wiki.stadtfabrikanten.org/books/fablab-chemnitz/page/purge-duplicate-path-segments)

Source: [https://github.com/incaya/incadiff](https://github.com/incaya/incadiff)

[![grafik.png](https://wiki.stadtfabrikanten.org/uploads/images/gallery/2025-05/scaled-1680-/DyVaLMo9RiW6Qb58-grafik.png)](https://wiki.stadtfabrikanten.org/uploads/images/gallery/2025-05/DyVaLMo9RiW6Qb58-grafik.png)
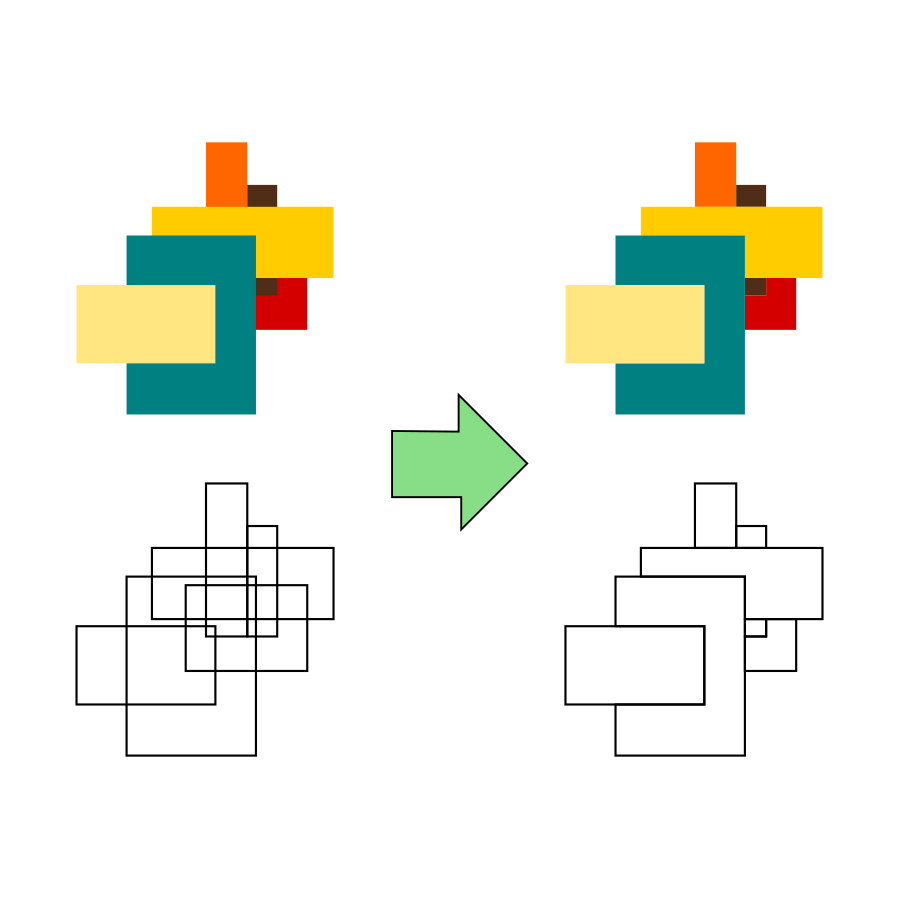
# Mutual Cut Line

This extension cuts exactly 2 (ideally straight) path segments and will create intersected elements. Depending on the path direction (which can be reversed) the ends are going to be cut against each other

## Draw some paths

[![grafik.png](https://wiki.stadtfabrikanten.org/uploads/images/gallery/2025-05/scaled-1680-/b6rzts01ZJrmhkwV-grafik.png)](https://wiki.stadtfabrikanten.org/uploads/images/gallery/2025-05/b6rzts01ZJrmhkwV-grafik.png)
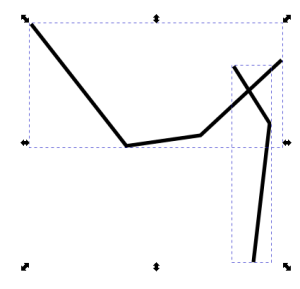
## Duplicate the paths (CTRL + D) and give some different color

This step is optional but helps to understand what's going on here

[![grafik.png](https://wiki.stadtfabrikanten.org/uploads/images/gallery/2025-05/scaled-1680-/7H4I5TudwDIgjgot-grafik.png)](https://wiki.stadtfabrikanten.org/uploads/images/gallery/2025-05/7H4I5TudwDIgjgot-grafik.png)
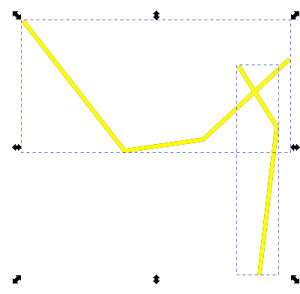
## Check the result

We repeat the previous step and this step for all variants to show the possible outputs. You can reverse the path using "Path → Reverse"

<table border="1" id="bkmrk-two-regular-paths-fi" style="border-collapse: collapse; width: 99.9734%; height: 111.35px;"><colgroup><col style="width: 20%;"></col><col style="width: 20%;"></col><col style="width: 20%;"></col><col style="width: 20%;"></col><col style="width: 20%;"></col></colgroup><thead><tr style="height: 35.1167px;"><td style="height: 35.1167px;">  
</td><td style="height: 35.1167px;">**Two regular paths**</td><td style="height: 35.1167px;">**First and second path reversed**</td><td style="height: 35.1167px;">**First path reversed**</td><td style="height: 35.1167px;">**Second path reversed**</td></tr></thead><tbody><tr style="height: 38.1167px;"><td style="height: 38.1167px;">Output with original as overlap</td><td style="height: 38.1167px;">[![grafik.png](https://wiki.stadtfabrikanten.org/uploads/images/gallery/2025-05/scaled-1680-/6xyCfCV3R5y6Nh4o-grafik.png)](https://wiki.stadtfabrikanten.org/uploads/images/gallery/2025-05/6xyCfCV3R5y6Nh4o-grafik.png)

</td><td style="height: 38.1167px;">[![grafik.png](https://wiki.stadtfabrikanten.org/uploads/images/gallery/2025-05/scaled-1680-/Tg05ckr8hDzvTFH2-grafik.png)](https://wiki.stadtfabrikanten.org/uploads/images/gallery/2025-05/Tg05ckr8hDzvTFH2-grafik.png)

</td><td style="height: 38.1167px;">[![grafik.png](https://wiki.stadtfabrikanten.org/uploads/images/gallery/2025-05/scaled-1680-/XEgewf2pZ7fYwjQb-grafik.png)](https://wiki.stadtfabrikanten.org/uploads/images/gallery/2025-05/XEgewf2pZ7fYwjQb-grafik.png)

</td><td style="height: 38.1167px;">[![grafik.png](https://wiki.stadtfabrikanten.org/uploads/images/gallery/2025-05/scaled-1680-/f1slLSJRaQKorpsA-grafik.png)](https://wiki.stadtfabrikanten.org/uploads/images/gallery/2025-05/f1slLSJRaQKorpsA-grafik.png)

</td></tr><tr style="height: 38.1167px;"><td style="height: 38.1167px;">Result only</td><td style="height: 38.1167px;">[![grafik.png](https://wiki.stadtfabrikanten.org/uploads/images/gallery/2025-05/scaled-1680-/xcJNRRvhyy0DdkXd-grafik.png)](https://wiki.stadtfabrikanten.org/uploads/images/gallery/2025-05/xcJNRRvhyy0DdkXd-grafik.png)

</td><td style="height: 38.1167px;">[![grafik.png](https://wiki.stadtfabrikanten.org/uploads/images/gallery/2025-05/scaled-1680-/PWyokZBHxJiRquRj-grafik.png)](https://wiki.stadtfabrikanten.org/uploads/images/gallery/2025-05/PWyokZBHxJiRquRj-grafik.png)

</td><td style="height: 38.1167px;">[![grafik.png](https://wiki.stadtfabrikanten.org/uploads/images/gallery/2025-05/scaled-1680-/iwIDznEfBQngYyEo-grafik.png)](https://wiki.stadtfabrikanten.org/uploads/images/gallery/2025-05/iwIDznEfBQngYyEo-grafik.png)

</td><td style="height: 38.1167px;">[![grafik.png](https://wiki.stadtfabrikanten.org/uploads/images/gallery/2025-05/scaled-1680-/tuXYDXMIT6dDNTFk-grafik.png)](https://wiki.stadtfabrikanten.org/uploads/images/gallery/2025-05/tuXYDXMIT6dDNTFk-grafik.png)

</td></tr></tbody></table>

# Path Intersections

In case your resulting intersection markings are displaced please run [Apply Transformations](https://wiki.stadtfabrikanten.org/books/fablab-chemnitz/page/apply-transformations) before running this.

## Draw some example with intersecting paths

[![grafik.png](https://wiki.stadtfabrikanten.org/uploads/images/gallery/2025-05/scaled-1680-/8KltVsQ1QQ42hwv3-grafik.png)](https://wiki.stadtfabrikanten.org/uploads/images/gallery/2025-05/8KltVsQ1QQ42hwv3-grafik.png)

## Run the extension

[![grafik.png](https://wiki.stadtfabrikanten.org/uploads/images/gallery/2025-05/scaled-1680-/TTe8CGZDimyn41dh-grafik.png)](https://wiki.stadtfabrikanten.org/uploads/images/gallery/2025-05/TTe8CGZDimyn41dh-grafik.png)

## Check the intersections

[![grafik.png](https://wiki.stadtfabrikanten.org/uploads/images/gallery/2025-05/scaled-1680-/dmt4e8yi3NuoxbT7-grafik.png)](https://wiki.stadtfabrikanten.org/uploads/images/gallery/2025-05/dmt4e8yi3NuoxbT7-grafik.png)

# Purge Duplicate Path Nodes

[<span>https://gitlab.com/EllenWasbo/inkscape-extension-removeduplicatenodes</span>](https://gitlab.com/EllenWasbo/inkscape-extension-removeduplicatenodes)

[![grafik.png](https://wiki.stadtfabrikanten.org/uploads/images/gallery/2025-05/scaled-1680-/tznqWjdCakpl8OEJ-grafik.png)](https://wiki.stadtfabrikanten.org/uploads/images/gallery/2025-05/tznqWjdCakpl8OEJ-grafik.png)

# Annotation belonging to the lines

This extension might turn straight lines into strange looking "d" content like the following

```bash
#using the extension will make
m 47.127583,101.78891 h 9.944022 z
 
#to
M 47.1276 101.789 C 47.1276 101.789 57.0716 101.789 57.0716 101.789 C 57.0716 101.789 47.1276 101.789 47.1276 101.789 Z
 
#selecting the line and moving it up/down/left/right will turn it into
m 47.1276,101.789 c 0,0 9.944,0 9.944,0 0,0 -9.944,0 -9.944,0 z
```

# Purge Duplicate Path Segments

A common problem while laser cutting or vinyl cutting for example, is the problem with duplicating lines which are overlapping invisibly. Often you won't find them in your drawing. If you use graphics without filtered duplications you might run into issues like burnt edges, rough-cut edges, long running cutting processes, etc.

This plugin removes duplicates from paths with respect to their type (bezier or straight line segments). Please note that **maybe you need to combine all lines/paths to one common path** to make this work. So this plugin is ideal to remove common edges like professional nesting software is doing too.

**Key phrases: remove overlapping lines, remove duplicated lines, purge redundant lines, purge doubled lines, remove common edges, remove occulted lines, hidden line removal, retrace edges, chain paths, clean paths**

## Annotation belonging to the lines

This extension also helps removing straight line duplications where start or end point is duplicated by using "z" or "Z" in "d" descriptor, which invokes a closing contour, like the following

```bash
#turns
m 47.127583,101.78891 h 9.944022 z
 
#into
M 47.1276 101.789 L 57.0716 101.789
```

## Example on how to remove duplicates

### Draw a line and copy/paste it

[![grafik.png](https://wiki.stadtfabrikanten.org/uploads/images/gallery/2025-05/scaled-1680-/bvcGX7ss0bEnyeKG-grafik.png)](https://wiki.stadtfabrikanten.org/uploads/images/gallery/2025-05/bvcGX7ss0bEnyeKG-grafik.png)

[![grafik.png](https://wiki.stadtfabrikanten.org/uploads/images/gallery/2025-05/scaled-1680-/CjoVmnSF12T9oiZA-grafik.png)](https://wiki.stadtfabrikanten.org/uploads/images/gallery/2025-05/CjoVmnSF12T9oiZA-grafik.png)

for each line a path 'd' is defined:

[![grafik.png](https://wiki.stadtfabrikanten.org/uploads/images/gallery/2025-05/scaled-1680-/9jcuofiBbfiR0FAb-grafik.png)](https://wiki.stadtfabrikanten.org/uploads/images/gallery/2025-05/9jcuofiBbfiR0FAb-grafik.png)

### Make the paths overlapping visually (to enforce having some example of duplicated, invisible path)

[![grafik.png](https://wiki.stadtfabrikanten.org/uploads/images/gallery/2025-05/scaled-1680-/xsRO0gcE3bumpmdO-grafik.png)](https://wiki.stadtfabrikanten.org/uploads/images/gallery/2025-05/xsRO0gcE3bumpmdO-grafik.png)

[![grafik.png](https://wiki.stadtfabrikanten.org/uploads/images/gallery/2025-05/scaled-1680-/NRqs1Cug1ntRNBzk-grafik.png)](https://wiki.stadtfabrikanten.org/uploads/images/gallery/2025-05/NRqs1Cug1ntRNBzk-grafik.png)

### Combine the lines (Ctrl + K)

[![grafik.png](https://wiki.stadtfabrikanten.org/uploads/images/gallery/2025-05/scaled-1680-/oTpgNUodBKuVR5B4-grafik.png)](https://wiki.stadtfabrikanten.org/uploads/images/gallery/2025-05/oTpgNUodBKuVR5B4-grafik.png)

The path is now duplicated. See entry 'd' - this is repeated

### Run the extension

Now check the XML element tree to see the cleaned up path

[![grafik.png](https://wiki.stadtfabrikanten.org/uploads/images/gallery/2025-05/scaled-1680-/pOYQUnJRUfZEQm7x-grafik.png)](https://wiki.stadtfabrikanten.org/uploads/images/gallery/2025-05/pOYQUnJRUfZEQm7x-grafik.png)

## Real example and known limitation(s)

### Get some parts you want to optimize by rearranging and removing common edges

[![grafik.png](https://wiki.stadtfabrikanten.org/uploads/images/gallery/2025-05/scaled-1680-/eOLOCMWhdNyy1cog-grafik.png)](https://wiki.stadtfabrikanten.org/uploads/images/gallery/2025-05/eOLOCMWhdNyy1cog-grafik.png)

### Check the node count

Calculate the total number of nodes by clicking through XML tree and noting down the nodes count. We use this information to check how good we can reduce the duplicates in the drawing.

[![grafik.png](https://wiki.stadtfabrikanten.org/uploads/images/gallery/2025-05/scaled-1680-/Q3y8mKR07PODeeTi-grafik.png)](https://wiki.stadtfabrikanten.org/uploads/images/gallery/2025-05/Q3y8mKR07PODeeTi-grafik.png)

[![grafik.png](https://wiki.stadtfabrikanten.org/uploads/images/gallery/2025-05/scaled-1680-/irwWOTPOR9p4AkhO-grafik.png)](https://wiki.stadtfabrikanten.org/uploads/images/gallery/2025-05/irwWOTPOR9p4AkhO-grafik.png)

For this example we have 13 paths witha total of 38 \* 5 + 21 \*8 = 358 nodes

### Check the total line length

We can also get a goodcomparison by measuring the total length of all paths before and after purging duplicate lines.

[![grafik.png](https://wiki.stadtfabrikanten.org/uploads/images/gallery/2025-05/scaled-1680-/NE0ORrrGjQQX0wfh-grafik.png)](https://wiki.stadtfabrikanten.org/uploads/images/gallery/2025-05/NE0ORrrGjQQX0wfh-grafik.png)

### Rearrange and combine all paths

CTRL + K to combine the things. You might need to ungroup all items before.

[![grafik.png](https://wiki.stadtfabrikanten.org/uploads/images/gallery/2025-05/scaled-1680-/jfLrGlX0iE8sStdd-grafik.png)](https://wiki.stadtfabrikanten.org/uploads/images/gallery/2025-05/jfLrGlX0iE8sStdd-grafik.png)

### Run the extension and get the result

[![grafik.png](https://wiki.stadtfabrikanten.org/uploads/images/gallery/2025-05/scaled-1680-/FaIUCynwdnCrbvZ5-grafik.png)](https://wiki.stadtfabrikanten.org/uploads/images/gallery/2025-05/FaIUCynwdnCrbvZ5-grafik.png)

### Check the line length again

[![grafik.png](https://wiki.stadtfabrikanten.org/uploads/images/gallery/2025-05/scaled-1680-/LKZvmO02vpSEp7RK-grafik.png)](https://wiki.stadtfabrikanten.org/uploads/images/gallery/2025-05/LKZvmO02vpSEp7RK-grafik.png)

<p class="callout warning">**Known Limitation:** We reduced the set by 8 nodes (only). The limitation can be found in detail: Duplicated paths are only removed if start and end point of the line segment are equal. It will not work if one line segment is shorter or longer because the X1Y1 or X2Y2 coordinate will be different. A more complicated algorithm is required to get optimal results. The following screenshots just shows one line segments moved to reveal the remaining underlying common edge. To avoid this problem we would need to intersect all lines with each other to receive the whole set of intersecting points. Then we proceed to remove duplicate segments.  
</p>

[![grafik.png](https://wiki.stadtfabrikanten.org/uploads/images/gallery/2025-05/scaled-1680-/hMpziFMywKvy6Bwc-grafik.png)](https://wiki.stadtfabrikanten.org/uploads/images/gallery/2025-05/hMpziFMywKvy6Bwc-grafik.png) [![grafik.png](https://wiki.stadtfabrikanten.org/uploads/images/gallery/2025-05/scaled-1680-/2SYGBZxPRJHDxmvY-grafik.png)](https://wiki.stadtfabrikanten.org/uploads/images/gallery/2025-05/2SYGBZxPRJHDxmvY-grafik.png)
### Check the total line length again

We reduced the line length from 2893.74 mm to 2882.45 mm. Not a great saving for this example, but still a reduction.

[![grafik.png](https://wiki.stadtfabrikanten.org/uploads/images/gallery/2025-05/scaled-1680-/XEFsKN5nVDikrEjv-grafik.png)](https://wiki.stadtfabrikanten.org/uploads/images/gallery/2025-05/XEFsKN5nVDikrEjv-grafik.png)
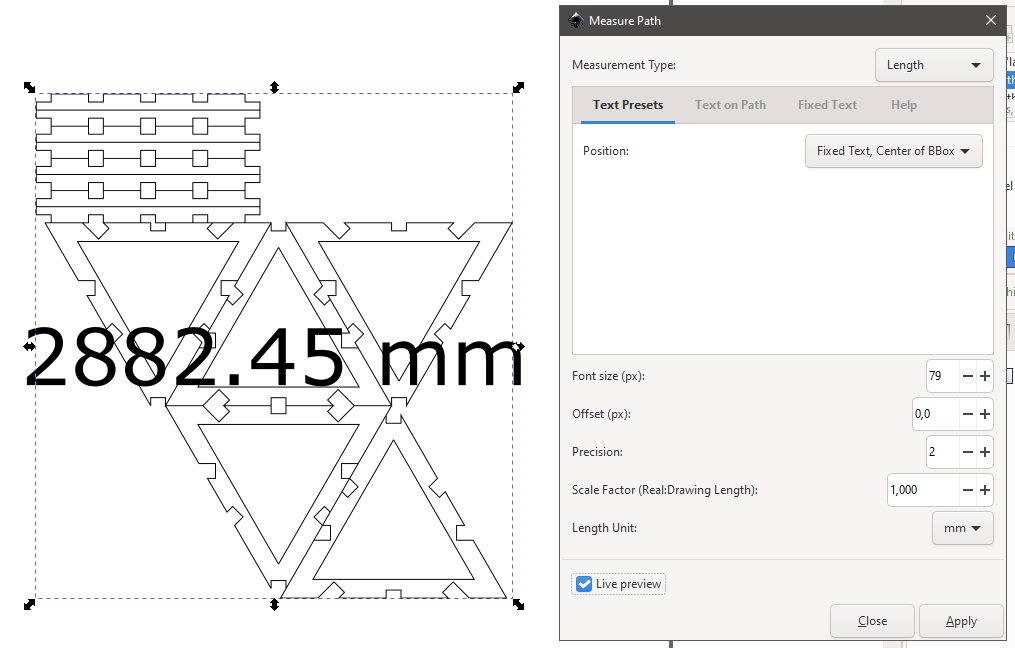
# Purge Pointy Paths

<div class="page view" id="bkmrk-this-filter-deletes-"><article>This filter deletes paths which render as point only, like:

<div class="wiki-content" id="bkmrk-m-45.250809%2C91.69273">- **`m 45.250809,91.692739`** - this path contains onyl one command - a single point
- **`m 45.250809,91.692739 z` -** this path contains two commands, but only one coordinate. It's a single point, the path is closed by a Z command
- `<strong>m 45.250809,91.692739 l 45.250809,91.692739</strong>` - this path contains two commands, but the first and second coordinate are the same. It will render als point
- `<strong>m 45.250809,91.692739 l 45.250809,91.692739 z</strong>` - this path contains three commands, but the first and second coordinate are the same. It will render als point, the path is closed by a Z command

</div></article></div>

# Remove Duplicate Line Segments

An Inkscape extension to remove duplicate line segments with an option to add a tolerance for regarding the segments as a match. See [http://cutlings.wasbo.net/inkscape-extension-removeduplicatelines](http://cutlings.wasbo.net/inkscape-extension-removeduplicatelines/)

[![grafik.png](https://wiki.stadtfabrikanten.org/uploads/images/gallery/2025-05/scaled-1680-/falSGT0urbPsZvoJ-grafik.png)](https://wiki.stadtfabrikanten.org/uploads/images/gallery/2025-05/falSGT0urbPsZvoJ-grafik.png)

See also

- [Purge Duplicate Path Segments](https://wiki.stadtfabrikanten.org/books/fablab-chemnitz/page/purge-duplicate-path-segments)
- [Contour Scanner And Trimmer](https://wiki.stadtfabrikanten.org/books/fablab-chemnitz/page/contour-scanner-and-trimmer)
- [Purge Duplicate Path Nodes](https://wiki.stadtfabrikanten.org/books/fablab-chemnitz/page/purge-duplicate-path-nodes)
- [Deduplicate Plugin](https://wiki.stadtfabrikanten.org/books/fablab-chemnitz/page/deduplicate-plugin)

# Split And Break Bezier At t

- Splits a path at value t=0..1 (t=0.5 means 50%)
- Applies independently for each sub path in selection.

Allows better control over splitting than [Add Nodes](https://wiki.stadtfabrikanten.org/books/in-house-extensions/page/add-nodes) or [Split Bezier (Subdivide Path)](https://wiki.stadtfabrikanten.org/books/fablab-chemnitz/page/split-bezier-subdivide-path).

## Draw some path

[![grafik.png](https://wiki.stadtfabrikanten.org/uploads/images/gallery/2025-05/scaled-1680-/W5EQfDTZa2SwrW8A-grafik.png)](https://wiki.stadtfabrikanten.org/uploads/images/gallery/2025-05/W5EQfDTZa2SwrW8A-grafik.png)

## Run the extension

[![grafik.png](https://wiki.stadtfabrikanten.org/uploads/images/gallery/2025-05/scaled-1680-/HxUn0jUAkqhGPmS8-grafik.png)](https://wiki.stadtfabrikanten.org/uploads/images/gallery/2025-05/HxUn0jUAkqhGPmS8-grafik.png)

## Splitted path

[![grafik.png](https://wiki.stadtfabrikanten.org/uploads/images/gallery/2025-05/scaled-1680-/rPypu5yMI6Be75ek-grafik.png)](https://wiki.stadtfabrikanten.org/uploads/images/gallery/2025-05/rPypu5yMI6Be75ek-grafik.png)

# Split Bezier (Subdivide Path)

Function is like Modify Path → [Add Nodes](https://stadtfabrikanten.org/display/FCT/Add+Nodes) but it provides additional features like

- splitting path into disconnected sub paths (break apart)
- choose units

<p class="callout info">Please note that the plugin will sub-divide each path segment (from path handle to path handle). So it does not split the whole curve into given amount of piece like acting "as one item". Each bezier segment is it's own element.</p>

## Draw some example

[![grafik.png](https://wiki.stadtfabrikanten.org/uploads/images/gallery/2025-05/scaled-1680-/ODoSgnSegSXiXHiB-grafik.png)](https://wiki.stadtfabrikanten.org/uploads/images/gallery/2025-05/ODoSgnSegSXiXHiB-grafik.png)

## Run the extension

[![grafik.png](https://wiki.stadtfabrikanten.org/uploads/images/gallery/2025-05/scaled-1680-/qhFvIbaAg5qUgqyR-grafik.png)](https://wiki.stadtfabrikanten.org/uploads/images/gallery/2025-05/qhFvIbaAg5qUgqyR-grafik.png)
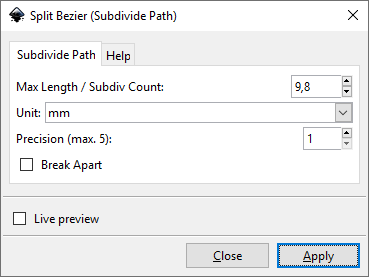
Note that "Live preview" will only work if "Break apart" is **not** selected

[![grafik.png](https://wiki.stadtfabrikanten.org/uploads/images/gallery/2025-05/scaled-1680-/iciKiNEgAZBAPvVL-grafik.png)](https://wiki.stadtfabrikanten.org/uploads/images/gallery/2025-05/iciKiNEgAZBAPvVL-grafik.png)
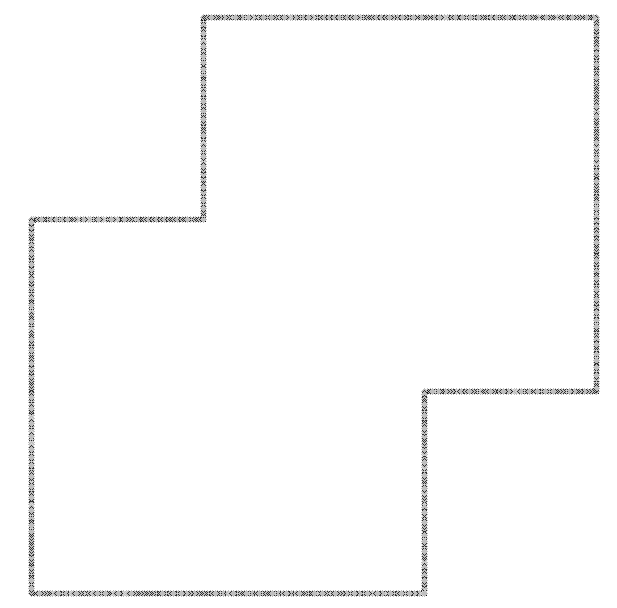
# Tip: Breaking apart the curve can also be done by ...

## Selecting the path and show handles

[![grafik.png](https://wiki.stadtfabrikanten.org/uploads/images/gallery/2025-05/scaled-1680-/9IpXsuOFy6mzjVTi-grafik.png)](https://wiki.stadtfabrikanten.org/uploads/images/gallery/2025-05/9IpXsuOFy6mzjVTi-grafik.png)
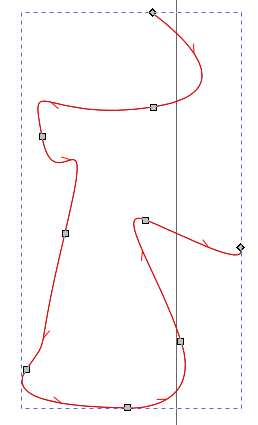
## Select all handles and break

[![grafik.png](https://wiki.stadtfabrikanten.org/uploads/images/gallery/2025-05/scaled-1680-/rZE9aWydsQrPNVZI-grafik.png)](https://wiki.stadtfabrikanten.org/uploads/images/gallery/2025-05/rZE9aWydsQrPNVZI-grafik.png) [![grafik.png](https://wiki.stadtfabrikanten.org/uploads/images/gallery/2025-05/scaled-1680-/n6QjfogjS7t0qKCY-grafik.png)](https://wiki.stadtfabrikanten.org/uploads/images/gallery/2025-05/n6QjfogjS7t0qKCY-grafik.png)
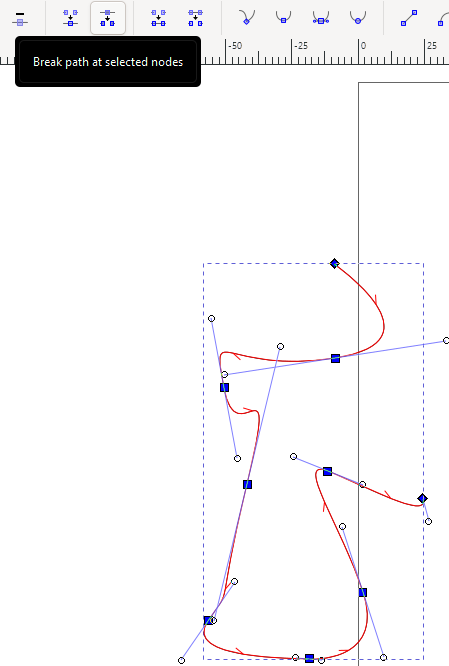
## Break apart the path

SHIFT + CTRL + K

[![grafik.png](https://wiki.stadtfabrikanten.org/uploads/images/gallery/2025-05/scaled-1680-/ubGvprwxRmx01ROz-grafik.png)](https://wiki.stadtfabrikanten.org/uploads/images/gallery/2025-05/ubGvprwxRmx01ROz-grafik.png)
## Tip: Splitted paths can be combined again nearly the same look like before by ...

### Example for bezier path

#### Draw some curve and split it up running the extension

[![grafik.png](https://wiki.stadtfabrikanten.org/uploads/images/gallery/2025-05/scaled-1680-/ZEk3O55tlHfRvrkn-grafik.png)](https://wiki.stadtfabrikanten.org/uploads/images/gallery/2025-05/ZEk3O55tlHfRvrkn-grafik.png)[![grafik.png](https://wiki.stadtfabrikanten.org/uploads/images/gallery/2025-05/scaled-1680-/CJH8mn8sI9FYK4K8-grafik.png)](https://wiki.stadtfabrikanten.org/uploads/images/gallery/2025-05/CJH8mn8sI9FYK4K8-grafik.png)
#### Duplicate the path

CTRL + D to duplicate. We use this to check the quality of simplification

#### Run Path → Simplify

As you can see the result has other handles than before. The right image shows a black curve (curve before simplification), the green shows the simplified curve. You can see that the curve is not exactly the same. So we can say that simplification for bezier curves is not the best in all use cases, but it will work absolutely fine for straight line segments:

[![grafik.png](https://wiki.stadtfabrikanten.org/uploads/images/gallery/2025-05/scaled-1680-/VkYTlXHvsfaHGSot-grafik.png)](https://wiki.stadtfabrikanten.org/uploads/images/gallery/2025-05/VkYTlXHvsfaHGSot-grafik.png)
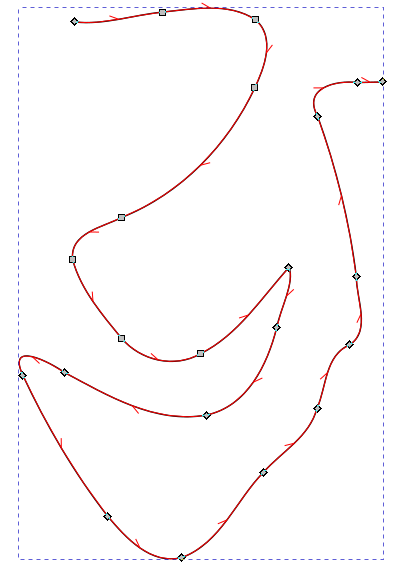
As you can see the result has other handles than before. The right image shows a black curve (curve before simplification), the green shows the simplified curve. You can see that the curve is not exactly the same. So we can say that simplification for bezier curves is not the best in all use cases, but it will work absolutely fine for straight line segments:[![grafik.png](https://wiki.stadtfabrikanten.org/uploads/images/gallery/2025-05/scaled-1680-/Uv0hCEsQk6oirKqQ-grafik.png)](https://wiki.stadtfabrikanten.org/uploads/images/gallery/2025-05/Uv0hCEsQk6oirKqQ-grafik.png)
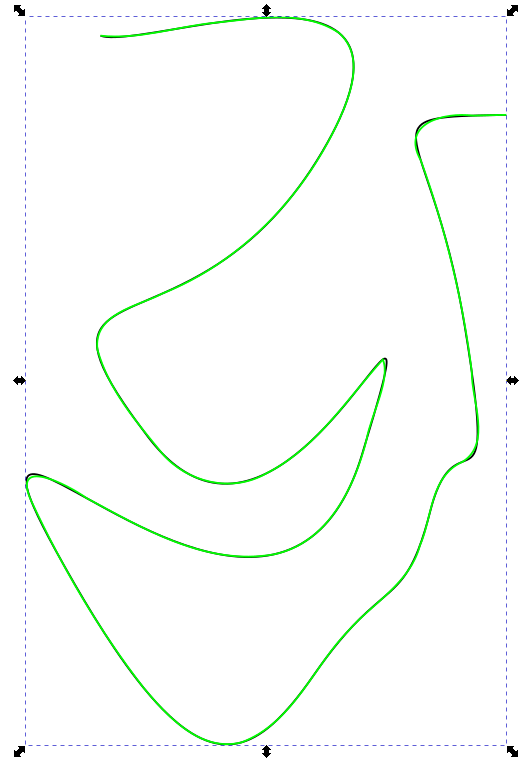
### Example for path with straight line segments only

#### Draw some curve and split it up running the extension

[![grafik.png](https://wiki.stadtfabrikanten.org/uploads/images/gallery/2025-05/scaled-1680-/rzY3fztW9RSJKAl9-grafik.png)](https://wiki.stadtfabrikanten.org/uploads/images/gallery/2025-05/rzY3fztW9RSJKAl9-grafik.png)
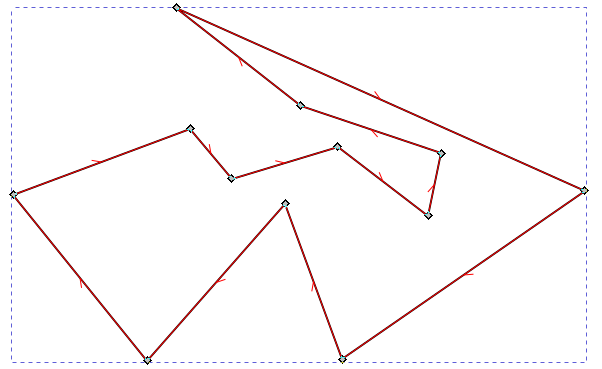
[![grafik.png](https://wiki.stadtfabrikanten.org/uploads/images/gallery/2025-05/scaled-1680-/Q270yHgiWpIJmN9n-grafik.png)](https://wiki.stadtfabrikanten.org/uploads/images/gallery/2025-05/Q270yHgiWpIJmN9n-grafik.png)
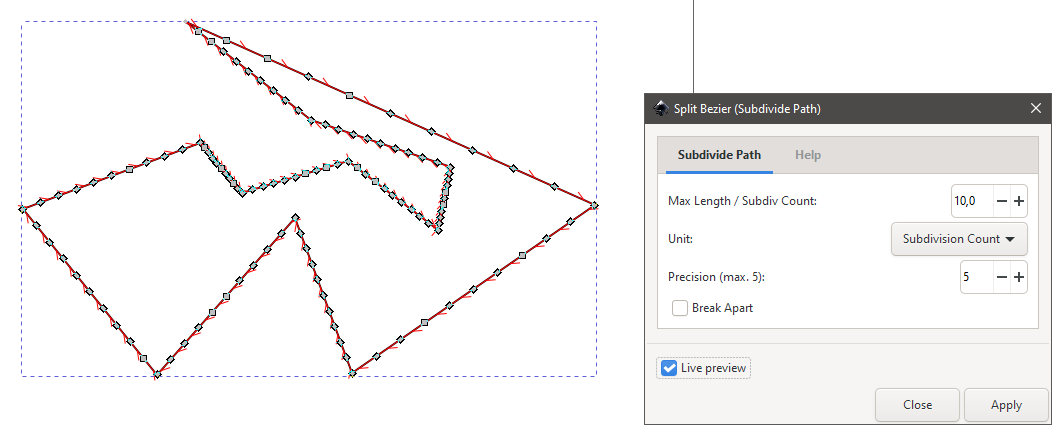
#### Run Path → Simplify

[![grafik.png](https://wiki.stadtfabrikanten.org/uploads/images/gallery/2025-05/scaled-1680-/FtCxeHGtDDgM4xwf-grafik.png)](https://wiki.stadtfabrikanten.org/uploads/images/gallery/2025-05/FtCxeHGtDDgM4xwf-grafik.png)
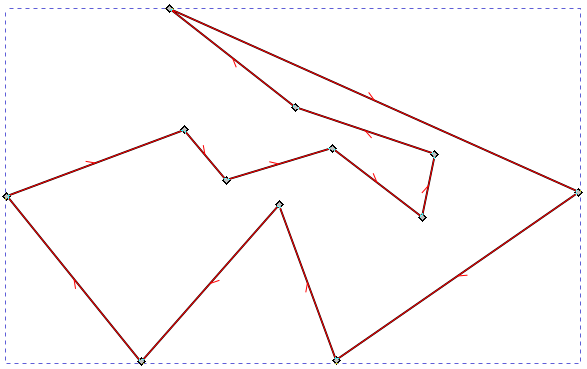
# Paths - Join/Order

# Chain Paths

## Source of documentation: [https://github.com/fablabnbg/inkscape-chain-paths](https://github.com/fablabnbg/inkscape-chain-paths)

An inkscape extension to combine paths. Like really combining path snippets into longer paths. The stock inkscape path operation "combine" does not do that. It only creates a single path object consisting of multiple distinct segments. Many commercial CAD packages create object contours consisting of separate path snippets using adjacent end points. Such objects cannot be used in path operations like "add", "intersect", "difference", as they are technically a set of objects, rather than a single stroke. This extension forms a longer path from multiple shorter path segments. It is irrelevant if the path segments are separate path objects in Inkscape, or if the path segments belong to the same path object. If two path segments have an end point in common, or if their end points are close together, they are linked together to form a longer path. It is optional weather the linking end points meld into a single common point, or if an optional straight line ('chain link') fills the gap, if any. The maximum distance for end points is a user setting. Usually a fraction of a millimeter works fine.

## Usage

Select multiple pathlike objects. If the status line shows you different object types, then use "Path → Object to Path". This is needed as we operate only on paths only. You can choose the maximum endpoint distance for path ends to be linked, and the combination method: snap the points together, or create a linking path segment.

Note, that **paths never fork**. This means, that if there are three or more path ends at the same location, only two are chained together. The others are left unchanged.

## Additional notes

- this plugin can be used to reduces node by chaining (linking) overlapping points
- by selecting "Snap connecting ends together" you are creating closed loops. Otherwise they are open!
- **This plugin does not apply for paths in groups. Please ungroup before!**

<details id="bkmrk-step-1---having-a-lo"><summary>Step 1 - Having a loose set of lines</summary>

[![grafik.png](https://wiki.stadtfabrikanten.org/uploads/images/gallery/2025-02/scaled-1680-/083D94GSITA24RQp-grafik.png)](https://wiki.stadtfabrikanten.org/uploads/images/gallery/2025-02/083D94GSITA24RQp-grafik.png)

</details><details id="bkmrk-step-2---apply-exten"><summary>Step 2 - Apply extension</summary>

[![grafik.png](https://wiki.stadtfabrikanten.org/uploads/images/gallery/2025-02/scaled-1680-/MiUK3Uy74r5Z3uW0-grafik.png)](https://wiki.stadtfabrikanten.org/uploads/images/gallery/2025-02/MiUK3Uy74r5Z3uW0-grafik.png)

</details><details id="bkmrk-step-3---get-closed-"><summary>Step 3 - Get closed (chained) contours</summary>

[![grafik.png](https://wiki.stadtfabrikanten.org/uploads/images/gallery/2025-02/scaled-1680-/V4YhTsf5OBO8Jo68-grafik.png)](https://wiki.stadtfabrikanten.org/uploads/images/gallery/2025-02/V4YhTsf5OBO8Jo68-grafik.png)

</details>Similar extensions: [Line Merging (Combine Paths)](https://wiki.stadtfabrikanten.org/books/fablab-chemnitz/page/line-merging-combine-paths "Line Merging (Combine Paths)"), [Close Paths](https://wiki.stadtfabrikanten.org/books/fablab-chemnitz/page/close-paths "Close Paths"), [Join Paths / Create Tabs And Dimples](https://wiki.stadtfabrikanten.org/books/fablab-chemnitz/page/join-paths-create-tabs-and-dimples "Join Paths / Create Tabs And Dimples")

# Circle Tangents (Replaced by Snap Objects Feature)

**1. Draw some circles  
[![grafik.png](https://wiki.stadtfabrikanten.org/uploads/images/gallery/2025-02/scaled-1680-/SKg3fZIcNJFsFoB9-grafik.png)](https://wiki.stadtfabrikanten.org/uploads/images/gallery/2025-02/SKg3fZIcNJFsFoB9-grafik.png)**

**2. Apply the extension**

**[![grafik.png](https://wiki.stadtfabrikanten.org/uploads/images/gallery/2025-02/scaled-1680-/BUfKxIGvi6fSgjIt-grafik.png)](https://wiki.stadtfabrikanten.org/uploads/images/gallery/2025-02/BUfKxIGvi6fSgjIt-grafik.png)**

You can have two different outputs:

[![grafik.png](https://wiki.stadtfabrikanten.org/uploads/images/gallery/2025-02/scaled-1680-/j7dSSwvZlz3V8XFH-grafik.png)](https://wiki.stadtfabrikanten.org/uploads/images/gallery/2025-02/j7dSSwvZlz3V8XFH-grafik.png) [![grafik.png](https://wiki.stadtfabrikanten.org/uploads/images/gallery/2025-02/scaled-1680-/FaNckM8kdKdahFMz-grafik.png)](https://wiki.stadtfabrikanten.org/uploads/images/gallery/2025-02/FaNckM8kdKdahFMz-grafik.png)

If you want to get sort of tangents at the path's point handles instead you can also try to run the extension [Draw Handles](https://wiki.stadtfabrikanten.org/books/fablab-chemnitz/page/draw-directions-travel-moves "Draw Directions / Travel Moves")

# Duplicate + Reverse + Join

An extension to effectively convert a single line svg font to a stick font by duplicating, reversing and joining each selected path and subpath. Read more on [http://cutlings.wasbo.net/single-line-font-to-stick-font](http://cutlings.wasbo.net/single-line-font-to-stick-font/)

# Join Paths / Create Tabs And Dimples

[![grafik.png](https://wiki.stadtfabrikanten.org/uploads/images/gallery/2025-05/scaled-1680-/4kYSOfjvvLP36dNQ-grafik.png)](https://wiki.stadtfabrikanten.org/uploads/images/gallery/2025-05/4kYSOfjvvLP36dNQ-grafik.png)

This extension works on the selected paths. The paths will be joined based on their Z-order (i.e. the lowest one in the document first and then the next one and so on) at their end nodes with a straight line segment. If the ending nodes of the paths coincide, they are merged and no new segment is created. If you check the option "optimized", the paths are joined starting with the one with the lowest Z-order (one at the bottom most position in the document) and the successive paths to be joined are chosen based on the distance of their end nodes to the ending node of the earlier path, i.e. the one with one of the end nodes closest to the ending node of the earlier path is joined to it. See also [Line Merging (Combine Paths)](https://wiki.stadtfabrikanten.org/books/fablab-chemnitz/page/line-merging-combine-paths), [Close Paths](https://wiki.stadtfabrikanten.org/books/fablab-chemnitz/page/close-paths) and [Chain Paths](https://wiki.stadtfabrikanten.org/books/fablab-chemnitz/page/chain-paths) for similar tools operating on path closing and joining.

## Draw some lines and select them

[![grafik.png](https://wiki.stadtfabrikanten.org/uploads/images/gallery/2025-05/scaled-1680-/Pd5ftllNiAvjtc6R-grafik.png)](https://wiki.stadtfabrikanten.org/uploads/images/gallery/2025-05/Pd5ftllNiAvjtc6R-grafik.png)

[![grafik.png](https://wiki.stadtfabrikanten.org/uploads/images/gallery/2025-05/scaled-1680-/lUK5Q2sKjDLR9OYS-grafik.png)](https://wiki.stadtfabrikanten.org/uploads/images/gallery/2025-05/lUK5Q2sKjDLR9OYS-grafik.png)

## Run the extension

[![grafik.png](https://wiki.stadtfabrikanten.org/uploads/images/gallery/2025-05/scaled-1680-/XDkxohwS9b9EYyp3-grafik.png)](https://wiki.stadtfabrikanten.org/uploads/images/gallery/2025-05/XDkxohwS9b9EYyp3-grafik.png)

## Get the joined path

[![grafik.png](https://wiki.stadtfabrikanten.org/uploads/images/gallery/2025-05/scaled-1680-/tfMU3CPaQ2tOhMXr-grafik.png)](https://wiki.stadtfabrikanten.org/uploads/images/gallery/2025-05/tfMU3CPaQ2tOhMXr-grafik.png)

[![grafik.png](https://wiki.stadtfabrikanten.org/uploads/images/gallery/2025-05/scaled-1680-/NknZN4DfiWj4XfKz-grafik.png)](https://wiki.stadtfabrikanten.org/uploads/images/gallery/2025-05/NknZN4DfiWj4XfKz-grafik.png)

<p class="callout warning">This plugin might fail in case there are any groups within selection or just groups (not selected) in the document at all! **This plugin generally does not apply for paths in groups. Please ungroup before!**</p>

```bash
    return super().__getitem__(self._to_key(key))
KeyError: 'path8'
```

## Creating tabs / dimples

This extension also deals with creating tabs and/or dimples.

<p class="callout info">See also [Tab Generator](https://wiki.stadtfabrikanten.org/books/fablab-chemnitz-boxespapercraft/page/tab-generator) and [Quick Joint](https://wiki.stadtfabrikanten.org/books/fablab-chemnitz-boxespapercraft/page/quick-joint)</p>

## Draw some path

[![grafik.png](https://wiki.stadtfabrikanten.org/uploads/images/gallery/2025-05/scaled-1680-/hZRmMa0sWYPCu90g-grafik.png)](https://wiki.stadtfabrikanten.org/uploads/images/gallery/2025-05/hZRmMa0sWYPCu90g-grafik.png)

## Create some gaps

We use [Create Links (Breakaway Connectors)](https://wiki.stadtfabrikanten.org/books/fablab-chemnitz/page/create-links-breakaway-connectors)

[![grafik.png](https://wiki.stadtfabrikanten.org/uploads/images/gallery/2025-05/scaled-1680-/G5VGWcyb7I5kJsvx-grafik.png)](https://wiki.stadtfabrikanten.org/uploads/images/gallery/2025-05/G5VGWcyb7I5kJsvx-grafik.png)
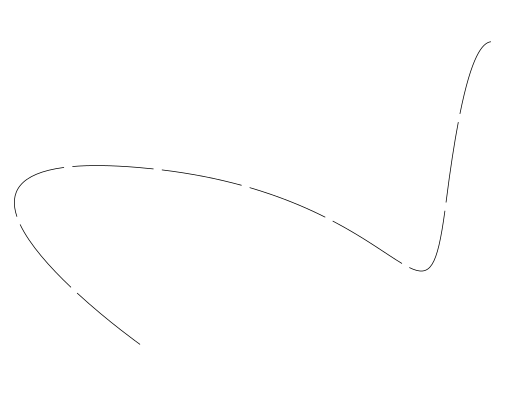
## Creeate dimples

[![grafik.png](https://wiki.stadtfabrikanten.org/uploads/images/gallery/2025-05/scaled-1680-/fS6VsZPyDlW9NHZY-grafik.png)](https://wiki.stadtfabrikanten.org/uploads/images/gallery/2025-05/fS6VsZPyDlW9NHZY-grafik.png)
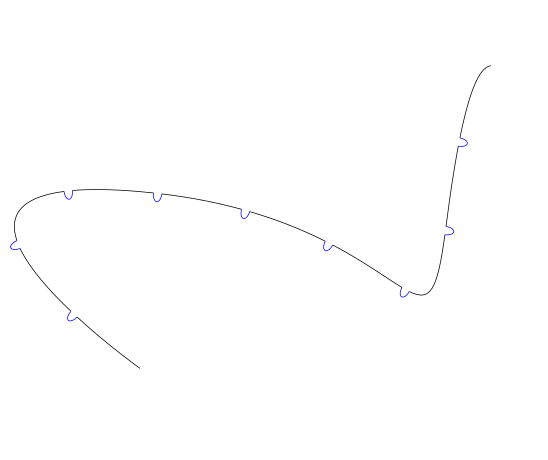
More examples:

[![grafik.png](https://wiki.stadtfabrikanten.org/uploads/images/gallery/2025-05/scaled-1680-/HBFjXDMqJHn0Yn1P-grafik.png)](https://wiki.stadtfabrikanten.org/uploads/images/gallery/2025-05/HBFjXDMqJHn0Yn1P-grafik.png)
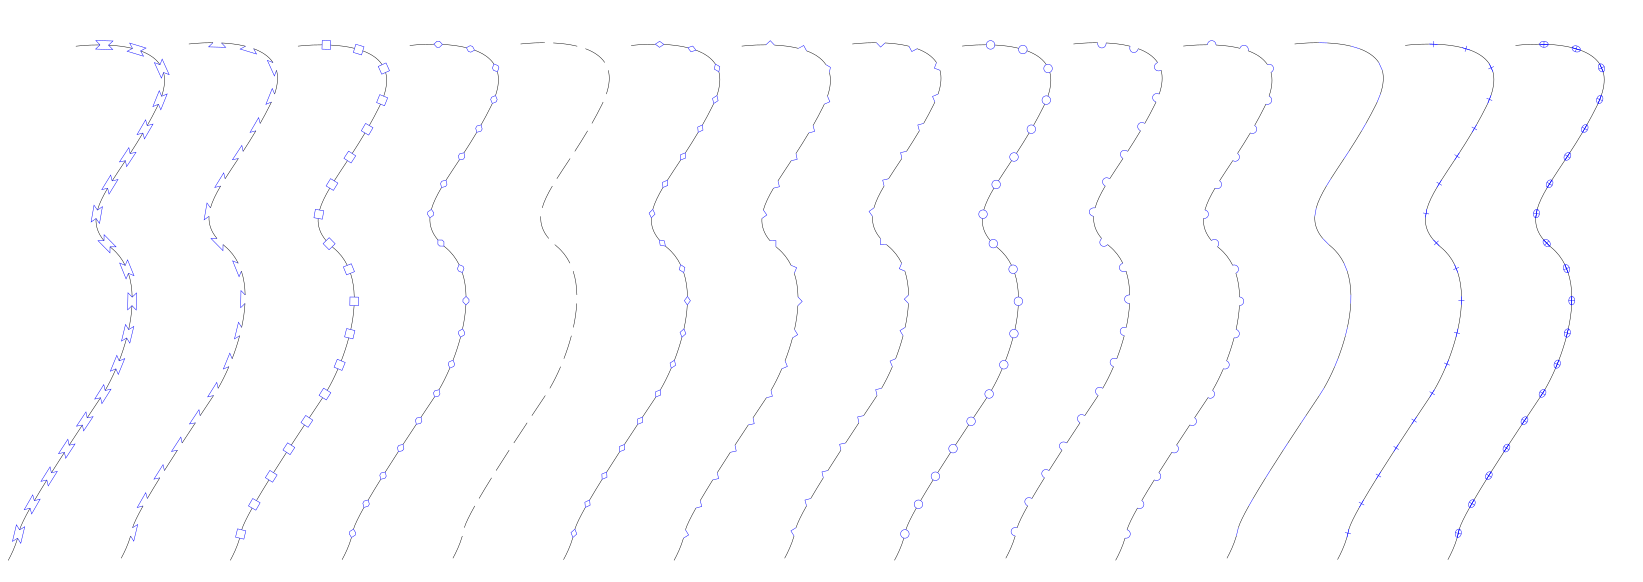
Sheetmal:

[![grafik.png](https://wiki.stadtfabrikanten.org/uploads/images/gallery/2025-05/scaled-1680-/dlo1U8YhiJFqagwU-grafik.png)](https://wiki.stadtfabrikanten.org/uploads/images/gallery/2025-05/dlo1U8YhiJFqagwU-grafik.png)
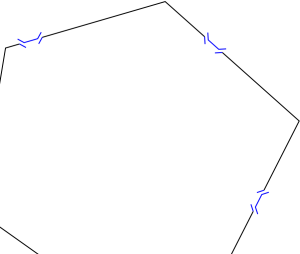
This is for a pattern like this:

[![grafik.png](https://wiki.stadtfabrikanten.org/uploads/images/gallery/2025-05/scaled-1680-/pKgiuxuVT3HjtBiW-grafik.png)](https://wiki.stadtfabrikanten.org/uploads/images/gallery/2025-05/pKgiuxuVT3HjtBiW-grafik.png)
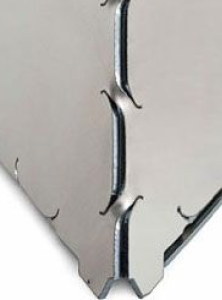
# Longest Continuous Path

Source of documentation: [https://github.com/Daekkyn/inkscapeOptimizePath](https://github.com/Daekkyn/inkscapeOptimizePath)

An Inkscape extension that tries to make the longest continuous paths. It converts the paths to a graph, converts the graph to an Eulerian graph and finds an Eulerian cycle. It was written for the [Axidraw](http://axidraw.com) pen plotter to reduce writing time of graph-like drawings like Voronoi diagrams and meshes.

<iframe allowfullscreen="allowfullscreen" height="273" src="https://www.youtube.com/embed/ZuaCT3Qi_-c" style="width: 490px; height: 273px;" width="490"></iframe>

[![grafik.png](https://wiki.stadtfabrikanten.org/uploads/images/gallery/2025-02/scaled-1680-/RnqtLcJxV7Tje48B-grafik.png)](https://wiki.stadtfabrikanten.org/uploads/images/gallery/2025-02/RnqtLcJxV7Tje48B-grafik.png)

**Usage**

1. Make sure to ungroup everything → Extensions → Reorder → Deep Ungroup
2. Make sure that the paths use only absolute coordinates (see trick below) or use → Extensions → Modify Path → [To Absolute](https://wiki.stadtfabrikanten.org/books/in-house-extensions/page/to-absolute "To Absolute")
3. Make sure to not have transforms on the paths. You can use the [Apply Transformations](https://wiki.stadtfabrikanten.org/books/fablab-chemnitz/page/apply-transformations "Apply Transformations") extension to remove them
4. Select all the paths you want to optimize (currently only works with polylines). Conversion to polylines can be done with [Approximate Curves by Straight Lines (Flatten Beziers)](https://wiki.stadtfabrikanten.org/books/in-house-extensions/page/approximate-curves-by-straight-lines-flatten-beziers "Approximate Curves by Straight Lines (Flatten Beziers)") or [Convert To Polylines](https://wiki.stadtfabrikanten.org/books/fablab-chemnitz/page/convert-to-polylines "Convert To Polylines") (as second choice). Bezier curves, which were not converted, are getting **lost** running this extension
5. Open the extension
6. Set the merge tolerance (0.1 should work in most cases)
7. Choose the Overwrite rule: 
    1. "Allow" means that the result will be a single path which might (probably) will have some overlapping edges.
    2. "Allow none" means that the results will be multiple disconnected paths but there will be no overlapping edges.
    3. "Allow some" is an in-between, overlapping edges are allowed, but only in short numbers. This is probably the best choice in most cases.
8. Apply

**Trick to remove relative coordinates**

1. Change the preferences for 'SVG Output &gt; Path Data' to always use absolute coordinates. This will only affect newly created paths, or existing objects for which a rewrite of the path data is triggered.
2. For existing paths, use 'Edit &gt; Select All in All Layers', and nudge the selection with the arrow keys (e.g. one step up and one back down again). This will trigger a rewrite of the path data in 'd' which will follow the changed preferences for optimized path data.

## Another Example

1. **Draw some paths and put the ends together by drag and drop with snap**  
    [![grafik.png](https://wiki.stadtfabrikanten.org/uploads/images/gallery/2025-02/scaled-1680-/Akp5GxSpaPIcR08E-grafik.png)](https://wiki.stadtfabrikanten.org/uploads/images/gallery/2025-02/Akp5GxSpaPIcR08E-grafik.png)
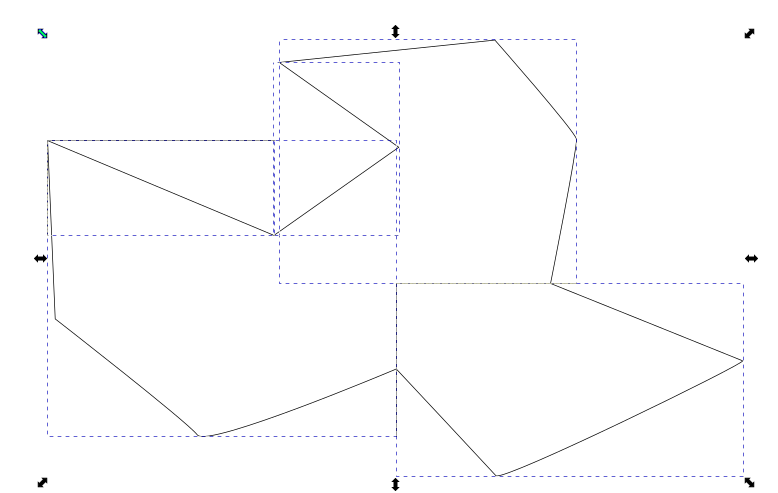
2. **Get the result**

The red contour is an optimized contour. It works similar like [Close Paths](https://wiki.stadtfabrikanten.org/books/fablab-chemnitz/page/close-paths "Close Paths"), [Chain Paths](https://wiki.stadtfabrikanten.org/books/fablab-chemnitz/page/chain-paths "Chain Paths") or [Join Paths / Create Tabs And Dimples](https://wiki.stadtfabrikanten.org/books/fablab-chemnitz/page/join-paths-create-tabs-and-dimples "Join Paths / Create Tabs And Dimples") except that it will not handle bezier curves but only polylines. So it acts like a combination of those plugins in junction with [Approximate Curves by Straight Lines (Flatten Beziers)](https://wiki.stadtfabrikanten.org/books/in-house-extensions/page/approximate-curves-by-straight-lines-flatten-beziers "Approximate Curves by Straight Lines (Flatten Beziers)") or [Convert To Polylines](https://wiki.stadtfabrikanten.org/books/fablab-chemnitz/page/convert-to-polylines "Convert To Polylines").

[![grafik.png](https://wiki.stadtfabrikanten.org/uploads/images/gallery/2025-02/scaled-1680-/xQsyvm7fwZgUwb2H-grafik.png)](https://wiki.stadtfabrikanten.org/uploads/images/gallery/2025-02/xQsyvm7fwZgUwb2H-grafik.png)
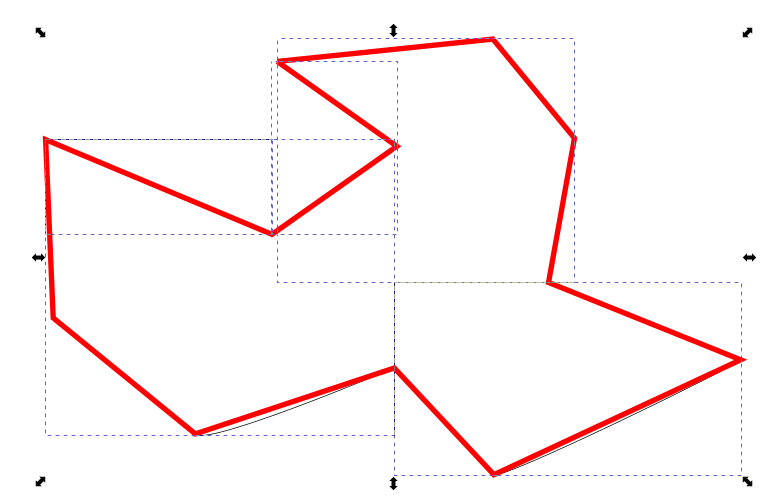
## This extension can also create really cool artwork

[![grafik.png](https://wiki.stadtfabrikanten.org/uploads/images/gallery/2025-02/scaled-1680-/hbk5qQEIF18IazX0-grafik.png)](https://wiki.stadtfabrikanten.org/uploads/images/gallery/2025-02/hbk5qQEIF18IazX0-grafik.png)
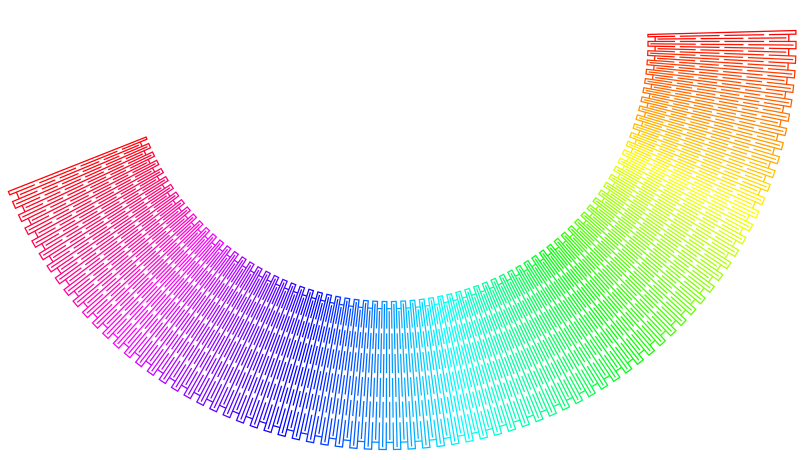
# Move Path Node

Extension to change starting / end node of a path and visualize it by dots and numbers. You can also use this extension as a trimmer for open paths. It is additionally highly useful when using the function to map text to path. By moving the node, the mapped path is moving too. It helps for fine-tuning a lot.

- Use "Path → Reverse" to change path direction
- Use extension [Chain Paths](https://wiki.stadtfabrikanten.org/books/fablab-chemnitz/page/chain-paths "Chain Paths") to make closed paths out of segments.

[![grafik.png](https://wiki.stadtfabrikanten.org/uploads/images/gallery/2025-02/scaled-1680-/mshYYGm7K2kM8GT6-grafik.png)](https://wiki.stadtfabrikanten.org/uploads/images/gallery/2025-02/mshYYGm7K2kM8GT6-grafik.png) [![grafik.png](https://wiki.stadtfabrikanten.org/uploads/images/gallery/2025-02/scaled-1680-/sdrMCAfrB5ZuaCiX-grafik.png)](https://wiki.stadtfabrikanten.org/uploads/images/gallery/2025-02/sdrMCAfrB5ZuaCiX-grafik.png)
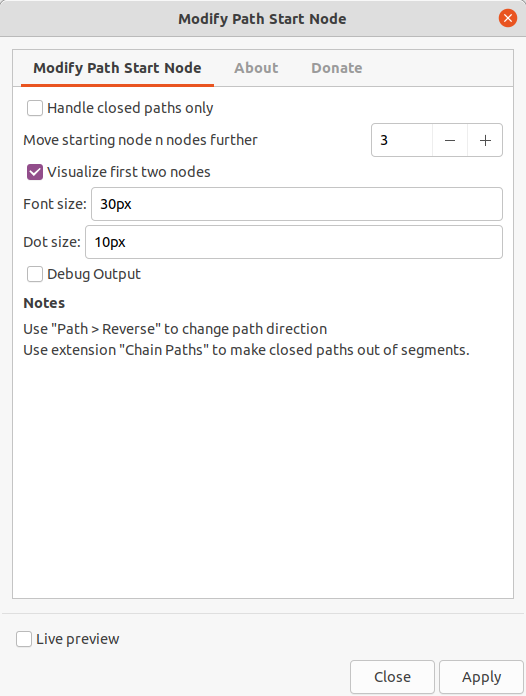
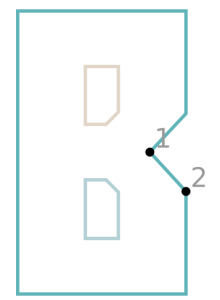
# Optimize Sequence: Small Holes First

Souce of Documentation: [https://github.com/L0laapk3/inkscape-laser-sequence-extension](https://github.com/L0laapk3/inkscape-laser-sequence-extension)

If you use(d) inkscape to create models for laser cutting, chances are you have ran into the following problem: the laser cutter first cuts the large shape, then it ever so slightly moves, then the holes in that shape are created but with a small offset. Thats why I created this simple extension to deal with this! The extension exists out of a couple lines of code that will re-arrange the order of the vectors for you, so the small holes get cut first.

<p class="callout warning">You might need to combine the desired contours using ctrl + K to build up a long "total path" object.</p>

<p class="callout info">Also have a look at [Line Sorting](https://wiki.stadtfabrikanten.org/books/fablab-chemnitz/page/line-sorting) and [Optimize Sequence: Travel Distances](https://wiki.stadtfabrikanten.org/books/fablab-chemnitz/page/optimize-sequence-travel-distances)</p>

## Example

### Draw some closed contours.

Make some "bad" order (first rectangle in the middle, then a small one, then a large outer one)

[![grafik.png](https://wiki.stadtfabrikanten.org/uploads/images/gallery/2025-05/scaled-1680-/ngjRRoJcF5v7Qk3v-grafik.png)](https://wiki.stadtfabrikanten.org/uploads/images/gallery/2025-05/ngjRRoJcF5v7Qk3v-grafik.png)
### Combine and check

Combine the paths to common contour using ctrl + K. Check the 'd' node of the XML item to see how the path actually looks alike.

[![grafik.png](https://wiki.stadtfabrikanten.org/uploads/images/gallery/2025-05/scaled-1680-/Zk4t4ow3p5eKHN1F-grafik.png)](https://wiki.stadtfabrikanten.org/uploads/images/gallery/2025-05/Zk4t4ow3p5eKHN1F-grafik.png)
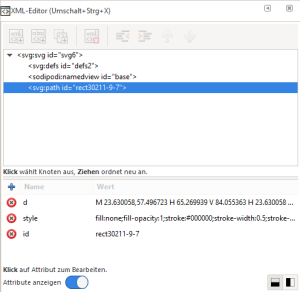
```ini
M 7.1105146,29.996967 H 173.07073 V 142.51136 H 7.1105146 Z M 23.630058,57.496723 h 41.639881 v 26.55864 H 23.630058 Z M 21.166666,44.450001 H 137.58332 V 120.65 H 21.166666 Z
```

### Run the extension and check the 'd' node again

```ini
M 7.1105146,29.996967 H 173.07073 V 142.51136 H 7.1105146 Z M 23.630058,57.496723 h 41.639881 v 26.55864 H 23.630058 Z M 21.166666,44.450001 H 137.58332 V 120.65 H 21.166666 Z
```

# Optimize Sequence: Travel Distances

Source documentation: [https://wiki.evilmadscientist.com/Reorder\_Paths\_for\_Speed](https://wiki.evilmadscientist.com/Reorder_Paths_for_Speed)

In normal use, and by default, elements within a document are plotted in the same order in which they appear in the file. This order is generally the order in which the objects were created; it might also be referred to as “bottom to top.” For example, suppose that you draw a circle and then a rectangle. Then, when you plot the file, the EggBot will plot the two objects in the order that you created them: The circle will plot before the rectangle. The rectangle in this example can also be described as being “above” the circle— a description that makes sense if you imagine painting one object and then painting the other on top of it. You can use the tools in the Object menu to rearrange the order of objects, for example with the Object &gt; Raise and Object &gt; Lower menu commands. If you raise our example circle above the rectangle, then the rectangle will plot before the circle.

This extension can re-order the objects in your plot so as to reduce the travel time spent with the pen up. Experimentation has shown that it can often reduce plotting time by 30% or more. Using this extension does impact your Inkscape drawing. This extension changes the order in which pieces of your drawing are drawn. For the Eggbot, this should produce no visual change in the finished plot.

- The first option, **Reorder within groups** will re-order objects and groups within each layer of your document. Grouped objects will remain grouped. But, objects (and other groups) within any given group will be re-ordered.
- The second option, **Preserve groups** will re-order elements and groups within any given layer of your document, but the order of elements with groups will not be altered.
- The third option, **Break apart groups** will ungroup all elements within each layer of your document and then re-order them for speed. This option removes the groups from your file.

[![grafik.png](https://wiki.stadtfabrikanten.org/uploads/images/gallery/2025-05/scaled-1680-/Jgg1UbvmoQe6lHWj-grafik.png)](https://wiki.stadtfabrikanten.org/uploads/images/gallery/2025-05/Jgg1UbvmoQe6lHWj-grafik.png)
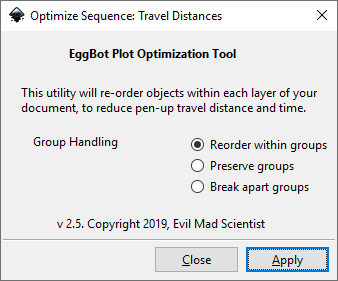
<p class="callout info">Also have a look at [Line Sorting](https://wiki.stadtfabrikanten.org/books/fablab-chemnitz/page/line-sorting) and [Optimize Sequence: Small Holes First](https://wiki.stadtfabrikanten.org/books/fablab-chemnitz/page/optimize-sequence-small-holes-first)</p>

# Reverse Order Of Subpaths

<div class="page view" id="bkmrk-reverse-order-of-sub"><article>Reverse order of subpaths (combined paths) without changing the direction of each subpath.

When drawing paths and combining these the order of the subpaths is from the last to the first drawn. This extension reverse the order of the subpaths and thus the order in which the paths were drawn can be restored.

Use together with the extension to [Number Subpaths](https://wiki.stadtfabrikanten.org/books/fablab-chemnitz/page/number-subpaths "Number Subpaths") to visualize the effect of reversing the subpaths.

See [https://inkscape.org/~EllenWasbo/%E2%98%85reverse-order-of-subpaths](https://inkscape.org/~EllenWasbo/%E2%98%85reverse-order-of-subpaths) and [https://gitlab.com/EllenWasbo/inkscape-extension-reverse-order-of-subpaths](https://gitlab.com/EllenWasbo/inkscape-extension-reverse-order-of-subpaths)

<div class="wiki-content" id="bkmrk-"></div></article></div>

# Ray Tracing

Sources:

- [https://inkscape.org/de/~dbloch/%E2%98%85ray-optics](https://inkscape.org/de/~dbloch/%E2%98%85ray-optics)
- [https://github.com/damienBloch/inkscape-raytracing](https://github.com/damienBloch/inkscape-raytracing)

[![grafik.png](https://wiki.stadtfabrikanten.org/uploads/images/gallery/2025-02/scaled-1680-/exX5wJipqOK8L7kE-grafik.png)](https://wiki.stadtfabrikanten.org/uploads/images/gallery/2025-02/exX5wJipqOK8L7kE-grafik.png) [![grafik.png](https://wiki.stadtfabrikanten.org/uploads/images/gallery/2025-02/scaled-1680-/m71BJgRco7GZGo92-grafik.png)](https://wiki.stadtfabrikanten.org/uploads/images/gallery/2025-02/m71BJgRco7GZGo92-grafik.png)

[![grafik.png](https://wiki.stadtfabrikanten.org/uploads/images/gallery/2025-02/scaled-1680-/9bc0ufHV44GmXvF8-grafik.png)](https://wiki.stadtfabrikanten.org/uploads/images/gallery/2025-02/9bc0ufHV44GmXvF8-grafik.png)

# Reload drawing

<div class="page view" id="bkmrk-an-extension-which-a"><article>An extension which allows to reload the drawing in case of any change without opening the file in a new window. Helpful if the file is opened and changes in background by another instance of Inkscape or any routine which processes and overwrites it in the meatime.

Acts also as kind of "reset", because we can skip executing all undo's from the history

<div class="wiki-content" id="bkmrk-"></div></article></div>

# Shape/Pattern from existing Object(s)

# Clones In Perspective

See also [Create patterns](https://old.stadtfabrikanten.org/display/IFM/Create+patterns)

## Draw some random stuff and group

Create a whole group of all objects you want to make off some pattern

[![grafik.png](https://wiki.stadtfabrikanten.org/uploads/images/gallery/2025-05/scaled-1680-/Q11kzvWkz9jKymwD-grafik.png)](https://wiki.stadtfabrikanten.org/uploads/images/gallery/2025-05/Q11kzvWkz9jKymwD-grafik.png)

## Adjust the center of rotation (move the vanishing point)

Select the group and click one time more to get the object rotation anchors. This will also show the rotation center point which can then be selected and moved

[![grafik.png](https://wiki.stadtfabrikanten.org/uploads/images/gallery/2025-05/scaled-1680-/nFGahVlIi4FMeXSk-grafik.png)](https://wiki.stadtfabrikanten.org/uploads/images/gallery/2025-05/nFGahVlIi4FMeXSk-grafik.png)

Move the vanishing point

[![grafik.png](https://wiki.stadtfabrikanten.org/uploads/images/gallery/2025-05/scaled-1680-/B3jnKRdnpRSfJmL3-grafik.png)](https://wiki.stadtfabrikanten.org/uploads/images/gallery/2025-05/B3jnKRdnpRSfJmL3-grafik.png)

[![grafik.png](https://wiki.stadtfabrikanten.org/uploads/images/gallery/2025-05/scaled-1680-/fIRz5i4OxKusM88X-grafik.png)](https://wiki.stadtfabrikanten.org/uploads/images/gallery/2025-05/fIRz5i4OxKusM88X-grafik.png)

[![grafik.png](https://wiki.stadtfabrikanten.org/uploads/images/gallery/2025-05/scaled-1680-/4tK2f3UYnEpJ6OZF-grafik.png)](https://wiki.stadtfabrikanten.org/uploads/images/gallery/2025-05/4tK2f3UYnEpJ6OZF-grafik.png)

# Fill Rectangle With Circles

[![grafik.png](https://wiki.stadtfabrikanten.org/uploads/images/gallery/2025-05/scaled-1680-/GrjWgrpkGCnq6IJz-grafik.png)](https://wiki.stadtfabrikanten.org/uploads/images/gallery/2025-05/GrjWgrpkGCnq6IJz-grafik.png)

[![grafik.png](https://wiki.stadtfabrikanten.org/uploads/images/gallery/2025-05/scaled-1680-/dQsmu1RYmxLlc9oM-grafik.png)](https://wiki.stadtfabrikanten.org/uploads/images/gallery/2025-05/dQsmu1RYmxLlc9oM-grafik.png)

# Hatches And Grains

Source: [https://gitlab.com/marcjeanmougin/inkscape-carto-ext/-/tree/master/](https://gitlab.com/marcjeanmougin/inkscape-carto-ext/-/tree/master/)

This mapping module is intended for the community of geographers and cartographers. It makes it possible to create visual variables like "hatch" or "grain" on surface or point implantation, in order to differentiate or prioritize the cartographic information.

[![grafik.png](https://wiki.stadtfabrikanten.org/uploads/images/gallery/2025-05/scaled-1680-/j0ywTesSj1iZaVOj-grafik.png)](https://wiki.stadtfabrikanten.org/uploads/images/gallery/2025-05/j0ywTesSj1iZaVOj-grafik.png) [![grafik.png](https://wiki.stadtfabrikanten.org/uploads/images/gallery/2025-05/scaled-1680-/Mi8w2WVXsAm95N1g-grafik.png)](https://wiki.stadtfabrikanten.org/uploads/images/gallery/2025-05/Mi8w2WVXsAm95N1g-grafik.png) [![grafik.png](https://wiki.stadtfabrikanten.org/uploads/images/gallery/2025-05/scaled-1680-/xIGmCyzIGtqrh71f-grafik.png)](https://wiki.stadtfabrikanten.org/uploads/images/gallery/2025-05/xIGmCyzIGtqrh71f-grafik.png)

Draw some object or path and apply hatches or grains:

[![grafik.png](https://wiki.stadtfabrikanten.org/uploads/images/gallery/2025-05/scaled-1680-/IcsYolJDm8jbe6WR-grafik.png)](https://wiki.stadtfabrikanten.org/uploads/images/gallery/2025-05/IcsYolJDm8jbe6WR-grafik.png) [![grafik.png](https://wiki.stadtfabrikanten.org/uploads/images/gallery/2025-05/scaled-1680-/5VXmhxPs2prCM6uB-grafik.png)](https://wiki.stadtfabrikanten.org/uploads/images/gallery/2025-05/5VXmhxPs2prCM6uB-grafik.png)

# IFS Fractals

[<span>https://github.com/dylex/inkscape-ifs</span>](https://github.com/dylex/inkscape-ifs)

## Draw some objects

[![grafik.png](https://wiki.stadtfabrikanten.org/uploads/images/gallery/2025-05/scaled-1680-/xos3MaSKh3UuwAoN-grafik.png)](https://wiki.stadtfabrikanten.org/uploads/images/gallery/2025-05/xos3MaSKh3UuwAoN-grafik.png)

[![grafik.png](https://wiki.stadtfabrikanten.org/uploads/images/gallery/2025-05/scaled-1680-/wjKs9leIVqJmsxFM-grafik.png)](https://wiki.stadtfabrikanten.org/uploads/images/gallery/2025-05/wjKs9leIVqJmsxFM-grafik.png) [![grafik.png](https://wiki.stadtfabrikanten.org/uploads/images/gallery/2025-05/scaled-1680-/esZts427i0A2h8rD-grafik.png)](https://wiki.stadtfabrikanten.org/uploads/images/gallery/2025-05/esZts427i0A2h8rD-grafik.png)

## Check the result

[![grafik.png](https://wiki.stadtfabrikanten.org/uploads/images/gallery/2025-05/scaled-1680-/hOmvm3BOjOrht5I2-grafik.png)](https://wiki.stadtfabrikanten.org/uploads/images/gallery/2025-05/hOmvm3BOjOrht5I2-grafik.png)

# Living Hinge (Fit To Rectangle)

This plugin only works für rectangles of the type "Object". So you may not convert the rectangle to a path before! See [https://wiki.lvl1.org/Inkscape\_Extension\_to\_Render\_a\_Living\_Hinge](https://wiki.lvl1.org/Inkscape_Extension_to_Render_a_Living_Hinge).

## Draw a rectangle object (do not convert to path!)

[![grafik.png](https://wiki.stadtfabrikanten.org/uploads/images/gallery/2025-05/scaled-1680-/MRdMeFTnRv763N6r-grafik.png)](https://wiki.stadtfabrikanten.org/uploads/images/gallery/2025-05/MRdMeFTnRv763N6r-grafik.png)

[![grafik.png](https://wiki.stadtfabrikanten.org/uploads/images/gallery/2025-05/scaled-1680-/8xLFJZPwfWVHLINB-grafik.png)](https://wiki.stadtfabrikanten.org/uploads/images/gallery/2025-05/8xLFJZPwfWVHLINB-grafik.png)

[![grafik.png](https://wiki.stadtfabrikanten.org/uploads/images/gallery/2025-05/scaled-1680-/eHXkl47Gp93eY1jL-grafik.png)](https://wiki.stadtfabrikanten.org/uploads/images/gallery/2025-05/eHXkl47Gp93eY1jL-grafik.png)

See also

- [Living Hinge (Size Input)](https://wiki.stadtfabrikanten.org/books/fablab-chemnitz/page/living-hinge-size-input)
- [Box Maker - Living Hinge](https://wiki.stadtfabrikanten.org/books/fablab-chemnitz-boxespapercraft/page/box-maker-living-hinge)
- [Buxtronix Living Hinges](https://wiki.stadtfabrikanten.org/books/fablab-chemnitz/page/buxtronix-living-hinges)

# Low Poly 2

This is similar to [Low Poly](https://stadtfabrikanten.org/display/IFM/Low+Poly) extension but works different regarding to the path handling.

## Allure a wannabe cat into Inkscape - thanks Charlie!

[![grafik.png](https://wiki.stadtfabrikanten.org/uploads/images/gallery/2025-05/scaled-1680-/H3m3kahvHTy0pp8I-grafik.png)](https://wiki.stadtfabrikanten.org/uploads/images/gallery/2025-05/H3m3kahvHTy0pp8I-grafik.png)

## Draw some lines at prominent positions

<div class="rwui_item_content" id="bkmrk-you-can-use-freehand">You can use freehand drawing tool. This is really quick and handy</div><span class="confluence-embedded-file-wrapper confluence-embedded-manual-size">![](https://old.stadtfabrikanten.org/download/attachments/79626265/image2020-8-23_3-2-36.png?version=1&modificationDate=1598144559013&api=v2)</span>

## Select all paths and the image, then run the extension

## Low Poly Charlie

Not the best example but it shows how the plugin works

[![grafik.png](https://wiki.stadtfabrikanten.org/uploads/images/gallery/2025-05/scaled-1680-/9so7vBNZcfJ3BmO3-grafik.png)](https://wiki.stadtfabrikanten.org/uploads/images/gallery/2025-05/9so7vBNZcfJ3BmO3-grafik.png)

# Shapes

Source of documentation: [https://www.arakne.es/en/inkscape-1-0-shapes-extension-new-version/](https://www.arakne.es/en/inkscape-1-0-shapes-extension-new-version/)

This plugin works for Object selection as well as Path selection

[![grafik.png](https://wiki.stadtfabrikanten.org/uploads/images/gallery/2025-05/scaled-1680-/J03l6UbPQkv2n39U-grafik.png)](https://wiki.stadtfabrikanten.org/uploads/images/gallery/2025-05/J03l6UbPQkv2n39U-grafik.png) [![grafik.png](https://wiki.stadtfabrikanten.org/uploads/images/gallery/2025-05/scaled-1680-/AgXf0gLYkMgGZUh3-grafik.png)](https://wiki.stadtfabrikanten.org/uploads/images/gallery/2025-05/AgXf0gLYkMgGZUh3-grafik.png) [![grafik.png](https://wiki.stadtfabrikanten.org/uploads/images/gallery/2025-05/scaled-1680-/OJSnisftSRb4am4s-grafik.png)](https://wiki.stadtfabrikanten.org/uploads/images/gallery/2025-05/OJSnisftSRb4am4s-grafik.png) [![grafik.png](https://wiki.stadtfabrikanten.org/uploads/images/gallery/2025-05/scaled-1680-/UUh93TgHb6XU2Fyx-grafik.png)](https://wiki.stadtfabrikanten.org/uploads/images/gallery/2025-05/UUh93TgHb6XU2Fyx-grafik.png) [![grafik.png](https://wiki.stadtfabrikanten.org/uploads/images/gallery/2025-05/scaled-1680-/Z1h8bryobXdVr7Xb-grafik.png)](https://wiki.stadtfabrikanten.org/uploads/images/gallery/2025-05/Z1h8bryobXdVr7Xb-grafik.png) [![grafik.png](https://wiki.stadtfabrikanten.org/uploads/images/gallery/2025-05/scaled-1680-/4eDaBGkrtQqenz3q-grafik.png)](https://wiki.stadtfabrikanten.org/uploads/images/gallery/2025-05/4eDaBGkrtQqenz3q-grafik.png) [![grafik.png](https://wiki.stadtfabrikanten.org/uploads/images/gallery/2025-05/scaled-1680-/tqwbSALPe52TvBKS-grafik.png)](https://wiki.stadtfabrikanten.org/uploads/images/gallery/2025-05/tqwbSALPe52TvBKS-grafik.png)

[![grafik.png](https://wiki.stadtfabrikanten.org/uploads/images/gallery/2025-05/scaled-1680-/bU2SR7i7VeDKgXKH-grafik.png)](https://wiki.stadtfabrikanten.org/uploads/images/gallery/2025-05/bU2SR7i7VeDKgXKH-grafik.png)

[![grafik.png](https://wiki.stadtfabrikanten.org/uploads/images/gallery/2025-05/scaled-1680-/u3ABgFkNFz92Kbzq-grafik.png)](https://wiki.stadtfabrikanten.org/uploads/images/gallery/2025-05/u3ABgFkNFz92Kbzq-grafik.png)

# Sheriff Star

<div class="page-metadata-wrapper" id="bkmrk-"></div><div class="page view" id="bkmrk-source-of-documentat"><article># Source of documentation: [https://github.com/garykac/pathmonkey](https://github.com/garykac/pathmonkey)

Sheriff stars typically have 5 or 6 points and also have a circle at the end of each point so that the badge can't accidentally stab the officer while they're wearing the badge.

## 6-pointed Sheriff Stars

<table border="1" style="border-collapse: collapse; width: 99.9734%; height: 362.2px;"><tbody><tr style="height: 38.1167px;"><td class="align-center" style="height: 38.1167px;">Shapes created by extension</td><td class="align-center" style="height: 38.1167px;">Remove original circle</td><td class="align-center" style="height: 38.1167px;">Union the shapes</td></tr><tr style="height: 324.083px;"><td class="align-center" style="height: 324.083px;">[![grafik.png](https://wiki.stadtfabrikanten.org/uploads/images/gallery/2025-05/scaled-1680-/W9pc8J7Uig6jDeNP-grafik.png)](https://wiki.stadtfabrikanten.org/uploads/images/gallery/2025-05/W9pc8J7Uig6jDeNP-grafik.png)

</td><td class="align-center" style="height: 324.083px;">[![grafik.png](https://wiki.stadtfabrikanten.org/uploads/images/gallery/2025-05/scaled-1680-/C3f2KGsINgIvn68l-grafik.png)](https://wiki.stadtfabrikanten.org/uploads/images/gallery/2025-05/C3f2KGsINgIvn68l-grafik.png)

</td><td class="align-center" style="height: 324.083px;">[![grafik.png](https://wiki.stadtfabrikanten.org/uploads/images/gallery/2025-05/scaled-1680-/crhecHmkj7PGpIHc-grafik.png)](https://wiki.stadtfabrikanten.org/uploads/images/gallery/2025-05/crhecHmkj7PGpIHc-grafik.png)

</td></tr></tbody></table>

The components (star, circles) are kept separate so that additional processing can be performed on each component if desired. To produce a sheriff star outline, just `union` the various shapes together.

## 5- and 7-pointed Sheriff Stars

<table border="1" style="border-collapse: collapse; width: 99.9734%; height: 629.166px;"><tbody><tr style="height: 313.083px;"><td class="align-center" style="height: 313.083px;">[![grafik.png](https://wiki.stadtfabrikanten.org/uploads/images/gallery/2025-05/scaled-1680-/aWRp3DQ9rlU0SJNR-grafik.png)](https://wiki.stadtfabrikanten.org/uploads/images/gallery/2025-05/aWRp3DQ9rlU0SJNR-grafik.png)

</td><td class="align-center" style="height: 313.083px;">[![grafik.png](https://wiki.stadtfabrikanten.org/uploads/images/gallery/2025-05/scaled-1680-/hTxpg7BoSYe1Nybr-grafik.png)](https://wiki.stadtfabrikanten.org/uploads/images/gallery/2025-05/hTxpg7BoSYe1Nybr-grafik.png)

</td><td class="align-center" style="height: 313.083px;">[![grafik.png](https://wiki.stadtfabrikanten.org/uploads/images/gallery/2025-05/scaled-1680-/iBrdScnqCg6QGVKz-grafik.png)](https://wiki.stadtfabrikanten.org/uploads/images/gallery/2025-05/iBrdScnqCg6QGVKz-grafik.png)

</td></tr><tr style="height: 316.083px;"><td class="align-center" style="height: 316.083px;">[![grafik.png](https://wiki.stadtfabrikanten.org/uploads/images/gallery/2025-05/scaled-1680-/TTCLbpzze2zBGimK-grafik.png)](https://wiki.stadtfabrikanten.org/uploads/images/gallery/2025-05/TTCLbpzze2zBGimK-grafik.png)

</td><td class="align-center" style="height: 316.083px;">[![grafik.png](https://wiki.stadtfabrikanten.org/uploads/images/gallery/2025-05/scaled-1680-/ksIUYXBn4cJpMiSR-grafik.png)](https://wiki.stadtfabrikanten.org/uploads/images/gallery/2025-05/ksIUYXBn4cJpMiSR-grafik.png)

</td><td class="align-center" style="height: 316.083px;">[![grafik.png](https://wiki.stadtfabrikanten.org/uploads/images/gallery/2025-05/scaled-1680-/ky2O8aWL2H0ePo53-grafik.png)](https://wiki.stadtfabrikanten.org/uploads/images/gallery/2025-05/ky2O8aWL2H0ePo53-grafik.png)

</td></tr></tbody></table>

</article></div>If the "Show inner circle" option is selected, then a circle touching the inner points of the star will be included in the output. Here is an example for a 5-pointed star:

[![grafik.png](https://wiki.stadtfabrikanten.org/uploads/images/gallery/2025-05/scaled-1680-/2037wmi6qt99k8Bi-grafik.png)](https://wiki.stadtfabrikanten.org/uploads/images/gallery/2025-05/2037wmi6qt99k8Bi-grafik.png)

This extension works with circles and ellipsis objects

[![grafik.png](https://wiki.stadtfabrikanten.org/uploads/images/gallery/2025-05/scaled-1680-/jevJ2xFxDbtXS4JW-grafik.png)](https://wiki.stadtfabrikanten.org/uploads/images/gallery/2025-05/jevJ2xFxDbtXS4JW-grafik.png)

[![grafik.png](https://wiki.stadtfabrikanten.org/uploads/images/gallery/2025-05/scaled-1680-/cG8oIr6WdFSx04Tl-grafik.png)](https://wiki.stadtfabrikanten.org/uploads/images/gallery/2025-05/cG8oIr6WdFSx04Tl-grafik.png)

[![grafik.png](https://wiki.stadtfabrikanten.org/uploads/images/gallery/2025-05/scaled-1680-/NBbJ57zlDl13RBhB-grafik.png)](https://wiki.stadtfabrikanten.org/uploads/images/gallery/2025-05/NBbJ57zlDl13RBhB-grafik.png)

<div class="page view" id="bkmrk--5"></div>

# X-Agram

# Source of documentation: [https://github.com/garykac/pathmonkey](https://github.com/garykac/pathmonkey)

X-agrams are stars with a circumscribed circle. While these can be drawn separately, it can be tricky to properly align the circle and the star, especially for odd-count stars where the center of the star's bounding box is not the true center of the star.

## Pentagram (5-agram)

<table border="1" id="bkmrk-create-and-select-a-" style="border-collapse: collapse; width: 99.9734%; height: 290.2px;"><colgroup><col style="width: 33.289%;"></col><col style="width: 33.289%;"></col><col style="width: 33.289%;"></col></colgroup><tbody><tr style="height: 252.083px;"><td class="align-center" style="height: 252.083px;">[![grafik.png](https://wiki.stadtfabrikanten.org/uploads/images/gallery/2025-05/scaled-1680-/KhUKXoCzBbFEh1yK-grafik.png)](https://wiki.stadtfabrikanten.org/uploads/images/gallery/2025-05/KhUKXoCzBbFEh1yK-grafik.png)

</td><td class="align-center" style="height: 252.083px;">[![grafik.png](https://wiki.stadtfabrikanten.org/uploads/images/gallery/2025-05/scaled-1680-/GFuPsp8cEQ67bUVk-grafik.png)](https://wiki.stadtfabrikanten.org/uploads/images/gallery/2025-05/GFuPsp8cEQ67bUVk-grafik.png)

</td><td class="align-center" style="height: 252.083px;">[![grafik.png](https://wiki.stadtfabrikanten.org/uploads/images/gallery/2025-05/scaled-1680-/XYv25TU8lva00xUl-grafik.png)](https://wiki.stadtfabrikanten.org/uploads/images/gallery/2025-05/XYv25TU8lva00xUl-grafik.png)

</td></tr><tr style="height: 38.1167px;"><td class="align-center" style="height: 38.1167px;">Create and select a circle</td><td class="align-center" style="height: 38.1167px;">Vertex skip = 1 (pentagon)</td><td class="align-center" style="height: 38.1167px;">Vertex skip = 2 (pentagram)</td></tr></tbody></table>

## Septagram (7-agram)

<table border="1" id="bkmrk-vertex-skip-%3D-1-vert" style="border-collapse: collapse; width: 99.9734%;"><colgroup><col style="width: 33.3112%;"></col><col style="width: 33.3112%;"></col><col style="width: 33.3112%;"></col></colgroup><tbody><tr><td class="align-center">[![grafik.png](https://wiki.stadtfabrikanten.org/uploads/images/gallery/2025-05/scaled-1680-/6dh8RjpjFn2vooOp-grafik.png)](https://wiki.stadtfabrikanten.org/uploads/images/gallery/2025-05/6dh8RjpjFn2vooOp-grafik.png)

</td><td class="align-center">[![grafik.png](https://wiki.stadtfabrikanten.org/uploads/images/gallery/2025-05/scaled-1680-/83gbVP3I2H1rualc-grafik.png)](https://wiki.stadtfabrikanten.org/uploads/images/gallery/2025-05/83gbVP3I2H1rualc-grafik.png)

</td><td class="align-center">[![grafik.png](https://wiki.stadtfabrikanten.org/uploads/images/gallery/2025-05/scaled-1680-/a67vLuJv3XpWjKyi-grafik.png)](https://wiki.stadtfabrikanten.org/uploads/images/gallery/2025-05/a67vLuJv3XpWjKyi-grafik.png)

</td></tr><tr><td class="align-center">Vertex skip = 1</td><td class="align-center">Vertex skip = 2</td><td class="align-center">Vertex skip = 3</td></tr></tbody></table>

In addition to connecting each point along the outer circle, they can also be connected via an inner circle.

## Septagram (7-agram) with inner connection

<table border="1" id="bkmrk-vertex-skip-%3D-1-vert-1" style="border-collapse: collapse; width: 99.9734%;"><colgroup><col style="width: 20%;"></col><col style="width: 20%;"></col><col style="width: 20%;"></col><col style="width: 20%;"></col><col style="width: 20%;"></col></colgroup><tbody><tr><td class="align-center">[![grafik.png](https://wiki.stadtfabrikanten.org/uploads/images/gallery/2025-05/scaled-1680-/DOuHvwMm6K2OWcN2-grafik.png)](https://wiki.stadtfabrikanten.org/uploads/images/gallery/2025-05/DOuHvwMm6K2OWcN2-grafik.png)

</td><td class="align-center">[![grafik.png](https://wiki.stadtfabrikanten.org/uploads/images/gallery/2025-05/scaled-1680-/AlrZ0DuOqNSxLDf4-grafik.png)](https://wiki.stadtfabrikanten.org/uploads/images/gallery/2025-05/AlrZ0DuOqNSxLDf4-grafik.png)

</td><td class="align-center">[![grafik.png](https://wiki.stadtfabrikanten.org/uploads/images/gallery/2025-05/scaled-1680-/1IDAN3TX0S8tFk3r-grafik.png)](https://wiki.stadtfabrikanten.org/uploads/images/gallery/2025-05/1IDAN3TX0S8tFk3r-grafik.png)

</td><td class="align-center">[![grafik.png](https://wiki.stadtfabrikanten.org/uploads/images/gallery/2025-05/scaled-1680-/WjAdzCOO8YYswjPT-grafik.png)](https://wiki.stadtfabrikanten.org/uploads/images/gallery/2025-05/WjAdzCOO8YYswjPT-grafik.png)

</td><td class="align-center">[![grafik.png](https://wiki.stadtfabrikanten.org/uploads/images/gallery/2025-05/scaled-1680-/A0XSsPylPZ2yVVza-grafik.png)](https://wiki.stadtfabrikanten.org/uploads/images/gallery/2025-05/A0XSsPylPZ2yVVza-grafik.png)

</td></tr><tr><td class="align-center">Vertex skip = 1</td><td class="align-center">Vertex skip = 2</td><td class="align-center">Vertex skip = 3</td><td class="align-center">Vertex skip = 4</td><td class="align-center">Vertex skip = 5</td></tr></tbody></table>

This extension works with circles and ellipsis objects

## Draw a circle object

[![grafik.png](https://wiki.stadtfabrikanten.org/uploads/images/gallery/2025-05/scaled-1680-/rlt2vm1rwRCAG1OD-grafik.png)](https://wiki.stadtfabrikanten.org/uploads/images/gallery/2025-05/rlt2vm1rwRCAG1OD-grafik.png)

[![grafik.png](https://wiki.stadtfabrikanten.org/uploads/images/gallery/2025-05/scaled-1680-/cCT9X4gQmUKoHsIG-grafik.png)](https://wiki.stadtfabrikanten.org/uploads/images/gallery/2025-05/cCT9X4gQmUKoHsIG-grafik.png)

[![grafik.png](https://wiki.stadtfabrikanten.org/uploads/images/gallery/2025-05/scaled-1680-/LNRLzgOTqhsyhFD9-grafik.png)](https://wiki.stadtfabrikanten.org/uploads/images/gallery/2025-05/LNRLzgOTqhsyhFD9-grafik.png)

# Shape/Pattern from existing Path(s)

# Bounding Box

This is a simple but useful extension to create rectangles and/or circles around selected items. In Inkscape 1.2.1 the option to set some margins around the object were removed, so this extension is even more useful, as it acts a similar way.

## Select one or more objects

[![grafik.png](https://wiki.stadtfabrikanten.org/uploads/images/gallery/2025-05/scaled-1680-/jL80nMMqkwXKLpsO-grafik.png)](https://wiki.stadtfabrikanten.org/uploads/images/gallery/2025-05/jL80nMMqkwXKLpsO-grafik.png) [![grafik.png](https://wiki.stadtfabrikanten.org/uploads/images/gallery/2025-05/scaled-1680-/tUTiMk4Y5EwkU4vV-grafik.png)](https://wiki.stadtfabrikanten.org/uploads/images/gallery/2025-05/tUTiMk4Y5EwkU4vV-grafik.png)

[![grafik.png](https://wiki.stadtfabrikanten.org/uploads/images/gallery/2025-05/scaled-1680-/YdXWUEotISifXiEw-grafik.png)](https://wiki.stadtfabrikanten.org/uploads/images/gallery/2025-05/YdXWUEotISifXiEw-grafik.png)

[![grafik.png](https://wiki.stadtfabrikanten.org/uploads/images/gallery/2025-05/scaled-1680-/m2kolI8mLFSBmZPQ-grafik.png)](https://wiki.stadtfabrikanten.org/uploads/images/gallery/2025-05/m2kolI8mLFSBmZPQ-grafik.png)

# Example 2 (multiple objects at once)

[![grafik.png](https://wiki.stadtfabrikanten.org/uploads/images/gallery/2025-05/scaled-1680-/pcnHLI4mUdy6Qq2m-grafik.png)](https://wiki.stadtfabrikanten.org/uploads/images/gallery/2025-05/pcnHLI4mUdy6Qq2m-grafik.png) [![grafik.png](https://wiki.stadtfabrikanten.org/uploads/images/gallery/2025-05/scaled-1680-/5CiOdWWEKKS55OMO-grafik.png)](https://wiki.stadtfabrikanten.org/uploads/images/gallery/2025-05/5CiOdWWEKKS55OMO-grafik.png)

<p class="callout info">The same can be done with Live Path effects!</p>

[![grafik.png](https://wiki.stadtfabrikanten.org/uploads/images/gallery/2025-05/scaled-1680-/fVVGUDfqH5ab90md-grafik.png)](https://wiki.stadtfabrikanten.org/uploads/images/gallery/2025-05/fVVGUDfqH5ab90md-grafik.png) [![grafik.png](https://wiki.stadtfabrikanten.org/uploads/images/gallery/2025-05/scaled-1680-/cI7IIZGTq530a4uU-grafik.png)](https://wiki.stadtfabrikanten.org/uploads/images/gallery/2025-05/cI7IIZGTq530a4uU-grafik.png)
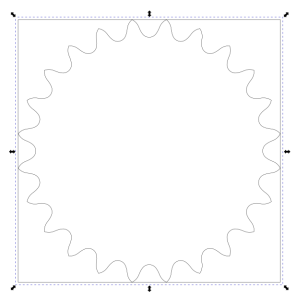
# Convex Hull

Creates a convex hull for the current selection of paths. Does not apply to objects and only works for polylines and not for bezier curves!

## Example for a long fuzzy polyline

[![grafik.png](https://wiki.stadtfabrikanten.org/uploads/images/gallery/2025-05/scaled-1680-/j4j1zKTeruO5rqHV-grafik.png)](https://wiki.stadtfabrikanten.org/uploads/images/gallery/2025-05/j4j1zKTeruO5rqHV-grafik.png) [![grafik.png](https://wiki.stadtfabrikanten.org/uploads/images/gallery/2025-05/scaled-1680-/GGzsdpsaui3clsFG-grafik.png)](https://wiki.stadtfabrikanten.org/uploads/images/gallery/2025-05/GGzsdpsaui3clsFG-grafik.png)
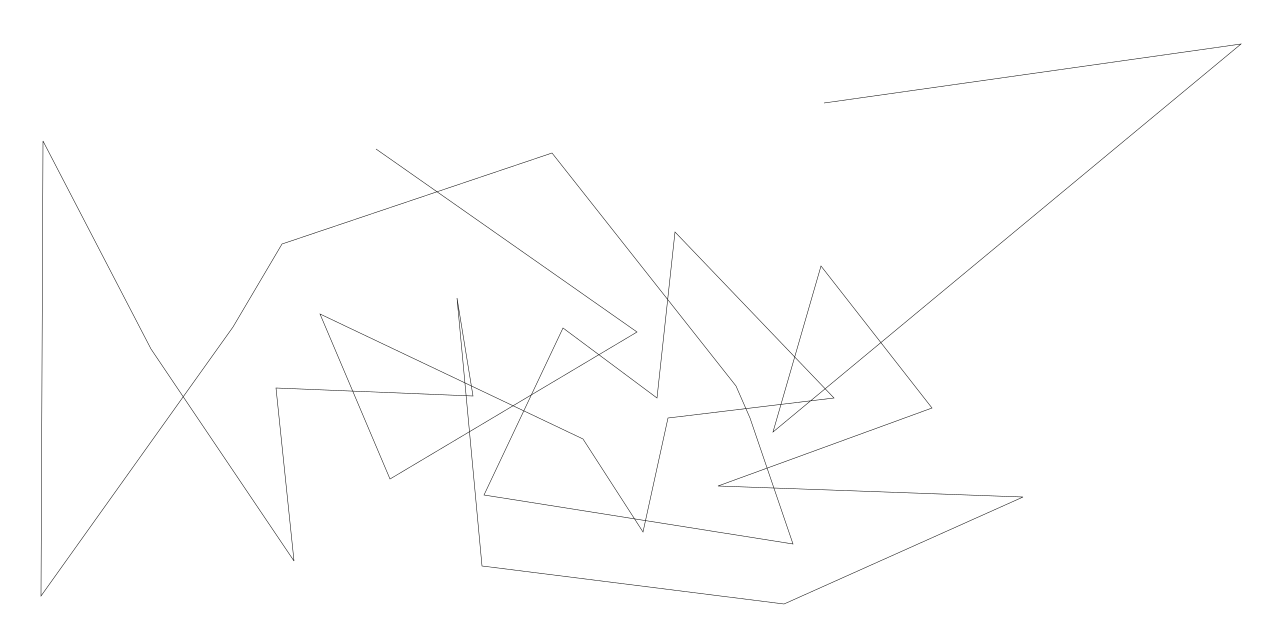
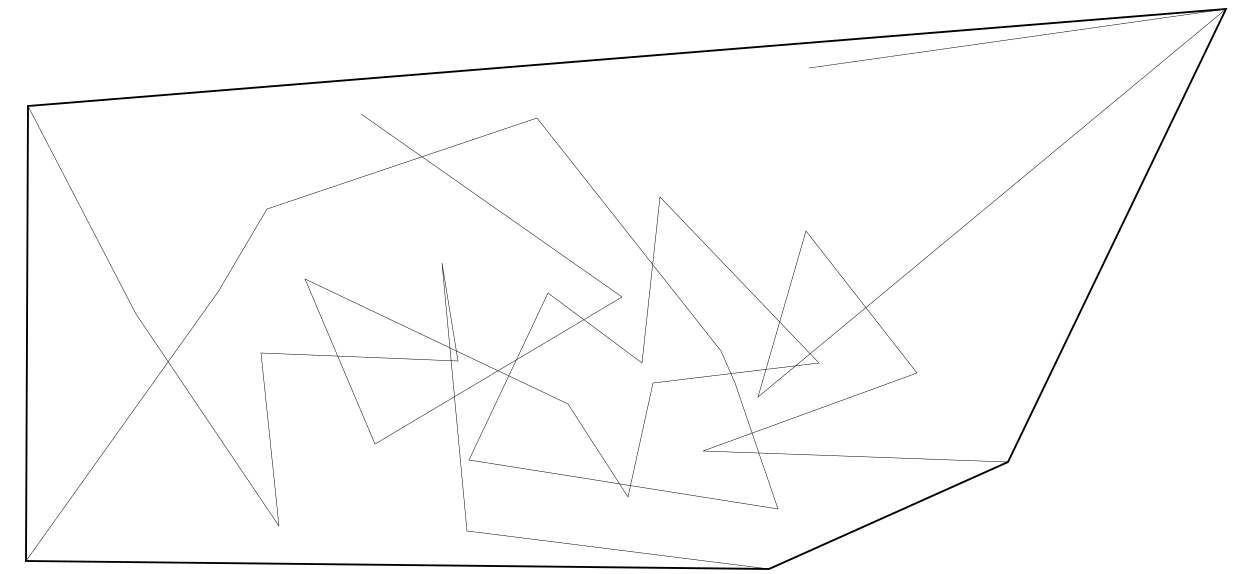
## Bad example with bezier paths

[![grafik.png](https://wiki.stadtfabrikanten.org/uploads/images/gallery/2025-05/scaled-1680-/U441I0PN4PJyIX6l-grafik.png)](https://wiki.stadtfabrikanten.org/uploads/images/gallery/2025-05/U441I0PN4PJyIX6l-grafik.png)
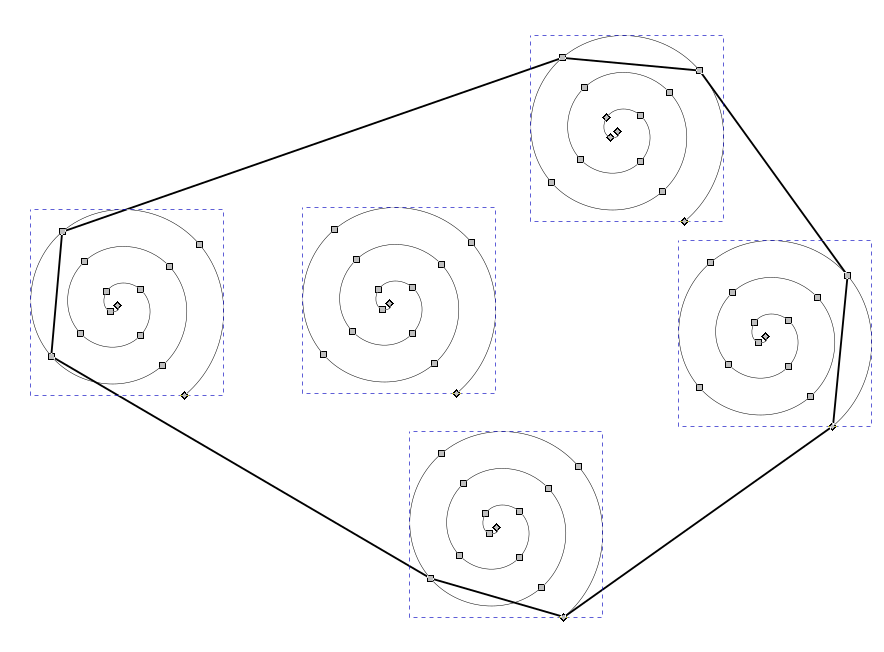
# Delaunay Triangulation

[![grafik.png](https://wiki.stadtfabrikanten.org/uploads/images/gallery/2025-05/scaled-1680-/nivWpcmEphZa4qPU-grafik.png)](https://wiki.stadtfabrikanten.org/uploads/images/gallery/2025-05/nivWpcmEphZa4qPU-grafik.png) [![grafik.png](https://wiki.stadtfabrikanten.org/uploads/images/gallery/2025-05/scaled-1680-/zcHTSpSz4HpWEAst-grafik.png)](https://wiki.stadtfabrikanten.org/uploads/images/gallery/2025-05/zcHTSpSz4HpWEAst-grafik.png)
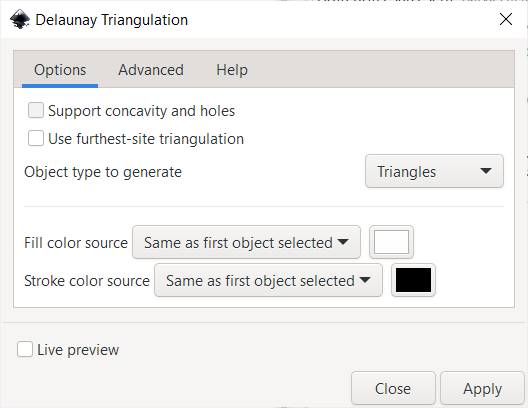
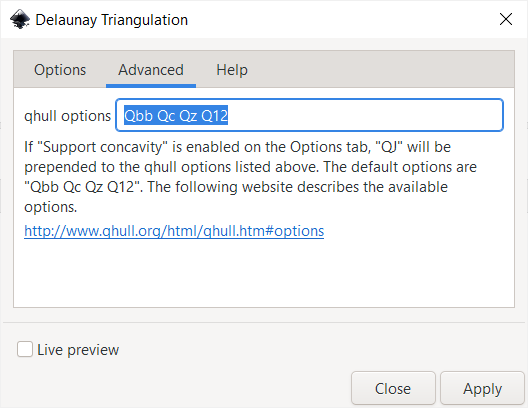
## Draw some paths

[![grafik.png](https://wiki.stadtfabrikanten.org/uploads/images/gallery/2025-05/scaled-1680-/LfF7j7jEYD0RnvBr-grafik.png)](https://wiki.stadtfabrikanten.org/uploads/images/gallery/2025-05/LfF7j7jEYD0RnvBr-grafik.png)

## Apply extension

[![grafik.png](https://wiki.stadtfabrikanten.org/uploads/images/gallery/2025-05/scaled-1680-/yFX7NGVaFhLmDmXy-grafik.png)](https://wiki.stadtfabrikanten.org/uploads/images/gallery/2025-05/yFX7NGVaFhLmDmXy-grafik.png)
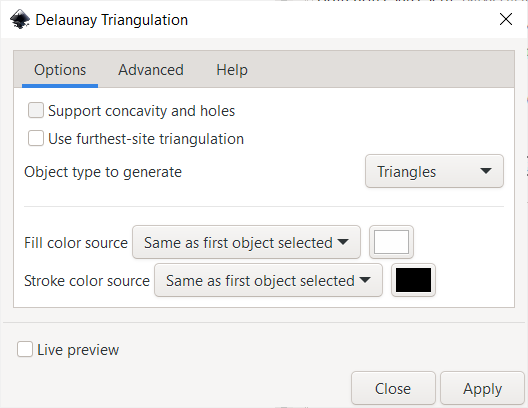
## The result

[![grafik.png](https://wiki.stadtfabrikanten.org/uploads/images/gallery/2025-05/scaled-1680-/89RPbT1Rdj9n6oje-grafik.png)](https://wiki.stadtfabrikanten.org/uploads/images/gallery/2025-05/89RPbT1Rdj9n6oje-grafik.png)
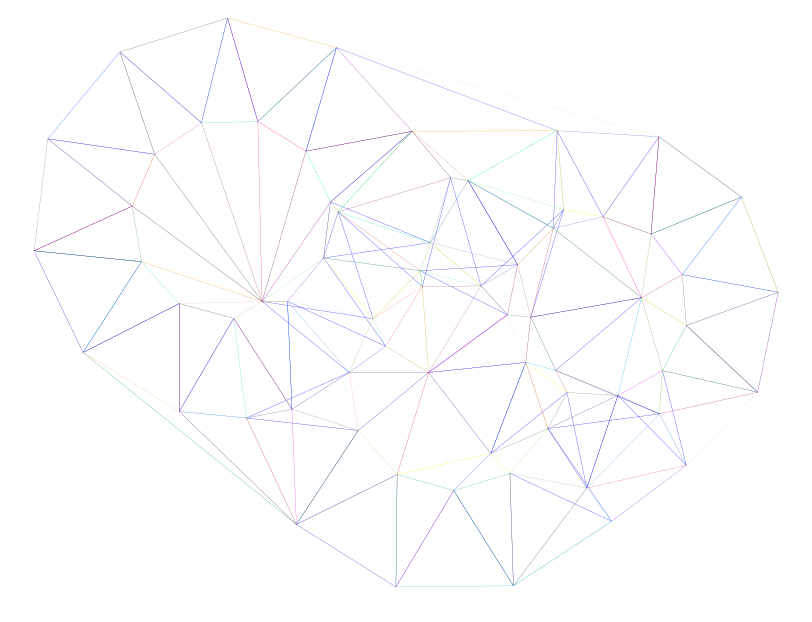
# Dots To Path Points

[![grafik.png](https://wiki.stadtfabrikanten.org/uploads/images/gallery/2025-05/scaled-1680-/IICJSD8WrZfgRsd0-grafik.png)](https://wiki.stadtfabrikanten.org/uploads/images/gallery/2025-05/IICJSD8WrZfgRsd0-grafik.png) [![grafik.png](https://wiki.stadtfabrikanten.org/uploads/images/gallery/2025-05/scaled-1680-/0c0rKhLSbPhm3mPM-grafik.png)](https://wiki.stadtfabrikanten.org/uploads/images/gallery/2025-05/0c0rKhLSbPhm3mPM-grafik.png)
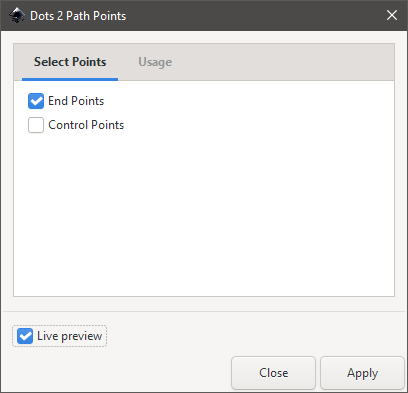
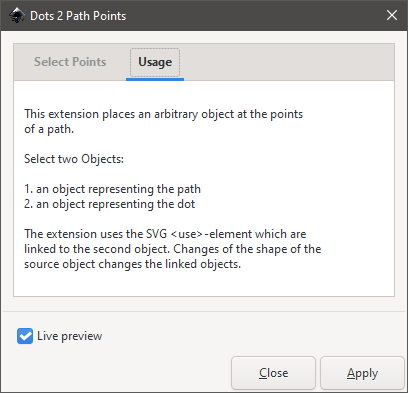
## Draw some guidance path and some object

The object will be cloned so it will be attached to each control path's point

[![grafik.png](https://wiki.stadtfabrikanten.org/uploads/images/gallery/2025-05/scaled-1680-/IV3WIxjBj7Rju6yB-grafik.png)](https://wiki.stadtfabrikanten.org/uploads/images/gallery/2025-05/IV3WIxjBj7Rju6yB-grafik.png)

[![grafik.png](https://wiki.stadtfabrikanten.org/uploads/images/gallery/2025-05/scaled-1680-/9jRkvaGi6lOya2OG-grafik.png)](https://wiki.stadtfabrikanten.org/uploads/images/gallery/2025-05/9jRkvaGi6lOya2OG-grafik.png)

## Run the extension

First select the object, then the control path

## The result

[![grafik.png](https://wiki.stadtfabrikanten.org/uploads/images/gallery/2025-05/scaled-1680-/9OEDLWddUxHuDdpJ-grafik.png)](https://wiki.stadtfabrikanten.org/uploads/images/gallery/2025-05/9OEDLWddUxHuDdpJ-grafik.png)
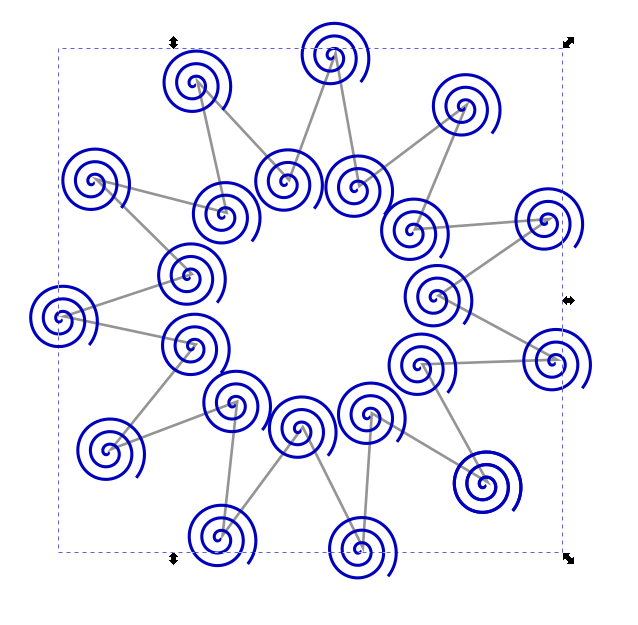
# Draw Directions / Travel Moves

This extensions marks start and end point of opened (red + blue) and closed paths (green + yellow). See also [Move Path Node](https://wiki.stadtfabrikanten.org/books/fablab-chemnitz/page/move-path-node).

[![grafik.png](https://wiki.stadtfabrikanten.org/uploads/images/gallery/2025-05/scaled-1680-/ToavWLHoEt54XKAy-grafik.png)](https://wiki.stadtfabrikanten.org/uploads/images/gallery/2025-05/ToavWLHoEt54XKAy-grafik.png)
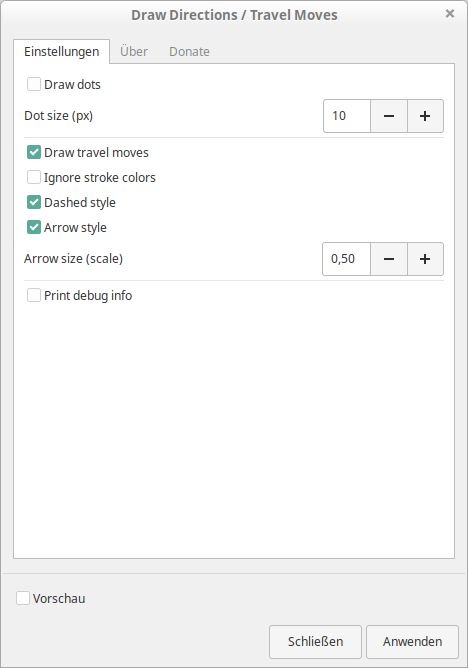
# Example 1: Draw dots

Draw some paths

[![grafik.png](https://wiki.stadtfabrikanten.org/uploads/images/gallery/2025-05/scaled-1680-/chyru6uKNisVD9Xa-grafik.png)](https://wiki.stadtfabrikanten.org/uploads/images/gallery/2025-05/chyru6uKNisVD9Xa-grafik.png)
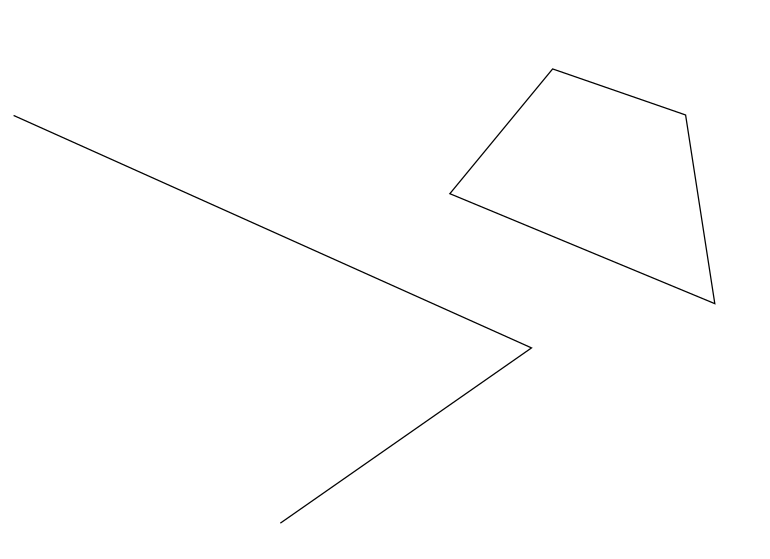
Run the extension and get the result

[![grafik.png](https://wiki.stadtfabrikanten.org/uploads/images/gallery/2025-05/scaled-1680-/7TD7FUTc19LNvp8A-grafik.png)](https://wiki.stadtfabrikanten.org/uploads/images/gallery/2025-05/7TD7FUTc19LNvp8A-grafik.png)
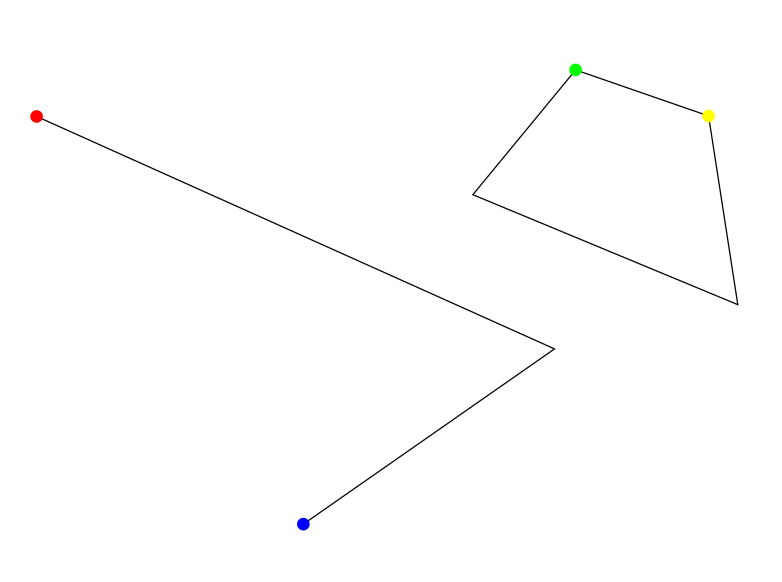
# Example 2: Draw travel moves

[![grafik.png](https://wiki.stadtfabrikanten.org/uploads/images/gallery/2025-05/scaled-1680-/WNYlavDWtaU5uvv3-grafik.png)](https://wiki.stadtfabrikanten.org/uploads/images/gallery/2025-05/WNYlavDWtaU5uvv3-grafik.png)
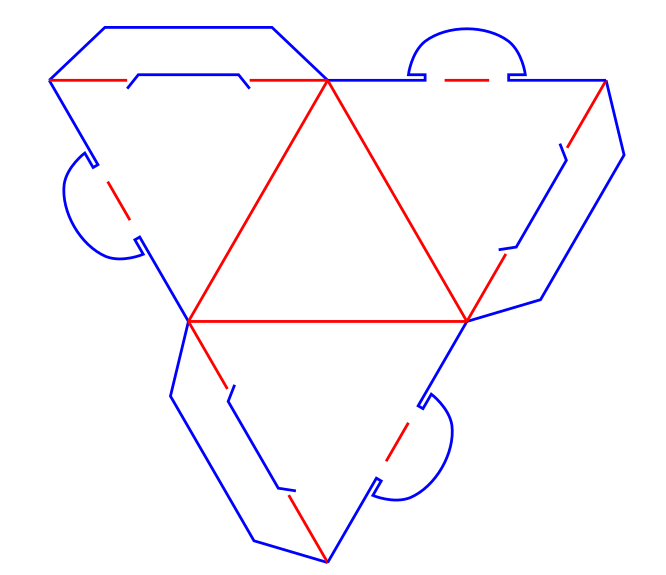
[![grafik.png](https://wiki.stadtfabrikanten.org/uploads/images/gallery/2025-05/scaled-1680-/myVsWAWDUuqVsR9z-grafik.png)](https://wiki.stadtfabrikanten.org/uploads/images/gallery/2025-05/myVsWAWDUuqVsR9z-grafik.png)
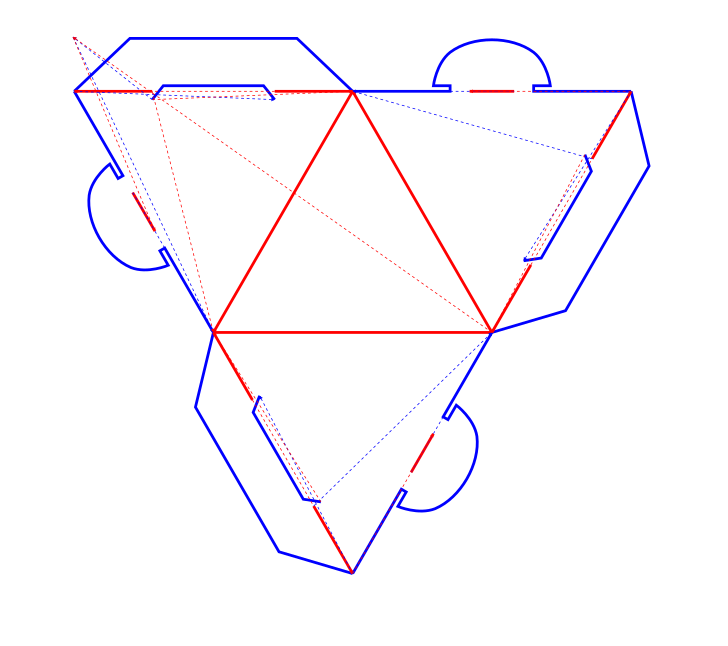
# Hatch Fill

[![grafik.png](https://wiki.stadtfabrikanten.org/uploads/images/gallery/2025-05/scaled-1680-/HsWJB7kPYCVLGeHc-grafik.png)](https://wiki.stadtfabrikanten.org/uploads/images/gallery/2025-05/HsWJB7kPYCVLGeHc-grafik.png)

[![grafik.png](https://wiki.stadtfabrikanten.org/uploads/images/gallery/2025-05/scaled-1680-/zAiKRVCAEu9Q6z7H-grafik.png)](https://wiki.stadtfabrikanten.org/uploads/images/gallery/2025-05/zAiKRVCAEu9Q6z7H-grafik.png)
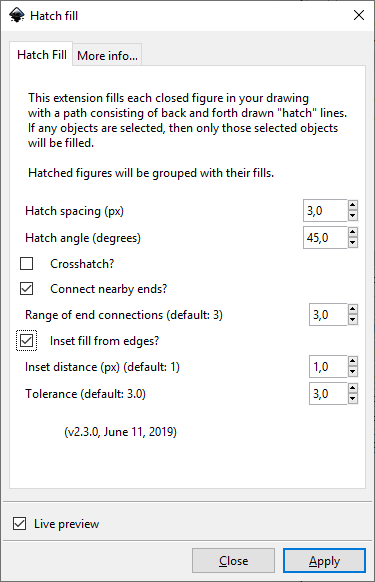
[![grafik.png](https://wiki.stadtfabrikanten.org/uploads/images/gallery/2025-05/scaled-1680-/zksX7Wp4NHIf1ePE-grafik.png)](https://wiki.stadtfabrikanten.org/uploads/images/gallery/2025-05/zksX7Wp4NHIf1ePE-grafik.png)

# Netting

<div class="page-metadata-wrapper" id="bkmrk-"></div><div class="page view" id="bkmrk-this-effect-%28alterna"><article>This effect (alternatingly) nets in the selected paths. Based on the work of Sunabe Kazumichi.

See [<span>http://dp48069596.lolipop.jp</span>](http://dp48069596.lolipop.jp)

[![grafik.png](https://wiki.stadtfabrikanten.org/uploads/images/gallery/2025-05/scaled-1680-/5VO9YM2Ge7ve4QNY-grafik.png)](https://wiki.stadtfabrikanten.org/uploads/images/gallery/2025-05/5VO9YM2Ge7ve4QNY-grafik.png)

<table border="1" style="border-collapse: collapse; width: 99.9734%; height: 340.2px;"><colgroup><col style="width: 33.289%;"></col><col style="width: 33.289%;"></col><col style="width: 33.289%;"></col></colgroup><thead><tr style="height: 36.1167px;"><td class="align-center" style="height: 36.1167px;">**Original Path**</td><td class="align-center" style="height: 36.1167px;">**All with all**</td><td class="align-center" style="height: 36.1167px;">**Alternatingly**</td></tr></thead><tbody><tr style="height: 304.083px;"><td class="align-center" style="height: 304.083px;">[![grafik.png](https://wiki.stadtfabrikanten.org/uploads/images/gallery/2025-05/scaled-1680-/9xXVuQsAmuYcCmfH-grafik.png)](https://wiki.stadtfabrikanten.org/uploads/images/gallery/2025-05/9xXVuQsAmuYcCmfH-grafik.png)</td><td class="align-center" style="height: 304.083px;">[![grafik.png](https://wiki.stadtfabrikanten.org/uploads/images/gallery/2025-05/scaled-1680-/9wYKnloIsqtLf3Ay-grafik.png)](https://wiki.stadtfabrikanten.org/uploads/images/gallery/2025-05/9wYKnloIsqtLf3Ay-grafik.png)</td><td class="align-center" style="height: 304.083px;">[![grafik.png](https://wiki.stadtfabrikanten.org/uploads/images/gallery/2025-05/scaled-1680-/hrhP2oUBuKUXY1sF-grafik.png)](https://wiki.stadtfabrikanten.org/uploads/images/gallery/2025-05/hrhP2oUBuKUXY1sF-grafik.png)</td></tr></tbody></table>

</article></div><div class="page view" id="bkmrk--1"></div>

# Number Subpaths

[![grafik.png](https://wiki.stadtfabrikanten.org/uploads/images/gallery/2025-05/scaled-1680-/IZrsBUu5gzkmKXxW-grafik.png)](https://wiki.stadtfabrikanten.org/uploads/images/gallery/2025-05/IZrsBUu5gzkmKXxW-grafik.png)

[![grafik.png](https://wiki.stadtfabrikanten.org/uploads/images/gallery/2025-05/scaled-1680-/3Zg3DfUpms572xdW-grafik.png)](https://wiki.stadtfabrikanten.org/uploads/images/gallery/2025-05/3Zg3DfUpms572xdW-grafik.png)

Visualize the order of subpaths within one path. Each start and end node will be marked with green/red dots and a text flag according to its order. Optionally the path ID could be visualized if working with more than one combined path.

I use this for various projects where combining paths is needed and the order is of importance - embroidery designs, developing and testing extensions for cutting/plotting.

This extension is based on the Inkscape included extension Visualize Path → Number Nodes by Aaron Spike from 2005. Number Subpaths can be found in the same menu when installed.

See [https://inkscape.org/~EllenWasbo/%E2%98%85number-subpaths](https://inkscape.org/~EllenWasbo/%E2%98%85number-subpaths) and [https://gitlab.com/EllenWasbo/inkscape-extension-number-subpaths](https://gitlab.com/EllenWasbo/inkscape-extension-number-subpaths)

# Offset Paths

Create offset for open or closed paths from non-bezier paths (destructive method). Python library **pyclipper** needs to be installed (which is automatically done, if you install MightyScape completely). Use [Approximate Curves by Straight Lines (Flatten Beziers)](https://wiki.stadtfabrikanten.org/books/in-house-extensions/page/approximate-curves-by-straight-lines-flatten-beziers "Approximate Curves by Straight Lines (Flatten Beziers)") extension in advance of this plugin to convert your paths.

<p class="callout info">This extensions' code is based on [https://github.com/TimeTravel-0/ofsplot](https://github.com/TimeTravel-0/ofsplot)</p>

## Draw some [Ratchet](https://wiki.stadtfabrikanten.org/books/fablab-chemnitz-shape-generators/page/ratchet) (as example)

[![grafik.png](https://wiki.stadtfabrikanten.org/uploads/images/gallery/2025-05/scaled-1680-/8ubqVq4sQ2ZwgyDW-grafik.png)](https://wiki.stadtfabrikanten.org/uploads/images/gallery/2025-05/8ubqVq4sQ2ZwgyDW-grafik.png)

[![grafik.png](https://wiki.stadtfabrikanten.org/uploads/images/gallery/2025-05/scaled-1680-/9U0uDYwPYkU8LB19-grafik.png)](https://wiki.stadtfabrikanten.org/uploads/images/gallery/2025-05/9U0uDYwPYkU8LB19-grafik.png)
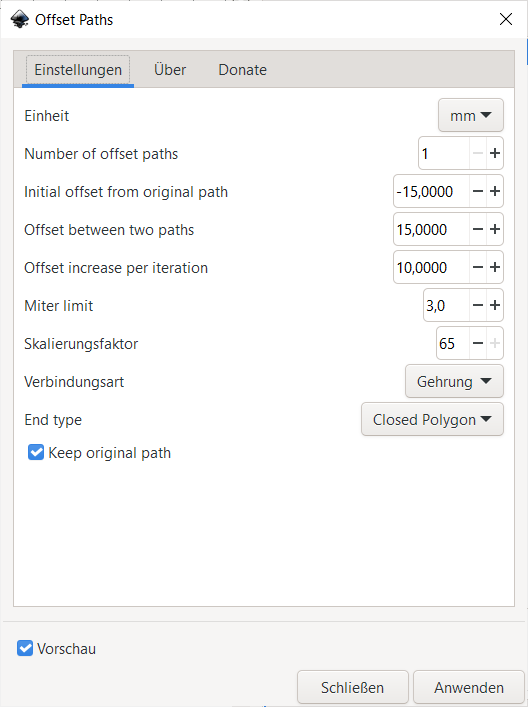
[![grafik.png](https://wiki.stadtfabrikanten.org/uploads/images/gallery/2025-05/scaled-1680-/VEnudQ1suw2uFsGr-grafik.png)](https://wiki.stadtfabrikanten.org/uploads/images/gallery/2025-05/VEnudQ1suw2uFsGr-grafik.png)

## Tests with Bezier curves

<table border="1" id="bkmrk-input-spiral-without" style="border-collapse: collapse; width: 99.9734%;"><colgroup><col style="width: 33.289%;"></col><col style="width: 33.289%;"></col><col style="width: 33.289%;"></col></colgroup><thead><tr><td>**Input**</td><td>**Spiral without [Approximate Curves by Straight Lines (Flatten Beziers)](https://wiki.stadtfabrikanten.org/books/in-house-extensions/page/approximate-curves-by-straight-lines-flatten-beziers)**</td><td>**Spiral with [Approximate Curves by Straight Lines (Flatten Beziers)](https://wiki.stadtfabrikanten.org/books/in-house-extensions/page/approximate-curves-by-straight-lines-flatten-beziers)**</td></tr></thead><tbody><tr><td>[![grafik.png](https://wiki.stadtfabrikanten.org/uploads/images/gallery/2025-05/scaled-1680-/qv1ELOpKZKvUWXsw-grafik.png)](https://wiki.stadtfabrikanten.org/uploads/images/gallery/2025-05/qv1ELOpKZKvUWXsw-grafik.png)</td><td>[![grafik.png](https://wiki.stadtfabrikanten.org/uploads/images/gallery/2025-05/scaled-1680-/K9WmTXttyowZFl5w-grafik.png)](https://wiki.stadtfabrikanten.org/uploads/images/gallery/2025-05/K9WmTXttyowZFl5w-grafik.png)</td><td>[![grafik.png](https://wiki.stadtfabrikanten.org/uploads/images/gallery/2025-05/scaled-1680-/Auh9BmWouP7XU6DV-grafik.png)](https://wiki.stadtfabrikanten.org/uploads/images/gallery/2025-05/Auh9BmWouP7XU6DV-grafik.png)</td></tr></tbody></table>

# Strip Line

Generates a strip line from linear path segments. The whole document will be parsed. This extension does not respect the user selection. Please remove existing transformations before using. You can use [Apply Transformations](https://wiki.stadtfabrikanten.org/books/fablab-chemnitz/page/apply-transformations) to do this.

## Draw some line pattern

[![grafik.png](https://wiki.stadtfabrikanten.org/uploads/images/gallery/2025-05/scaled-1680-/0SJFqIUgoRmMMDJ9-grafik.png)](https://wiki.stadtfabrikanten.org/uploads/images/gallery/2025-05/0SJFqIUgoRmMMDJ9-grafik.png)

## Run the extension

[![grafik.png](https://wiki.stadtfabrikanten.org/uploads/images/gallery/2025-05/scaled-1680-/NQQVHCVVnQYrfMus-grafik.png)](https://wiki.stadtfabrikanten.org/uploads/images/gallery/2025-05/NQQVHCVVnQYrfMus-grafik.png)

## Get strip lines

[![grafik.png](https://wiki.stadtfabrikanten.org/uploads/images/gallery/2025-05/scaled-1680-/b45kkeGYpB0W8cBL-grafik.png)](https://wiki.stadtfabrikanten.org/uploads/images/gallery/2025-05/b45kkeGYpB0W8cBL-grafik.png)

# Travel

Source of documentation: [https://github.com/rkp8000/inkscape-travel](https://github.com/rkp8000/inkscape-travel)

Copy an object along a precise parametric trajectory.

### Usage

Select two objects to use this extension: a rectangle and a template. The rectangle must be below the template, and the template must be a path or group of paths. If any path within the template has "arc" elements (e.g. ellipse/arc objects that have been converted to paths) you will encounter errors using the rotation function (sorry, unfortunately this isn't an easy fix).

Specify the timepoints at which your template will be copied using "start time", "end time", and either "number of steps", "fps", or "time interval". For example, if "start time" is 1, "end time" is 2, and "number of steps" is 6, then 6 copies of the template will be made, corresponding to times 1, 1.2, 1.4, 1.6, 1.8, and 2.0. If "number of steps" is zero, then "fps" can be used to specify frames per second, and if "fps" is also zero, "time interval" can be used to specify the interval between time points from "start time" to "end time".

Next, write in equations for x(t) and y(t) using Python syntax (e.g. x = t, y = t \*\* 2 yields part of a parabola). The units of x and y are relative to the size of the rectangle, for example, if X scale = 2, then one rectangle width corresponds to 2 units along the x-axis. If Y scale = 3, then one rectangle height corresponds to 3 units along the y-axis. The point (0, 0) corresponds to the lower left corner of the rectangle.

The equations for x\_size and y\_size are relative to the size of the object. E.g. if x\_size(t) = 1, and y\_size(t) = t, then the width of the copies will be identical to the template, but their height will increase with increasing t.

Finally, specify the rotation angle (theta) as a function of time. If the rotation anchor is set, the object will be rotated around it, otherwise it will be rotated around its center.

## Draw a rectangle (leave as object) and some path you want to let "travel"(convert from object to path if required)

The rectangle has to be in bottom layer in relation to the travel object

[![grafik.png](https://wiki.stadtfabrikanten.org/uploads/images/gallery/2025-05/scaled-1680-/a5jcbcR70aQB5TF2-grafik.png)](https://wiki.stadtfabrikanten.org/uploads/images/gallery/2025-05/a5jcbcR70aQB5TF2-grafik.png)

[![grafik.png](https://wiki.stadtfabrikanten.org/uploads/images/gallery/2025-05/scaled-1680-/uTFPlSwocHsCIKgC-grafik.png)](https://wiki.stadtfabrikanten.org/uploads/images/gallery/2025-05/uTFPlSwocHsCIKgC-grafik.png)

[![grafik.png](https://wiki.stadtfabrikanten.org/uploads/images/gallery/2025-05/scaled-1680-/ooBpVDPrChBbBVIe-grafik.png)](https://wiki.stadtfabrikanten.org/uploads/images/gallery/2025-05/ooBpVDPrChBbBVIe-grafik.png)

## Some example travel

[![grafik.png](https://wiki.stadtfabrikanten.org/uploads/images/gallery/2025-05/scaled-1680-/PD9AMDVbEM4aHLt2-grafik.png)](https://wiki.stadtfabrikanten.org/uploads/images/gallery/2025-05/PD9AMDVbEM4aHLt2-grafik.png)

# Twist

Source: [<span>https://wiki.evilmadscientist.com/Twist</span>](https://wiki.evilmadscientist.com/Twist)

## Draw some path

[![grafik.png](https://wiki.stadtfabrikanten.org/uploads/images/gallery/2025-05/scaled-1680-/5NAiRF76t4wfJhIe-grafik.png)](https://wiki.stadtfabrikanten.org/uploads/images/gallery/2025-05/5NAiRF76t4wfJhIe-grafik.png)

## Apply extension

[![grafik.png](https://wiki.stadtfabrikanten.org/uploads/images/gallery/2025-05/scaled-1680-/DFVOLNunMCPPtFWk-grafik.png)](https://wiki.stadtfabrikanten.org/uploads/images/gallery/2025-05/DFVOLNunMCPPtFWk-grafik.png)

## Check the result

[![grafik.png](https://wiki.stadtfabrikanten.org/uploads/images/gallery/2025-05/scaled-1680-/51ppngYs6sAaJDBR-grafik.png)](https://wiki.stadtfabrikanten.org/uploads/images/gallery/2025-05/51ppngYs6sAaJDBR-grafik.png)

# Special factor 0.5

[![grafik.png](https://wiki.stadtfabrikanten.org/uploads/images/gallery/2025-05/scaled-1680-/E522zXP1tRa7eLCV-grafik.png)](https://wiki.stadtfabrikanten.org/uploads/images/gallery/2025-05/E522zXP1tRa7eLCV-grafik.png)

# Unwind Paths

<div class="page-metadata-wrapper" id="bkmrk-"></div><div class="page view" id="bkmrk-an-extension-to-wrap"><article>An extension to wrap off paths to receive horizontal lines or extruded bands. Can be used for paper crafting, analysis and other works. You can also just use it to colorize path segments.

Tips:

<div class="wiki-content">- You can use [Move Path Node](https://wiki.stadtfabrikanten.org/books/fablab-chemnitz/page/move-path-node) to change the starting nodes of paths.
- You can use [Offset Paths](https://wiki.stadtfabrikanten.org/books/fablab-chemnitz/page/offset-paths) to offset the root paths
- You can use [Joinery - Laschen, Ösen, Nasen, Stege in 2D-Modelle einarbeiten](https://old.stadtfabrikanten.org/pages/viewpage.action?pageId=94175414) to add tabs, flaps or other connectors

</div>Note: Unwind Paths is similar to [https://inkscape.org/~Shoshanaz/%E2%98%85horizontal-lines-effect-hlines](https://inkscape.org/~Shoshanaz/%E2%98%85horizontal-lines-effect-hlines), but it is more andvanced as it supports bezier curves and allows to create extruded bands, style config, etc.

See also:

<div class="wiki-content">- [Paperfold](https://wiki.stadtfabrikanten.org/books/fablab-chemnitz-boxespapercraft/page/paperfold)
- [Box Maker - Path To Flex](https://wiki.stadtfabrikanten.org/books/fablab-chemnitz-boxespapercraft/page/box-maker-t-slot)

</div>[![grafik.png](https://wiki.stadtfabrikanten.org/uploads/images/gallery/2025-05/scaled-1680-/maPQTFZesHyAhVA6-grafik.png)](https://wiki.stadtfabrikanten.org/uploads/images/gallery/2025-05/maPQTFZesHyAhVA6-grafik.png)

[![grafik.png](https://wiki.stadtfabrikanten.org/uploads/images/gallery/2025-05/scaled-1680-/vGboj3xBfLPp7mbl-grafik.png)](https://wiki.stadtfabrikanten.org/uploads/images/gallery/2025-05/vGboj3xBfLPp7mbl-grafik.png)

<div class="wiki-content" id="bkmrk--1"></div></article></div>

# Zigzag Nodes

## Draw a path (circle in this example)

[![grafik.png](https://wiki.stadtfabrikanten.org/uploads/images/gallery/2025-05/scaled-1680-/Uf4okXrTQ619yTjv-grafik.png)](https://wiki.stadtfabrikanten.org/uploads/images/gallery/2025-05/Uf4okXrTQ619yTjv-grafik.png)

## Add nodes to path to generate a good base

Modify Path → Add Nodes

[![grafik.png](https://wiki.stadtfabrikanten.org/uploads/images/gallery/2025-05/scaled-1680-/jrLFmLRKndU4imoR-grafik.png)](https://wiki.stadtfabrikanten.org/uploads/images/gallery/2025-05/jrLFmLRKndU4imoR-grafik.png)

[![grafik.png](https://wiki.stadtfabrikanten.org/uploads/images/gallery/2025-05/scaled-1680-/QytYEWvWz8VPKH3I-grafik.png)](https://wiki.stadtfabrikanten.org/uploads/images/gallery/2025-05/QytYEWvWz8VPKH3I-grafik.png)

[![grafik.png](https://wiki.stadtfabrikanten.org/uploads/images/gallery/2025-05/scaled-1680-/ImW61oQzJW5CNGyY-grafik.png)](https://wiki.stadtfabrikanten.org/uploads/images/gallery/2025-05/ImW61oQzJW5CNGyY-grafik.png)

[![grafik.png](https://wiki.stadtfabrikanten.org/uploads/images/gallery/2025-05/scaled-1680-/rmBGBU7O6yEGpluy-grafik.png)](https://wiki.stadtfabrikanten.org/uploads/images/gallery/2025-05/rmBGBU7O6yEGpluy-grafik.png)

# Shape/Pattern from Generator

# Archimedes Spiral

The extension draws a spiral by a lot of fine-grained line segments. The quality can be set by "Step".

<div class="wDYxhc" data-md="61" id="bkmrk-a-is-a-constant%C2%A0-r-i" lang="de-DE" style="clear: none;"><div class="LGOjhe" data-attrid="wa:/description" data-hveid="CDIQAA">- <span class="ILfuVd" lang="en"><span class="hgKElc">a is a constant </span></span>
- <span class="ILfuVd" lang="en"><span class="hgKElc">r is the length of the radius from the centre or beginning of the spiral</span></span>

<span class="kX21rb ZYHQ7e">vor 6 Tagen</span></div></div>[![grafik.png](https://wiki.stadtfabrikanten.org/uploads/images/gallery/2025-05/scaled-1680-/SShXPOKOpfQQuauT-grafik.png)](https://wiki.stadtfabrikanten.org/uploads/images/gallery/2025-05/SShXPOKOpfQQuauT-grafik.png)

## Examples

[![grafik.png](https://wiki.stadtfabrikanten.org/uploads/images/gallery/2025-05/scaled-1680-/vzbZtjU03Fgp5oZr-grafik.png)](https://wiki.stadtfabrikanten.org/uploads/images/gallery/2025-05/vzbZtjU03Fgp5oZr-grafik.png)

[![grafik.png](https://wiki.stadtfabrikanten.org/uploads/images/gallery/2025-05/scaled-1680-/f4WvM4d3WvxyMDcj-grafik.png)](https://wiki.stadtfabrikanten.org/uploads/images/gallery/2025-05/f4WvM4d3WvxyMDcj-grafik.png)

# Buxtronix Living Hinges

[![grafik.png](https://wiki.stadtfabrikanten.org/uploads/images/gallery/2025-05/scaled-1680-/fyPsNZfM1OpjDrqr-grafik.png)](https://wiki.stadtfabrikanten.org/uploads/images/gallery/2025-05/fyPsNZfM1OpjDrqr-grafik.png) [![grafik.png](https://wiki.stadtfabrikanten.org/uploads/images/gallery/2025-05/scaled-1680-/uj2eziPRCHmyhdBF-grafik.png)](https://wiki.stadtfabrikanten.org/uploads/images/gallery/2025-05/uj2eziPRCHmyhdBF-grafik.png) [![grafik.png](https://wiki.stadtfabrikanten.org/uploads/images/gallery/2025-05/scaled-1680-/glonbGVX9TiLfHZ4-grafik.png)](https://wiki.stadtfabrikanten.org/uploads/images/gallery/2025-05/glonbGVX9TiLfHZ4-grafik.png) [![grafik.png](https://wiki.stadtfabrikanten.org/uploads/images/gallery/2025-05/scaled-1680-/csqKeh7Xhnir6lwO-grafik.png)](https://wiki.stadtfabrikanten.org/uploads/images/gallery/2025-05/csqKeh7Xhnir6lwO-grafik.png)

## Examples

[![grafik.png](https://wiki.stadtfabrikanten.org/uploads/images/gallery/2025-05/scaled-1680-/db5fuGOCiC9Uy1nu-grafik.png)](https://wiki.stadtfabrikanten.org/uploads/images/gallery/2025-05/db5fuGOCiC9Uy1nu-grafik.png) [![grafik.png](https://wiki.stadtfabrikanten.org/uploads/images/gallery/2025-05/scaled-1680-/CZq2uKjaQbkPttqB-grafik.png)](https://wiki.stadtfabrikanten.org/uploads/images/gallery/2025-05/CZq2uKjaQbkPttqB-grafik.png) [![grafik.png](https://wiki.stadtfabrikanten.org/uploads/images/gallery/2025-05/scaled-1680-/fjatQ5k3gVnAYQkI-grafik.png)](https://wiki.stadtfabrikanten.org/uploads/images/gallery/2025-05/fjatQ5k3gVnAYQkI-grafik.png) [![grafik.png](https://wiki.stadtfabrikanten.org/uploads/images/gallery/2025-05/scaled-1680-/mpG5TpWNlJGwSUqp-grafik.png)](https://wiki.stadtfabrikanten.org/uploads/images/gallery/2025-05/mpG5TpWNlJGwSUqp-grafik.png)

Source: [https://github.com/buxtronix/living-hinge](https://github.com/buxtronix/living-hinge)

See also:

- [Living Hinge (Size Input)](https://wiki.stadtfabrikanten.org/books/fablab-chemnitz/page/living-hinge-size-input)
- [Living Hinge (Fit To Rectangle)](https://wiki.stadtfabrikanten.org/books/fablab-chemnitz/page/living-hinge-fit-to-rectangle)
- [Box Maker - Living Hinge](https://wiki.stadtfabrikanten.org/books/fablab-chemnitz-boxespapercraft/page/box-maker-living-hinge)

# Fibonacci Pattern

[![grafik.png](https://wiki.stadtfabrikanten.org/uploads/images/gallery/2025-05/scaled-1680-/NRRYaNgndRSAva3J-grafik.png)](https://wiki.stadtfabrikanten.org/uploads/images/gallery/2025-05/NRRYaNgndRSAva3J-grafik.png)

## Examples

[![grafik.png](https://wiki.stadtfabrikanten.org/uploads/images/gallery/2025-05/scaled-1680-/PwSWWrNiVyxalj6g-grafik.png)](https://wiki.stadtfabrikanten.org/uploads/images/gallery/2025-05/PwSWWrNiVyxalj6g-grafik.png) [![grafik.png](https://wiki.stadtfabrikanten.org/uploads/images/gallery/2025-05/scaled-1680-/Dwy1ujXV2U2QGAQN-grafik.png)](https://wiki.stadtfabrikanten.org/uploads/images/gallery/2025-05/Dwy1ujXV2U2QGAQN-grafik.png)

# Inklin

<div class="page-metadata-wrapper" id="bkmrk-erstellt-von-admin-a"><div class="page-metadata">- Erstellt von <span class="author"> [admin](https://old.stadtfabrikanten.org/display/~admin)</span> am [09.07.2021](https://old.stadtfabrikanten.org/pages/viewpreviousversions.action?pageId=114524250 "Änderungen anzeigen")

</div></div><div id="bkmrk-" style="clear: both;">  
</div><div class="page view" id="bkmrk-source%3A-https%3A%2F%2Finks"><article>Source: [https://inkscape.org/de/~inklinea/%E2%98%85inklin](https://inkscape.org/de/~inklinea/%E2%98%85inklin)

A polygon arc generator. Creates polygons with arcs as sides instead of straight lines.

[![grafik.png](https://wiki.stadtfabrikanten.org/uploads/images/gallery/2025-05/scaled-1680-/O0mSYxvZObxMhotJ-grafik.png)](https://wiki.stadtfabrikanten.org/uploads/images/gallery/2025-05/O0mSYxvZObxMhotJ-grafik.png) [![grafik.png](https://wiki.stadtfabrikanten.org/uploads/images/gallery/2025-05/scaled-1680-/GaXTaEJiKPDUBDgH-grafik.png)](https://wiki.stadtfabrikanten.org/uploads/images/gallery/2025-05/GaXTaEJiKPDUBDgH-grafik.png)

See also:

- [Lasercut Polygon](https://old.stadtfabrikanten.org/display/IFM/Lasercut+Polygon)
- [Polygon Side](https://old.stadtfabrikanten.org/display/IFM/Polygon+Side)

<div class="wiki-content" id="bkmrk--1"></div></article></div>

# Lasercut Polygon

[![grafik.png](https://wiki.stadtfabrikanten.org/uploads/images/gallery/2025-05/scaled-1680-/brIRSE5WNIiqHquy-grafik.png)](https://wiki.stadtfabrikanten.org/uploads/images/gallery/2025-05/brIRSE5WNIiqHquy-grafik.png)

[![grafik.png](https://wiki.stadtfabrikanten.org/uploads/images/gallery/2025-05/scaled-1680-/IT3ki1Kh8r87pweo-grafik.png)](https://wiki.stadtfabrikanten.org/uploads/images/gallery/2025-05/IT3ki1Kh8r87pweo-grafik.png)

# Living Hinge (Size Input)

[![grafik.png](https://wiki.stadtfabrikanten.org/uploads/images/gallery/2025-05/scaled-1680-/FlIiqRErzxAeFhTI-grafik.png)](https://wiki.stadtfabrikanten.org/uploads/images/gallery/2025-05/FlIiqRErzxAeFhTI-grafik.png) [![grafik.png](https://wiki.stadtfabrikanten.org/uploads/images/gallery/2025-05/scaled-1680-/BzM21NbZJoroW9Z3-grafik.png)](https://wiki.stadtfabrikanten.org/uploads/images/gallery/2025-05/BzM21NbZJoroW9Z3-grafik.png)

See also

- [Buxtronix Living Hinges](https://wiki.stadtfabrikanten.org/books/fablab-chemnitz/page/buxtronix-living-hinges)
- [Living Hinge (Fit To Rectangle)](https://wiki.stadtfabrikanten.org/books/fablab-chemnitz/page/living-hinge-fit-to-rectangle)
- [Box Maker - Living Hinge](https://wiki.stadtfabrikanten.org/books/fablab-chemnitz-boxespapercraft/page/box-maker-living-hinge)

# Parabola

Source: [<span>https://github.com/opensourcebear/inkscape-extension-parabola</span>](https://github.com/opensourcebear/inkscape-extension-parabola)

[![grafik.png](https://wiki.stadtfabrikanten.org/uploads/images/gallery/2025-05/scaled-1680-/V6WzV4Z8tCAY1Lyd-grafik.png)](https://wiki.stadtfabrikanten.org/uploads/images/gallery/2025-05/V6WzV4Z8tCAY1Lyd-grafik.png) [![grafik.png](https://wiki.stadtfabrikanten.org/uploads/images/gallery/2025-05/scaled-1680-/iQjLqFzmm6PjR4oT-grafik.png)](https://wiki.stadtfabrikanten.org/uploads/images/gallery/2025-05/iQjLqFzmm6PjR4oT-grafik.png) [![grafik.png](https://wiki.stadtfabrikanten.org/uploads/images/gallery/2025-05/scaled-1680-/WNudx5Dy5g9yRCN6-grafik.png)](https://wiki.stadtfabrikanten.org/uploads/images/gallery/2025-05/WNudx5Dy5g9yRCN6-grafik.png)

# Parabola 2

Source: [<span>https://github.com/opensourcebear/inkscape-extension-parabola/pull/1/commits/d645767e18b59b8373d45736a615dbae8da913fc</span>](https://github.com/opensourcebear/inkscape-extension-parabola/pull/1/commits/d645767e18b59b8373d45736a615dbae8da913fc)

[![grafik.png](https://wiki.stadtfabrikanten.org/uploads/images/gallery/2025-05/scaled-1680-/LscDbS1vl4hJprNk-grafik.png)](https://wiki.stadtfabrikanten.org/uploads/images/gallery/2025-05/LscDbS1vl4hJprNk-grafik.png)

[![grafik.png](https://wiki.stadtfabrikanten.org/uploads/images/gallery/2025-05/scaled-1680-/02yanUeQWOmg7s17-grafik.png)](https://wiki.stadtfabrikanten.org/uploads/images/gallery/2025-05/02yanUeQWOmg7s17-grafik.png)

# Polygon Side

Source: [https://inkscape.org/de/~inklinea/%E2%98%85polygon-side](https://inkscape.org/de/~inklinea/%E2%98%85polygon-side)

Creates a polygon with a given side length.

[![grafik.png](https://wiki.stadtfabrikanten.org/uploads/images/gallery/2025-05/scaled-1680-/x5sLlcjJvVIxeF8s-grafik.png)](https://wiki.stadtfabrikanten.org/uploads/images/gallery/2025-05/x5sLlcjJvVIxeF8s-grafik.png)

[![grafik.png](https://wiki.stadtfabrikanten.org/uploads/images/gallery/2025-05/scaled-1680-/Eh3ZcsGW0NiDYg2p-grafik.png)](https://wiki.stadtfabrikanten.org/uploads/images/gallery/2025-05/Eh3ZcsGW0NiDYg2p-grafik.png)

See also:

- [Lasercut Polygon](https://wiki.stadtfabrikanten.org/books/fablab-chemnitz/page/lasercut-polygon)
- [Inklin](https://wiki.stadtfabrikanten.org/books/fablab-chemnitz/page/inklin)

# Random Line

Source: [<span>https://github.com/opensourcebear/inkscape-extension-random-line</span>](https://github.com/opensourcebear/inkscape-extension-random-line)

[![grafik.png](https://wiki.stadtfabrikanten.org/uploads/images/gallery/2025-05/scaled-1680-/efZSP5xcjdccfvUY-grafik.png)](https://wiki.stadtfabrikanten.org/uploads/images/gallery/2025-05/efZSP5xcjdccfvUY-grafik.png)

[![grafik.png](https://wiki.stadtfabrikanten.org/uploads/images/gallery/2025-05/scaled-1680-/Ae0fw5XM3nQSPyAl-grafik.png)](https://wiki.stadtfabrikanten.org/uploads/images/gallery/2025-05/Ae0fw5XM3nQSPyAl-grafik.png)

# Sine and Lace

Source → [<span>https://github.com/vishnu20001/EggBot/tree/master/inkscape\_contributed</span>](https://github.com/vishnu20001/EggBot/tree/master/inkscape_contributed)

[![grafik.png](https://wiki.stadtfabrikanten.org/uploads/images/gallery/2025-05/scaled-1680-/wfUJaHMIfNH9oH1v-grafik.png)](https://wiki.stadtfabrikanten.org/uploads/images/gallery/2025-05/wfUJaHMIfNH9oH1v-grafik.png)

[![grafik.png](https://wiki.stadtfabrikanten.org/uploads/images/gallery/2025-05/scaled-1680-/2OaHkAiKCu45aquX-grafik.png)](https://wiki.stadtfabrikanten.org/uploads/images/gallery/2025-05/2OaHkAiKCu45aquX-grafik.png)

# SpiroGraph

[![grafik.png](https://wiki.stadtfabrikanten.org/uploads/images/gallery/2025-05/scaled-1680-/m4WskMECq0jSNvbi-grafik.png)](https://wiki.stadtfabrikanten.org/uploads/images/gallery/2025-05/m4WskMECq0jSNvbi-grafik.png)

[![grafik.png](https://wiki.stadtfabrikanten.org/uploads/images/gallery/2025-05/scaled-1680-/jyvjkSdrSaFqcgXx-grafik.png)](https://wiki.stadtfabrikanten.org/uploads/images/gallery/2025-05/jyvjkSdrSaFqcgXx-grafik.png)

## Requirements

- [https://github.com/fsmMLK/inkscapeMadeEasy](https://github.com/fsmMLK/inkscapeMadeEasy) (included in MightyScape)
- [https://github.com/fsmMLK/inkscapeSpirograph](https://github.com/fsmMLK/inkscapeSpirograph) (included in MightyScape)

<div class="expand-container conf-macro output-block" data-hasbody="true" data-macro-name="expand" id="bkmrk--2"><div aria-level="6" class="expand-control" id="bkmrk--3" role="heading"></div></div><div class="expand-container conf-macro output-block" data-hasbody="true" data-macro-name="expand" id="bkmrk--4"></div>Docs

- [https://inkscape.org/zh-hans/~fsmMLK/%E2%98%85this-extension-will-assist-you-creating-spirograph-plots](https://inkscape.org/zh-hans/~fsmMLK/%E2%98%85this-extension-will-assist-you-creating-spirograph-plots)
- [https://github.com/fsmMLK/inkscapeSpirograph](https://github.com/fsmMLK/inkscapeSpirograph)

# Sundial Declining

[https://inkscape.org/de/~TomasUrban/%E2%98%85sundial-declining](https://inkscape.org/de/~TomasUrban/%E2%98%85sundial-declining)

You can use [mapcoordinates.net](https://www.mapcoordinates.net) to retreive your desired location coordinates

[![grafik.png](https://wiki.stadtfabrikanten.org/uploads/images/gallery/2025-05/scaled-1680-/pHfAvUnvxg3H0pT1-grafik.png)](https://wiki.stadtfabrikanten.org/uploads/images/gallery/2025-05/pHfAvUnvxg3H0pT1-grafik.png) [![grafik.png](https://wiki.stadtfabrikanten.org/uploads/images/gallery/2025-05/scaled-1680-/ynOPdXtpi4cUzJT3-grafik.png)](https://wiki.stadtfabrikanten.org/uploads/images/gallery/2025-05/ynOPdXtpi4cUzJT3-grafik.png) [![grafik.png](https://wiki.stadtfabrikanten.org/uploads/images/gallery/2025-05/scaled-1680-/Wyhw3uNQUyUn8ZYp-grafik.png)](https://wiki.stadtfabrikanten.org/uploads/images/gallery/2025-05/Wyhw3uNQUyUn8ZYp-grafik.png)

[![grafik.png](https://wiki.stadtfabrikanten.org/uploads/images/gallery/2025-05/scaled-1680-/VOqPW1vRag04Uh8C-grafik.png)](https://wiki.stadtfabrikanten.org/uploads/images/gallery/2025-05/VOqPW1vRag04Uh8C-grafik.png)

[![grafik.png](https://wiki.stadtfabrikanten.org/uploads/images/gallery/2025-05/scaled-1680-/XkvCa7oVQ1bqrODf-grafik.png)](https://wiki.stadtfabrikanten.org/uploads/images/gallery/2025-05/XkvCa7oVQ1bqrODf-grafik.png)

# Triangle

Same triangle generator than default, but with possibility to enter units:

[![grafik.png](https://wiki.stadtfabrikanten.org/uploads/images/gallery/2025-05/scaled-1680-/fCeyiNbCHv0UCW4B-grafik.png)](https://wiki.stadtfabrikanten.org/uploads/images/gallery/2025-05/fCeyiNbCHv0UCW4B-grafik.png)

# Vektorkollektor

A little contribution to the ongoing Vektorkollektor project by [Niklas Roy](https://www.niklasroy.com) and [Kati Hyyppä](http://katihyyppa.com/).

[![grafik.png](https://wiki.stadtfabrikanten.org/uploads/images/gallery/2025-05/scaled-1680-/NtjIPlbJHU6SPPiK-grafik.png)](https://wiki.stadtfabrikanten.org/uploads/images/gallery/2025-05/NtjIPlbJHU6SPPiK-grafik.png)

<p class="callout info">See [https://stadtfabrikanten.org/article/offene-werkstatt-mit-vektorkollektor](https://stadtfabrikanten.org/article/offene-werkstatt-mit-vektorkollektor)</p>

This extensions grabs the live vector data from RAW js file and parses it into usable arrays creating Inkscape SVG lines

[![grafik.png](https://wiki.stadtfabrikanten.org/uploads/images/gallery/2025-05/scaled-1680-/5NICY0juvqZpmiC0-grafik.png)](https://wiki.stadtfabrikanten.org/uploads/images/gallery/2025-05/5NICY0juvqZpmiC0-grafik.png) [![grafik.png](https://wiki.stadtfabrikanten.org/uploads/images/gallery/2025-05/scaled-1680-/4PRPxDek0sa8wUTw-grafik.png)](https://wiki.stadtfabrikanten.org/uploads/images/gallery/2025-05/4PRPxDek0sa8wUTw-grafik.png)
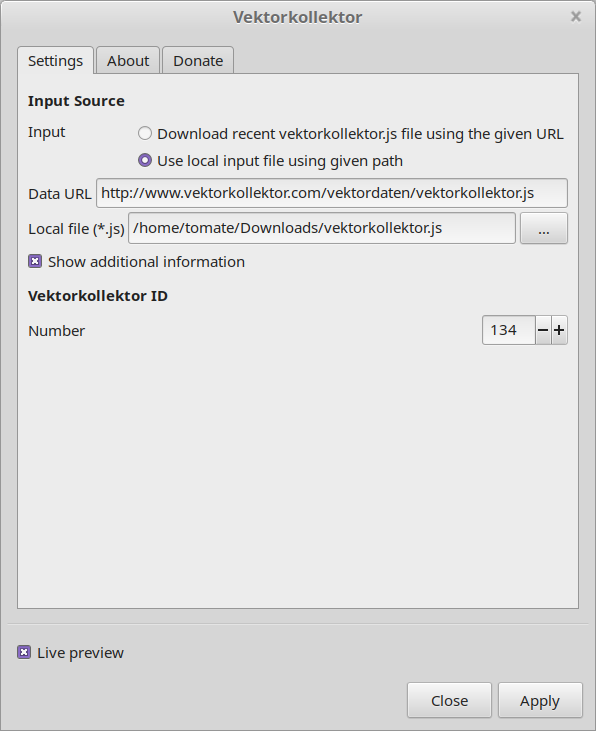
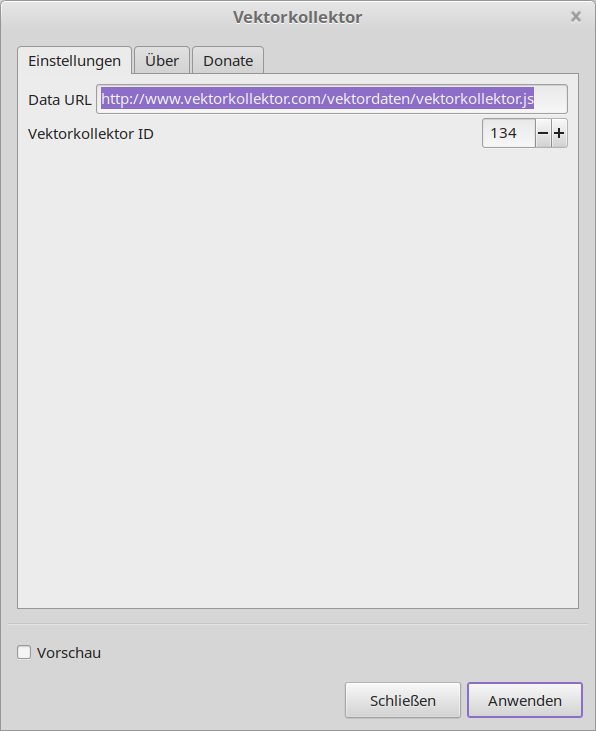
[![grafik.png](https://wiki.stadtfabrikanten.org/uploads/images/gallery/2025-05/scaled-1680-/HTFaZP3QUmyVDvO4-grafik.png)](https://wiki.stadtfabrikanten.org/uploads/images/gallery/2025-05/HTFaZP3QUmyVDvO4-grafik.png)
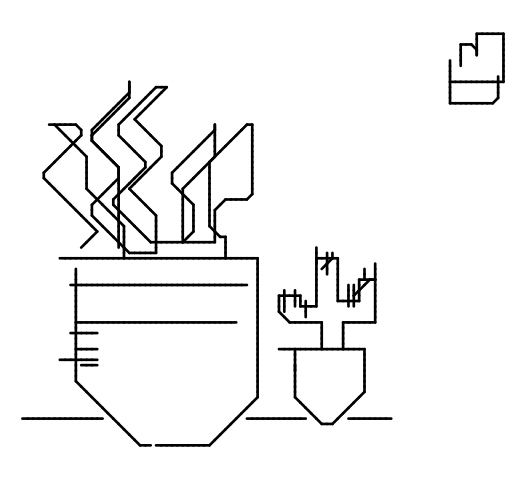
# Tips for post processing

## Making files for T Shirts

1. select all paths and run [Chain Paths](https://wiki.stadtfabrikanten.org/books/fablab-chemnitz/page/chain-paths)
2. additionally change miter style / cap style to straight  
    [![grafik.png](https://wiki.stadtfabrikanten.org/uploads/images/gallery/2025-05/scaled-1680-/WJ7Elz1XcQCUA1DU-grafik.png)](https://wiki.stadtfabrikanten.org/uploads/images/gallery/2025-05/WJ7Elz1XcQCUA1DU-grafik.png)
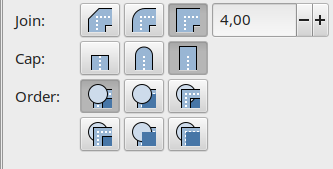
3. thicken up the paths to desired width
4. convert the contour to a path. This allows to cut those images with a vinylcutter:  
    [![grafik.png](https://wiki.stadtfabrikanten.org/uploads/images/gallery/2025-05/scaled-1680-/IYihBRiDosk5aEPy-grafik.png)](https://wiki.stadtfabrikanten.org/uploads/images/gallery/2025-05/IYihBRiDosk5aEPy-grafik.png)
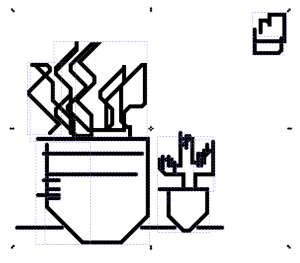
## 3D Printing

Use [Paths to OpenSCAD](https://wiki.stadtfabrikanten.org/books/fablab-chemnitz/page/paths-to-openscad)

[![grafik.png](https://wiki.stadtfabrikanten.org/uploads/images/gallery/2025-05/scaled-1680-/tkJgsDPpUebEyz0o-grafik.png)](https://wiki.stadtfabrikanten.org/uploads/images/gallery/2025-05/tkJgsDPpUebEyz0o-grafik.png)
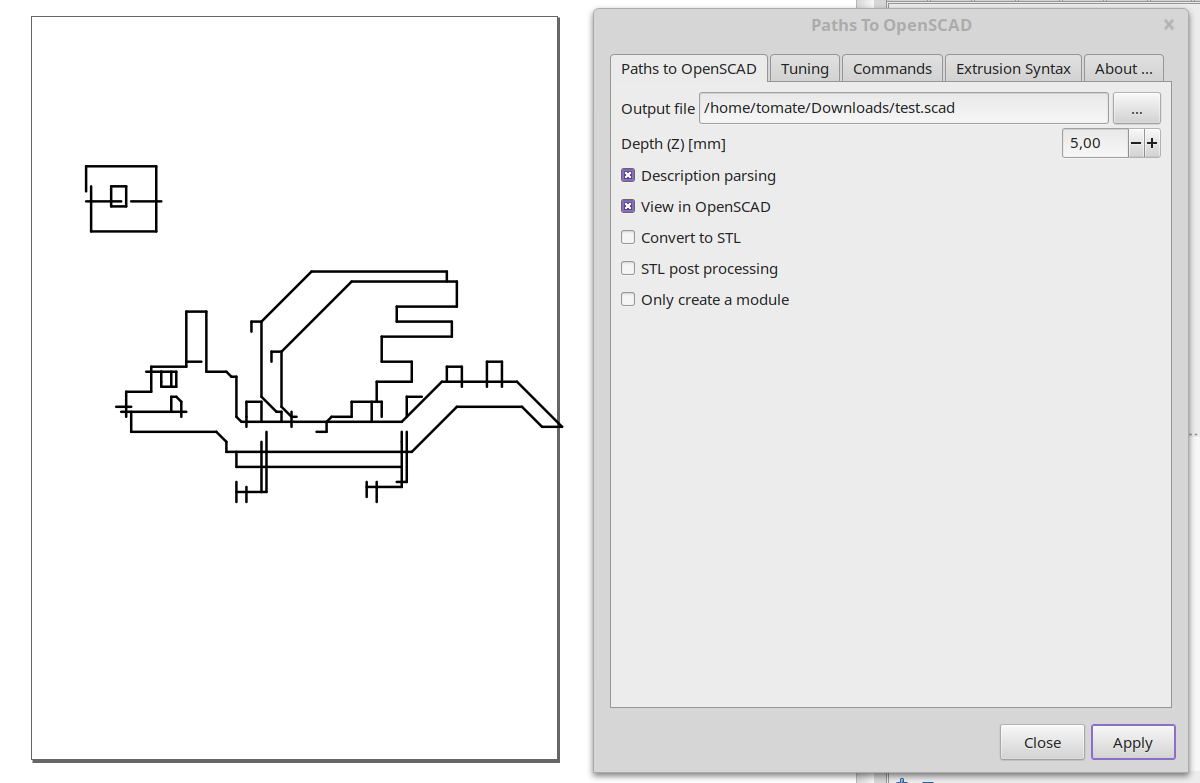
[![grafik.png](https://wiki.stadtfabrikanten.org/uploads/images/gallery/2025-05/scaled-1680-/AbNae1TWTBaxoypT-grafik.png)](https://wiki.stadtfabrikanten.org/uploads/images/gallery/2025-05/AbNae1TWTBaxoypT-grafik.png)
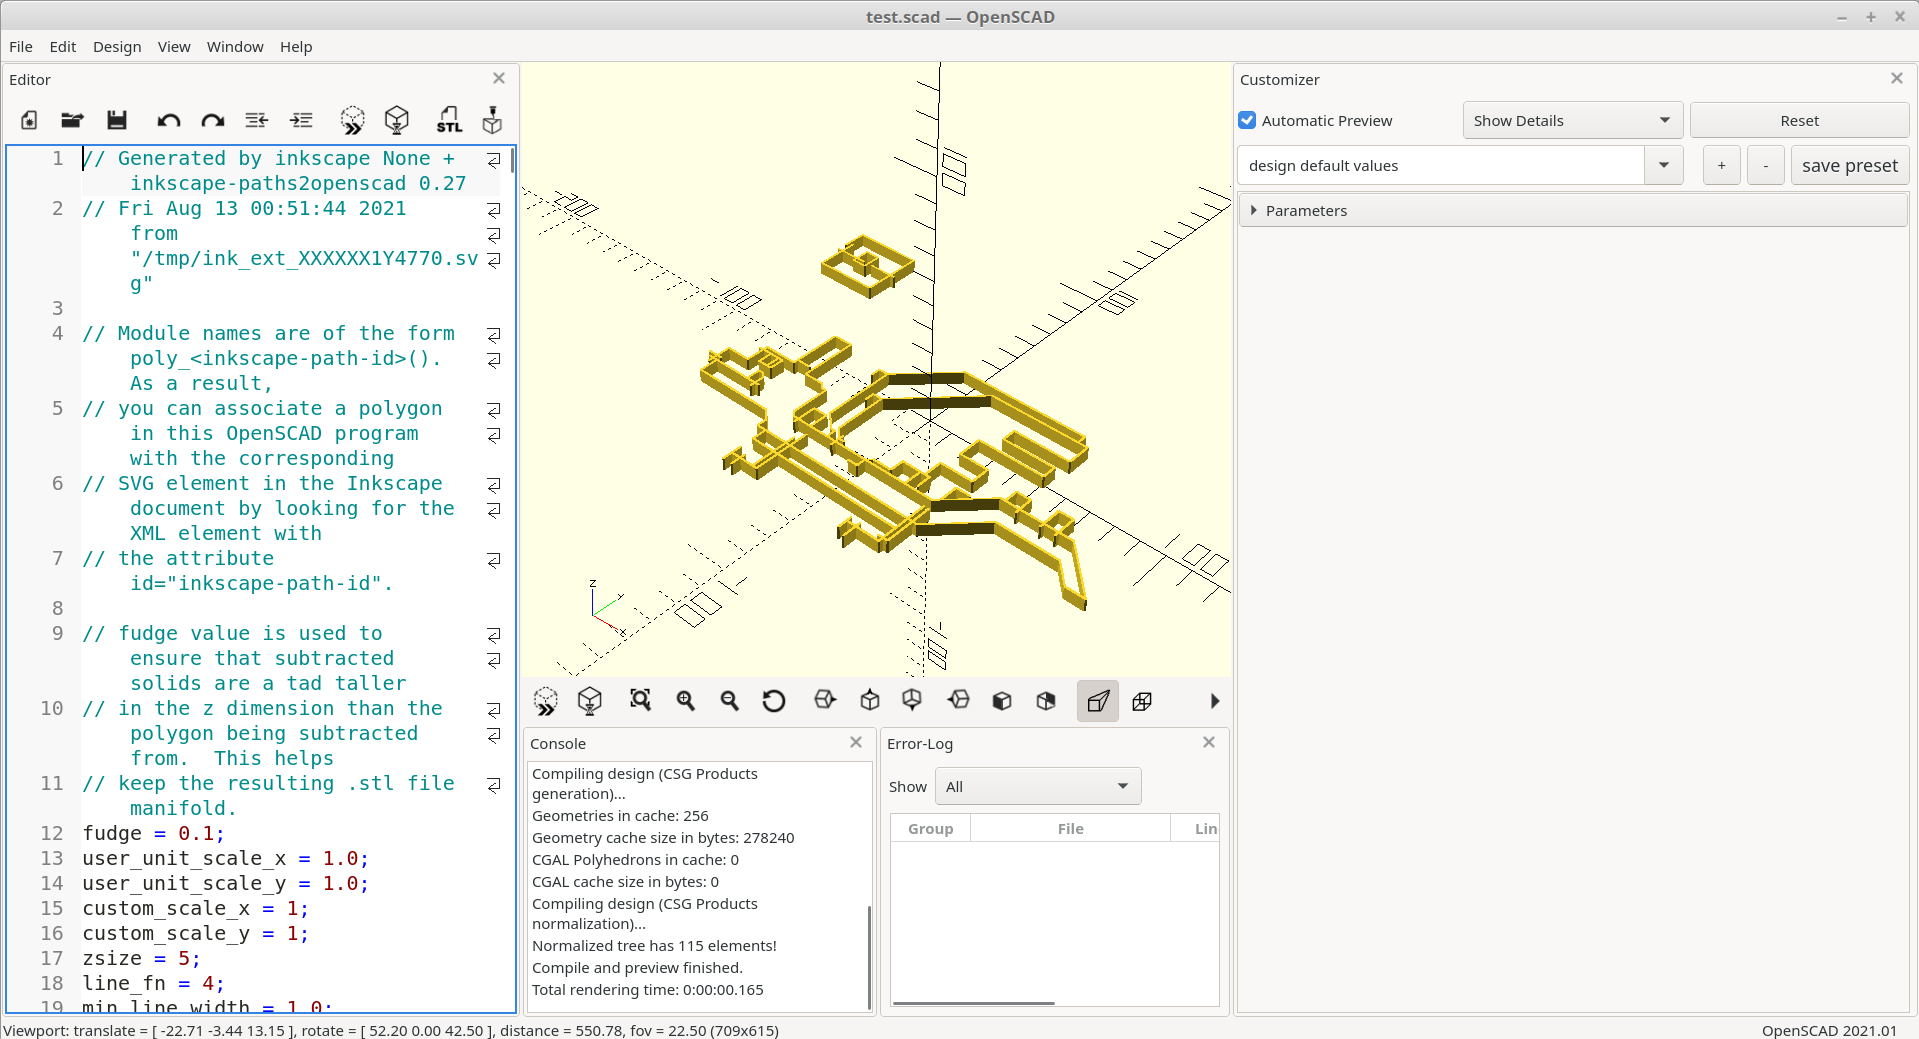
More details:

- [http://www.vektorkollektor.com](http://www.vektorkollektor.com/)
- [http://www.vektorkollektor.com/vektordaten/vektorkollektor.pdf](http://www.vektorkollektor.com/vektordaten/vektorkollektor.pdf)
- [http://www.vektorkollektor.com/vektordaten/vektorkollektor.js](http://www.vektorkollektor.com/vektordaten/vektorkollektor.js)
- [http://www.vektorkollektor.com/vektordaten/vektorkollektor\_optimized.js](http://www.vektorkollektor.com/vektordaten/vektorkollektor_optimized.js) (same format like vektorkollektor.js but with filtered line duplicates / overlapping segments)

# Simple Inkscape (Interface)

Source: [https://inkscape.org/~Mr.Raven/%E2%98%85simpleinkscapev01+2](https://inkscape.org/~Mr.Raven/%E2%98%85simpleinkscapev01+2)

Original description:

> This extension changes the Inkscape interface into a simpler one.
> 
> It hides quite some elements from the menus and toolbars so that a more basic version of the interface remains. This can be useful for educational purposes. It is very easy to use and you can always go back to the default Inkscape user interface.
> 
> After installing the extension, you restart Inkscape, open the menu 'Extensions', submenu 'Interface' and then 'Simple Inkscape'. It explains itself.
> 
> This extension was made in collaboration with @Kirstie, one of the users of the Inkscape forum and writer of a very good Dutch book about Inkscape. She made the changes to the ui, I made the extension that installs or removes them.
> 
> There are two forum topics about this extension.
> 
> [https://inkscape.org/forums/extensions/simple-inkscape-what-items-do-we-want/](https://inkscape.org/forums/extensions/simple-inkscape-what-items-do-we-want/)
> 
> [https://inkscape.org/forums/extensions/simple-inkscape-extension-children-education-learning-simplified-user-interface/](https://inkscape.org/forums/extensions/simple-inkscape-extension-children-education-learning-simplified-user-interface/)
> 
> It works in Windows and Linux for Inkscape 1.0 and above.
> 
> Lower versions of Inkscape will not work.
> 
> Mac is currently not supported since I have no Mac to test it on. It will simply give an error message on Mac. If anyone who has a Mac wants to help me test it, I believe I can make it work for Mac as well. Please contact me if you want to help me with it.
> 
> If you have questions - please feel free to ask.
> 
> I would also be interested to know if the extension is used and what it is used for so that I can keep that in mind for future versions. So if use it - leave a post if you like.

[![grafik.png](https://wiki.stadtfabrikanten.org/uploads/images/gallery/2025-02/scaled-1680-/vC2cKmfOUUWZFyNS-grafik.png)](https://wiki.stadtfabrikanten.org/uploads/images/gallery/2025-02/vC2cKmfOUUWZFyNS-grafik.png)
# Table Support

- Source: [https://sourceforge.net/projects/inkscape-tables/files/](https://sourceforge.net/projects/inkscape-tables/files/)
- Updated to be compatible with InkScape 1.2+
- The functions "Duplicate Table" and "Fit Guides" options were removed due to defectness

## Possible actions to perform

- Create
- Add 
    - Colums
    - Rows
    - Guide Lines
- Edit 
    - Selected cells text
    - Selected columns width
    - Selected rows height
    - Selected table width and height
- Fit 
    - Selected table to page
    - Selected table to page width
    - Selected table to page height
- Merge cells 
    - Merge selected cells
    - Split selected cells
- Remove 
    - Selected columns
    - Selected rows

[![grafik.png](https://wiki.stadtfabrikanten.org/uploads/images/gallery/2025-02/scaled-1680-/83Z82URTv6LjOxrW-grafik.png)](https://wiki.stadtfabrikanten.org/uploads/images/gallery/2025-02/83Z82URTv6LjOxrW-grafik.png) [![grafik.png](https://wiki.stadtfabrikanten.org/uploads/images/gallery/2025-02/scaled-1680-/zNDweAyPFavfUWZN-grafik.png)](https://wiki.stadtfabrikanten.org/uploads/images/gallery/2025-02/zNDweAyPFavfUWZN-grafik.png)
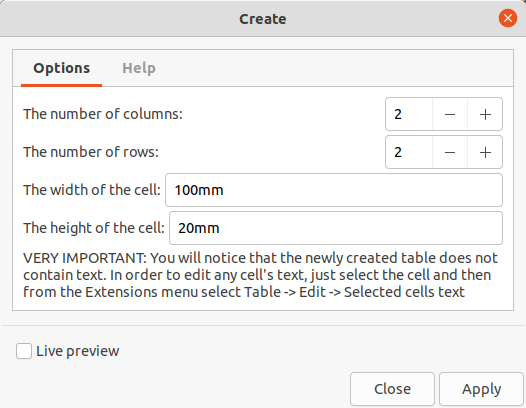
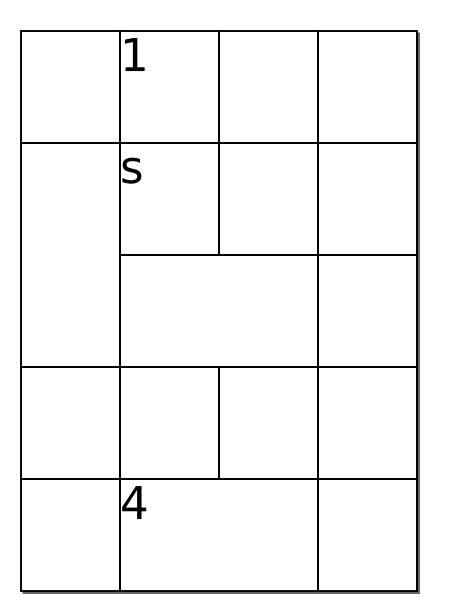
# Text

# Convert To Localized Braille

[https://github.com/mondeja/inkscape-braille-l18n-ext](https://github.com/mondeja/inkscape-braille-l18n-ext)

This extension has some more options than the default one from Inkscape

[![grafik.png](https://wiki.stadtfabrikanten.org/uploads/images/gallery/2025-05/scaled-1680-/F6jf8TnyGb8gxR2n-grafik.png)](https://wiki.stadtfabrikanten.org/uploads/images/gallery/2025-05/F6jf8TnyGb8gxR2n-grafik.png)
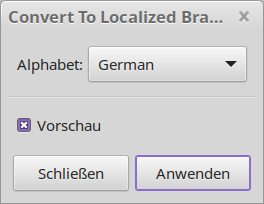
[![grafik.png](https://wiki.stadtfabrikanten.org/uploads/images/gallery/2025-05/scaled-1680-/QYsT5riHzLlXa6at-grafik.png)](https://wiki.stadtfabrikanten.org/uploads/images/gallery/2025-05/QYsT5riHzLlXa6at-grafik.png)

# Glyph IDs

<div class="page view" id="bkmrk-source%3A-https%3A%2F%2Fgitl"><article>Source: [https://gitlab.com/EllenWasbo/inkscape-extension-getsetGlyphIDs](https://gitlab.com/EllenWasbo/inkscape-extension-getsetGlyphIDs)

These two extensions streamline the process of creating fonts using the Custom Stroke Font extension [https://github.com/Shriinivas/inkscapestrokefont](https://github.com/Shriinivas/inkscapestrokefont). With a font with many glyphs it might be quite cumbersome to set the ids of each glyph manually using the XML editor. Use the getGlyphIDs to fetch the IDs before editing a font - the path IDs are easily changed during editing. Use the setGlyphIDs to set the path IDs effectively based on a string input having all the glyphs ordered from left to right. Read more about this extension on [Cutlings](http://cutlings.wasbo.net/inkscape-extension-automate-glyph-ids/).

<div class="wiki-content" id="bkmrk-"></div></article></div>

# Ids To Text

Lets you extract the ids (or other attributes) from all selected paths and show them as text elements inside the paths.

Source: [https://github.com/whiplashoo/ids\_to\_text\_inkscape](https://github.com/whiplashoo/ids_to_text_inkscape)

[![grafik.png](https://wiki.stadtfabrikanten.org/uploads/images/gallery/2025-05/scaled-1680-/umienyeAmTTFo2aW-grafik.png)](https://wiki.stadtfabrikanten.org/uploads/images/gallery/2025-05/umienyeAmTTFo2aW-grafik.png)

[![grafik.png](https://wiki.stadtfabrikanten.org/uploads/images/gallery/2025-05/scaled-1680-/Xxr04VzmfQFjm7KJ-grafik.png)](https://wiki.stadtfabrikanten.org/uploads/images/gallery/2025-05/Xxr04VzmfQFjm7KJ-grafik.png)

[![grafik.png](https://wiki.stadtfabrikanten.org/uploads/images/gallery/2025-05/scaled-1680-/WUId79J6bjGwkn6M-grafik.png)](https://wiki.stadtfabrikanten.org/uploads/images/gallery/2025-05/WUId79J6bjGwkn6M-grafik.png)

# Label Feature With Fill Color

[![grafik.png](https://wiki.stadtfabrikanten.org/uploads/images/gallery/2025-05/scaled-1680-/Mbs6EHZlsvqjA5tR-grafik.png)](https://wiki.stadtfabrikanten.org/uploads/images/gallery/2025-05/Mbs6EHZlsvqjA5tR-grafik.png)

# OCR (Image To Text)

Reads text from Inkscape canvas. Data inside may be SVG or PNG or whatever because the canvas will be exported as PNG using Cairo library.

Source: [https://github.com/amal-san/inkscape-ocr](https://github.com/amal-san/inkscape-ocr)

Requirements (Ubuntu):

```bash
sudo apt-get install tesseract-ocr
pip3 install pytesseract cairosvg
```

# Remove Text Stops

Remove the following portions from text elements by filtering the `dx` attribute of `tspan` children of `text` elements:

Input:

[![grafik.png](https://wiki.stadtfabrikanten.org/uploads/images/gallery/2025-08/scaled-1680-/r4SN6SyInmDy2Guo-grafik.png)](https://wiki.stadtfabrikanten.org/uploads/images/gallery/2025-08/r4SN6SyInmDy2Guo-grafik.png)

Output:

[![grafik.png](https://wiki.stadtfabrikanten.org/uploads/images/gallery/2025-08/scaled-1680-/E4VVe47c3E6m2L2E-grafik.png)](https://wiki.stadtfabrikanten.org/uploads/images/gallery/2025-08/E4VVe47c3E6m2L2E-grafik.png)

This extension helps to clean up imported PDF docs and other weird files :-)

# Source Code Text

Based on the "Lorem Ipsum" plugin, this plugin searches the base directory for code, and strings it all together by concatenating on whitespace. If a flowed text is selected, Source code is added to it; otherwise a new flowed text object, the size of the page, is created in a new layer.

Source: [<span>https://gist.github.com/om-henners/8c642c87b71daa3ea68222d40167edbc</span>](https://gist.github.com/om-henners/8c642c87b71daa3ea68222d40167edbc)

[![grafik.png](https://wiki.stadtfabrikanten.org/uploads/images/gallery/2025-05/scaled-1680-/Di1XwTkjQ7uQAEg3-grafik.png)](https://wiki.stadtfabrikanten.org/uploads/images/gallery/2025-05/Di1XwTkjQ7uQAEg3-grafik.png)

[![grafik.png](https://wiki.stadtfabrikanten.org/uploads/images/gallery/2025-05/scaled-1680-/lggA5ULVX1VisZFa-grafik.png)](https://wiki.stadtfabrikanten.org/uploads/images/gallery/2025-05/lggA5ULVX1VisZFa-grafik.png)

# Stroke Font Creator

<div class="page view" id="bkmrk-source%3A-https%3A%2F%2Fgith"><article>Source: [https://github.com/Shriinivas/inkscapestrokefont](https://github.com/Shriinivas/inkscapestrokefont)

<div class="wiki-content" id="bkmrk-"></div></article></div>

# Replace Text

Simple plugin to replace the text of all (selected) text elements. Nice for mass editing.

`text` elements often contain multiple lines, which is represented by multiple `tspan` elements. We can delete all tspans except the first to "shorten" everything.

It can be also used to remove trailing whitespaces and whitespaces between words.

[![grafik.png](https://wiki.stadtfabrikanten.org/uploads/images/gallery/2025-08/scaled-1680-/VUJDnIQWPuxG26RM-grafik.png)](https://wiki.stadtfabrikanten.org/uploads/images/gallery/2025-08/VUJDnIQWPuxG26RM-grafik.png)

# Tracing/Images/Edge Detection

# Centerline Trace

[![grafik.png](https://wiki.stadtfabrikanten.org/uploads/images/gallery/2025-05/scaled-1680-/WPFwrXTeTMChLVso-grafik.png)](https://wiki.stadtfabrikanten.org/uploads/images/gallery/2025-05/WPFwrXTeTMChLVso-grafik.png)

[![grafik.png](https://wiki.stadtfabrikanten.org/uploads/images/gallery/2025-05/scaled-1680-/5ZchYXRQR0kToMKw-grafik.png)](https://wiki.stadtfabrikanten.org/uploads/images/gallery/2025-05/5ZchYXRQR0kToMKw-grafik.png)

[![grafik.png](https://wiki.stadtfabrikanten.org/uploads/images/gallery/2025-05/scaled-1680-/Xu5Ue6vnOpTViqo4-grafik.png)](https://wiki.stadtfabrikanten.org/uploads/images/gallery/2025-05/Xu5Ue6vnOpTViqo4-grafik.png)

# Image Triangulation

requires python modules "Pillow" "numpy" "scipy" "opencv-python" - need to be installed manually

[![grafik.png](https://wiki.stadtfabrikanten.org/uploads/images/gallery/2025-05/scaled-1680-/KfETre4tX79O6AFI-grafik.png)](https://wiki.stadtfabrikanten.org/uploads/images/gallery/2025-05/KfETre4tX79O6AFI-grafik.png)

## Examples

[![grafik.png](https://wiki.stadtfabrikanten.org/uploads/images/gallery/2025-05/scaled-1680-/lcvu5AIhYBDWqFRI-grafik.png)](https://wiki.stadtfabrikanten.org/uploads/images/gallery/2025-05/lcvu5AIhYBDWqFRI-grafik.png)

[![grafik.png](https://wiki.stadtfabrikanten.org/uploads/images/gallery/2025-05/scaled-1680-/jc4szET1g5yivzQV-grafik.png)](https://wiki.stadtfabrikanten.org/uploads/images/gallery/2025-05/jc4szET1g5yivzQV-grafik.png) [![grafik.png](https://wiki.stadtfabrikanten.org/uploads/images/gallery/2025-05/scaled-1680-/f2DHK2MiZemxtmlY-grafik.png)](https://wiki.stadtfabrikanten.org/uploads/images/gallery/2025-05/f2DHK2MiZemxtmlY-grafik.png)

# Imagetracer.js

<div class="page-metadata-wrapper" id="bkmrk-"></div><div class="page view" id="bkmrk-this-extension-is-an"><article>This extension is an InkScape wrapper for [https://github.com/jankovicsandras/imagetracerjs.](https://github.com/jankovicsandras/imagetracerjs) It utilized a standalone node.js executable to run the JavaScript code. It will be fed with embedded or linked images within InkScape.

The big difference between this tracer and all other tracers in recent InkScape is the fact that it is better capable of splitting an image into it's "isles" (cutouts). The regular tracers separate by colors or layers but not by objects. That makes it hard to work with sometimes. Imagetracer.js will vectorize your beautiful image into a more beautiful SVG trace with separated infills (break apart into single surfaces like a puzzle), that means you get a lot of single areas. However, this separation does not work flawlessly. It does not reach the quality of the software "Vector Magic". See also [KVEC](https://wiki.stadtfabrikanten.org/books/fablab-chemnitz/page/kvec)

Tip: You can separate the colors into handy layers if you want by using [Styles To Layers](https://wiki.stadtfabrikanten.org/books/fablab-chemnitz/page/styles-to-layers)

[![grafik.png](https://wiki.stadtfabrikanten.org/uploads/images/gallery/2025-05/scaled-1680-/JJGur88RufcDuYdT-grafik.png)](https://wiki.stadtfabrikanten.org/uploads/images/gallery/2025-05/JJGur88RufcDuYdT-grafik.png)

Notes about the code:

- tested to run with **NodeJS v10.19.0** (and hopefully above)
- some options were removed because they make no sense within Inkscape, like: `pal, scale, corseenabled, layercontainerid`

## Take Mario's cat Mister Charlie

[![grafik.png](https://wiki.stadtfabrikanten.org/uploads/images/gallery/2025-05/scaled-1680-/IoQK8jw91rmE33Uy-grafik.png)](https://wiki.stadtfabrikanten.org/uploads/images/gallery/2025-05/IoQK8jw91rmE33Uy-grafik.png)

## Trace Charlie by running Imagertracer.js

Maybe you want to run [Apply Transformations](https://wiki.stadtfabrikanten.org/books/fablab-chemnitz/page/apply-transformations) after running the extension because the imported SVG group will have it's own matrix transformation (XY translation and scaling) which could be annoying for you.

## Play with Charlie

[![grafik.png](https://wiki.stadtfabrikanten.org/uploads/images/gallery/2025-05/scaled-1680-/KcdhhKbcYBh0abZt-grafik.png)](https://wiki.stadtfabrikanten.org/uploads/images/gallery/2025-05/KcdhhKbcYBh0abZt-grafik.png)

**Splitting by ungrouping**

[![grafik.png](https://wiki.stadtfabrikanten.org/uploads/images/gallery/2025-05/scaled-1680-/jMqiPccd66jTGeFm-grafik.png)](https://wiki.stadtfabrikanten.org/uploads/images/gallery/2025-05/jMqiPccd66jTGeFm-grafik.png)

[![grafik.png](https://wiki.stadtfabrikanten.org/uploads/images/gallery/2025-05/scaled-1680-/LnCeNRJ3N4skOMGr-grafik.png)](https://wiki.stadtfabrikanten.org/uploads/images/gallery/2025-05/LnCeNRJ3N4skOMGr-grafik.png)

<p class="callout warning">Warning: Do not calculate on ultra large images. You might get errors like:</p>

```bash
FATAL ERROR: CALL_AND_RETRY_LAST Allocation failed - JavaScript heap out of memory
 1: 0x7fb77b79446c node::Abort() [/lib/x86_64-linux-gnu/libnode.so.64]
 2: 0x7fb77b7944b5  [/lib/x86_64-linux-gnu/libnode.so.64]
 3: 0x7fb77b9c0e6a v8::Utils::ReportOOMFailure(v8::internal::Isolate*, char const*, bool) [/lib/x86_64-linux-gnu/libnode.so.64]
 4: 0x7fb77b9c10e1 v8::internal::V8::FatalProcessOutOfMemory(v8::internal::Isolate*, char const*, bool) [/lib/x86_64-linux-gnu/libnode.so.64]
 5: 0x7fb77bd5bc66  [/lib/x86_64-linux-gnu/libnode.so.64]
 6: 0x7fb77bd6fa37 v8::internal::Heap::AllocateRawWithRetryOrFail(int, v8::internal::AllocationSpace, v8::internal::AllocationAlignment) [/lib/x86_64-linux-gnu/libnode.so.64]
 7: 0x7fb77bd3bdda v8::internal::Factory::NewFillerObject(int, bool, v8::internal::AllocationSpace) [/lib/x86_64-linux-gnu/libnode.so.64]
 8: 0x7fb77bfc7424 v8::internal::Runtime_AllocateInTargetSpace(int, v8::internal::Object**, v8::internal::Isolate*) [/lib/x86_64-linux-gnu/libnode.so.64]
 9: 0x2d292f85452b
Aborted (core dumped)
Error while processing input:
<--- Last few GCs --->
 
[7149:0x1eff140]    13889 ms: Mark-sweep 934.7 (959.0) -> 934.7 (959.0) MB, 92.5 / 0.0 ms  (average mu = 0.642, current mu = 0.001) last resort GC in old space requested
[7149:0x1eff140]    13989 ms: Mark-sweep 934.7 (959.0) -> 934.7 (959.0) MB, 99.4 / 0.0 ms  (average mu = 0.446, current mu = 0.000) last resort GC in old space requested
 
 
<--- JS stacktrace --->
 
==== JS stack trace =========================================
 
    0: ExitFrame [pc: 0x2d292f85452b]
    1: StubFrame [pc: 0x2d292f836510]
    2: StubFrame [pc: 0x2d292f837f8d]
Security context: 0x1ac76ab2ee11 <JSObject>
    3: new Uint8ClampedArray(aka Uint8ClampedArray) [0x1ac76ab43189](this=0x1331c8a02609 <the_hole>,0x01ad07902c99 <JSArray[63700992]>)
    4: ConstructFrame [pc: 0x2d292f799edf]
    5: StubFrame [pc: 0x2d292f874384]
    6: /* anonymous */ [0x148beddd5bc9] [/home/tomate/.config/inksc...
 
 
Check the image file (maybe convert and save as new file) and try again.
 
Your parser command:
node imagetracerjs-master/nodecli/nodecli.js /tmp/imagetracerjs.png ltres 1.0 qtres 1.0 pathomit 8 rightangleenhance true colorsampling 0 numberofcolors 32 mincolorratio 0 numberofcolors 32 colorquantcycles 5 layering 0 strokewidth 1.0 linefilter false scale 1.0 roundcoords 1 viewbox false desc false blurradius 1 blurdelta 20.0
```

<div class="wiki-content" id="bkmrk--1"></div></article></div>

# KVEC

KVEC is a freeware program that allows you to convert raster graphics to vector graphics. You can freely use it. Before 2010 it was distributed as shareware. Please download the freeware version from the kvec web site ([https://www.kvec.de](https://www.kvec.de/)). It can be freely distributed and copied. KVEC is very exacting with respect to memory demands. Vectorizing is a critical process and often leads to a trade off between memory demands and performance. It is crucial for the performance that your computer has enough RAM. The selection of values for the switch parameters requires some caution. Noisy pictures (typical for scanned colour pictures) or pictures with a lot of very small details should be evaluated with larger 'grit values' and smaller 'quantize values'.

This is a special inkscape frontend implementation. A lot of KVEC options are not supported, because we reduced the support for SVG format only. Please see the KVEC readme for full details.

[![grafik.png](https://wiki.stadtfabrikanten.org/uploads/images/gallery/2025-05/scaled-1680-/LAdHT3RAeInR1cqu-grafik.png)](https://wiki.stadtfabrikanten.org/uploads/images/gallery/2025-05/LAdHT3RAeInR1cqu-grafik.png)

## Generate bezier curves

The output will consist of bezier-curves instead of straight lines. This allows you to zoom the image without getting edges. For the output formats which don't support bezier curves, the bezier algorithm will be simulated and approximated by polylines.

## Centerlines

<table id="bkmrk-off-turns-centerline" style="width: 99.9734%;"><tbody><tr><td scope="col" style="width: 5.48173%;">off</td><td scope="col" style="width: 94.5183%;">Turns centerline vectorization off (Default)</td></tr><tr><td style="width: 5.48173%;">mixed</td><td style="width: 94.5183%;">The effect of this parameter depends on the value of the parameter -lwidth. (If used together with -centerline, the meaning of the parameter -lwidth is modified). Before vectorizing, all detected objects were checked for its maximal thickness. All objects with a maximal thickness less than -lwidth were treated as line objects; all other objects were vectorized in the normal way. The vectorization of line objects does not result in border lines around the objects. It produces single lines which are located along the centerlines of the objects. The final linewidth of this generated single lines will be adopted so that the area of the line object is about the same as the area of the original object. (this has no effect, if the output format cannot handle variable linewidths).</td></tr><tr><td style="width: 5.48173%;">lines</td><td style="width: 94.5183%;">The same as 'centerline mixed' except that only line objects will be generated. All other objects will be discarded</td></tr></tbody></table>

## Colorspace conversion parameters

Selects the internal color space which is used by kvec. The effect of changing the internal color space will be noticed when used together with the "colorsep" option or when bitmap processing is performed ("process" option). Note: If a color space other than RGB or CMYK is selected, the colors will be changed such that the optical impression will be quite near to the original image. RGB is default.

## Color separation parameters 

 Selects the type of color separation. The output file will only contain the specified color components. Please note, that for cmyk separation the color space is also set to the right value. Note: It is useful to produce a gray-scale output file for single component color separation. This can be achieved by using the "-black" option together with colsep.

- rgb: no color separation (default).
- cmyk: no color separation
- rb: extract R and B components
- gb: extract G and B components
- gr: extract R and G components
- cy: extract C and Y components
- my: extract M and Y components
- mc: extract C and M components
- rr: separate R color
- gg: separate G color
- bb: separate B color
- cc: separate C color
- mm: separate M color
- yy: separate Y color

## Fill

The fill parameters specify how the generated polylines/polygons will be interpreted:

<div class="table-wrap" id="bkmrk-solid-polygons-are-a"><table style="width: 99.9734%;"><tbody><tr><td scope="col" style="width: 6.34552%;">solid</td><td scope="col" style="width: 93.6545%;">Polygons are always closed (i.e. the last point of a vector is identical with the first point). The Polygons are filled with individual colors (DEFAULT). The sort parameter should not be 'min' in this case because the larger Polygons would cover and hide the smaller ones.</td></tr><tr><td style="width: 6.34552%;">line</td><td style="width: 93.6545%;">Output consists of polylines with individual colors. The polylines are not closed. This is the preferable fill parameter if the outputfile is generated for a pen-plotter. The plotter pen will never plot more than one color one upon another. The layout will depend on the sort order specified with the 'sort' switch. With the switches 'reduce' and 'smooth' you can once more refine the layout of the output.</td></tr><tr><td style="width: 6.34552%;">contour</td><td style="width: 93.6545%;"> The same as '-fill solid', however the interiors of the polygons remain 'hollow'. Lines with different colour can cover each other. The layout will depend on the sort order specified with the 'sort' switch.</td></tr></tbody></table>

</div>## Font

KVEC generates (before vectorization) an optimized set of parameters, which is suited for vectorization of dark colored text on a clear background. All objects get a unique 'dark' color. Sort order "local" is automatically turned on for generation of sub-polygons.

## Gap fill (jumping)

This parameter controls whether the vectorizer can 'jump' over gaps while tracing an object. The value N must be specified in 10ths of a pixel. Allowed values: 0 - 30.

## Filter out details smaller than x pixels

Polylines or polygons which belong to a bounded area with a number of pixels fewer than N will be filtered out (i.e. small details are 'erased'). The default value depends on the dimensions and the colour depth of the picture. The use of a grit value &gt; 0 increases the computing time and increases also considerably the demand of memory. If you have to deal economically with memory you should try a grit value of 0 and decrease the quantization value.

## Line width

Specifies the line width of the generated output vectors in 10ths of a pixel. Allowed values: 0-1000. Default value: 0. Note that this parameter has a different meaning if used together with the option -centerline. In this case the default value for the lwidth is 100.

## Polygons overlap (1px)

If this switch is specified, Polygons will slightly overlap, actually one pixel. (DEFAULT: no overlap). If vector images show strange coloured gaps after they have been rotated (especially along border lines between adjacent Polygons) you should set this switch.

## Palette

<div class="table-wrap" id="bkmrk-optimize-kvec-will-u"><table style="width: 99.9734%; height: 198.817px;"><colgroup><col style="width: 12.3256%;"></col><col style="width: 87.6744%;"></col></colgroup><tbody><tr style="height: 38.1167px;"><td scope="col" style="height: 38.1167px;">optimize</td><td scope="col" style="height: 38.1167px;">KVEC will use internal optimized palette when color reducing has to be done (default)</td></tr><tr style="height: 59.2333px;"><td style="height: 59.2333px;">fixed</td><td style="height: 59.2333px;">KVEC will use a standard color palette when color reducing has to be done. This often gives better vectorization results, especially if the raster image contains less than 16 colors.</td></tr><tr style="height: 101.467px;"><td style="height: 101.467px;">user (not supported!)</td><td style="height: 101.467px;">&lt;n&gt; R1,G1,B1, .... Rn,Gn,Bn: Here you can specify a user supplied color palette which contains &lt;n&gt; colors. The value &lt;n&gt; must be followed by &lt;n&gt; RGB triples. It is more practicable to use a parameter file than entering all RGB values on the commandline. The value for n may not exceed 256 colors.</td></tr></tbody></table>

</div>## Color quantization

The input file will be quantized down to N colors before vectorization, if it contains more than N colours. Default: 32 colors

## Type of line reducing

The reduce parameters specify whether all those points of a vector laying on a straight line may be replaced (= reduced) by two points (the start and the end point of the straight line). This reduces the size of the outputfile. Because straight lines can lie horizontally, vertically, or diagonally,we have:

<div class="table-wrap" id="bkmrk-orthogonal-straight-"><table style="width: 99.9734%;"><colgroup><col style="width: 7.54153%;"></col><col style="width: 92.4585%;"></col></colgroup><tbody><tr><td scope="col">orthogonal</td><td scope="col">straight horizontal and vertical line-segments will be reduced. This is the default value.</td></tr><tr><td>all</td><td>All straight lines will be reduced (diagonal lines too). Occasionally, small gaps may appear in the layout.</td></tr><tr><td>off</td><td>lines will not be reduced. The only case in which you may want this setting is when you want the velocity of a plotter pen to slow down for long straight lines.</td></tr></tbody></table>

</div>## High vectorization resolution

The resolution parameters have some influence on the internal evaluation. If high, all details will be retained (needs more memory), else very small details may get lost (default)

## Sorting

The sort parameters specify the sequence order in which the vectors appear in the outputfile:

<div class="table-wrap" id="bkmrk-nosort-%C2%A0vectors-will"><table style="width: 99.9734%;"><colgroup><col style="width: 5.94684%;"></col><col style="width: 94.0532%;"></col></colgroup><tbody><tr><td scope="col">nosort</td><td scope="col"> Vectors will not be sorted. Contours with different colours may cover each other but the interior areas of each vector cannot be covered by those of another vector.</td></tr><tr><td>max</td><td>This parameter depends on the filltype: For filltype 'solid' the Polygons are sorted by the size of the bounded area. For filltype line and color they are sorted by the length of the vectors (sortorder is from maximimum to minimum). This is the default value.</td></tr><tr><td>min</td><td>The same as sort 'max' but sortorder is from minimum to maximum. This makes no sense together with '-fill solid'.</td></tr><tr><td>local</td><td>The generated output order preserves the local topology, i.e. objects are drawn in the order in which they are nested. The sort order in a group of nested objects is from max to min. The sort order for groups is the same. Needs more computing time. If the sort order is local0, KVEC will try to generate subpolygons having transparency color. This may be usefull for vectorizing of text. The "-font" option will turn on the local sort order automatically.</td></tr><tr><td>color</td><td>Polygons/polylines are sorted by color.</td></tr></tbody></table>

</div>## Subsampling

If enabled, the output vectors are subsampled by a factor of 2. This will reduce the size of the output file and will also result in smoothing the vectors.

## Sysmalloc

If enabled, use the memory-allocation routines from the operating system, else KVEC uses its own memory allocation routines. Some operating systems have slow allocation routines. Try this switch if the performance of KVEC decreases.

## Text

Generate or suppress output of text in the output file. Default is enabled

## Color vectorization

<div class="table-wrap" id="bkmrk-normal-no-special-mo"><table style="width: 99.9734%;"><colgroup><col style="width: 20.7641%;"></col><col style="width: 79.2359%;"></col></colgroup><tbody><tr><td scope="col">Normal</td><td scope="col">No special mode. Default</td></tr><tr><td>Only darkest and brightest color</td><td>The same as -vblack, except that only the dark areas will be processed. Thus, white areas inside of black areas might dissapear if the 'black' object is of type 'filled polygon'.</td></tr><tr><td>All colors except brightest</td><td> The same as -vblack, except that only 'not white' areas will be processed. Thus, white areas inside of other areas might dissapear if the object is of type 'filled polygon'.</td></tr><tr><td>Only colors with 'darkest' RGB-values</td><td>Only the colors with the 'darkest' RGB-values will be vectorized (picks the 'black' lines out of the picture). All other objects were treated as having one unique 'white color'. The regions consisting of this 'white' color will also be vectorized. Thus, white areas inside of black areas will be shown correctly. Note that a lower -quantize value results in the generation of more 'black' lines. If the quantize value is too high, the program will not catch all all dark regions.</td></tr></tbody></table>

</div>## Winding

<div class="table-wrap" id="bkmrk-original-%28default%29-w"><table style="width: 99.9734%;"><colgroup><col style="width: 7.00997%;"></col><col style="width: 92.99%;"></col></colgroup><tbody><tr><td scope="col">original</td><td scope="col">(Default) Winding of polygons will be unchanged, as detected from the source or from the vectorizer.</td></tr><tr><td>reversed</td><td>Reverse the winding direction. This may be necessary for some types of input data. </td></tr><tr><td>optimized</td><td>KVEC sets alternating winding directions for main- and subpolygons, depending on the nesting depth. </td></tr></tbody></table>

</div>## Delta

This is the maximal allowed color difference between the rough and the detail layer. The detail layer contains a vector representation of these areas which have a colour difference to the first layer greater than delta. Note: delta has two different meanings: If used together with the 'progressive' option it means a color difference between two layers. If used together with the 'vcolor' option it means a maximal allowed color tolerance. Values: 0 up to 128. Default: 0

## Error-Parameter for Bezier-curves

Use the value N for the Bezier error-parameter. Allowed values: 1 - 20. Greater values for errbez will allow more differences between the original and the output picture and will reduce the size of the output. The default value is 3.

## Lossless

Generates a lossless image. May need enormous memory. This is a synonym for: -resolution high -grit 0 -reduce orth. and no quantization

## Progressive

KVEC offers you the possibility of building a 'progressive' image. The term 'progressive' means that the image is build up from two successive layers (one 'rough' picture without details and one refined picture which contains only details). The two layers follow in this order as the image is build up. This kind of image representation is very robust against all kinds of transformations and local deformations. The difference of the two layers with respect to colour quantization and resolution of details is expressed by the gritfactor and the colorfactor:

-progressive gritfactor N: Generates a progressive image with 2 Layers. The first layer has a grit-value multiplied by N  
-progressive colorfactor N: Generates a progressive image with 2 Layers. The first layer has a quantize-value divided by N

## Smoothing of polylines

The program will try to smoothen the polylines and Polygons. This is involving some loss of information. Default: Depends on the output format. Using the 'smooth on' with the WMF or EMF-Format will increase the resolution of the outputfile by a factor of 4.

## Pick out regions with color - mode

<div class="table-wrap" id="bkmrk-none-do-not-apply-ma"><table style="width: 99.9734%;"><colgroup><col style="width: 9.00332%;"></col><col style="width: 90.9967%;"></col></colgroup><tbody><tr><td scope="col">none</td><td scope="col">Do not apply</td></tr><tr><td>matching</td><td>This switch can be be used to pick out regions of the image which have the specified color. The color representation is RGB (Red Green Blue) with values from 0 up to 255. Only these regions that match this colour will be vectorized. Note: If a delta value &gt; 0 is specified ('-delta' option) all colors which lie in the range (RGB +/- delta) will be vectorized.</td></tr><tr><td>not\_matching</td><td>Only these regions that do not match this colour will be vectorized. Note: If a delta value &gt; 0 is specified ('-delta' option) all colors which lie in the range (RGB +/- delta) will not be vectorized.</td></tr></tbody></table>

</div># Original KVEC software

This is how official GUI looks (some settings screenshots).

[![grafik.png](https://wiki.stadtfabrikanten.org/uploads/images/gallery/2025-05/scaled-1680-/QCkF4qx8zAyakoQ5-grafik.png)](https://wiki.stadtfabrikanten.org/uploads/images/gallery/2025-05/QCkF4qx8zAyakoQ5-grafik.png) [![grafik.png](https://wiki.stadtfabrikanten.org/uploads/images/gallery/2025-05/scaled-1680-/Guj7Wy6E18xmZeDD-grafik.png)](https://wiki.stadtfabrikanten.org/uploads/images/gallery/2025-05/Guj7Wy6E18xmZeDD-grafik.png) [![grafik.png](https://wiki.stadtfabrikanten.org/uploads/images/gallery/2025-05/scaled-1680-/1Eo2VRqGNuwkyPMv-grafik.png)](https://wiki.stadtfabrikanten.org/uploads/images/gallery/2025-05/1Eo2VRqGNuwkyPMv-grafik.png) [![grafik.png](https://wiki.stadtfabrikanten.org/uploads/images/gallery/2025-05/scaled-1680-/k34slO6KWbrg2wOb-grafik.png)](https://wiki.stadtfabrikanten.org/uploads/images/gallery/2025-05/k34slO6KWbrg2wOb-grafik.png)

# Line Shading

<p class="callout info">See also [Raster 2 Laser GCode](https://old.stadtfabrikanten.org/display/IFM/Raster+2+Laser+GCode)</p>

The Endurance Line Shading extension enables to convert a raster image into waves. This extension can be used to get an art effect that goes perfectly with laser engraving. The image is divided into a certain number of lines. The pixel brightness in every line modulates the frequency and amplitude of the basic wave.

**Options**

1. Waveform 
    1. three basic waveforms are available: sinusoidal, triangle (saw-shaped), square (meander)
2. Number of lines
3. Min period: 
    1. of the wave (maximal frequency corresponds to the black color)
4. Max perio: 
    1. of the wave (minimal frequency corresponds to the white color)
    2. If you set the same values for the max. and min. periods only the amplitude modulation will be used. The waves period at that will correspond to the given one. If you make the minimal period bigger than the maximal one, the colors in the picture will get inverted
5. Min amplitude: 
    1. of the wave (corresponds to the white color)
6. Max amplitude: 
    1. of the wave (corresponds to the black color)  
        If you set the same values for the max. and min. amplitudes only the frequency modulation will be used. The wave’s amplitude at that will correspond to the given one. If you make the minimal amplitude bigger than the maximal one, the colors in the picture will get inverted
7. Gamma: 
    1. gamma correction coefficient. The parameter increment makes middle tones of the picture darker; the parameter decrement makes them lighter. The brightness of the middle tones corresponds to the initial at 2,2 value of this parameter.  
        Line width
8. Remove image

<iframe allowfullscreen="allowfullscreen" height="314" src="https://www.youtube.com/embed/uqGsX6ceRQI?feature=emb_logo" width="560"></iframe>

[![grafik.png](https://wiki.stadtfabrikanten.org/uploads/images/gallery/2025-05/scaled-1680-/dZeHrTx8oswaO09u-grafik.png)](https://wiki.stadtfabrikanten.org/uploads/images/gallery/2025-05/dZeHrTx8oswaO09u-grafik.png)

[![grafik.png](https://wiki.stadtfabrikanten.org/uploads/images/gallery/2025-05/scaled-1680-/ZKSptd0S6p2kRY4R-grafik.png)](https://wiki.stadtfabrikanten.org/uploads/images/gallery/2025-05/ZKSptd0S6p2kRY4R-grafik.png) [![grafik.png](https://wiki.stadtfabrikanten.org/uploads/images/gallery/2025-05/scaled-1680-/9WQzHE8KlTSx2b8O-grafik.png)](https://wiki.stadtfabrikanten.org/uploads/images/gallery/2025-05/9WQzHE8KlTSx2b8O-grafik.png)
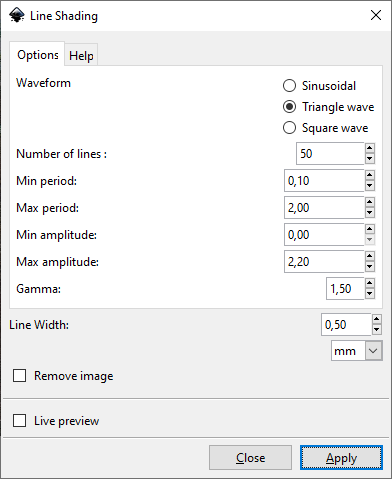
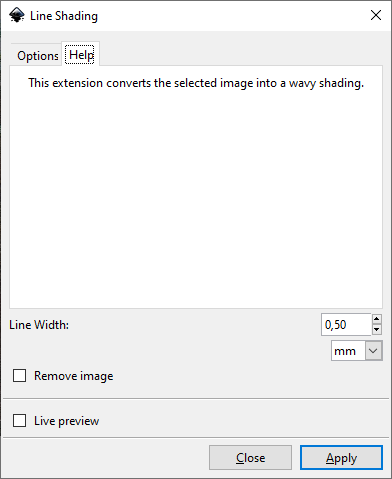
[![grafik.png](https://wiki.stadtfabrikanten.org/uploads/images/gallery/2025-05/scaled-1680-/UQ5KaPxM9jBS6Rd0-grafik.png)](https://wiki.stadtfabrikanten.org/uploads/images/gallery/2025-05/UQ5KaPxM9jBS6Rd0-grafik.png)
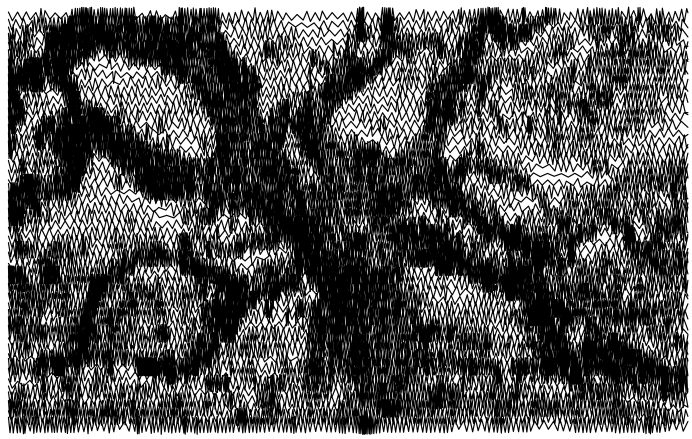
# Pixel2SVG

Makes a SVG colored rectangle raster from true raster image. Ideal for Icon creation. Documentation → [<span>https://florian-berger.de/en/software/pixel2svg</span>](https://florian-berger.de/en/software/pixel2svg/)

[![grafik.png](https://wiki.stadtfabrikanten.org/uploads/images/gallery/2025-05/scaled-1680-/G53neSI6ZgOLcwDn-grafik.png)](https://wiki.stadtfabrikanten.org/uploads/images/gallery/2025-05/G53neSI6ZgOLcwDn-grafik.png) [![grafik.png](https://wiki.stadtfabrikanten.org/uploads/images/gallery/2025-05/scaled-1680-/T1RWDK9IuTseD53v-grafik.png)](https://wiki.stadtfabrikanten.org/uploads/images/gallery/2025-05/T1RWDK9IuTseD53v-grafik.png) [![grafik.png](https://wiki.stadtfabrikanten.org/uploads/images/gallery/2025-05/scaled-1680-/WHOJeK0gZGkjUsPf-grafik.png)](https://wiki.stadtfabrikanten.org/uploads/images/gallery/2025-05/WHOJeK0gZGkjUsPf-grafik.png)
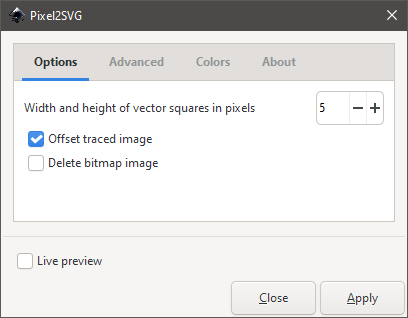
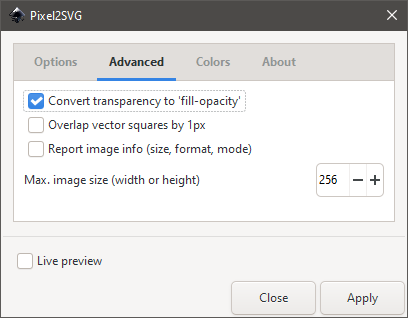
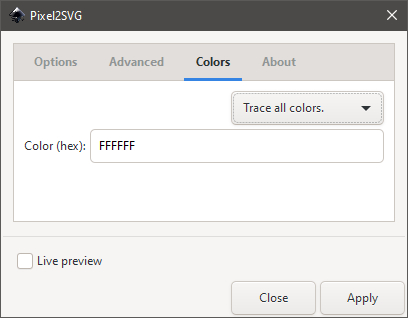
## Example

Input Image:

[![grafik.png](https://wiki.stadtfabrikanten.org/uploads/images/gallery/2025-05/scaled-1680-/EtLmQkAC8KrnNH71-grafik.png)](https://wiki.stadtfabrikanten.org/uploads/images/gallery/2025-05/EtLmQkAC8KrnNH71-grafik.png)
Result:

[![grafik.png](https://wiki.stadtfabrikanten.org/uploads/images/gallery/2025-05/scaled-1680-/1I2WiB1BCWIpEzu8-grafik.png)](https://wiki.stadtfabrikanten.org/uploads/images/gallery/2025-05/1I2WiB1BCWIpEzu8-grafik.png)
# Pixels To Objects

Source: [https://inkscape.org/~pakin/%E2%98%85pixels-to-objects](https://inkscape.org/~pakin/%E2%98%85pixels-to-objects)

Select a bitmap and one other objects, and run the extension. It will place one copy of the object at each pixel coordinate. For example, a 32×32 image will lead to objects being placed at coordinates (0, 0) through (31, 31).

Options enable objects to have their stroke and/or fill color adjusted to match the corresponding image pixel; background-colored pixels to be either considered or ignored; image coordinates to be scaled up or down; and multiple objects to be assigned to coordinates either randomly or deterministically. For instance, in the banner image above, a 16×16 bitmap was selected along with four path objects of size at most 18×18. In the dialog box, "Apply color to stroke" and "Ignore background pixels" were checked. "Image coordinate scaling" was set to 18 to prevent the path objects from overlapping. And "Instantiation of multiple objects" was set to "By image coordinates" to cycle evenly through all four path objects.

[![grafik.png](https://wiki.stadtfabrikanten.org/uploads/images/gallery/2025-05/scaled-1680-/uZk3dOW4CgL3OGVd-grafik.png)](https://wiki.stadtfabrikanten.org/uploads/images/gallery/2025-05/uZk3dOW4CgL3OGVd-grafik.png)
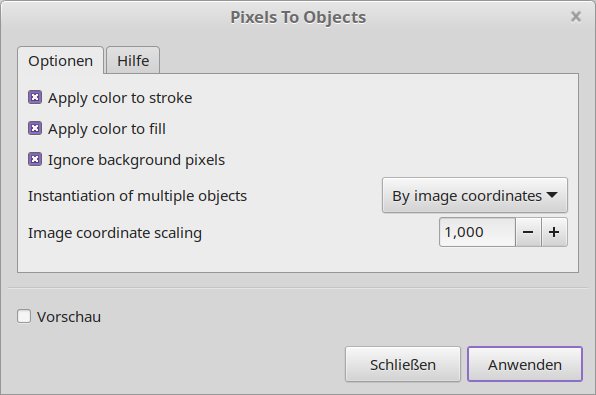
## Take some picture

We use [https://openclipart.org/detail/190682/trace-tree](https://openclipart.org/detail/190682/trace-tree)

[![grafik.png](https://wiki.stadtfabrikanten.org/uploads/images/gallery/2025-05/scaled-1680-/YDKT0m18dvvKcLHn-grafik.png)](https://wiki.stadtfabrikanten.org/uploads/images/gallery/2025-05/YDKT0m18dvvKcLHn-grafik.png)

## Reduce the image to less pixels

[![grafik.png](https://wiki.stadtfabrikanten.org/uploads/images/gallery/2025-05/scaled-1680-/nwTvs3xe6SeDrJwX-grafik.png)](https://wiki.stadtfabrikanten.org/uploads/images/gallery/2025-05/nwTvs3xe6SeDrJwX-grafik.png)

## Run the extension

[![grafik.png](https://wiki.stadtfabrikanten.org/uploads/images/gallery/2025-05/scaled-1680-/UyzkWFePN3eAC8xC-grafik.png)](https://wiki.stadtfabrikanten.org/uploads/images/gallery/2025-05/UyzkWFePN3eAC8xC-grafik.png)
<p class="callout info">See also [Pixel2SVG](https://wiki.stadtfabrikanten.org/books/fablab-chemnitz/page/pixel2svg)</p>

# Primitive (Michael Fogleman)

<div class="page view" id="bkmrk-source-code-https%3A%2F%2F"><article><div class="wiki-content">- Source code [https://github.com/fogleman/primitive](https://github.com/fogleman/primitive)
- HowTo compiling on Windows → [fogleman/primitive on Windows](https://wiki.stadtfabrikanten.org/books/wissenswertes-DZA/page/foglemanprimitive-mit-windows)

</div>## Say hello to Nala cat

[![grafik.png](https://wiki.stadtfabrikanten.org/uploads/images/gallery/2025-05/scaled-1680-/DbXnD3j8M3dzcZSk-grafik.png)](https://wiki.stadtfabrikanten.org/uploads/images/gallery/2025-05/DbXnD3j8M3dzcZSk-grafik.png)

## Configure her a nice primitive setting

[![grafik.png](https://wiki.stadtfabrikanten.org/uploads/images/gallery/2025-05/scaled-1680-/pzAi2kEKQRoYVeWt-grafik.png)](https://wiki.stadtfabrikanten.org/uploads/images/gallery/2025-05/pzAi2kEKQRoYVeWt-grafik.png)

## Vectorized cat madame

[![grafik.png](https://wiki.stadtfabrikanten.org/uploads/images/gallery/2025-05/scaled-1680-/LSyabCrP7DdJ4Sb6-grafik.png)](https://wiki.stadtfabrikanten.org/uploads/images/gallery/2025-05/LSyabCrP7DdJ4Sb6-grafik.png)

<div class="wiki-content" id="bkmrk--1"></div></article></div>

# Shape Recognition

[![grafik.png](https://wiki.stadtfabrikanten.org/uploads/images/gallery/2025-05/scaled-1680-/Vx8Zy5CwPqpTOvXK-grafik.png)](https://wiki.stadtfabrikanten.org/uploads/images/gallery/2025-05/Vx8Zy5CwPqpTOvXK-grafik.png) [![grafik.png](https://wiki.stadtfabrikanten.org/uploads/images/gallery/2025-05/scaled-1680-/363ROi7HEbVwxX5Z-grafik.png)](https://wiki.stadtfabrikanten.org/uploads/images/gallery/2025-05/363ROi7HEbVwxX5Z-grafik.png) [![grafik.png](https://wiki.stadtfabrikanten.org/uploads/images/gallery/2025-05/scaled-1680-/YVRhMqfdYKFd6njm-grafik.png)](https://wiki.stadtfabrikanten.org/uploads/images/gallery/2025-05/YVRhMqfdYKFd6njm-grafik.png) [![grafik.png](https://wiki.stadtfabrikanten.org/uploads/images/gallery/2025-05/scaled-1680-/QoBmdcBUNVk98e2D-grafik.png)](https://wiki.stadtfabrikanten.org/uploads/images/gallery/2025-05/QoBmdcBUNVk98e2D-grafik.png) [![grafik.png](https://wiki.stadtfabrikanten.org/uploads/images/gallery/2025-05/scaled-1680-/iE1KNXgHSjSKfimO-grafik.png)](https://wiki.stadtfabrikanten.org/uploads/images/gallery/2025-05/iE1KNXgHSjSKfimO-grafik.png)

## Example

[![grafik.png](https://wiki.stadtfabrikanten.org/uploads/images/gallery/2025-05/scaled-1680-/k5ceZaNcZV1UNPIl-grafik.png)](https://wiki.stadtfabrikanten.org/uploads/images/gallery/2025-05/k5ceZaNcZV1UNPIl-grafik.png)

[![grafik.png](https://wiki.stadtfabrikanten.org/uploads/images/gallery/2025-05/scaled-1680-/xpCjYh8BzQ9EYQVA-grafik.png)](https://wiki.stadtfabrikanten.org/uploads/images/gallery/2025-05/xpCjYh8BzQ9EYQVA-grafik.png)

# SVG Embed And Crop Linked Images

Sources:

- [https://github.com/bnanes/svg-embed-and-crop/releases](https://github.com/bnanes/svg-embed-and-crop/releases)
- [https://b.nanes.org/svg-embed-and-crop](https://b.nanes.org/svg-embed-and-crop/)

requires to install Java

```bash
#Fedora
sudo dnf install java-latest-openjdk.x86_64
```

## About

Inkscape is a powerful open-source vector graphics editor which supports the inclusion of raster images either through file references (links) or through direct embedding of the image data in the Inkscape SVG file. Referencing images as links keeps SVG files small and ensures that changes to image placement and transformations specified in the SVG file remain separate from the underlying image data. However, embedding images may be required as a final step in some production work-flows.

This java-based extension for Inkscape facilitates image embedding by:

- Automatically identifying all linked images
- Cropping image data that lies outside the images’ clipping frame
- Optionally applying jpeg compression
- Optionally resampling images above a maximum resolution
- Writing the cropped and possibly compressed image data directly in the SVG file

By cropping image data that lies outside the clipping frame, applying jpeg compression, or resampling to lower resolution, the resulting file size can be reduced significantly. If preserving image quality is a priority jpeg compression and resampling can be explicitly avoided.

## Known Issues

- Images that have already been embedded are ignored.
- Only clipping planes created from rectangles are currently supported.
- In Inkscape versions &gt;= 1.0, non-ASCII characters in text elements may be disrupted on some systems. This is dues to an issue with the new extension system; [a fix has been proposed](https://gitlab.com/inkscape/extensions/-/merge_requests/363). Workarounds include using Inkscape versions &lt; 1.0 or editing share/inkscape/extensions/inkex/extensions.py in your Inkscape installation as detailed [here](https://gitlab.com/inkscape/extensions/-/merge_requests/363).
- PDFs saved from Inkscape may not include jpeg compression, even if images are embedded in the SVG as jpegs. Additional information is available [here](https://bugs.launchpad.net/inkscape/+bug/168708). A workaround is to embed images without compression, export a PDF, then compress images in the PDF using [The PDF Shrinker](https://b.nanes.org/shrink-pdf.html).
- On some 64bit Windows systems, Inkscape’s Python interpreter fails to recognize the JRE, even if it is correctly registered with the system. A workaround for this issue is to edit svg-embed-and-crop.py to include an absolute path to the JRE.
- cannot access some files from regular user "can't read file link"

# Transformations

# Another Perspective

This is similar to [Bezier Envelope](https://wiki.stadtfabrikanten.org/books/fablab-chemnitz/page/bezier-envelope)

## Draw an object and convert to path

[![grafik.png](https://wiki.stadtfabrikanten.org/uploads/images/gallery/2025-05/scaled-1680-/DQoGK6Gt2qKSnMVn-grafik.png)](https://wiki.stadtfabrikanten.org/uploads/images/gallery/2025-05/DQoGK6Gt2qKSnMVn-grafik.png)

## Draw some envelope path

[![grafik.png](https://wiki.stadtfabrikanten.org/uploads/images/gallery/2025-05/scaled-1680-/Pn8Doj1wtOs48sLq-grafik.png)](https://wiki.stadtfabrikanten.org/uploads/images/gallery/2025-05/Pn8Doj1wtOs48sLq-grafik.png)

## Run the extension and check result

[![grafik.png](https://wiki.stadtfabrikanten.org/uploads/images/gallery/2025-05/scaled-1680-/vRf5vQVowOr4djfU-grafik.png)](https://wiki.stadtfabrikanten.org/uploads/images/gallery/2025-05/vRf5vQVowOr4djfU-grafik.png)

# Apply Transformations

An Inkscape extension which recursively applies transformations to shapes. This will remove applied Matrix values from object but will keep it's transformation. It will reset the matrix to basic values like these:

[![grafik.png](https://wiki.stadtfabrikanten.org/uploads/images/gallery/2025-05/scaled-1680-/ybXIMz6GVukLLgVo-grafik.png)](https://wiki.stadtfabrikanten.org/uploads/images/gallery/2025-05/ybXIMz6GVukLLgVo-grafik.png)

It will also clean Live Path Effects

[![grafik.png](https://wiki.stadtfabrikanten.org/uploads/images/gallery/2025-05/scaled-1680-/PaGDDL1c2JUWpi4U-grafik.png)](https://wiki.stadtfabrikanten.org/uploads/images/gallery/2025-05/PaGDDL1c2JUWpi4U-grafik.png)

# Barrel Distortion

## Draw some shape

[![grafik.png](https://wiki.stadtfabrikanten.org/uploads/images/gallery/2025-05/scaled-1680-/KgvEHuncRKcNJg6k-grafik.png)](https://wiki.stadtfabrikanten.org/uploads/images/gallery/2025-05/KgvEHuncRKcNJg6k-grafik.png)

## Run the extension

[![grafik.png](https://wiki.stadtfabrikanten.org/uploads/images/gallery/2025-05/scaled-1680-/CYYlQqsnUn4CLuMe-grafik.png)](https://wiki.stadtfabrikanten.org/uploads/images/gallery/2025-05/CYYlQqsnUn4CLuMe-grafik.png)

## Result

![](https://wiki.stadtfabrikanten.org/loading.gif)

# Bezier Envelope

This extension is similar to default Inkscape extension "Modify Path → Envelope" and is also similar to [Another Perspective](https://wiki.stadtfabrikanten.org/books/fablab-chemnitz/page/another-perspective).

Note: this extension does not work for svg:circle which were converted to svg:path. Those will contain a or A commands in their path. We need to convert those to paths with c or C commands!

## Draw the path you want to fit into the envelope

[![grafik.png](https://wiki.stadtfabrikanten.org/uploads/images/gallery/2025-05/scaled-1680-/B4MGcBsFv5O0ZZRg-grafik.png)](https://wiki.stadtfabrikanten.org/uploads/images/gallery/2025-05/B4MGcBsFv5O0ZZRg-grafik.png)

## Draw your 4-sided envelope around

**Please note!**

- Paths with more than 4 sides will not correctly apply. Paths with less than 4 sides will fail. So just draw a square shape (angles don't have to be 90 degrees)
- Start in the upper left corner and draw clockwise. Otherwise your result may get twisted in an undesired way

[![grafik.png](https://wiki.stadtfabrikanten.org/uploads/images/gallery/2025-05/scaled-1680-/YZnnhUlSyJ789HUk-grafik.png)](https://wiki.stadtfabrikanten.org/uploads/images/gallery/2025-05/YZnnhUlSyJ789HUk-grafik.png)

## Run the extension

First select the inner path. As second select the envelope. If you dismiss the order the extension will fail.

[![grafik.png](https://wiki.stadtfabrikanten.org/uploads/images/gallery/2025-05/scaled-1680-/M7xIAbXMA0hc84TF-grafik.png)](https://wiki.stadtfabrikanten.org/uploads/images/gallery/2025-05/M7xIAbXMA0hc84TF-grafik.png)

# Cutting Optimizer (Nesting)

Source of documentation: [<span>https://translate.google.com/translate?hl=de&amp;sl=fr&amp;tl=en&amp;u=https%3A%2F%2Fwiki.fablab-lannion.org%2Findex.php%3Ftitle%3DCutOptim</span>](https://translate.google.com/translate?hl=de&sl=fr&tl=en&u=https%3A%2F%2Fwiki.fablab-lannion.org%2Findex.php%3Ftitle%3DCutOptim)

# <span class="notranslate">CutOptim</span>

[![grafik.png](https://wiki.stadtfabrikanten.org/uploads/images/gallery/2025-05/scaled-1680-/vuM9aIv0VBjAtpMp-grafik.png)](https://wiki.stadtfabrikanten.org/uploads/images/gallery/2025-05/vuM9aIv0VBjAtpMp-grafik.png)

## <span class="notranslate"> <span class="mw-headline">Presentation</span></span>

<span class="notranslate"> All the users of the laser cutter have probably been confronted with the problem: my drawing does not fit in the wood sheet at my disposal or even in the laser cutter!</span> <span class="notranslate"> To try to remedy this problem, I started writing an optimization program for placing objects on a sheet.</span>   
<span class="notranslate"> For interested readers, this is a variant of a problem well known in the world of optimization (bin packing problem). By doing a little research on the Web, there are also many links to programs performing this task, but the free versions are often very limited, they are content to optimize the cutting of rectangles.</span> <span class="notranslate"> This can help a furniture manufacturer, but it's too limiting for a laser cutter!</span>

  
<span class="notranslate"> This program reads an input SVG file containing the objects to be placed and outputs a second SVG file containing the placed objects.</span>   
<span class="notranslate"> It can be used as is (command line, no GUI!) Or as an extension inkscape which then provides the GUI.</span>

## <span class="notranslate"> <span class="mw-headline">Environment</span></span>

<span class="notranslate"> As mentioned above, this program can be used alone or as an inkscape extension.</span>   
<span class="notranslate"> The work to be done can take a relatively long time, it is better to run it on a modern processor, but if you are in no hurry ...</span>   
<span class="notranslate"> The memory consumption is reasonable, no need to rush to buy new RAMs!</span>

## <span class="notranslate"> S<span class="mw-headline">oftware</span></span>

<span class="notranslate"> First of all as it is a program written in C ++ for a performance issue, it must be compiled on your machine.</span>   
<span class="notranslate"> I wrote this program under Linux / Ubuntu (compiled with gcc), but since there is no system dependency, it should work as it is under any other version of Linux.</span> <span class="notranslate"> For fans of Windows (there is!), I created a Visual Studio project that allows to compile on this platform.</span> <span class="notranslate"> For Mac users, sorry I do not have it, you will have to fend for yourself, but the C ++ used is really standard, it should work as soon as you have access to a compiler.</span> <span class="notranslate"> For information, I did not change the code between Linux and Windows, that's saying!</span>

### <span class="notranslate"> <span class="mw-headline">Linux installation</span></span>

<span class="notranslate"> The code is available here: [https://github.com/thierry7100/CutOptim](https://github.com/thierry7100/CutOptim) For the uninitiated, you clone (or download) the directory, it comes in the form of a .zip archive, which must be extracted.</span> <span class="notranslate"> Then you open a terminal, go to the created directory and launch the commands:</span>

1. <span class="notranslate"> make release</span>
2. <span class="notranslate"> make install: this will copy the software to the directory ~ / .local / bin which is in the list of executable directories, which will allow you to use it directly (this may be specific Ubuntu, it's up to you put the program elsewhere on another system.</span>
3. <span class="notranslate"> make install\_inkscape: this will copy the program to the inkscape extension directory (~ / .config / inkscape / extensions).</span> <span class="notranslate"> If you want to make this extension available for all accounts on your machine, copy the file cutoptim.inx + the executable into / usr / share / inkscape / extensions (you must be root).</span>

<span class="notranslate"> If you have opted for the inkscape extension, at the next start you will have a Fablab / Laser Cutting Optimizer extension</span>

```bash
cd ~
git clone https://github.com/thierry7100/CutOptim.git
cd CutOptim
make release
#make install
 
#try
~/CutOptim/bin/Release/CutOptim
```

### <span class="notranslate"> <span class="mw-headline">Windows installation</span></span>

<span class="notranslate"> The code is available here: [https://github.com/thierry7100/CutOptim](https://github.com/thierry7100/CutOptim).</span>

<span class="notranslate">For the uninitiated, you clone (or download) the directory, it comes in the form of a .zip archive, which must be extracted.</span> <span class="notranslate"> Then you launch Visual Studio, you can get a free version for special purposes, see [Visual Studio Community Edition v17](https://visualstudio.microsoft.com/thank-you-downloading-visual-studio/?sku=Community&rel=17) (You also need to install Windows SDK-Version 10.0.16299.0 within Visual Studio Installer). </span>

[![grafik.png](https://wiki.stadtfabrikanten.org/uploads/images/gallery/2025-05/scaled-1680-/l2GZ6d1moOjxUUNl-grafik.png)](https://wiki.stadtfabrikanten.org/uploads/images/gallery/2025-05/l2GZ6d1moOjxUUNl-grafik.png)

[![grafik.png](https://wiki.stadtfabrikanten.org/uploads/images/gallery/2025-05/scaled-1680-/IfZMCwOt0d7KZ8Uj-grafik.png)](https://wiki.stadtfabrikanten.org/uploads/images/gallery/2025-05/IfZMCwOt0d7KZ8Uj-grafik.png)

<span class="notranslate">Then, once Visual studio started, you have the CutOptim project, then:</span>

1. <span class="notranslate"> You ask to generate the release version of the project if it is not the one that appears in the menu bar.</span>
2. <span class="notranslate"> You choose the platform (x86 or x64) of your choice.</span> <span class="notranslate"> By default the file is configured in x64, if you have a 32bit version of Windows, change to x86.</span>
3. <span class="notranslate"> You click Generate / Generate Solution, the compilation starts and after a few seconds, your program is available.</span>
4. <span class="notranslate"> Then, under windows, better use this program as extension inkscape, the command line is hardly used?</span> <span class="notranslate"> !</span> <span class="notranslate"> To do this, copy the cutoptim.inx and CutOptm / x64 / Release / CutOptim.exe files to the inkscape extensions directory.</span> <span class="notranslate"> This can be found via the Edit / Preferences / System command, but it is usually under C: \\ USERS \\ &lt;Your user name&gt; \\ AppData \\ Roaming / inkscape / extensions.</span> <span class="notranslate"> Attention, to see this directory, you will have to validate the visualization of hidden files under the explorer of files, if it were not done.</span>

<span class="notranslate"> As in Linux, at the next start of inkscape you will have a Fablab / Laser Cutting Optimizer extension</span>

## <span class="notranslate"> <span class="mw-headline">Operation</span></span>

<span class="notranslate"> The input and output format of the files is the SVG format, available on many software programs.</span> <span class="notranslate"> If you use inkscape, it is the native format, the program has been tested in this context.</span> <span class="notranslate"> It should also work with files from other drawing software that generates SVG.</span> <span class="notranslate"> If you have a problem tell me (<thierry@fablab-lannion.org>)</span>   
  
<span class="notranslate"> Description of the process:</span>

1. <span class="notranslate"> The inkscape document (at least its size) can usually be of importance, here it sets the size of the sheet used for cutting.</span> <span class="notranslate"> You will need to set a document size compatible with your material (and the cutter, of course!).</span>
2. <span class="notranslate"> First of all, the program reads the inkscape document, it only considers paths or simple objects.</span> <span class="notranslate"> The texts not transformed in the way, the images ... are ignored.</span> <span class="notranslate"> I therefore advise to turn everything into a path before launching the program.</span> <span class="notranslate"> Inkscape Ctrl + A then Objects in Path (SHIFT + Ctrl + C). Unclosed paths are also ingnorated, the software is only able to process shapes with a closed outline.</span>
3. <span class="notranslate"> Paths can be placed anywhere, in the sheet or out, it does not matter.</span> <span class="notranslate"> To a certain extent, they can even be superimposed (see below).</span>
4. <span class="notranslate"> Then, from these paths, the program creates polygons approaching the paths (with an error of less than 0.1mm on average).</span>
5. <span class="notranslate"> Then the program "enlarges" these polygons to prevent paths from touching each other in the final result.</span> <span class="notranslate"> The size of the enlargement is configurable.</span>
6. <span class="notranslate"> The program then takes these enlarged polygons and will try to place them in a way that is not optimal but good.</span> <span class="notranslate"> Why not optimal because the problem is difficult (complete NP in mathematical terms) and requires a very long time even for simple configurations.</span> <span class="notranslate"> The basic idea here is to start from the largest polygon, then to place the sorted polygons by decreasing size such that a vertex of the polygon to be placed is positioned on a vertex of an already placed polygon.</span> <span class="notranslate"> This reduces the space of possibilities, even if it remains very large!</span>
7. <span class="notranslate"> The "best" configuration is obtained when the size of the convex hull is minimal.</span> <span class="notranslate"> Another mathematical term!</span> <span class="notranslate"> The convex hull is the smallest convex hull containing all points of all plotted polygons.</span> <span class="notranslate"> Intuitively, this maximizes the free space on the plate, which is the desired result.</span> <span class="notranslate"> Be careful, it is not necessarily the smallest rectangle, the convex envelope is not usually a rectangle!</span>
8. <span class="notranslate"> To place the paths, the software is allowed to turn the objects, unless you block this possibility.</span> <span class="notranslate"> Depending on your needs (non-homogeneous material) you may have to limit rotations to 0 and 180 ° for example, or even to block any rotation (this will be the case for example with printed fabric).</span>

### <span class="notranslate"> <span class="mw-headline">Program Options under inkscape</span></span>

[![grafik.png](https://wiki.stadtfabrikanten.org/uploads/images/gallery/2025-05/scaled-1680-/UAxKRDEsCI6GW5JB-grafik.png)](https://wiki.stadtfabrikanten.org/uploads/images/gallery/2025-05/UAxKRDEsCI6GW5JB-grafik.png)

<span class="notranslate"> The program has many options detailed below:</span>

- <span class="notranslate"> Units: Always use the mm, the program is not tested for other choices.</span>
- <span class="notranslate"> Min distance between objects: This is the size of which polygons will be enlarged.</span> <span class="notranslate"> This value must be greater than 0.8mm, the approximation by polygons is not perfect.</span>
- <span class="notranslate"> Max length of single segment: as explained above the software will try to find a good configuration by positioning vertices on other vertices.</span> <span class="notranslate"> It can be interesting in some cases to "add" vertices to have more possibilities.</span> <span class="notranslate"> If an edge is larger than the specified size, it will be broken into multiple segments, with additional vertices.</span> <span class="notranslate"> Do not abuse this option, too low a value will slow down the treatment tremendously.</span> <span class="notranslate"> Do not go below 100mm in most cases, even if the value 0 is allowed to indicate that you do NOT want to use this possibility.</span>
- <span class="notranslate"> Optimizing level: as indicated above the program places the polygons in order of decreasing size (we place the largest pebbles first ...).</span> <span class="notranslate"> This sometimes leads to clearly suboptimal situations.</span> <span class="notranslate"> By increasing this parameter, the software will optimize the placement of a group of N polygons.</span> <span class="notranslate"> This gives better results, but be careful, it considerably increases the treatment time.</span> <span class="notranslate"> Do not exceed 2 or 3, if the default value of 1 does not give good results.</span> <span class="notranslate"> If you draw has 300 vertices already placed (rather low value actually) and you allow rotations in steps of 10 °, use N = 2 will multiply operations by 36 \* 300!</span> <span class="notranslate"> And for N = 3 by (36 \* 300) ²!</span>
- <span class="notranslate"> Keep original layer in output.</span> <span class="notranslate"> If you do not trust!, You can check this option, the original shapes will be kept as well as those placed, but placed in different layers.</span> <span class="notranslate"> You will be able to check the work done.</span>
- <span class="notranslate"> Select option for largest element placement.</span> <span class="notranslate"> The first item can be placed where you want on the page.</span> <span class="notranslate"> Usually at the top left, but the center also gives good results.</span>
- <span class="notranslate"> If this option is checked, the rotation angle of each object will be chosen from 4 to make the edge coincide with one of the two of the vertex on which the object is going. to be positioned.</span> <span class="notranslate"> This option is economical in processing time (at most 4 tests) but can give less good results than the fixing of the angle of rotation.</span> <span class="notranslate"> The results are worse when the segments are very short, if the input form is not a polygon for example.</span>
- <span class="notranslate"> Try rotation by (0 no rotation allowed): This option is incompatible with the previous one, it is only valid if the previous option is NOT checked.</span> <span class="notranslate"> In this case, the objects are positioned on discrete rotation steps.</span> <span class="notranslate"> 0 means that rotations are prohibited, this is useful when the material is not homogeneous.</span> <span class="notranslate"> For MDF, no restrictions, but for wood or even plywood, if you want to respect the direction of the wood, rotations are not advisable.</span> <span class="notranslate"> Choose 180 ° in this case.</span> <span class="notranslate"> Attention, low values ​​greatly increase the calculation time.</span> <span class="notranslate"> With 10 °, there are 36 times more calculations than with 0 °!</span> <span class="notranslate"> If the input shapes are rectangular, a value of 90 ° gives good results.</span>
- <span class="notranslate"> In practice, we often deal with situations or related objects.</span> <span class="notranslate"> For example, a plate with fixing holes.</span> <span class="notranslate"> If this box is checked, the software checks if the path is included in another one, and if it is, it will not process it but link it to the larger path.</span> <span class="notranslate"> Once it is placed, the same transformation (rotation / translation) will be applied to the "small" included object.</span> <span class="notranslate"> Attention the software is not able to recover the space released in holes, you have to leave a little work anyway.</span>
- <span class="notranslate"> Debug file generation: If this box is checked, a debug file (Debug\_CutOptim.txt) is created in the inkscape extension directory.</span> <span class="notranslate"> This can be used to understand what has (badly) happened.</span>

### <span class="notranslate"> <span class="mw-headline">Program options via the command line</span></span>

<span class="notranslate"> The software has pretty much the same options as via inkscape, with some additions.</span>

```bash
eridur-cutoptim.exe [OPTION...] [optional args]
 
  -f, --file SVG Input File     File (default: TestPoly1.svg)
  -o, --output SVG Output File  Output file
      --positional arg          File to be processed
  -h, --help                    Print help
  -d, --distance 1.0            Min distance between paths to be cut
  -m, --max_length 1000.0       Max length of one segment, break than longer
  -l, --optimizing_level 1      Optimizing level, process list_size elements together
      --debug_level 0           Level of debug info in specific debug file
      --debug_file              Generate debug info from inkscape (default: true)
  -k, --original                Output Original layer
  -n, --nested                  Keep nested path together (default: true)
  -y, --layer_output 0          Output internal layers : 1 Input layer, 2 Polygon, 4 Large polygon, 8 Hull layer, 16 Placed Polygon layer, OR these values to output multiple layers
  -a, --angle 90.0              Rotation step
  -r, --free_rot                allow free rotation (default: true)
  -p, --firstpos Position of largest object on the sheet
                                Position of largest object
```

## <span class="notranslate"> <span class="mw-headline">Possible developments / known limitations  
</span></span>

- <span class="notranslate"> No doubt a lot of things, to you to propose and even to realize, the code is open!</span>
- <span class="notranslate">the colors and layers of the objects do not play a role yet</span>
- <span class="notranslate">generates trashy results in a lot of situations</span>
- <span class="notranslate">there is no solution to remove duplicate edges</span>
- <span class="notranslate">there is no solution to allow zero distance between the parts</span>
- <span class="notranslate">known Bugs:</span>
    - <span class="notranslate">does not work for parts which have lines it it (groups with things like living hinge flex pattern) and ignores groups of objects</span>

<table border="1" id="bkmrk-example-input-output" style="border-collapse: collapse; width: 99.9734%;"><colgroup><col style="width: 6.98138%;"></col><col style="width: 47.7528%;"></col><col style="width: 45.2658%;"></col></colgroup><thead><tr><td>**Example**</td><td>**Input**</td><td>**Output**</td></tr></thead><tbody><tr><td>1</td><td>[![grafik.png](https://wiki.stadtfabrikanten.org/uploads/images/gallery/2025-05/scaled-1680-/4Q8HZUOpW0MHCjBj-grafik.png)](https://wiki.stadtfabrikanten.org/uploads/images/gallery/2025-05/4Q8HZUOpW0MHCjBj-grafik.png)

</td><td>[![grafik.png](https://wiki.stadtfabrikanten.org/uploads/images/gallery/2025-05/scaled-1680-/PF9MlbArg57oZ3yJ-grafik.png)](https://wiki.stadtfabrikanten.org/uploads/images/gallery/2025-05/PF9MlbArg57oZ3yJ-grafik.png)

</td></tr><tr><td>2</td><td>[![grafik.png](https://wiki.stadtfabrikanten.org/uploads/images/gallery/2025-05/scaled-1680-/Cdihjlg5jvplQ8Aa-grafik.png)](https://wiki.stadtfabrikanten.org/uploads/images/gallery/2025-05/Cdihjlg5jvplQ8Aa-grafik.png)

</td><td>[![grafik.png](https://wiki.stadtfabrikanten.org/uploads/images/gallery/2025-05/scaled-1680-/GWdQONJ6IS6EkWqC-grafik.png)](https://wiki.stadtfabrikanten.org/uploads/images/gallery/2025-05/GWdQONJ6IS6EkWqC-grafik.png)

</td></tr><tr><td>3</td><td>[![grafik.png](https://wiki.stadtfabrikanten.org/uploads/images/gallery/2025-05/scaled-1680-/8NlKQIDeNi7RdmFb-grafik.png)](https://wiki.stadtfabrikanten.org/uploads/images/gallery/2025-05/8NlKQIDeNi7RdmFb-grafik.png)

</td><td>[![grafik.png](https://wiki.stadtfabrikanten.org/uploads/images/gallery/2025-05/scaled-1680-/xjurtJDfLiNMT0Vv-grafik.png)](https://wiki.stadtfabrikanten.org/uploads/images/gallery/2025-05/xjurtJDfLiNMT0Vv-grafik.png)

</td></tr></tbody></table>

<span class="notranslate">as soon as you have more than one open path (e.g. a line with 2 points) CutOptim **will crash**</span>

<table border="1" id="bkmrk-is-okay-%28open-contou" style="border-collapse: collapse; width: 99.9734%; height: 76.2334px;"><colgroup><col style="width: 49.9668%;"></col><col style="width: 49.9668%;"></col></colgroup><thead><tr style="height: 38.1167px;"><td style="height: 38.1167px;">**is okay (open contour will be deleted while nesting)**</td><td style="height: 38.1167px;">**will crash**</td></tr></thead><tbody><tr style="height: 38.1167px;"><td style="height: 38.1167px;">[![grafik.png](https://wiki.stadtfabrikanten.org/uploads/images/gallery/2025-05/scaled-1680-/Nknh3Gk3io3RFOIX-grafik.png)](https://wiki.stadtfabrikanten.org/uploads/images/gallery/2025-05/Nknh3Gk3io3RFOIX-grafik.png)</td><td style="height: 38.1167px;">[![grafik.png](https://wiki.stadtfabrikanten.org/uploads/images/gallery/2025-05/scaled-1680-/4gNDQUkqokRE54OC-grafik.png)](https://wiki.stadtfabrikanten.org/uploads/images/gallery/2025-05/4gNDQUkqokRE54OC-grafik.png)</td></tr></tbody></table>

## <span class="notranslate"> <span class="mw-headline">Bibliography</span></span>

<span class="notranslate"> As indicated the subject is well known in the scientific world, I used the two following articles</span>

- <span class="notranslate"> Waste minimization in irregular stock cutting published in 2014 by Doraid Dalalah, Samir Khrais and Khaled Bataineh.</span> <span class="notranslate"> This article gives the basis of what is achieved.</span>
- <span class="notranslate"> Jostle heuristics for the 2D-irregular shapes bin packing problems with free rotation published in 2018 by Ranga P. Abeysooriya, Julia A. Bennell and Antonio Martinez-Sykora</span>

<span class="notranslate"> Good reading !</span>

# Epilog Dashboard BBox Adjust

This tool is a helper to adjust the document border including an offset value, which is added. Sending vector data to Epilog Dashboard often results in trimmed paths. This leads to wrong geometry where the laser misses to cut them. So we add a default (small) amount of to expand the document's canvas.

[![grafik.png](https://wiki.stadtfabrikanten.org/uploads/images/gallery/2025-05/scaled-1680-/XSVqyYtpIYBXrgdn-grafik.png)](https://wiki.stadtfabrikanten.org/uploads/images/gallery/2025-05/XSVqyYtpIYBXrgdn-grafik.png)

## The issue in pictures

<table border="1" id="bkmrk-correct-fit-in-inksc" style="border-collapse: collapse; width: 99.9734%;"><colgroup><col style="width: 49.9668%;"></col><col style="width: 49.9668%;"></col></colgroup><thead><tr><td>**Correct fit in Inkscape**</td><td>**Import in Epilog Dashboard (ellipse lost parts of its contour)**</td></tr></thead><tbody><tr><td>[![grafik.png](https://wiki.stadtfabrikanten.org/uploads/images/gallery/2025-05/scaled-1680-/s6kI7S4XjuitRhL1-grafik.png)](https://wiki.stadtfabrikanten.org/uploads/images/gallery/2025-05/s6kI7S4XjuitRhL1-grafik.png)</td><td>[![grafik.png](https://wiki.stadtfabrikanten.org/uploads/images/gallery/2025-05/scaled-1680-/k9Rruu0YaG3TGbcK-grafik.png)](https://wiki.stadtfabrikanten.org/uploads/images/gallery/2025-05/k9Rruu0YaG3TGbcK-grafik.png)</td></tr></tbody></table>

# Exponential Distort

[![grafik.png](https://wiki.stadtfabrikanten.org/uploads/images/gallery/2025-05/scaled-1680-/U6uB5e8BIydnDIhx-grafik.png)](https://wiki.stadtfabrikanten.org/uploads/images/gallery/2025-05/U6uB5e8BIydnDIhx-grafik.png)

[![grafik.png](https://wiki.stadtfabrikanten.org/uploads/images/gallery/2025-05/scaled-1680-/ltOGR9CYDtg01lQV-grafik.png)](https://wiki.stadtfabrikanten.org/uploads/images/gallery/2025-05/ltOGR9CYDtg01lQV-grafik.png)

[![grafik.png](https://wiki.stadtfabrikanten.org/uploads/images/gallery/2025-05/scaled-1680-/poH70Ae6jBjm0jtc-grafik.png)](https://wiki.stadtfabrikanten.org/uploads/images/gallery/2025-05/poH70Ae6jBjm0jtc-grafik.png)

# Flip

This extension only operates on a single path (or a selection of paths, but all individually) by flipping it about the *imaginary* line that goes from the paths first node to its last node.

Source: [https://github.com/aconz2/inkscape-extension-flip](https://github.com/aconz2/inkscape-extension-flip)

## Draw some path

[![grafik.png](https://wiki.stadtfabrikanten.org/uploads/images/gallery/2025-05/scaled-1680-/sIyRKa992PEg2tkc-grafik.png)](https://wiki.stadtfabrikanten.org/uploads/images/gallery/2025-05/sIyRKa992PEg2tkc-grafik.png)

## Run the extension and check result

[![grafik.png](https://wiki.stadtfabrikanten.org/uploads/images/gallery/2025-05/scaled-1680-/IYkgSyqQJ6z1evWG-grafik.png)](https://wiki.stadtfabrikanten.org/uploads/images/gallery/2025-05/IYkgSyqQJ6z1evWG-grafik.png)

<div class="rwui_steps conf-macro output-block" data-hasbody="true" data-macro-name="ui-steps" id="bkmrk--2"><div class="rwui_step conf-macro output-block" data-hasbody="true" data-macro-name="ui-step"><div class="rwui_item_number">  
</div><div class="rwui_item_content">  
</div></div></div>

# Inset Alignment

This extension aligns elements into the first, last or largest selected item. The bounding box shape and some custom entered offset values are used to calculate the new position.

[![grafik.png](https://wiki.stadtfabrikanten.org/uploads/images/gallery/2025-05/scaled-1680-/g1YIH2XntO17V8A7-grafik.png)](https://wiki.stadtfabrikanten.org/uploads/images/gallery/2025-05/g1YIH2XntO17V8A7-grafik.png)

## Draw some objects

[![grafik.png](https://wiki.stadtfabrikanten.org/uploads/images/gallery/2025-05/scaled-1680-/dah9246ZPGYlwfo9-grafik.png)](https://wiki.stadtfabrikanten.org/uploads/images/gallery/2025-05/dah9246ZPGYlwfo9-grafik.png)

## Run the extension

[![grafik.png](https://wiki.stadtfabrikanten.org/uploads/images/gallery/2025-05/scaled-1680-/JNsReTDAaISYA9Ag-grafik.png)](https://wiki.stadtfabrikanten.org/uploads/images/gallery/2025-05/JNsReTDAaISYA9Ag-grafik.png)

# Isometric Projection

Source of documentation: [https://github.com/jdhoek/inkscape-isometric-projection](https://github.com/jdhoek/inkscape-isometric-projection)

[http://jeroenhoek.nl/articles/svg-and-isometric-projection.html](http://jeroenhoek.nl/articles/svg-and-isometric-projection.html)

This extension has two modes (dimetric and isometric)

[![grafik.png](https://wiki.stadtfabrikanten.org/uploads/images/gallery/2025-05/scaled-1680-/xJwz9IZ5aIpoGJI4-grafik.png)](https://wiki.stadtfabrikanten.org/uploads/images/gallery/2025-05/xJwz9IZ5aIpoGJI4-grafik.png) [![grafik.png](https://wiki.stadtfabrikanten.org/uploads/images/gallery/2025-05/scaled-1680-/riapspRzDy5djtbu-grafik.png)](https://wiki.stadtfabrikanten.org/uploads/images/gallery/2025-05/riapspRzDy5djtbu-grafik.png)

[![grafik.png](https://wiki.stadtfabrikanten.org/uploads/images/gallery/2025-05/scaled-1680-/gUPJxc8n10sK1Yua-grafik.png)](https://wiki.stadtfabrikanten.org/uploads/images/gallery/2025-05/gUPJxc8n10sK1Yua-grafik.png) [![grafik.png](https://wiki.stadtfabrikanten.org/uploads/images/gallery/2025-05/scaled-1680-/WNdnZrPVSJn28tvZ-grafik.png)](https://wiki.stadtfabrikanten.org/uploads/images/gallery/2025-05/WNdnZrPVSJn28tvZ-grafik.png)

<p class="callout info">Also have a look at Live Path Effect "Extrude" for projections:</p>

[![grafik.png](https://wiki.stadtfabrikanten.org/uploads/images/gallery/2025-05/scaled-1680-/an317r3o0RNnE9dr-grafik.png)](https://wiki.stadtfabrikanten.org/uploads/images/gallery/2025-05/an317r3o0RNnE9dr-grafik.png) [![grafik.png](https://wiki.stadtfabrikanten.org/uploads/images/gallery/2025-05/scaled-1680-/4Y0eY8KtyX8ELSu4-grafik.png)](https://wiki.stadtfabrikanten.org/uploads/images/gallery/2025-05/4Y0eY8KtyX8ELSu4-grafik.png)
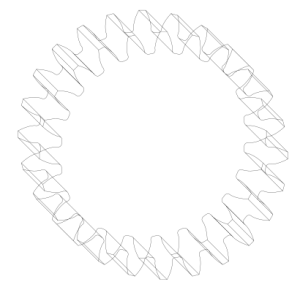
# Mirror

This function is a legacy one because the exact same can be done with Live Path Effects ("Mirror symmetry")

## Draw some objects and a path (line) to mirror

[![grafik.png](https://wiki.stadtfabrikanten.org/uploads/images/gallery/2025-05/scaled-1680-/FQmhyWEZGSe5m5QU-grafik.png)](https://wiki.stadtfabrikanten.org/uploads/images/gallery/2025-05/FQmhyWEZGSe5m5QU-grafik.png)
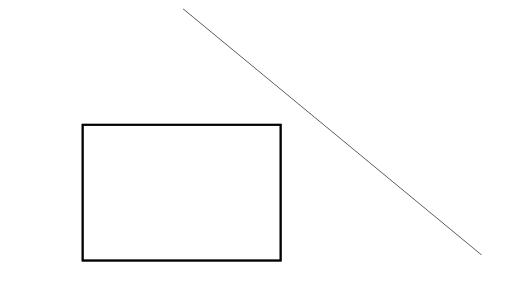
## Make a copy of the objects you want to mirror (otherwise the tool will just move the selection)

Use Ctrl +D

## Run the extension

[![grafik.png](https://wiki.stadtfabrikanten.org/uploads/images/gallery/2025-05/scaled-1680-/ffn2YyDAXjlpGsiD-grafik.png)](https://wiki.stadtfabrikanten.org/uploads/images/gallery/2025-05/ffn2YyDAXjlpGsiD-grafik.png)
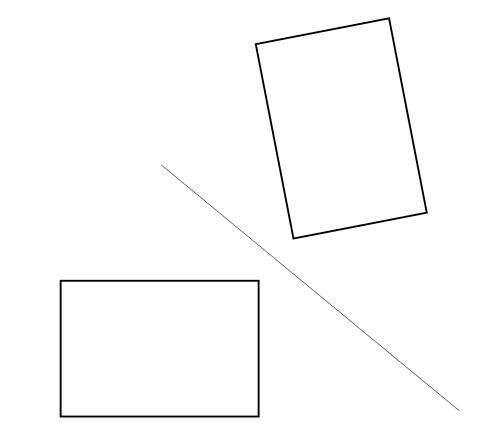
If you forget to make a copy:

[![grafik.png](https://wiki.stadtfabrikanten.org/uploads/images/gallery/2025-05/scaled-1680-/oPTxQRpDFNniHKVo-grafik.png)](https://wiki.stadtfabrikanten.org/uploads/images/gallery/2025-05/oPTxQRpDFNniHKVo-grafik.png)
# Normalize Drawing Scale

This extension will set the drawing scale to 100% and adds fitting transforms to keep the element size. You can use [Apply Transformations](https://wiki.stadtfabrikanten.org/books/fablab-chemnitz/page/apply-transformations) to apply those transforms afterwards. This neat toolchain helps to handle all path command coordinates easier. Especially helpful for import/export usage for programs which might not handle viewBox of svg:svg head correctly.

[![grafik.png](https://wiki.stadtfabrikanten.org/uploads/images/gallery/2025-05/scaled-1680-/DnJHdgnfhbemkkvH-grafik.png)](https://wiki.stadtfabrikanten.org/uploads/images/gallery/2025-05/DnJHdgnfhbemkkvH-grafik.png)
[![grafik.png](https://wiki.stadtfabrikanten.org/uploads/images/gallery/2025-05/scaled-1680-/G9F3HOi7BI6sxywt-grafik.png)](https://wiki.stadtfabrikanten.org/uploads/images/gallery/2025-05/G9F3HOi7BI6sxywt-grafik.png)
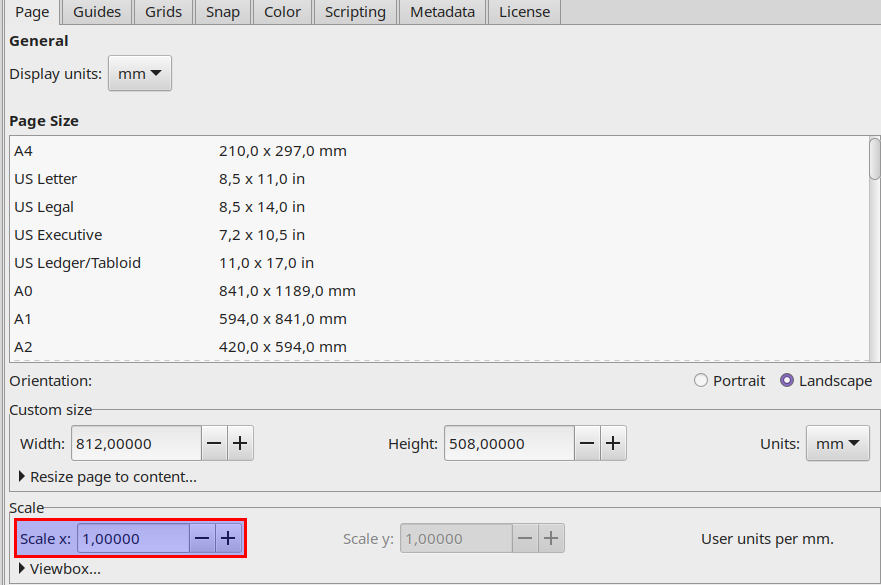
# Parallel Translation

Source: [https://github.com/chris0371/parallel-translation\_extension](https://github.com/chris0371/parallel-translation_extension)

Allows parallel translations and alignment operations of selected straight lines.  
These lines can be simple path objects (with only start- and end-node) or line segments of larger path objects.

## Purpose

This extension has been written to help making a strange kind of paper cube with angles different to 90 degrees. It helps to align the faces together (probably in different arrangements, as indicated in the right side of the screenshot below) and to add complex folding flaps with lines in different colors to the edges. There are options to resize the length of the flaps so that they match the length of the edges.

[![grafik.png](https://wiki.stadtfabrikanten.org/uploads/images/gallery/2025-05/scaled-1680-/3ag9GSZsbxFHFBaU-grafik.png)](https://wiki.stadtfabrikanten.org/uploads/images/gallery/2025-05/3ag9GSZsbxFHFBaU-grafik.png)
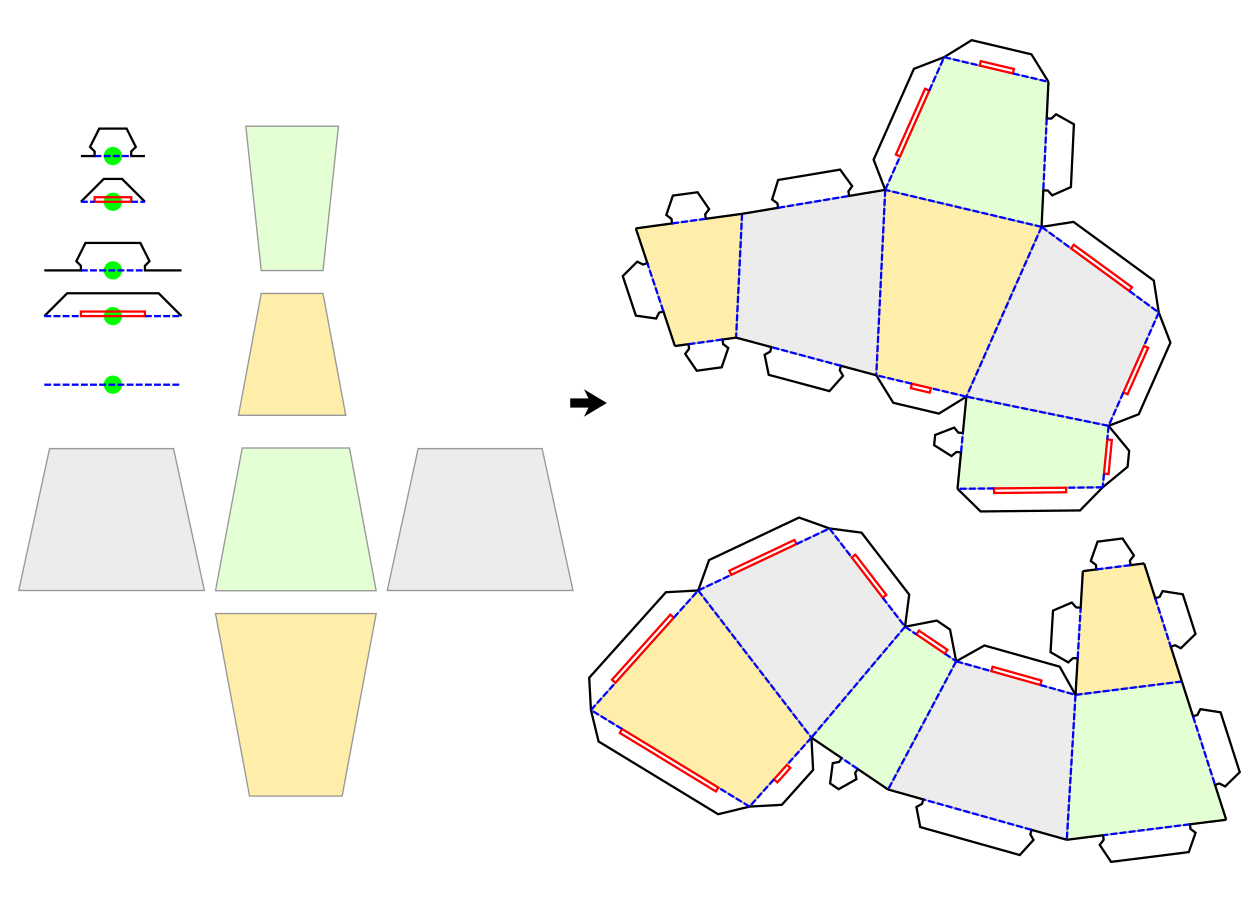
## More detailed description

The functionality of the extension is spread across different tabs of the UI. The currently selected tab determines what functionality is performed by the extension. At first glance, the individual tabs seem to have completely different functionality, but if you look closer, it all comes back to the same basic concept.

You have to tell the extension what object(s) of your drawing to use/modify by selecting them before hitting the apply-button.

### Object types to select

Within all the objects selected by you, the extension always looks for a ***line segment***, calculates its orientation angle and length, and performs some tasks based on that calculation. This line segment could be

1. a simple path object with just the start- and end-node. In such a case, you just have to select the whole path object. Or it could be
2. a line between two nodes of a larger path object. In that case, you have to select the two nodes of the path.

For the "Group-Alignment" functionality, the extension also looks for an ***alignment group***. This is a group of an arbitrary number of other objects, which is aligned to the line segment we've talked about earlier. 'Aligned' means that the group is rotated, moved, and it's width is modified to match the position, orientation and length of the line segment.

The extension assumes two things about an alignment group:

1. The group shall be in its horizontal default orientation. That means that if this group is to be aligned to a horizontal line segment drawn from left to right, it does not need to be rotated.
2. The group shall contain exactly one special object which center marks the rotation center of the whole group. It is recommended to use a circle or square or simple path for this. The extension identifies this special object by its fill-color. The color to look for can be set in the UI (at the "Group-Alignment"-tab) and defaults to neon green (#0x00FF00)

### Information Tab

This first tab contains version information and a brief explanation of extensions functionality. Hitting the 'Apply'-button in here will just show some basic information about the drawing, what objects are selected, and some basic calculations done on those objects (like length and orientation angle for the selected line segment(s).

### Translation Tab

This tab performs parallel translation of the selected line segment. That is, the extension calculates the orientation angle of the selected line segment, and moves the object by the given distance in the direction of a right angle to the lines direction.

There are options to apply the movement to just the original object, to the original object and leaving a copy at the original position, or to a copy of the object leaving the original one untouched.

There are also options to revert the movement direction and to use a fixed translation angle instead of calculating it from the original line orientation.

### Group-Alignment Tab

This tab aligns the selected group to the selected line-segment. 'Aligned' means that the group is rotated, moved, and it's width is modified to match the position, orientation and length of the line segment.

There are options to apply the alignment to just the original group, to the original group and leaving a copy at the original position, or to a copy of the group leaving the original one untouched. Further, there are different options to adjust the width of the aligned group.

There are also options to apply an additional rotation of 180 degrees to the group and to auto-remove the group rotation center object from the aligned group.

For the strange-paper-cube example, this functionality can be used to place the folding flaps at the straight but odd-angeled edges of the faces.

### Object-to-Group Tab

This tab is used to turn an ordinary object into an alignment group. This is done by rotating the object so that the selected line-segment is in horizontal orientation, adding a group rotation center object at the middle of the selected line-segment, and then group the objects together.

For the strange-paper-cube example, this functionality can be used to align the faces of the cube together. Moving and rotating face A to align one of its edges with the corresponding edge of a fixed face B would be a 2-step-process like this:

1. Select the line-segment to be aligned from face A and turn the object that makes up the face into an alignment group using the Object-to-Group tab.
2. Select this group and the line-segment to be aligned with from face B. Then align just this group (no copies) using the Group-Alignment tab with no group width adjustment.

[![grafik.png](https://wiki.stadtfabrikanten.org/uploads/images/gallery/2025-05/scaled-1680-/ORt9dqQ4NSrfFaOE-grafik.png)](https://wiki.stadtfabrikanten.org/uploads/images/gallery/2025-05/ORt9dqQ4NSrfFaOE-grafik.png) [![grafik.png](https://wiki.stadtfabrikanten.org/uploads/images/gallery/2025-05/scaled-1680-/jcSSQ9E6hSlHjVrf-grafik.png)](https://wiki.stadtfabrikanten.org/uploads/images/gallery/2025-05/jcSSQ9E6hSlHjVrf-grafik.png) [![grafik.png](https://wiki.stadtfabrikanten.org/uploads/images/gallery/2025-05/scaled-1680-/B3wKxEMLvXMuWURz-grafik.png)](https://wiki.stadtfabrikanten.org/uploads/images/gallery/2025-05/B3wKxEMLvXMuWURz-grafik.png) [![grafik.png](https://wiki.stadtfabrikanten.org/uploads/images/gallery/2025-05/scaled-1680-/1O9OJrFqrtbiW6xg-grafik.png)](https://wiki.stadtfabrikanten.org/uploads/images/gallery/2025-05/1O9OJrFqrtbiW6xg-grafik.png)
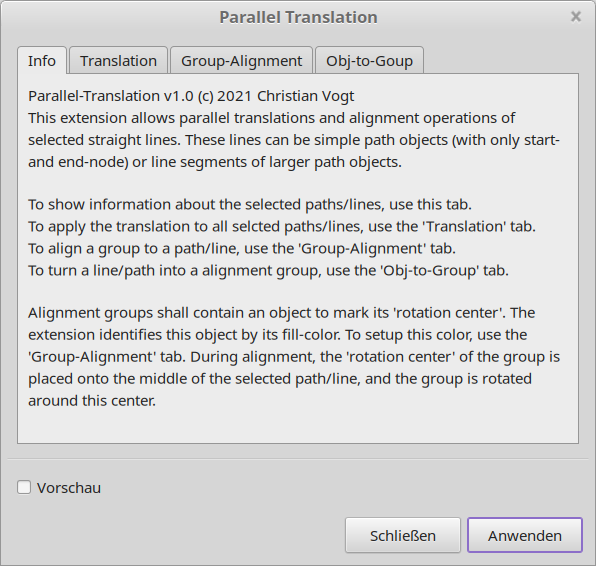
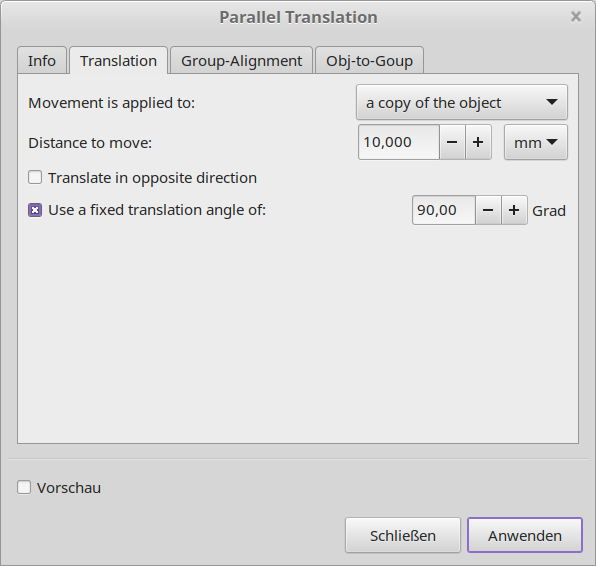
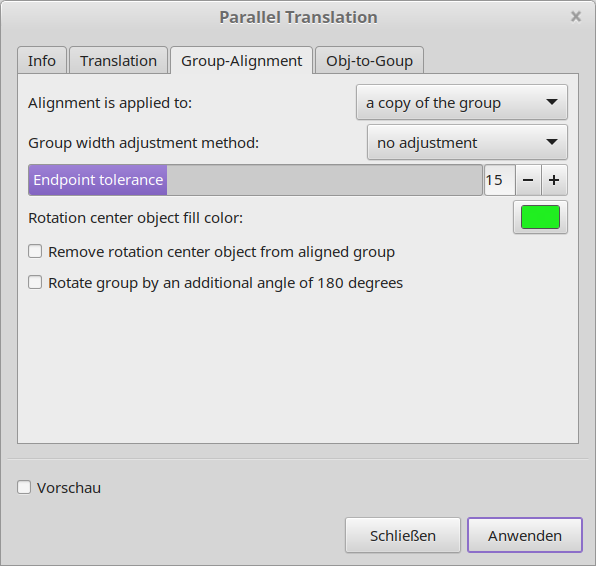
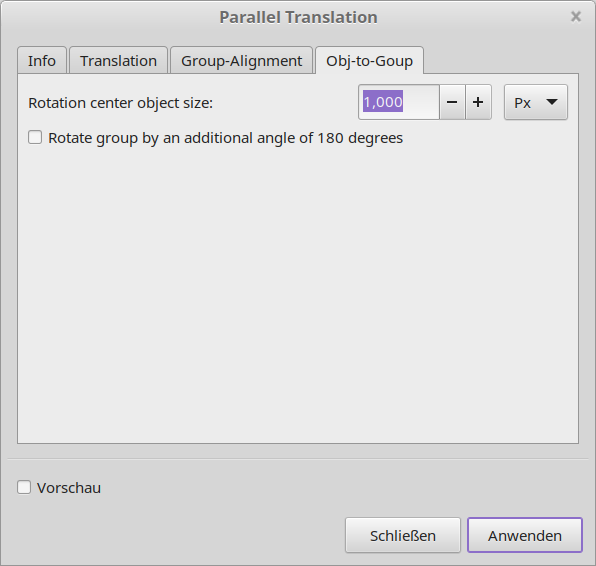
# Raster Perspective

Source: [https://github.com/s1291/InkRasterPerspective](https://github.com/s1291/InkRasterPerspective)

Apply a perspective transformation to bitmap image using the selected path as envelope, without the need to use an external software to transform the image. Select the raster image and the quadrangle path (envelope).

[![grafik.png](https://wiki.stadtfabrikanten.org/uploads/images/gallery/2025-05/scaled-1680-/DYerz46jgl86280z-grafik.png)](https://wiki.stadtfabrikanten.org/uploads/images/gallery/2025-05/DYerz46jgl86280z-grafik.png)
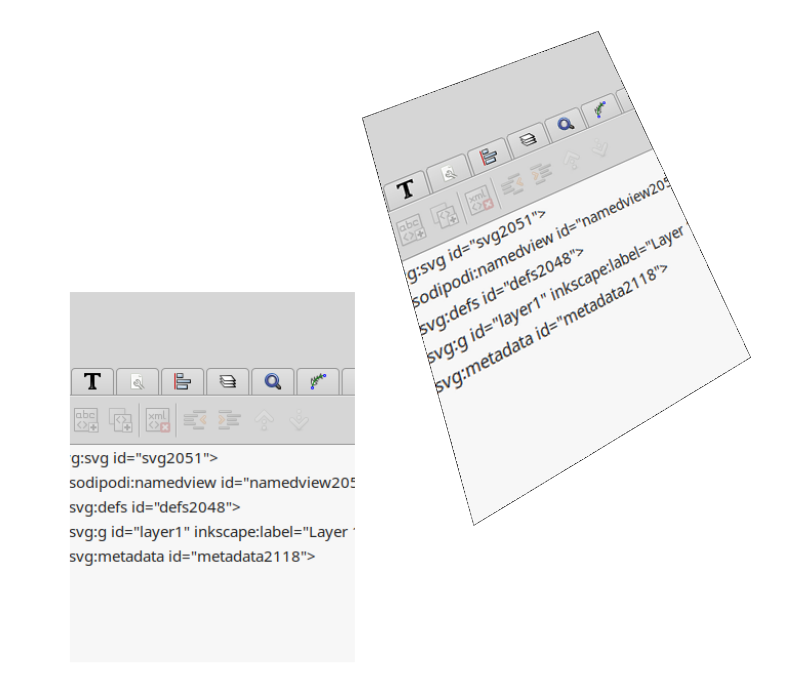
# Rotations - Minimum Bounding Box Area / Minimum Width / Find All Optimal

There are three extension from [https://github.com/hobzcalvin/LaserPrep](https://github.com/hobzcalvin/LaserPrep) which allow optimal rotation according to width or bounding box.

## Rotate for Minimum Width

Helpful when trying to nest objects, this extension rotates all selected objects to minimize their width.

## Rotate for Minimum Bounding Box Area

Similarly, this rotates all selected objects to minimize the area of their bounding boxes.

## Find All Optimal Rotations

This rotates the selected objects to minimize the width and area of their bounding boxes. If these are optimized at different angles, the objects are duplicated and rotated accordingly.

## Having some rotated object(s)

[![grafik.png](https://wiki.stadtfabrikanten.org/uploads/images/gallery/2025-05/scaled-1680-/qDhA4b4YC3mKXQ5d-grafik.png)](https://wiki.stadtfabrikanten.org/uploads/images/gallery/2025-05/qDhA4b4YC3mKXQ5d-grafik.png)
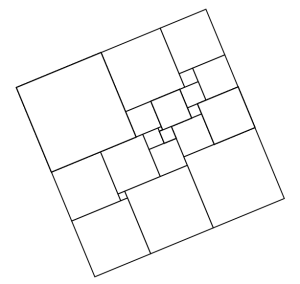
## Run the extension

[![grafik.png](https://wiki.stadtfabrikanten.org/uploads/images/gallery/2025-05/scaled-1680-/16K5rqjA3uIusD6p-grafik.png)](https://wiki.stadtfabrikanten.org/uploads/images/gallery/2025-05/16K5rqjA3uIusD6p-grafik.png)
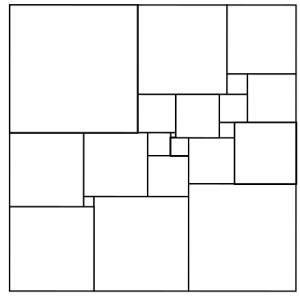
# Scale To Path Length

This effect makes the length of all the destination paths the same as that of the source path, while maintaining their shapes. The source is the topmost path in the selection.

Please note if the size seems incorrect after running this extension, please check if you have left some transformations. They can be removed by [Apply Transformations](https://wiki.stadtfabrikanten.org/books/fablab-chemnitz/page/apply-transformations).

## Draw some paths

[![grafik.png](https://wiki.stadtfabrikanten.org/uploads/images/gallery/2025-05/scaled-1680-/GSj4zIJUSSe8ZoaS-grafik.png)](https://wiki.stadtfabrikanten.org/uploads/images/gallery/2025-05/GSj4zIJUSSe8ZoaS-grafik.png)
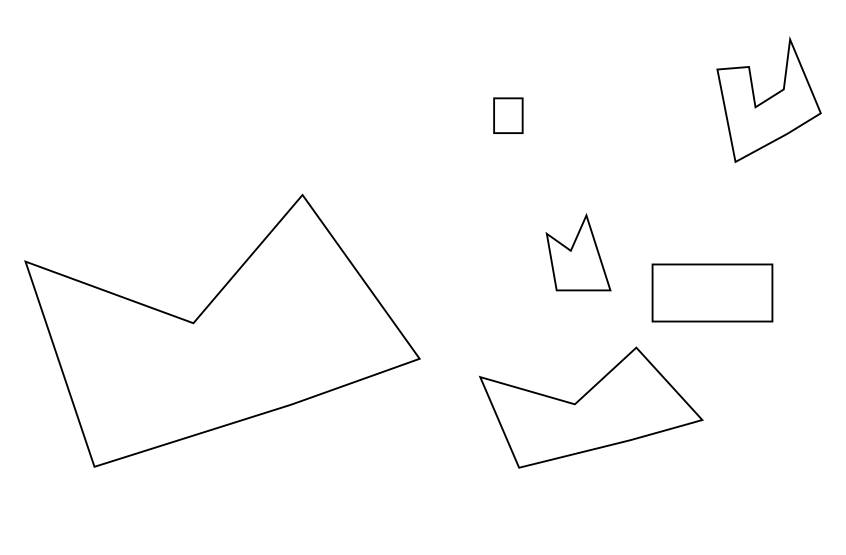
[![grafik.png](https://wiki.stadtfabrikanten.org/uploads/images/gallery/2025-05/scaled-1680-/vCuWIJDZ1KaRJhCH-grafik.png)](https://wiki.stadtfabrikanten.org/uploads/images/gallery/2025-05/vCuWIJDZ1KaRJhCH-grafik.png)
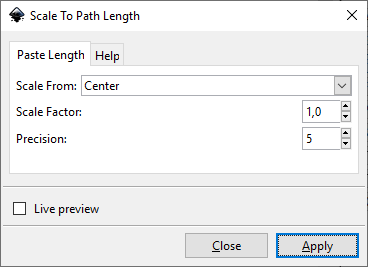
[![grafik.png](https://wiki.stadtfabrikanten.org/uploads/images/gallery/2025-05/scaled-1680-/d4w5eBIijsXucguY-grafik.png)](https://wiki.stadtfabrikanten.org/uploads/images/gallery/2025-05/d4w5eBIijsXucguY-grafik.png)
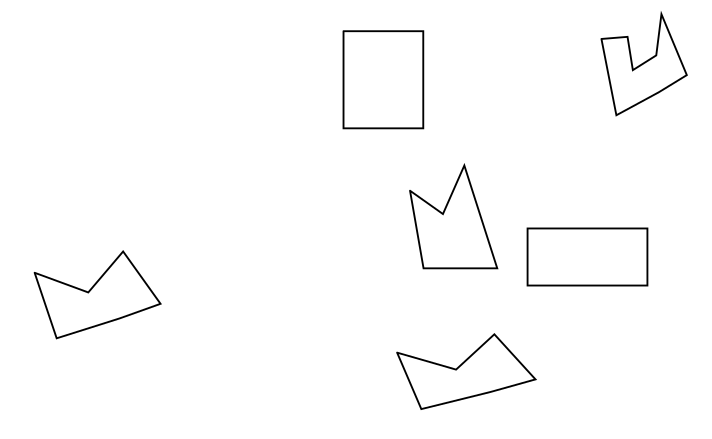
## Measure to check

Visualize Path → Measure Path

[![grafik.png](https://wiki.stadtfabrikanten.org/uploads/images/gallery/2025-05/scaled-1680-/GjIc6uieSpClw4Lw-grafik.png)](https://wiki.stadtfabrikanten.org/uploads/images/gallery/2025-05/GjIc6uieSpClw4Lw-grafik.png)
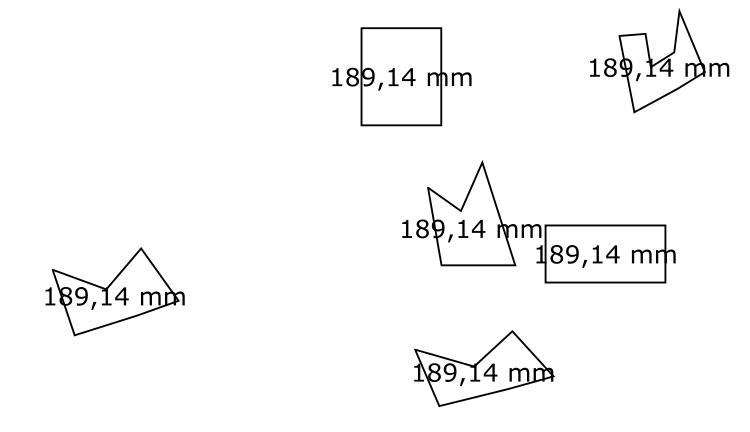
See also

- [Scale To Size (Replaced by default transform scale)](https://wiki.stadtfabrikanten.org/books/fablab-chemnitz/page/scale-to-size-replaced-by-default-transform-scale)
- [Scale To Real](https://wiki.stadtfabrikanten.org/books/fablab-chemnitz/page/scale-to-real)

# Scale To Real

Good description for this plugin can be found at the source → [https://gitlab.com/Moini/inkscape-realscale-extension](https://gitlab.com/Moini/inkscape-realscale-extension)

[![grafik.png](https://wiki.stadtfabrikanten.org/uploads/images/gallery/2025-05/scaled-1680-/fqAnQNHGRXY2NuGD-grafik.png)](https://wiki.stadtfabrikanten.org/uploads/images/gallery/2025-05/fqAnQNHGRXY2NuGD-grafik.png)
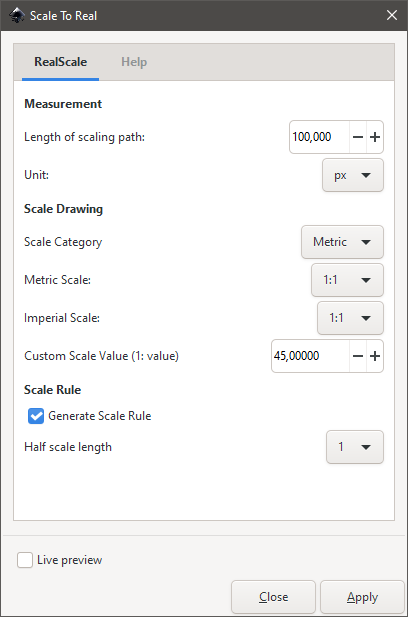
[![grafik.png](https://wiki.stadtfabrikanten.org/uploads/images/gallery/2025-05/scaled-1680-/Y7iZlyiLuGegNj8f-grafik.png)](https://wiki.stadtfabrikanten.org/uploads/images/gallery/2025-05/Y7iZlyiLuGegNj8f-grafik.png)
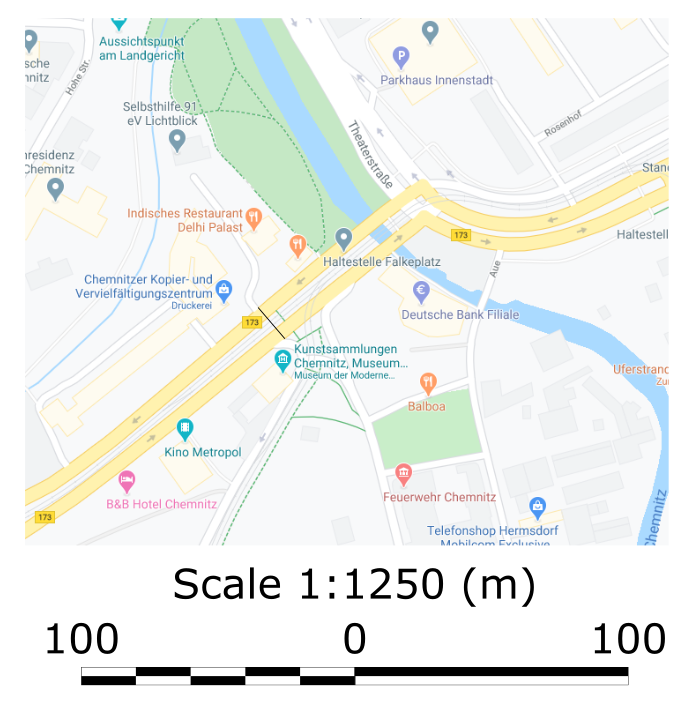
See also

- [Scale To Size (Replaced by default transform scale)](https://wiki.stadtfabrikanten.org/books/fablab-chemnitz/page/scale-to-size-replaced-by-default-transform-scale)
- [Scale To Path Length](https://wiki.stadtfabrikanten.org/books/fablab-chemnitz/page/scale-to-path-length)

# Scale To Size (Replaced by default transform scale)

## Draw some objects / paths

[![grafik.png](https://wiki.stadtfabrikanten.org/uploads/images/gallery/2025-05/scaled-1680-/5pOqOwf9u2jtc4MU-grafik.png)](https://wiki.stadtfabrikanten.org/uploads/images/gallery/2025-05/5pOqOwf9u2jtc4MU-grafik.png)
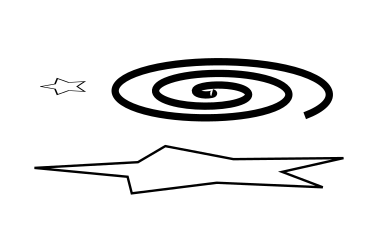
[![grafik.png](https://wiki.stadtfabrikanten.org/uploads/images/gallery/2025-05/scaled-1680-/D02PdEQr95Podxjz-grafik.png)](https://wiki.stadtfabrikanten.org/uploads/images/gallery/2025-05/D02PdEQr95Podxjz-grafik.png)
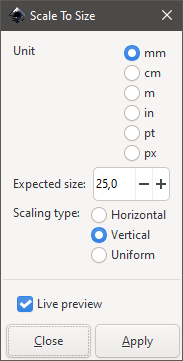
## Get the result

[![grafik.png](https://wiki.stadtfabrikanten.org/uploads/images/gallery/2025-05/scaled-1680-/mPrIJ2EcHIuq3coc-grafik.png)](https://wiki.stadtfabrikanten.org/uploads/images/gallery/2025-05/mPrIJ2EcHIuq3coc-grafik.png)
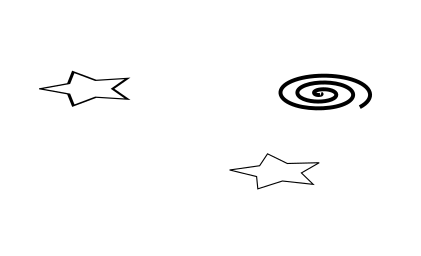
<p class="callout info">This extension is obsolete because we can do the same with default transformation menu:</p>

[![grafik.png](https://wiki.stadtfabrikanten.org/uploads/images/gallery/2025-05/scaled-1680-/x9shFjpQAMxzBzqB-grafik.png)](https://wiki.stadtfabrikanten.org/uploads/images/gallery/2025-05/x9shFjpQAMxzBzqB-grafik.png)

See also

- [Scale To Path Length](https://wiki.stadtfabrikanten.org/books/fablab-chemnitz/page/scale-to-path-length)
- [Scale To Real](https://wiki.stadtfabrikanten.org/books/fablab-chemnitz/page/scale-to-real)

# Set View Box (Replaced by CTRL + SHIFT + R)

<div class="page view" id="bkmrk-this-plugins-allows-"><article>This plugins allows to adjust the view box (canvas) size according to a drawn rectangle. <s>You can do this using CTRL +D too but it might be quicker sometimes using "Set View Box".</s> Use the built-in default key combination to quickly resize the view to the selected object (CTRL + SHIFT + R).

<div class="wiki-content" id="bkmrk-"></div></article></div>

# Various

# Batch Task

Source: [<span>https://github.com/heyzec/Inkscape-Extensions</span>](https://github.com/heyzec/Inkscape-Extensions)

[![grafik.png](https://wiki.stadtfabrikanten.org/uploads/images/gallery/2025-05/scaled-1680-/KXXDP5Dtwe2KR7OL-grafik.png)](https://wiki.stadtfabrikanten.org/uploads/images/gallery/2025-05/KXXDP5Dtwe2KR7OL-grafik.png) [![grafik.png](https://wiki.stadtfabrikanten.org/uploads/images/gallery/2025-05/scaled-1680-/pKzu2xLMbU0o4ikl-grafik.png)](https://wiki.stadtfabrikanten.org/uploads/images/gallery/2025-05/pKzu2xLMbU0o4ikl-grafik.png)

[![grafik.png](https://wiki.stadtfabrikanten.org/uploads/images/gallery/2025-05/scaled-1680-/TGvibGfhECoZmrFI-grafik.png)](https://wiki.stadtfabrikanten.org/uploads/images/gallery/2025-05/TGvibGfhECoZmrFI-grafik.png)

# Delete Above

Delete the selected node(s) and any other nodes that are completely within the bounding-boxes of the selected nodes that have a greater z-order. Simply put: you select a "background" rectangle, then use this plugin to delete it and everything that appears on top of it.

## Take some drawing and select the target object

[![grafik.png](https://wiki.stadtfabrikanten.org/uploads/images/gallery/2025-05/scaled-1680-/niR2YFiOxIuTcYMX-grafik.png)](https://wiki.stadtfabrikanten.org/uploads/images/gallery/2025-05/niR2YFiOxIuTcYMX-grafik.png)

## Run the extension and get the result

[![grafik.png](https://wiki.stadtfabrikanten.org/uploads/images/gallery/2025-05/scaled-1680-/7WjCtCQPPR8qfYTR-grafik.png)](https://wiki.stadtfabrikanten.org/uploads/images/gallery/2025-05/7WjCtCQPPR8qfYTR-grafik.png)

# Edit Attributes

Edits an attribute on all selected elements. Available edit options:

- set sets new value of attribute (adds attribute if necessary)
- append adds new value to the end of current value of attribute
- prefix adds new value to the beginning of current value of attribute
- subtract deletes the given value string from current value of attribute
- remove deletes attribute of given name

[![grafik.png](https://wiki.stadtfabrikanten.org/uploads/images/gallery/2025-05/scaled-1680-/CY54obaukZGaOT8W-grafik.png)](https://wiki.stadtfabrikanten.org/uploads/images/gallery/2025-05/CY54obaukZGaOT8W-grafik.png)

# Import Attributes

Imports attribute values from given text file. Lines in the file must be in format `elementId,attributeName,value`. Malformed ids will be skipped (you will get a warning).

## Get the items you want to modify

[![grafik.png](https://wiki.stadtfabrikanten.org/uploads/images/gallery/2025-05/scaled-1680-/D5tioDls5YplGz0t-grafik.png)](https://wiki.stadtfabrikanten.org/uploads/images/gallery/2025-05/D5tioDls5YplGz0t-grafik.png)

## Run the extension

Select the file you want to import data from. Example: `C:\Users\test\Desktop\test.txt`

```ini
rect823,y,30
rect823,x,30
rect823,width,130
rect823,height,130
```

[![grafik.png](https://wiki.stadtfabrikanten.org/uploads/images/gallery/2025-05/scaled-1680-/jdC8JQXaVSMW82GV-grafik.png)](https://wiki.stadtfabrikanten.org/uploads/images/gallery/2025-05/jdC8JQXaVSMW82GV-grafik.png)

## Check the XML tree for changed values

[![grafik.png](https://wiki.stadtfabrikanten.org/uploads/images/gallery/2025-05/scaled-1680-/vKh4RV3JZCEEHx2P-grafik.png)](https://wiki.stadtfabrikanten.org/uploads/images/gallery/2025-05/vKh4RV3JZCEEHx2P-grafik.png)

# Random Delete

<div class="page view" id="bkmrk-this-extensions-does"><article>This extensions does what it says. It allows to delete with a certain probability each of the selected objects.

<div class="wiki-content" id="bkmrk-"></div></article></div>

# Remove Obsolete Attributes

Remove attributes `sodipodi:absref`, `sodipodi:docbase` and `sodipodi:docname` from all elements that contain them. These attributes contain absolute paths to resources which can pose a security issue. This is a legacy extension and might not be required nowadays.

[![grafik.png](https://wiki.stadtfabrikanten.org/uploads/images/gallery/2025-05/scaled-1680-/a5R3XGT6kfilN1RK-grafik.png)](https://wiki.stadtfabrikanten.org/uploads/images/gallery/2025-05/a5R3XGT6kfilN1RK-grafik.png)

# Set CSS Class On Elements

Set a CSS class on the selected elements. Their current inline styles will be removed

[![grafik.png](https://wiki.stadtfabrikanten.org/uploads/images/gallery/2025-05/scaled-1680-/5jYzdun8sWhtRHID-grafik.png)](https://wiki.stadtfabrikanten.org/uploads/images/gallery/2025-05/5jYzdun8sWhtRHID-grafik.png)

# vpypetools

# Deduplicate Plugin

Source: [<span>https://github.com/LoicGoulefert/deduplicate</span>](https://github.com/LoicGoulefert/deduplicate)

```bash
pip3 install tqdm
pip3 install git+https://github.com/LoicGoulefert/deduplicate.git#egg=deduplicate
```

# Filter

Filter paths according to specified criterion. When an option is provided (e.g. <cite>--min-length 10cm</cite>) the corresponding criterion is applied and paths which do not respect the criterion (e.g. a 9cm-long path) are rejected. If multiple options are provided, paths will be kept only if they respect every corresponding criterion (i.e. logical AND operator). See [https://vpype.readthedocs.io/en/stable/reference.html#filter](https://vpype.readthedocs.io/en/stable/reference.html#filter). Also check out [vpype Free Mode](https://wiki.stadtfabrikanten.org/books/fablab-chemnitz/page/vpype-free-mode "vpype Free Mode") which can do the same and more.

<p class="callout info">Similar extension to [Filter By Length/Area](https://wiki.stadtfabrikanten.org/books/fablab-chemnitz/page/filter-by-lengtharea "Filter By Length/Area")</p>

[![grafik.png](https://wiki.stadtfabrikanten.org/uploads/images/gallery/2025-05/scaled-1680-/ZP9wmjAnrkdLtuJh-grafik.png)](https://wiki.stadtfabrikanten.org/uploads/images/gallery/2025-05/ZP9wmjAnrkdLtuJh-grafik.png) [![grafik.png](https://wiki.stadtfabrikanten.org/uploads/images/gallery/2025-05/scaled-1680-/AMrIXFCHEPMVv1Pw-grafik.png)](https://wiki.stadtfabrikanten.org/uploads/images/gallery/2025-05/AMrIXFCHEPMVv1Pw-grafik.png)
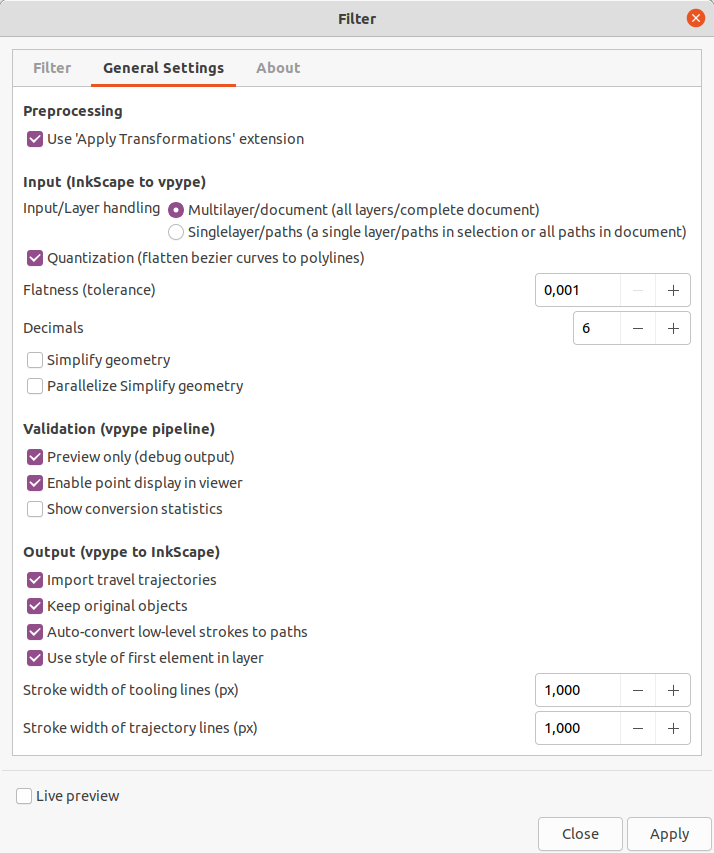
# Line Merging (Combine Paths)

Merge lines whose endings and starts overlap or are very close. By default, <cite>linemerge</cite> considers both directions of a stroke. If there is no additional start of a stroke within the provided tolerance, it also checks for ending points of strokes and uses them in reverse. You can use the <cite>--no-flip</cite> to disable this reversing behaviour and preserve the stroke direction from the input. By default, gaps of maximum 0.05mm are considered for merging. Also check out [vpype Free Mode](https://wiki.stadtfabrikanten.org/books/fablab-chemnitz/page/vpype-free-mode) which can do the same and more.

See [https://vpype.readthedocs.io/en/stable/reference.html#linemerge](https://vpype.readthedocs.io/en/stable/reference.html#linemerge)

<p class="callout info">Similar extension to [Chain Paths](https://wiki.stadtfabrikanten.org/books/fablab-chemnitz/page/chain-paths), [Join Paths / Create Tabs And Dimples](https://wiki.stadtfabrikanten.org/books/fablab-chemnitz/page/join-paths-create-tabs-and-dimples), [Close Paths](https://wiki.stadtfabrikanten.org/books/fablab-chemnitz/page/close-paths)</p>

<p class="callout info">Similar to default function "Path → Combine" (CTRL + K)</p>

<p class="callout info">inverted function is [Split All](https://wiki.stadtfabrikanten.org/books/fablab-chemnitz/page/split-all)</p>

<p class="callout warning">Warning: Can mess your paths because it does not delete overlapping duplicate line segments!  
</p>

[![grafik.png](https://wiki.stadtfabrikanten.org/uploads/images/gallery/2025-05/scaled-1680-/Y7eMmtLIsHiCe19s-grafik.png)](https://wiki.stadtfabrikanten.org/uploads/images/gallery/2025-05/Y7eMmtLIsHiCe19s-grafik.png) [![grafik.png](https://wiki.stadtfabrikanten.org/uploads/images/gallery/2025-05/scaled-1680-/U5HGIUrYgxKkoFKY-grafik.png)](https://wiki.stadtfabrikanten.org/uploads/images/gallery/2025-05/U5HGIUrYgxKkoFKY-grafik.png)
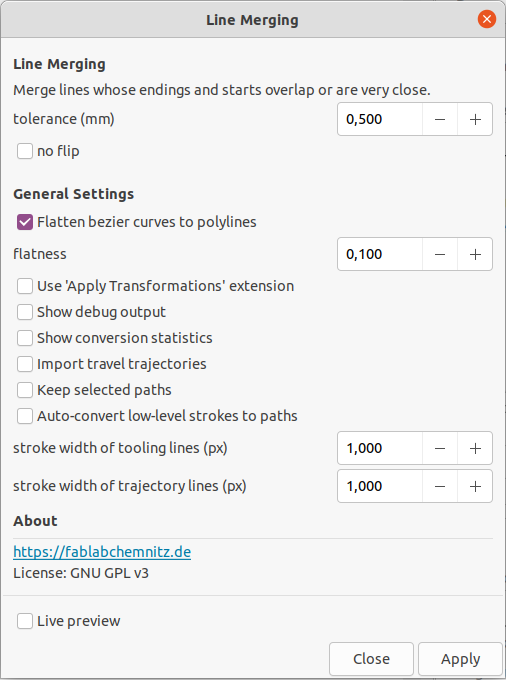
## Draw some paths and attach the path node ends with each other

[![grafik.png](https://wiki.stadtfabrikanten.org/uploads/images/gallery/2025-05/scaled-1680-/xPI23PyVu7xrsEtH-grafik.png)](https://wiki.stadtfabrikanten.org/uploads/images/gallery/2025-05/xPI23PyVu7xrsEtH-grafik.png)
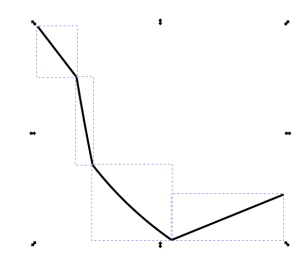
## Run the extension and get the result

[![grafik.png](https://wiki.stadtfabrikanten.org/uploads/images/gallery/2025-05/scaled-1680-/nYH4k1yjCIbjYm9b-grafik.png)](https://wiki.stadtfabrikanten.org/uploads/images/gallery/2025-05/nYH4k1yjCIbjYm9b-grafik.png)
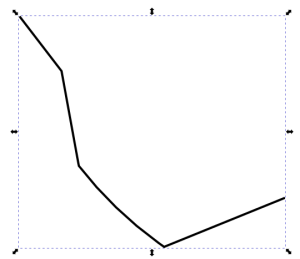
# Line Sorting

- This extension is similar to [Optimize Sequence: Travel Distances](https://wiki.stadtfabrikanten.org/books/fablab-chemnitz/page/optimize-sequence-travel-distances "Optimize Sequence: Travel Distances") and [Optimize Sequence: Small Holes First](https://wiki.stadtfabrikanten.org/books/fablab-chemnitz/page/optimize-sequence-small-holes-first "Optimize Sequence: Small Holes First").
- Also have a look at [https://github.com/inconvergent/svgsort](https://github.com/inconvergent/svgsort) which could be another great path planning tool for InkScape.
- Also check out [vpype Free Mode](https://wiki.stadtfabrikanten.org/books/fablab-chemnitz/page/vpype-free-mode "vpype Free Mode") which can do the same and more.

[![grafik.png](https://wiki.stadtfabrikanten.org/uploads/images/gallery/2025-05/scaled-1680-/OQ0e1DQWkIn3GVKY-grafik.png)](https://wiki.stadtfabrikanten.org/uploads/images/gallery/2025-05/OQ0e1DQWkIn3GVKY-grafik.png) [![grafik.png](https://wiki.stadtfabrikanten.org/uploads/images/gallery/2025-05/scaled-1680-/dkEbASLpUM9dowNs-grafik.png)](https://wiki.stadtfabrikanten.org/uploads/images/gallery/2025-05/dkEbASLpUM9dowNs-grafik.png)
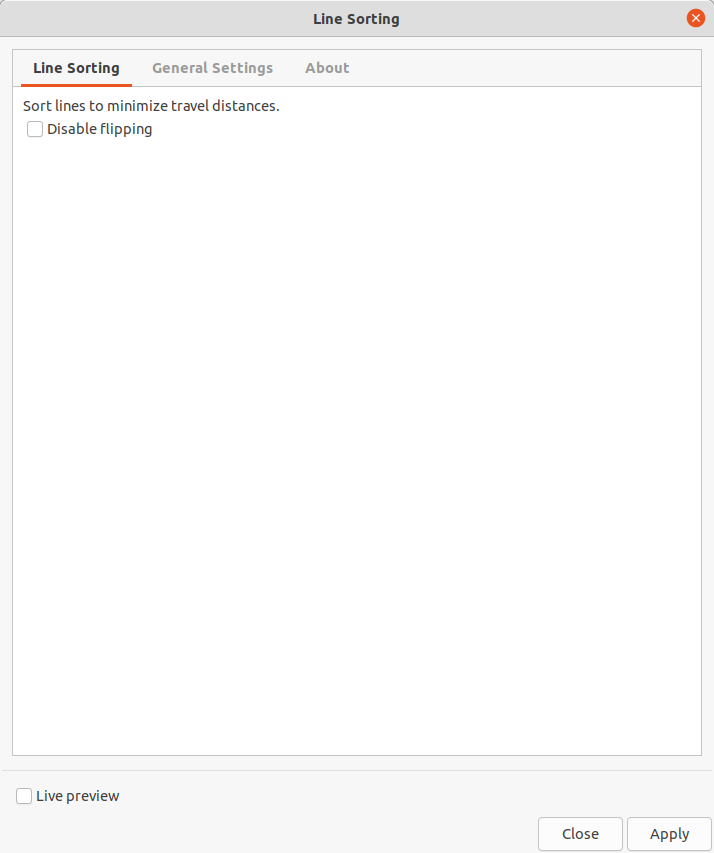
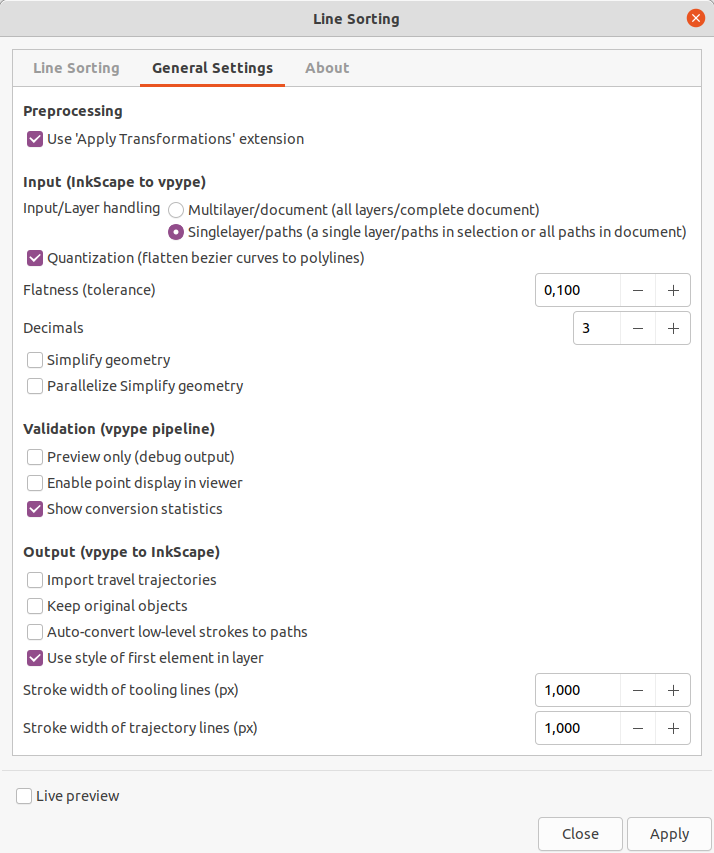
## Example

<table border="1" id="bkmrk-before-conversion-af" style="border-collapse: collapse; width: 99.9734%;"><colgroup><col style="width: 50%;"></col><col style="width: 50%;"></col></colgroup><thead><tr><td>**Before conversion**</td><td>**After conversion (showing the same lines sorted plus traveling lines + conversion statistics)**</td></tr></thead><tbody><tr><td>[![grafik.png](https://wiki.stadtfabrikanten.org/uploads/images/gallery/2025-05/scaled-1680-/2lmQ1AdQemR0AWql-grafik.png)](https://wiki.stadtfabrikanten.org/uploads/images/gallery/2025-05/2lmQ1AdQemR0AWql-grafik.png)

</td><td>[![grafik.png](https://wiki.stadtfabrikanten.org/uploads/images/gallery/2025-05/scaled-1680-/dct1vpbgYaz37tmI-grafik.png)](https://wiki.stadtfabrikanten.org/uploads/images/gallery/2025-05/dct1vpbgYaz37tmI-grafik.png)

[![grafik.png](https://wiki.stadtfabrikanten.org/uploads/images/gallery/2025-05/scaled-1680-/YMCmVXL1ZuhVvpmd-grafik.png)](https://wiki.stadtfabrikanten.org/uploads/images/gallery/2025-05/YMCmVXL1ZuhVvpmd-grafik.png)
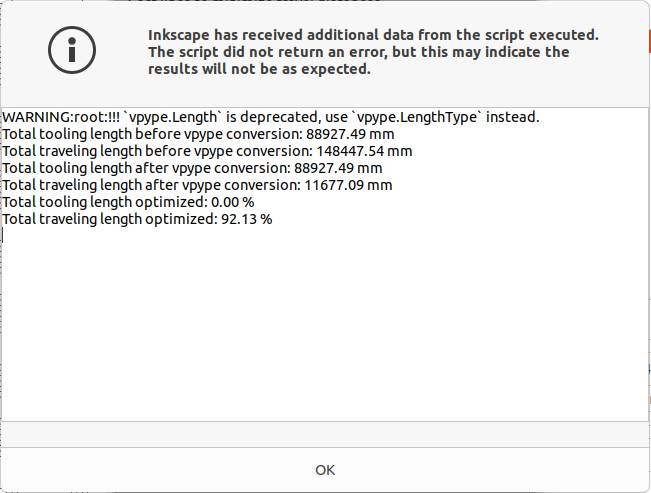
</td></tr></tbody></table>

# Multipass

Add multiple passes to each line. Each line is extended with a mirrored copy of itself, optionally multiple times. This is useful for pens that need several passes to ensure a good quality. See [https://vpype.readthedocs.io/en/stable/reference.html#multipass](https://vpype.readthedocs.io/en/stable/reference.html#multipass). Also check out [vpype Free Mode](https://wiki.stadtfabrikanten.org/books/fablab-chemnitz/page/vpype-free-mode) which can do the same and more.

[![grafik.png](https://wiki.stadtfabrikanten.org/uploads/images/gallery/2025-05/scaled-1680-/7bMMIQq0D7d6tfV6-grafik.png)](https://wiki.stadtfabrikanten.org/uploads/images/gallery/2025-05/7bMMIQq0D7d6tfV6-grafik.png) [![grafik.png](https://wiki.stadtfabrikanten.org/uploads/images/gallery/2025-05/scaled-1680-/nQAsz5tfiPs2VH3g-grafik.png)](https://wiki.stadtfabrikanten.org/uploads/images/gallery/2025-05/nQAsz5tfiPs2VH3g-grafik.png)

# Occult Plugin (Hidden / Superimposed Line Removal)

This plugin command removes lines hidden by polygons. It acts like a trimmer to receive a clean set of visible paths only. **It does not remove common lines between opened paths, but for <u>closed</u> polygons.** You need to install occult plugin for vpype. See vpypetools documentation.

It's a great helper for optimizing cutting jobs. It is really powerful in conjunction with [Line Sorting](https://wiki.stadtfabrikanten.org/books/fablab-chemnitz/page/line-sorting). Also check out [vpype Free Mode](https://wiki.stadtfabrikanten.org/books/fablab-chemnitz/page/vpype-free-mode) which can do the same and more.

**Key phrases: remove overlapping lines, superimposed lines, remove duplicated lines, purge redundant lines, purge doubled lines, remove common edges, remove occulted lines, hidden line removal, retrace edges, chain paths, clean paths**

This extension is similar (**but superior**) to

- [Chain Paths](https://wiki.stadtfabrikanten.org/books/fablab-chemnitz/page/chain-paths)
- [Join Paths / Create Tabs And Dimples](https://wiki.stadtfabrikanten.org/books/fablab-chemnitz/page/join-paths-create-tabs-and-dimples)
- [Purge Duplicate Path Segments](https://wiki.stadtfabrikanten.org/books/fablab-chemnitz/page/purge-duplicate-path-segments)

<p class="callout info">Also have a look at [Purge Duplicate Path Nodes](https://wiki.stadtfabrikanten.org/books/fablab-chemnitz/page/purge-duplicate-path-nodes) if you only want to remove duplicate knot handles in a path.</p>

[![grafik.png](https://wiki.stadtfabrikanten.org/uploads/images/gallery/2025-05/scaled-1680-/FuWMMfuxLC9kY4Sd-grafik.png)](https://wiki.stadtfabrikanten.org/uploads/images/gallery/2025-05/FuWMMfuxLC9kY4Sd-grafik.png) [![grafik.png](https://wiki.stadtfabrikanten.org/uploads/images/gallery/2025-05/scaled-1680-/M7jAMQ3tdWy1u68u-grafik.png)](https://wiki.stadtfabrikanten.org/uploads/images/gallery/2025-05/M7jAMQ3tdWy1u68u-grafik.png)
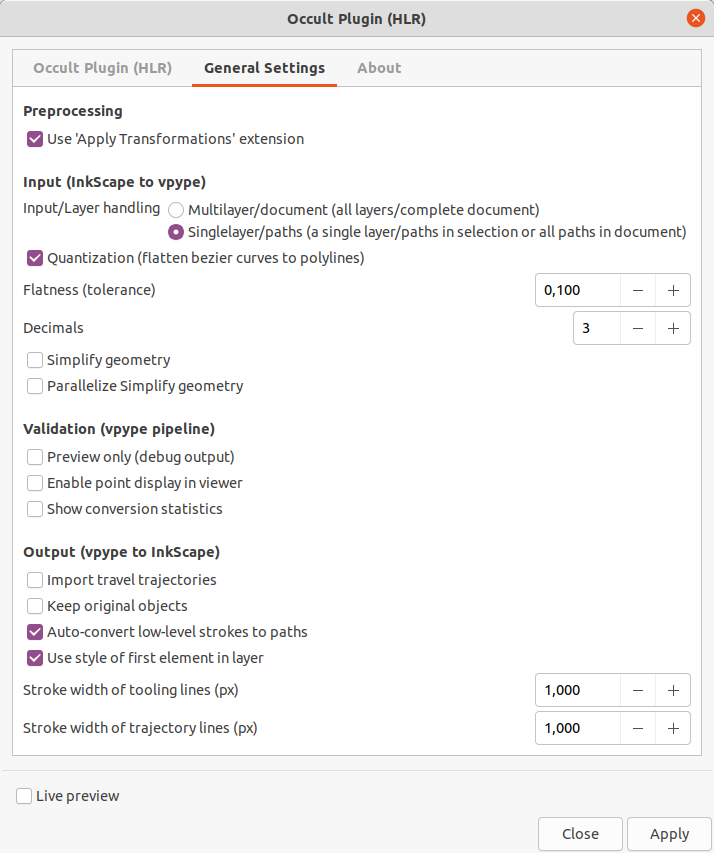
## Troubleshooting / Upgrade extension

If the extension does not generate any output and you cannot explain why, please check if you have the latest version installed. Sometimes exceptions are hidden which show up when running from console instead.

Typical error like this:

```bash
Traceback (most recent call last):
  File "c:\users\tomate\appdata\local\programs\python\python39\lib\site-packages\click_plugins\core.py", line 37, in decorator
    group.add_command(entry_point.load())
  File "c:\users\tomate\appdata\local\programs\python\python39\lib\site-packages\pkg_resources\__init__.py", line 2450, in load
    return self.resolve()
  File "c:\users\tomate\appdata\local\programs\python\python39\lib\site-packages\pkg_resources\__init__.py", line 2456, in resolve
    module = __import__(self.module_name, fromlist=['__name__'], level=0)
  File "c:\users\tomate\appdata\local\programs\python\python39\lib\site-packages\occult\occult.py", line 7, in <module>
    import pygeos
  File "c:\users\tomate\appdata\local\programs\python\python39\lib\site-packages\pygeos\__init__.py", line 1, in <module>
    from .lib import GEOSException  # NOQA
ImportError: DLL load failed while importing lib: Die angegebene Prozedur wurde nicht gefunden.
```

You can remove and reinstall the following way:

```bash
#failed
#pip3 install --upgrade git+https://github.com/LoicGoulefert/occult.git#egg=occult
 
#worked
pip3 uninstall git+https://github.com/LoicGoulefert/occult.git#egg=occult
pip3 install git+https://github.com/LoicGoulefert/occult.git#egg=occult
```

## Simple example

### Draw some rectangles

[![grafik.png](https://wiki.stadtfabrikanten.org/uploads/images/gallery/2025-05/scaled-1680-/edP4j6KF1ZVQ1ESD-grafik.png)](https://wiki.stadtfabrikanten.org/uploads/images/gallery/2025-05/edP4j6KF1ZVQ1ESD-grafik.png)

### Layout edges above each other (simulate having common edges)

[![grafik.png](https://wiki.stadtfabrikanten.org/uploads/images/gallery/2025-05/scaled-1680-/GeOotGVwkpcuEudK-grafik.png)](https://wiki.stadtfabrikanten.org/uploads/images/gallery/2025-05/GeOotGVwkpcuEudK-grafik.png)

### Run extension to remove common edges

Move the paths to some other directions to see how the edge removal was worked out

[![grafik.png](https://wiki.stadtfabrikanten.org/uploads/images/gallery/2025-05/scaled-1680-/qfj7t0XSHGlvBtBW-grafik.png)](https://wiki.stadtfabrikanten.org/uploads/images/gallery/2025-05/qfj7t0XSHGlvBtBW-grafik.png)

[![grafik.png](https://wiki.stadtfabrikanten.org/uploads/images/gallery/2025-05/scaled-1680-/esLX6HHlsNP78o8Q-grafik.png)](https://wiki.stadtfabrikanten.org/uploads/images/gallery/2025-05/esLX6HHlsNP78o8Q-grafik.png)

# Relooping

Randomize the seam location of closed paths. When plotted, closed path may exhibit a visible mark at the seam, i.e. the location where the pen begins and ends the stroke. This command randomizes the seam location in order to help reduce visual effect of this in plots with regular patterns. Paths are considered closed when their beginning and end points are closer than some tolerance. See [https://vpype.readthedocs.io/en/stable/reference.html#reloop](https://vpype.readthedocs.io/en/stable/reference.html#reloop). Also check out [vpype Free Mode](https://wiki.stadtfabrikanten.org/books/fablab-chemnitz/page/vpype-free-mode "vpype Free Mode") which can do the same and more.

[![grafik.png](https://wiki.stadtfabrikanten.org/uploads/images/gallery/2025-05/scaled-1680-/f2Ujg4BCKq6mimTu-grafik.png)](https://wiki.stadtfabrikanten.org/uploads/images/gallery/2025-05/f2Ujg4BCKq6mimTu-grafik.png) [![grafik.png](https://wiki.stadtfabrikanten.org/uploads/images/gallery/2025-05/scaled-1680-/kOVguK5qwwzgxS1G-grafik.png)](https://wiki.stadtfabrikanten.org/uploads/images/gallery/2025-05/kOVguK5qwwzgxS1G-grafik.png)

# Split All

Split all paths into their constituent segments. This command may be used together with linemerge for cases such as densely-connected meshes where the latter cannot optimize well enough by itself. This command will filter out segments with identical end-points. Note that since some paths (especially curved ones) can be made of a large number of segments, this command may significantly increase the processing time of the pipeline.

<p class="callout info">The inverted function is [Line Merging (Combine Paths)](https://wiki.stadtfabrikanten.org/books/fablab-chemnitz/page/line-merging-combine-paths "Line Merging (Combine Paths)")</p>

<p class="callout warning">Split All extension might be really slow on large documents. Maybe you can go get some coffee while it performs.</p>

## Create some paths

[![grafik.png](https://wiki.stadtfabrikanten.org/uploads/images/gallery/2025-05/scaled-1680-/Lm4t6Ym4pk8rJEiQ-grafik.png)](https://wiki.stadtfabrikanten.org/uploads/images/gallery/2025-05/Lm4t6Ym4pk8rJEiQ-grafik.png)

## Run the extension

[![grafik.png](https://wiki.stadtfabrikanten.org/uploads/images/gallery/2025-05/scaled-1680-/EpnQ0aXItv5GmxuM-grafik.png)](https://wiki.stadtfabrikanten.org/uploads/images/gallery/2025-05/EpnQ0aXItv5GmxuM-grafik.png)
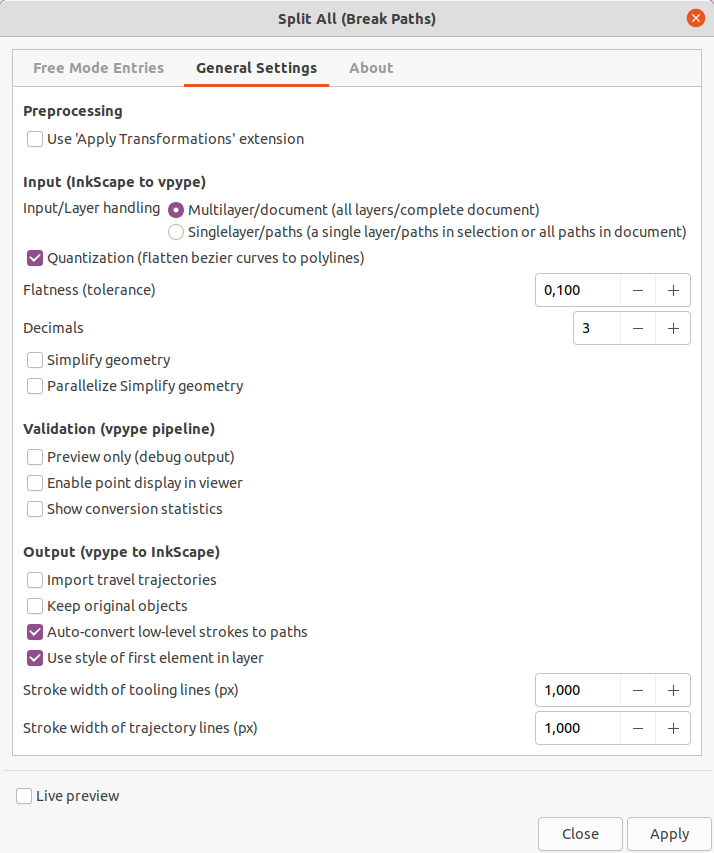
## Get the result

We can move all lines separately now, like this:

[![grafik.png](https://wiki.stadtfabrikanten.org/uploads/images/gallery/2025-05/scaled-1680-/N9vYLtM419i4LJkF-grafik.png)](https://wiki.stadtfabrikanten.org/uploads/images/gallery/2025-05/N9vYLtM419i4LJkF-grafik.png)

# Trimming

Trim the geometries by some margin. This command trims the geometries by the provided X and Y margins with respect to the current bounding box. Also check out [vpype Free Mode](https://wiki.stadtfabrikanten.org/books/fablab-chemnitz/page/vpype-free-mode "vpype Free Mode") which can do the same and more.

[![grafik.png](https://wiki.stadtfabrikanten.org/uploads/images/gallery/2025-05/scaled-1680-/dKi09lMKgQ8BKksL-grafik.png)](https://wiki.stadtfabrikanten.org/uploads/images/gallery/2025-05/dKi09lMKgQ8BKksL-grafik.png) [![grafik.png](https://wiki.stadtfabrikanten.org/uploads/images/gallery/2025-05/scaled-1680-/qKqgsU1M63YFD9l3-grafik.png)](https://wiki.stadtfabrikanten.org/uploads/images/gallery/2025-05/qKqgsU1M63YFD9l3-grafik.png)
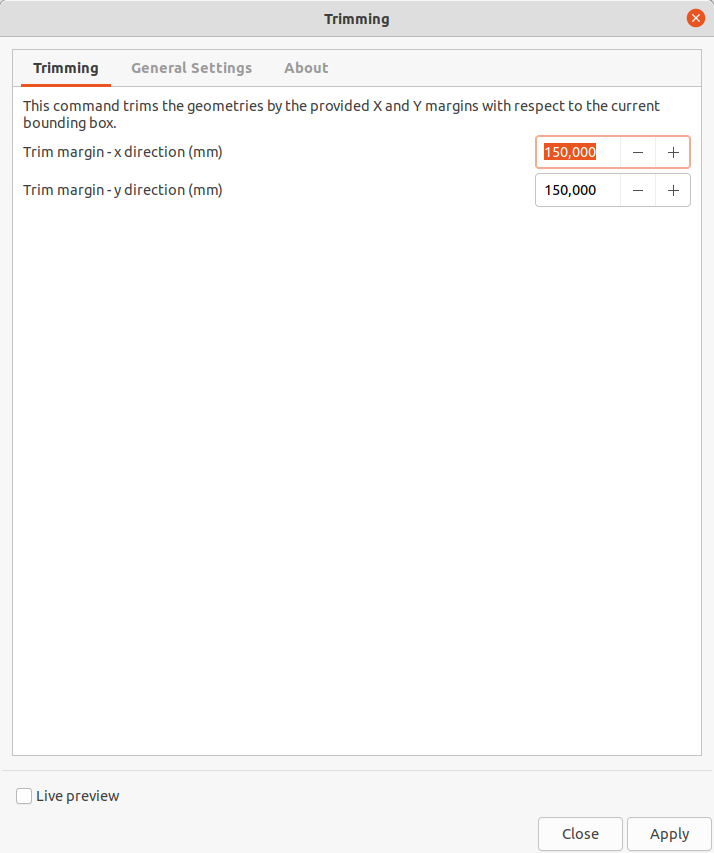
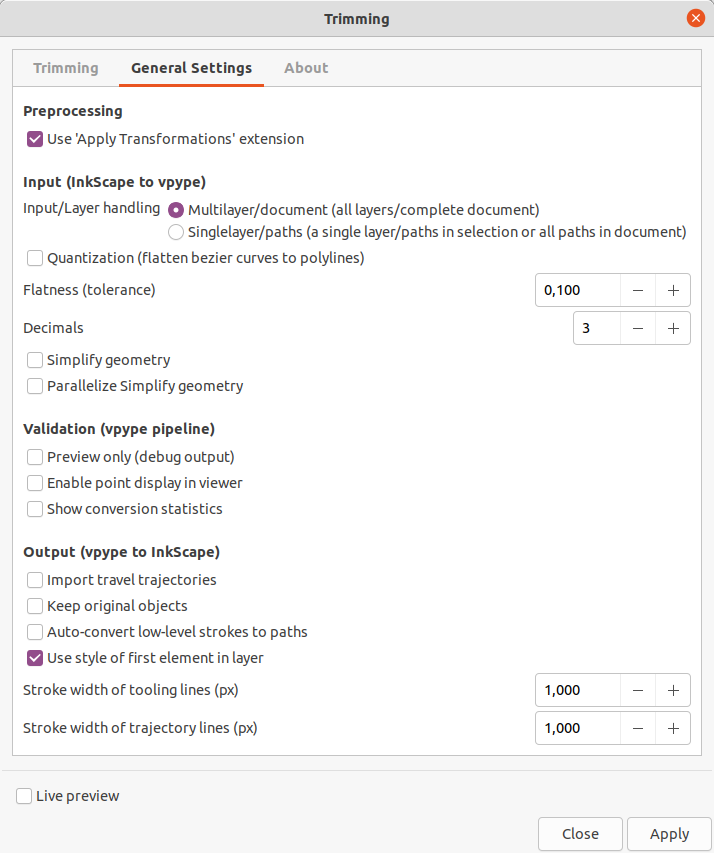
## Draw some paths

[![grafik.png](https://wiki.stadtfabrikanten.org/uploads/images/gallery/2025-05/scaled-1680-/kUxMeVjJZZwxQeaV-grafik.png)](https://wiki.stadtfabrikanten.org/uploads/images/gallery/2025-05/kUxMeVjJZZwxQeaV-grafik.png)
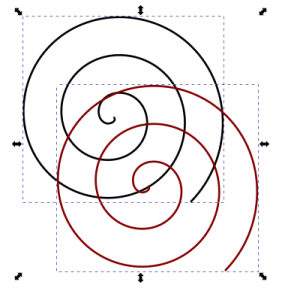
## Run the extension and get result

[![grafik.png](https://wiki.stadtfabrikanten.org/uploads/images/gallery/2025-05/scaled-1680-/B6C7pMNJzPSm3rum-grafik.png)](https://wiki.stadtfabrikanten.org/uploads/images/gallery/2025-05/B6C7pMNJzPSm3rum-grafik.png)
# vpype Free Mode

This extension mode for vpypetools allows to execute one up to five command sets in the given row. It works on the current selection of paths, or if nothing selected it applies to all paths in the document. You can do exactly the same like in [Filter](https://wiki.stadtfabrikanten.org/books/fablab-chemnitz/page/filter), [Line Sorting](https://wiki.stadtfabrikanten.org/books/fablab-chemnitz/page/line-sorting) and so on, but you are freely more versatile entering combinations as you like. Free Mode allows to enter different units, like **"trim 1mm 3cm"**

[![grafik.png](https://wiki.stadtfabrikanten.org/uploads/images/gallery/2025-05/scaled-1680-/KUPatnUUDuN08ERb-grafik.png)](https://wiki.stadtfabrikanten.org/uploads/images/gallery/2025-05/KUPatnUUDuN08ERb-grafik.png) [![grafik.png](https://wiki.stadtfabrikanten.org/uploads/images/gallery/2025-05/scaled-1680-/xgYKWRpJDPtrqesR-grafik.png)](https://wiki.stadtfabrikanten.org/uploads/images/gallery/2025-05/xgYKWRpJDPtrqesR-grafik.png) [![grafik.png](https://wiki.stadtfabrikanten.org/uploads/images/gallery/2025-05/scaled-1680-/69qyi7rZ0dhIcbjU-grafik.png)](https://wiki.stadtfabrikanten.org/uploads/images/gallery/2025-05/69qyi7rZ0dhIcbjU-grafik.png)
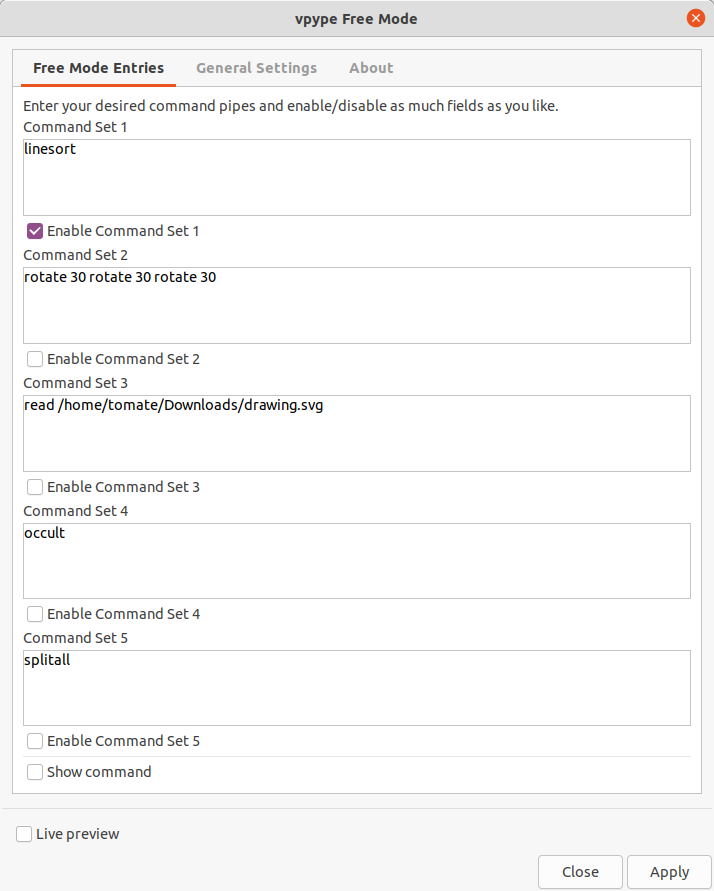
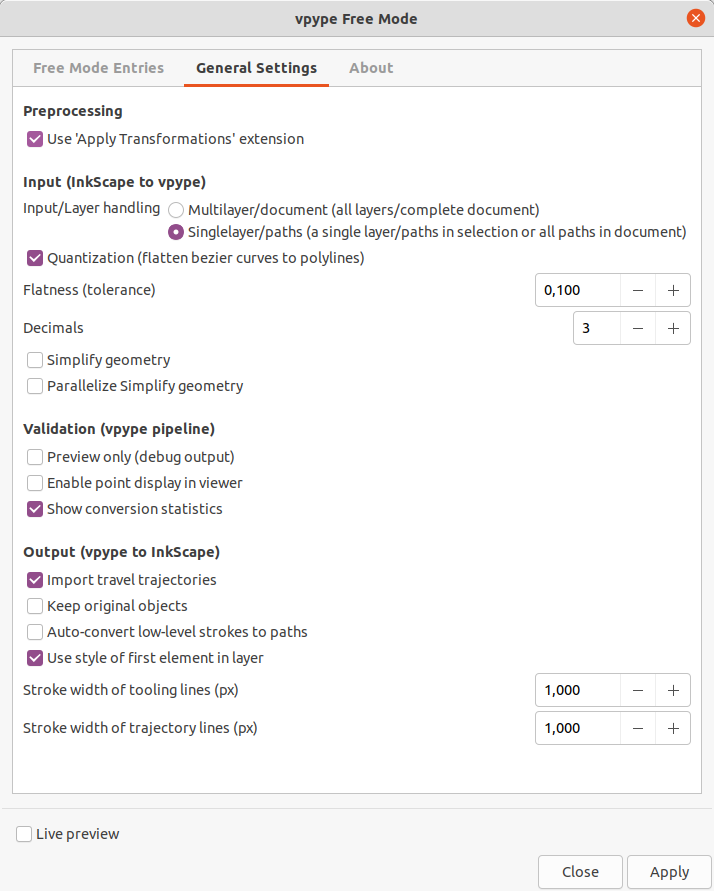
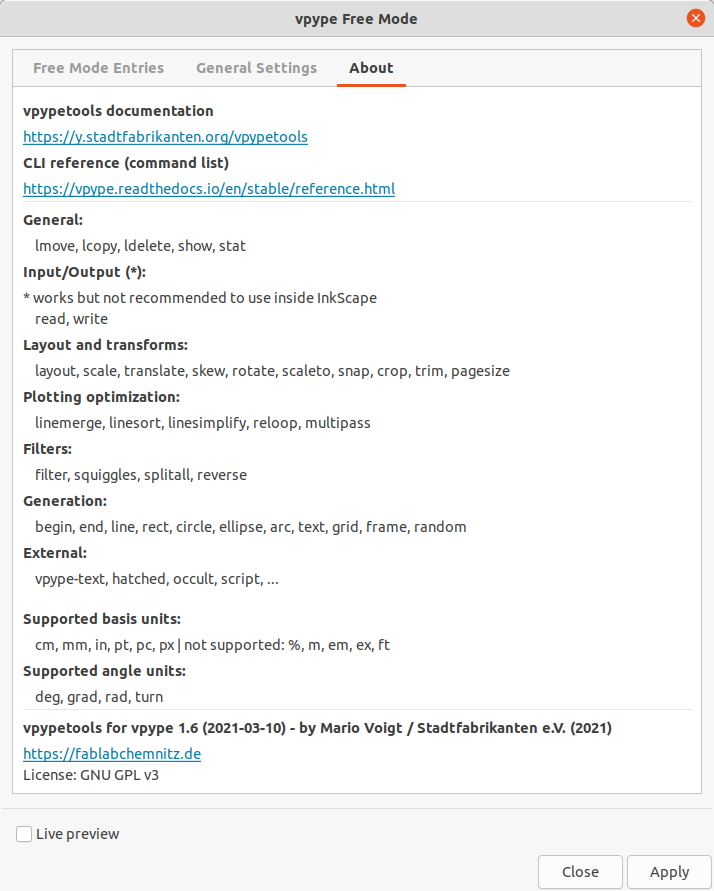
# vpypetools Intro

[![grafik.png](https://wiki.stadtfabrikanten.org/uploads/images/gallery/2025-05/scaled-1680-/CMcAojYfIVDjjwYa-grafik.png)](https://wiki.stadtfabrikanten.org/uploads/images/gallery/2025-05/CMcAojYfIVDjjwYa-grafik.png)

## About vpype and this extension

vpype is a command processor working with SVG files. It can do a lot of productive steps to optimize files for different purposes like pen plotting, laser cutting or the generation of creative artwork. vpype is really powerful and helps to extend Inkscape feature capability. vpype contains a lot of functionality which is included natively within Inkscape. The extension "vpype for Inkscape" does not deal with all features but with a set of important commands like linemerge, linesort, linesimplify, occult, etc. We can use it to shorten tool path lengths, remove hidden lines and so on.

vpype converts all elements into simple SVG elements like **svg:line**, **svg:polyline** and **svg:polygon**. They can be displayed properly in Inkscape, but they have no knot handles to edit (see [https://alpha.inkscape.org/vectors/www.inkscapeforum.com/viewtopicb51d.html?f=16&amp;t=32562](https://alpha.inkscape.org/vectors/www.inkscapeforum.com/viewtopicb51d.html?f=16&t=32562)). We need to convert those elements to **svg:path** using key combination **CTRL + SHIFT + C** ("object to path"; do not use "stroke to path" because it will duplicate your outline with inset and outset contours). Our extension allows to do this conversion **automatically**.

## Caveats of vpype

- requires to simplify bezier curves to polylines (reduces quality)
- does not honor the individual line styles (like width, color, miter, ...) - the output lines all will have the same style. We can work with vpype layerwise to distinguish between different styles
- output is done in svg:line, svg:polyline and svg:polygon. Converting them back in Inkscape (we need paths) is really slow. Native svg:path output would be great

**![(Info)](https://old.stadtfabrikanten.org/s/-6fzg5h/9012/tu5x00/_/images/icons/emoticons/information.svg) Source code → [https://github.com/abey79/vpype](https://github.com/abey79/vpype)**

## Preparations (Installation of vpype)

At first we need to install vpype and occult extension. It was tested successfully...

- with Python 3.8.5 on Ubuntu 20 LTS (Python 3.9 failed to install vpype and occult)
- with Python 3.9 on Windows 10

We use vpype 1.7 (2021-06-10)

vpype Changelog: [https://vpype.readthedocs.io/en/stable/CHANGELOG.html](https://vpype.readthedocs.io/en/stable/CHANGELOG.html)

## Linux / Windows Python modules

```bash
pip install vpype
#pip install git+https://github.com/abey79/vpype.git
 
#or by using pipx
pip uninstall vpype
pip install pipx
pipx ensurepath
# restart your shell
pipx install "vpype[all]"
 
#extra module occult
pip install git+https://github.com/LoicGoulefert/occult.git#egg=occult
#or
pip install vpype-occult
 
#extra module deduplicate
pip install git+https://github.com/LoicGoulefert/deduplicate.git#egg=deduplicate
```

## Special inclusions and similarities to existing Inkscape extensions

- linemerge: [Join Paths / Create Tabs And Dimples](https://wiki.stadtfabrikanten.org/books/fablab-chemnitz/page/join-paths-create-tabs-and-dimples), [Close Paths](https://wiki.stadtfabrikanten.org/books/fablab-chemnitz/page/close-paths) and [Chain Paths](https://wiki.stadtfabrikanten.org/books/fablab-chemnitz/page/chain-paths)
- linesort: [Optimize Sequence: Travel Distances](https://wiki.stadtfabrikanten.org/books/fablab-chemnitz/page/optimize-sequence-travel-distances) and [Optimize Sequence: Small Holes First](https://wiki.stadtfabrikanten.org/books/fablab-chemnitz/page/optimize-sequence-small-holes-first)
- linesimplify: native function "Path → Simplify"
- filter: [Contour Scanner And Trimmer](https://wiki.stadtfabrikanten.org/books/fablab-chemnitz/page/contour-scanner-and-trimmer)
- multipass: none
- occult: [Purge Duplicate Path Nodes](https://wiki.stadtfabrikanten.org/books/fablab-chemnitz/page/purge-duplicate-path-nodes) and [Purge Duplicate Path Segments](https://wiki.stadtfabrikanten.org/books/fablab-chemnitz/page/purge-duplicate-path-segments)
- trim: [Destructive Clip](https://wiki.stadtfabrikanten.org/books/fablab-chemnitz/page/destructive-clip)

**Overview by docs**

- [Deduplicate Plugin](https://wiki.stadtfabrikanten.org/books/fablab-chemnitz/page/deduplicate-plugin)
- [Filter](https://wiki.stadtfabrikanten.org/books/fablab-chemnitz/page/filter)
- [Line Merging (Combine Paths)](https://wiki.stadtfabrikanten.org/books/fablab-chemnitz/page/line-merging-combine-paths)
- [Line Sorting](https://wiki.stadtfabrikanten.org/books/fablab-chemnitz/page/line-sorting)
- [Multipass](https://wiki.stadtfabrikanten.org/books/fablab-chemnitz/page/multipass)
- [Occult Plugin (Hidden / Superimposed Line Removal)](https://wiki.stadtfabrikanten.org/books/fablab-chemnitz/page/occult-plugin-hidden-superimposed-line-removal)
- [Relooping](https://wiki.stadtfabrikanten.org/books/fablab-chemnitz/page/relooping)
- [Split All](https://wiki.stadtfabrikanten.org/books/fablab-chemnitz/page/split-all)
- [Trimming](https://wiki.stadtfabrikanten.org/books/fablab-chemnitz/page/trimming)
- [vpype Free Mode](https://wiki.stadtfabrikanten.org/books/fablab-chemnitz/page/vpype-free-mode)

## Feature exclusions

As mentioned vpype has a lot of features, but we do not need all of them. We decided to exclude or handle the following functions more strictly because a lot of stuff is integrated in Inkscape natively. You can try to use [vpype Free Mode](https://old.stadtfabrikanten.org/display/IFM/vpype+Free+Mode) to use these.

<table border="1" id="bkmrk-category-comments-pr" style="border-collapse: collapse; width: 99.9734%; height: 419.284px;"><colgroup><col style="width: 12.2597%;"></col><col style="width: 87.7414%;"></col></colgroup><thead><tr style="height: 38.1167px;"><td style="height: 38.1167px;">**category**</td><td style="height: 38.1167px;">**comments**</td></tr></thead><tbody><tr style="height: 38.1167px;"><td style="height: 38.1167px;">Primitives</td><td style="height: 38.1167px;">```bash
arc, circle, ellipse, line, rect
```

</td></tr><tr style="height: 38.1167px;"><td style="height: 38.1167px;">Block control</td><td style="height: 38.1167px;">```bash
begin, end
```

</td></tr><tr style="height: 38.1167px;"><td style="height: 38.1167px;">Operation</td><td style="height: 38.1167px;">```bash
crop         # we use trim feature instead 
layout       #Inkscape:  CTRL + SHIFT + D 
pagesize     #Inkscape:  CTRL + SHIFT + D
reverse      #Inkscape:  Path > Reverse
```

</td></tr><tr style="height: 38.1167px;"><td style="height: 38.1167px;">Generators</td><td style="height: 38.1167px;">```bash
frame  #see "Bounding Box" extension
random
```

See [Bounding Box](https://wiki.stadtfabrikanten.org/books/fablab-chemnitz/page/bounding-box)

</td></tr><tr style="height: 38.1167px;"><td style="height: 38.1167px;">Block processors</td><td style="height: 38.1167px;">```bash
grid, repeat
```

Native functions inside Inkscape

</td></tr><tr style="height: 38.1167px;"><td style="height: 38.1167px;">Layers</td><td style="height: 38.1167px;">```bash
lcopy, ldelete, lmove
```

This is too generic to make use inside Inkscape

</td></tr><tr style="height: 38.1167px;"><td style="height: 38.1167px;">Input</td><td style="height: 38.1167px;">```bash
script
```

This is too generic to make use inside Inkscape

</td></tr><tr style="height: 38.1167px;"><td style="height: 38.1167px;">Transforms</td><td style="height: 38.1167px;">```bash
rotate, scale, scaleto, skew, translate
```

See [Scale To Path Length](https://wiki.stadtfabrikanten.org/books/fablab-chemnitz/page/scale-to-path-length), [Scale To Real](https://wiki.stadtfabrikanten.org/books/fablab-chemnitz/page/scale-to-real), [Scale To Size (Replaced by default transform scale)](https://wiki.stadtfabrikanten.org/books/fablab-chemnitz/page/scale-to-size-replaced-by-default-transform-scale) and native functions like path effects and transformations

</td></tr><tr style="height: 38.1167px;"><td style="height: 38.1167px;">Filters</td><td style="height: 38.1167px;">```bash
squiggles
```

</td></tr><tr style="height: 38.1167px;"><td style="height: 38.1167px;">Text</td><td style="height: 38.1167px;">```bash
text
```

See [Hershey Text Alternative](https://old.stadtfabrikanten.org/display/IFM/Hershey+Text+Alternative)

</td></tr></tbody></table>

## Troubleshooting

Problem:

```bash
Traceback (most recent call last):
  File "C:\Users\tomate\AppData\Roaming\inkscape\extensions\mightyscape-1.2\extensions\fablabchemnitz\vpypetools\vpypetools.py", line 17, in <module>
    import vpype_viewer
  File "C:\Users\tomate\AppData\Local\Programs\Python\Python39\lib\site-packages\vpype_viewer\__init__.py", line 6, in <module>
    from .engine import *
  File "C:\Users\tomate\AppData\Local\Programs\Python\Python39\lib\site-packages\vpype_viewer\engine.py", line 13, in <module>
    from ._painters import (
  File "C:\Users\tomate\AppData\Local\Programs\Python\Python39\lib\site-packages\vpype_viewer\_painters.py", line 9, in <module>
    from ._utils import ColorType, load_program, load_texture_array
  File "C:\Users\tomate\AppData\Local\Programs\Python\Python39\lib\site-packages\vpype_viewer\_utils.py", line 9, in <module>
    from PIL import Image
ModuleNotFoundError: No module named 'PIL'
```

Solution:

```bash
Traceback (most recent call last):
  File "C:\Users\tomate\AppData\Roaming\inkscape\extensions\mightyscape-1.2\extensions\fablabchemnitz\vpypetools\vpypetools.py", line 17, in <module>
    import vpype_viewer
  File "C:\Users\tomate\AppData\Local\Programs\Python\Python39\lib\site-packages\vpype_viewer\__init__.py", line 6, in <module>
    from .engine import *
  File "C:\Users\tomate\AppData\Local\Programs\Python\Python39\lib\site-packages\vpype_viewer\engine.py", line 13, in <module>
    from ._painters import (
  File "C:\Users\tomate\AppData\Local\Programs\Python\Python39\lib\site-packages\vpype_viewer\_painters.py", line 9, in <module>
    from ._utils import ColorType, load_program, load_texture_array
  File "C:\Users\tomate\AppData\Local\Programs\Python\Python39\lib\site-packages\vpype_viewer\_utils.py", line 9, in <module>
    from PIL import Image
ModuleNotFoundError: No module named 'PIL'
```